
Learn how to use conditional formatting in the interactive table widget.
To use conditional formatting, you need to have an interactive table widget with a datasource in your app.
If you don’t have one yet, read Building Your First Table: Walkthrough.
In this guide, you’ll learn how to:
- Set up new rules for conditional formatting
- Understand different rule types for conditional formatting
- Use field comparison in your formatting rules
- Troubleshoot error states with conditional formatting
Set Up a Rule
- Click on the interactive table widget, and go to the Side Pane.
- Scroll down to the Conditional Formatting section.
- Click + to add a new rule.
- By default, the first Field in the widget is be selected, and a basic rule is automatically configured.
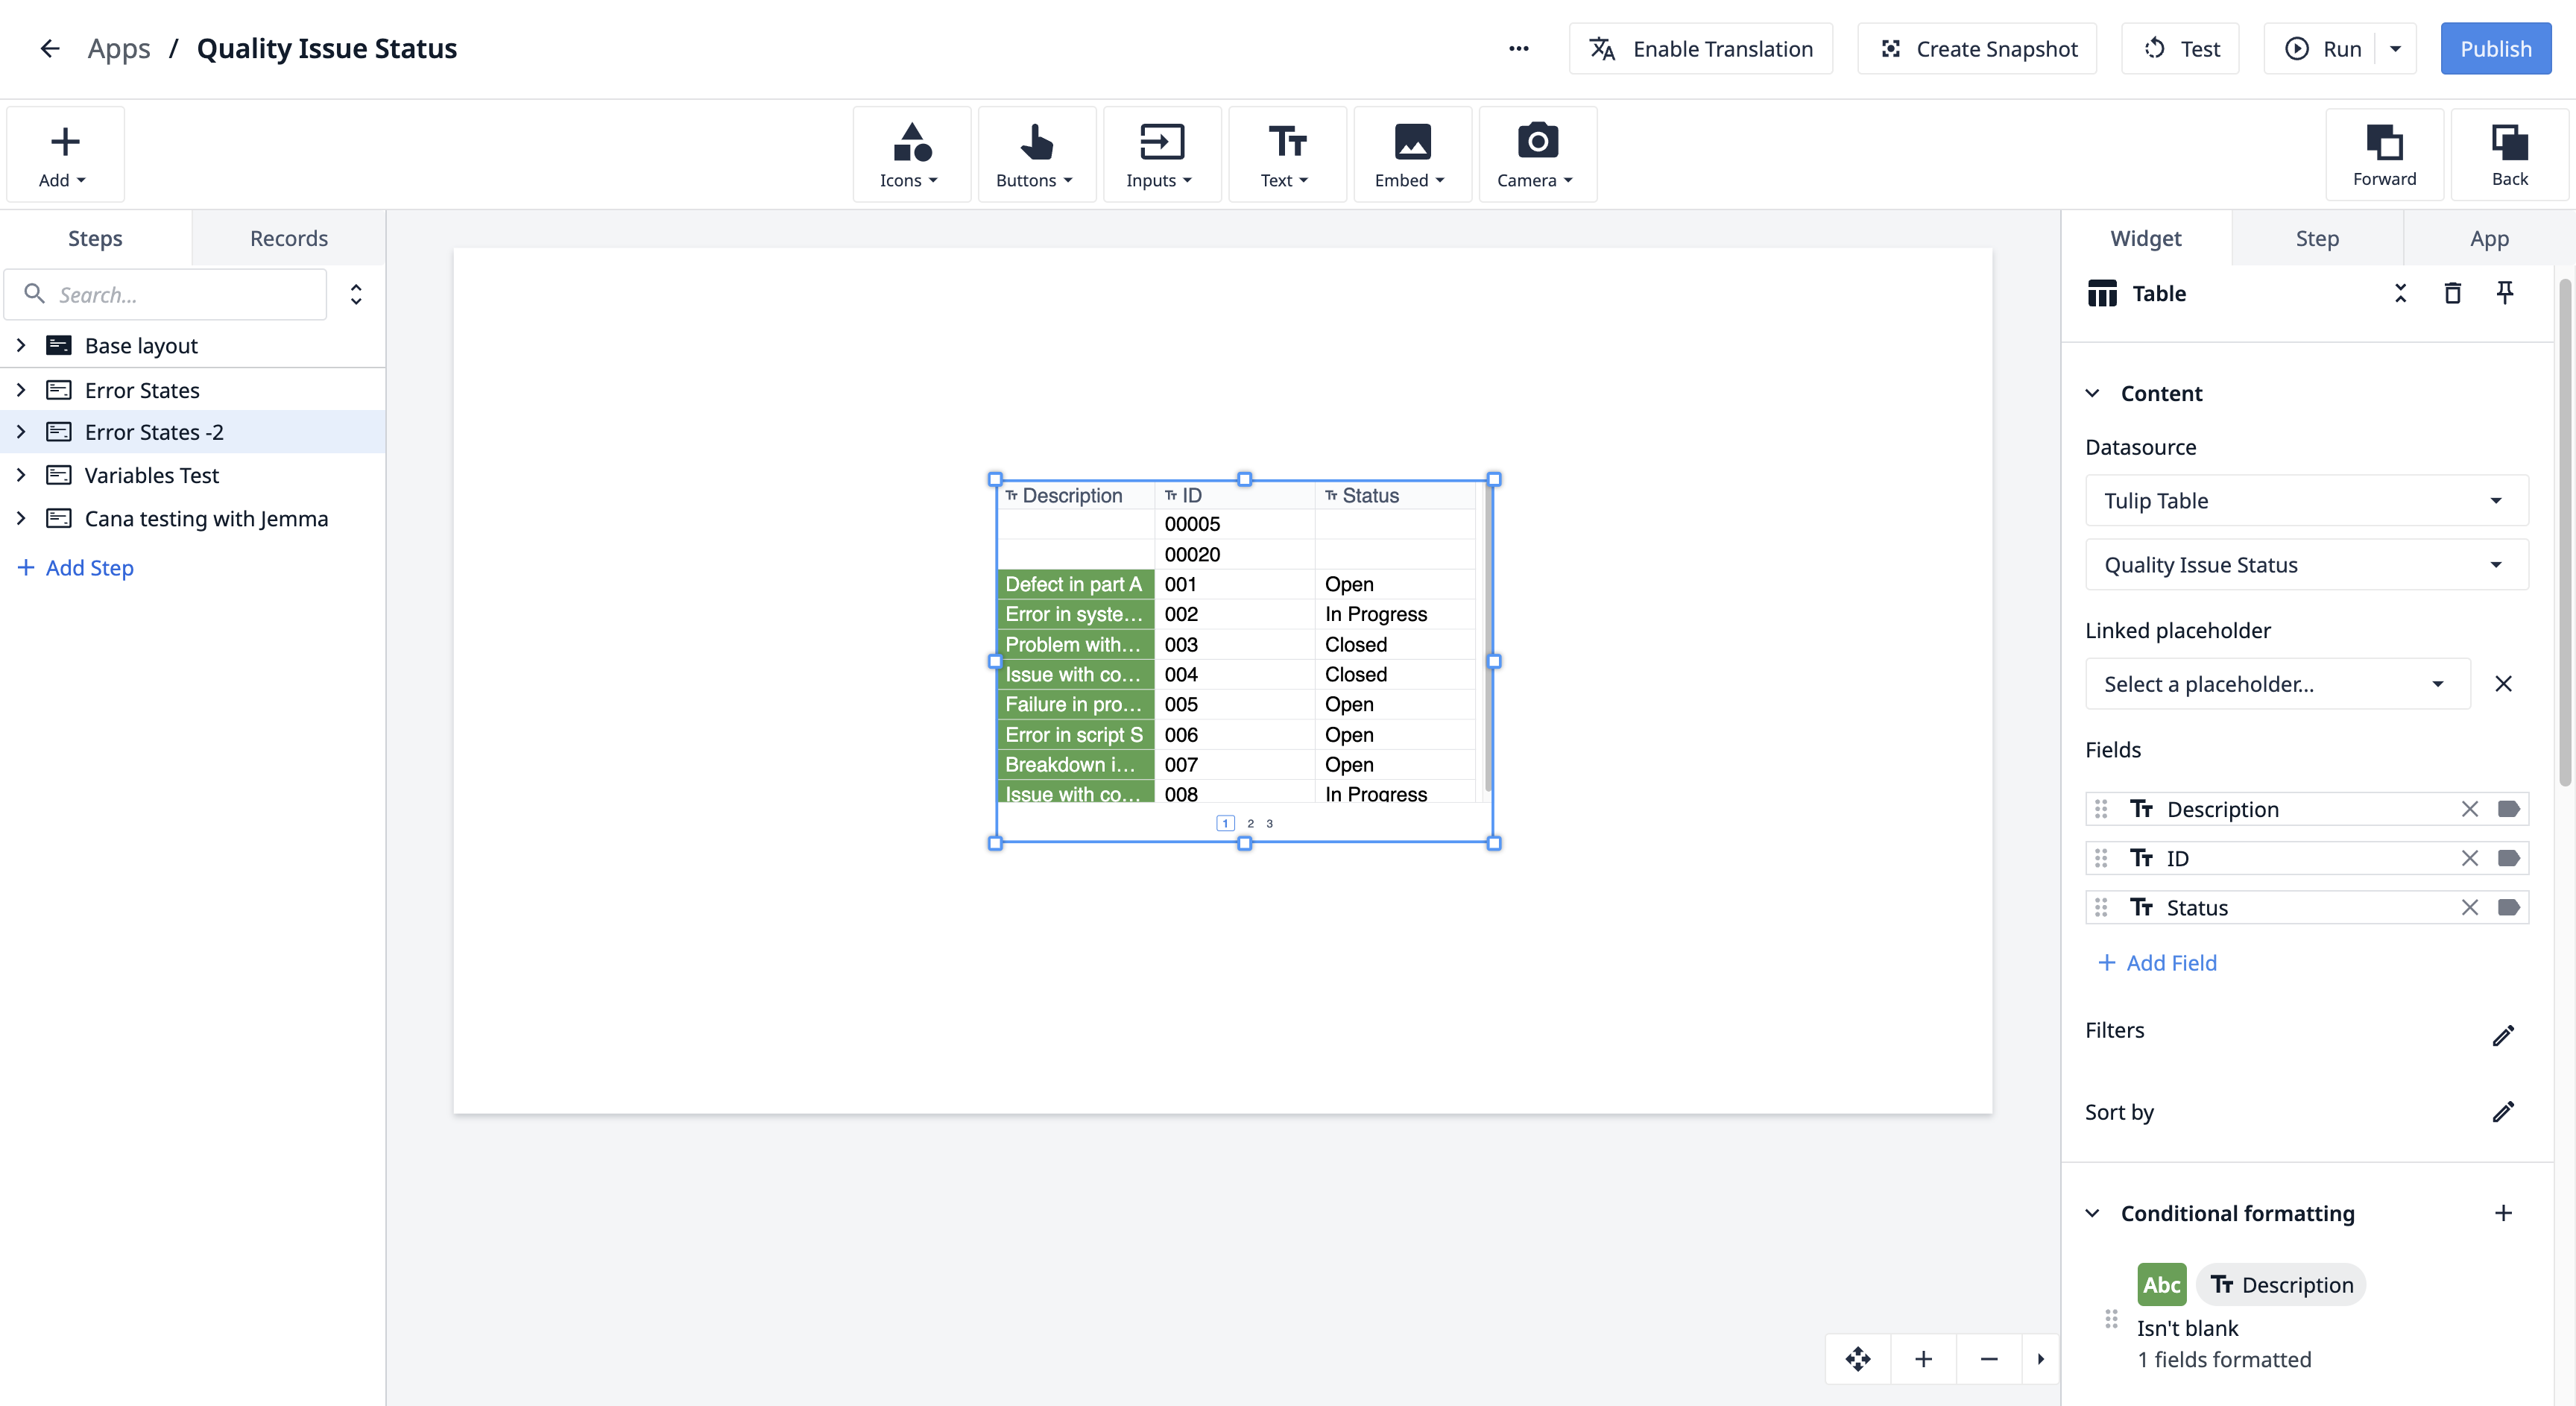
Example
- The first field, Description, is selected.
- If the data in this field is not blank, the background is formatted green with white text.
- This formatting applies only to the Description column.
Rule Summary
The Rule Summary lists the following details:
- Formatting: The text color and background color
- Source Field: The field that the conditional format rule applies to
- Condition: The requirement that must be fulfilled for the format to apply
- Argument: The logic that must be fulfilled for the format to apply
- Formatting Applied to: The number of fields the formatting applies to
This is the Rule Summary for the example above:
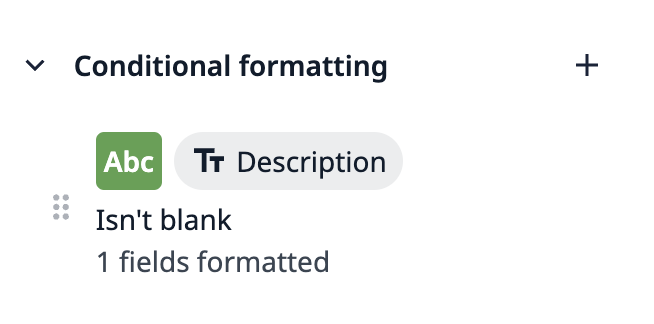
Note that the Condition appears in the Rule Summary, not the Argument. This is because our conditional formatting applies on the condition that the field isn't blank.
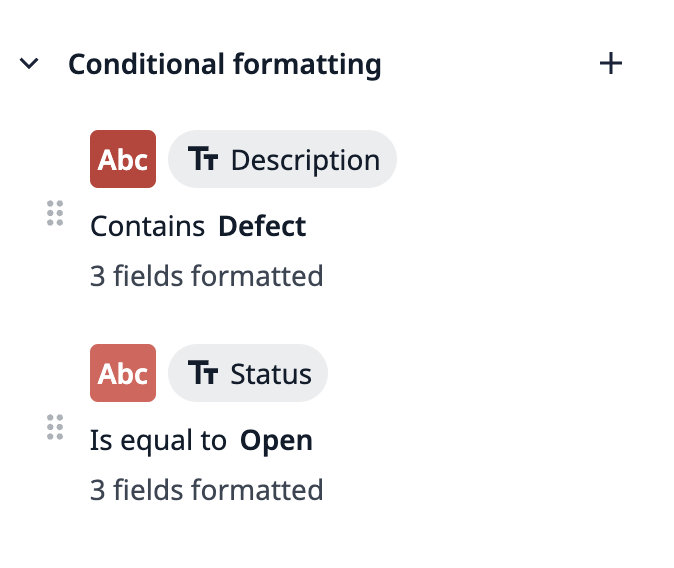
In the third example we'll use later in this article, the conditional format uses a Contains argument. For this example, the Rule Summary looks like this:

Edit a Rule
- In the Conditional Formatting section, hover over the rule you want to edit in the list.
- Click the pencil icon to modify it.
- Choose the appropriate source field and condition type for your use case.
- Select either a static value or a Variable for the argument.
Changes apply immediately to the widget.
Example
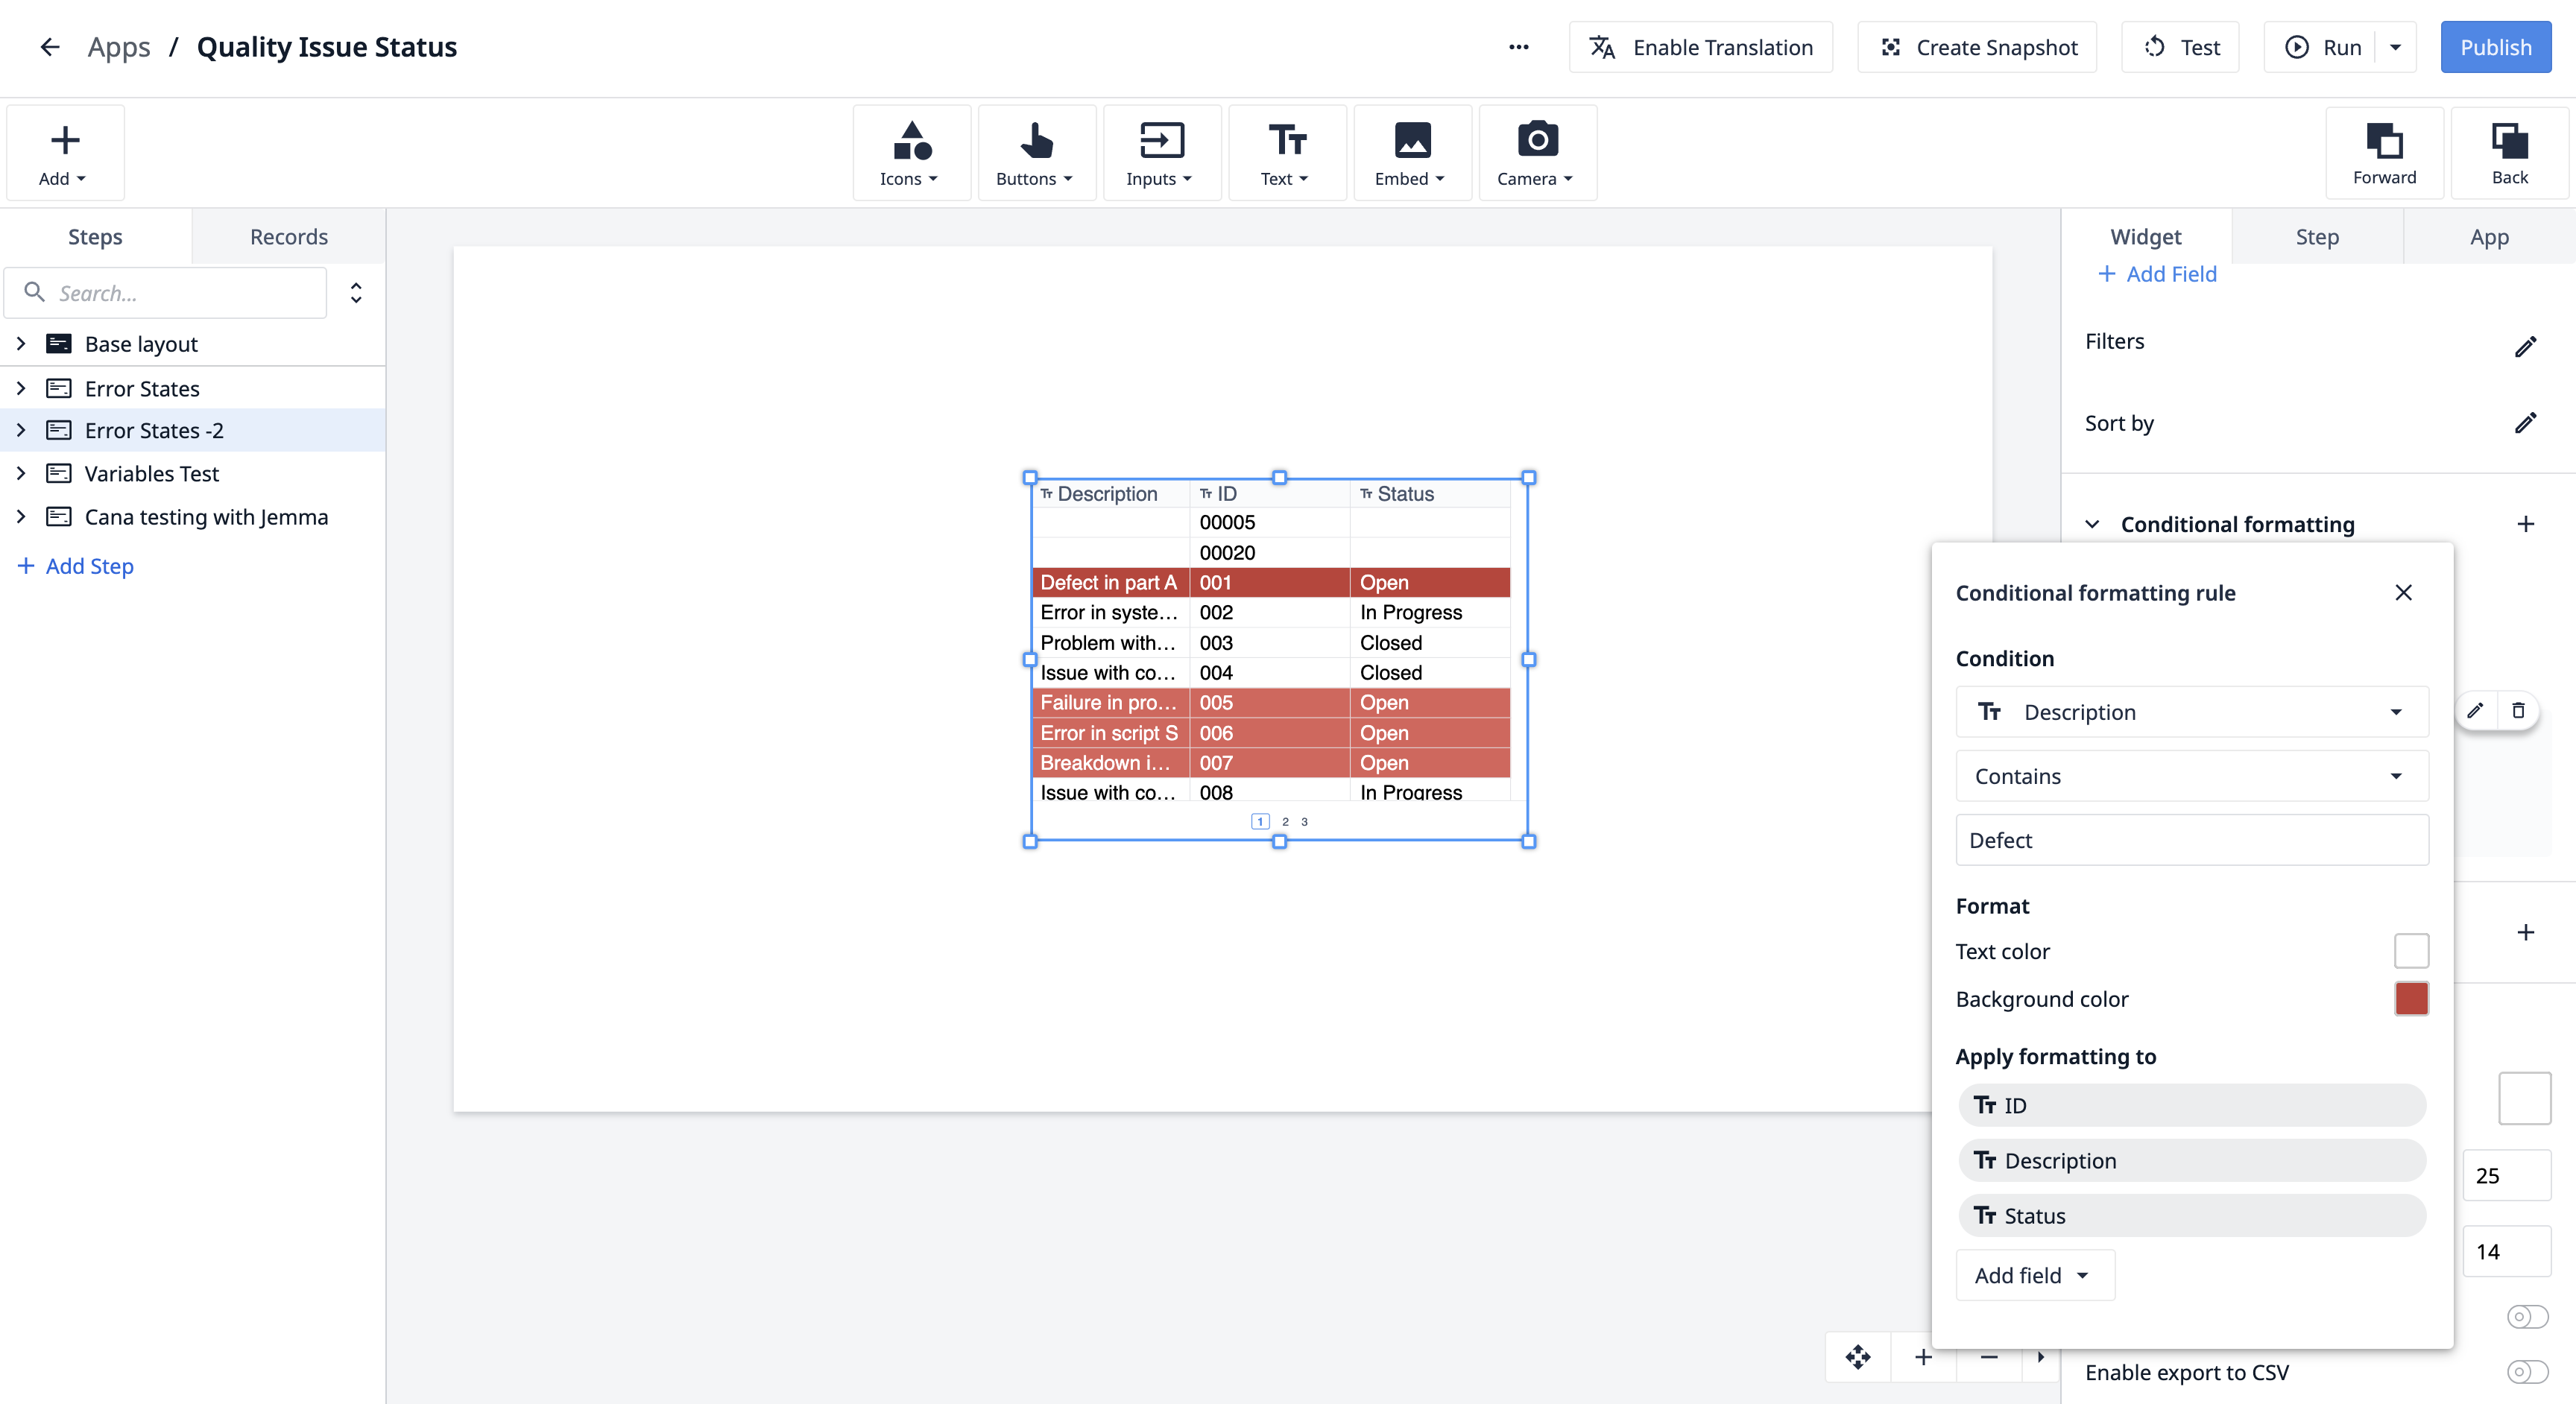
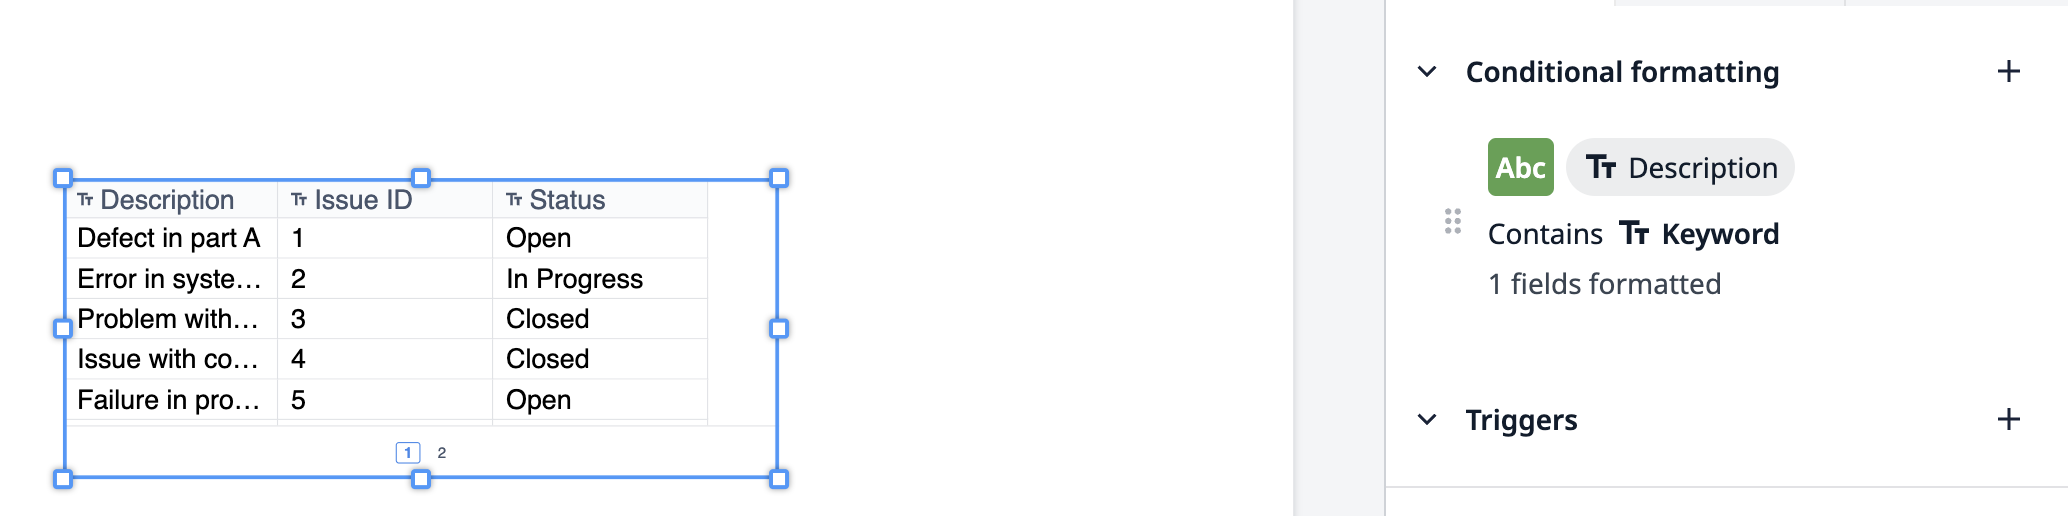
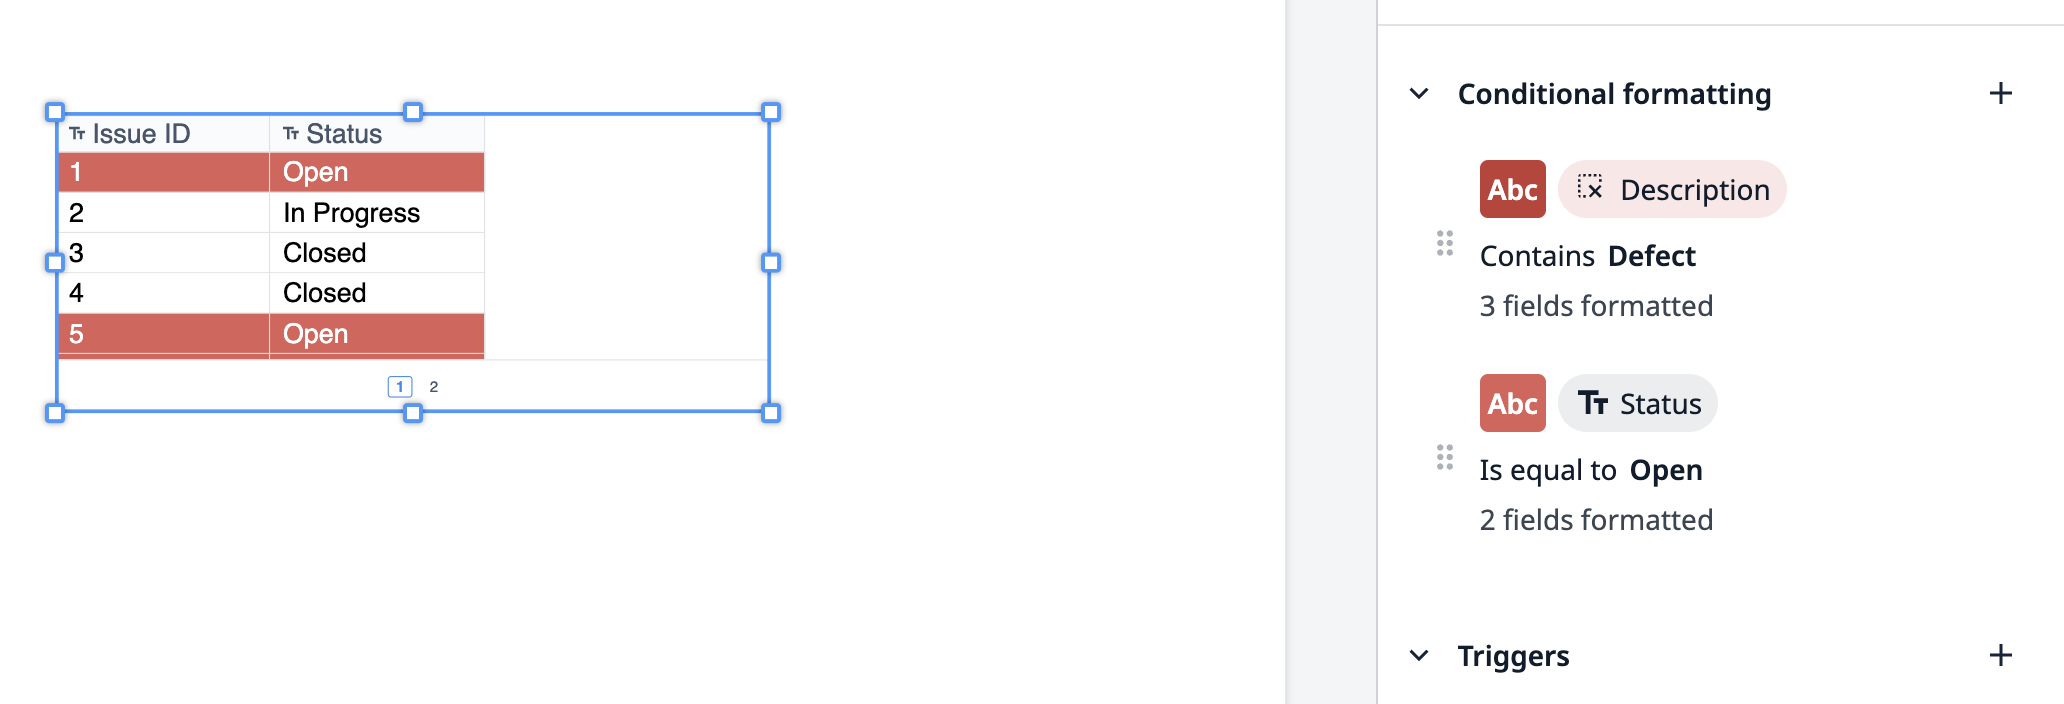
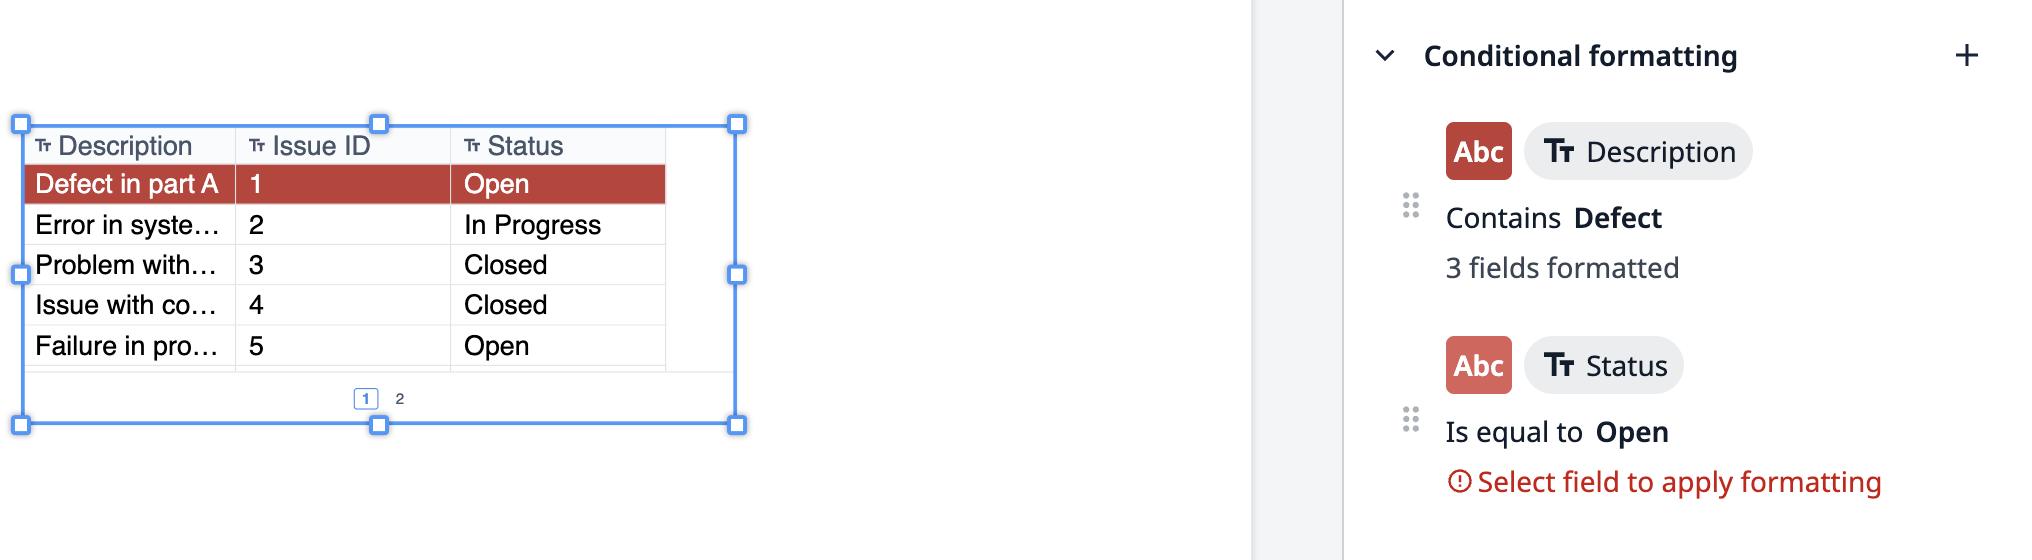
We can select Status, set the condition type to Equal to, and the static value to "Open". Then, we apply a red background with white text formatting and choose to apply the rule to all fields.
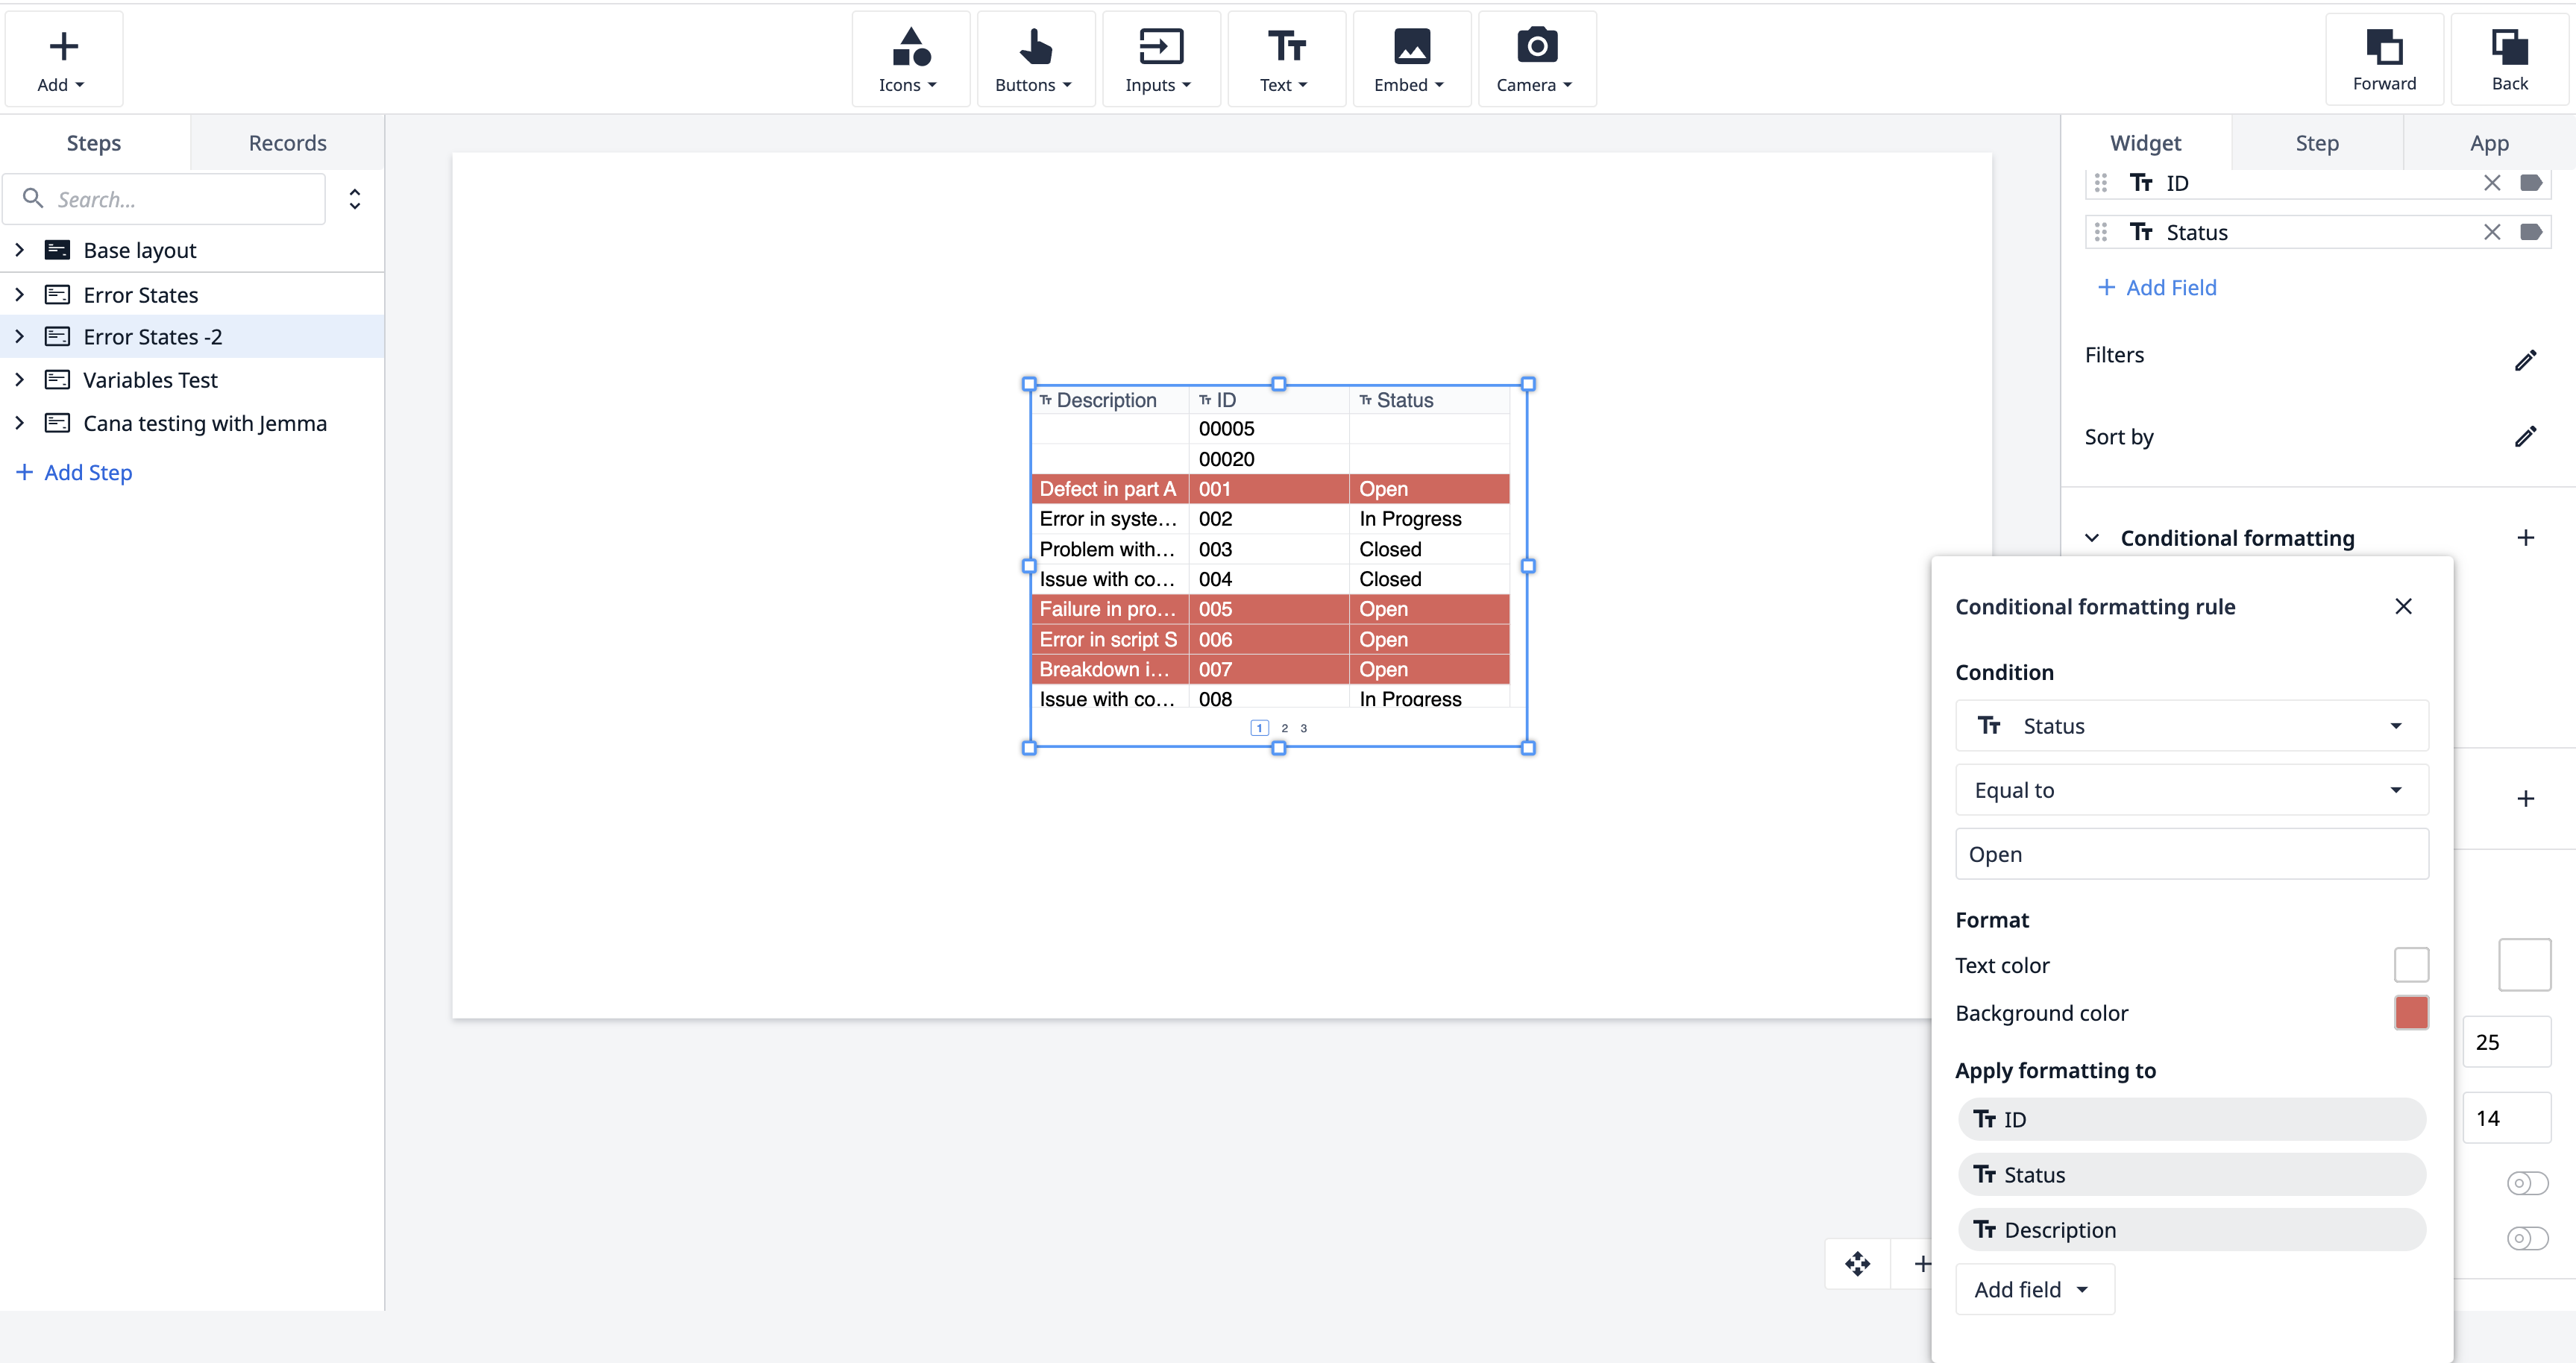
Now, we’ll highlight rows containing the word “Defect” in the Description by applying a darker red background.
Rule Execution
Rules are evaluated in the order they are listed.
- The first rule found to be true determines the formatting of the cell or range.
- To reorder rules, click and drag them to a new position.
Example
We'll apply the Contains condition to Description, set the static value to "Defect", and apply red formatting. We move this rule higher in the hierarchy to ensure it takes precedence.
Using a variable in a rule
If an argument uses a variable that has no default value, the rule will not execute in the app editor, but it will execute when it has a value (either in Developer Mode or in the Player).
Error States
For conditional formatting to execute, make sure the following sections are filled out:
- Source Field
- Argument(s)
- Apply Formatting to
Additionally, the following scenarios will result in conditional formatting errors:
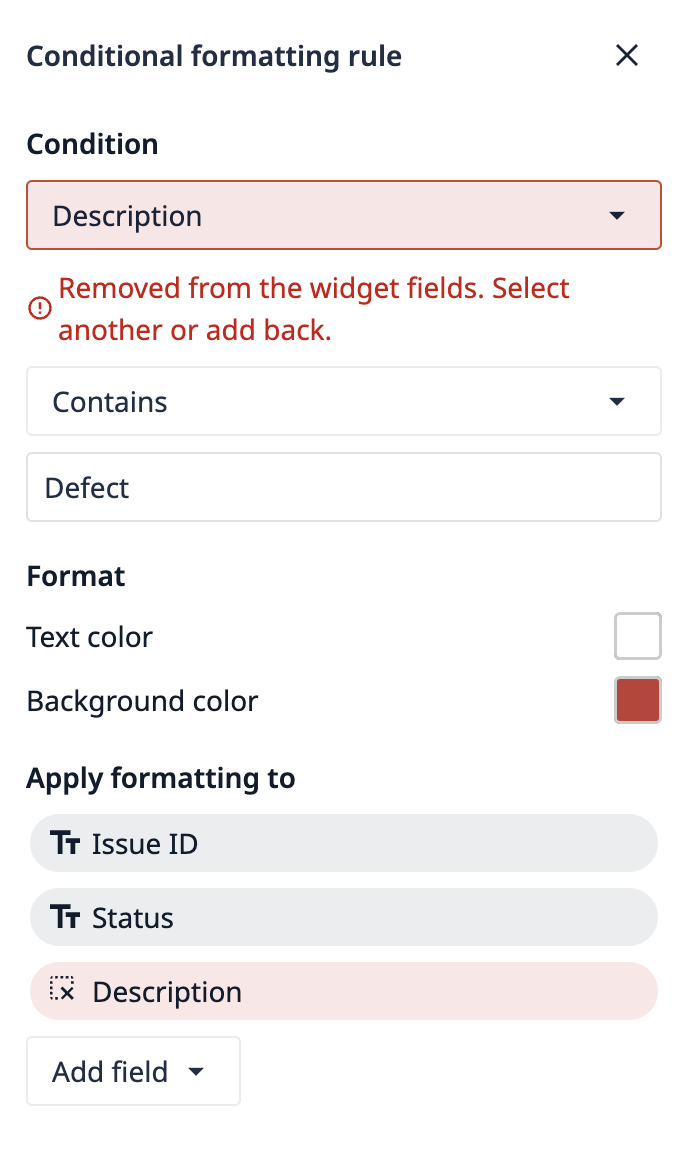
- Missing Source Field or Archived Fields
If a source field has been archived or deleted from the widget, the rule will no longer function as expected. Ensure that all source fields are active in your widget and datasource.
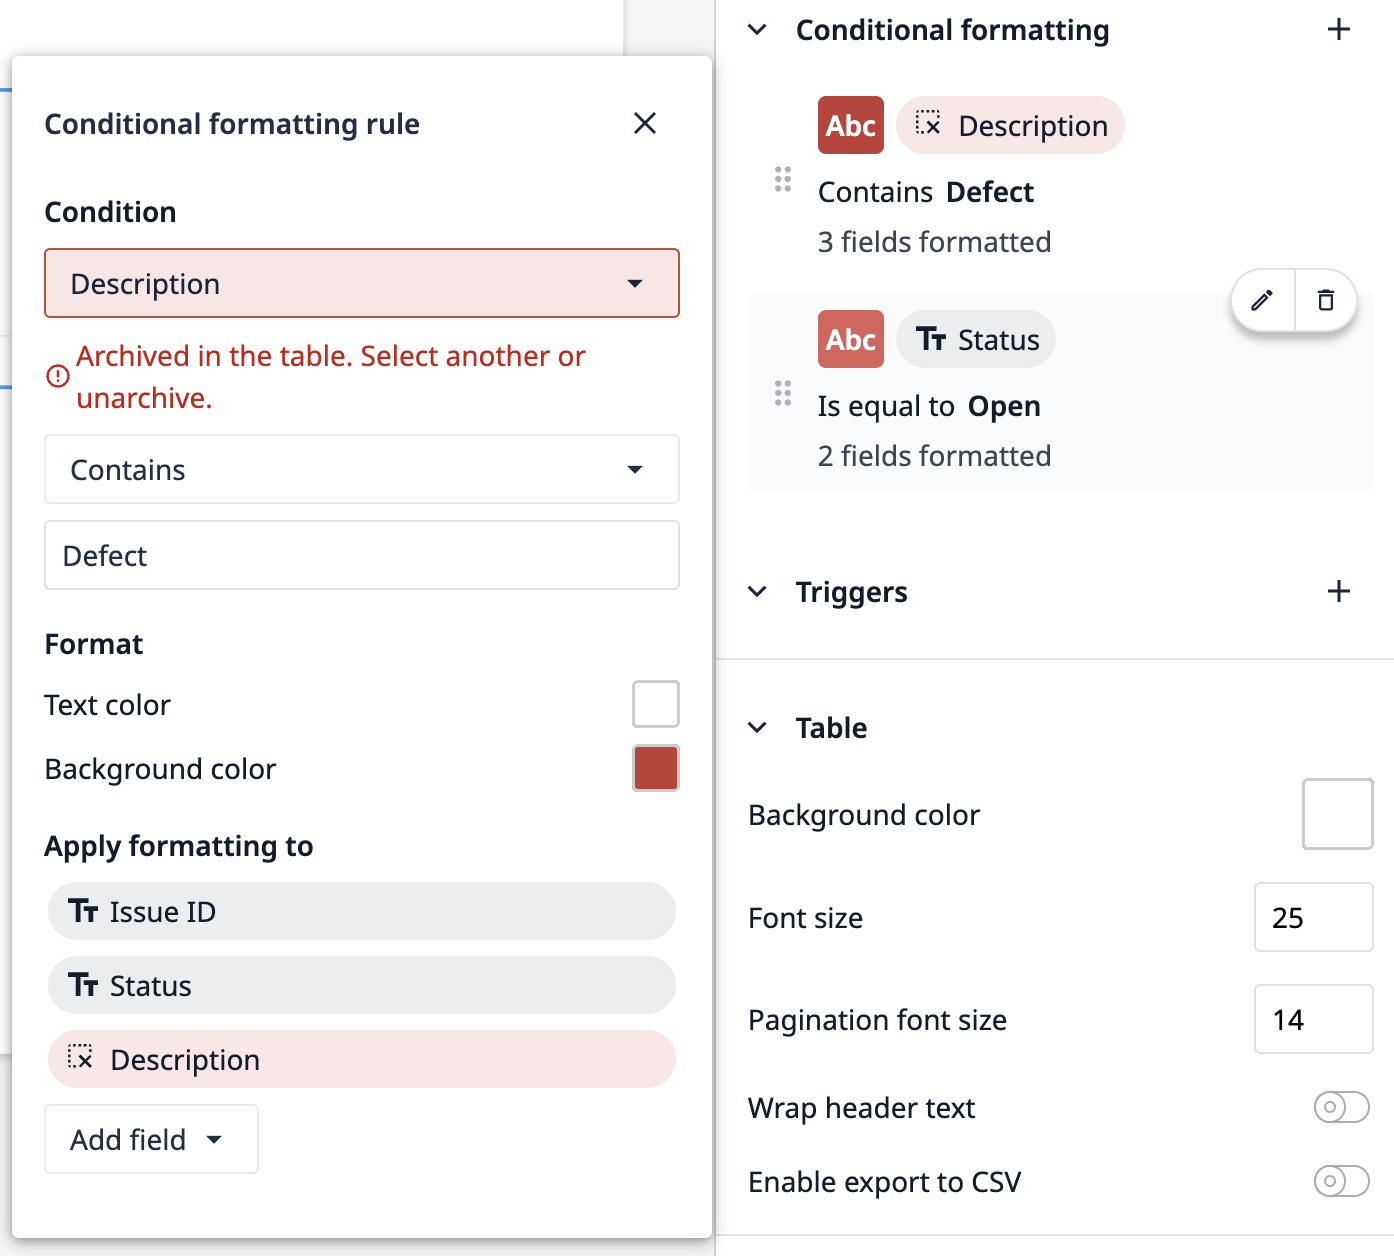
- Archived Fields in the "Apply Formatting to" Section
If some fields in the "Apply Formatting to" section are archived or deleted but others are still available, the rule will continue to function. However, the archived fields will still display, and formatting may not apply to them.
- Missing Argument Field
A rule cannot function if the argument field is missing. Ensure that all required fields are filled out for the rule to execute successfully.
Delete a Rule
To delete a rule:
- In the Conditional Formatting section, hover over the rule you want to delete.
- Click the trash icon in the top right corner of the rule card.
Limits
Set up conditional formatting rules with the following limit to ensure your widget performs optimally.
| Limit | |
|---|---|
| Rules per widget (as of r333) | 20 |
| Rules per widget (pre-r333) | 10 |
Highlight a Row
To apply conditional formatting to an entire row (i.e., all columns in that row):
- In the Apply Formatting to section of a rule, select all of the fields for the row.
This will apply the selected formatting across the entire row, allowing you to highlight rows with specific conditions or criteria.
Troubleshooting and Best Practices
If you're encountering issues with conditional formatting, here are some best practices to consider:
- Ensure your fields are active: Make sure that none of the fields you are working with are archived or deleted.
- Check for rule conflicts: Since rules are evaluated in order, ensure that higher-priority rules are placed at the top of the list if you need them to override other rules.
- Test your rules: After setting up or editing a rule, check to make sure the formatting is applying correctly in both the app editor and Tulip Player.
Did you find what you were looking for?
You can also head to community.tulip.co to post your question or see if others have faced a similar question!
.gif)