
Using Vision's Snapshot Feature
Take Snapshot of your Vision Camera Feed within Apps
Overview
Vision's Snapshot Feature is a powerful tool that can be leveraged to enhance the visual inspection of the processes on your shop floor. Using this feature, you can easily take a snapshot of a Vision camera's current scene view. A snapshot is treated as a device action within Tulip, and this action can be triggered by any event, like a button press, or a Vision detector event.
In this short article, we will learn how to setup and use the snapshot feature.
Prerequisite: A Vision Camera Configuration
The only prerequisite to using Vision's Snapshot Feature, is that you have previously set-up a camera with a Vision Camera Configuration.
To set-up a camera configuration, first navigate to your Shop Floor tab, and click Vision.
Next, select Camera Configurations, click Create, and enter a name for your new Camera Configuration.
Finally, assign the configuration to a camera connected to a Station on your Shop Floor.
- For more details on how to set-up a camera configuration in Vision, please see this Support Article: Getting Started with Vision
Setting Up a Snapshot Trigger
With a camera configuration in place, you are now ready to start using the Snapshot feature from within an App.
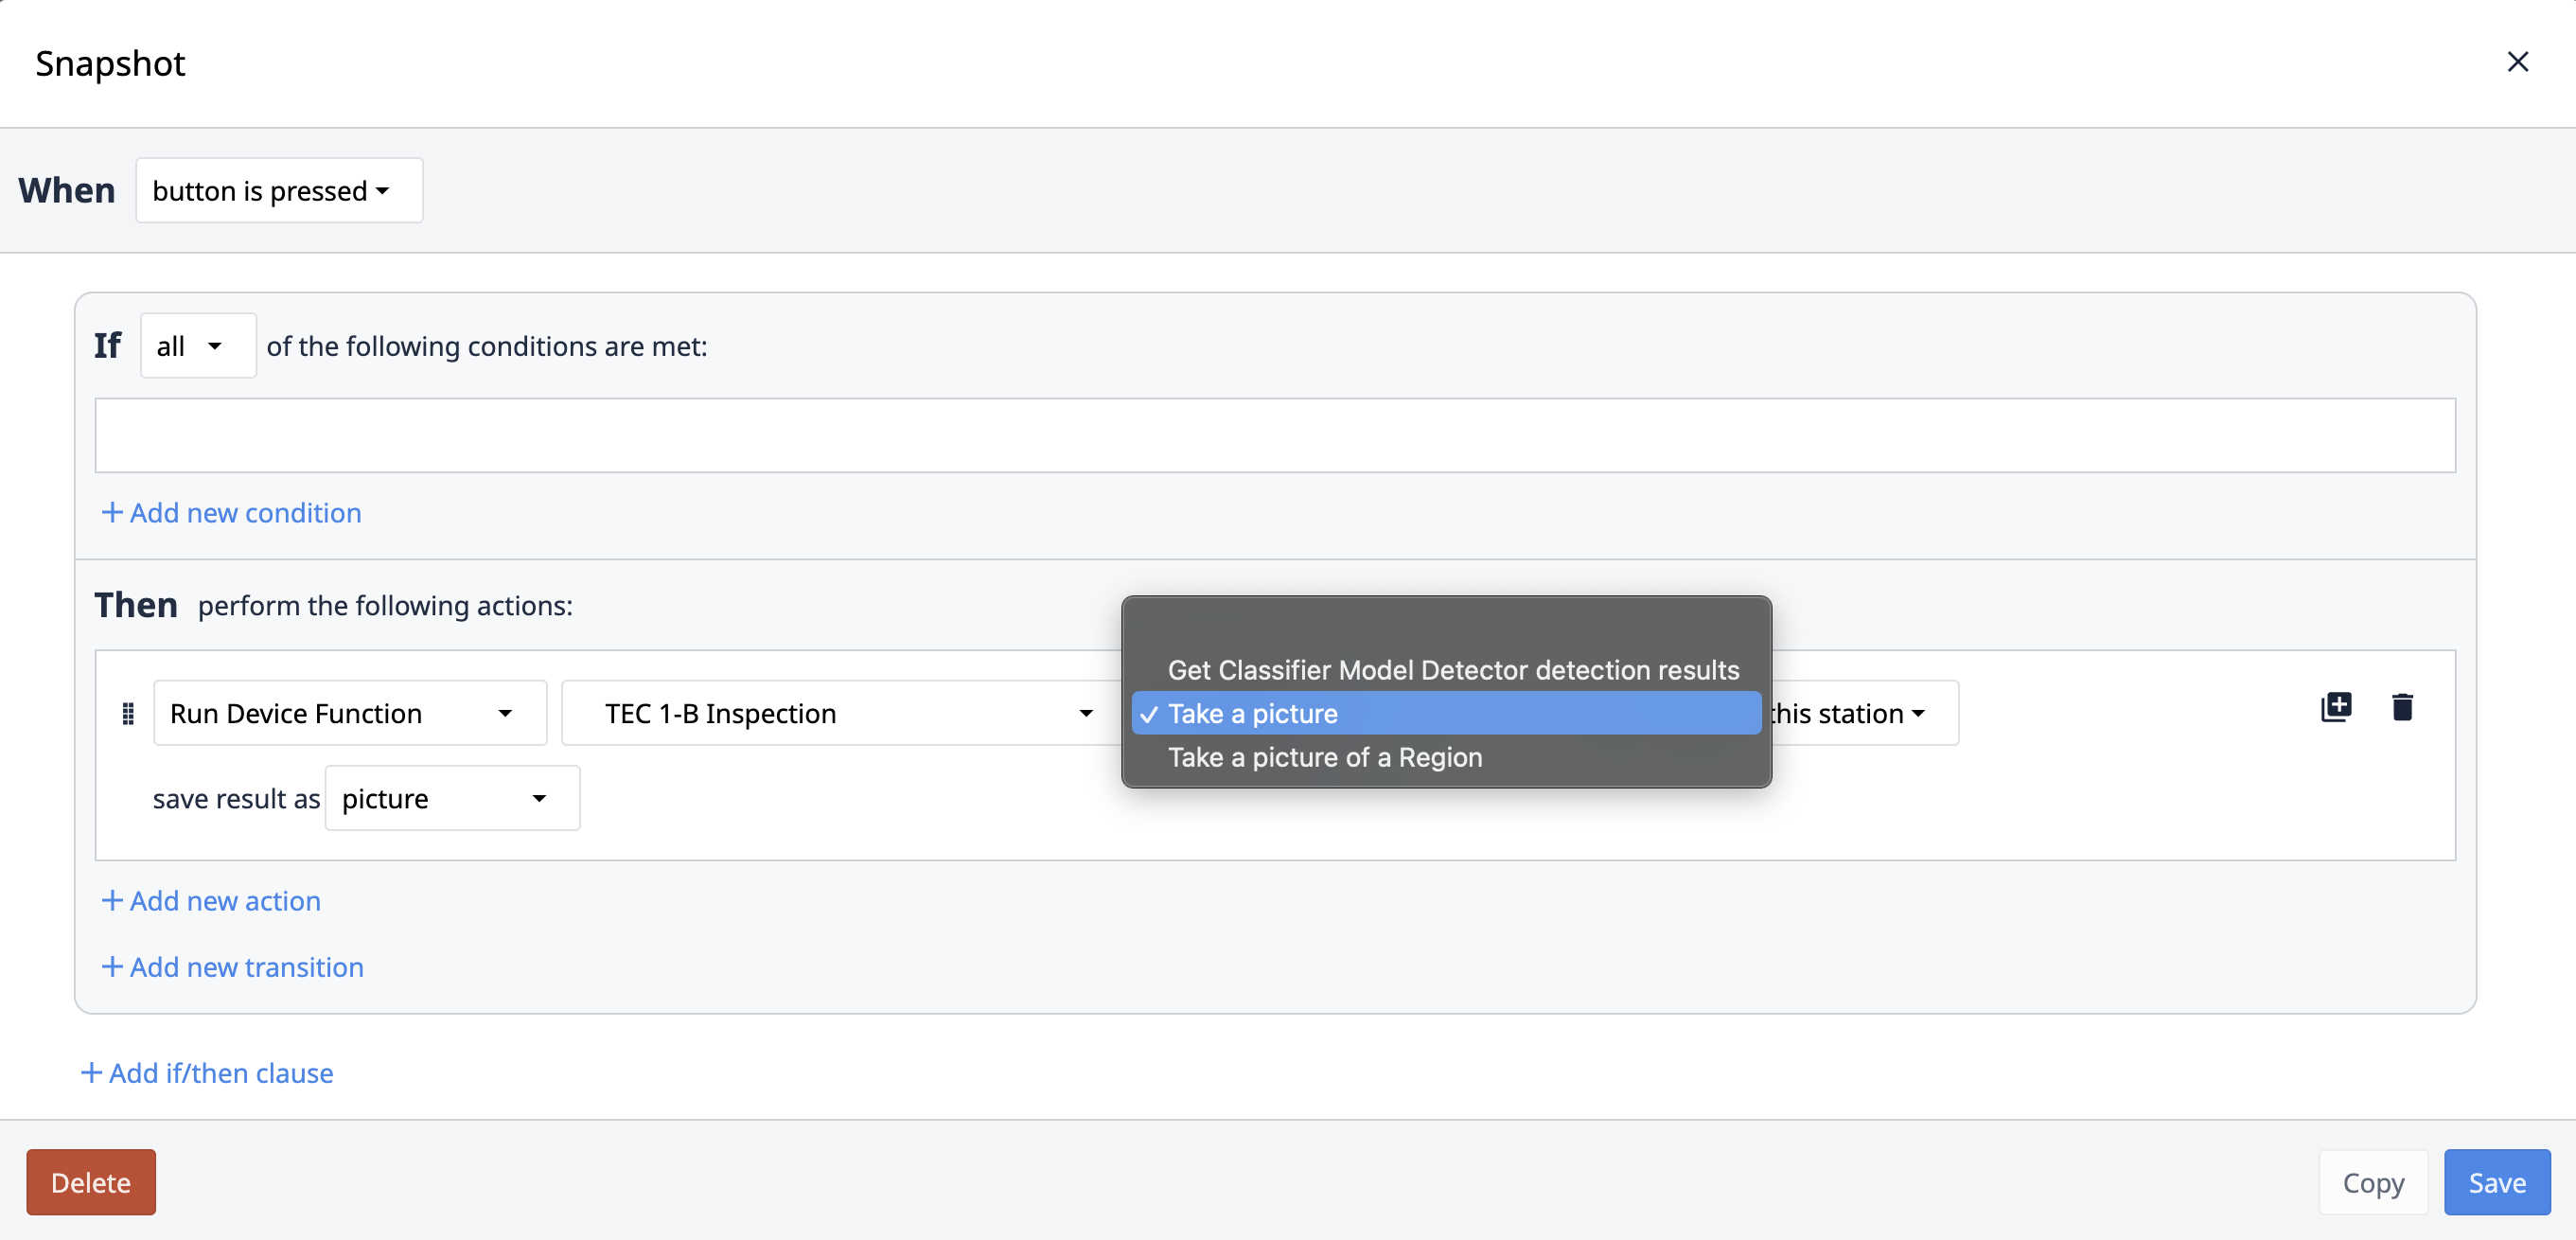
From within an app, create a button and add a Trigger to its click action.
Set the action within the trigger to be: Run Device Function, and select your camera configuration as the device to use. Then, select: Take a Picture as the function to call, and save the result in a Variable.
Alternatively, you can select Take a Picture of a Region if you want to focus on a particular area.
As seen in the gif below, this feature will just provide a snapshot of the camera's scene. It may be helpful to embed the live stream of your Vision Camera within the app. To do so, embed a Vision Camera Widget.
At this point, you can add anything else to the app that makes sense in terms of your process. As an example, you may want to save the snapshots to a table, and begin building a database of images you could use later (e.g. detect defects visually). You may even want to send the snapshot to an HTTP connector, and run some external processing on it.
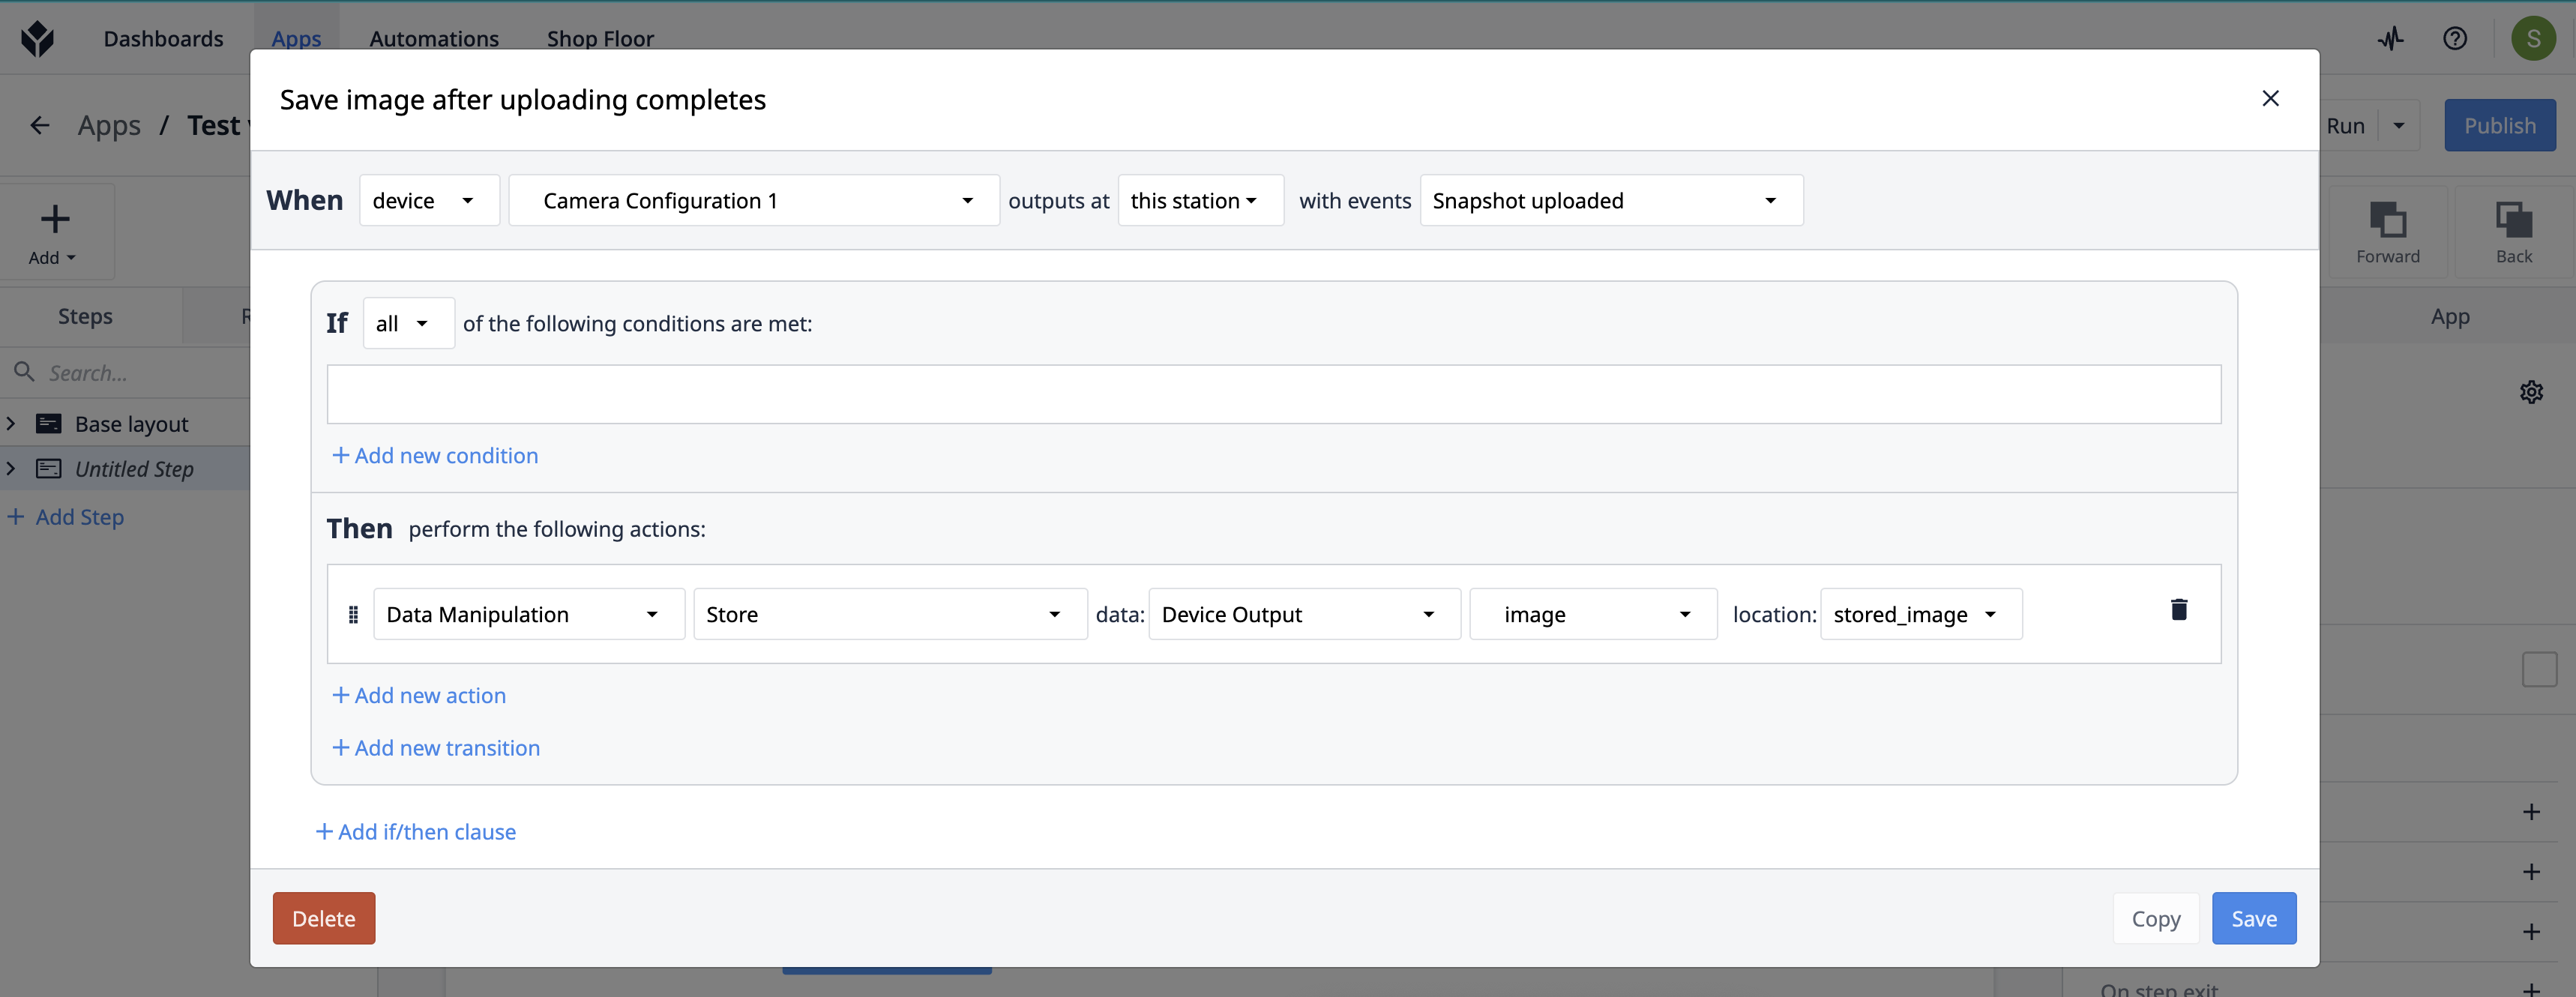
Async Snapshot
Prerequisite:
- Reach out to your Tulip CSM or support to enable Async Snapshot for your Tulip instance.
Asynchronous snapshots represent a sophisticated approach to image capture and processing that offers significant performance advantages - it allows for concurrent image uploading and processing and parallel execuution of capture and upload tasks.
What this means is that you can continually take pictures without having to wait for the previous one to be uploaded.
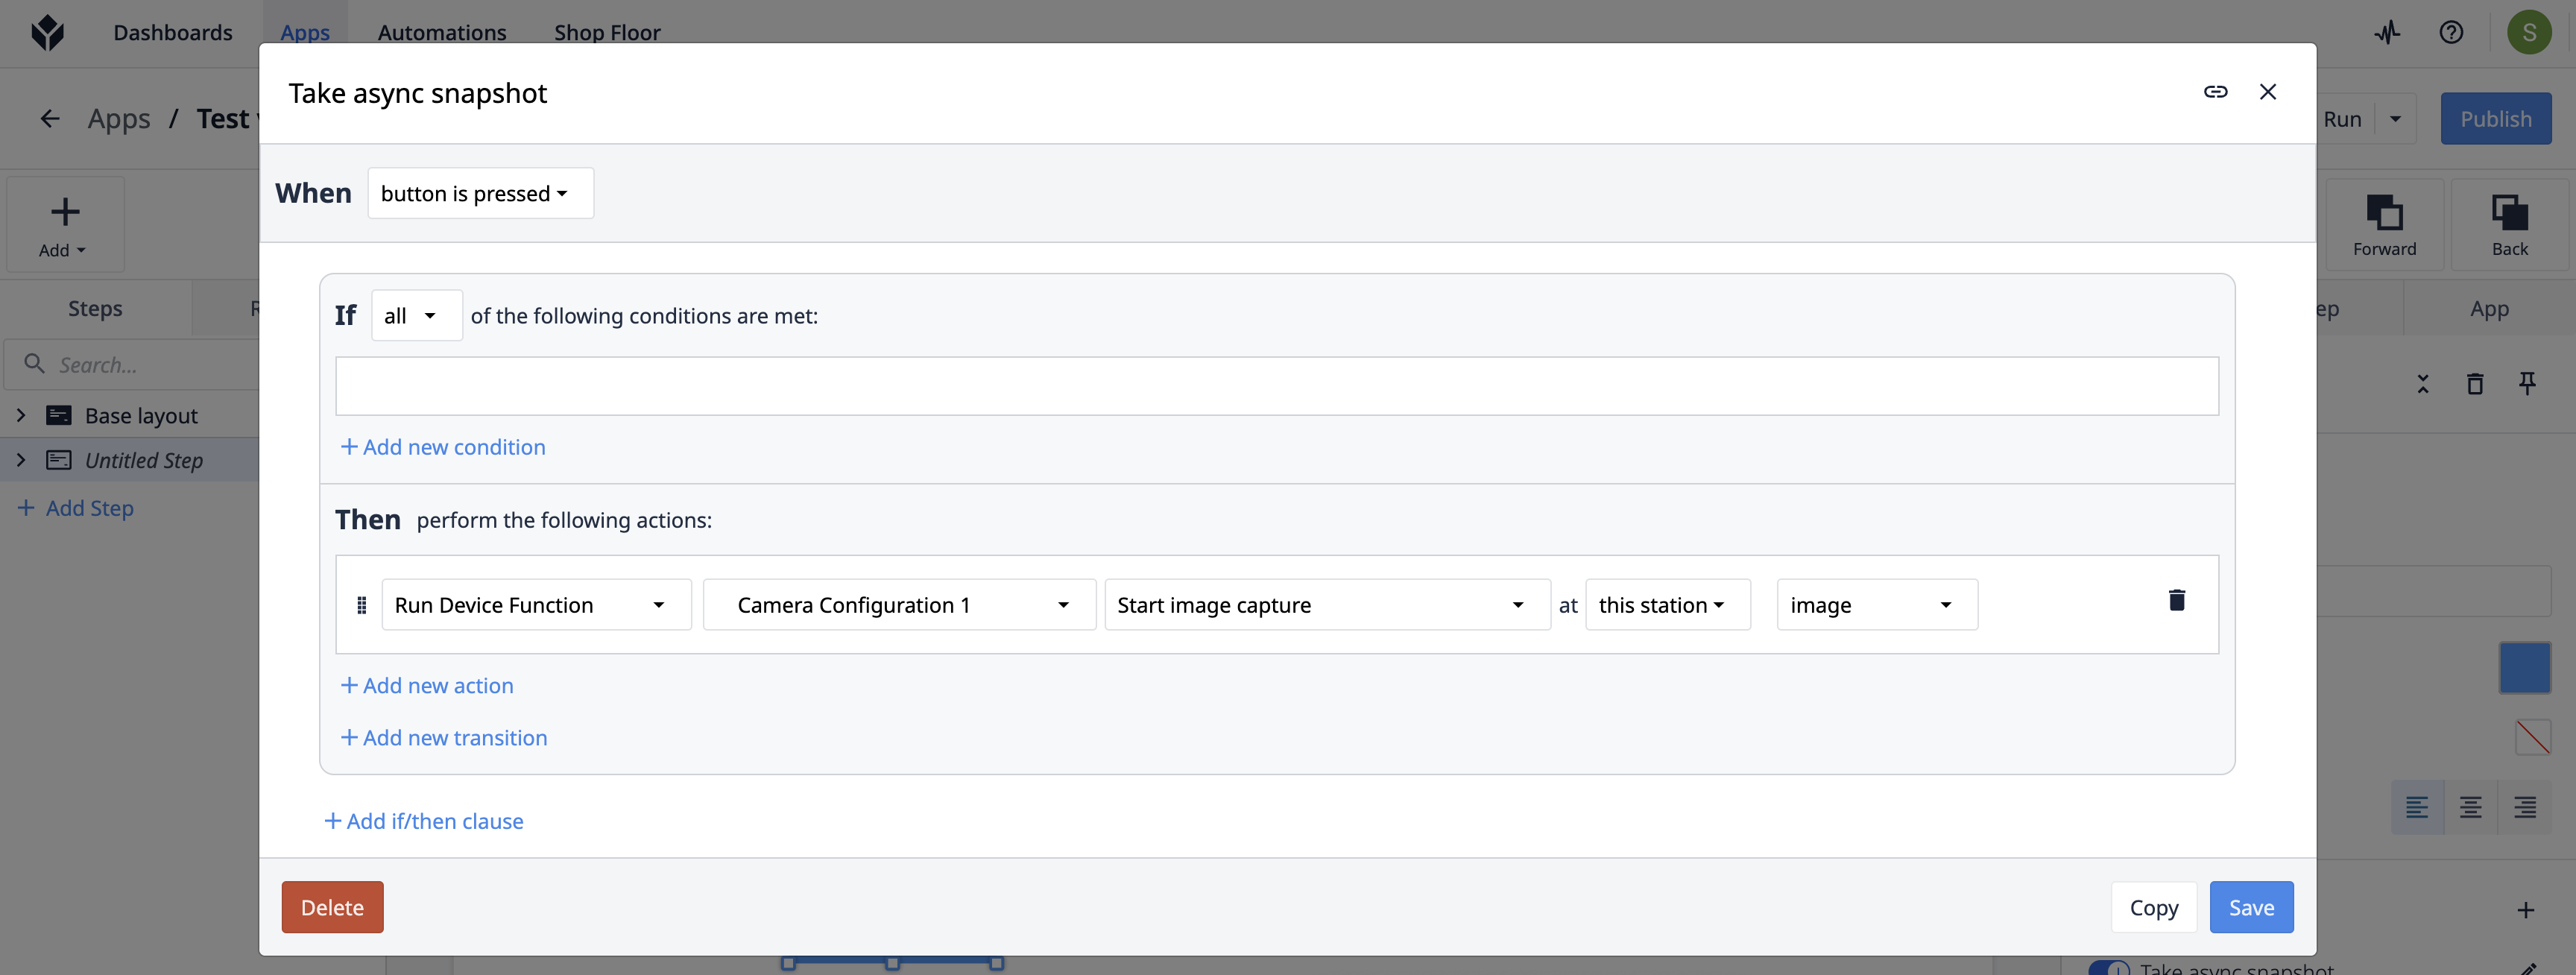
You will notice that the image is "Start Image Capture" available compared to "Take a Picture" in "Run Device Function".
Further Reading
- Using the Change Detector (Requires: Intel RealSense D415)
- Using the Jig Detector
- Using the Color Detector
- Using the Vision Camera Widget in Apps
- Using the Snapshot Feature with an External Vision Service