


How To Manage Your Inventory Using Tables
Use this guide to set up an inventory management system using Tables
In this guide, you will learn...
- How to create a Table for your inventory
- How to add to that inventory via a Form Step in an app
Note: This topic is featured in the "Build an Advanced Work Instructions App" course in Tulip University.
Tulip's Tables feature allows you to control inventory via a no-code database.
Within Tulip, you can manage inventory by...
- Updating the latest quantity of certain materials in your manufacturing process
- Deducting from inventory every time a product is completed or scrapped
- Sending warnings when a quantity falls below a certain amount
This tutorial will show you how to create an inventory Table, and then update that Table in an app.
In order to understand this tutorial, you should first read this overall guide to Tables
This example will use the example of a cabinet making manufacturing process.
Creating An Inventory Table
We will create an inventory Table with 5 materials:
- 1 1/4" screws
- 2" screws
- 2" x 4" lumber
- 4" x 6" lumber
- Maple colored stain
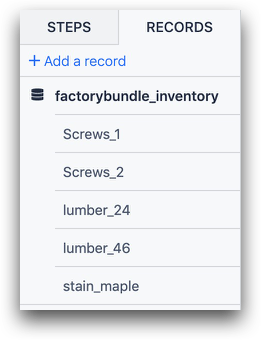
First, add each type of material as a unique record via the ID field. Here is an example:
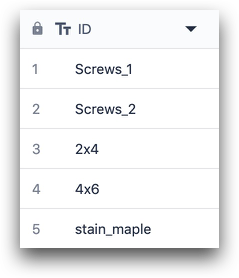
Each of these text values must be unique. Then, add the required fields for each record. In this case, there are 6:

- Quantity (number)
- Label (text)
- Warning Threshold (number)
- Image (image)
- Official Name (text)
- Price/Unit (number)
Then, fill in some values for at least one of the records so you are able to successfully test the table in an app. Here's an example:

We will now create a one step "Inventory Updater" app. This might run on a tablet, and be used by an associate who is in charge of stocking inventory.
Creating An "Inventory Updater" App
As of r234, form steps have been disabled for all new Tulip Instances.
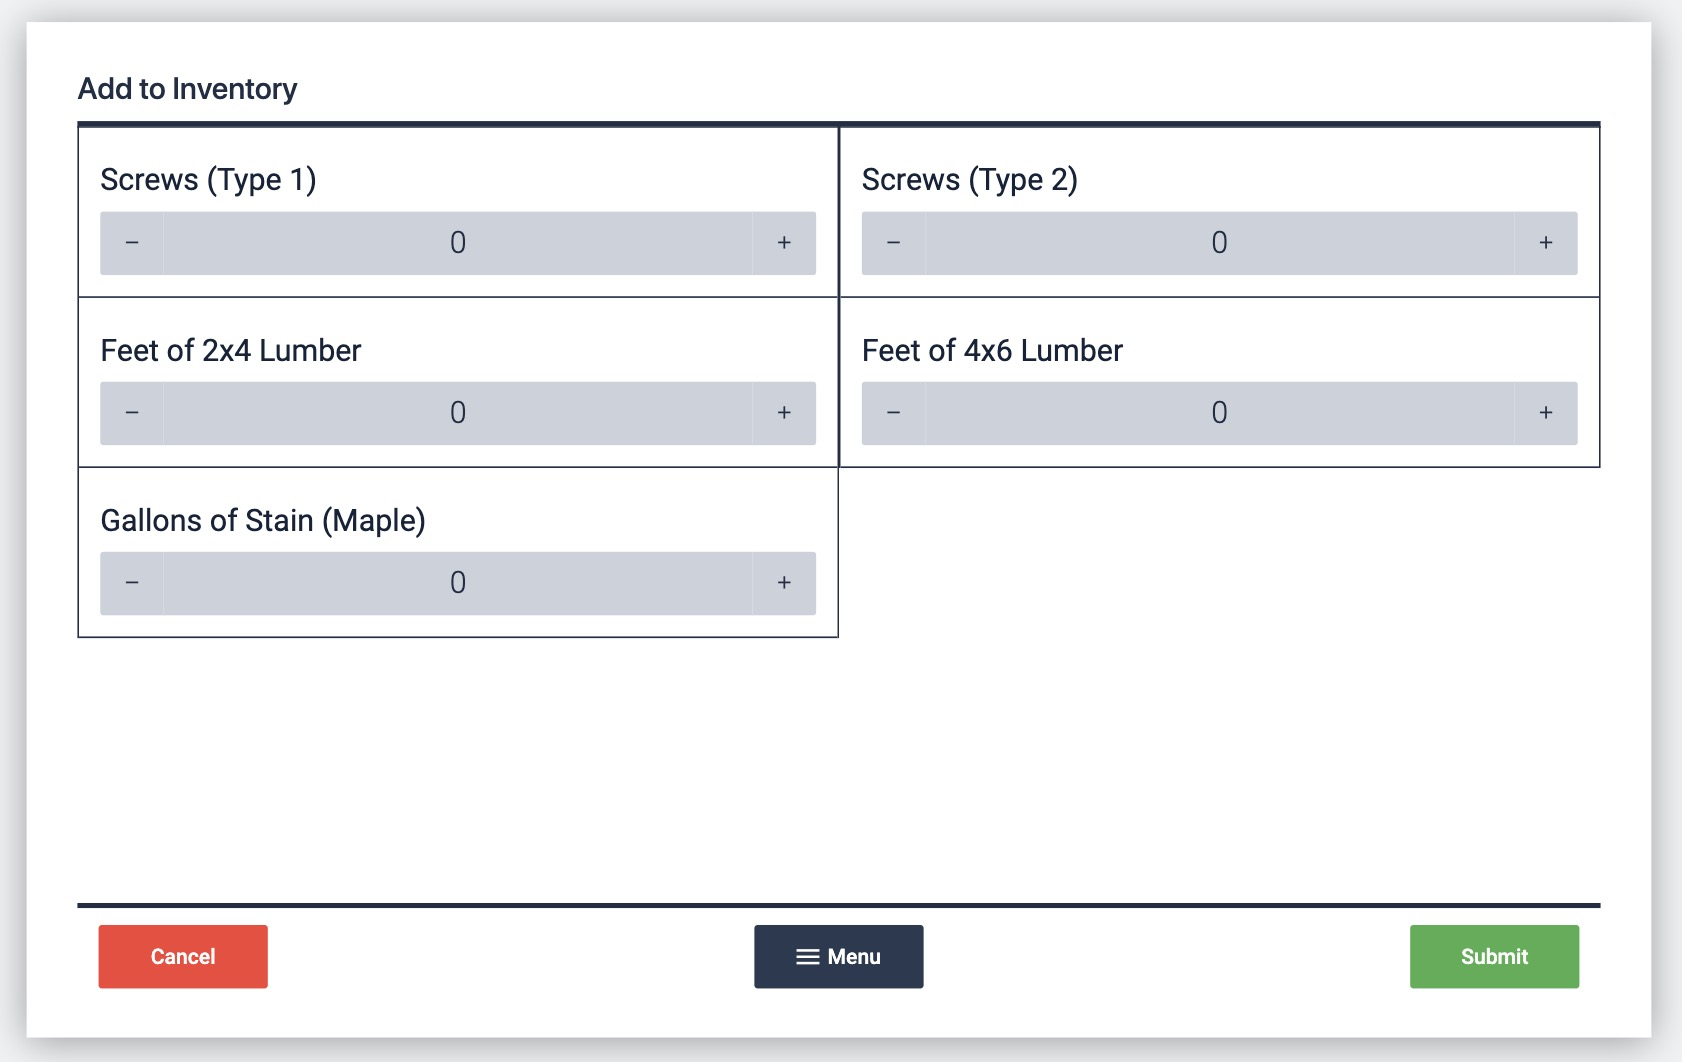
This app will have one step- a Form Step with widgets that correspond to each of the 5 types of inventory above. When an associate presses "Submit", the quantities of all 5 materials will be updated.
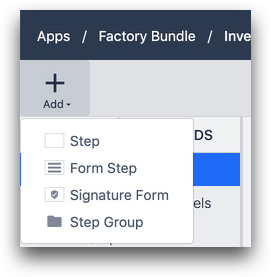
First, create a new app and then add a Form Step.
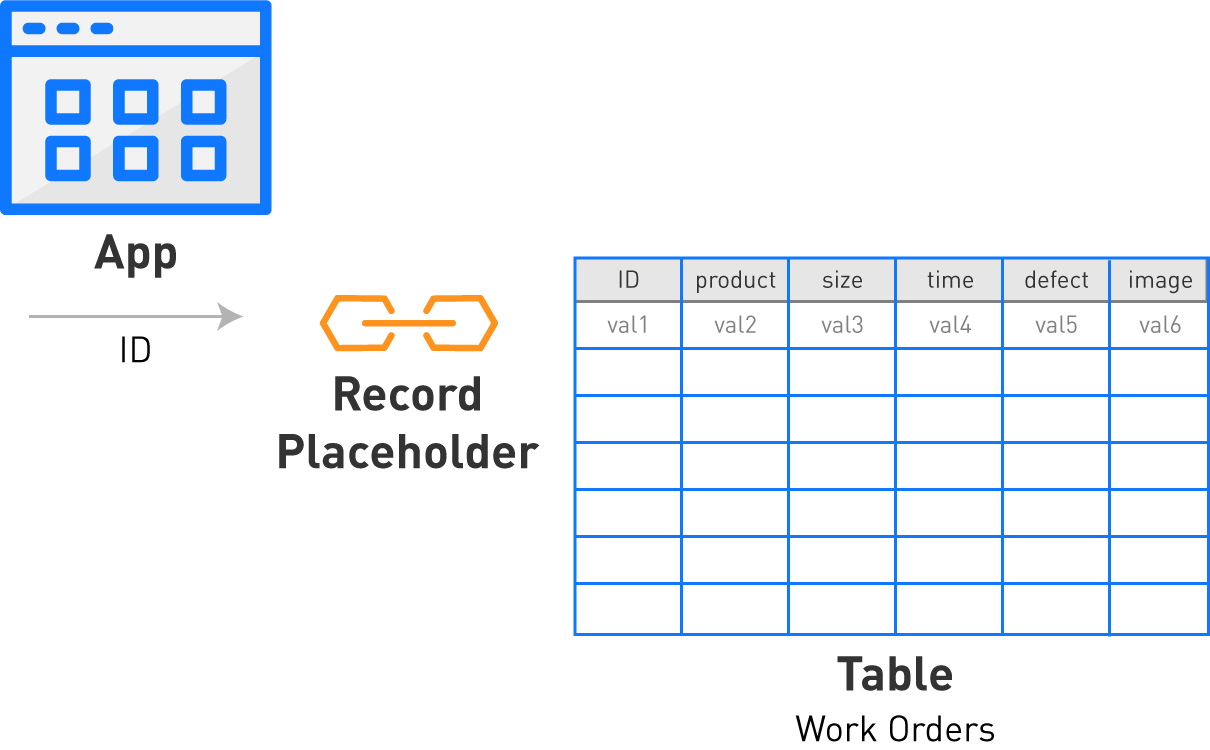
Then, select the "Records" tab and add a record placeholder for each of the 5 items. The "record placeholder" connects an app to a table. Since we will need to add 5 inventory items, we will need 5 record placeholders.
Select "Add A Record", then add a name that corresponds to each item in the "Inventory" table that you just created.
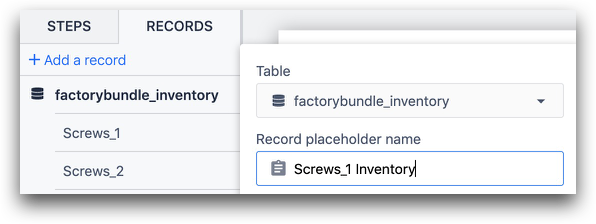
In this case, the name of the Table is "factorybundle_inventory" and the name of the record placeholder is "Screws_1 Inventory".
After you have added 5 record placeholders, your Records List should look like this:
Now we need to load 5 records into the app, which corresponds to the 5 items in inventory. To do this, add a Trigger to the Form Step as a whole.
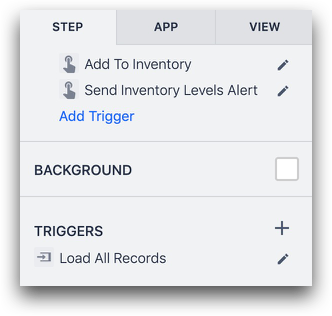
Set it to run when the step is opened. Then, use the exact text from the ID of the record in the Table to load each of the 5 records as the correct placeholder.
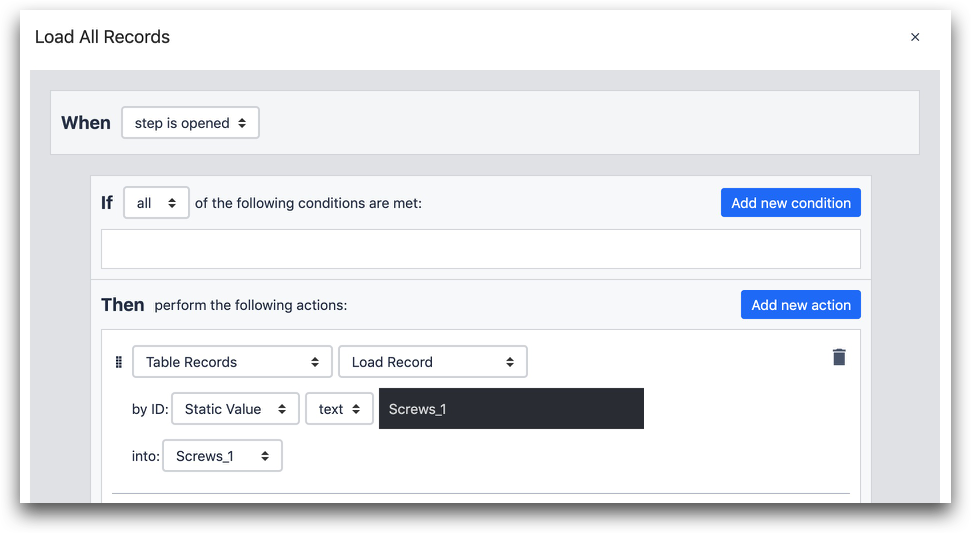
- "Table Records" "Load Record"
- by ID: "Static Value" "text" "Screws_1"
- into: "Screws_1" (name of record placeholder)
In this case, "Screws_1" is both the ID of a record in the Table AND the name of a record placeholder.
After doing this for each of the 5 items, you are ready to add widgets to the Form Step.
Add a "Number" widget for each of the inventory items. Here's what all 5 look like:
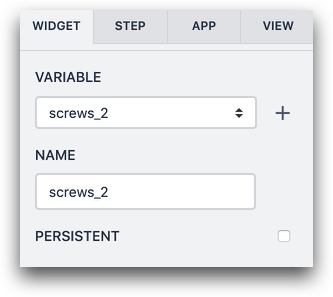
Then, after selecting a Number widget, select the "+" button next to "Variable" in the Widget tab of the side pane. This will create a new variable for each form widget. Do this for each of the 5 widgets.
Here's an example of a variable named "screws_2".
Finally, we need to add the Trigger to update the inventory and complete the app.
After clicking on the background of the Form Step, select the "Custom Action" under the "Submit" button.
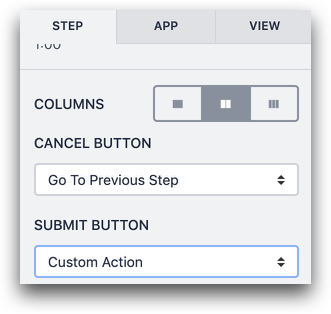
Then, select "Add Trigger" and name the trigger "Add to Inventory". For each of the 5 form widgets, add an action that increments the "Quantity" field of the correct table record. Here's an example:

- "Data Manipulation" "Increment Value"
- value: "Table Record" "Screws_1" "Quantity" by: "Variable" "screws_1"
In this statement, we are accessing the record placeholder called "Screws_1", choosing the quantity field, and then adding the variable "screws_1" from the Form Step.
After writing 5 trigger actions, add a "Complete App" statement.

Now, test the app in the Tulip Player and ensure that the Table is correctly updated when the "Submit" button is pressed.
Further Reading
Did you find what you were looking for?
You can also head to community.tulip.co to post your question or see if others have faced a similar question!