Learn how to use HTTP Connectors in applications.
Overview
So you’ve configured a connector, set up a Connector Function, and are getting data returned in your test results–great! Now what?
Now, you can run your connectors in apps and use Trigger logic, Variables, and interactive tables to control and utilize your test results.
Set Up
In order to use HTTP connectors in applications, you’ll need to set up a connector and create a connector function so that you have data coming through. If you haven’t done so already, check out the following articles for help on how to do so:
- Connectors and Integrations
- How to Configure a Connector
- How to Create and Configure an HTTP Connector Function
Before you begin, map out what you want to do in your app with your connector data. This will be based on the Call Type you set up in the connector function. Do you want to display information? Or delete data? Or write information to your server? Knowing what action you need to do helps you to understand what you need to build in your app to accomplish your goals.
Using Connectors in an App
Trigger Logic
In order for a connector to make an API Call to a server, we need to set up some logic within an application to make this happen. Connector Functions can be run anywhere you place a Trigger, including on buttons, when a device like a barcode fires, on timers, or on Step Level Triggers or App Level Triggers.
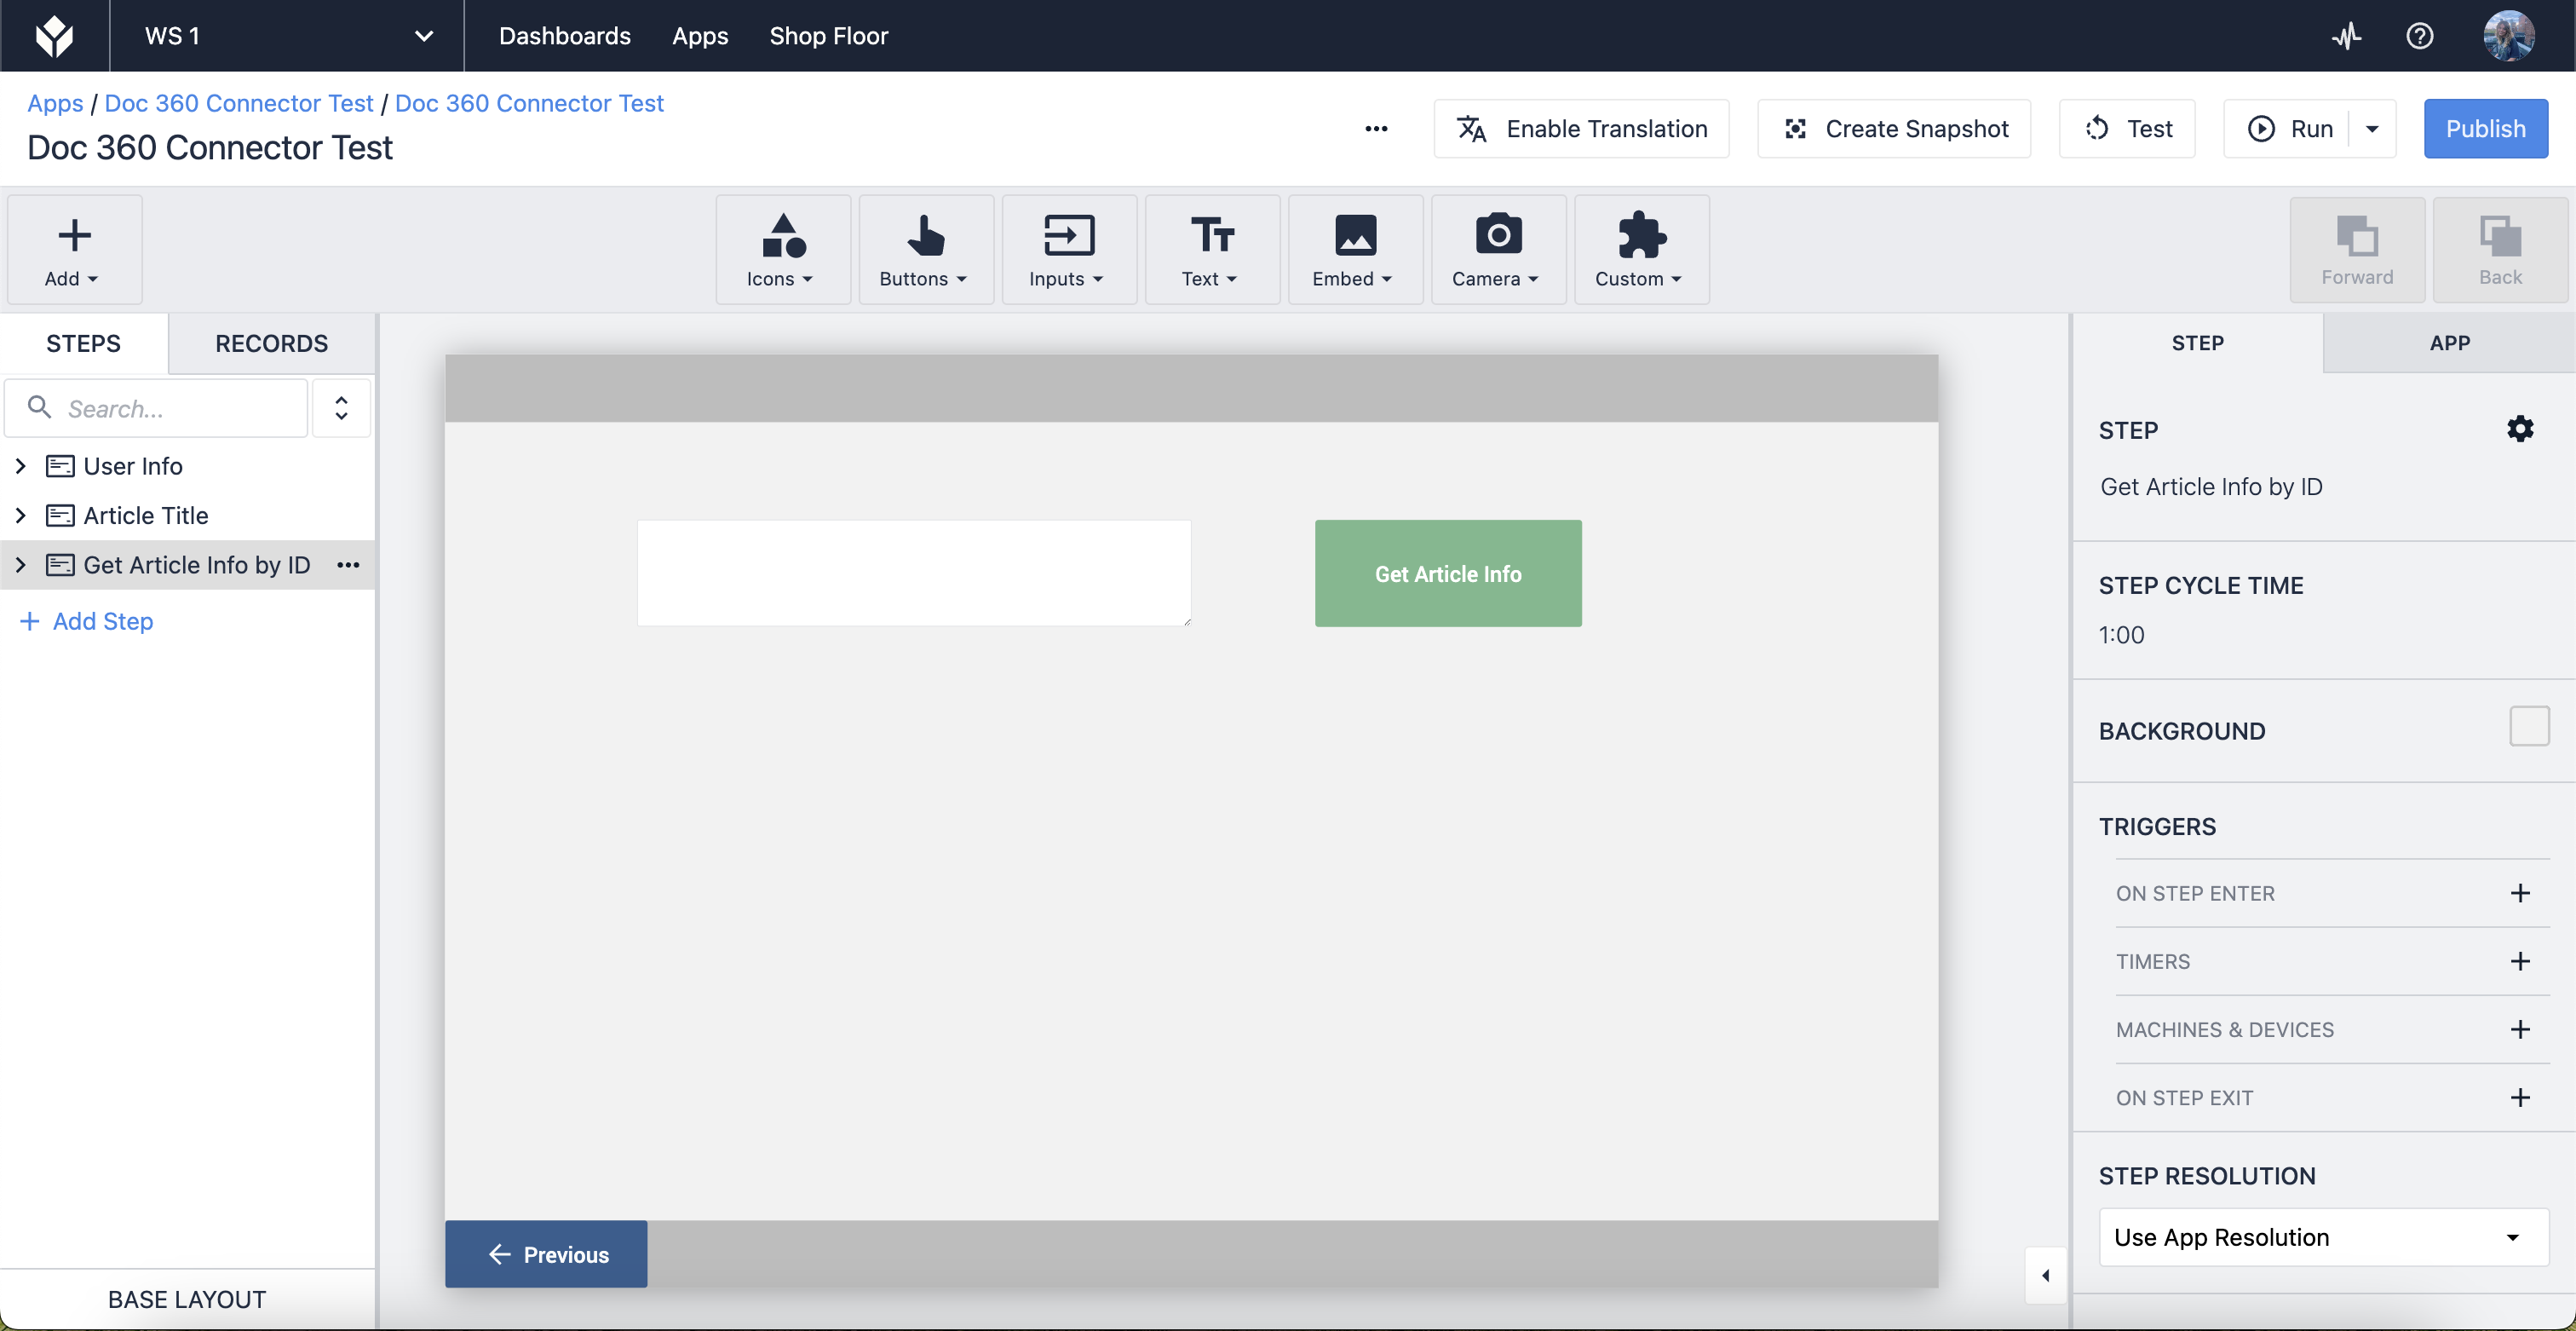
In our example, our connector function returns information about a knowledge base article based on an article ID entered into a text input field. This input field in the application maps to the Input in our connector function, and will set the value of the input for the connector. For a simple connector function like our example, our application only needs two elements: an input field for collecting an article ID, and a button for triggering the connector function. The app below has a text Input Widget to specify the article ID and button that will run the connector using the value of the text Widget as the connector function input.
If we want to run the connector function when a button is pressed, the following example shows how the logic would flow.
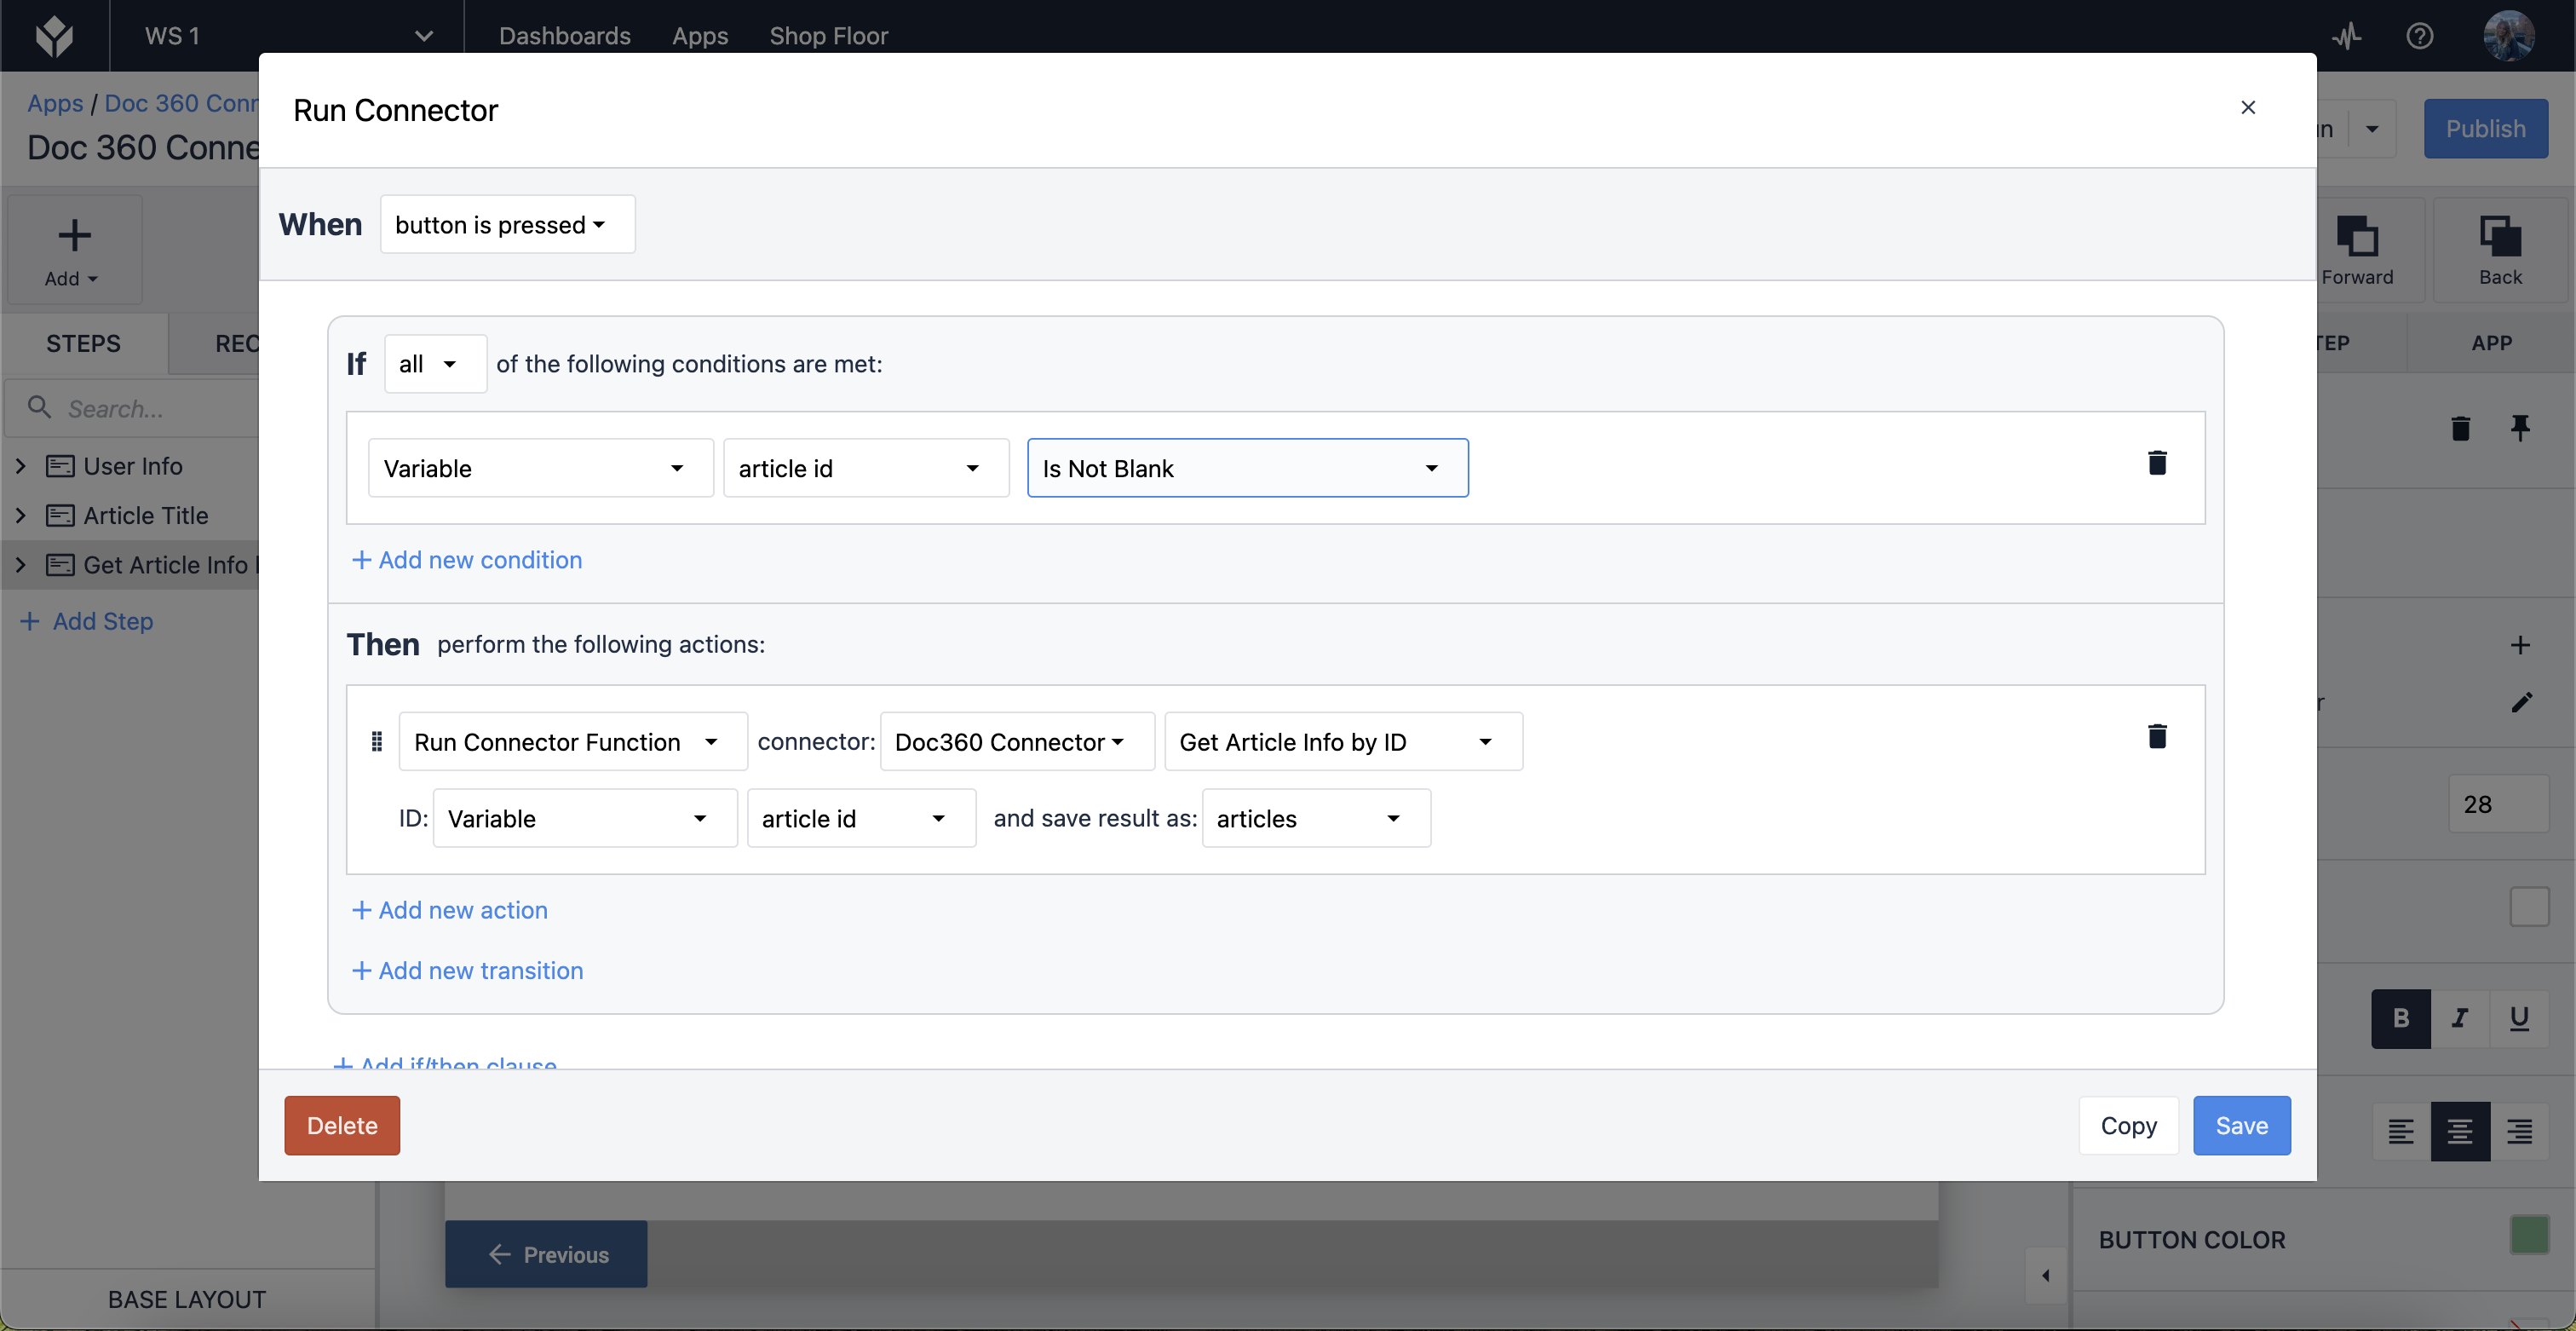
Let’s break this logic down.
When the button is pressed, if the variable is not blank, then it will run the connector’s (Doc360 Connector) function (Get Article Info by ID) based on the variable input (article id) and save the result into a new Variable (articles).
Variables and Interactive Tables
Displaying the connector function results in an interactive table is quick and simple to do, just be sure to remember the Outputs you set up in the function.
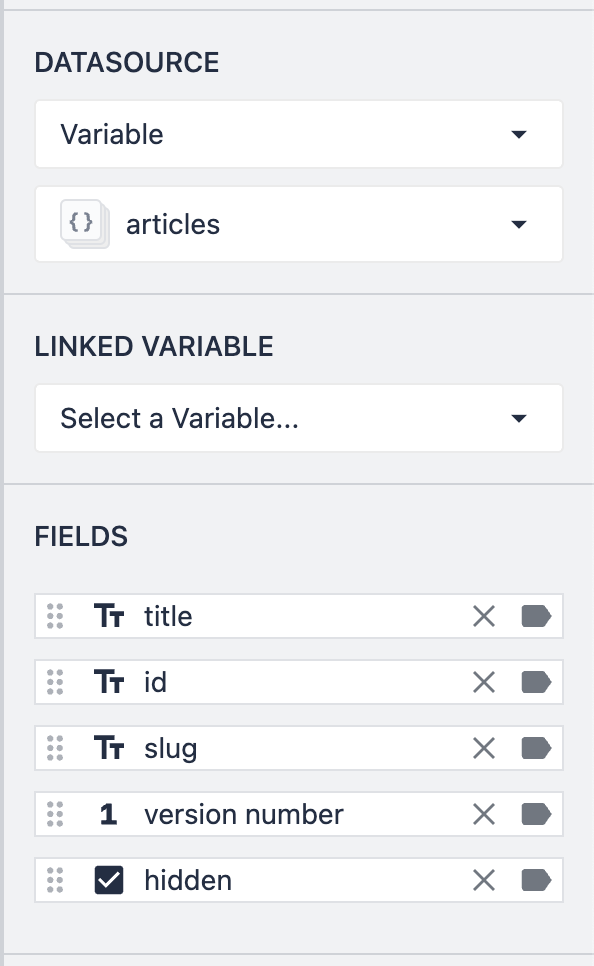
Choose Variable as the datasource and you’ll find the object list you made as outputs in the connector function.
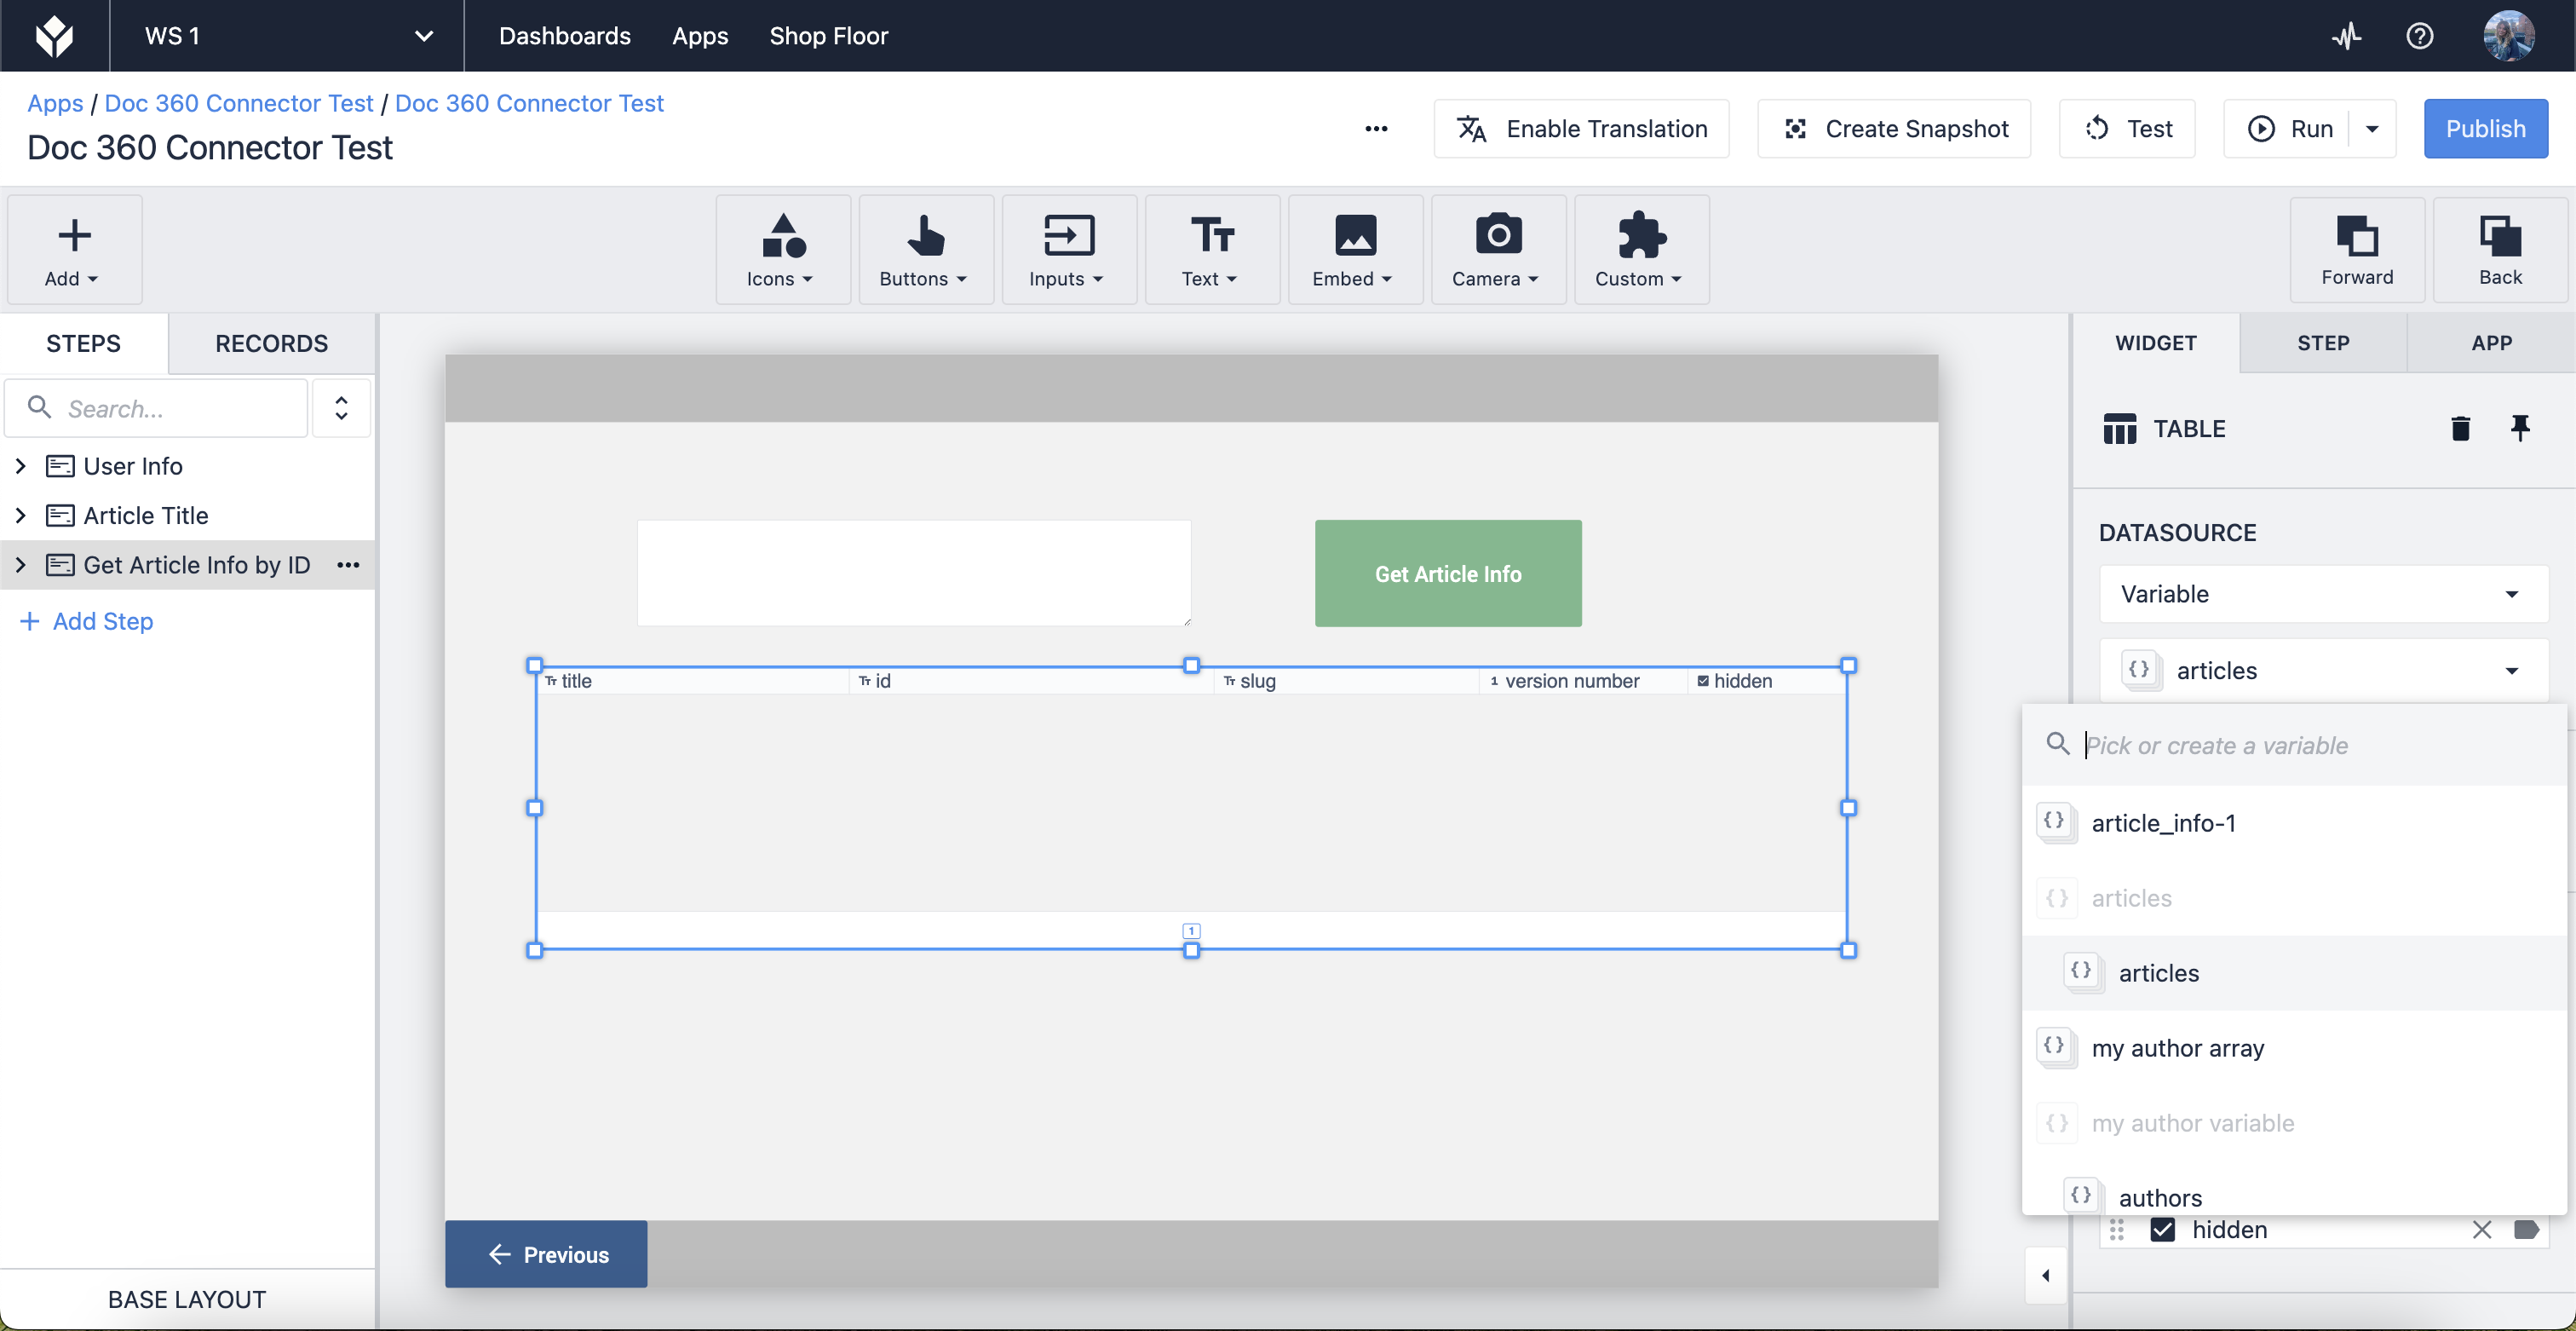
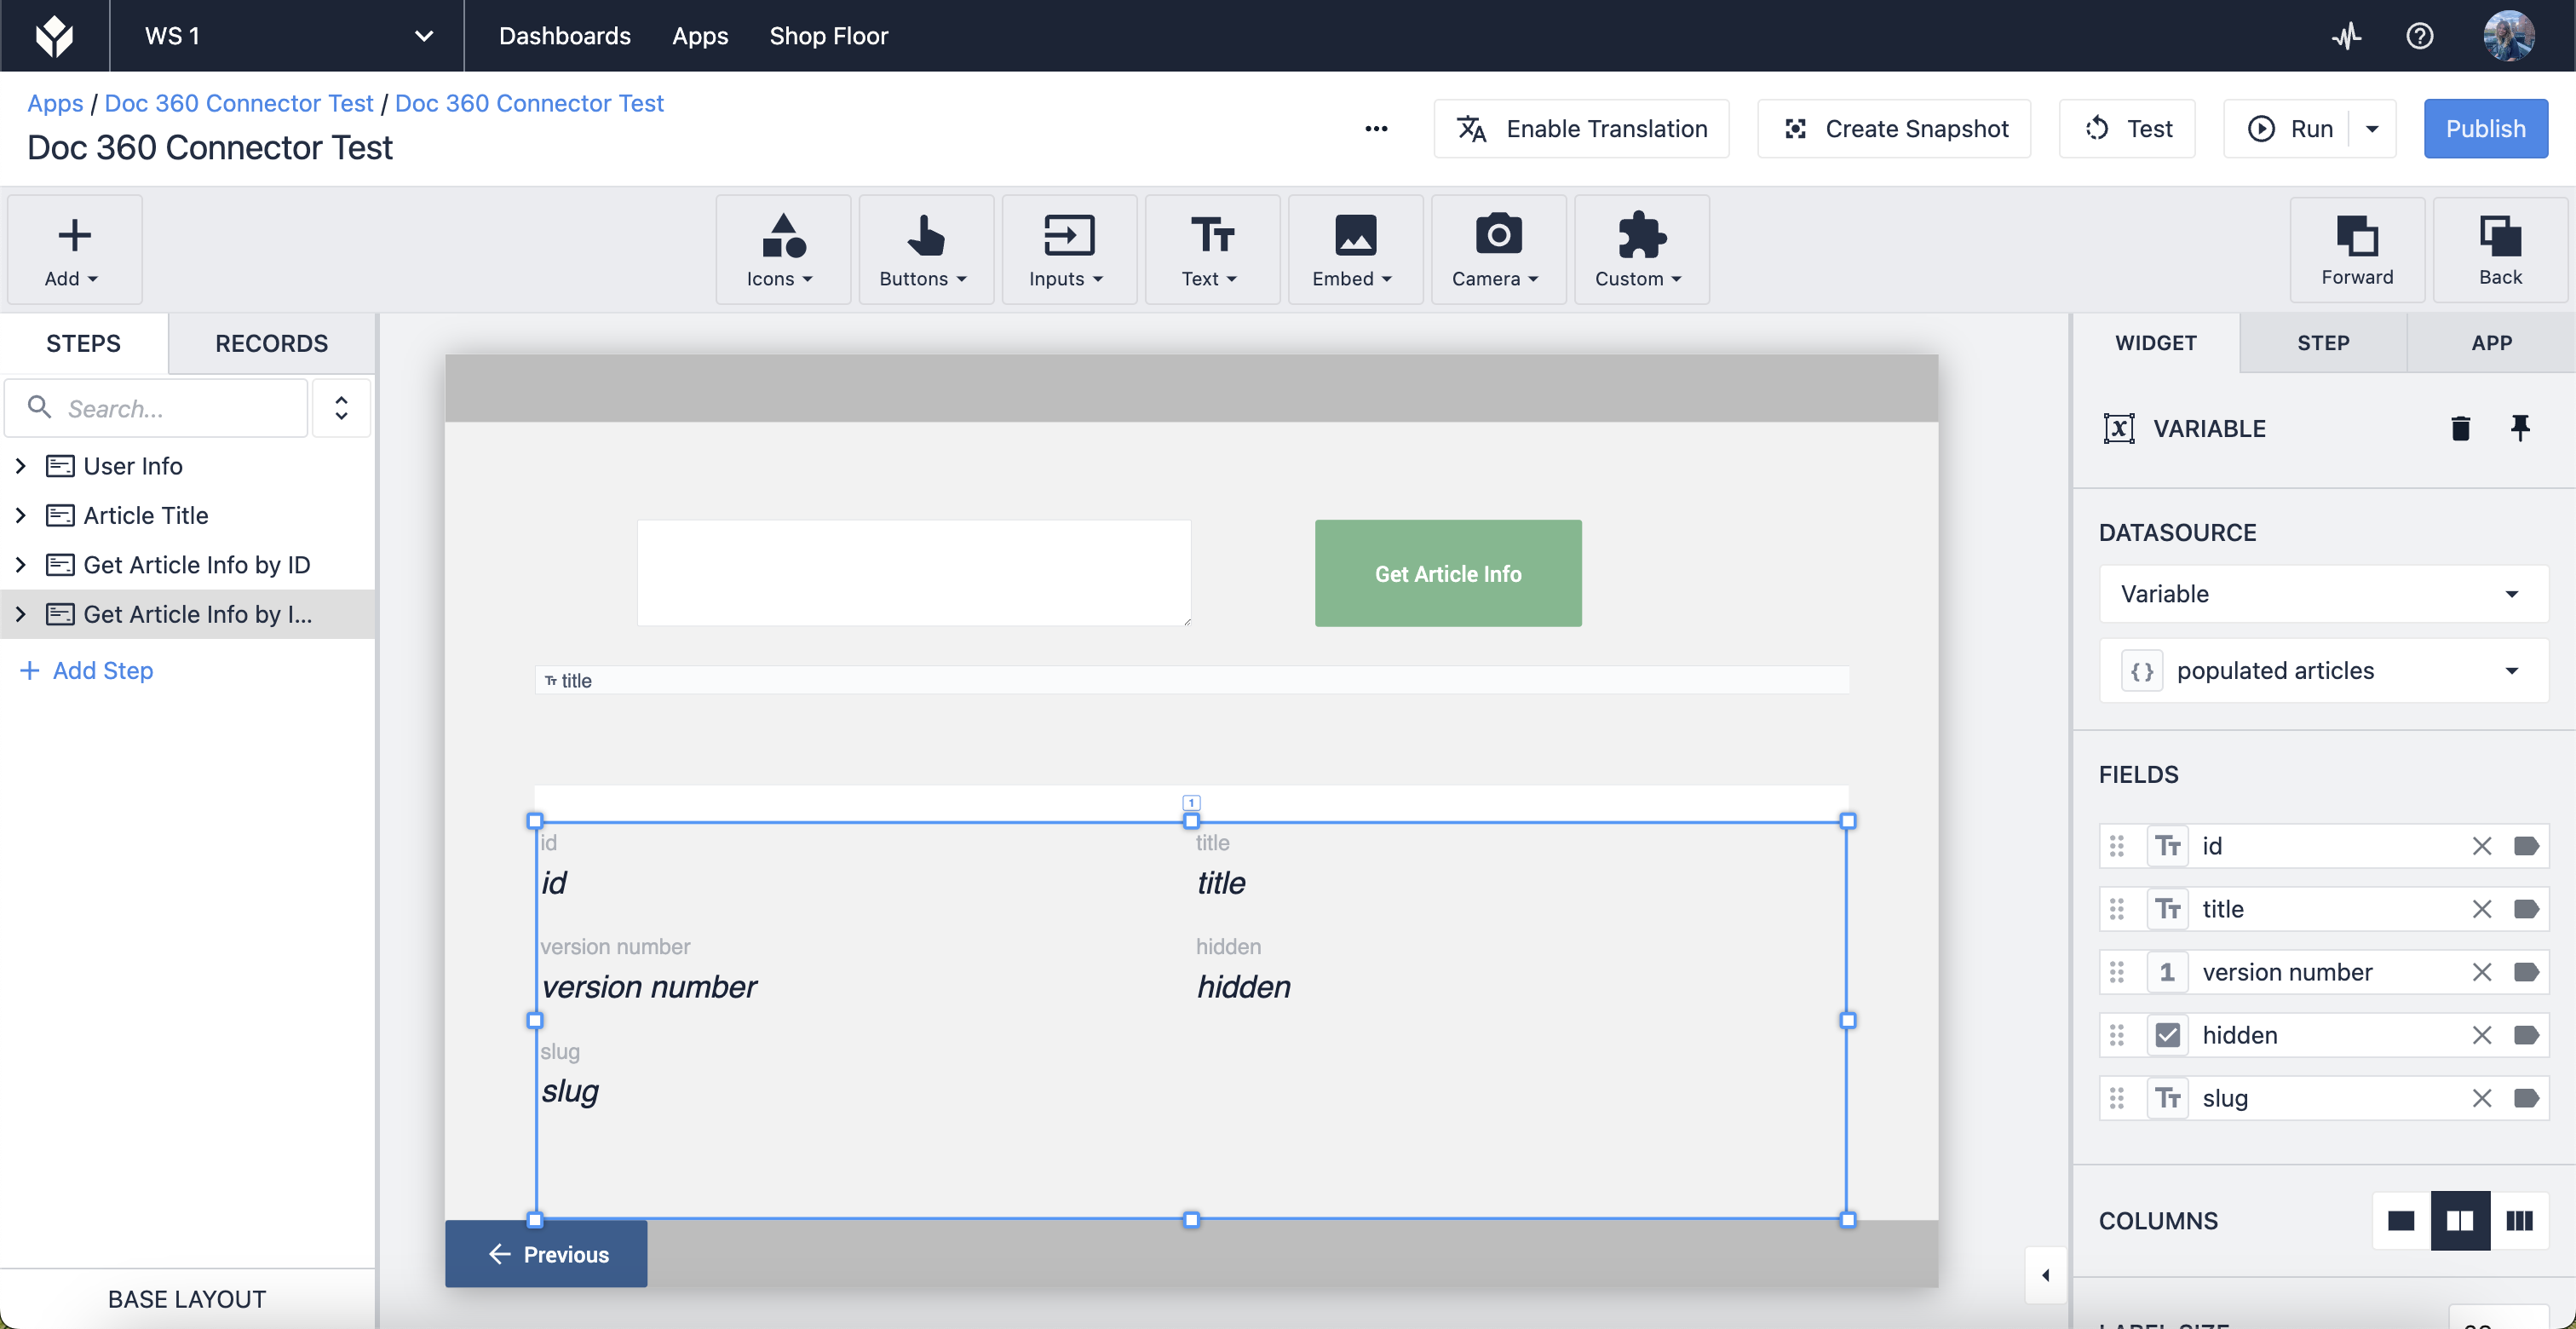
After selecting the variable, choose the fields you want to display in the table, i.e. the outputs within the Object list.
In Developer Mode, the interactive table populates the results of the connector function when the call is made. The outputs instantly save as values to their respective variables.

Additionally, you can use variables to populate the information from connectors. This is useful if you want to expand your view on a piece of data without seeing all the information listed in the interactive table.
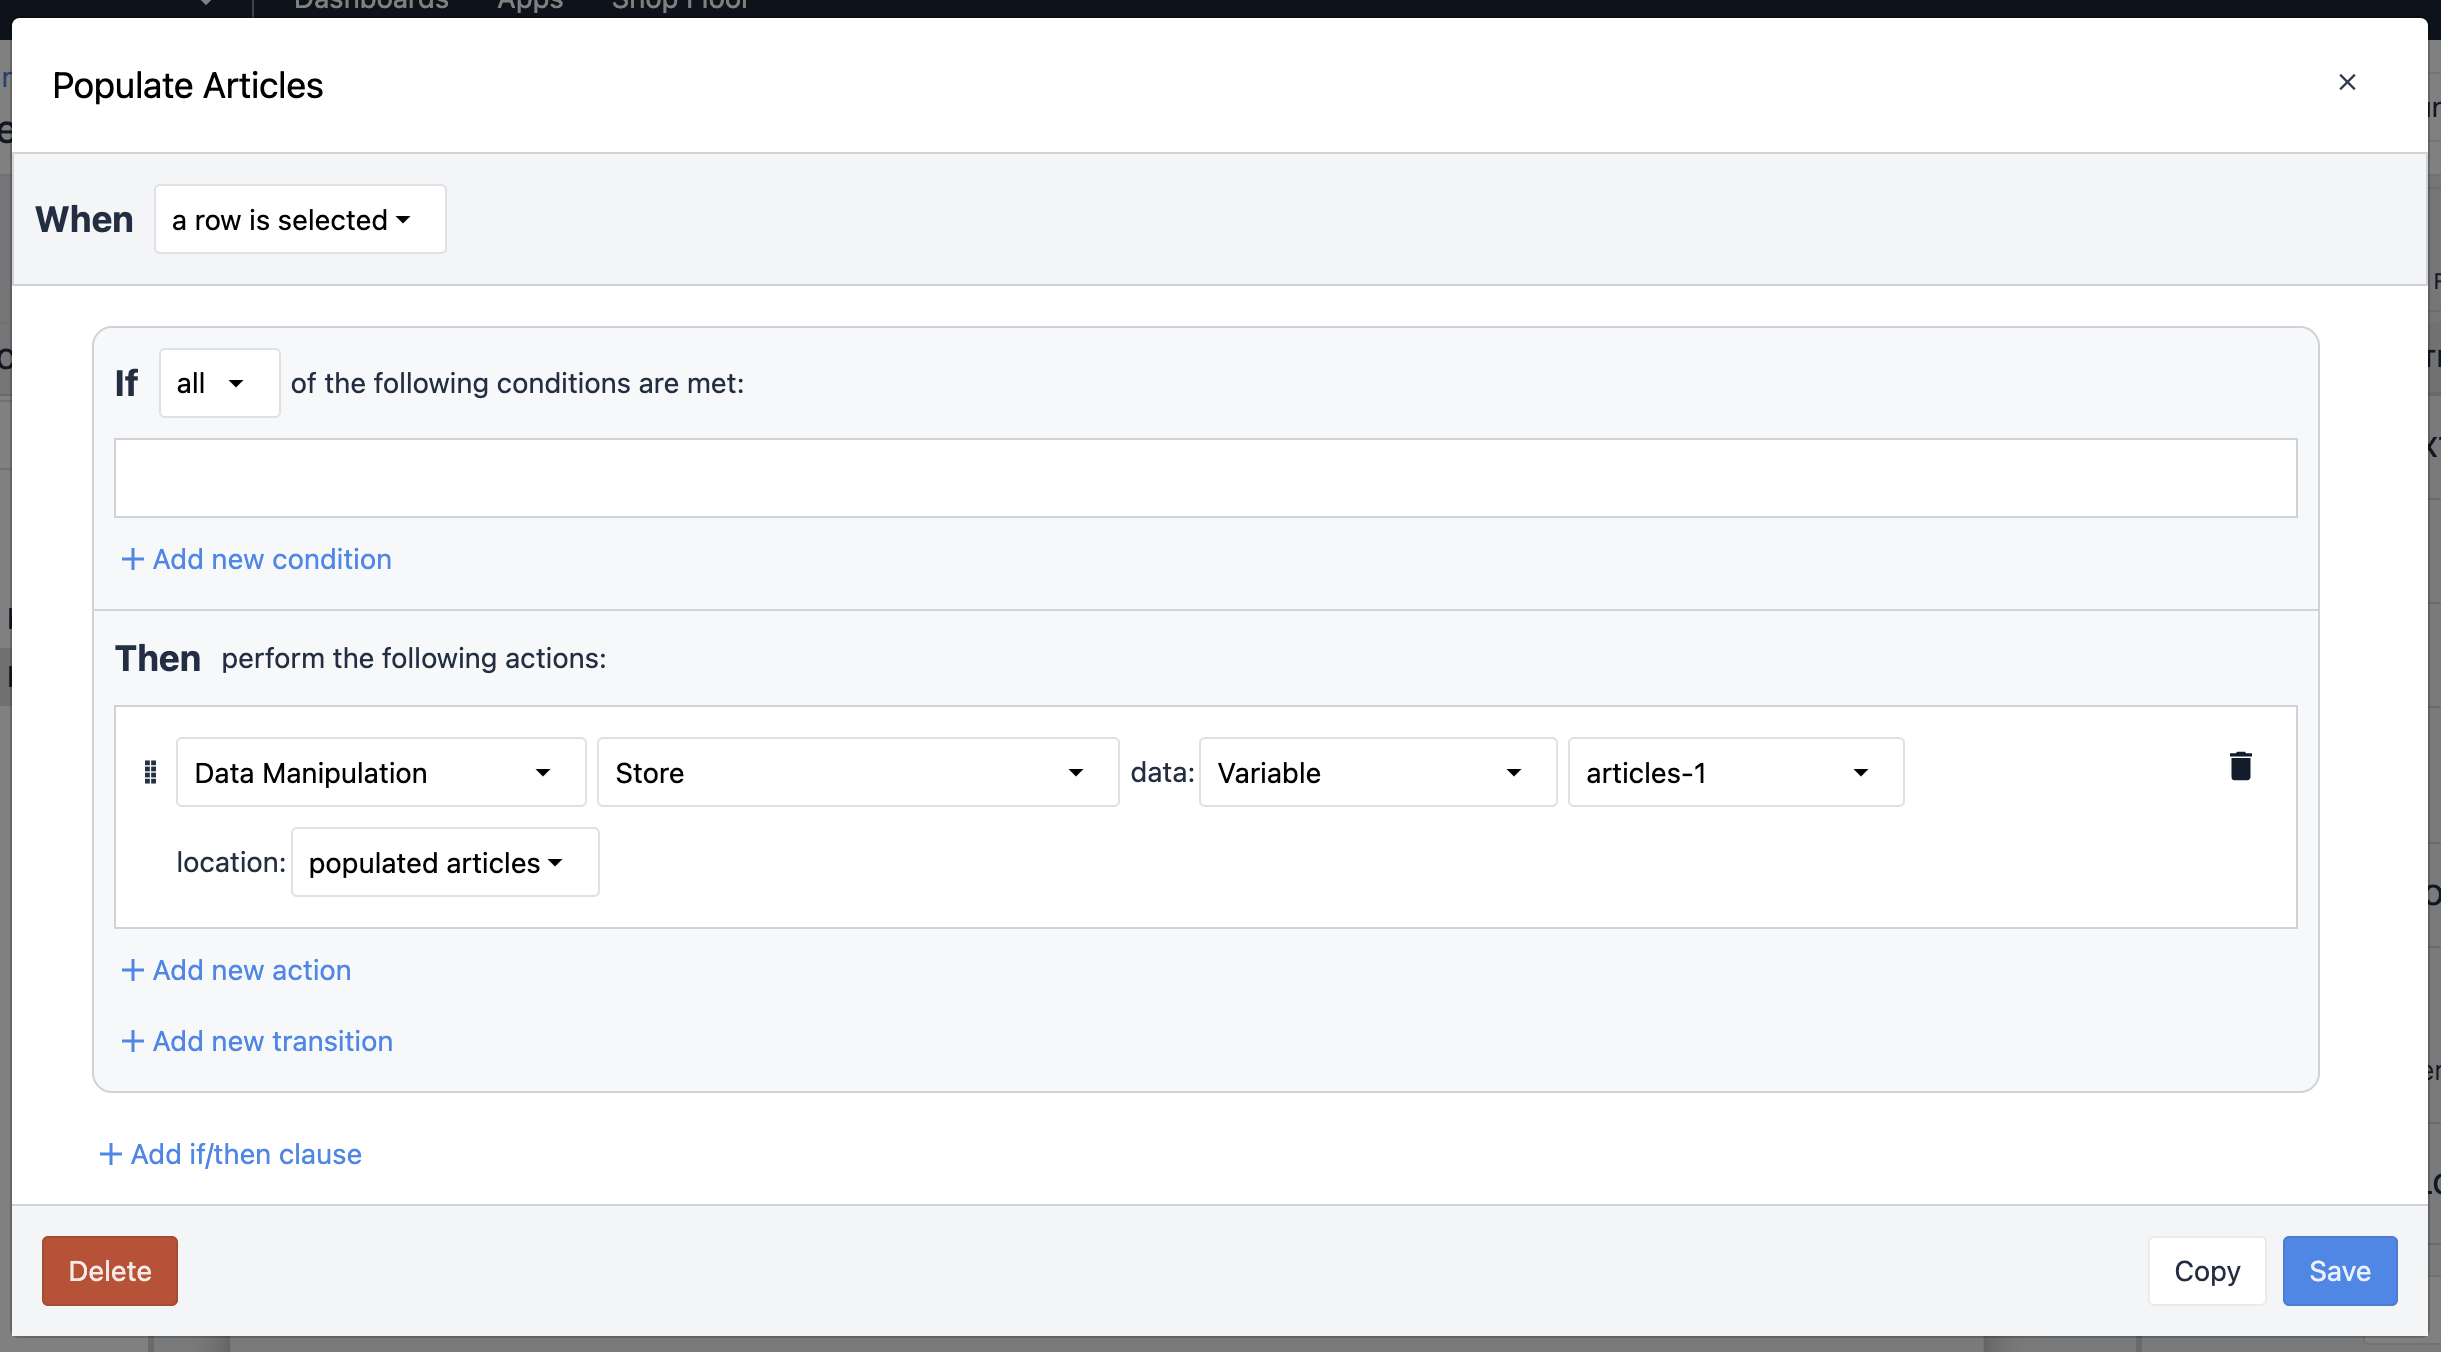
To do this, replicate the trigger above. The data source variable is the same as the linked variable to the interactive table. Create a new variable for the data to be stored in.
Next, configure a variable so that the datasource is the variable we just created. This ensures that when a row in the interactive table is selected, the data of that field stores in the variables of the widget.
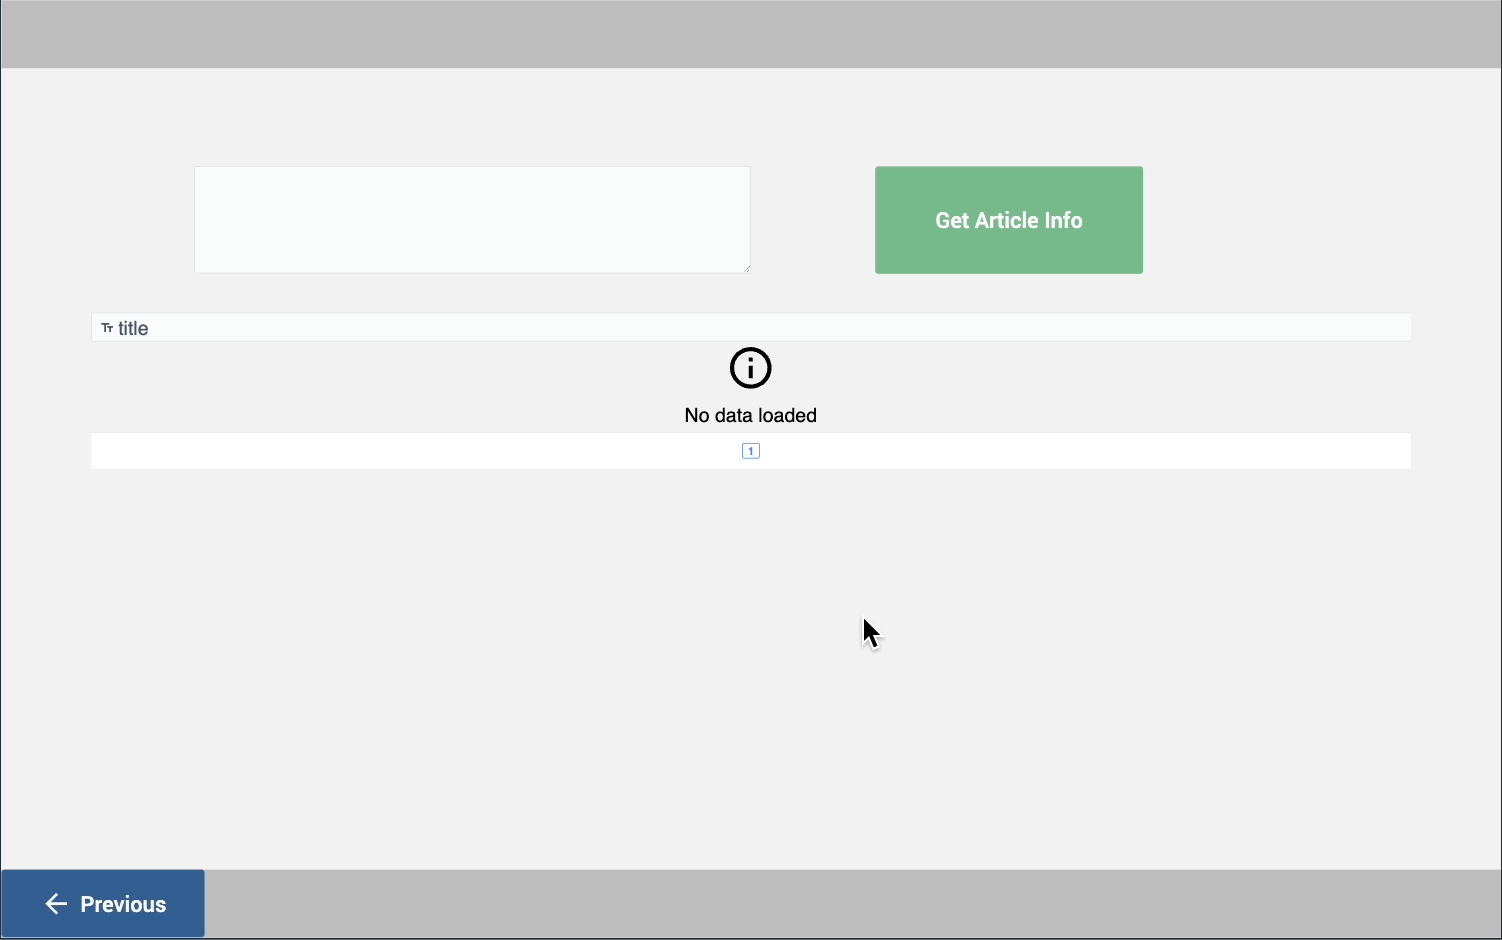
The result operates as the following:
Now that you’ve seen how you can use your HTTP connectors in applications, you can replicate these steps to use in your own apps to work with your processes.
Further Reading
Did you find what you were looking for?
You can also head to community.tulip.co to post your question or see if others have faced a similar question!