

Learn how to incorporate computer vision functionalities in your Tulip apps.
Users on Professional plans and above.
In this article you will learn...
- Vision functionalities and use cases
- How to setup a Camera Configuration
- How to remotely view the video stream of a camera
- How to use multiple camera configurations at a station
With Vision, you can integrate computer visual functionality with your Tulip apps. Vision is integrated into Tulip Player, and requires no additional software installation.
Vision is available to all Tulip accounts and integrates with the newest release of the Tulip Player.
Features
- Video Stream - view video stream of cameras on your shop floor.
- Change Detector - detect changes in pre-defined Regions.
- Jig Detector - detect Jigs, objects to which you've attached printed markers.
- Snapshots - set up Snapshots to send images along to different models of your choice.
- Color detector - detect different colors
- Barcode and datamatrix detectors - read in barcodes or 2D Datamatrix barcodes as vision events
- Custom models - create and train your own custom model for classification and object detection on your shop floor
- IP Cameras - connect and use IP cameras on your shop floor
- Camera Resolution - set camera resolution
- Tulip tables as a dataset - turn valuable data from tables into your a dataset
What can vision do for your operation?
- Remotely assist operators by having a real-time view into what's happening at a station
- Implement an advanced Pick To Light system by combining the Change Detector with the Light Kit
- Extend your time studies with additional events detected through Vision
- Track material arrival & departure at a station by knowing when a jig appears or disappears or by capturing barcode, qrcode, or datamatrix readings in real time.
- Improve tracking of quality problems or create your own quality inspections by capturing snapshots.
- Quickly create custom models by sending data from a Tulip connector or table to an external platform.
- Improve processes by reviewing video of specific instances for audit or process logs.
These example use cases show that, much in contrast to traditional visual inspection systems, vision is focused on augmenting your operators.
Watch the video below for a demo:
Requirements
Before starting with the setup, there are some prerequisites to note:
- Tulip Player must be running on Windows (minimum version is 1.3.2).
- Your user must have a Station Supervisor role, or higher.
- Use a supported camera, see Hardware Recommendations for Vision
NOTE: When connecting USB cameras to Tulip, please make sure to only use USB 3.0 cables to the clearly marked USB 3.0 ports on the computer
Set up Vision
To setup vision, you'll need to first setup a Camera Configuration.
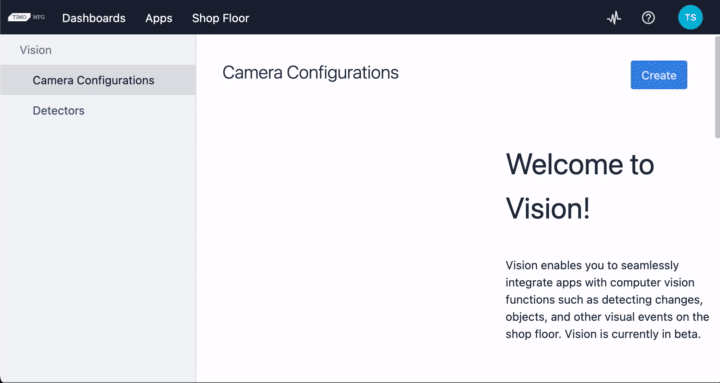
- Click Shop Floor tab, and select Vision.
-
Click Create to create a new Camera Configuration. Name the configuration then click Next.
-
Assign the new Camera Configuration to a camera on your shop floor.
This shows a list of all cameras connected to any Tulip Player authenticated to your Tulip Account. If the list is empty, please plug in a USB camera now.
You can also duplicate/edit camera configurations by clicking the three-dot-menu pertaining to a specific camera configuration.
To identify a specific camera you may want to un-plug it, and then plug it back in. The most recently connected camera will be shown at the top of the list.
- Click Assign and then Done. A new page for your Camera Configuration will open.
By default, once your camera configuration is completed, the operator at the assigned station will be prompted with the following modal in the Player:
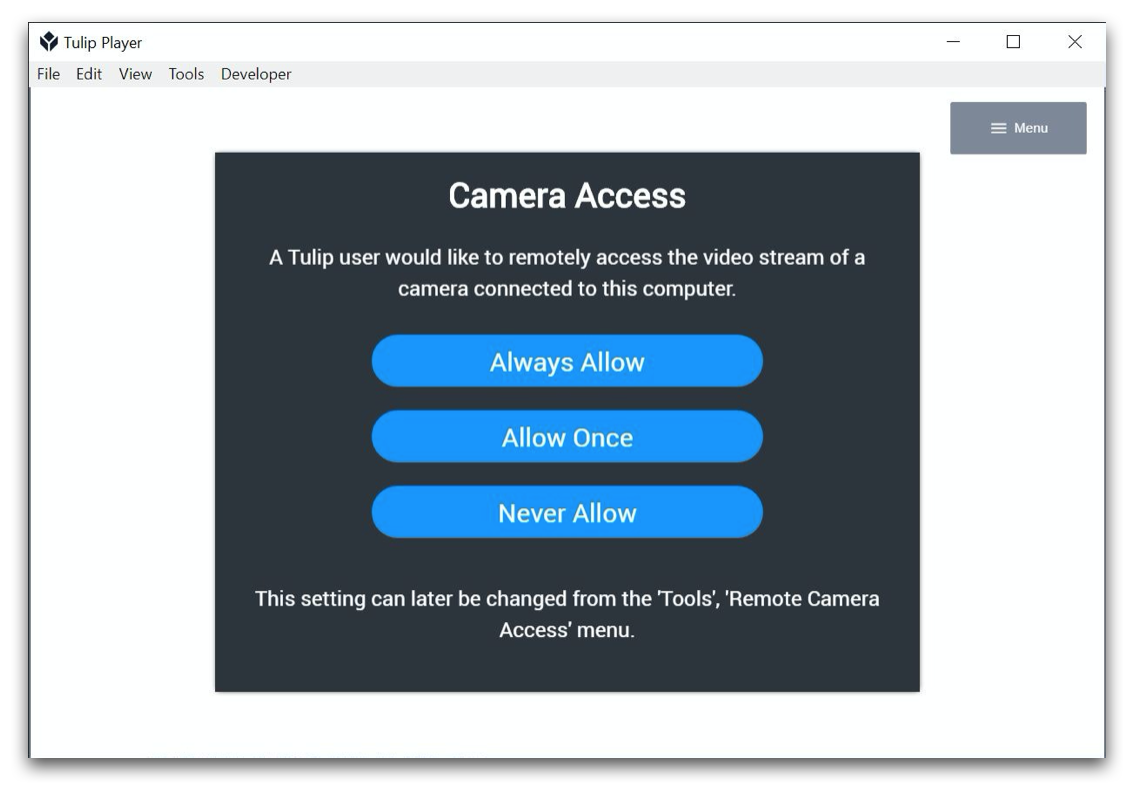
Note: For more information on camera stream permissions, please Vision and Privacy
Once permission has been granted in Tulip Player, the video stream of the camera you selected will appear:
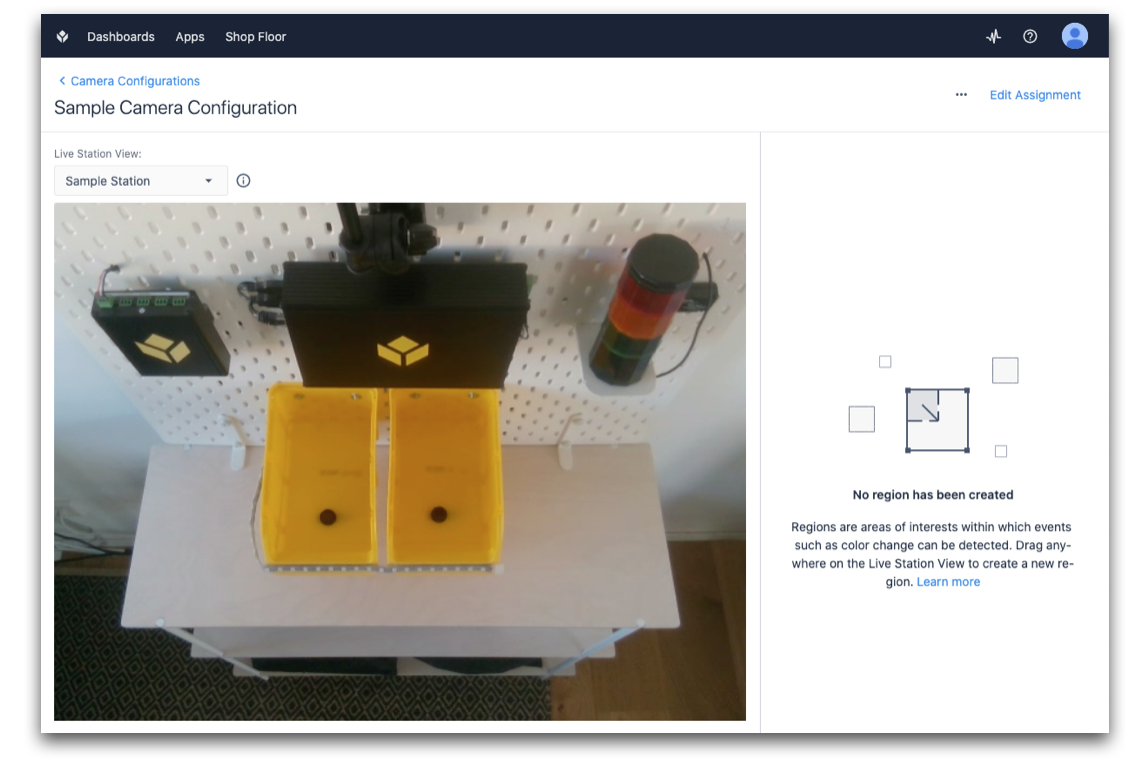
Congratulations - you are now ready to create Regions, and start using Detectors.
See our collection of Vision setup articles to learn how to setup features such as a change detector or jig detector.
Advanced assignment of camera configurations
An overview of all assignments you previously made on Camera Configuration page can also be found on the Shop Floor page. This overview can be convenient, especially if you want to simultaneously use multiple cameras at a Station:
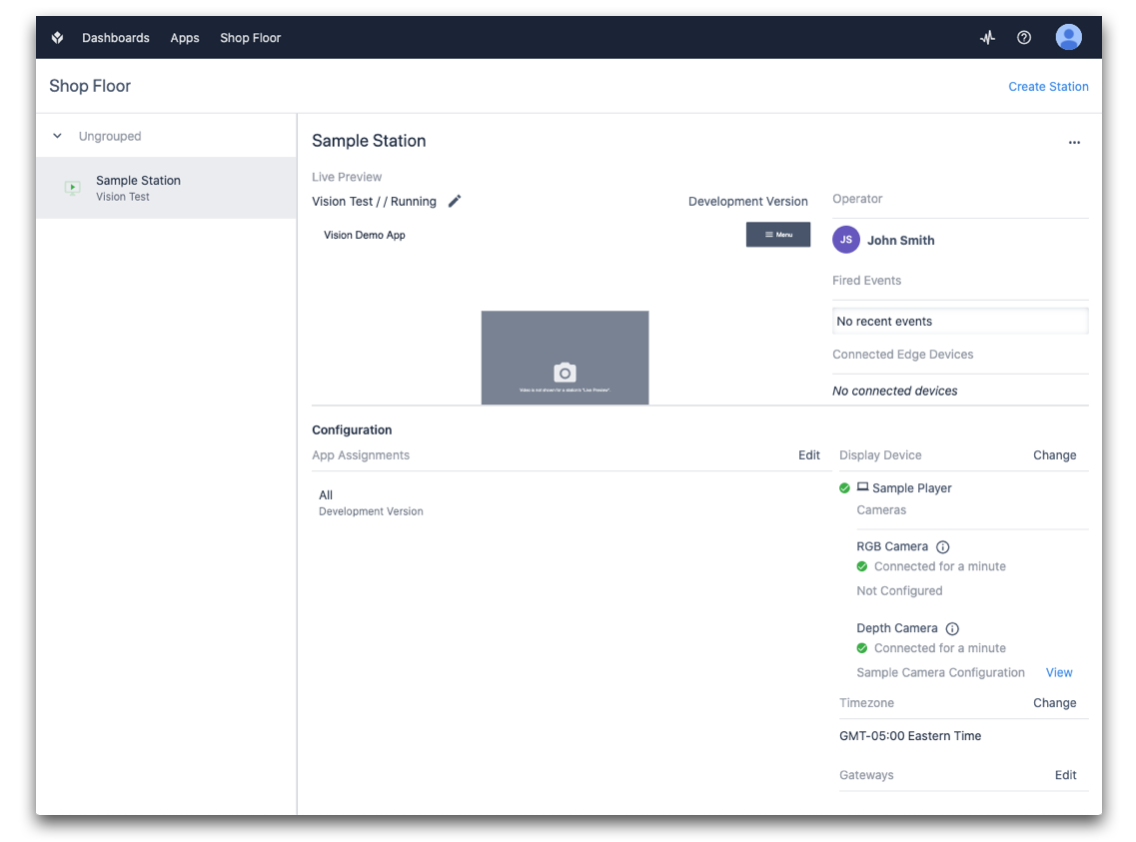
- In the bottom right of the Shop Floor page, you'll see the Display Device (Interface) section:
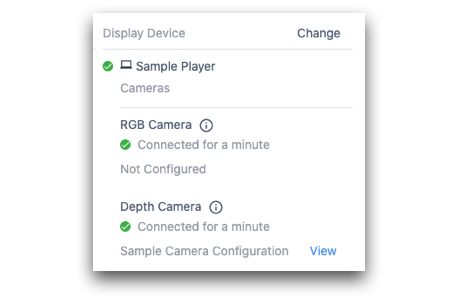
This list shows all connected cameras.
-
Click on the View button to view the camera's live stream directly.
-
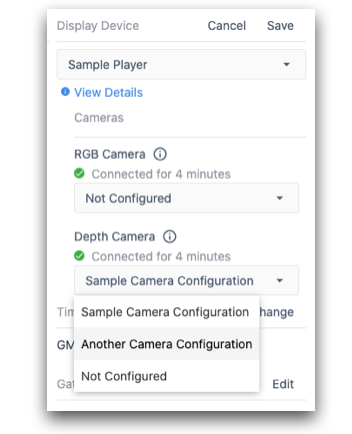
To edit your assigned cameras, or adjust their Camera Configuration, click the Change button:
Further reading
- Using the Change Detector (Requires: Intel RealSense D415)
- Using the Jig Detector
- Using the Color Detector
- Using the Vision Camera Widget in Apps
- Using the Snapshot Feature in Apps
- Using the Snapshot Feature with an External Vision Service
- Using the Datamatrix and Barcode Detectors
- Vision and Privacy
- Hardware Recommendations for Vision