
To download the app, visit: Library
This article is a guide for app configuration that includes a functional breakdown of steps and ideas for connecting to other apps.
The Material Warehouse app is a part of Tulip’s composable MES Inventory app suite. You can use it individually or in combination with other applications.
The main function of this app is to store newly arrived materials into the warehouse or move items from one bin location to another.
This application can streamline handling newly arrived materials or other item movements inside the warehouse by reducing manual data entry and administrative overhead, allowing staff to focus on more value-added tasks.
Usage and Value Creation
This mobile app allows the users to transact materials to Tulip, greatly increasing inventory accuracy. Easy and straigthforward to use, helps digitalize newly arrived materials as soon as possible.
Tulip Tables in the app
All the applications in the Composable MES app suite use common tables.
The main Tulip tables used in this application are the Inventory Items and the Material Definitions. Inventory Items is used to store all the relevant information of every single piece material in the warehouse, and Material Definitions show every bit of information known about these items.
(Physical Artifact) Inventory Items
- ID: Unique identifier for items
- Material Definition ID: Material Definition of the inventory item
- Material Definition Type: Type of Material of the inventory item
- Status: The status or current state of the inventory item
- Location ID: Current physical location of the inventory item. It could be a station ID, a location ID, or any arbitrary indication of a location.
- Location Area: Further subdivision of locations by area, allows for grouping or filtering by area or zone
- QTY: The quantity of the inventory record.
- Unit Of Measure: The Unit of Measure related to the quantity.
(Reference) Material Definitions
- ID: The unique identification of a items
- Name: The name of the material definition
- Type: Field used to categorize materials. For example: Raw vs Intermediate vs Final or Make vs Buy
- Description: Material Description
- Image: Image of the material
- Status: As a material evolves, it can progress through various statuses (for example: NEW, READY, BLOCKED, OBSOLETE)
- Unit of Measure: Unit of Measure
- Version/Revision: The number or letter representing the individual revision of the part
- Vendor ID: Reference to the Supplier of the material
- Target Cycle Time: The amount of time it should take to complete 1 unit, this can be used to set target production rates and establish target cycle times.
Configuration and customization
In-app help
As with all applications in the Composable MES app suite, the Material Warehouse app includes in-app help as well. These are short descriptions of the Required setup steps and App builder tips to support further customization. After downloading the app make sure to read these instructions and then delete them before running the application.

Tables that provide data input
To be able to use the application some tables need to be populated. In this specific case you need information about the existing items uploaded to the Material Definitions table in your factory. There are several ways to accomplish this: you can populate the Material Definitions table manually, or simply have all these information imported from a 3rd party ERP software through Tulip Connectors.
Other configuration needs
- In the Scan Location step, ensure the method for selecting Item Locations is configured. This can be done using any type of scanner, data from an aggregation, or a set of static values.
- Modify the static texts in the Set location button's triggers.
- Also there is an option to scan the barcode of locations in the Inventory step, for that your actual barcode or optical scanner need to be configured to the already existing machine trigger.
Customization options
- In the Inventory step add or remove fields to show for the selected Inventory item table widget according to your company standards.
App Structure
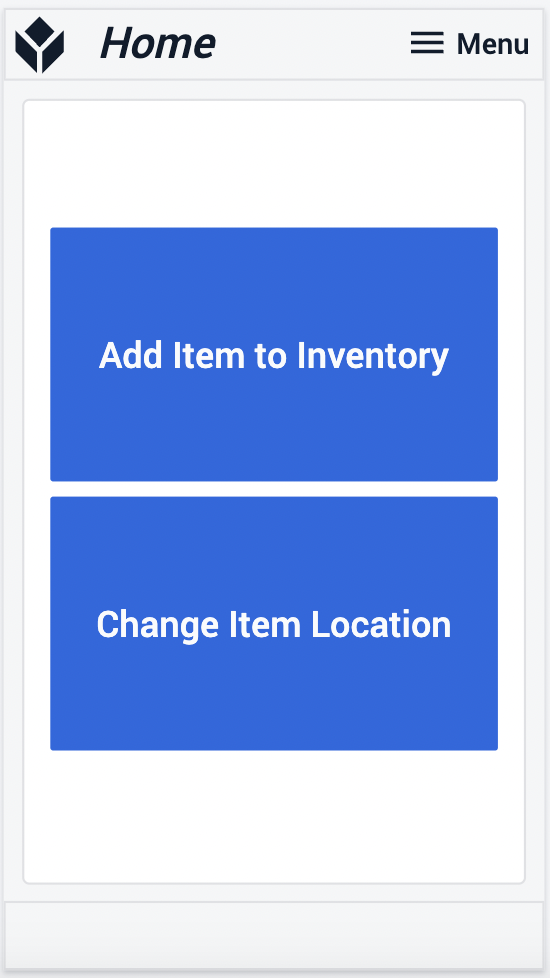
In the Home step, the user needs to choose a flow, depending on whether it's a completely new item to add to inventory or an existing item that requires relocation. Both flows guide the user through similar steps, but they involve different backend logics.
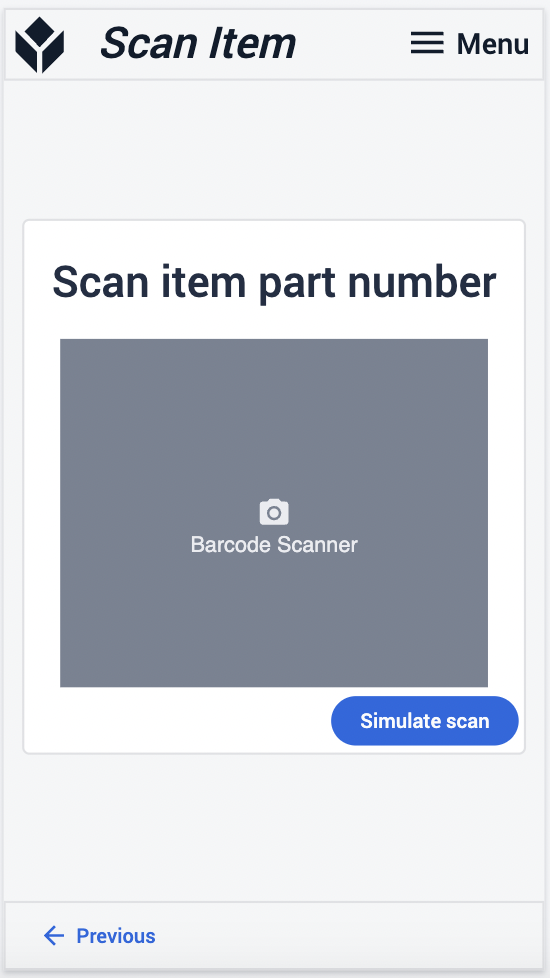
In the Scan Item step you can scan an item either with a barcode or an optical scanner.
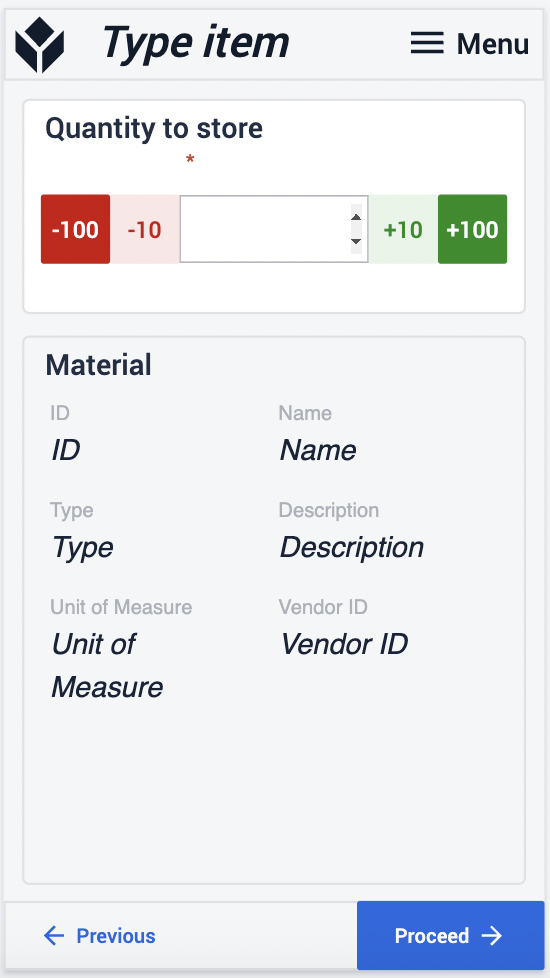
After you scanned an item and viewed all its details, type in the quantity you want to store or move between locations. Note, that if you choose to move items, you can't type in more quantities, than stored in the original location.
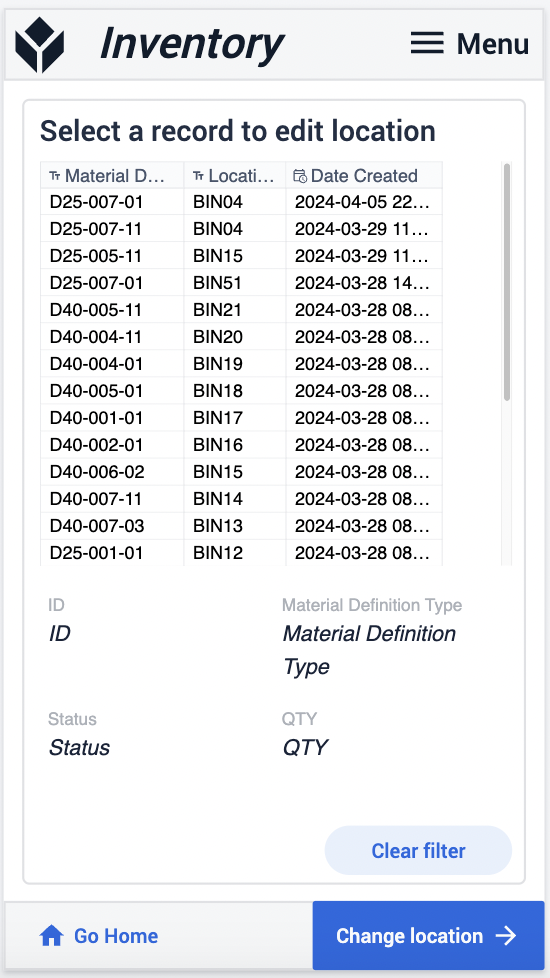
In the next step scan the new location you want to store the items. After it's done, on the Inventory step you can see whether the storing or moving was successful.
Extended App Connections
Examples for connecting apps to work with each other.
Inventory Management
All the items moved or stored with this application can be shown in the Inventory Management application. Also the the mistyped quantities and status can be modified there as well.