Learn how to navigate the Connector Function modal and creation process.
Overview
Connector Functions are a feature for structuring how Tulip applications interact with external servers and services. If a Connector is the general connection between Tulip and the external server, connector functions are specific requests for services or information.
Learn about the basics of APIs here.
Connector function details
Within an HTTP connector, you can write a series of Connector Functions that will run common types of HTTP requests using predefined inputs. Connector functions are the individual actions which make API Calls. Tulip HTTP connector functions support the following methods:
- GET
- HEAD
- POST
- PUT
- PATCH
- DELETE
They support modifications to the following fields:
- Hostname, Port, and Path
- Authentication none, Basic Auth, OAuth 2)
- Request Headers
- Query Parameters
- Request Body (JSON, Form URL-Encoded, XML, or Plain Text)
This selection will impact the Content-Type header. E.g. if you want to send JSON using the Plain Text option, you must manually hardcode the Content-Type of "application/json" in your headers.
The responses can then be processed and information extracted from the:
- Response Headers
- Response Body (JSON using json-query or XML using xpath)
HTTP Connectors support the following data types in outputs:
- Text
- Integer
- Float
- Boolean
- Datetime*
- Objects with all the data types above
- Arrays with all the data types above
*Datetime parsing supports:
- OData timestamps in milliseconds since Jan 1, 1970 UTC
- numbers interpreted as milliseconds since Jan 1, 1970 UTC
- ISO 8601 date strings
Set up
Before creating a connector function, you’ll need to create an HTTP connector to create a connection between your apps and the service you’d like to communicate with. You’ll create your connector functions within this connector, and each connector function within a connector will share its parent connector’s configuration. To create an HTTP Connector, follow the steps in this article: How to Configure a Connector.
Once you’ve created a Connector, it’s time to create connector functions. Connector functions are the individual operations that your connector goes through to pull data from the API server you’re connecting to.
Create a Connector Function
From the Connectors page, select the Connector you want to work with by clicking on its name.
This page shows a list of functions associated with the connector. To create a new connector function, click + Create Function.
To keep things short, in this article we’ll assume that you already know the different parts of the Connector Function Editor.
Here’s the process we’ll use to set up a connector function:
- Select the API Call type
- Write the API URL
- Set the inputs
- Define the parameters for the data returned
- Set the outputs using Dot Notation
Call type and URL
The first two items to configure for any HTTP connector function are the API call type (GET, POST, PUT, etc.) and the endpoint URL. Select from the list of call types by using the drop down, and enter the endpoint path in the field following the base URL. Consult the API documentation for the service you’d like to connect to for a list of endpoint and configuration details.
An API call, or API request, is a message sent to a server asking an API to provide a service or information. Since APIs are a way for one program to interact with another, calls are the process by which one application sends a request to another application.
In this article, we’ll be using the Document360 API as an example, which is the service that hosts Tulip’s Knowledge Base. The function we’re setting up returns an article along with their associated properties based on the article’s ID.
Let’s name our function, set the call type (GET), and type in the URL for the call:
The call URL is case sensitive. Make sure you type it in exactly how you see it listed in the API documentation.
Obtain the call type and URL from endpoint documentation of your system. These two actions determine your REST request. For a detailed outline of what a REST request is, see Anatomy of a REST Request.
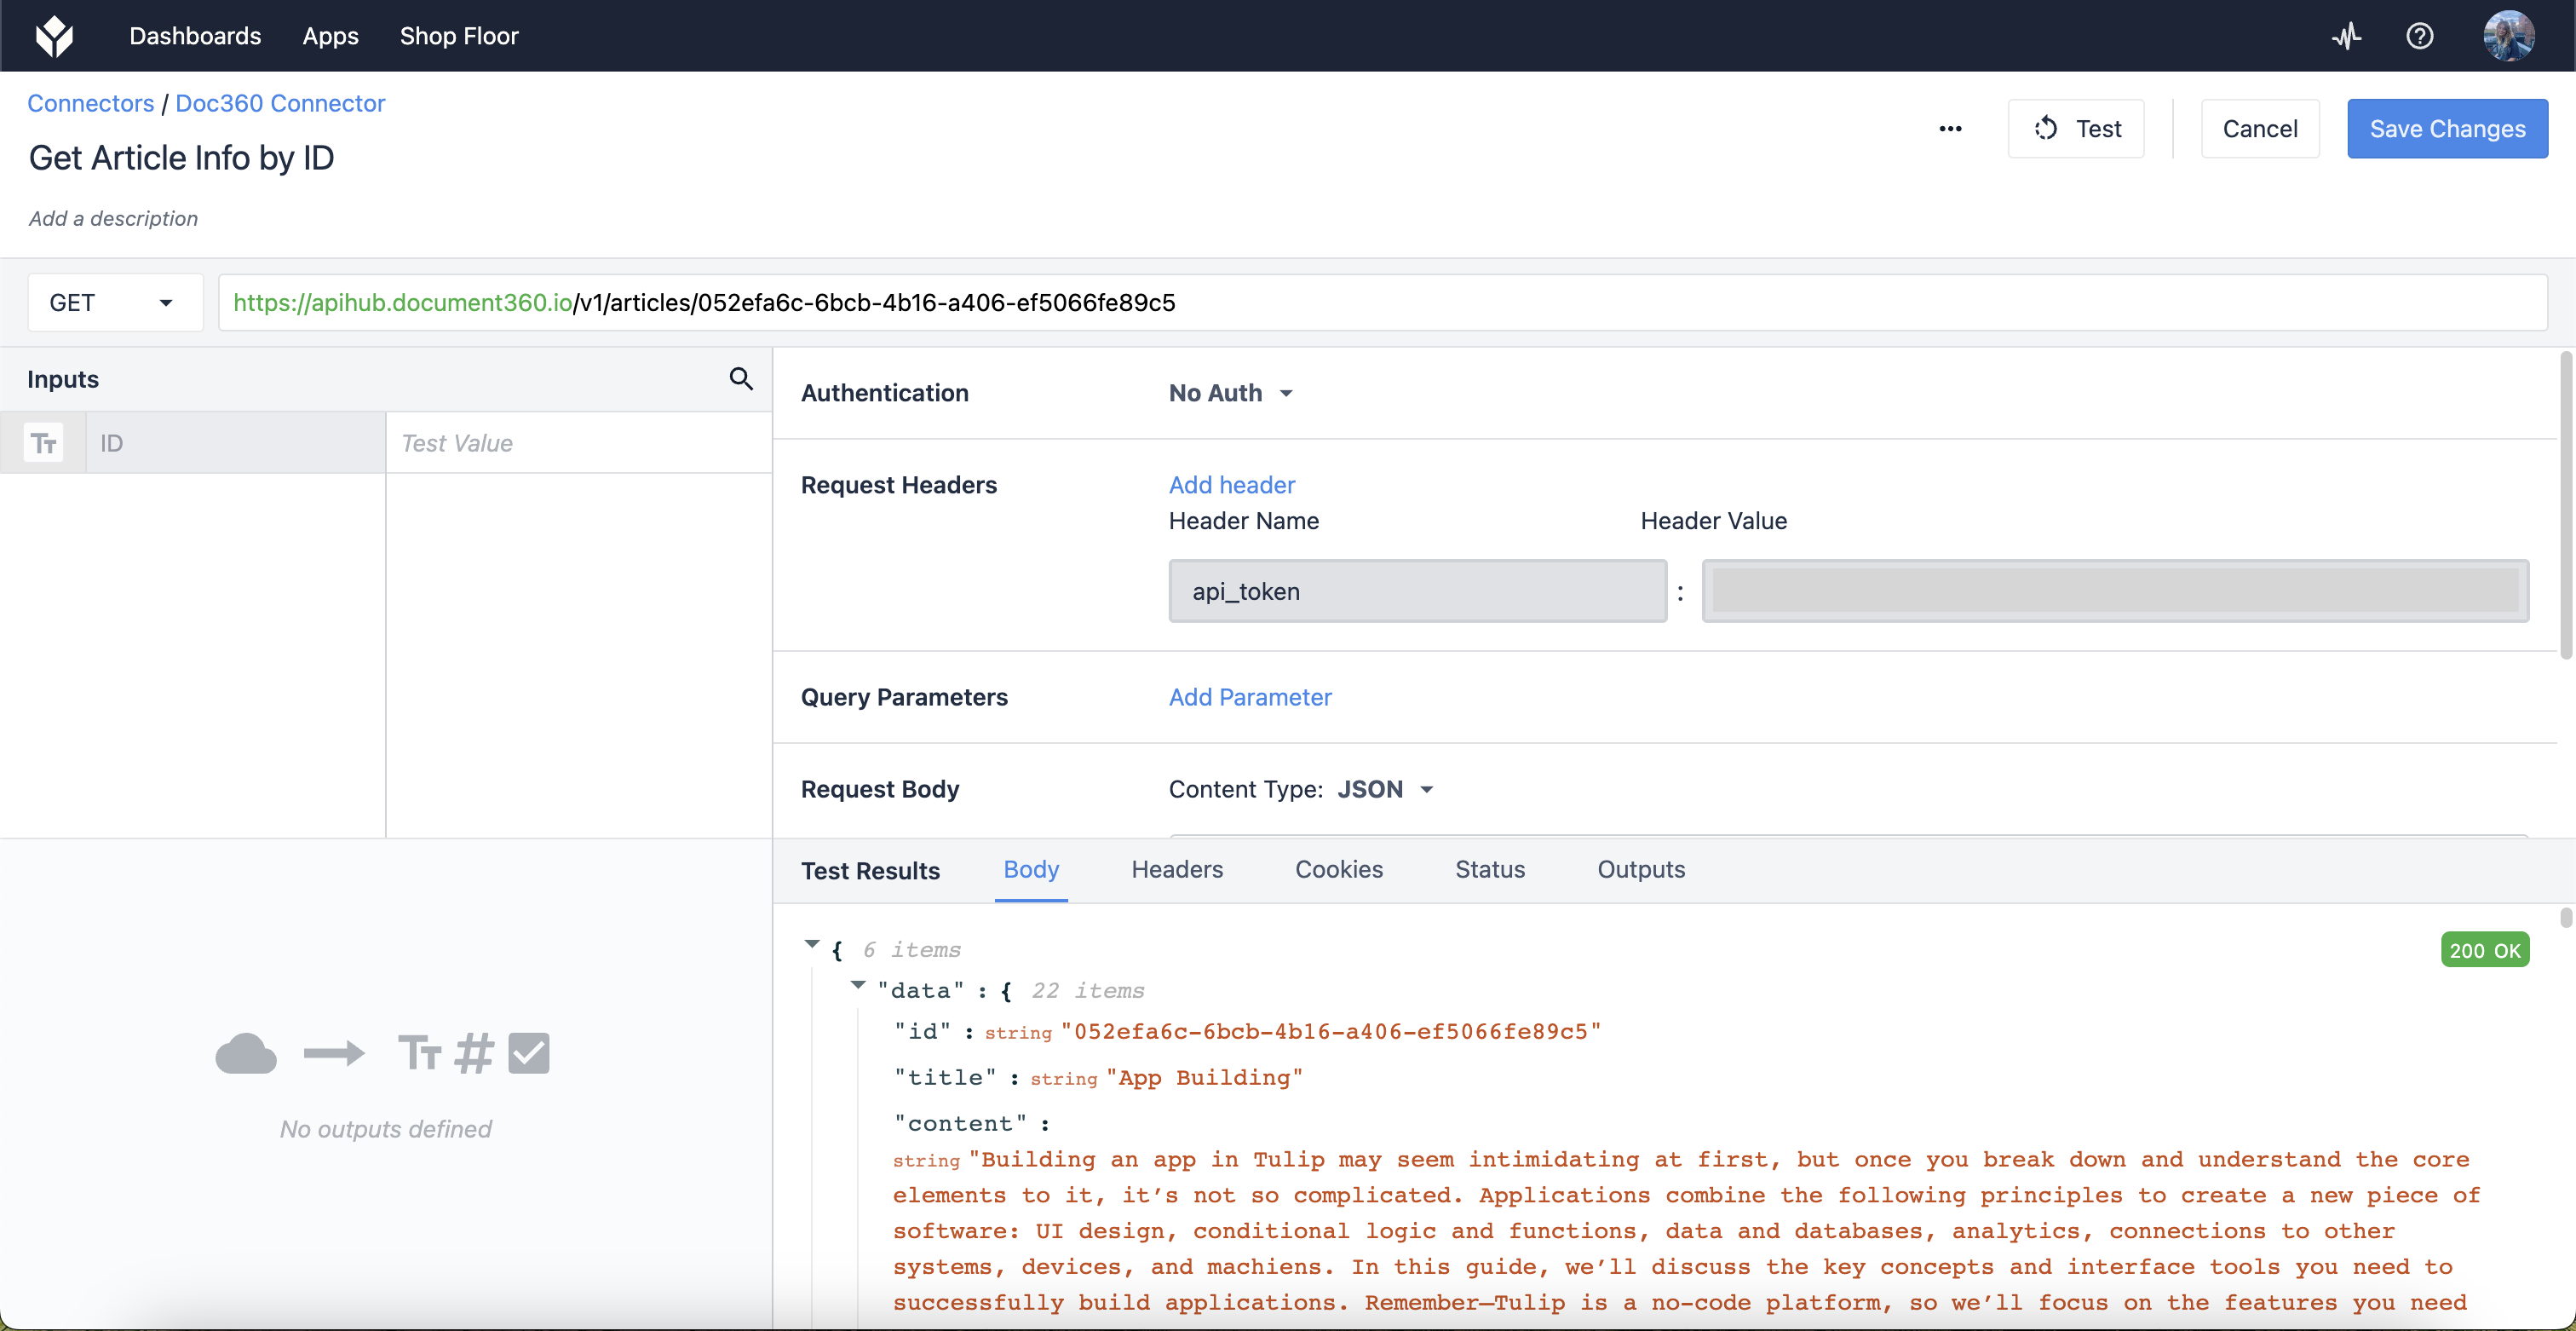
Clicking Test runs the function and returns information in the Test Results section of the editor. By selecting Body under Test Results, you can view the full, unfiltered result of your request. Great, we have data!
Inputs
Connector function inputs allow letters from any languages, numbers, spaces, underscores, dashes and parentheses (parentheses are valid after r366/LTS17).
The way our connector function is currently configured, we can only get one specific article ID.

Our goal with this function is to configure it such that it returns information on any article we’re interested in. To do this, we’ll need to edit our function to allow us to pass a value for any given article ID.
We can edit our connector function to take any value by configuring Inputs. Inputs allow you to take values from your applications and pass them into connector functions.
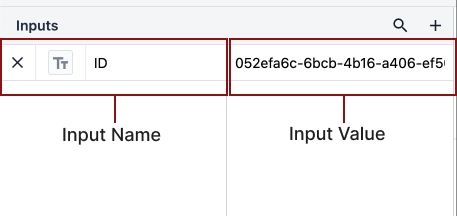
Inputs are configured in two parts: 1.) creating an input in the input pane, 2.) specifying where that input will be used in the connector function.
First, add a field to the input pane. You can edit an input’s data type by clicking on the icon next to the Input name. Ensure that the type you select matches the type of the source you’ll use in your applications. The field next to the input name can be used for testing values you’d like to pass into your connector function, and can simulate inputs from your applications.
Next, we’ll need to specify where that input will be used in our connector function.
Inputs can be accessed throughout a connector function, including in the endpoint URL, query parameters, and within JSON extractors in outputs. Please consult the API documentation for any service you’d like to use for more information on how a particular function needs to be configured.
For our example, we can access a particular article by specifying it at the end of the endpoint path, or in place of “{articleId}”.

Using inputs, we can dynamically pass a value into this URL, and thus use this connector function to get information on any article we desire.
We add inputs to the endpoint path by putting a dollar sign ($) before and after the parameter (in this case, “ID”). The string between the dollar sign is case sensitive, and must be an exact match to the name of your input.
For the input "ID", you will type:
$ID$
The text between the dollar signs turns into a block, indicating a property, like so:
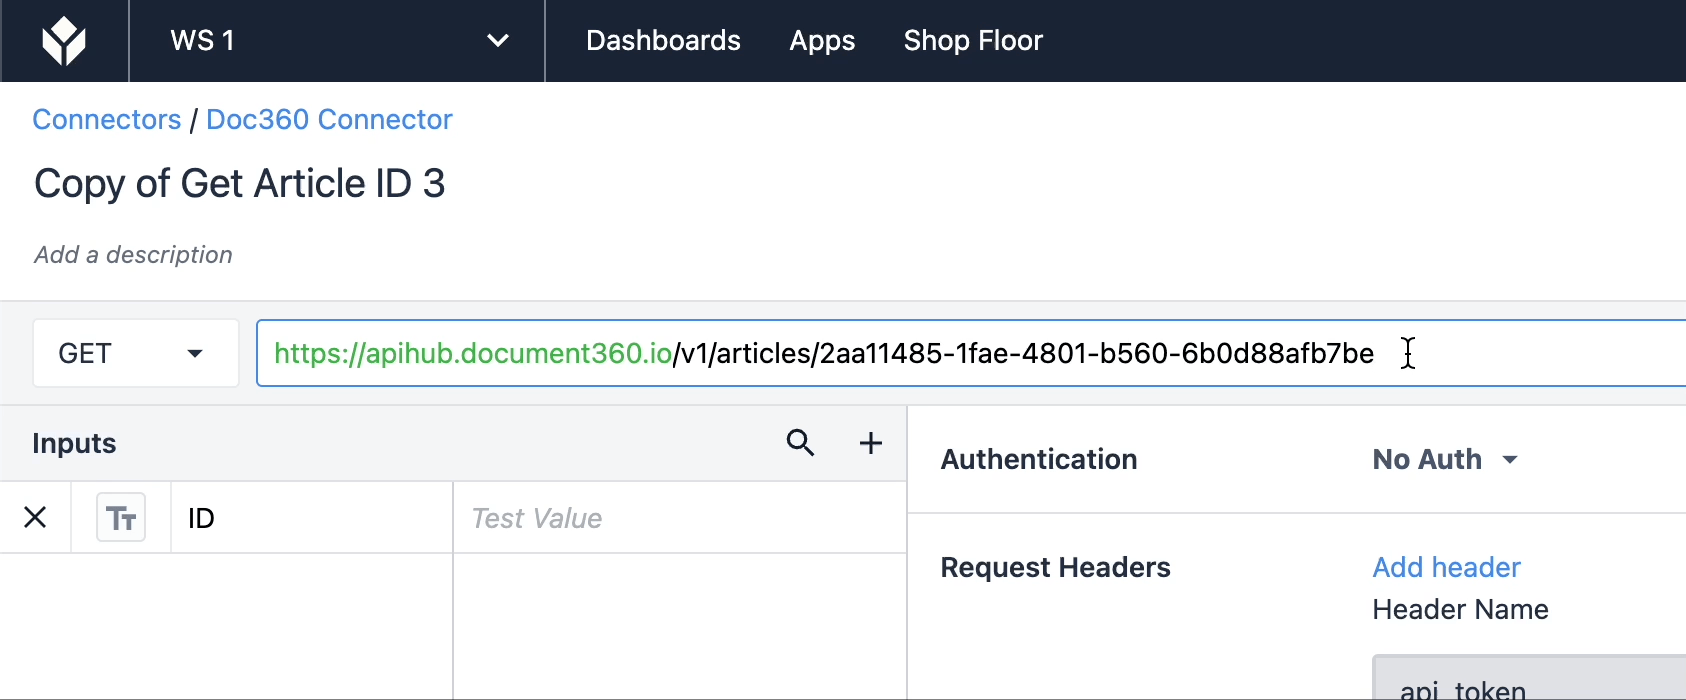
Now we can set the ID as input values rather than hardcoding the value directly into the endpoint URL.
To add more inputs, click + in the top right corner of the inputs box.
Parameters
Query Parameters are Key-Value pairs that appear after the ? in the Endpoint or under Query Parameters when creating a Connector Function.
Now that we’ve set up our inputs, you can create some parameters to modify the Test Results and make sure you’re only getting the information that you want. Find the keys and values for these parameters in the API documentation of the server you’re connecting to.
With Key-Value pairs, one of the components is a “Key” and the other is the “Value”; both are added to the end of your form link URL. Think of them like tokens in an email to personalize someone’s name. Using Key-Value pairs allows you to pass in information to a form.
The key indicates a variable name.
The value indicates a property value.
In this example, we want to set a parameter that ensures the article returned is published on the Knowledge Base site. Entering the information given in the API documentation, the parameter looks like the following:

These query and request parameters are optional fields to fill in, but they give specificity to the Test Results should you need it.
Outputs
Connector function outputs allow letters from any languages, numbers, spaces, underscores, and dashes.
Outputs are the part of the connector function that shows what information is directly returning. They are structured in Dot Notation, so pay close attention to the format of the Test Results to verify that your notation is following an accurate path. Outputs map to variables in apps, so make sure you name them something identifiable and unique.
Note that you can change the type of output to lists by using the List Toggle; this option nests variable outputs within objects and universally maps the dot notation path for all the nested outputs in an object list.
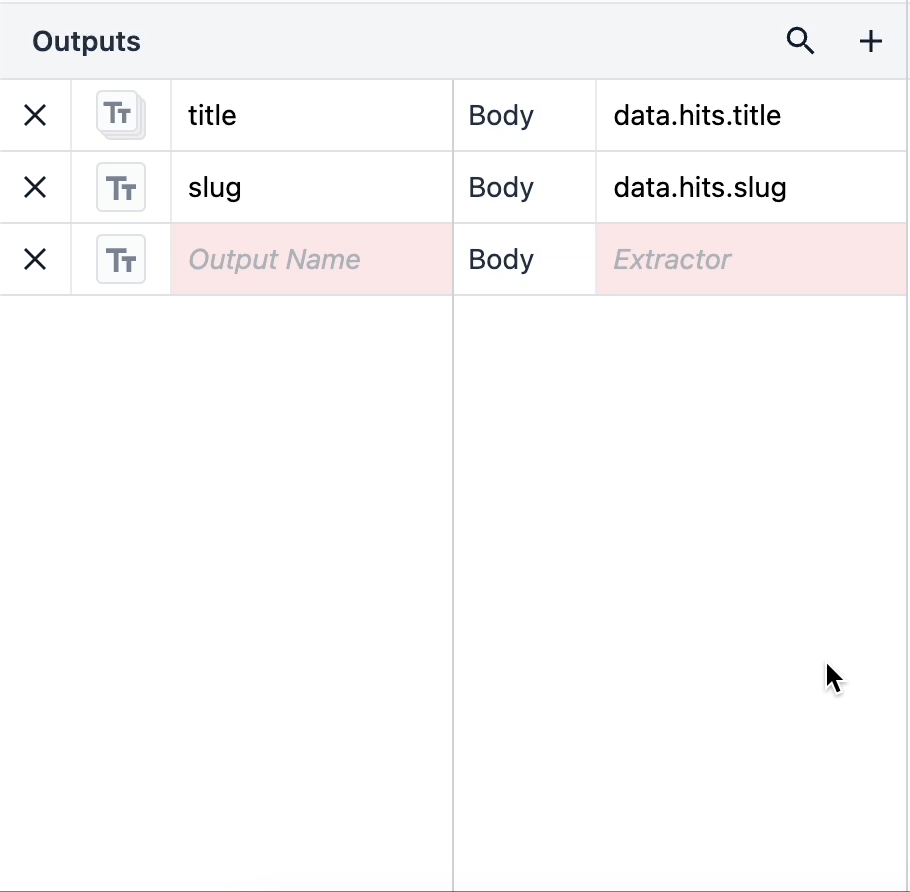
To view whether or not your outputs are correctly mapped, click the outputs tab in the Test Results pane and note the results that are returning.
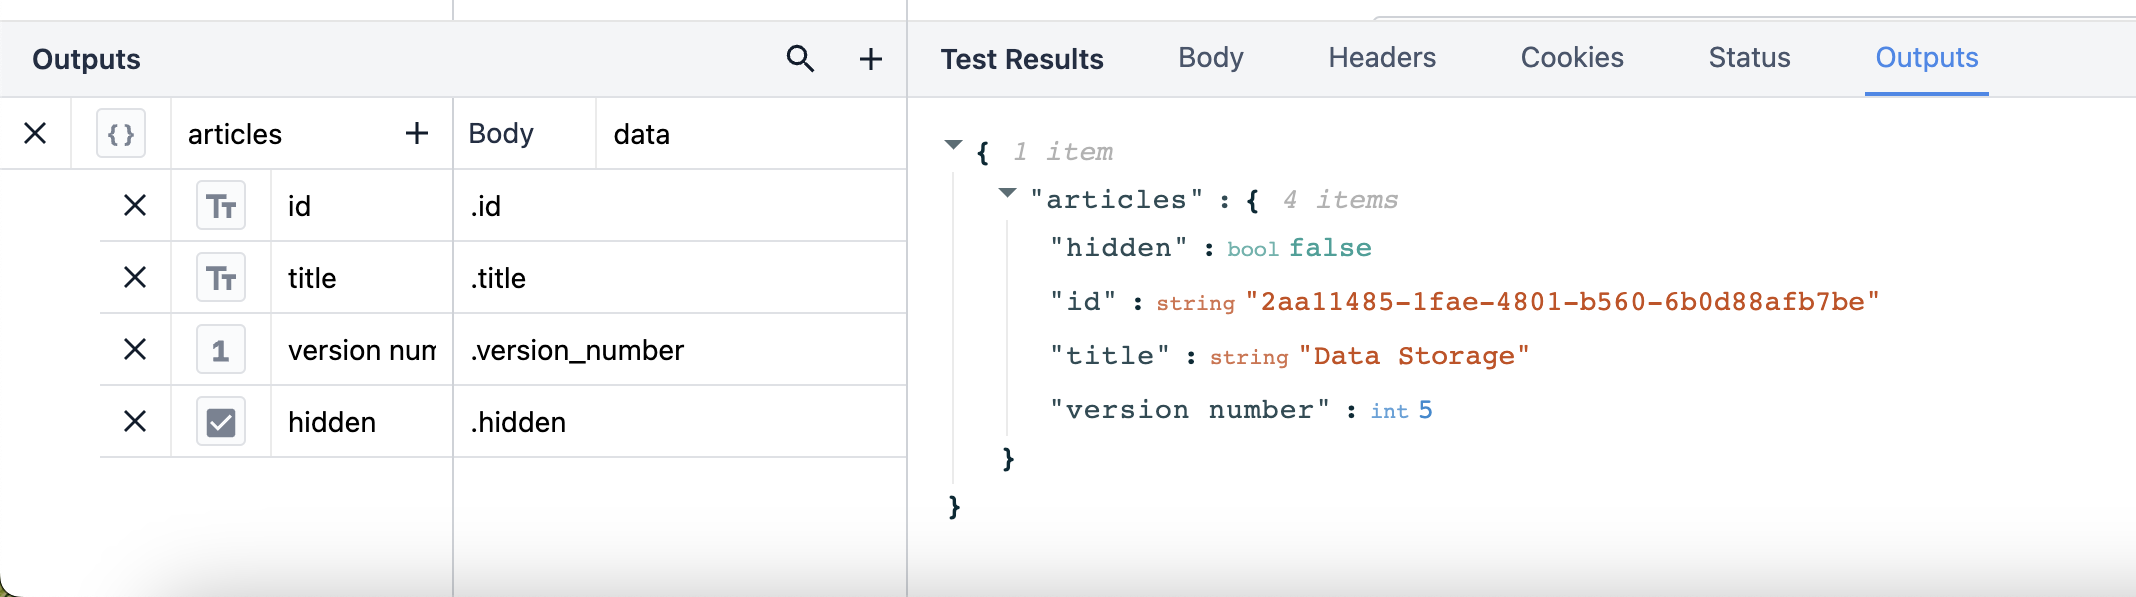
If the outputs match the results, then congratulations! You’ve successfully created a working connector function and are ready to use it in applications.
Handle responses
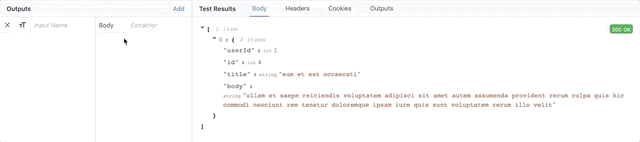
You will see a JSON or XML response in the Test Results section. Now, you can map parts of this response to Outputs and then use them in apps.
JSON extractors use the json-query syntax. To test the syntax, use this online tool.
XML extractors use XPATH syntax.
There are two ways to do this:
- Click on properties in the body of the response to map them to outputs
- Manually specify the path using json-query
Here's how to specify the extractors using point and click:
If you want to use json-query, add a few outputs so you can map the contents of the response to Tulip.

Next, you need to specify "extractors" next to each output to indicate the data from the body of the response that you would like to store.
Here's an example with json-query: let's say that you write a GET request that returns an Array of Objects. You want to return the value of the name property from the first object in the array.
This is what you would write in the path field:
0.name
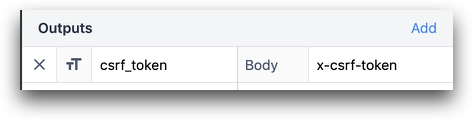
You can also store values from the Headers and Cookies section of the response.

Similar to the section above, you must specify a specific output in the Output section. Then, click on a part of a sample response or use json-query to access the correct property from the JSON in the HTTP response.
Here is an example where an output named "csrf_token" stores the value called "x-csrf-token" from the property in the header.
Outputs are stored as properties of an object when they are shared with an app. You must then store the object in a variable in an app. For more details, see this guide to using connector outputs with apps
Use RegEx to modify outputs
You can also use RegEx to refine text values from the response. To do this, add one of these functions in the Path field to pass the value through a regular expression:
:regexp()
To capture multiple substrings within the string-
:regexpGroup()
Examples:
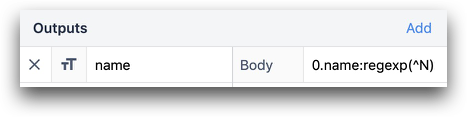

0.name:regexp(^N)
0.name:regexpGroup(^\w + (w+))
Using RegEx group, you may want to capture a single group within a larger string. To do this, add a comma to the end of your RegEx string and add the number of the specific group within the string.

parts[0].inputs:regexpGroup(^\w\w\s(\w\w)\s(\w\w)\s(\w\w),2)
Or, use it to select a specific item in an array that matches a rule. For example, the first object with an email value that starts with n.
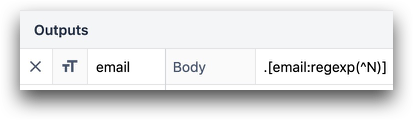
.[email:regexp(^N)]
We recommend RegExr to test your RegEx. Tulip uses the JavaScript (ECMA) RegEx engine.
Next steps
Check out Using HTTP Connectors in Apps for next steps.
If you’re having issues with your connector function not working properly, see our Troubleshooting Guide for information on what might be going wrong.
Take the HTTP Connectors University course for a walkthrough on building connectors.
Further reading
Did you find what you were looking for?
You can also head to community.tulip.co to post your question or see if others have faced a similar question!