Using IP Cameras with Vision
Set up an IP camera as a Vision camera and use it for detections.
Tulip Vision enables you to connect IP cameras in the same way you connect USB cameras. IP cameras are useful when you cannot connect the camera directly to a PC. The camera may be mounted in a location high above the station, or in a completely different location, even outside the facility. The only requirement is that the PC can reach the camera stream over your network . Many IP cameras are wireless (using wi-fi network) and require no cabling at all just a power source, which may be a battery. IP cameras in Vision give you complete freedom to monitor any part of your facility with Tulip.
Obtaining the Camera Stream URL
To get started, obtain an IP camera and set it up.
This process usually requires you to connect it to a mobile phone app. For the camera to work with Vision you must get its RTSP URL, such as rtsp://1.1.1.1:8555/live. The 1.1.1.1 being the IP of the camera and 8555 is the network port for the RTSP stream. The /live portion is the "path" and it may vary between IP camera vendors.
Follow the instructions and documentation for your camera to get this URL. You may also be required to set a user and password for your camera, which you can then add to the stream URL for example rtsp://user:pass@1.1.1.1:855/live. The user:pass@ prefix before the IP will provide the credentials to the streaming server and enable your stream.
Generally, IP cameras that support RTSP streaming can be used with Tulip Vision. Check the capabilities of the camera for RTSP support before purchasing; it should be clearly advertised by the vendor and verified by users.
Testing the Camera Stream
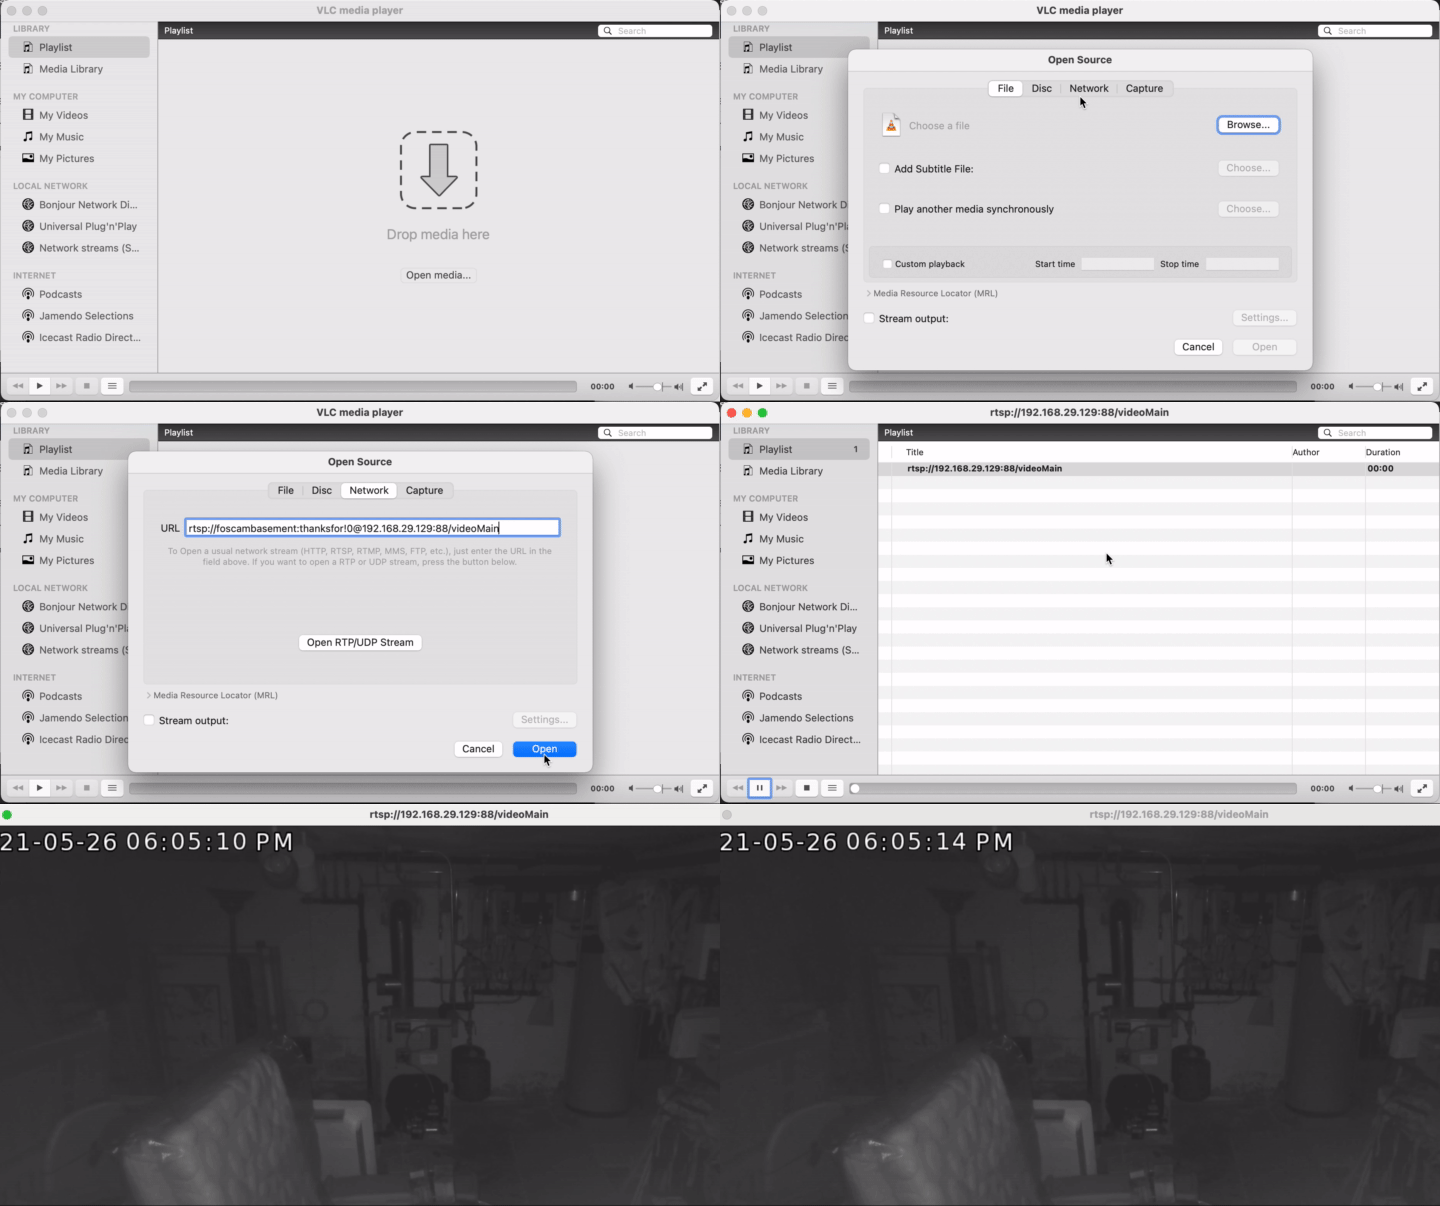
If you have the URL on hand, before setting it up in Tulip Vision you can test it to work. We recommend using the VLC link program to do that. The testing process is simple: in VLC create a network connection and provide the URL. The stream will then start playing.

Adding an IP Camera in Vision
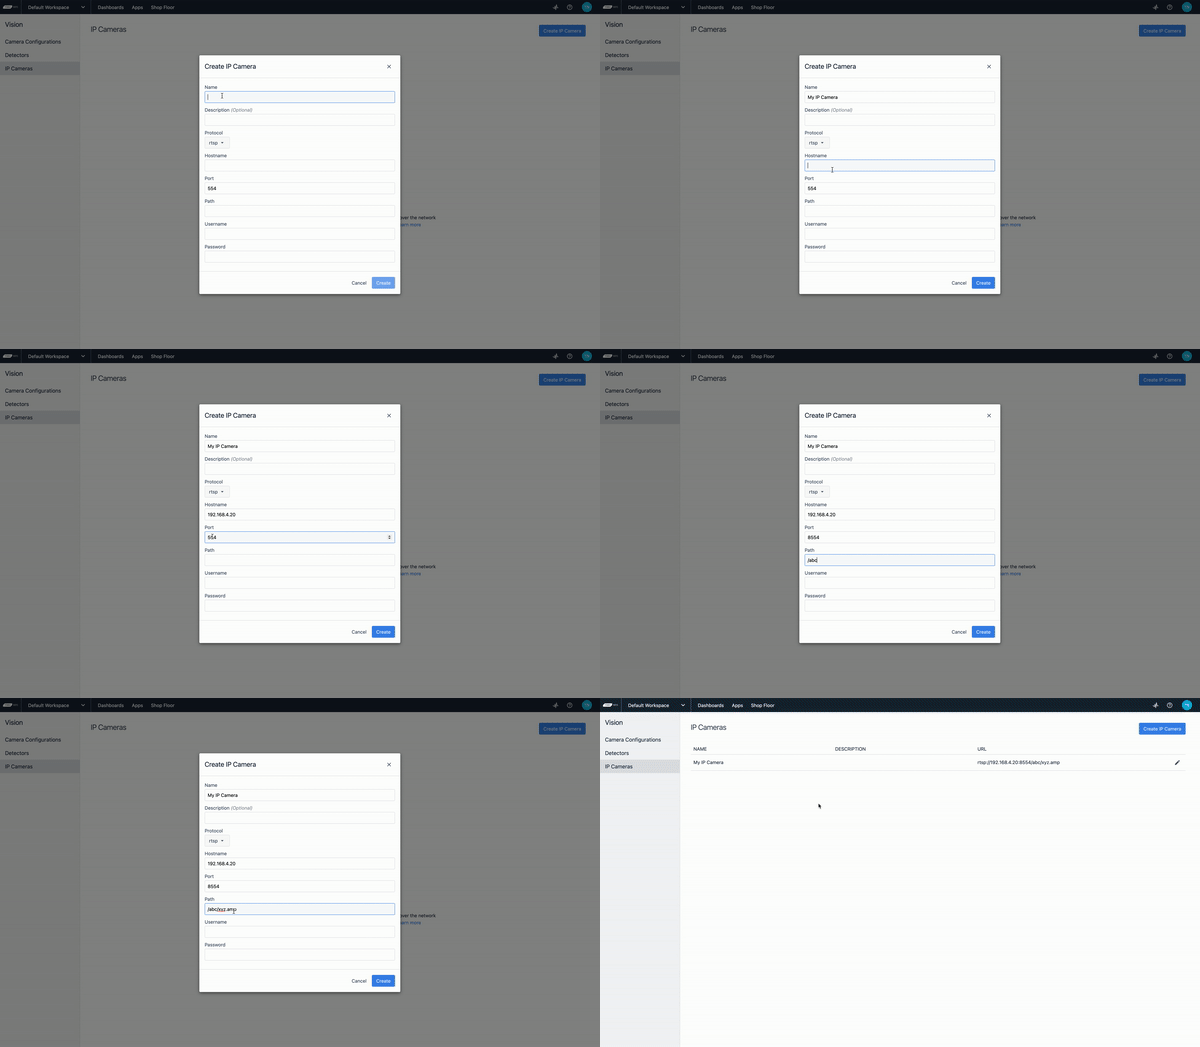
After verifying that the camera stream works, you're ready to add the camera to Tulip Vision. In the Vision pages you can go into the "IP Cameras" tab and create a new IP camera configuration with your stream details.
You can also create a duplicate of an existing configuration by clicking on the ellipsis icon of an existing configuration.

Using the IP Camera in Vision
When the IP camera is configured it can be used just as any other camera in Vision, and get a Camera Configuration. Since IP cameras are not connected to any computer with a USB cable they can be used in any station, provided that station computer can reach the camera stream over the network. This adds a lot of flexibility to placing cameras around your factory.
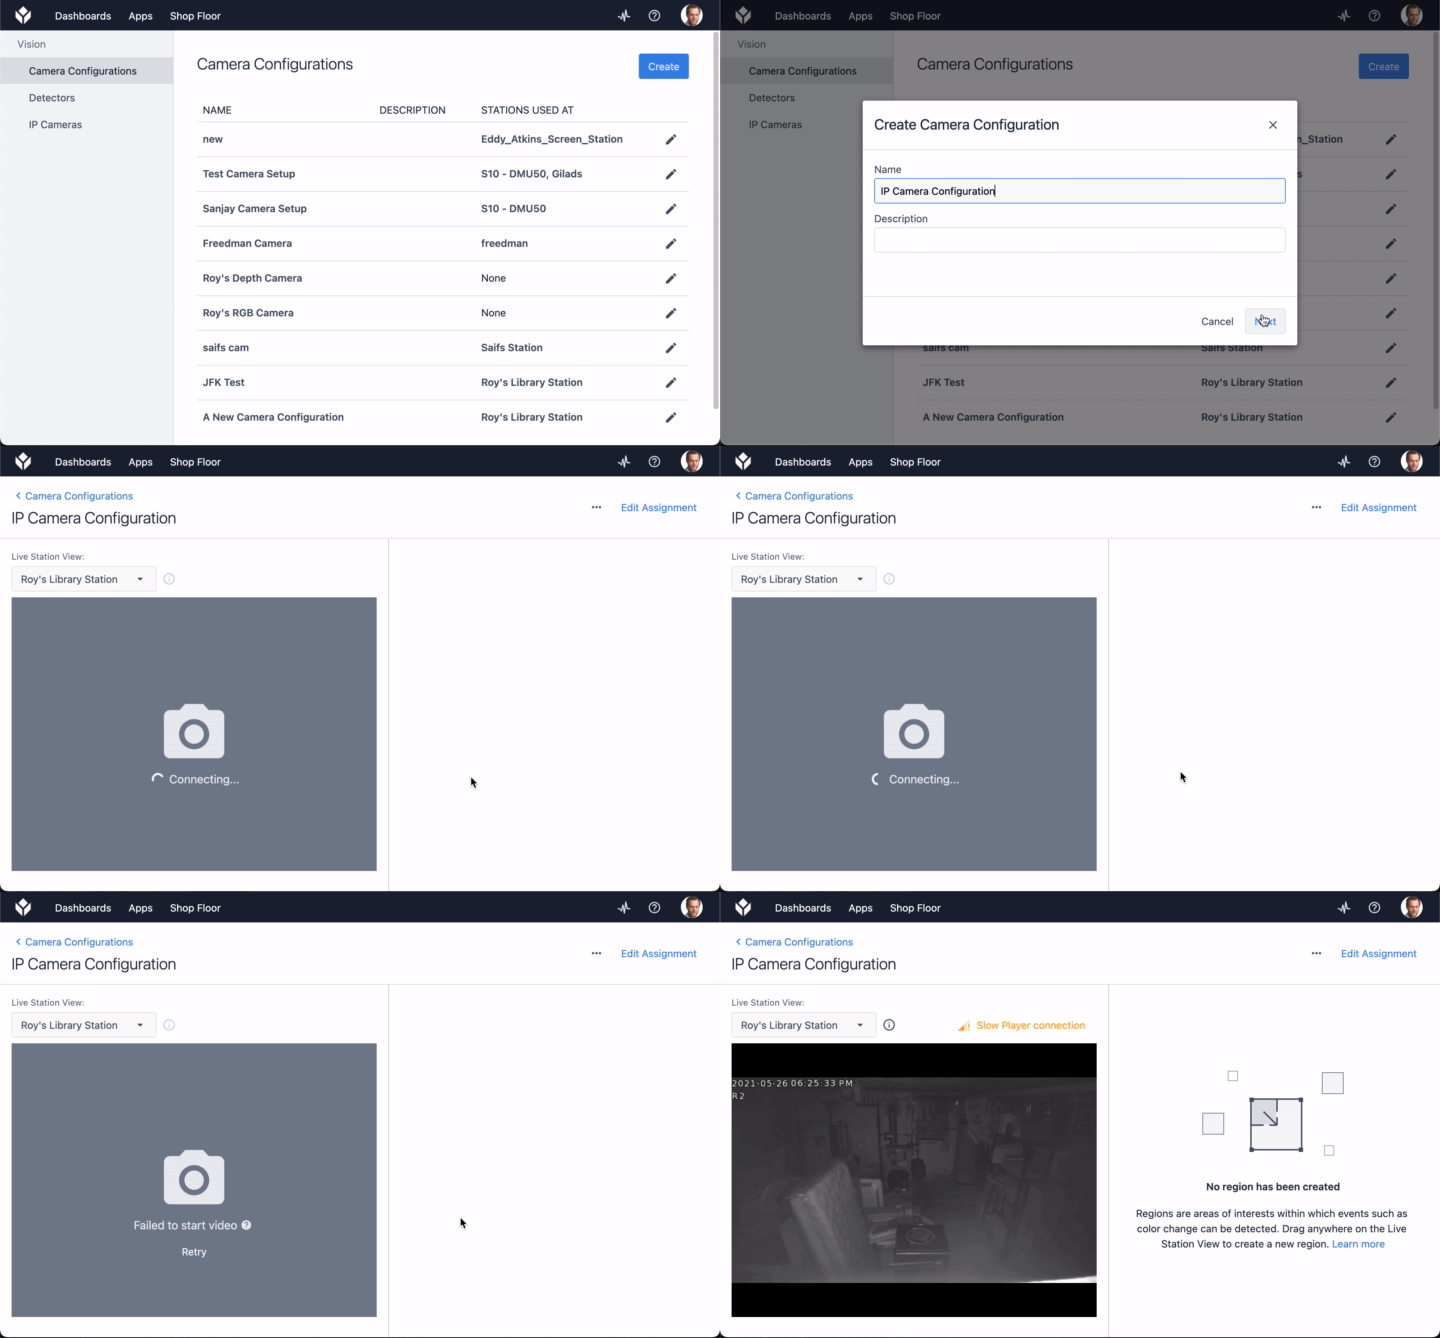
To use your IP camera, assign it to a Camera Configuration. This may be done when creating a new camera configuration, or via the Shop Floor page. When assigning a new configuration, select "Show IP Cameras" to display the IP camera in every Station.

When the configuration is assigned, the IP camera can be used just like any other color camera in Vision. Regions and detectors may be defined to generate events and signals from the camera. See the below guides on how to set up various detectors on camera and how to use Vision cameras in apps.
Further Reading
- Using the Jig Detector
- Using the Color Detector
- Using the Vision Camera Widget in Apps
- Using the Snapshot feature in Apps
Did you find what you were looking for?
Head to community.tulip.co to post your question, or see if others have faced a similar question!


