

Learn how to disable automatic updates for the Tulip Player
The Tulip Player application by default automatically updates to the latest version when available. It is strongly recommended that you receive these regular updates for new features, security, bug fixes, stability, and performance optimizations.
For LTS customers, they should use the Player version that is appropriate with their LTS version.
However, if there is a need to disable automatic updates for compliance with your IT policies, this can be achieved by following the procedure outlined below.
Using a settings.json File
Supported from version 1.5.1 and above.
This method applies for all PC users.
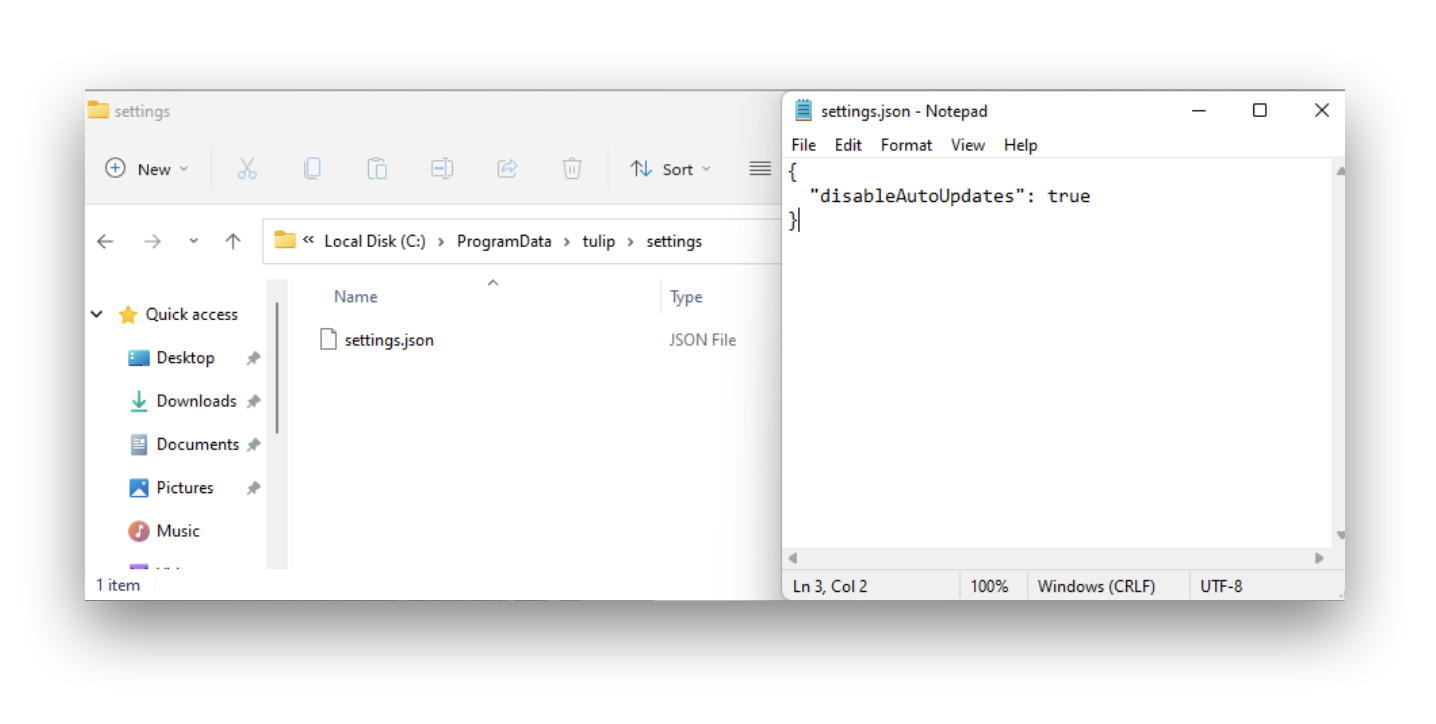
- Create a “settings.json” file at
C:\ProgramData\tulip\settingsfolder. If this folder path does not already exist, you will need to create it. - Ensure that all other users of the PC have “READ” privilege on this file.
- Open the file in Notepad or any text editor and add the following content to it:
{
"disableAutoUpdates": true
}
If this file already exists and has other contents, simply add the "disableAutoUpdates": true entry, separated by a comma from other file entries.
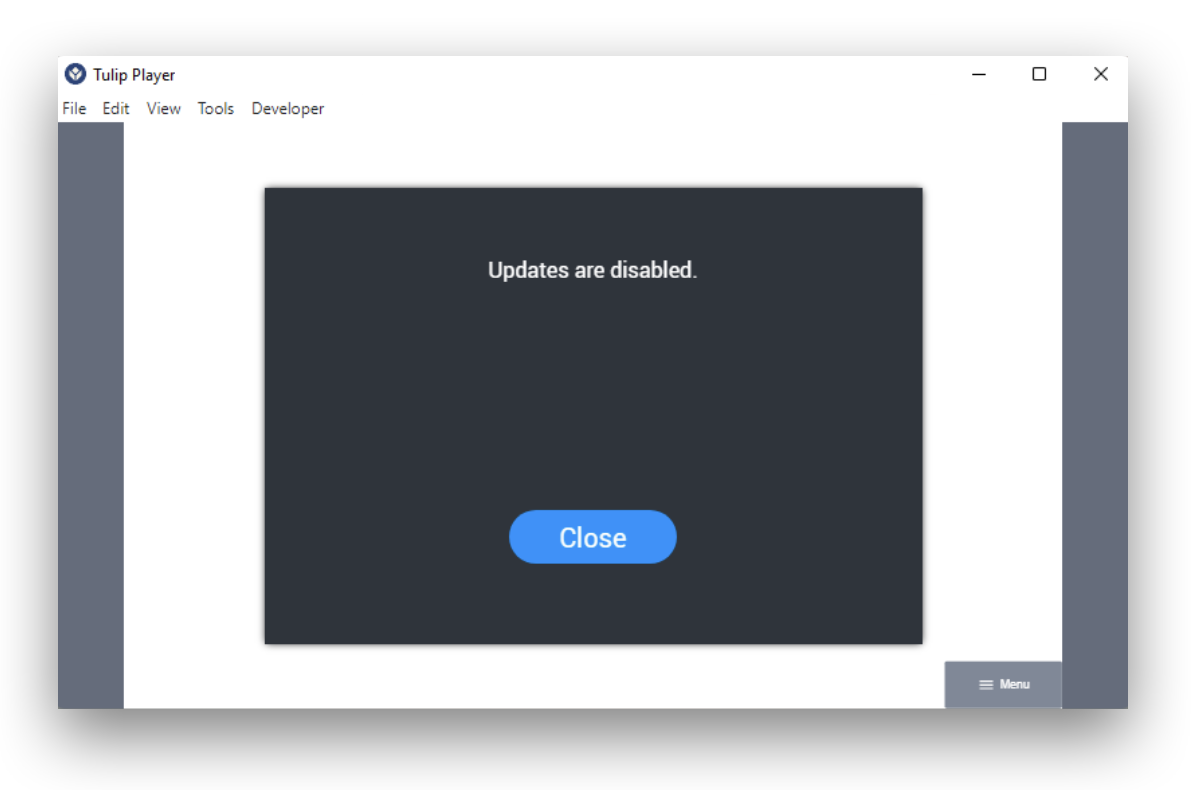
At this stage, you can launch the Tulip Player and from the top menu bar, select File → Check for Updates. The modal that opens should say “Updates are disabled” if this has been configured correctly.
Using Windows Registry
Supported from version 2.4.0 and above.
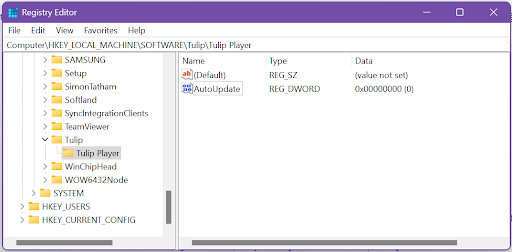
Use the HKLM:\SOFTWARE\Tulip\Tulip Player registry key to disable auto updates by setting the AutoUpdate DWORD value to 0.
This registry key is automatically created when installing through the MSI installer. Passing the AUTOUPDATEENABLED=0 parameter will result in the installer setting this registry key with value 0.
For more info, see Tulip Player Enterprise Deployments.
In case of EXE installer, this registry key is not created automatically. An admin will need to create the key and set the the AutoUpdate DWORD value.
Using Environment Variables
Supported from version 2.0.0 and above.
For the current user:
- Open a PowerShell terminal and execute the following command to set an environment variable named:
"TULIP_PLAYER_DISABLE_AUTO_UPDATES" with value "true"
[Environment]::SetEnvironmentVariable("TULIP_PLAYER_DISABLE_AUTO_UPDATES", "true", [EnvironmentVariableTarget]::User)
For the all users on the PC:
- Open a PowerShell terminal as Administrator and execute the following command to set an environment variable named:
“TULIP_PLAYER_DISABLE_AUTO_UPDATES”with value“true”
[Environment]::SetEnvironmentVariable("TULIP_PLAYER_DISABLE_AUTO_UPDATES", "true", [EnvironmentVariableTarget]::Machine)
Did you find what you were looking for?
You can also head to community.tulip.co to post your question or see if others have faced a similar question!