Introduction
Users will not be able to have a driver run in an app until the Edge Driver Page is added. Please send an email to developer@tulip.co detailing the driver you want to build without the driver zip/file.
How to test a custom Edge Driver using an ESP32 development board and a readily-available DHT22 temperature and humidity sensor.
What you will need (pre-requisites):
- LOLIN S3 Mini running CircuitPython
- Your IDE (Integrated Development Environment) of choice - Visual Studio Code
- Node.js and NPM
In this guide, we’ll walk through an example of building and testing a custom Edge Driver for an ESP32 development board and a readily-available DHT22 temperature and humidity sensor.
Getting the Hardware Ready
For this example, we’ll use a LOLIN S3 Mini development board (based on the ESP32-S3 microcontroller) running CircuitPython to read data from a DHT22 temperature and humidity sensor.
Wiring the DHT22 Sensor to the ESP32
Connecting the DHT22 sensor to the S3 Mini is straightforward:
- GND (-) on DHT22 → GND pin on the S3 Mini
- VCC (+) on DHT22 → 3V3 pin on the S3 Mini
- OUT (S) on DHT22 → D1 pin on the S3 Mini (or any available IO pin)
Reading Sensor Data
Here's a link to setup CircuitPython.
Below is a simple CircuitPython script that reads temperature and humidity values from the DHT22 sensor every second and prints the data as JSON over the USB serial interface. We are also adding the text "ESP:" before each message as well, so our driver can ignore other serial messages like logs and boot information.
Save this script as <code.py> on the CIRCUITPY drive, and it will automatically start sending data over the serial port:
import adafruit_dht
import board
import time
import json

dht = adafruit_dht.DHT22(board.D1)

while True:
    print(
        "ESP:",
        json.dumps(
            {
                "temperature": dht.temperature,
                "humidity": dht.humidity,
            }
        ),
    )
    time.sleep(1)
Building Your Edge Driver
To create a custom Edge Driver, you'll need Node.js and NPM installed. If you haven't installed Node.js and NPM, follow this guide.
Creating a New Edge Driver Project
Run the following command to create a new Edge Driver project:
npx @tulip/create-edge-driver
Follow the prompts to configure your driver. For this example, we will name our driver "esp32-diy-sensor" and enable the Serial service to read data from the S3 Mini over its USB interface.
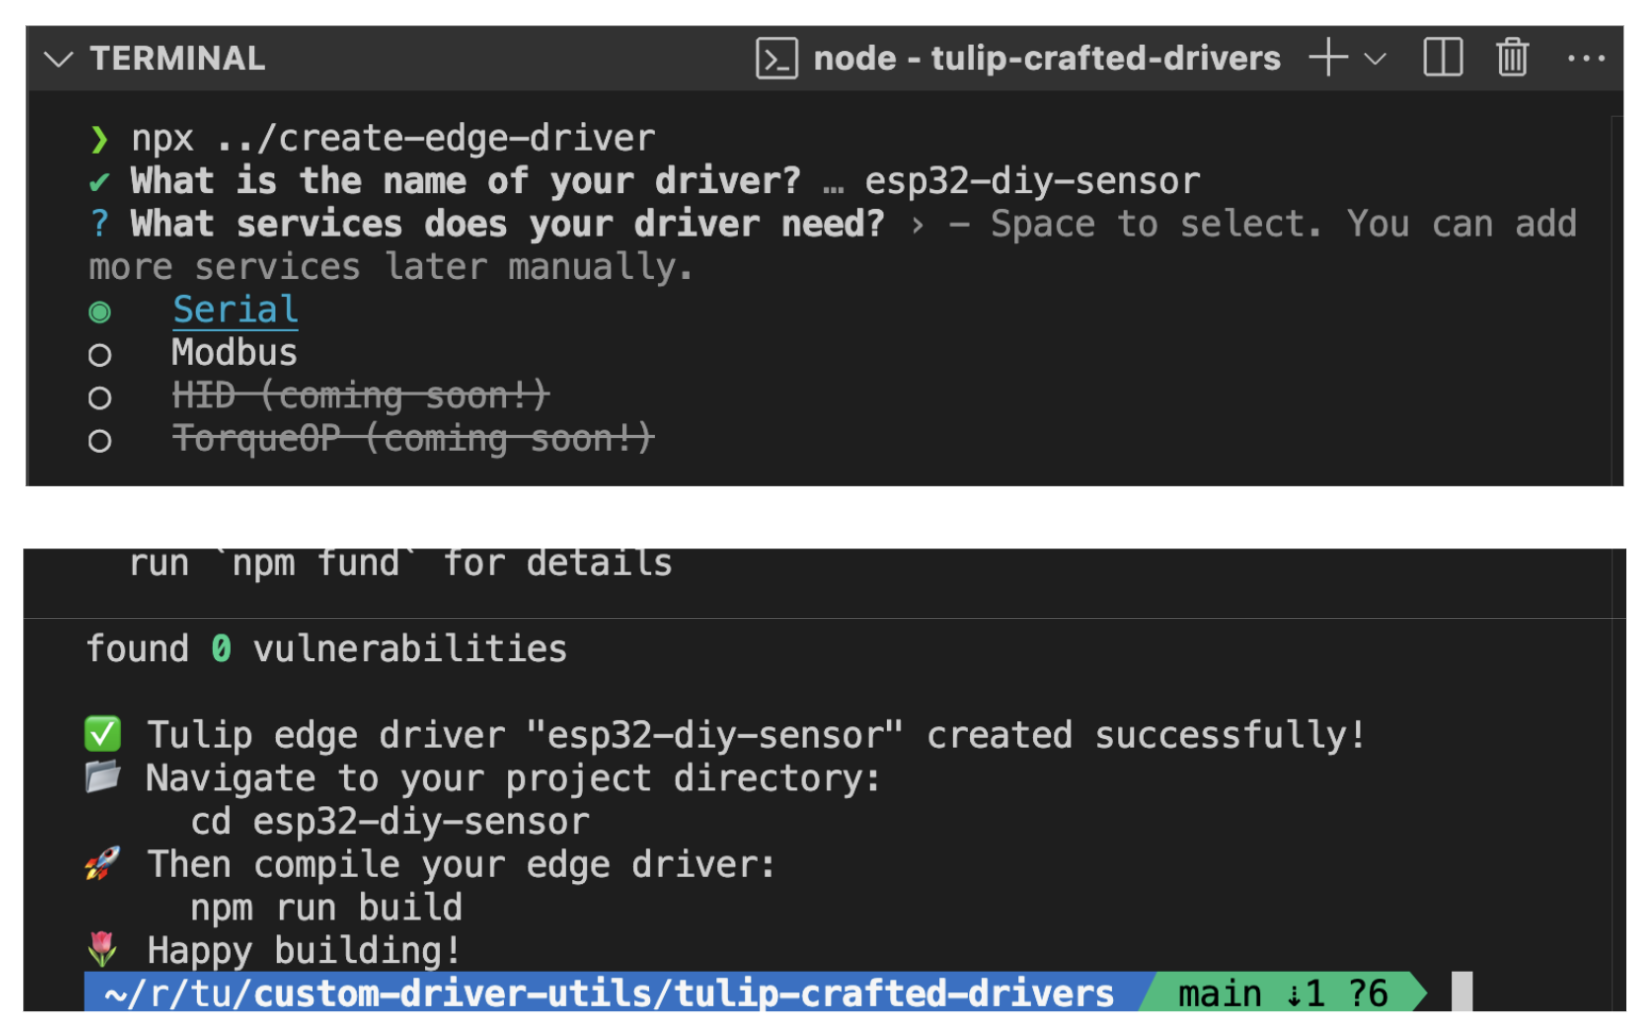
Once the setup is complete, navigate to your project directory and run:
npm run build
This command will:
- Validate the manifest.json file.
- Compile the TypeScript code.
- Bundle the driver into a JavaScript file that can be loaded in Tulip Player.
Updating manifest.json
First, we need to define the events and functions implemented by our driver. Device events can be used as triggers for logic in Tulip Apps. For example, you can set up an App trigger like:
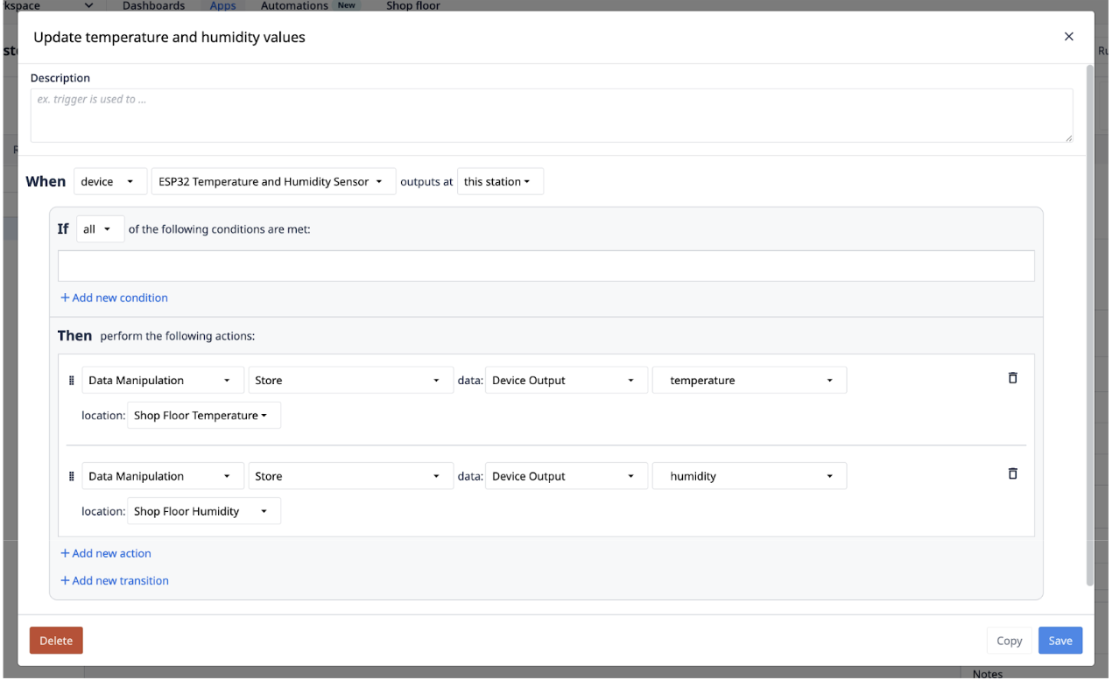
"When my sensor fires a measurement event, store the temperature data in the 'Shop Floor Temperature' variable."
Drivers can also implement device functions, which can be executed in response to triggers within an app. For instance:
"When I click this button, call the 'Toggle Light' function on my device."
In this example, our driver will have no functions, but will fire an event called "data" when our sensor takes a measurement. Update the functions section in your src/manifest.json file by either leaving it empty or removing it entirely:
...
  "functions": [],
...
Then update the events section to define the shape of the "data" event. This event will be an object with two float properties, "temperature" and "humidity":
...
  "events": [
    {
      "name": "data",
      "schema": {
        "type": "object",
        "properties": {
          "temperature": { "type": "float" },
          "humidity": { "type": "float" }
        }
      }
    }
  ],
...
Updating <index.ts>
Now we will write the driver code that uses the Edge Driver SDK to find and connect to the S3 Mini's USB serial port, reads incoming serial data, parses the JSON messages, and fires the "data" event using fireEvent(). Replace the example code in your src/index.ts file with this new code:
edgeDriverSdk.SerialPort.listAvailablePorts().then((ports) => {
  const esp32port = ports.find((port) => port.productId === 33128);
  const serial = new edgeDriverSdk.SerialPort(esp32port.path, {
    baudRate: 115200,
  });

  serial.onData((data) => {
    try {
      const decoder = new TextDecoder();
      const stringData = decoder.decode(new Uint8Array(data));
      const espData = JSON.parse(stringData.split("ESP: ")[1]);
      edgeDriverSdk.fireEvent("data", espData);
    } catch (error) {
      console.error(error);
    }
  });

  serial.open();
});
In this example, we automatically try to find the device using the Product ID of the USB device when the driver starts for the first time. However, the Edge Driver SDK also supports configuring drivers to be started when new devices are detected by the system, which can help make more robust production drivers.
Building and Running the Driver
After updating the driver code and manifest.json, build the driver again:
npm run build
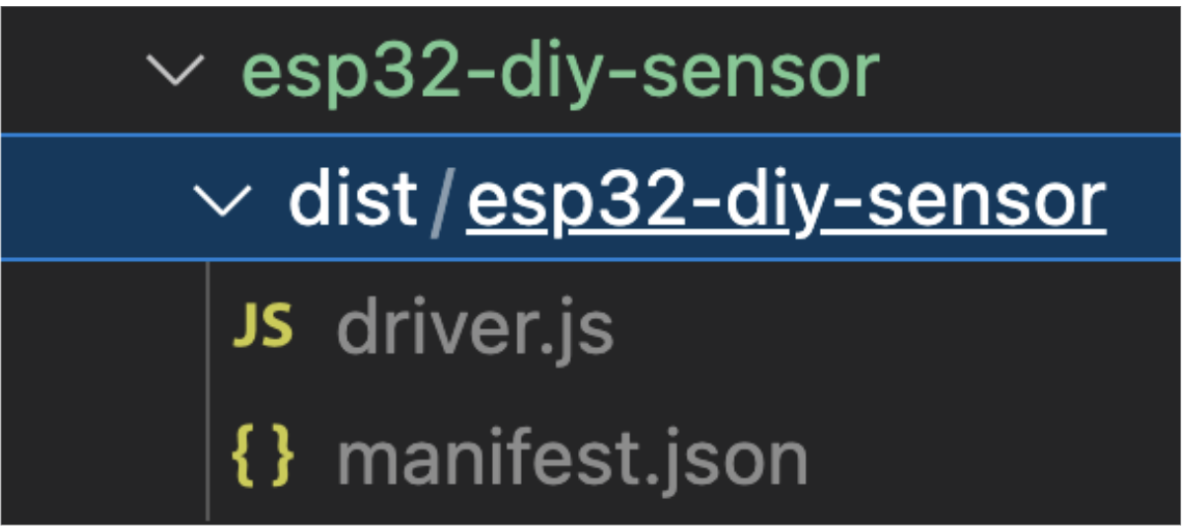
This will generate the compiled and bundled JavaScript file as well as a copy of the validated manifest inside the dist directory.
Testing Your Driver in Tulip Player
By default, Tulip Player runs with built-in drivers that work out of the box. However, you can also run your custom driver locally in Tulip Player, even without a Tulip instance. To do this, you can launch Player from the command line with the path to your driver's dist directory. Download and install Tulip Player from here.
On Windows, this is done by using the set command in the terminal to set the TULIP_PLAYER_CUSTOM_DRIVERS_PATH environment variable, then running the "Tulip Player.exe" from the same terminal:
C:\Users\Bob> set "TULIP_PLAYER_CUSTOM_DRIVERS_PATH=C:\Users\Bob\Documents\esp32-diy-sensor\dist"
C:\Users\Bob> "C:\Users\Bob\AppData\Local\tulip-player-desktop\Tulip Player.exe"
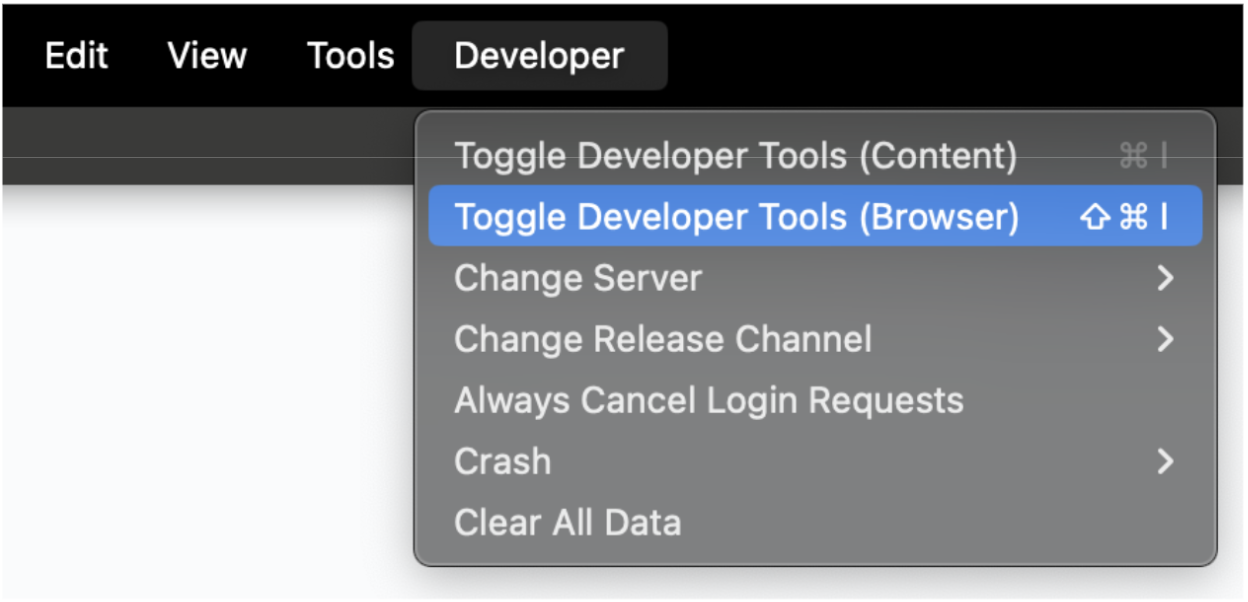
Once player starts, open Browser Developer Tools in the Player app and go to the Console tab.
Filter messages with "[CED]" to see your driver logs.
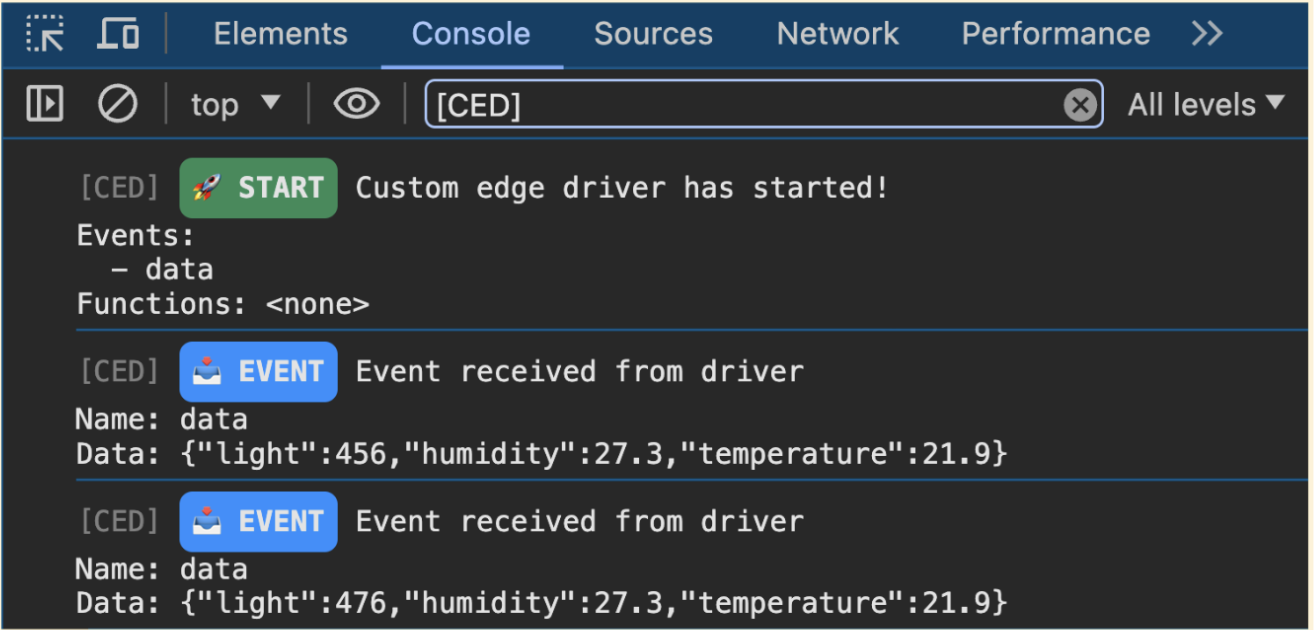
If successful, you should see "data" events logging temperature and humidity values in real time.
Using Your Driver in a Tulip App
Soon, you’ll be able to upload custom drivers to your Tulip instance. Until then, we can import a pre-defined example driver.
Go to the Tulip library and install any driver that has an install button like this one.
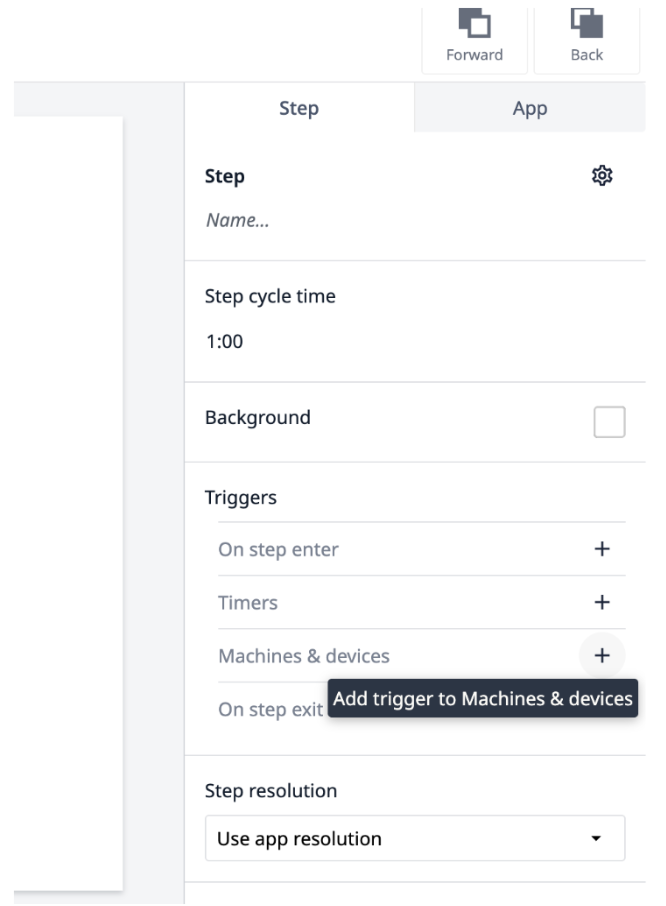
Install the driver when prompted. Create a new Tulip App and add a "Machines & devices" trigger to your step.
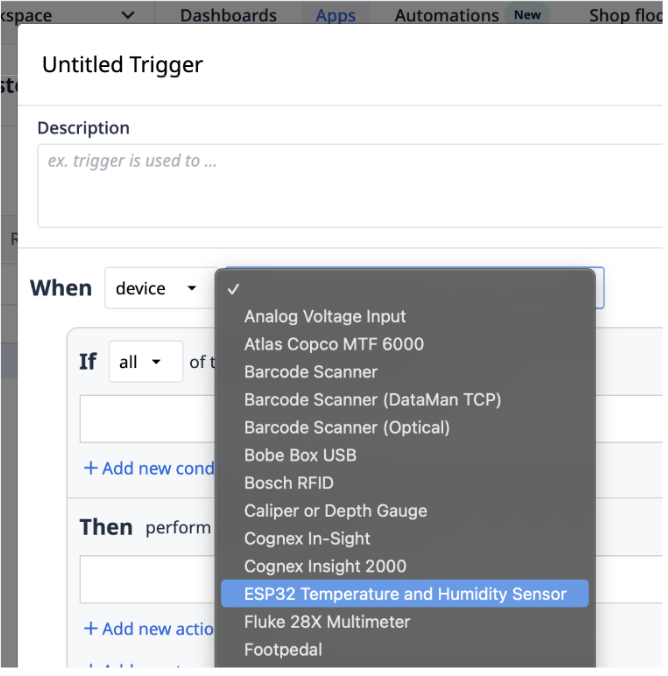
You should see the imported ESP32 Temperature and Humidity Sensor in the device list.
Now, you can create a trigger that updates some app variables with live sensor data.
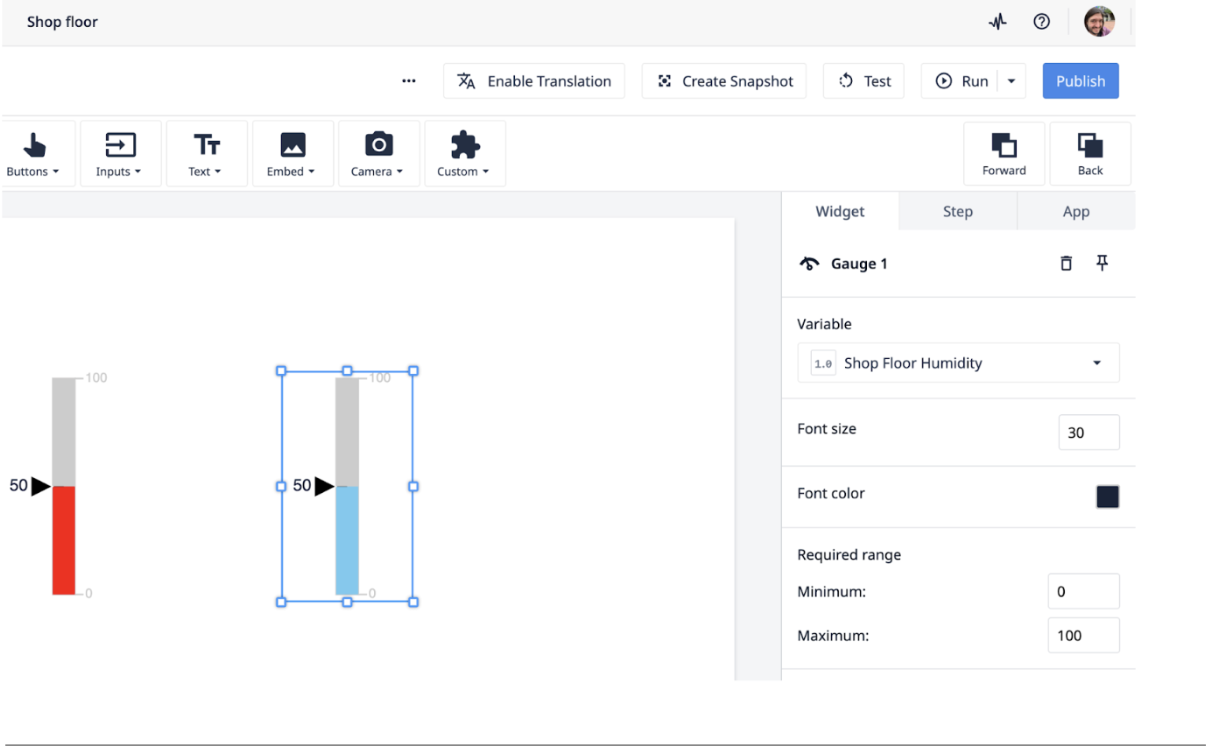
Create some widgets that use those variables on your step so that you can visualize the temperature and humidity data in your app.
Running Your Tulip App
Once your app is set up, run it in Tulip Player. If everything is configured correctly, you should see real-time sensor values updating in your App!
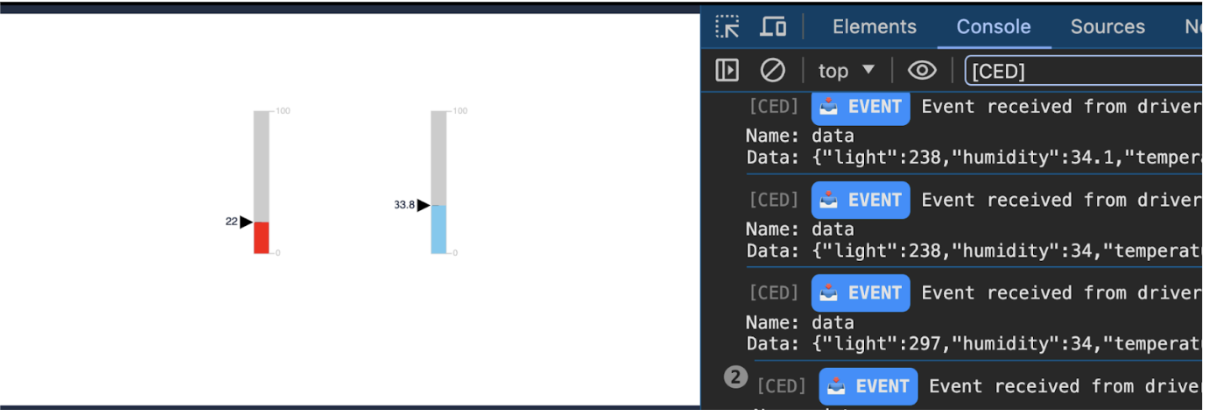
And that's it! You’ve successfully built, tested, and integrated a custom Edge Driver in Tulip!

