This article covers Triggers with conditions and offers an example of how to build a trigger with a simple condition.
Note: This topic is featured in the "Build a Quality Inspection App" section of Tulip University.
Purpose
Using Conditions, you can add if/else logic to Triggers.
You can think of conditions as a way to route an operator to a specific outcome depending on the trigger inputs.
Tulip allows you to add a single or multiple conditions and to choose whether “all” conditions or “any” condition must be met to result in an action being triggered.
You can do this on all three types of triggers:
- Button Triggers
- Widget Triggers
- Step Level Triggers
- App Level Triggers
Check out this article if you need an introduction to triggers
Once you have selected the event, you must choose the type of value you will be checking.
Adding an "If" statement
Within the "If" statement, click "Add New Condition" on the right and choose from one of the eight options.
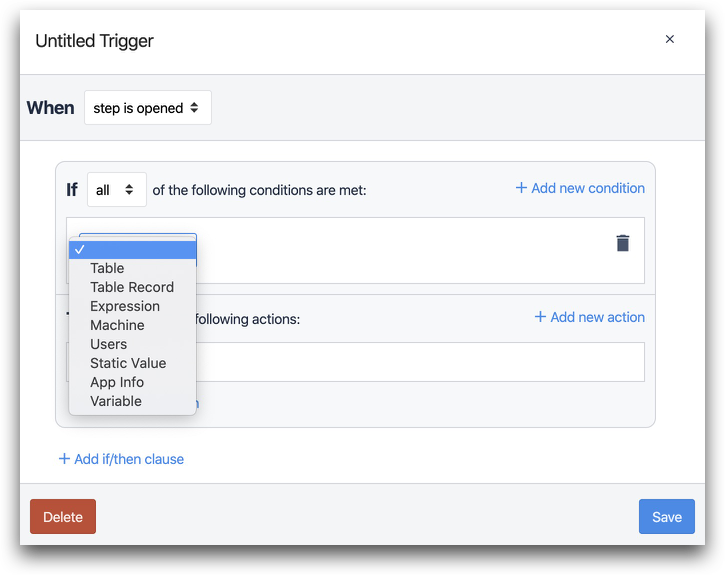
Here's an explanation of each option
Then, you need to define the condition during the event required to trigger an output. Available conditional operators in Tulip are:
- Equals (=)
- Greater than (>)
- Greater than or equal to (≥)
- Inside range ( Y<X<Z)
- Is Blank (X=_)
- Is Not Blank (X≠_)
- Less Than or Equal To (≤)
- Less Than (<)
- Does Not Equal (≠)
- Outside range (X<Y | X >Z)
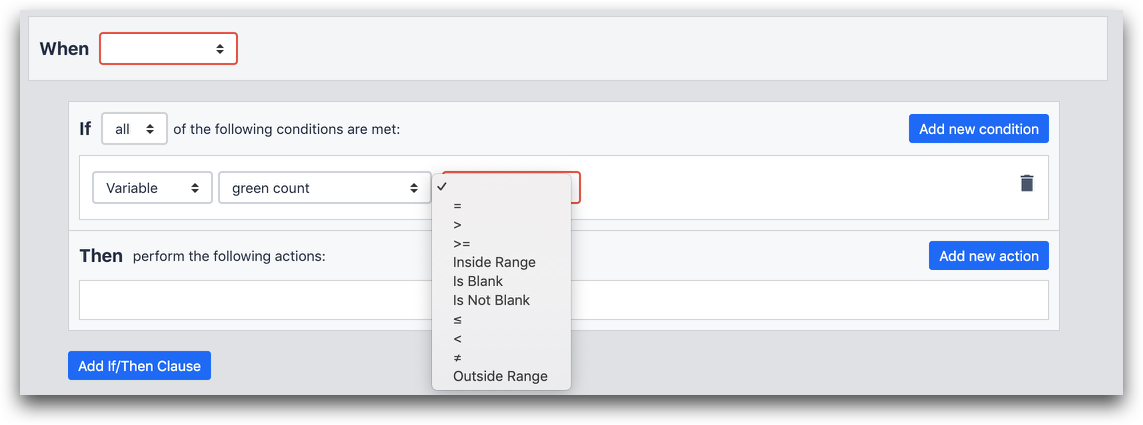
The available operators depend on the type of values you are using for the condition
To complete a Trigger, create the desired Action or actions in the "Then" section.
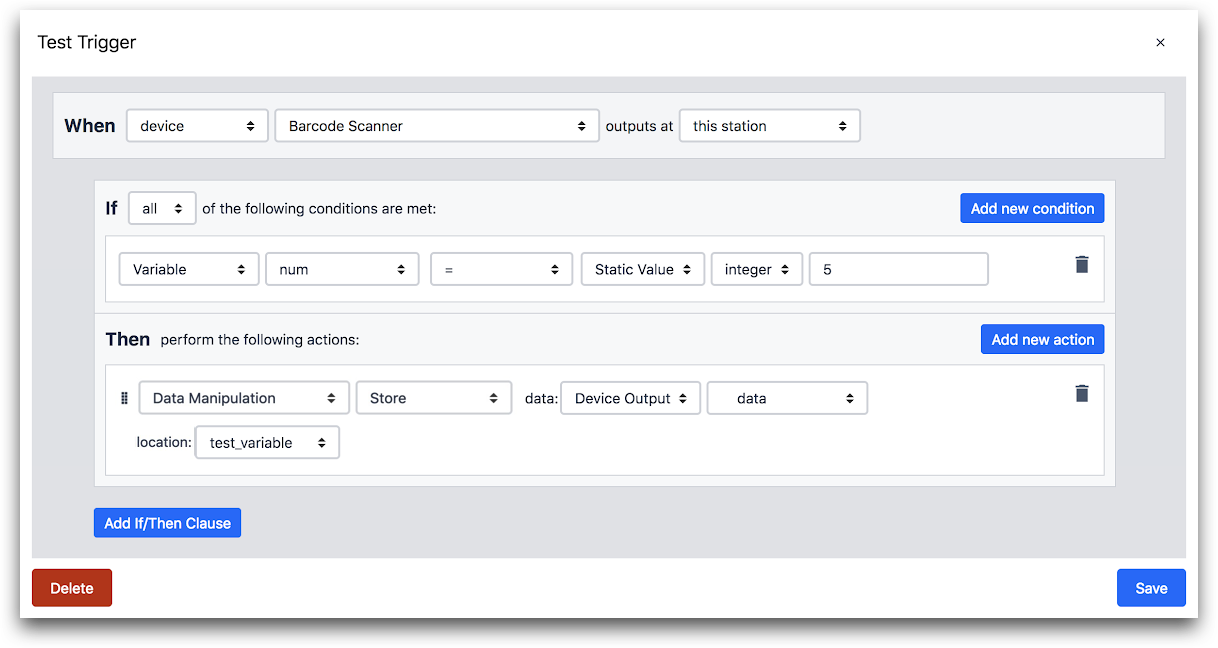
WHEN
- "Device" "Barcode Scanner" outputs at "this station"
IF
- "Variable" "num" "=" "Static Value" "integer" "5"
THEN
- "Data Manipulation" "Store" data: "Device Output" "data" location: "test_variable"
How to Create an Example Trigger with Conditions
In this example, we will test to ensure that measurements from connected calipers are in range:
-
Open a step within the desired app in the Tulip App Editor.
-
Select the Step Trigger by clicking on the plus icon in the side pane.
-
Name the trigger by clicking title in the Trigger Editor.
-
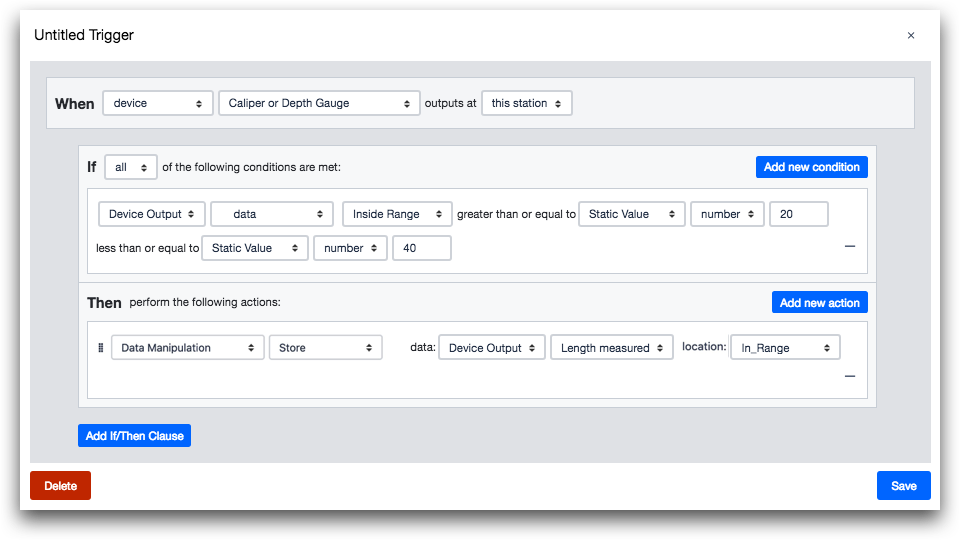
Set the Event:
- Select “device” in the dropdown menu
- Select “Caliper or Depth Gauge” in the second dropdown menu
- Select “this station” in the third dropdown menu

- Set a Condition:
- Click the plus icon in the right side of the Conditions row.
- Select “Device Output” in the dropdown menu
- Select “data” in the dropdown menu
- Select “Inside range” in the operator dropdown to make sure the output is within the desired range
- Select “Static value” in the greater or equal to dropdown
- Select “Number” and input the number 20.
- Select “Static value” in the less than or equal to dropdown
- Select “Number” and input the number 40.
 {height="" width=""}
6. Set an Action:
1. Click the plus icon in the right side of the Actions row.
2. Select “Data Manipulation” in the dropdown menu
3. Select “Store”
4. Select “Device Output”
5. Select “Length measured”.
6. Select “New Variable” in the location dropdown menu and name new variable “In_Range”

Here's the full example from the Trigger Editor.
Duplicating a Trigger Action
Starting r235, users can duplicate an Action or a condition in the Trigger editor. This enables easier "copy-paste" for multiple conditions or actions. To duplicate a condition, hover over the condition, and click on the highlighted icon.

The image below shows the duplicated condition.
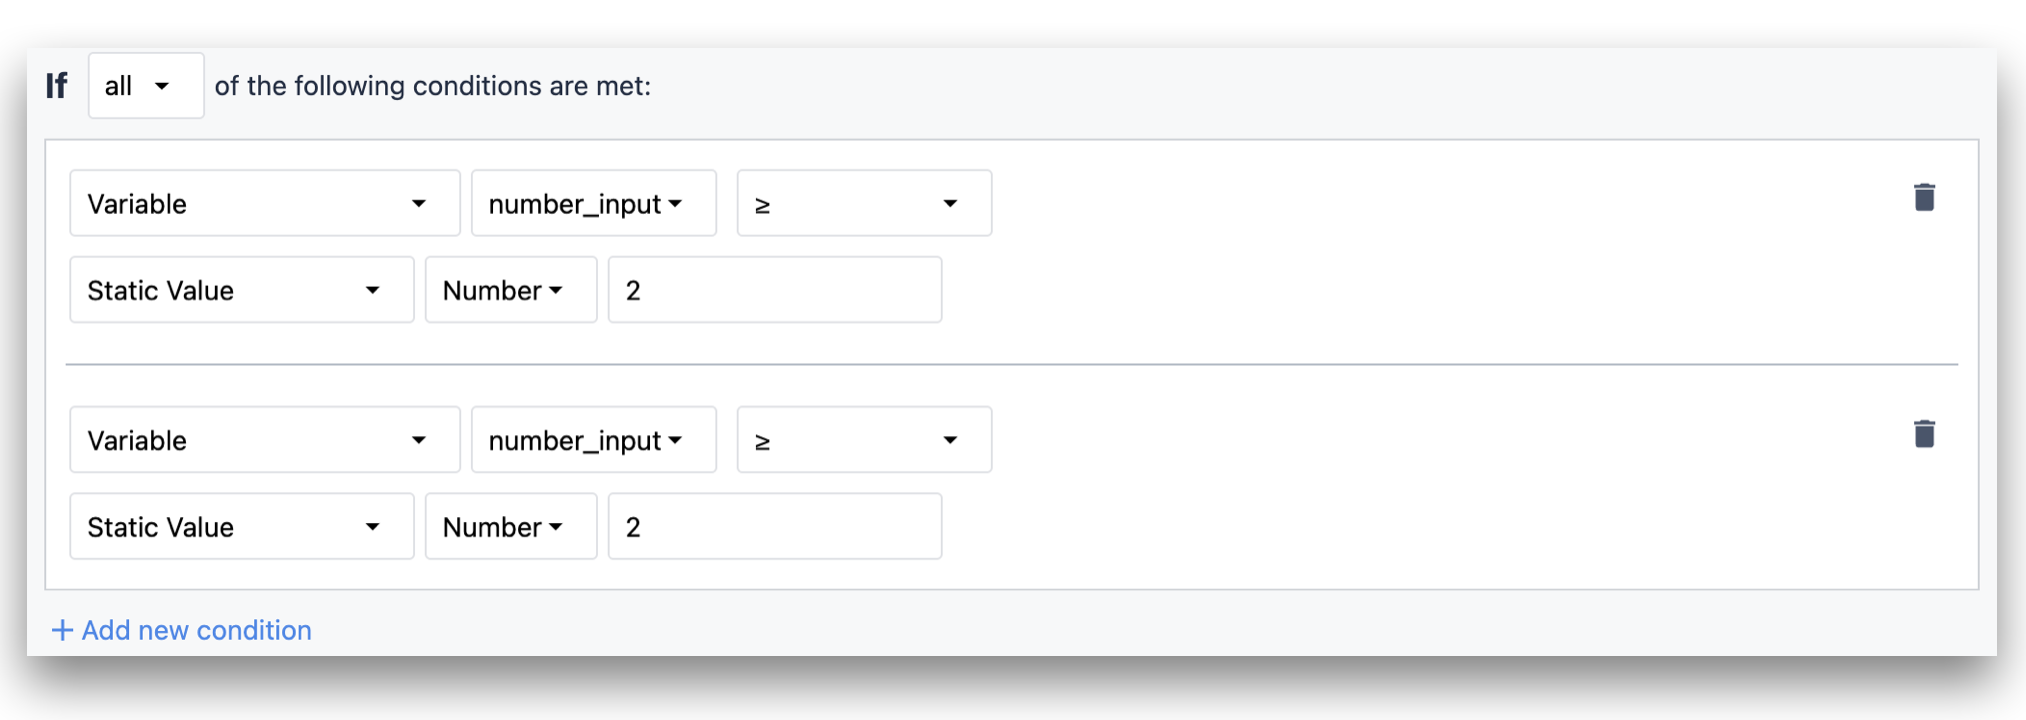
Similarly, to duplicate an action in the Trigger editor, hover over an action and click the highlighted icon.

The image below shows the duplicated action.
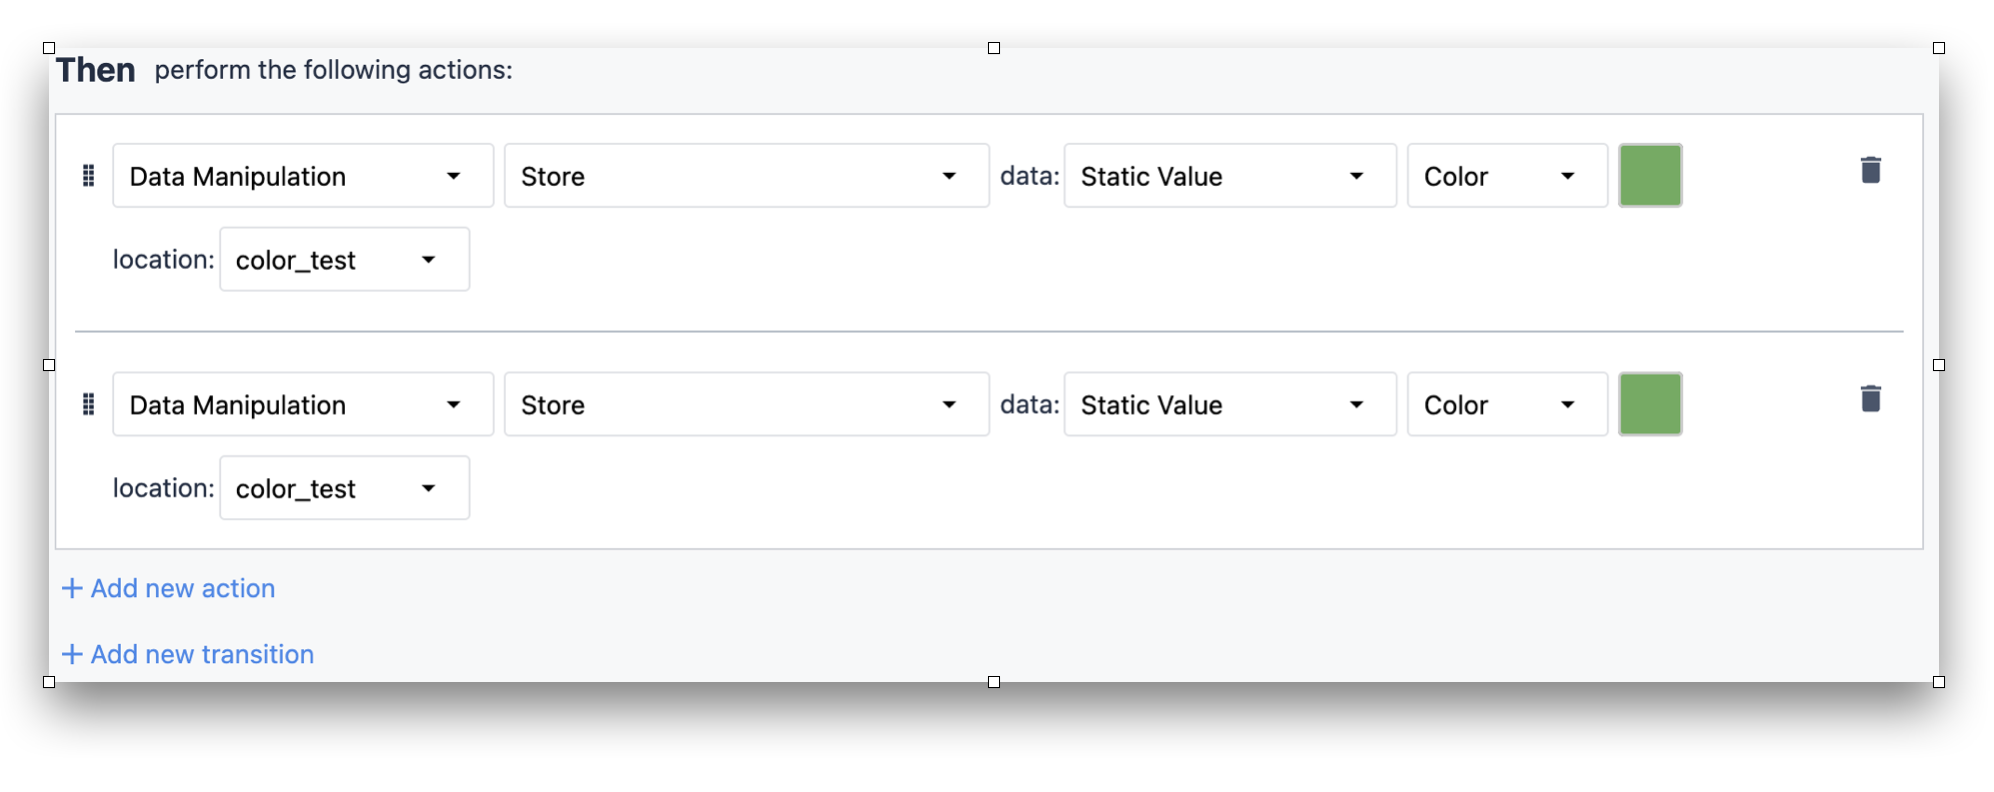
Further Reading
For more examples of commonly used triggers we recommend reading, "What are the 10 most commonly used triggers?"
Did you find what you were looking for?
You can also head to community.tulip.co to post your question or see if others have faced a similar question!

