
Tulip Light Kit Initial Setup
Here's how to set up your light kit and configure the LED strips.
The Tulip Light Kit is a helpful way to help direct attention to a specific item or area with a Tulip app.
This article will walk you through the initial setup of the Light Kit. For more information on how to use the light kit in your Tulip apps, we recommend taking a look at “How to use the Tulip Light Kit.”
The Light Kit box contains:
- Light Kit
- 2 Light Strips
- Power Adapter
- Mini USB Cable

Setting Up your Light Kit
1- Plug the AC adapter into Light Kit and connect to power.
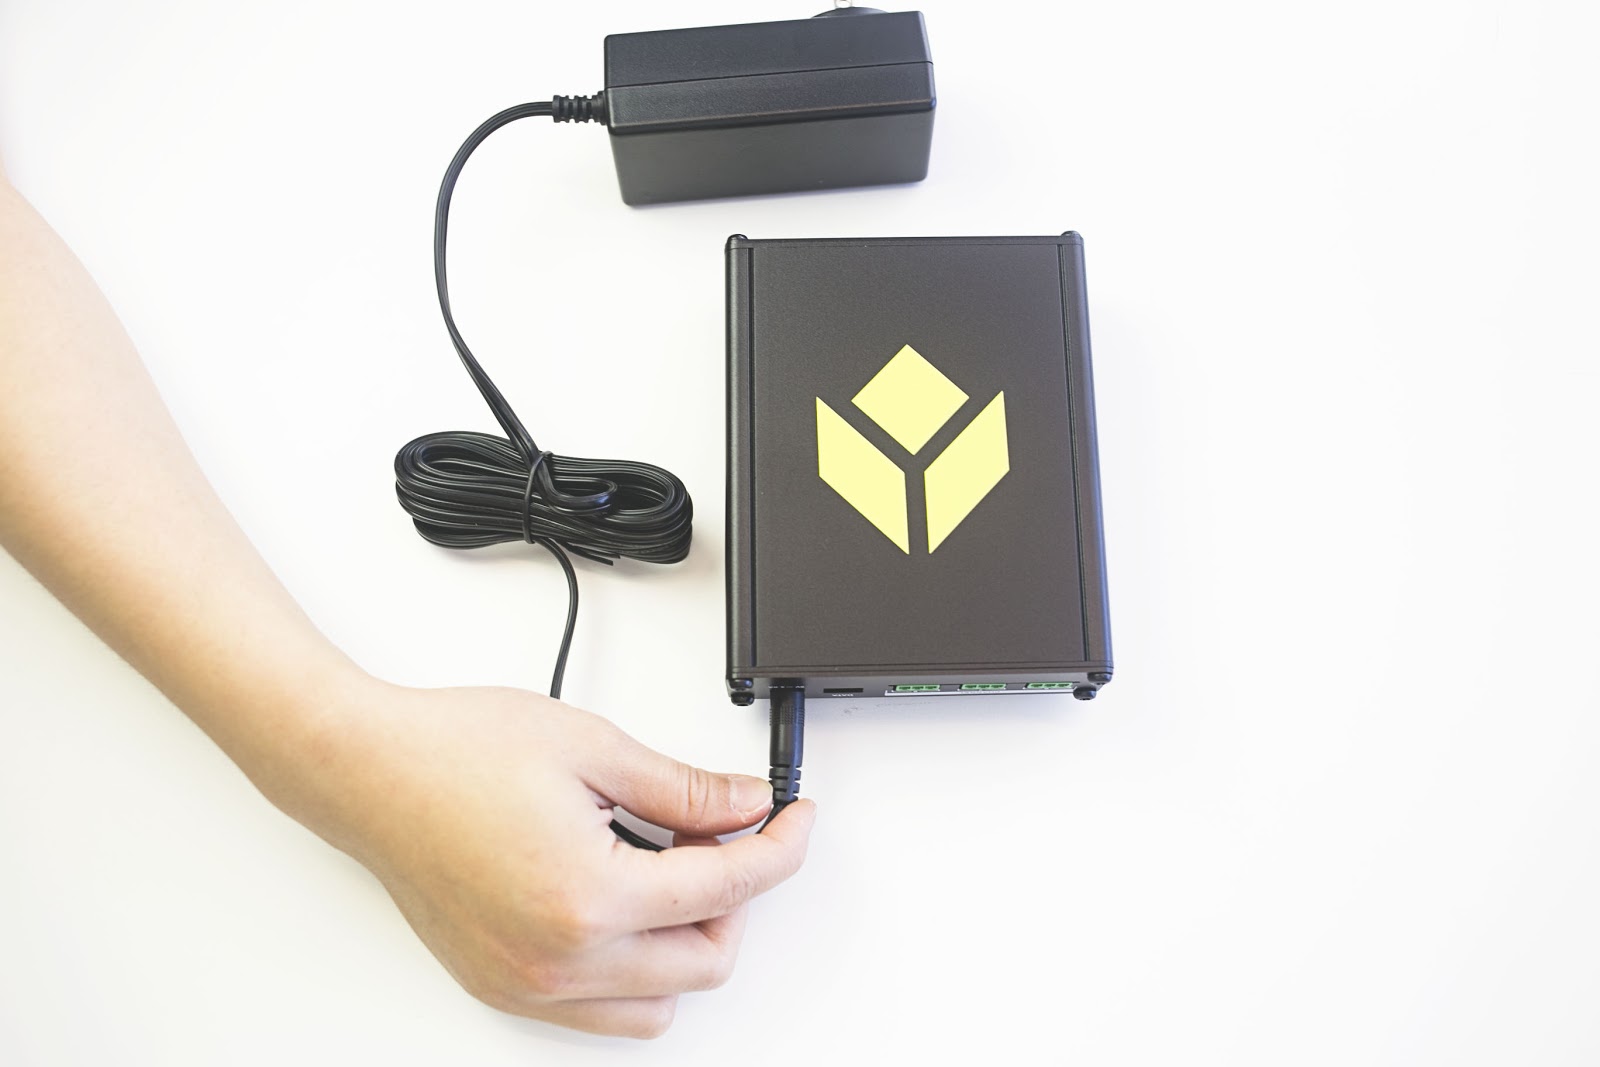
2- Plug the mini USB end of the USB cable into the Light Kit.

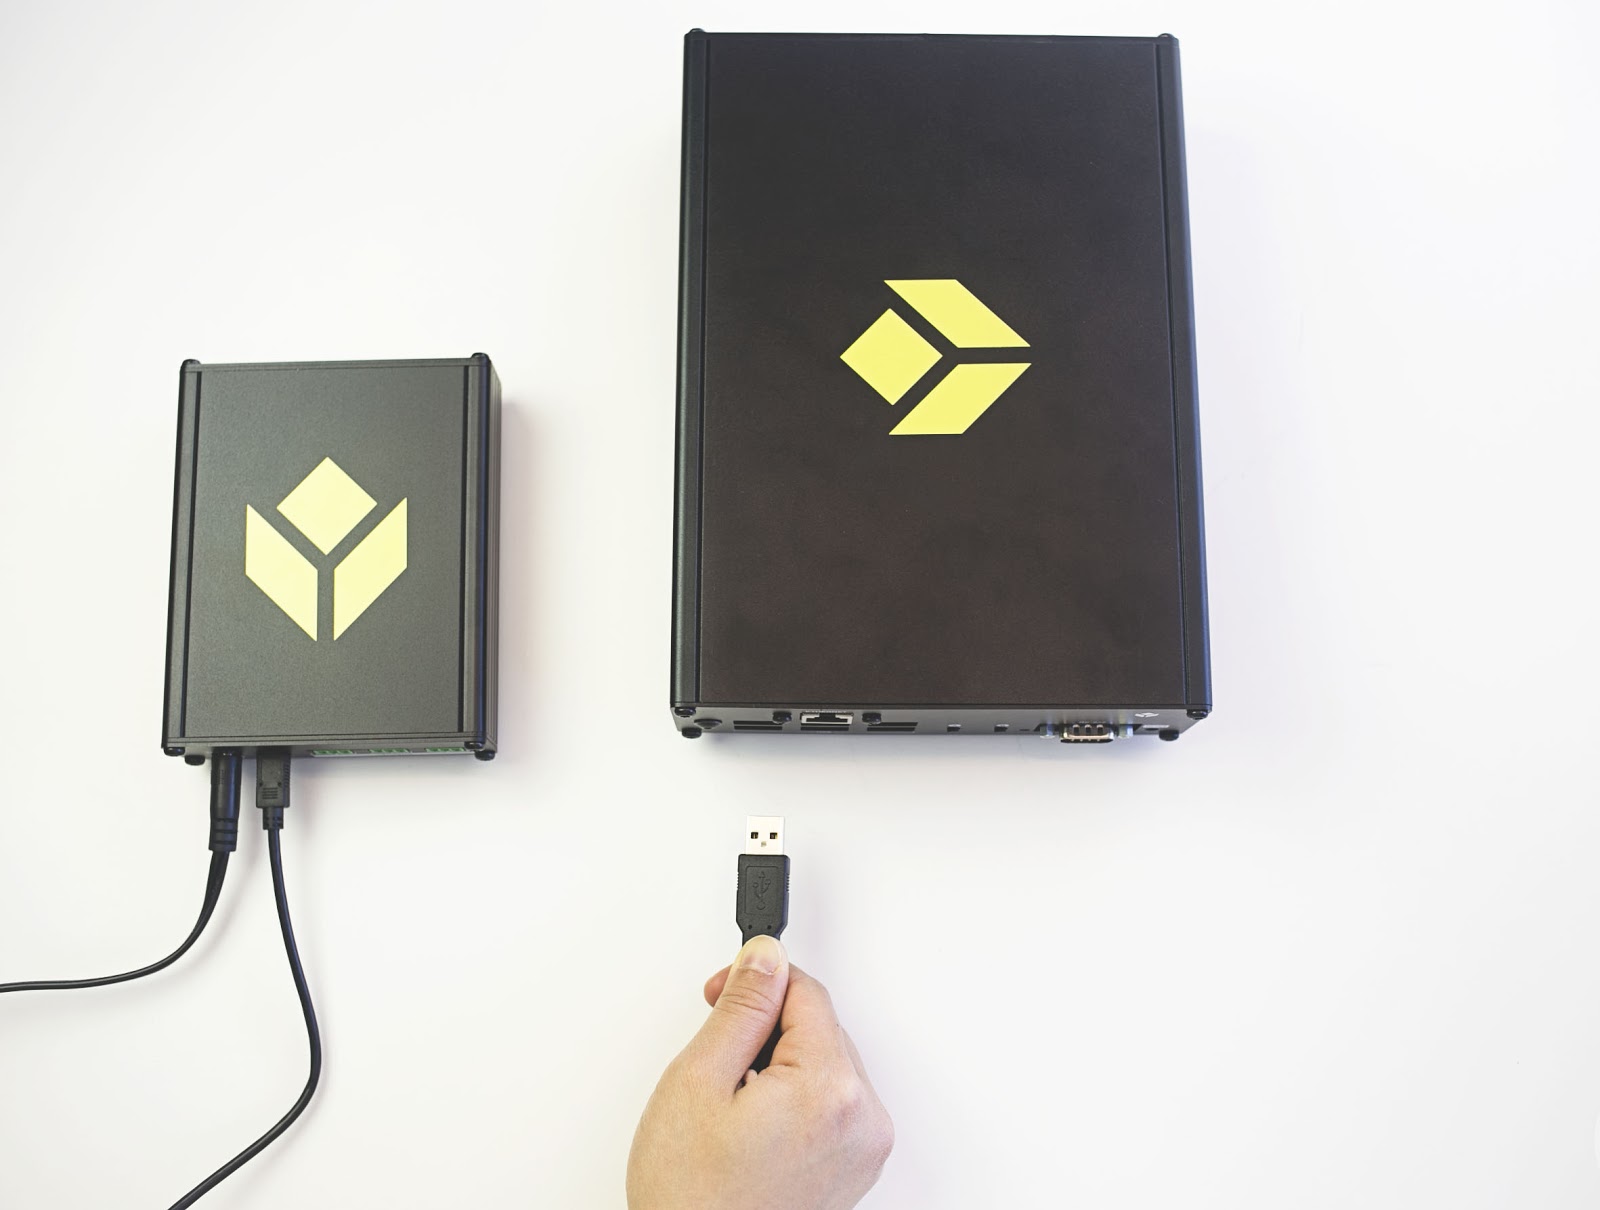
3- Connect the Light Kit to any USB port on your gateway.
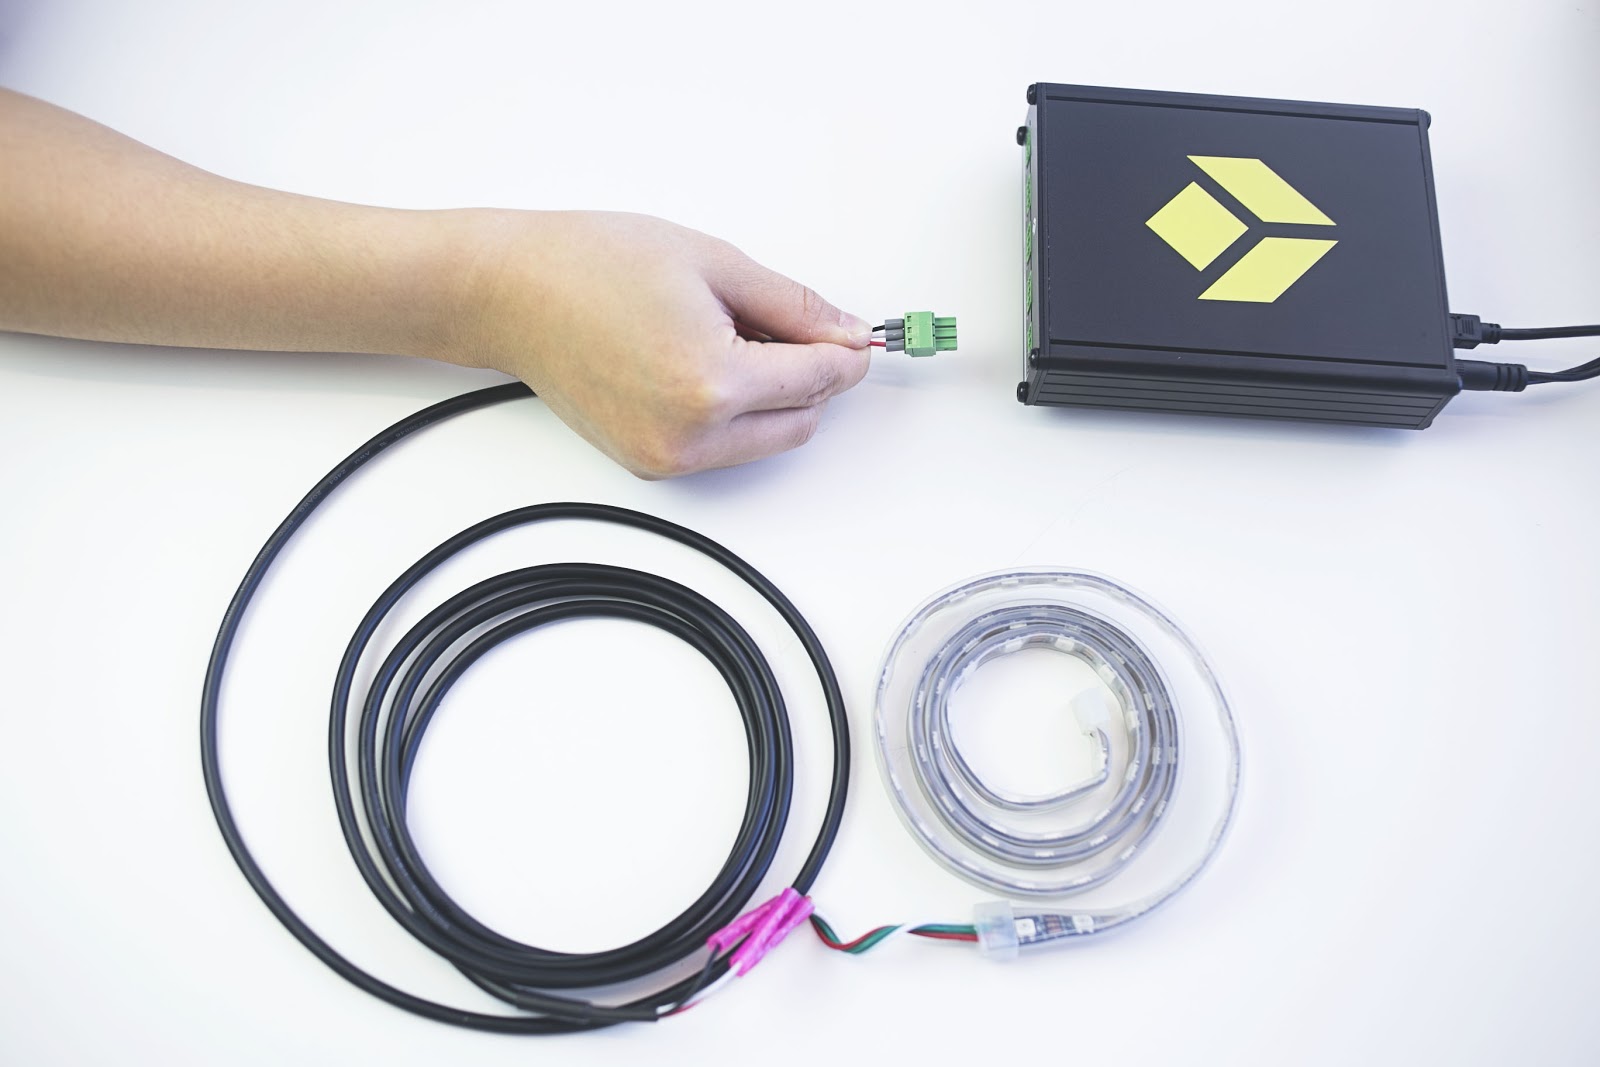
4- Plug the light strips into CHANNEL 1 and CHANNEL 2 on the Light Kit.
Now you can test the Light Kit. Run the Light Kit Unit Test app on your Player and:
- Select the Light Kit option
- Input a bin number to turn the bin on
- Confirm that there was a response on the light strip.
Having trouble? Contact us on live chat in the bottom right of the screen.
How to change the bin sizing on the light strips
You will need to connect to the Edge Device to adjust the Light Kit bin settings. To do this:
1- Connect your computer to the Edge Device’s local Wi-Fi network.
Example:

Note: The Wi-Fi dongle MUST be inserted into a USB port to broadcast the local Wi-Fi network on the IO Gateway.
- The Wi-Fi network name will be the serial number of the gateway
- The password will be the same as the one you set up during the initial configuration of the gateway.
Forgot your password? Follow Instructions to Restart your Gateway
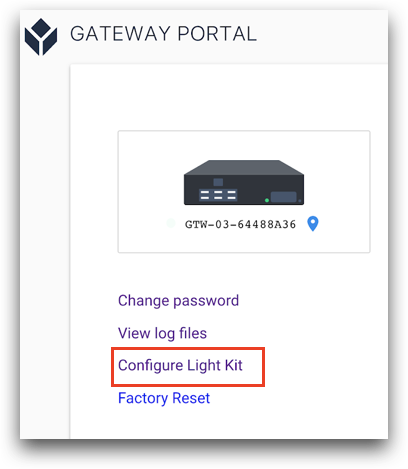
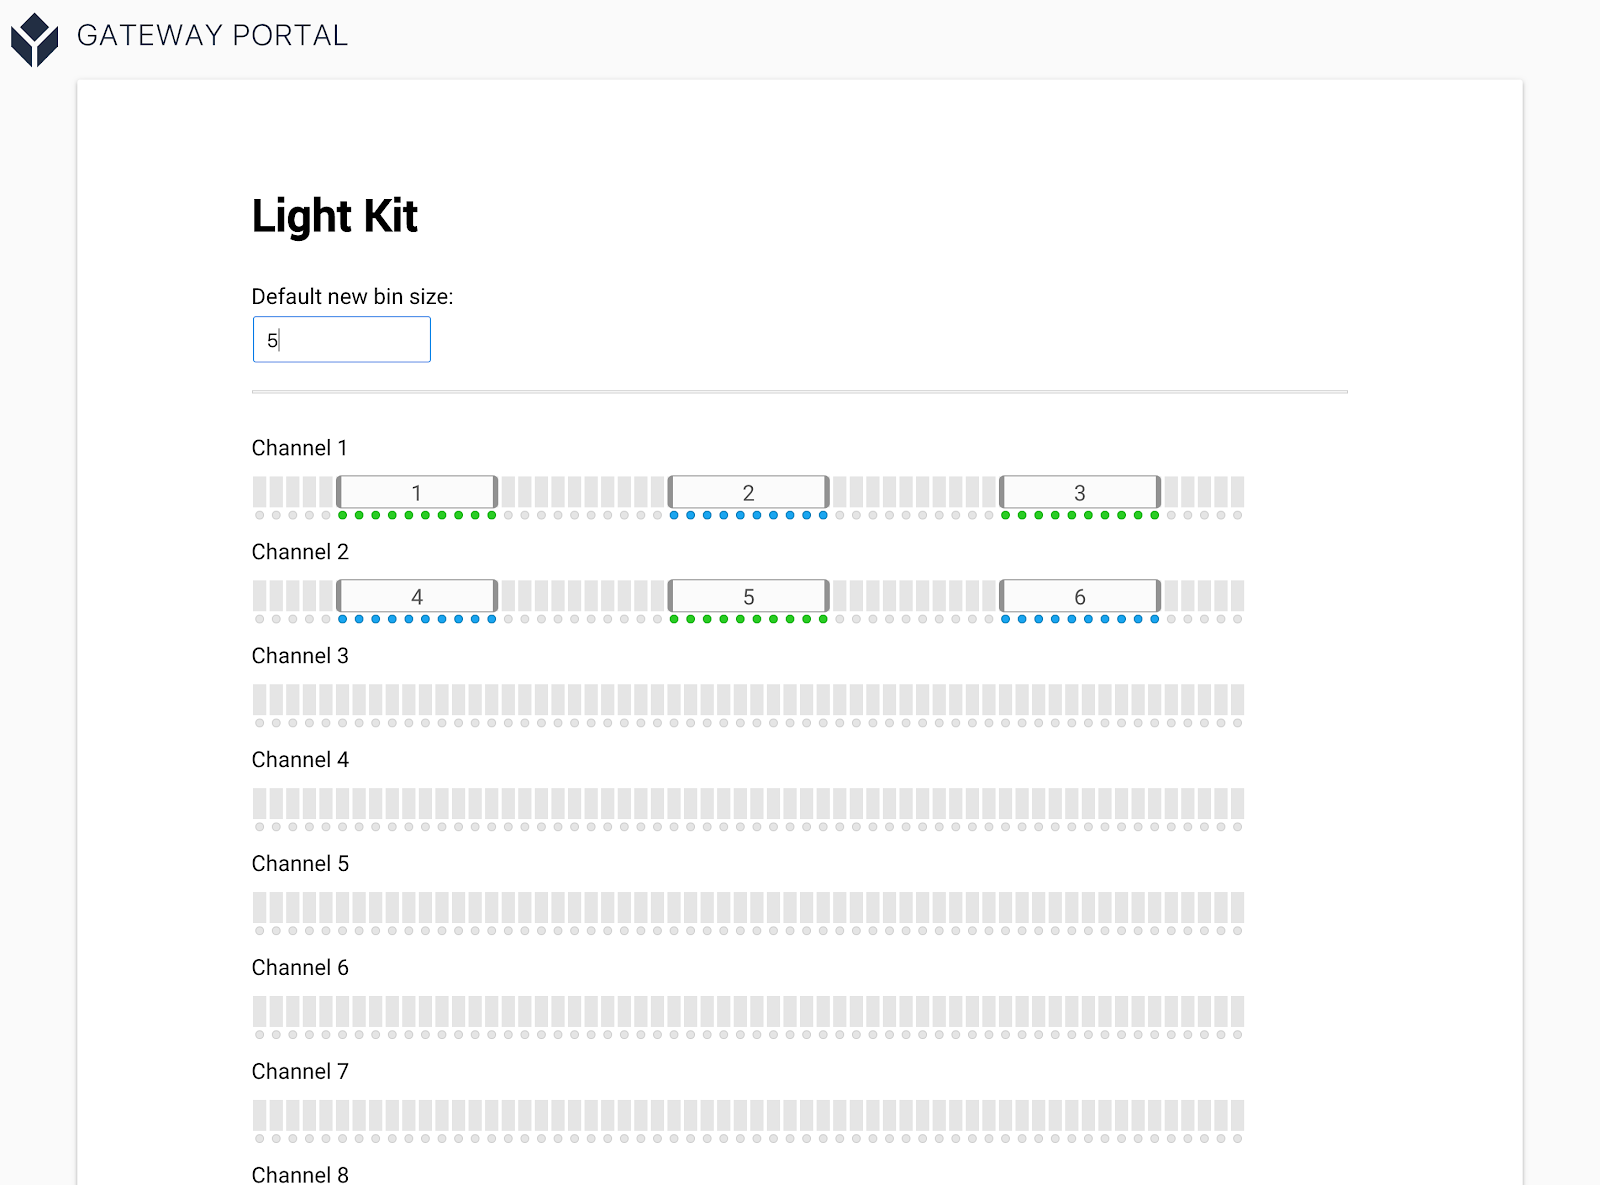
2- Click “Configure Light Kit” .
3- Configure each LED strip attached to an output channel on your Light Kit using the interactive interface, below.
You can add multiple digital “bins” to each strip and drag their size to match the size and location of the physical bins used with the Light Kit. It is recommended that you mount the light strip to your bins before configuration.
Note: the number associated with each bin is the bin number and it is how you will reference them later in triggers when building applications.
When the light kit is configured, close the Gateway portal, reconnect to your local Wi-Fi network, and relaunch Tulip.
Now you’re ready to mount the light strips to a workspace to help guide operators through their workflow. The next step of the Factory Kit Quick Start guide is to set up your break beam sensor. This article will show you how: “Setting up the Break Beam Sensor”.