
Learn how to create and configure a machine from the Machines page.
Setting up a Machine allows you to establish a connection between Tulip and a physical device that you have on your shop floor. At Tulip, machines are high-speed output systems (mills and lathes) that can also be network-based (with Node RED connectivity). The Machines page covers creating a machine, as well as getting information about your Machines, their connection status, their activity, and more.
Before setting up a machine, it’s important to familiarize yourself with the Basics of Machine Monitoring.
Machines Page Overview
To find the Machines page, click the Shop Floor tab and select Machines.
The Machines page is initially blank if you haven’t created any machines before. Below, you’ll see an annotated version of the page that includes a few machines already configured so you can see how this page functions.
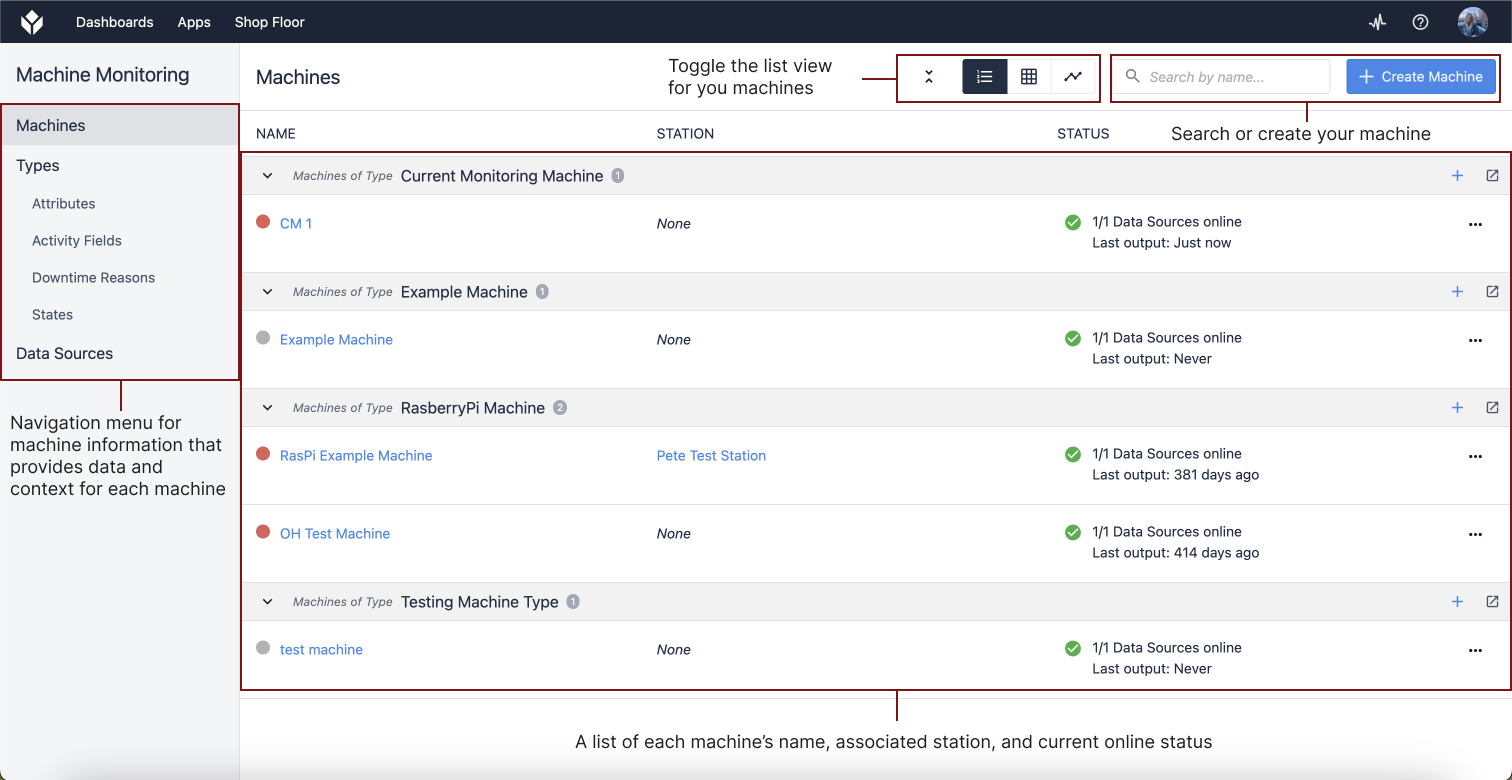
The left navigation menu provides information about machine types, including attributes, activity fields, downtime reasons, and machine states, as well as the data sources of the machines. Knowing where to find information about your machines is important in utilizing the full operations that Tulip offers.
Setting Up a Machine
Create a Machine Type
To create a new machine, you first need to create a Machine Type.
Machine types set parameters, including assigned attributes and triggers to each machine. When you assign a new machine to a machine type, it automatically designates those parameters to each machine. This reduces the amount of redundant configuration if you have more than one of the same machine type on your shop floor. For example, multiple CNC Mill machines might share the same CNC Mill type because their attributes are the same, even if their models aren’t identical.
To create your first Machine Type, click Types in the left navigation bar on the Machines page.
Click + Create Machine Type, name your machine type, and click Create.
Once you create a Machine Type, assign attributes and triggers.
Machine Attributes set values for your machine. You can choose from a list of attributes or create your own.
Machine Triggers set Triggers to fire when a particular event occurs.
Once you’ve created and configured your Machine Type, go ahead and create a Machine.
Create a Machine
From the Machines page, navigate to Machines from the left navigation menu. Click + Create Machine and a modal pops up.
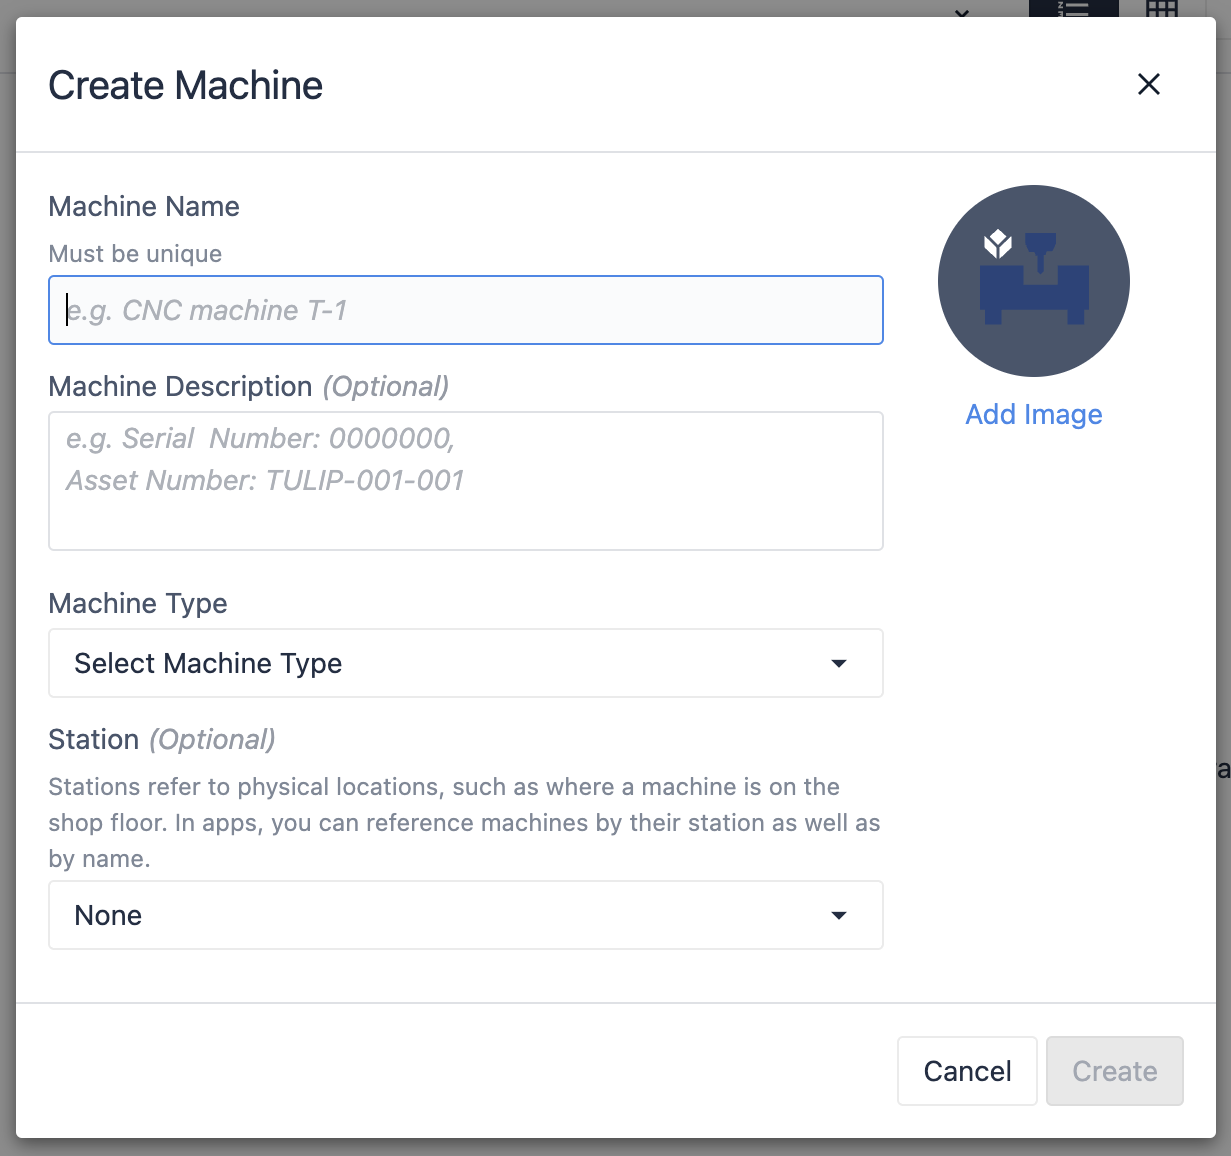
Let’s go over what each field should contain:
Machine Name - The unique name for your machine.
Machine Description - Use this field to enter additional reference information that may be helpful to your users, such as model number or the machine's location.
Machine Type - A designated type of machine, which is required to set up prior to creating a machine.
Station - Set a physical location to your machine on the shop floor. This is particularly useful if you plan to use your machine data in an application.
Once you fill in all the appropriate fields, click Create.
Now that your first machine is set up, you can begin using it in applications and gathering data.
Mapping to Data Sources
Machine data sources provide the credentials, address, and other data needed to connect to a third party data store such as OPC UA, MQTTA, APIs, or Edge Devices.
To map a machine attribute to a data source, select the attribute you want to map it to from the Configuration page. Select an available data source from the list on the right and select the link icon to bind it to the chosen attribute.
Multi-Datasource Machines
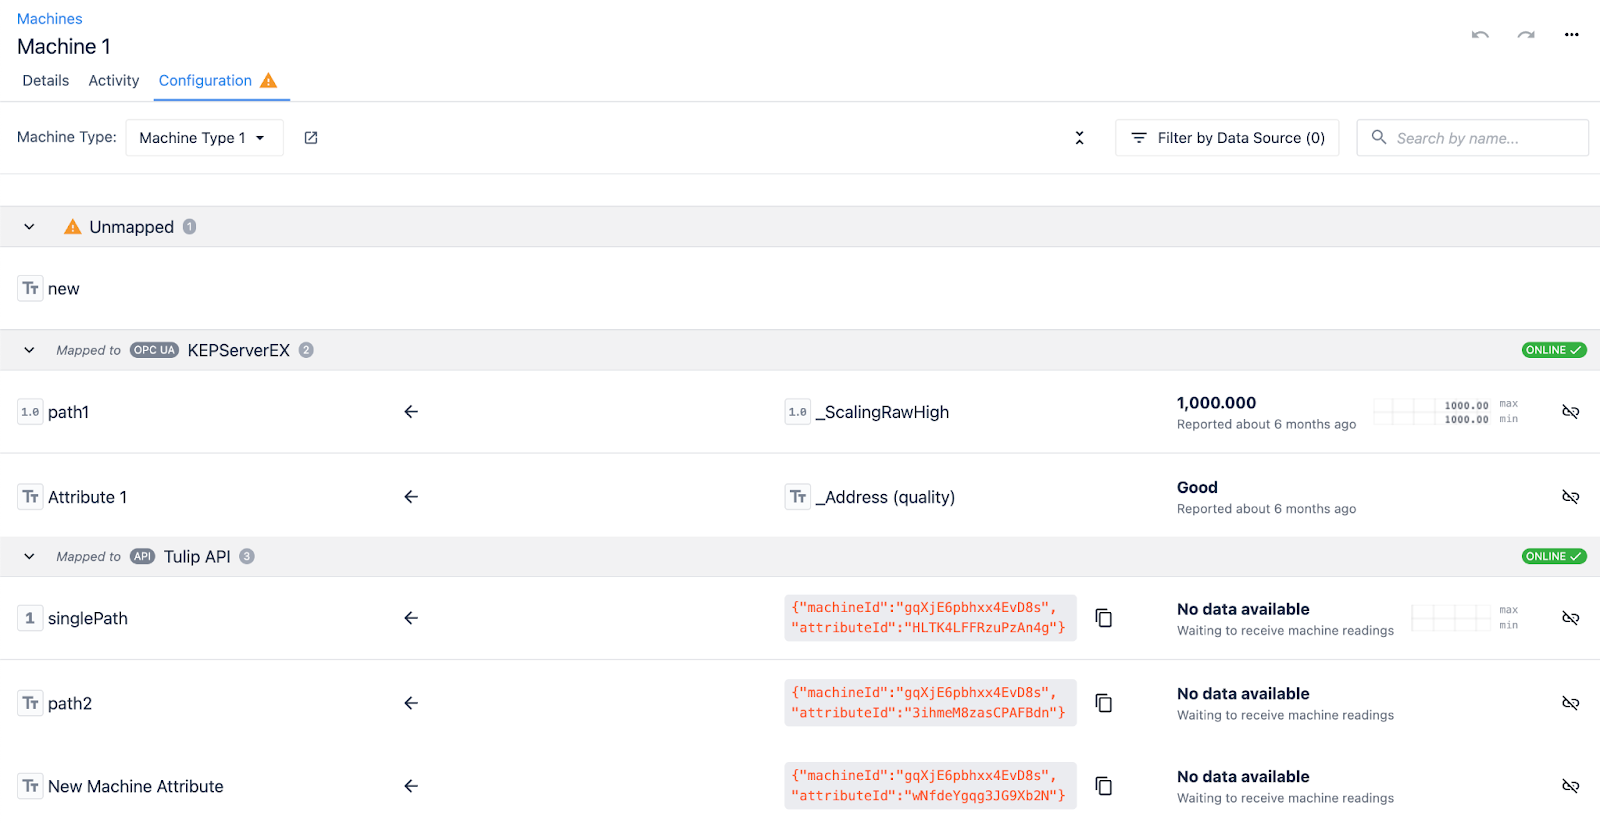
There may be a case where one machine in Tulip reads outputs from multiple data sources. Once multiple data sources are set-up and the attributes are added to the machine type, head over to the corresponding Machines page for that machine and switch to the Configuration tab.

Now, click on the unmapped attribute(s), which in this example is a Text attribute called “new”. A pane with available data sources opens on the right and displays the several data sources that have been configured and are available to map this attribute to.
Further Reading
- Recommendations for Machine Monitoring Architecture with Tulip
- How To Add a Machine Widget to an App
- How To Add Individual Machines And View Their History