
How to Set Up a Kolver Torque Controller
Learn how to connect and configure a Kolver Torque Controller in Tulip.
Note: The newer Kolver K-Ducer is supported by the Torque OP driver.
The Kolver Torque Controller is a hardware device which controls the torque/force used while securing a screw. The underlying assumption of this article is that the Kolver controller has been configured with the required programs and drivers. This configuration is done via the Kolver controller and not via Tulip.
The Kolver can interact with a Tulip I/O Gateway and not directly with the tablet/device being used to run the Tulip App.
Kolver Wiring
Equipment needed
- 8 Strand wire
- Ferrules
- Crimping tool
- Wire sripper
- Heat Shrink tubing
- Hot air gun
Prepare the Cable
- Measure length from the Kolver to the I/O Gateway, accounting for any cable management length.
- Cut cable and remove 3 inches of outer casing from each side.
- Cut 2 2" pieces of heat shrink tubing and slide them on to the main wire.
- Strip just enough wire off each end so that the bare wire is covered by the ferrule cap.
- Crimp Ferrules onto exposed wire ends.
- Place shrink tubing over main casing and individual wires and appy heat until it is snug.
Attach to Kolver side
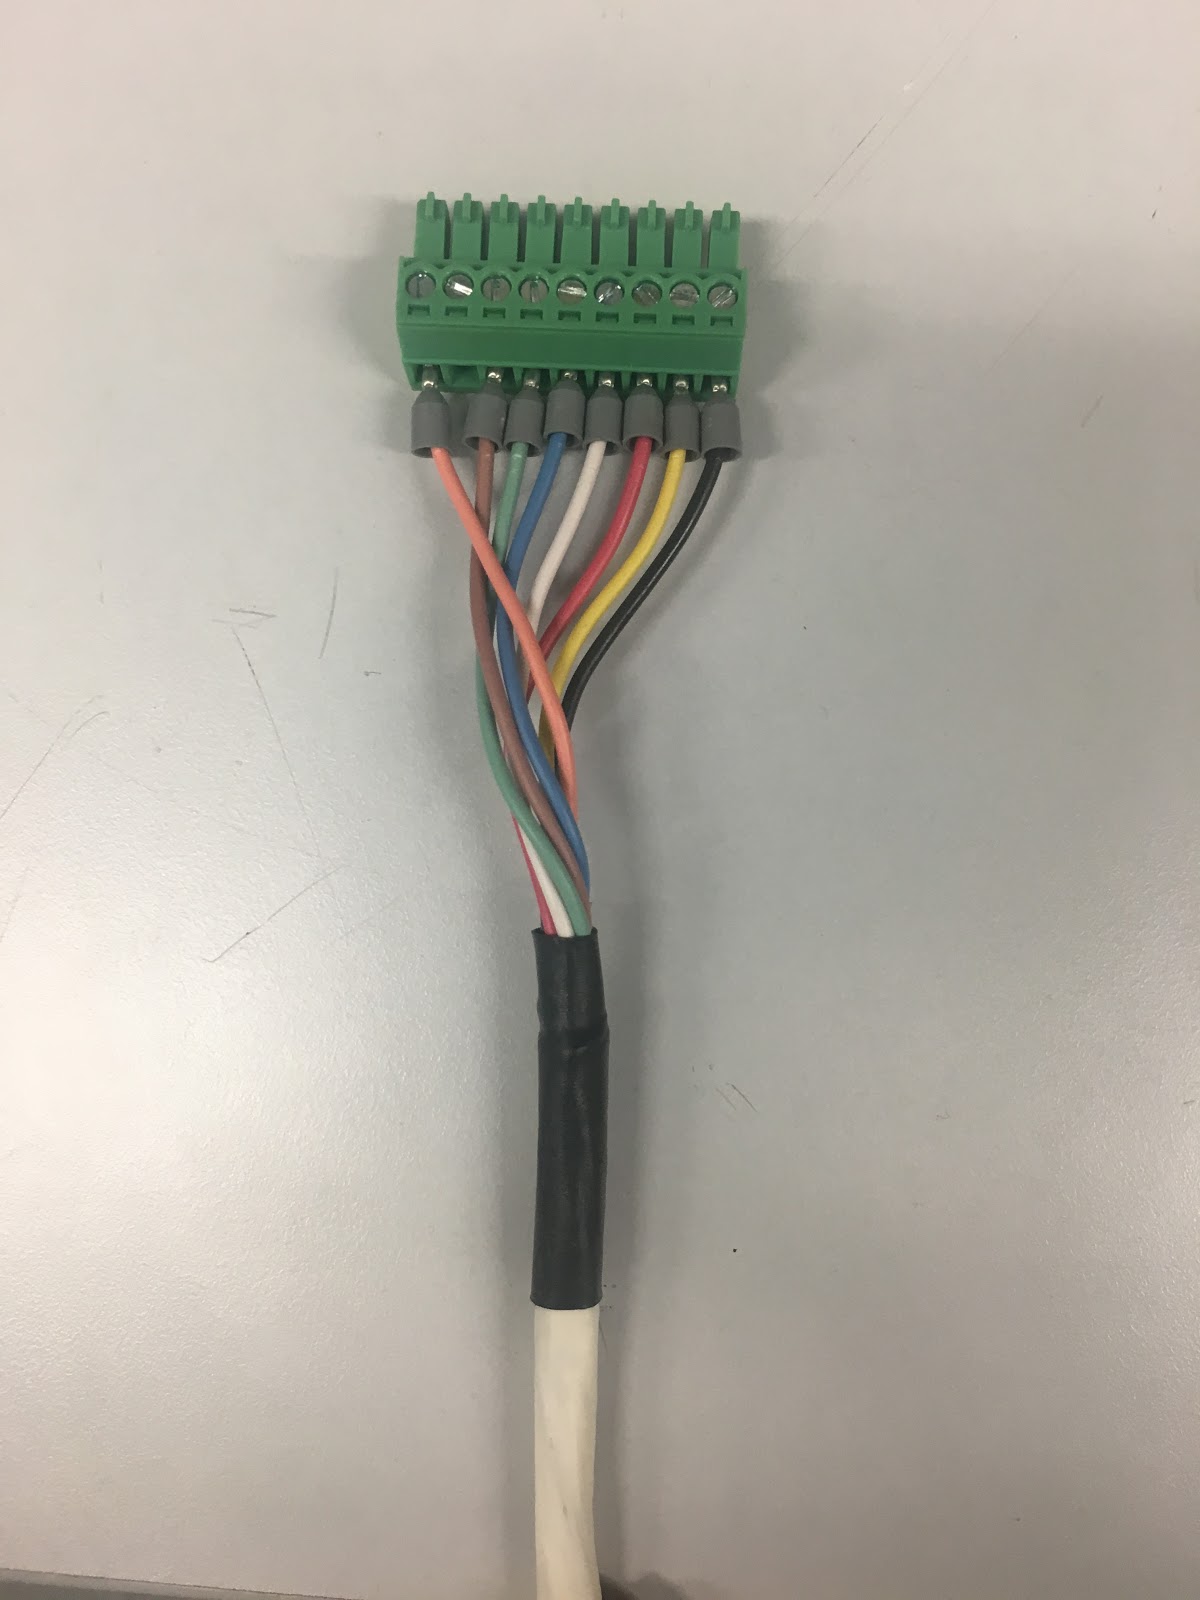
The Phoenix Contact connector wire configuration required at the Kolver is as follows:
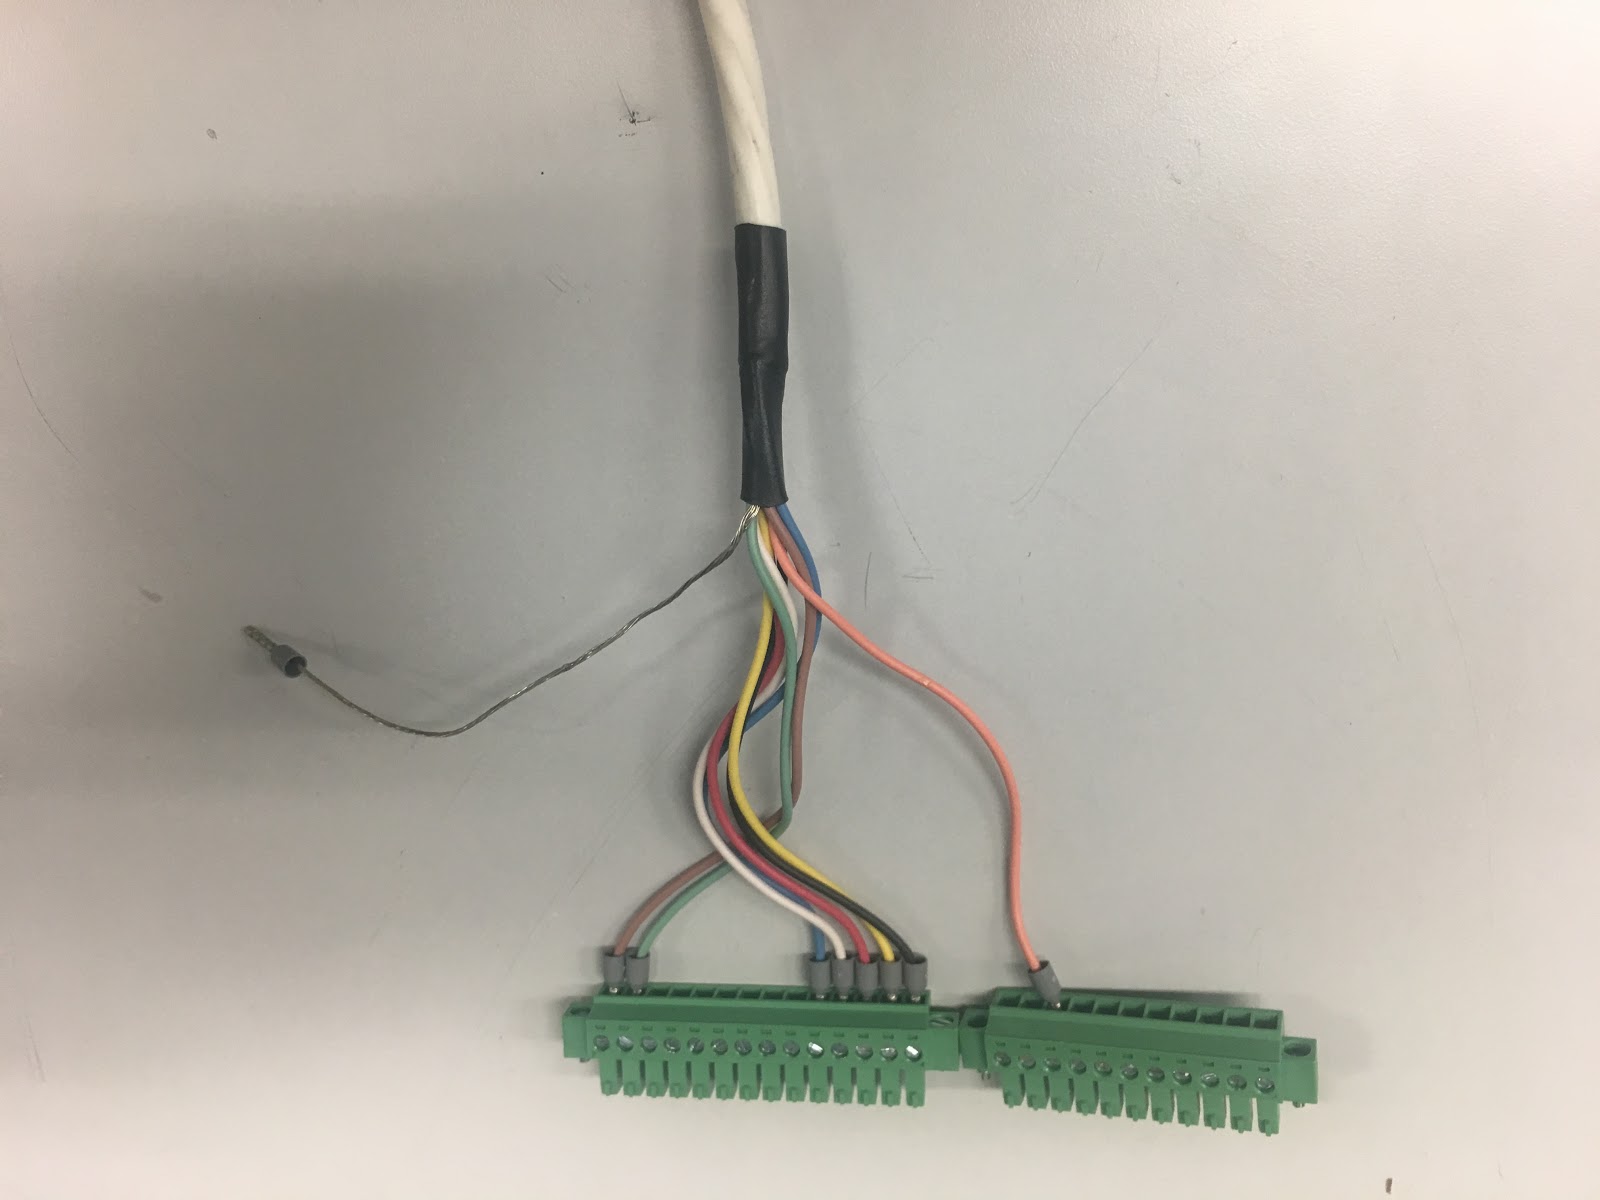
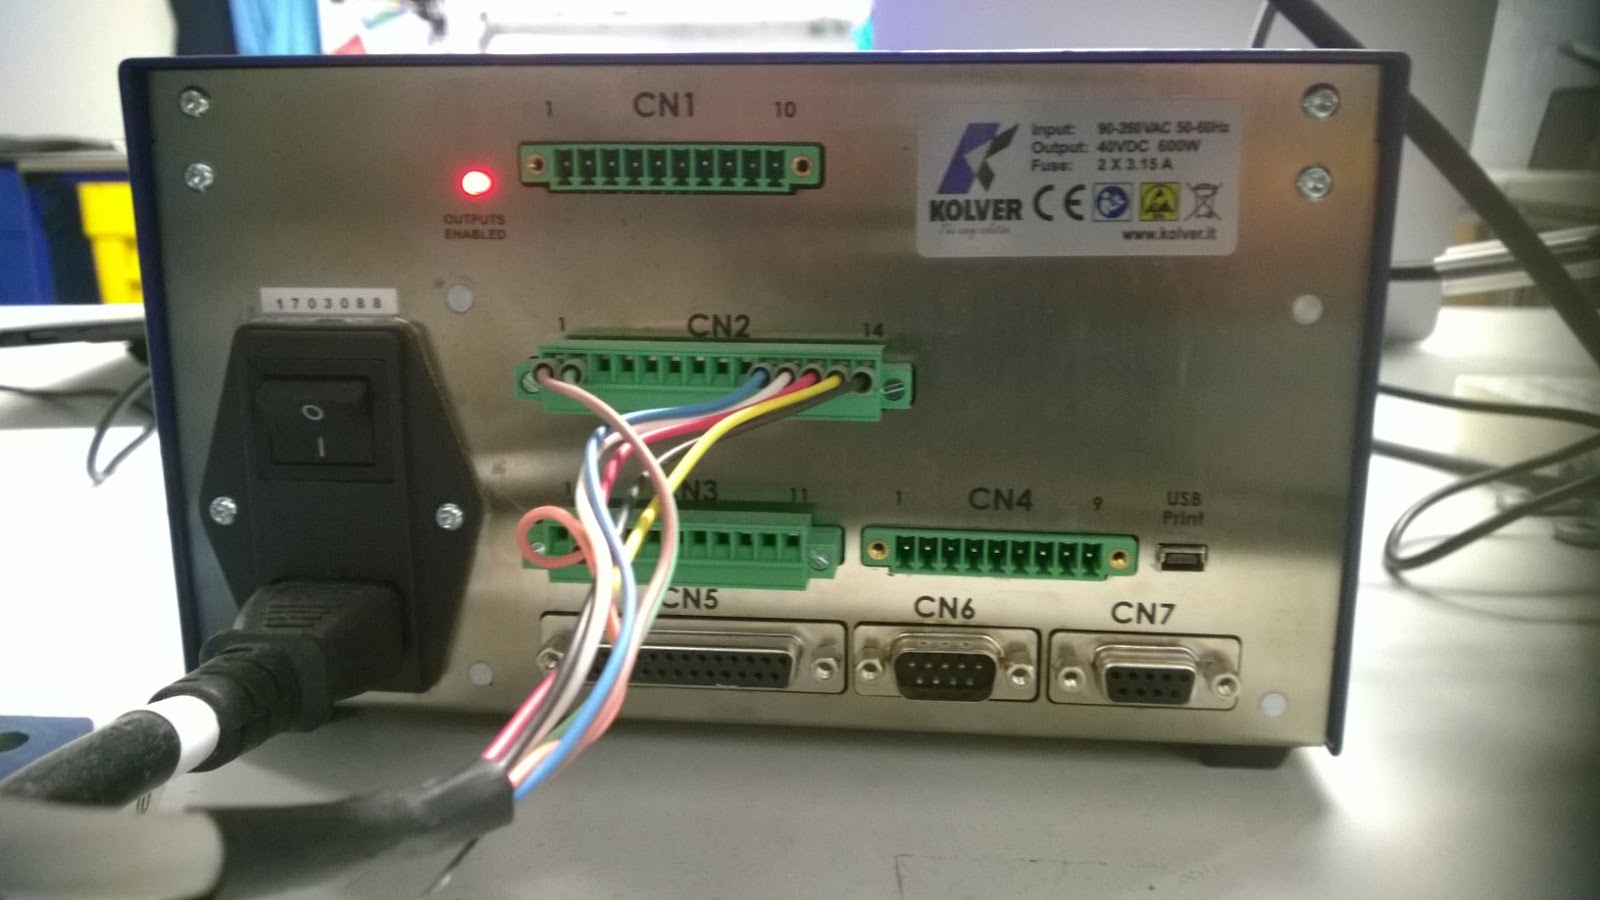
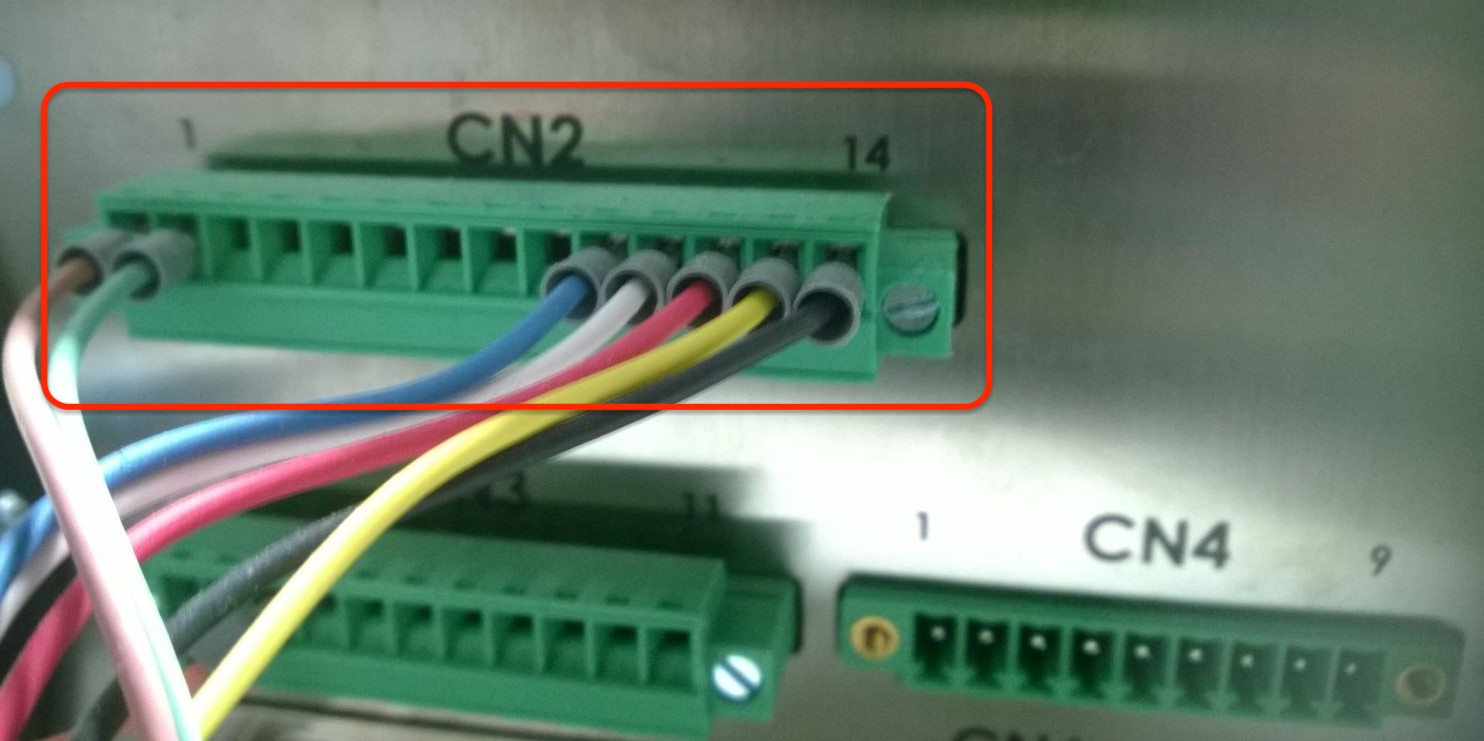
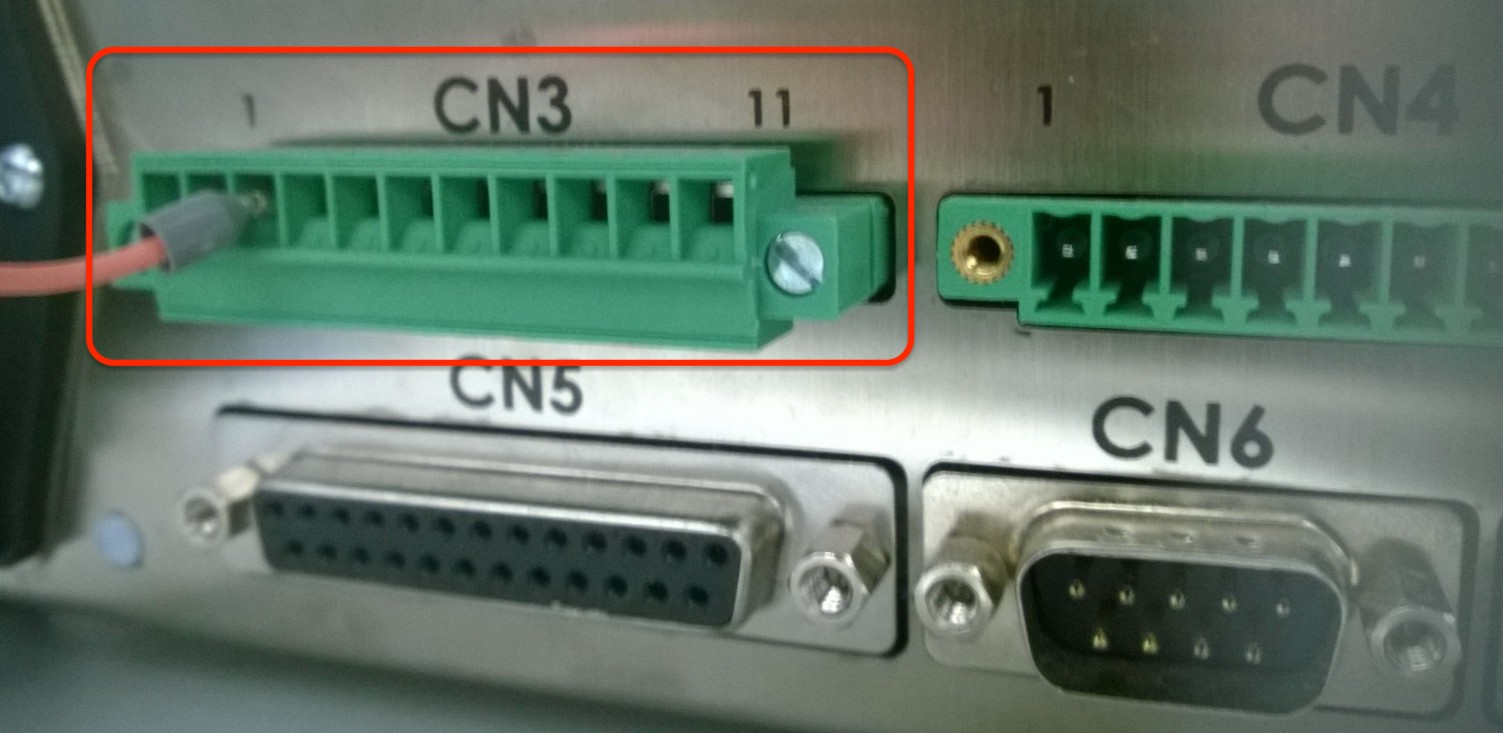
Plug in the Phoenix Contact connectors to the Kolver as depicted in the images below.
In accordance to the image above, the Left connector connects to bank - CN3 on the back of the Kolver-EDU-2AE-TOP-E and the connector on the right connects to the bank - CN2 bank on the back of the Kolver.
Attach to I/O Gateway Side
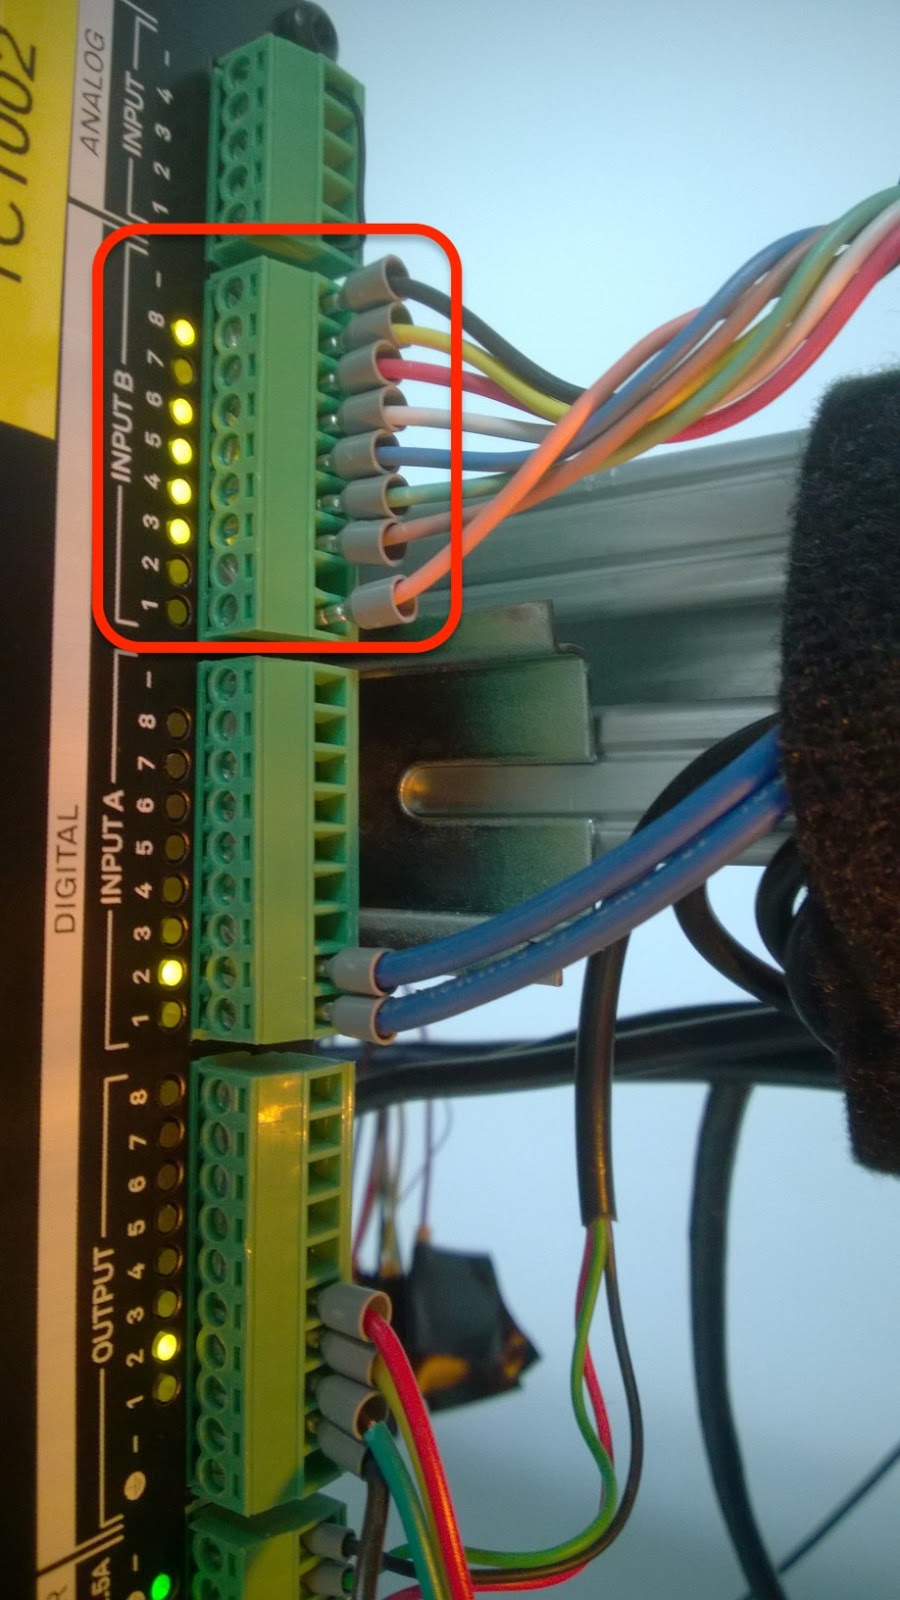
The Phoenix Contact connector wire configuration required at the Tulip I/O Gateway is as follows:
Plug in the Phoenix Contact connectors to the Tulip I/O Gateway at Digital Input bank A (or B) as depicted in the image below:
Once you have completed the necessary hardware connections, check the Sequence settings on Kolver. In order to do this, use the settings option on the Kolver-EDU-2AE-TOP-E:
- Go to Main Menu → Sequence setting on Kolver screen
- Navigate to Ext box and ensure that it is on
- If Ext box is off, use the arrows to change the settings and hit OK
To set Programs on the Kolver, see the manual here
To use the Kolver in Tulip, see article: Using the Kolver