To send messages from Tulip (e.g. from in-App Triggers or Automations), a Connector can be used. This is most easily done with the Connector Host installed on all Tulip Edge Devices.
With Tulip Edge Devices
The following flow will be used to send a message from a Tulip Trigger to Node-RED running on a Tulip Edge Device:
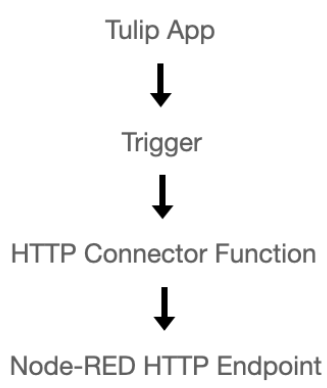
Once complete, use the newly-created Connector in any Tulip App or Automation to send messages to Node-RED, such as device commands or flow inputs.
In Tulip: Configuring your Connector and Connector Host
Note: If you're not familiar with Connector Hosts and Connector Function in Tulip, check out this article.
- Create a new Connector from the Connectors page in your Tulip Instance.
- In the modal that appears, fill in the information as specified below:
Name: Choose a name for your Connector
Description: Choose a description for your Connector Host
Connector Type: Select HTTP
- Click "Save".
- To specify the Connector Host's details, click on the production & testing & development button on the left. In the modal that appears, enter the following information:
Running On: Select the target Edge Device's Connector Host
Note: If the Edge Device's Connector Host cannot be found, navigate to the Edge Device's portal and make sure "Connector Host" has been enabled.
Host: Enter localhost
Port: Enter 1880 (this is the port Node-RED is running on)
TLS: Enter No
There is no need to add headers or certs.
- Click Test, and verify your connection passes. Finally, click Save.
This Connector is now able to communicate with Node-RED on the target Edge Device.
In Node-RED: Configuring the HTTP IN Node
This section assumes familiarity with Node-RED. Learn more here.
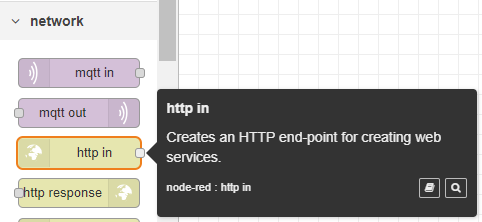
In order to receive the message from the on-device Connector Host, an HTTP IN node will be used.
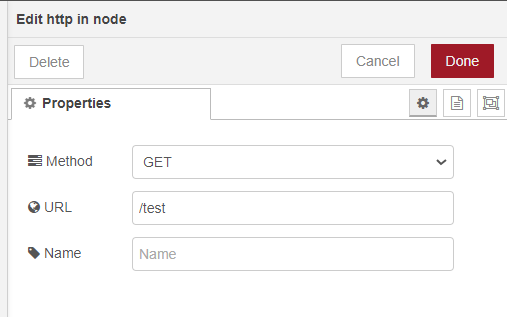
- Click and drag to add an HTTP IN node from the Palette on the left side of the Node-RED Editor to the flow:
Enter the following information:
Method: POST
URL: any user-defined path, such as /nodeRED or /myMachine/0013. It will be re-used in Node-RED, so it should be easy to recognize and remember.
The example below shows the URL configured as /test:
- Click "Done" to save changes.
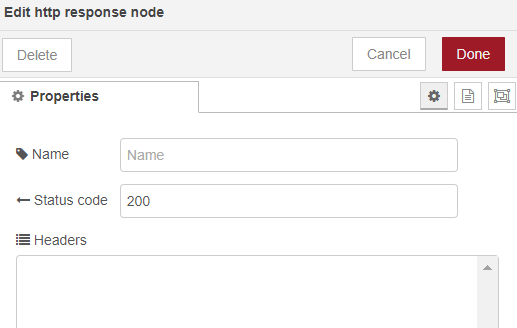
HTTP Requests will fail without a Response being returned to the server (in this case, Tulip).
- Drag in an HTTP Response node.
- Connect the HTTP Request node to the HTTP Response node.
- Double-click the HTTP Response node and enter 200 as the Status Code. Click Done.
 {height="" width="")
Modify the Status Code and/or use the +add button in the HTTP Response node to modify or add to the Connector's response. These data (most often, system or device outputs generated by the Flow) will appear in the Connector's Response. Configure Connector Outputs with the guide here.
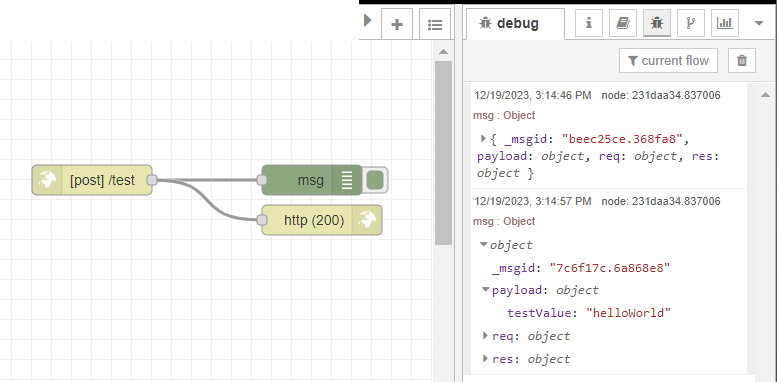
- Finally, drag in a Debug node from the Palette. Configure this node to output "Complete Message Object using the msg. drop-down:
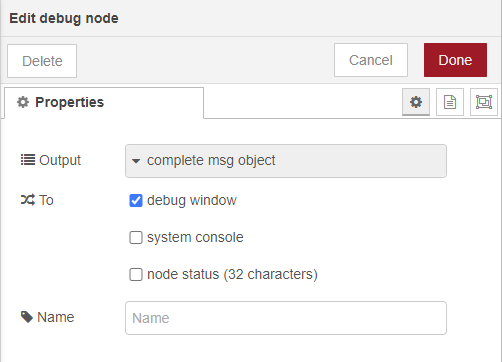
This Node-RED flow will now receive a message from Tulip and display it in the Node-RED Debug Log.
A completed flow may appear as shown below:
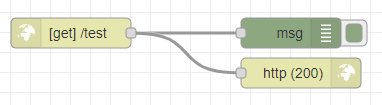
Click Deploy in the top-right to commit all changes.
In Tulip: Configuring and Testing the Connector Function
Once Node-RED Flow configuration is completed, return to the Connector in Tulip.
- Create a new Connector Function.
- Change the Connector Function from GET to POST.
- Enter the path configured in Node-RED (in this example,
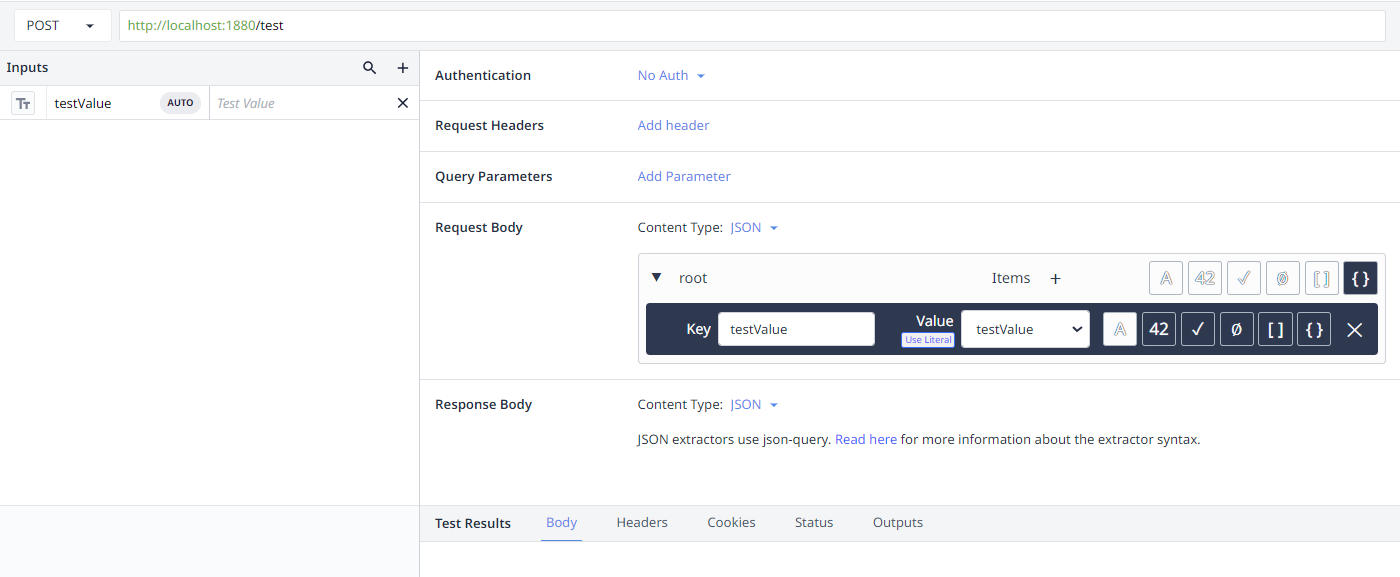
/test) in the URL. - (optional) to add content to the Connector (such as a message or command), add an Input to the connector.
- (optional) Add the Input to the Request Body by first changing the Content Type to JSON, and then adding an item to
root.
The screenshot below shows a Connector configured to the /test endpoint specified above and includes an input called testValue:
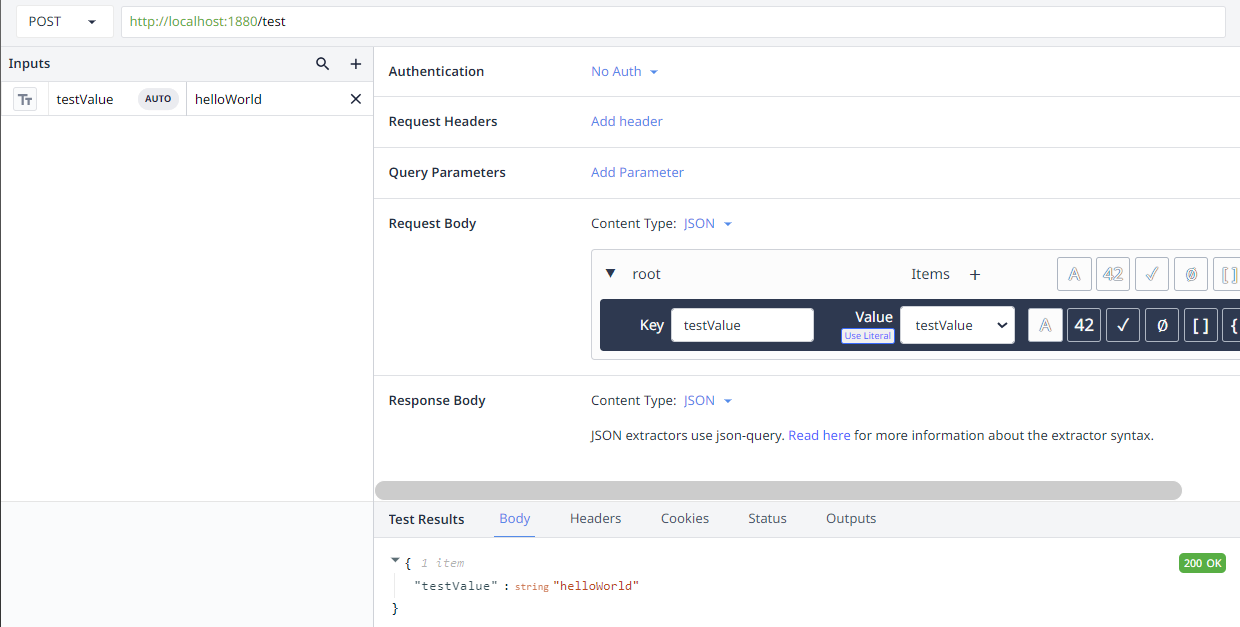
Click "Run" to test the Connector Function. Two indicators of success will occur:
- The Connector Function will receive a
200 OKresponse, containing (if applicable):- Any inputs configured to the Connector
- Any additional outputs configured in Node-RED's HTTP Response node
- The Debug Log in Node-RED will display the Connector message.
Note: Depending on the current version of Node-RED, the Connector Request body can be found at either:
a.msg.payload, or
b.msg.req.body
Both success states can be found below:
Connector Success:
Node-RED Success: