To download the app, visit: Library
Purpose
Quality Events (QEs) are an integral process of any good Quality Management System. They are used to identify anomalies or any departure from expected process or behavior. The objectives of tracking QEs are to provide a systematic way of investigating an event, to determine root cause, to evaluate the need for corrective and/or preventive action, and possibly to help inform product disposition decisions.
This application provides a digital way to manage these process steps consistently so that you can spend your time focusing on the investigation. With all your data in digital format you can easily view historical and current records in order to evaluate and manage the effectiveness of your quality event process and focus on continuous improvement.
***NOTE**** This application contains documentation to help you get up and running more quickly. Contact support@tulip.co for an Operational Flow Diagram, a Risk Assessment, and a Test Plan for a seamless GxP deployment, or you can download them (OFD, RA, Test script).
If you want to learn more about our digital validation approach, here is Tulip's university course that focuses on quality and validation. It outlines topics in Industry and Pharma 4.0, along with Tulip’s approach to quality. This includes features supporting GxP, release cycles, Tulip Docs, Tulip’s SDLC, and governance.
Overview
This application is powered by the Quality Events Table. Every time a new Quality Event or CAPA event is submitted, it is entered into the table. The following metadata stored with each event at the conclusion of the entire workflow includes:
- Description
- Location
- Created By
- Created Date
- Actions Taken
- Investigation Summary
- Owner
- Due Date
- Reference Records (if applicable)
The application has a pre-defined workflow that guides an event through pre-configured screens in order to move the event through the following states:
- SUBMITTED
- IN REVIEW
- UNDER INVESTIGATION
- CLOSED
Setup
There are a few customizations that are required before you can run this application
At each state change there is also a new Owner assigned to the ticket. In order to configure and make this application your own you must update the logic to have it route to the appropriate Owner for your organization. In the App Editor make the following updates:
- On 'Report Quality Event' step click on 'Report Event' button
- Click the pencil icon next to the 'Create Event Record & Navigate' trigger
- Update the action to assign to the Quality Manager in your organization
- On 'Edit Quality Event' step click on the 'Submit' button
- Click the pencil icon next to the 'Update Event Record & Navigate' trigger
- Update the action to assign to the Quality Manager in your organization
- On 'Update Quality Event' step click on the 'Submit' button
- Click the pencil icon next to the 'Update Event' trigger
- Update the action to assign to the Quality Manager in your organization
***NOTE****: You also want to make sure that each Owner has properly set up their profile so they will receive e-mail and SMS notifications.
Modifications/Optional Suggestions
Update/Change Status'
If the status' we provided don't work for your organization, you can easily change them by modifying the triggers at each state change. Use this chart to locate the different state changes:
| State Change (to) | Step Name | Button Name |
| SUBMITTED | Report Quality Event | Report Event |
| NEEDS MORE INFORMATION, UNDER INVESTIGATION, OR CANCEL | Assign Status | Save |
| IN REVIEW | Update Quality Event | Save |
| CLOSED | Additional Info - Accept | Save |
| UNDER INVESTIGATION | Additional Info - Reject | Save |
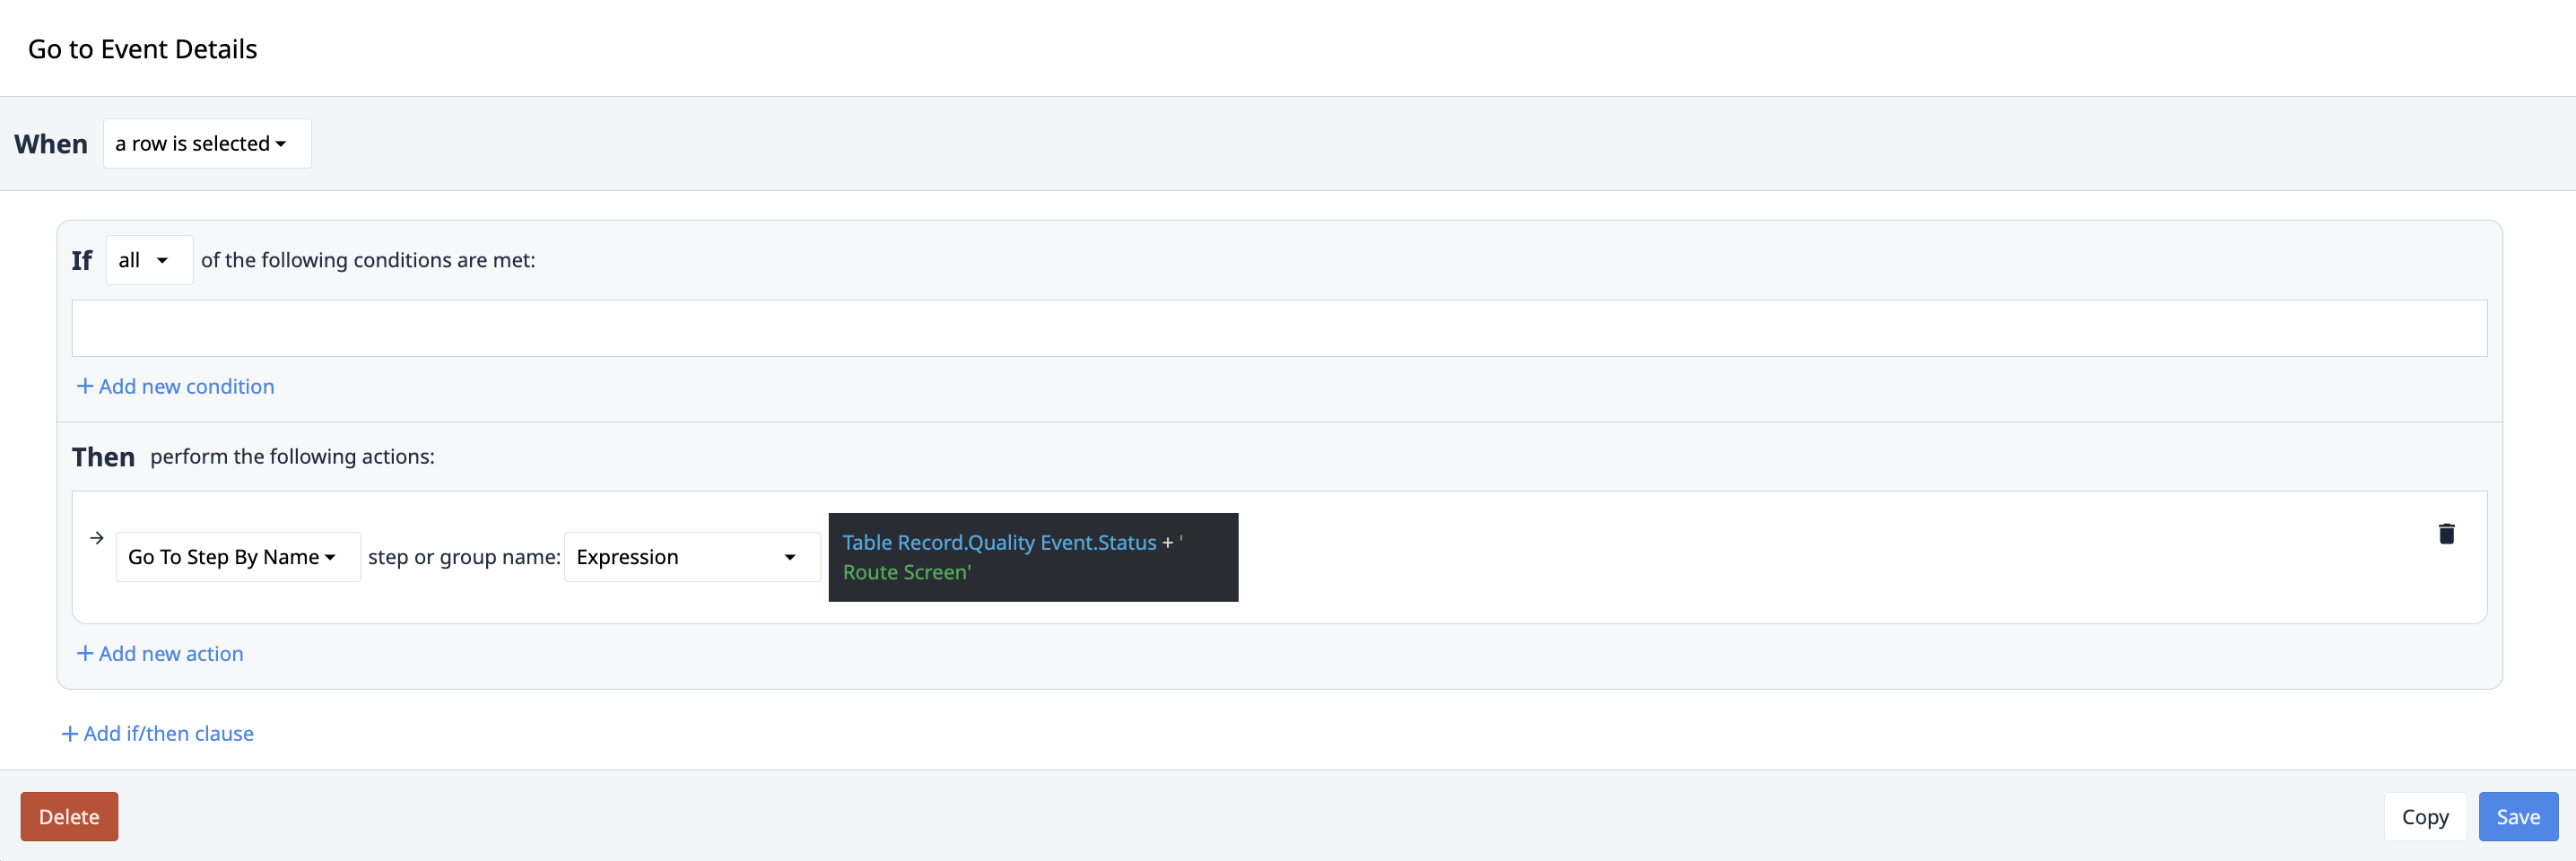
Once you have changed the existing status' you will want to update each of the steps in the Step Group labeled 'Routing based on Status'. You will notice on the Home step there is a trigger on the embedded table that looks like this

Therefore, if you are adding a new status you must copy one of the route screens and name it in accordance with the trigger above. Ex - new status is Cancelled then you must make a step titled Cancelled Route Screen.
Link to an external system
If you are eager to learn more about how to connect your already used issue tracking system to ours, you can leverage the connector functionality to set it up.
