To download the app, visit: Library
Purpose
This application is designed to create 5 WHY reports or find answers to questions within the already saved reports using AI functions.
Setup
Installing the app also installs the connector in your instance, called Get Records. You need to configure this connector to use it effectively. If the Get Records connector is offline, follow the process outlined in step one. If the connector is already set up, you only need to update the authentication of the connector function, as detailed in step two.
Step one, adding an API
Navigate to the Settings page of your Tulip Account.

Select API tokens from the menu and click on Create API token.

Provide a name for the API Token and define the scopes it will be allowed to perform. For example, in this instance, the API Token is configured to read from Tulip Tables.
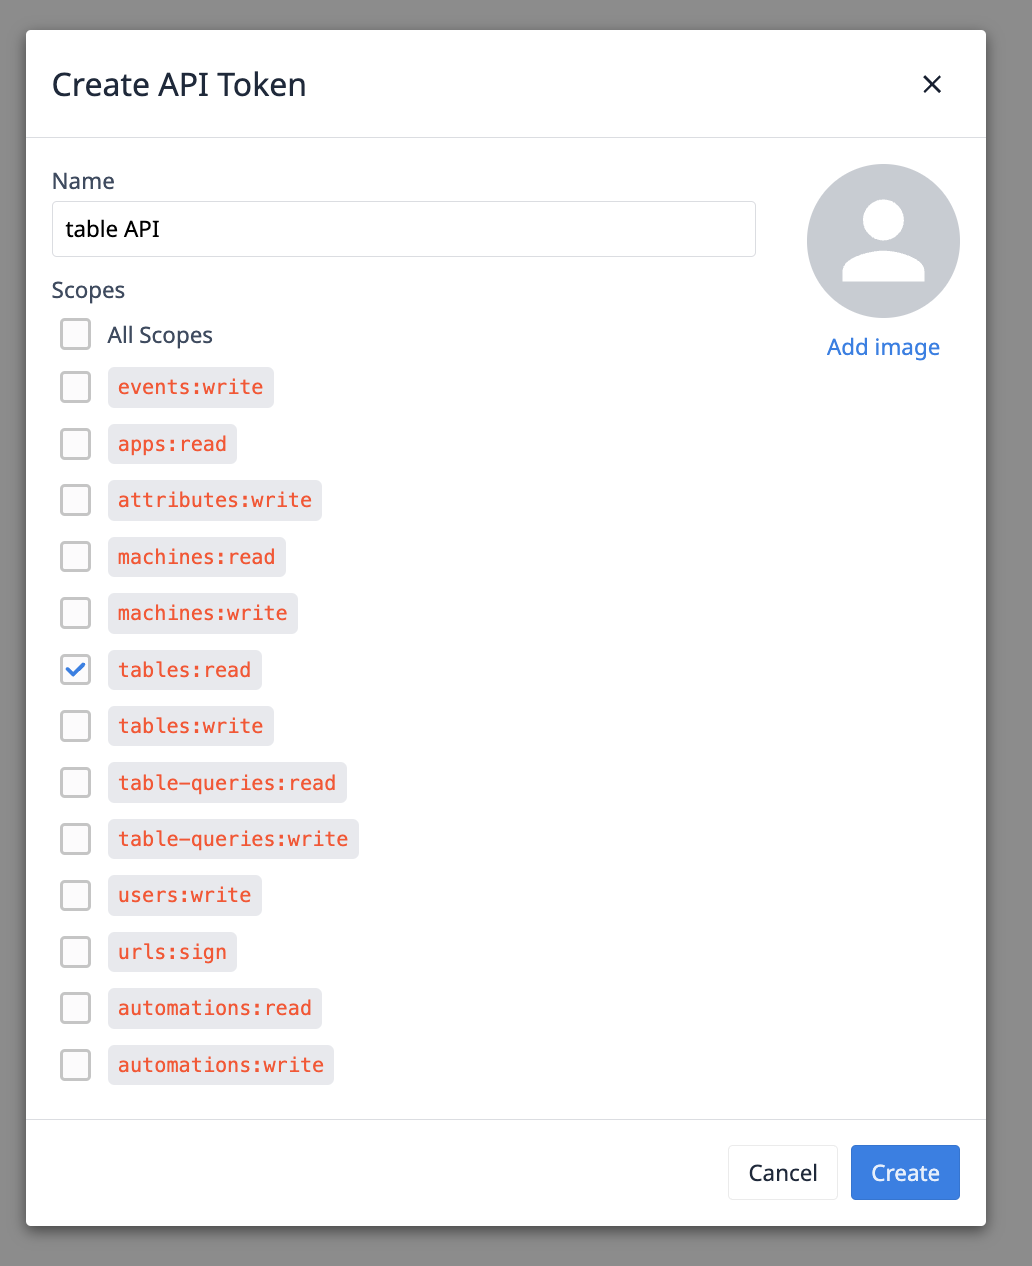
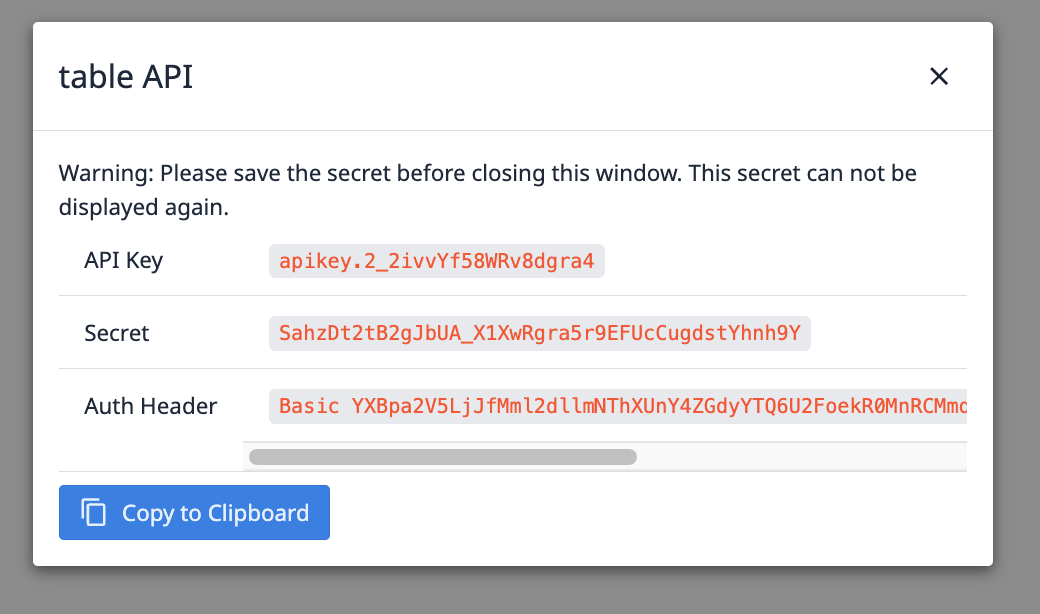
After clicking Create, the API information will be provided. Ensure to save this information as it cannot be accessed again.
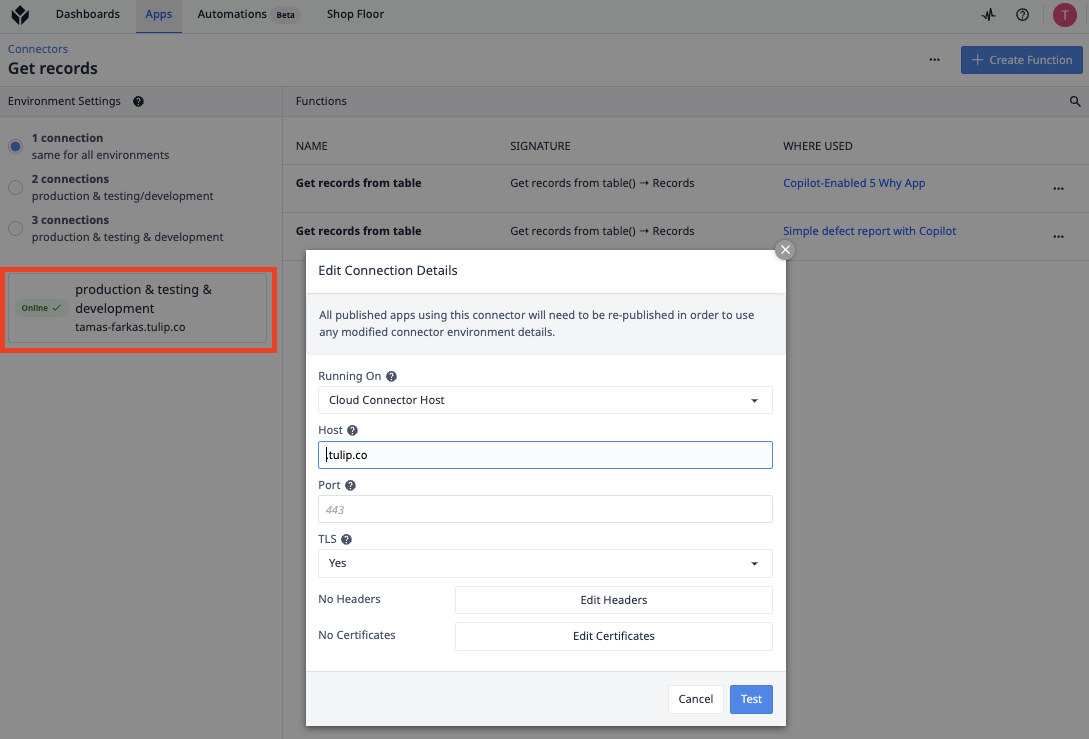
Next, navigate to the connectors and set up the connector named Get Records.

Clicking on the connector's name takes you to the connector settings.
On this page, click the button marked with a red border to configure the connector details.
Select the Cloud Connector host on the Running On field and update the host field with your instance URL. If everything is set correctly, click on the test button. If there are no errors, you can save the settings.
Step two, updating the authentication.
In this step, update the username and password for the connector function used in the Copilot - 5 Why Root Cause Analysis. Change the authentication method from 'no auth' to'basic auth, and then copy the API key from the API token, using it as the username and the Secret as the password. This ensures proper authentication for the connector, enhancing security and access control.
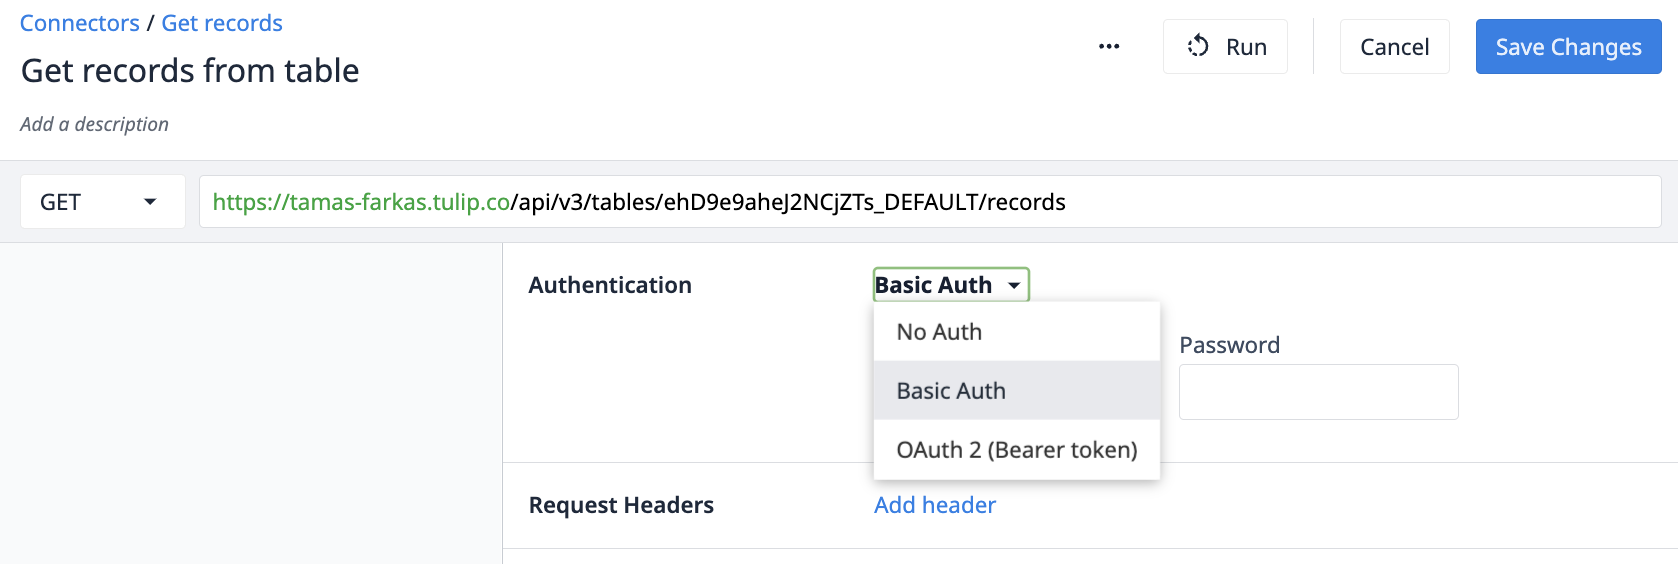
Save the changes, and now you are ready to use the Copilot - 5 Why Root Cause Analysis.
Tables Used
(Log) Deviation Events - This table is used to track defect or deviation events. Each entry in this table corresponds to a unique event related to a single material or the observation of a deviation. Each line in the table may represent multiple quantities associated with the event, providing a comprehensive overview of deviations and defects within the system.
App Structure
In the app, users have two options: they can either create a new 5-Why report or view already created ones.
To initiate a report, users should navigate to the step labeled Create New Report. The required fields for creating a report include the problem statement, root cause determination, and the corrective action, while the others are optional. Reports are successfully created only when all the required fields are filled out.
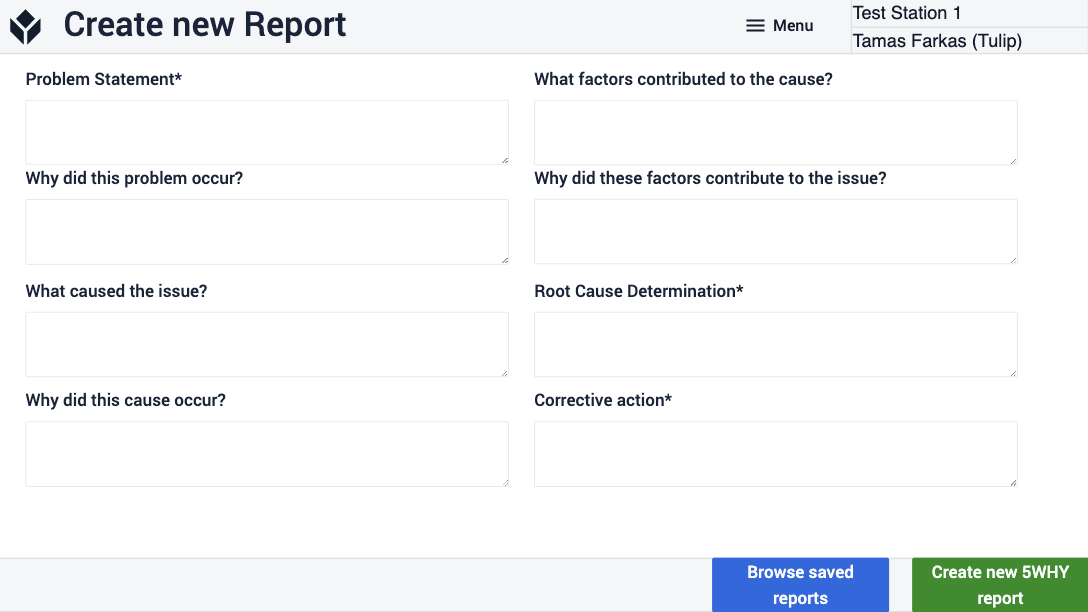
In the step called Browse Existing Reports, users can view all the previously created reports. By entering a search parameter and clicking on the Search for Specific Report button, users are directed to the next step where they can see results for their query. In both steps, users have the option to select a report and populate the Create New Report step with the selected report data. This feature aids users in creating a report without starting from scratch.
Further Reading
Check out these other documents to extend your knowledge about table API
.gif)