

Monitor your stations in real-time for visual changes and events with Vision's Change Detector.
You will need a depth camera, see here for Tulip recommendations.
In this article you will learn:
- How to setup a Change Detector
- Using the Change Detector in an app
- How to adjust the Settings of a Change Detector
Before reading this article, review Getting Started with Vision to get an understanding of Vision's functionalities and requirements and for instructions on how to setup your camera.
Change Detector Overview
Using the Change Detector, you can monitor pre-defined regions on your camera's stream for changes occurring in real-time. You can then use these changes or events, to build logic within your app.
Setting up the Change Detector
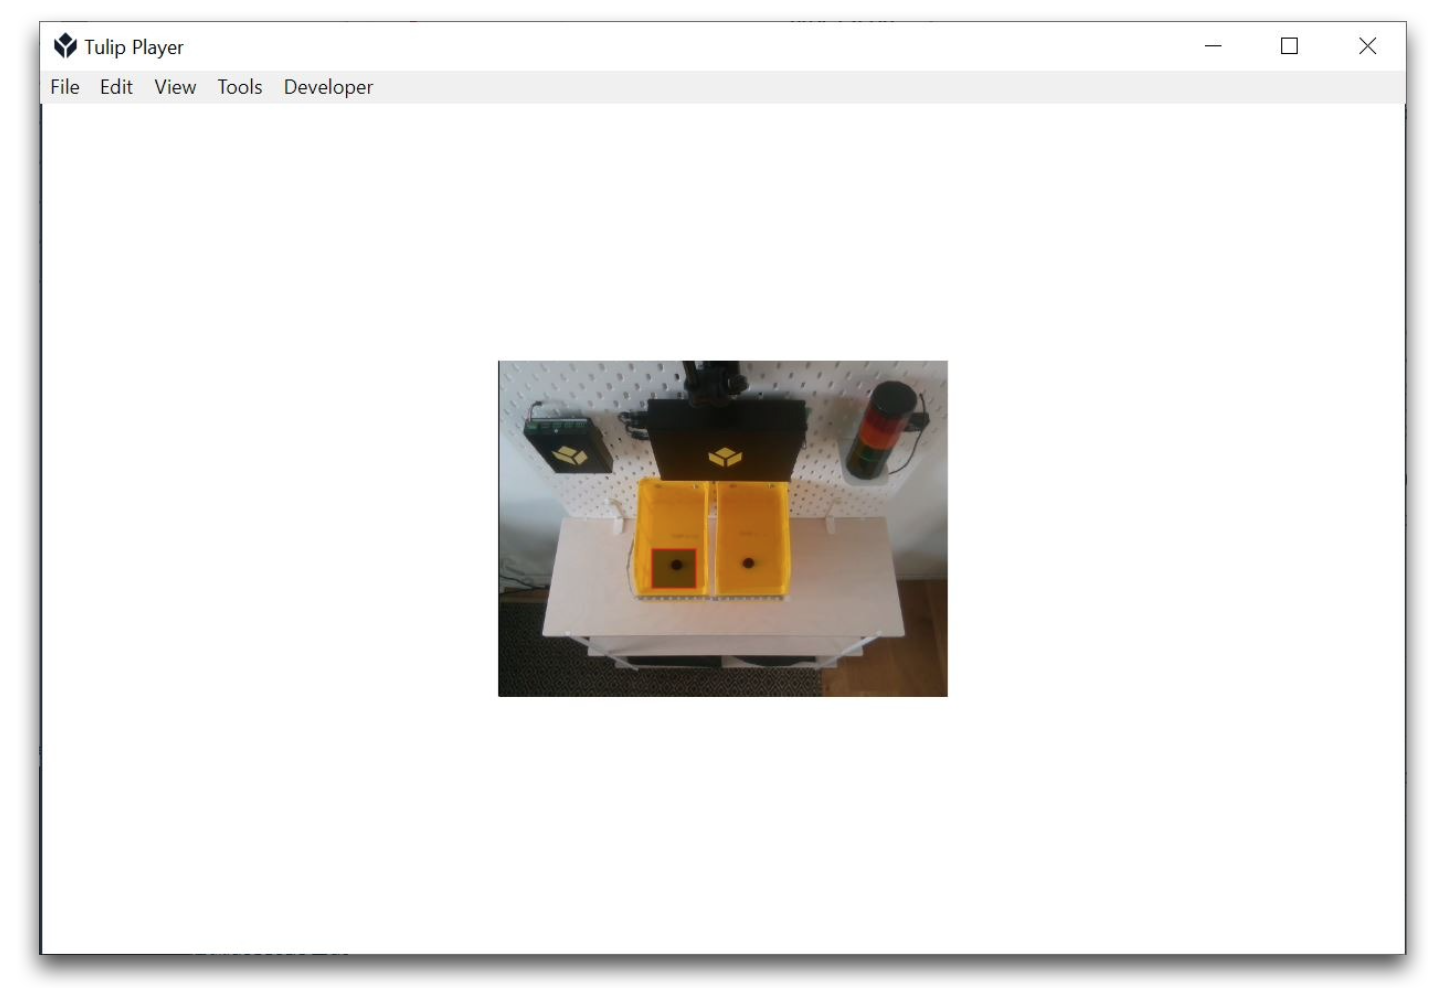
After completing your Camera Configuration setup, you should see the video stream of a station like this:
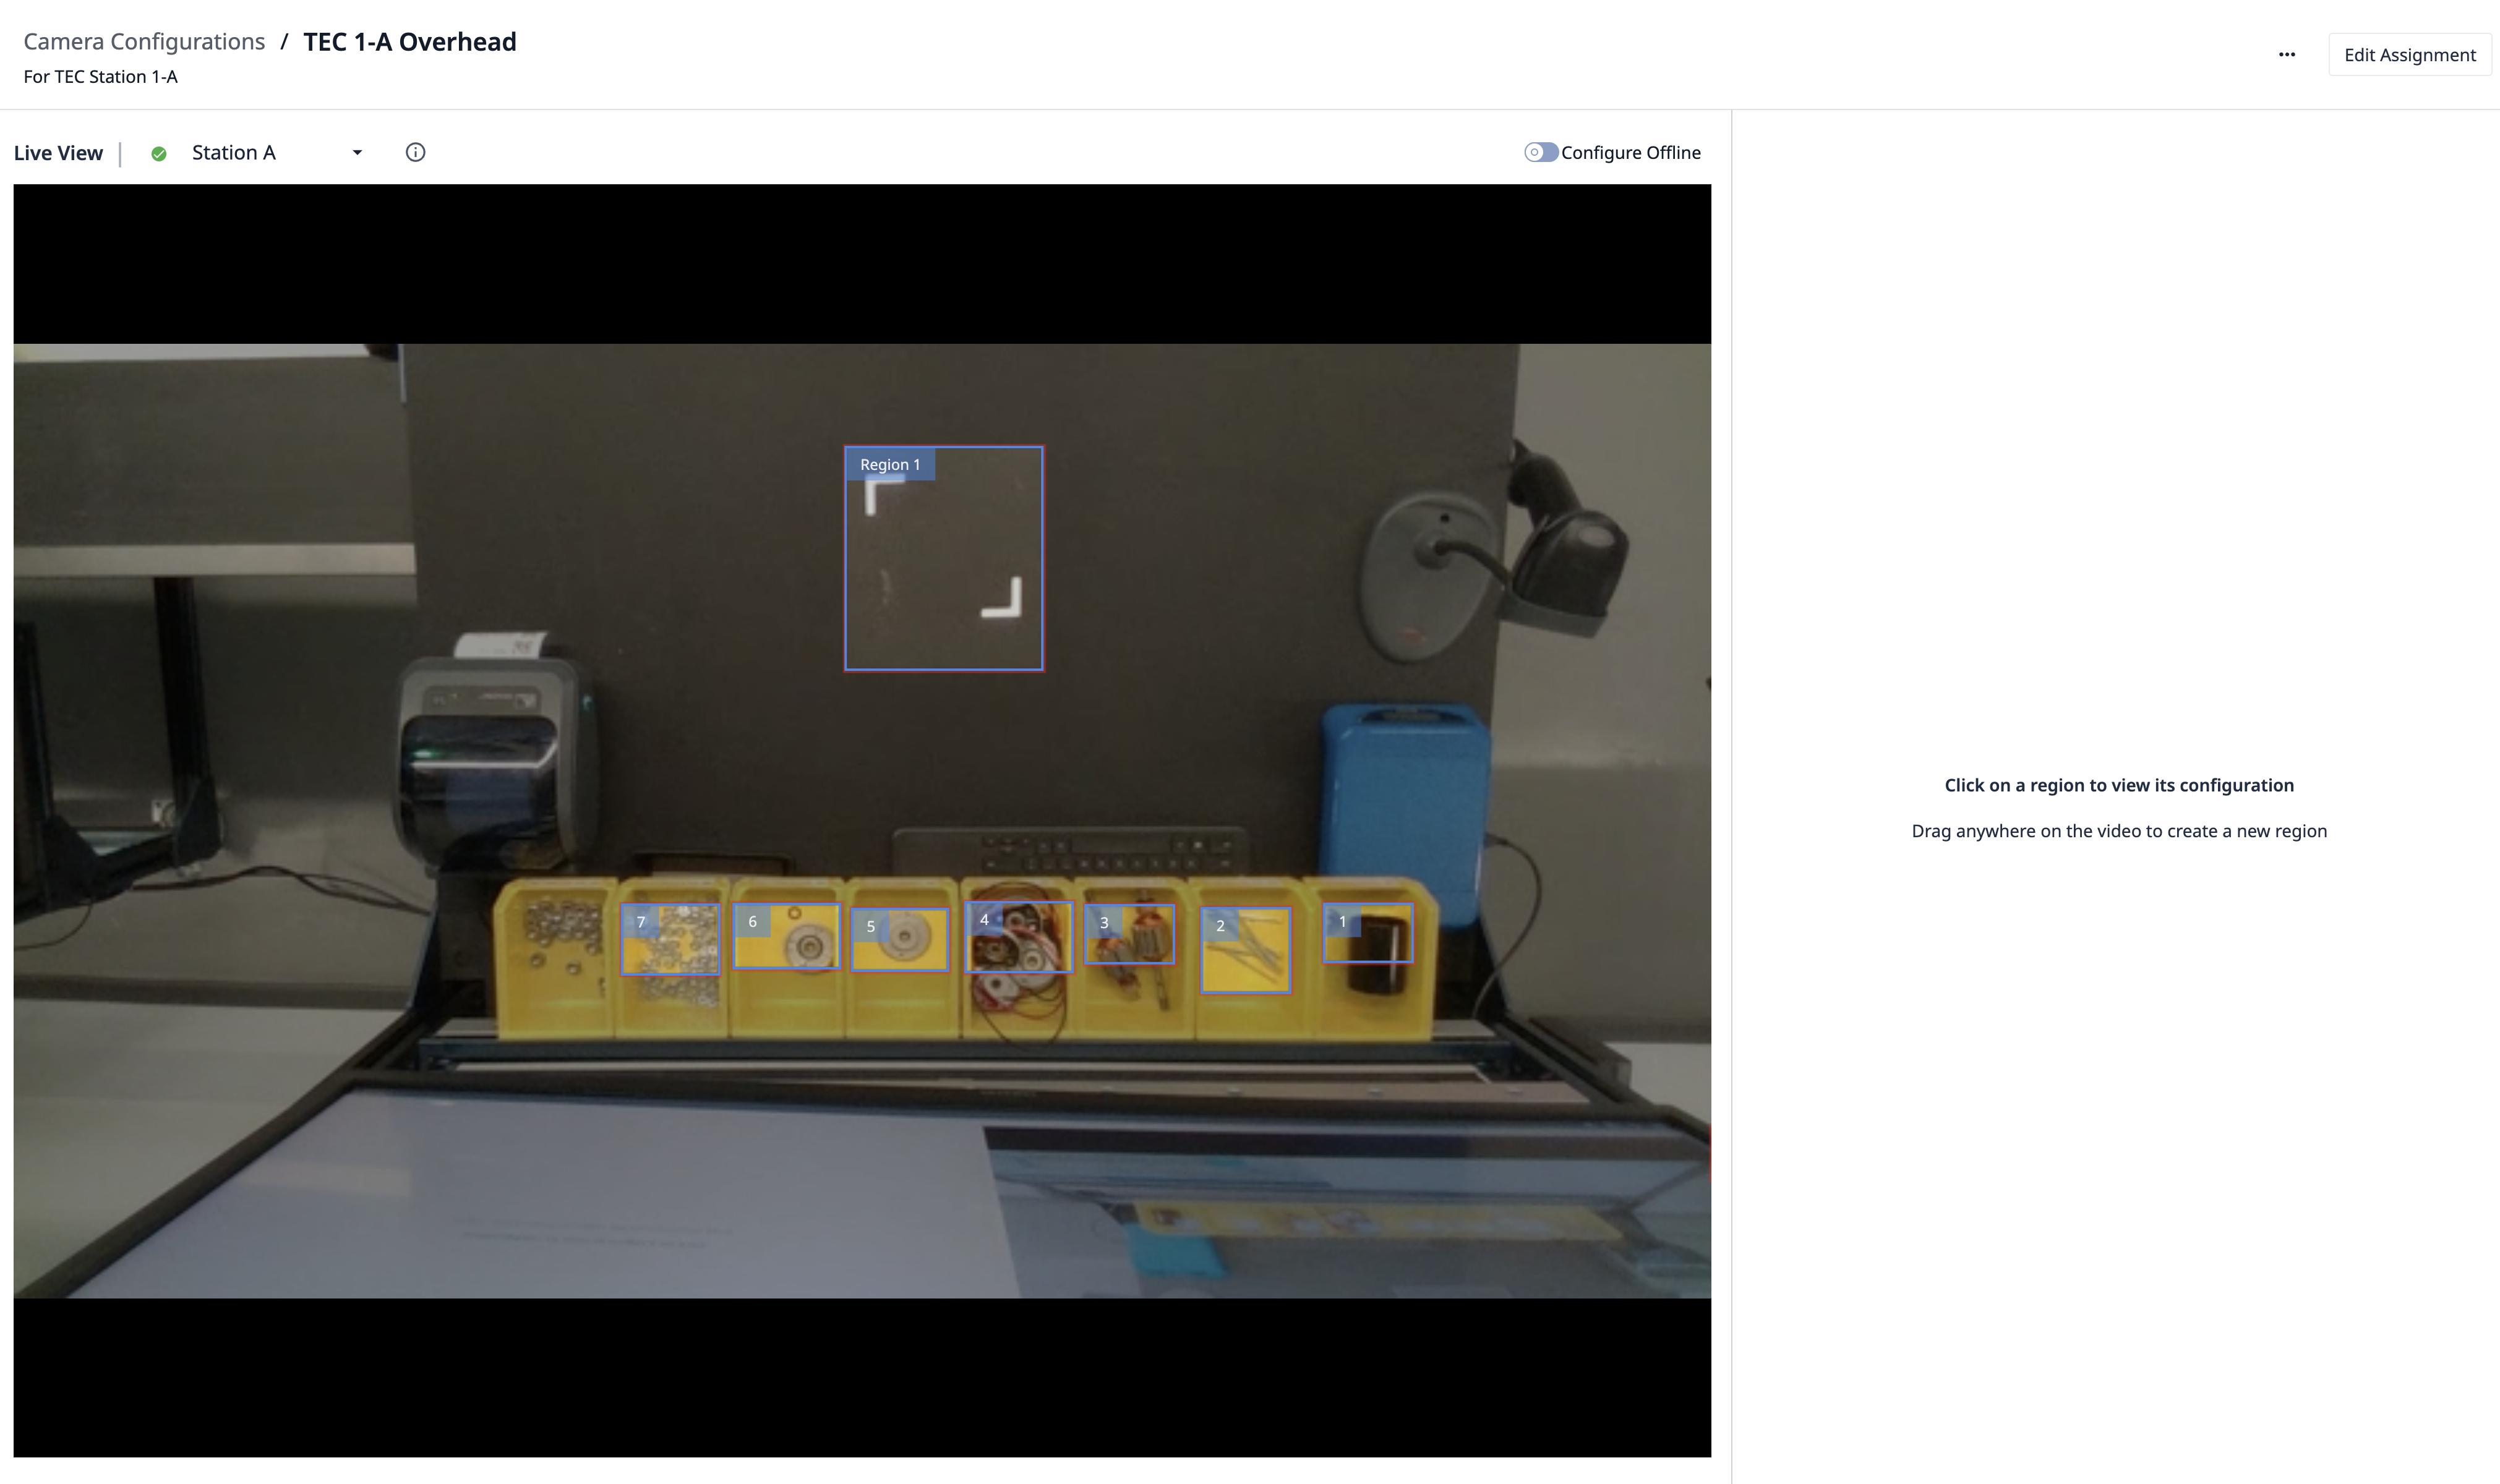
To set-up the change detector, you'll want to select the region that you want to monitor for changes. To do this, click and drag your mouse to define your region:
Then you'll want to give the Region a name.
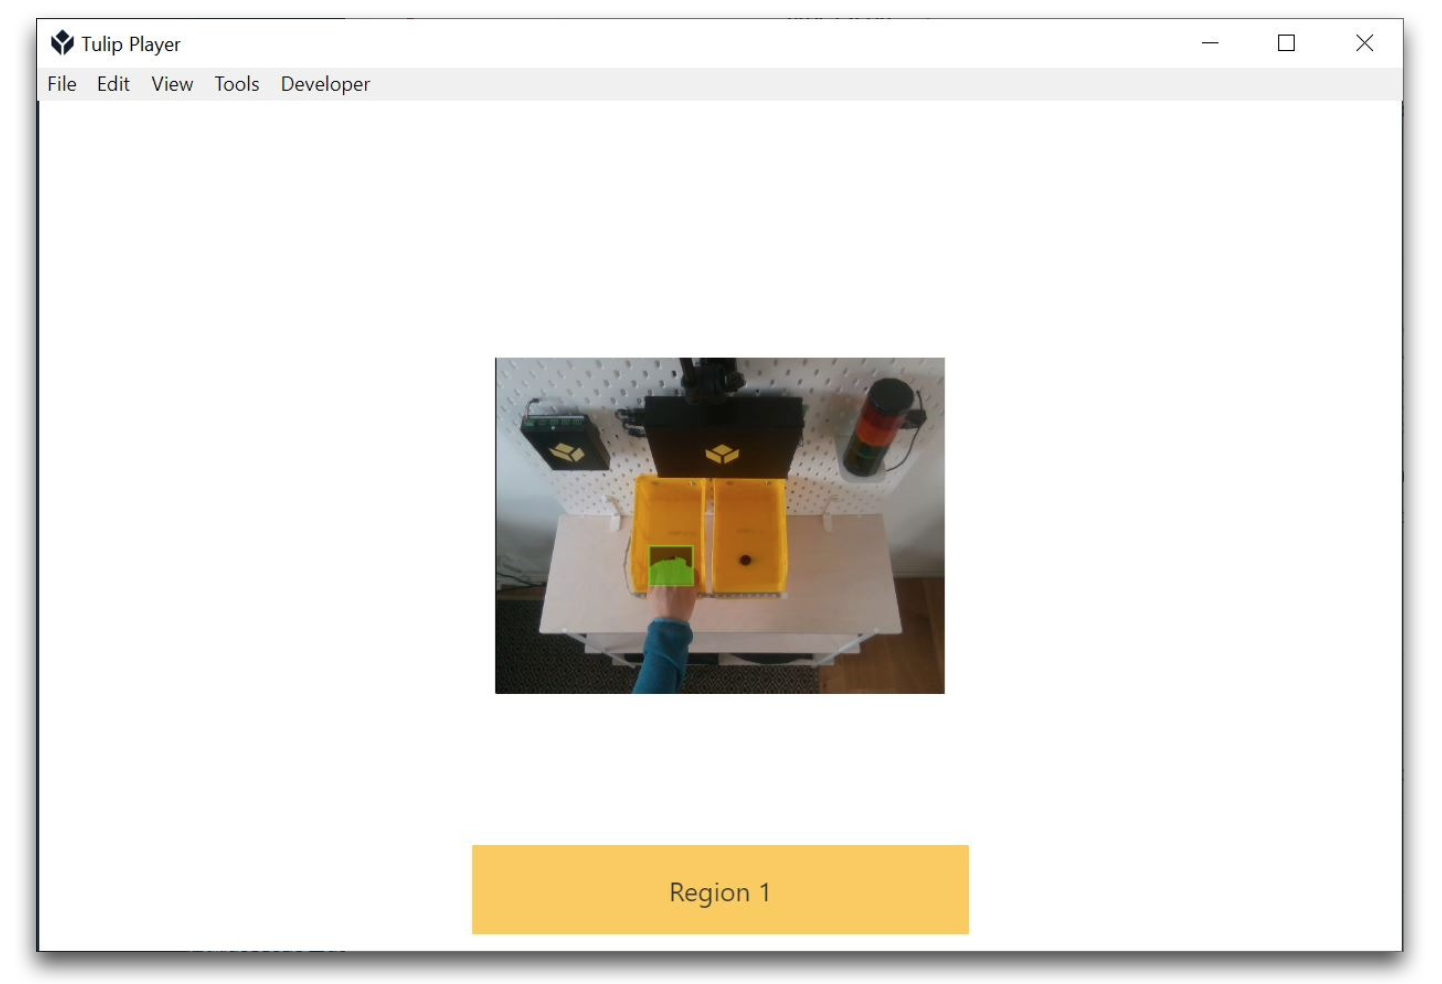
Next try to make a change in this region, for example by putting your hand inside it.
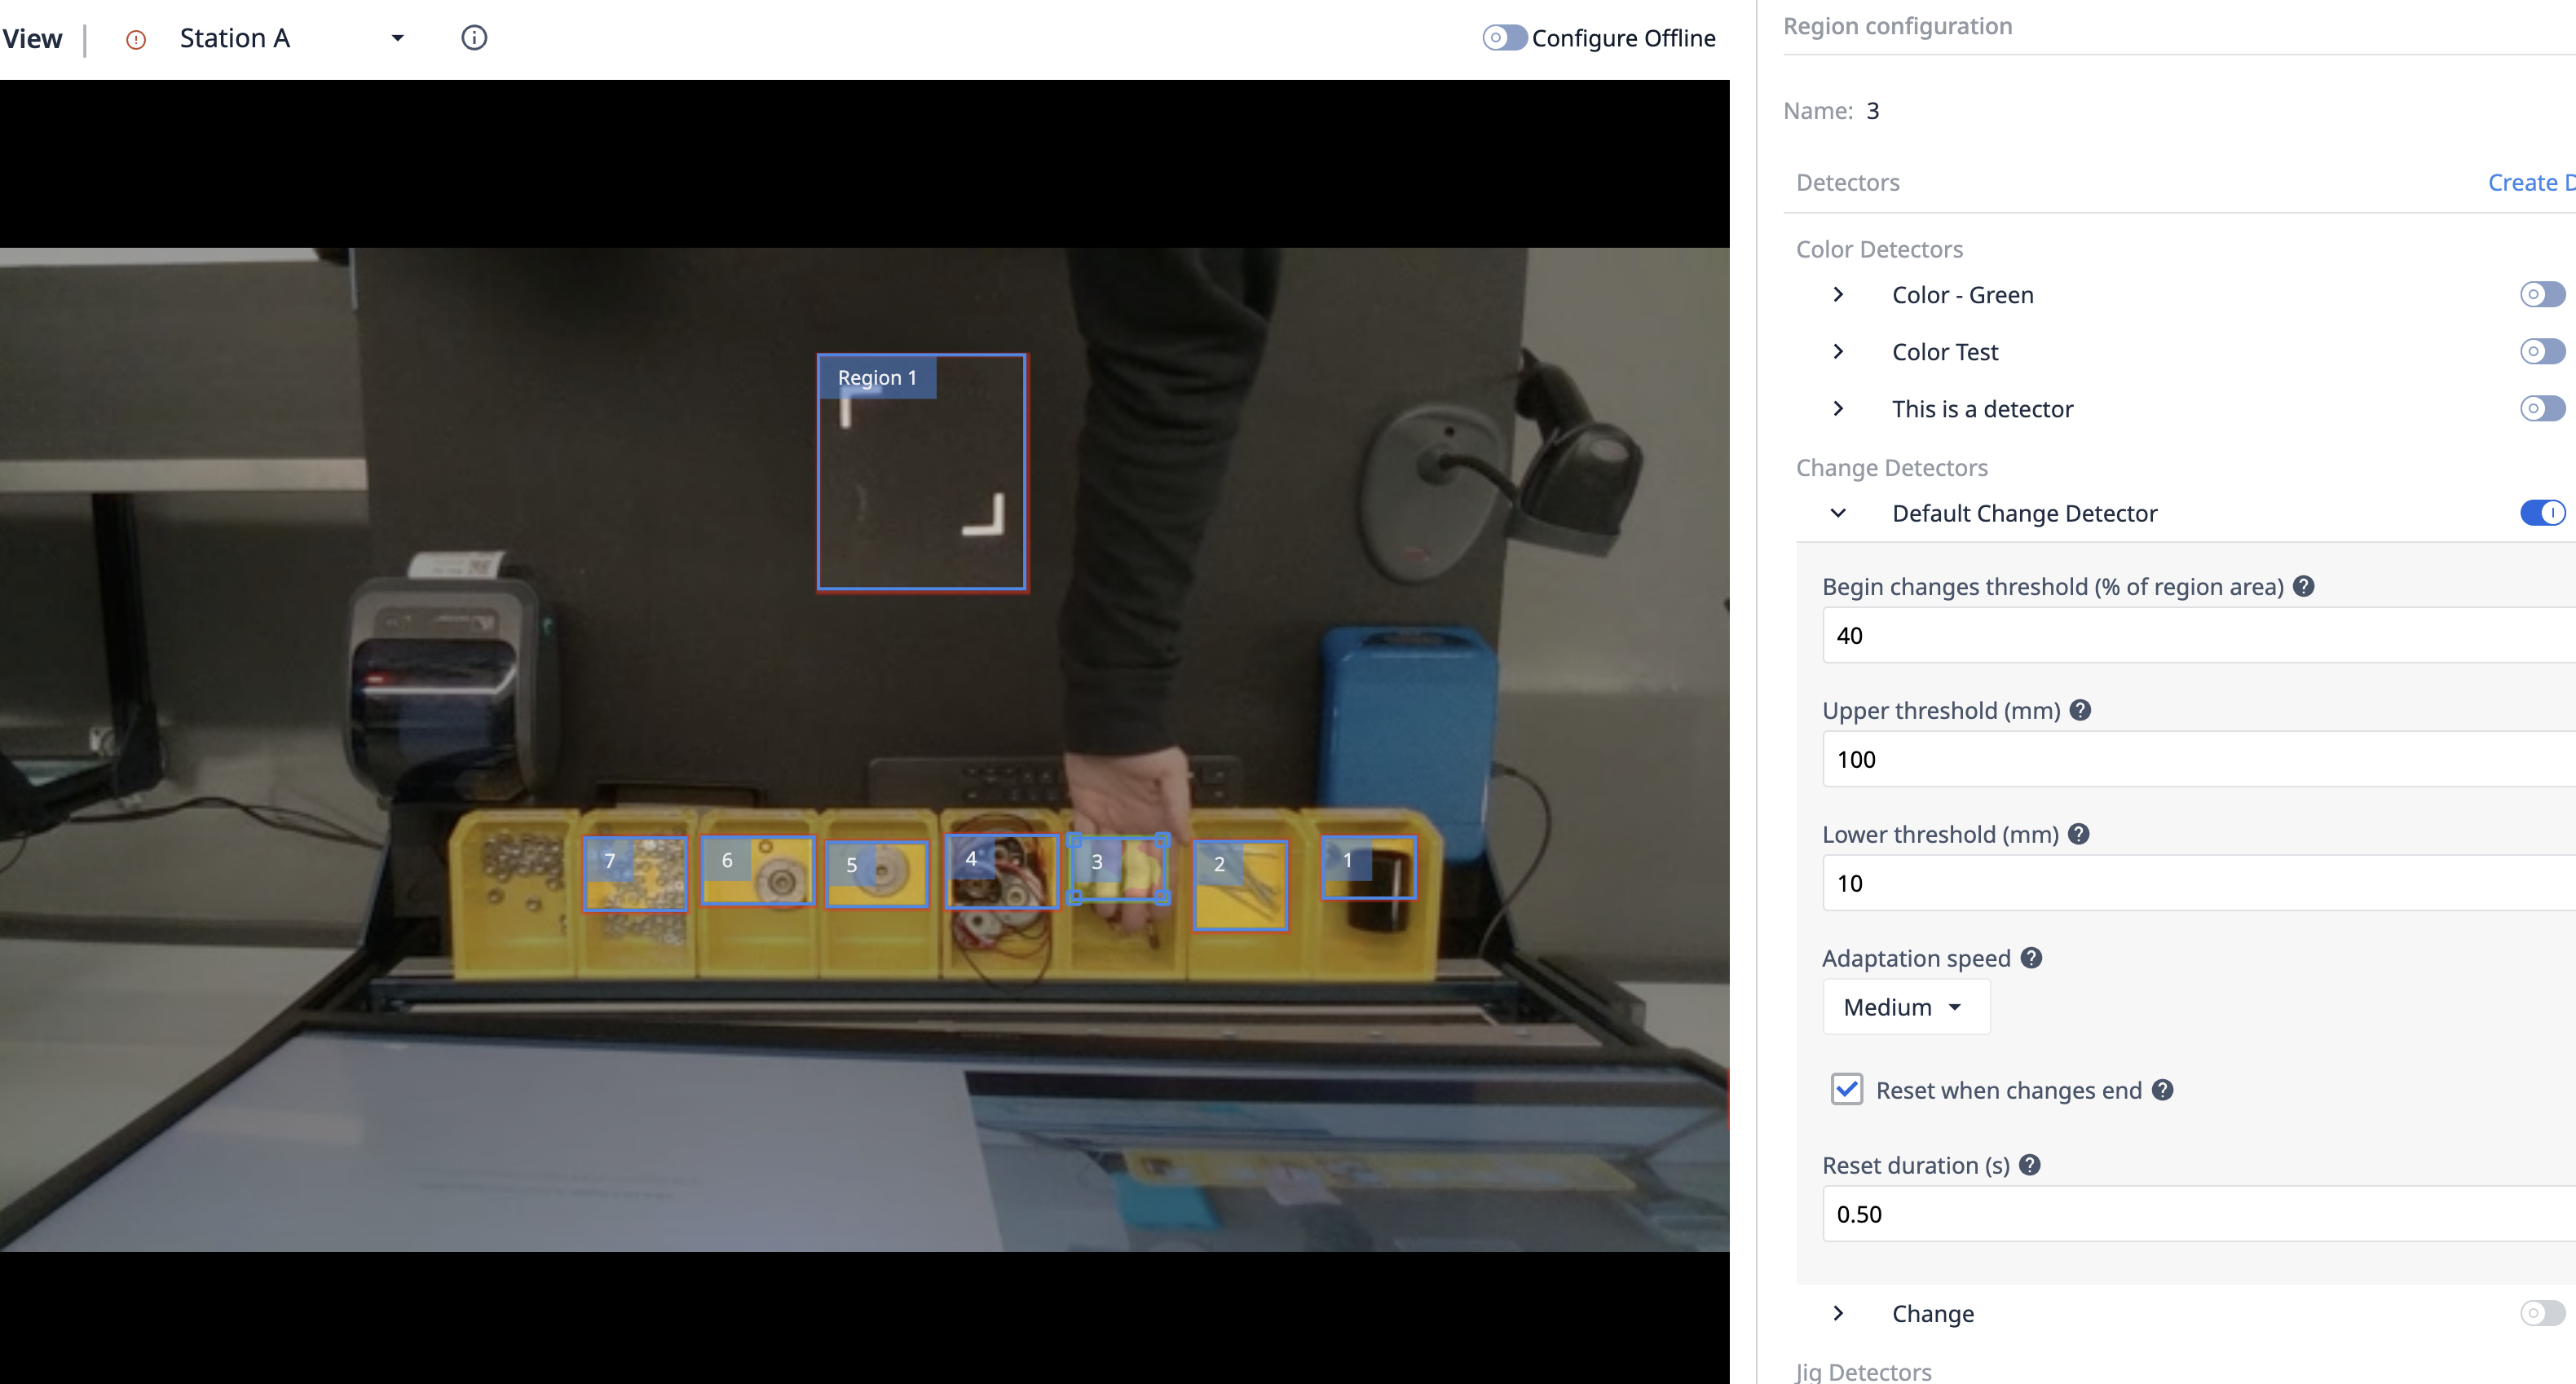
As seen above, the Change Detector Region has changed color, showing that the detector has recorded as a change.
The region will turn green based on the Begin changes threshold. If this threshold is 50%, then there must be a detected change in at least 50% of the region for the color to turn from red to green. It's as this point that an event will trigger in the app that is using this Camera Configuration.
Try adjusting the Begin changes threshold and the size of the region, so that the region turns green when your hand is inside the region.
Using the Change Detector in an App
Switch over to your app editor, and create a new Device Output Trigger.
All Camera Configuration will appear under the sub-list of Specific device. Select your Camera Configuration from the dropdown.
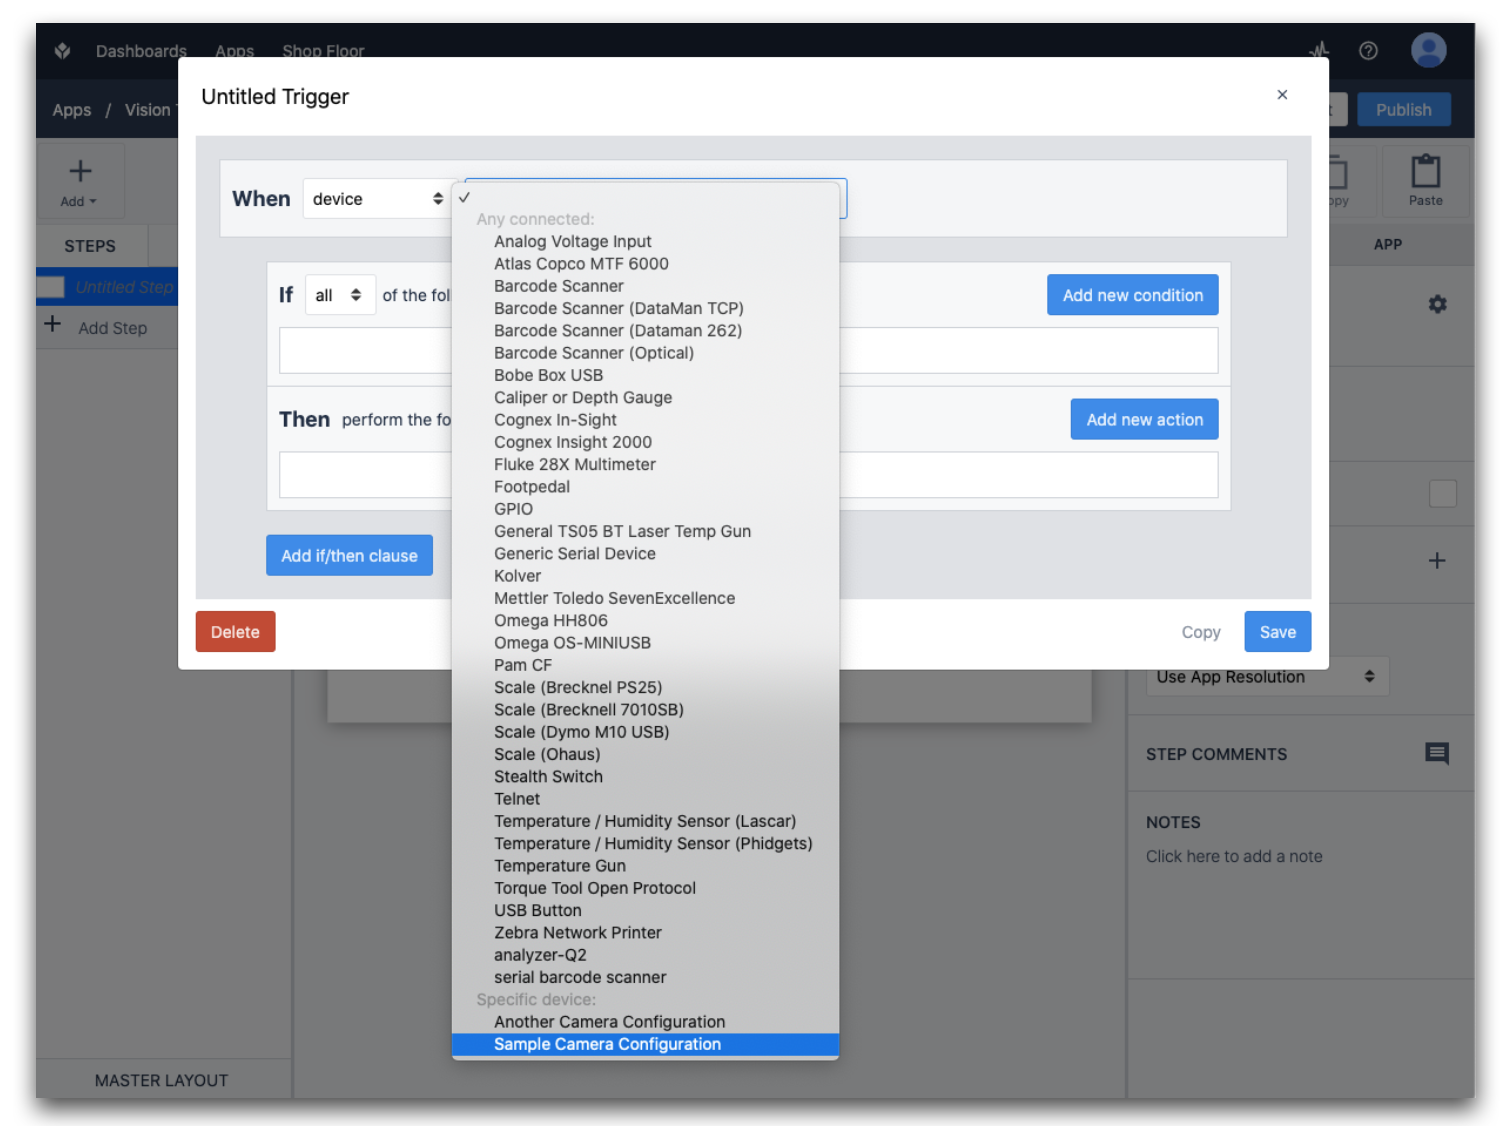
Note, that the Specific Device section allows you to use multiple cameras in the same app. Any Station that runs this app must have the specific Camera Configuration that you selected for the camera. Otherwise, a warning will be shown when the app runs.
Now you will see a dropdown of various events to run the trigger off of:
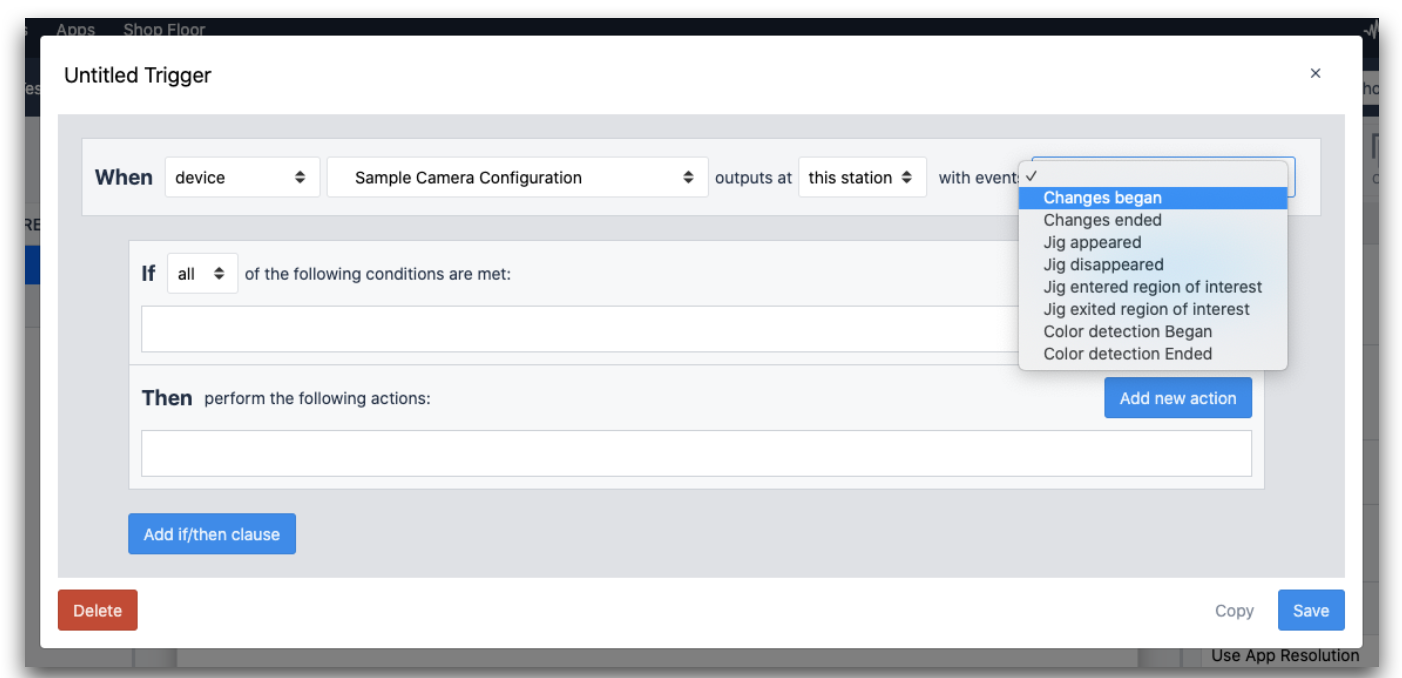
For this example, select Changes Began from the list of Events.
Next, add a trigger action to Show Message, when the Change Detector detects the event. The Device Output data will hold the name you gave to the region:
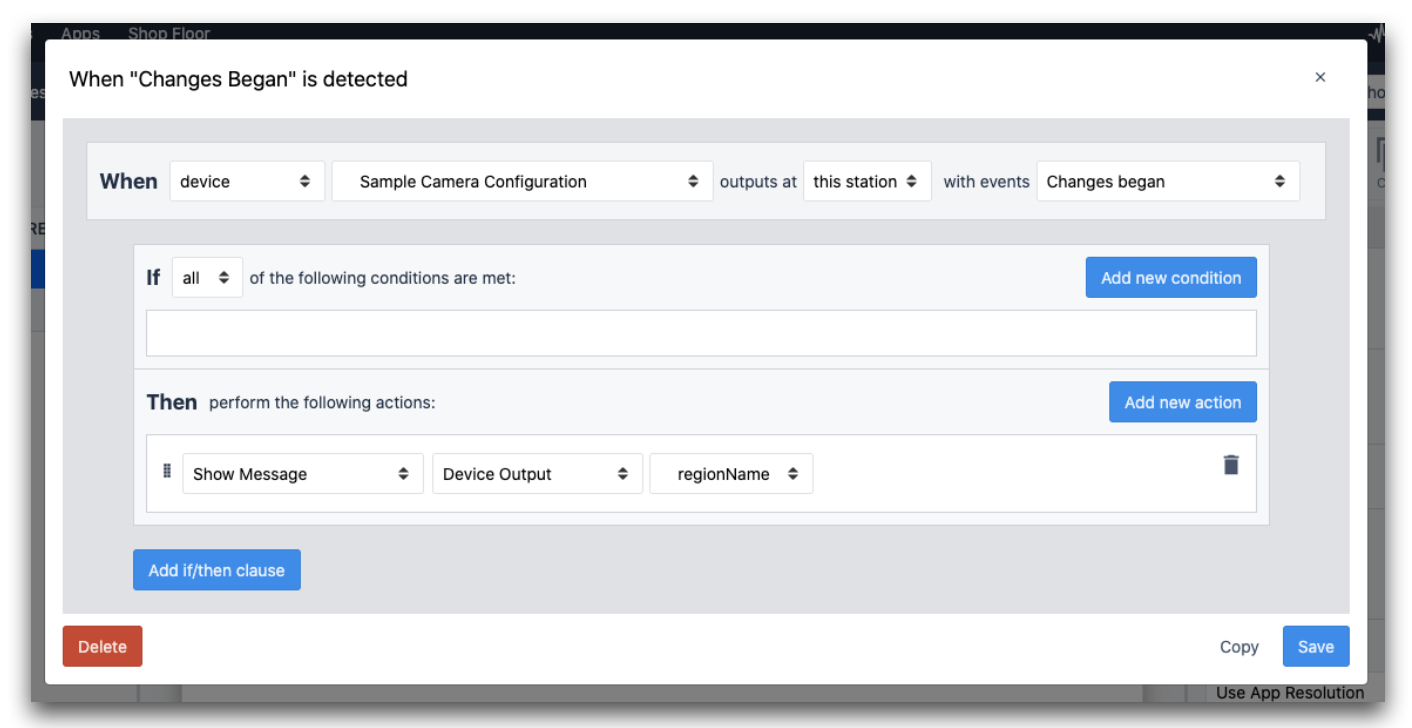
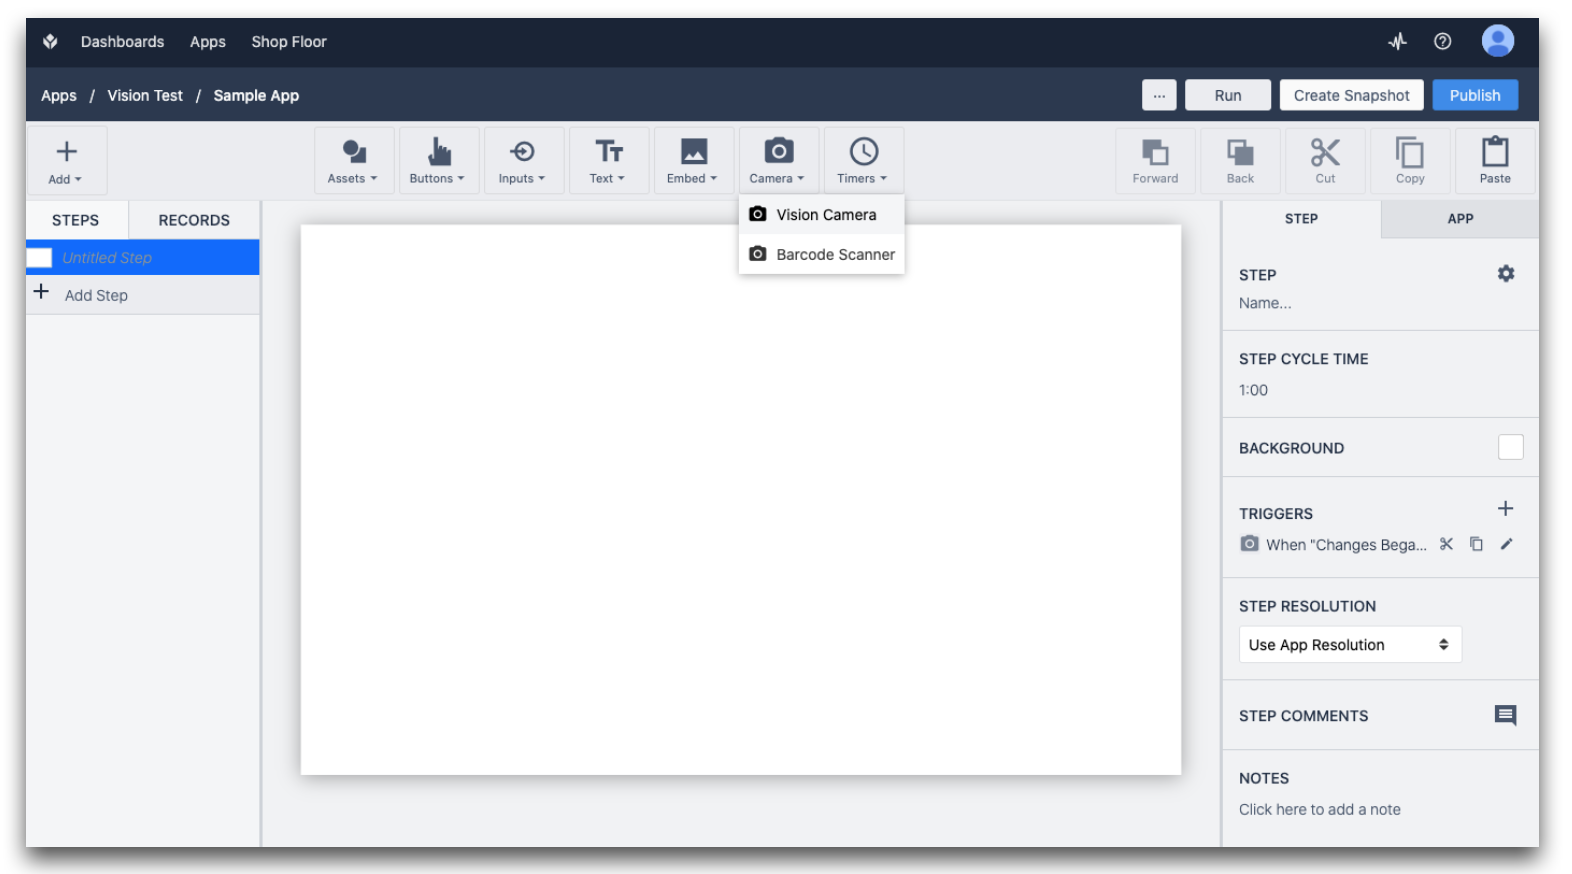
Save your trigger now. Before running the app, let's add a Vision Camera Widget to show the video stream for your Camera Configuration from within the app.
To do this, select Camera, then Vision Camera:
Click and drag to adjust the size and placement of the Widget.
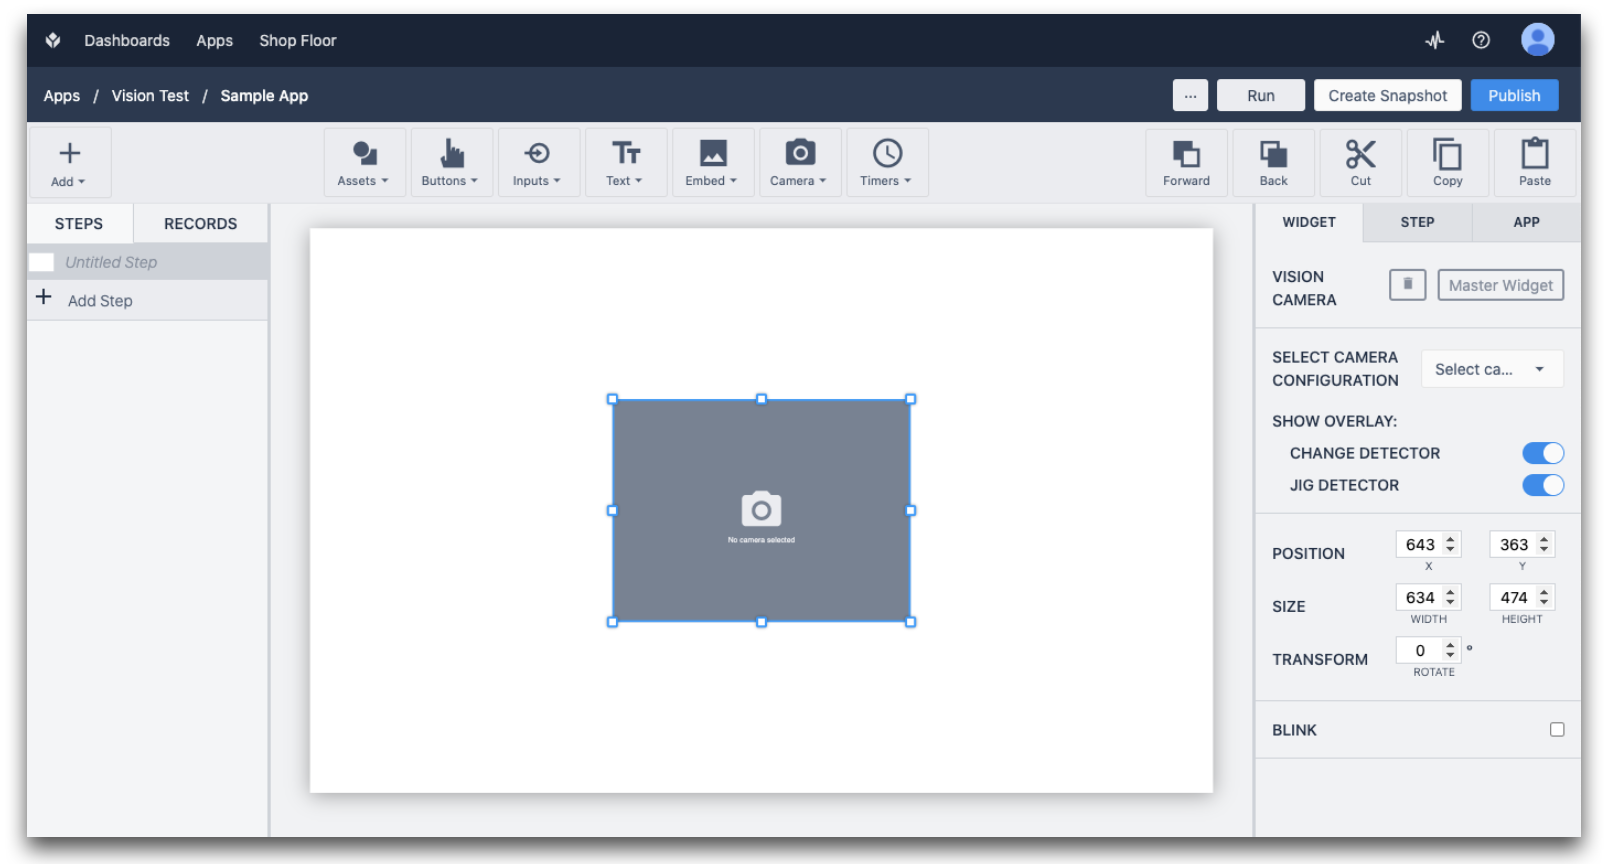
On the right side panel please select your Camera Configuration.
The Show Overlay option allows you to disable showing the regions on top of the video. Keep this enabled for now.
It's finally time to run your app. Run it at the station to which you assigned your Camera Configuration.
When opening the step with the Vision Camera Widget in your Player, you will see the video stream of the camera:
When you move your hand inside the region, the region will turn green, and the message with the region name will be shown:
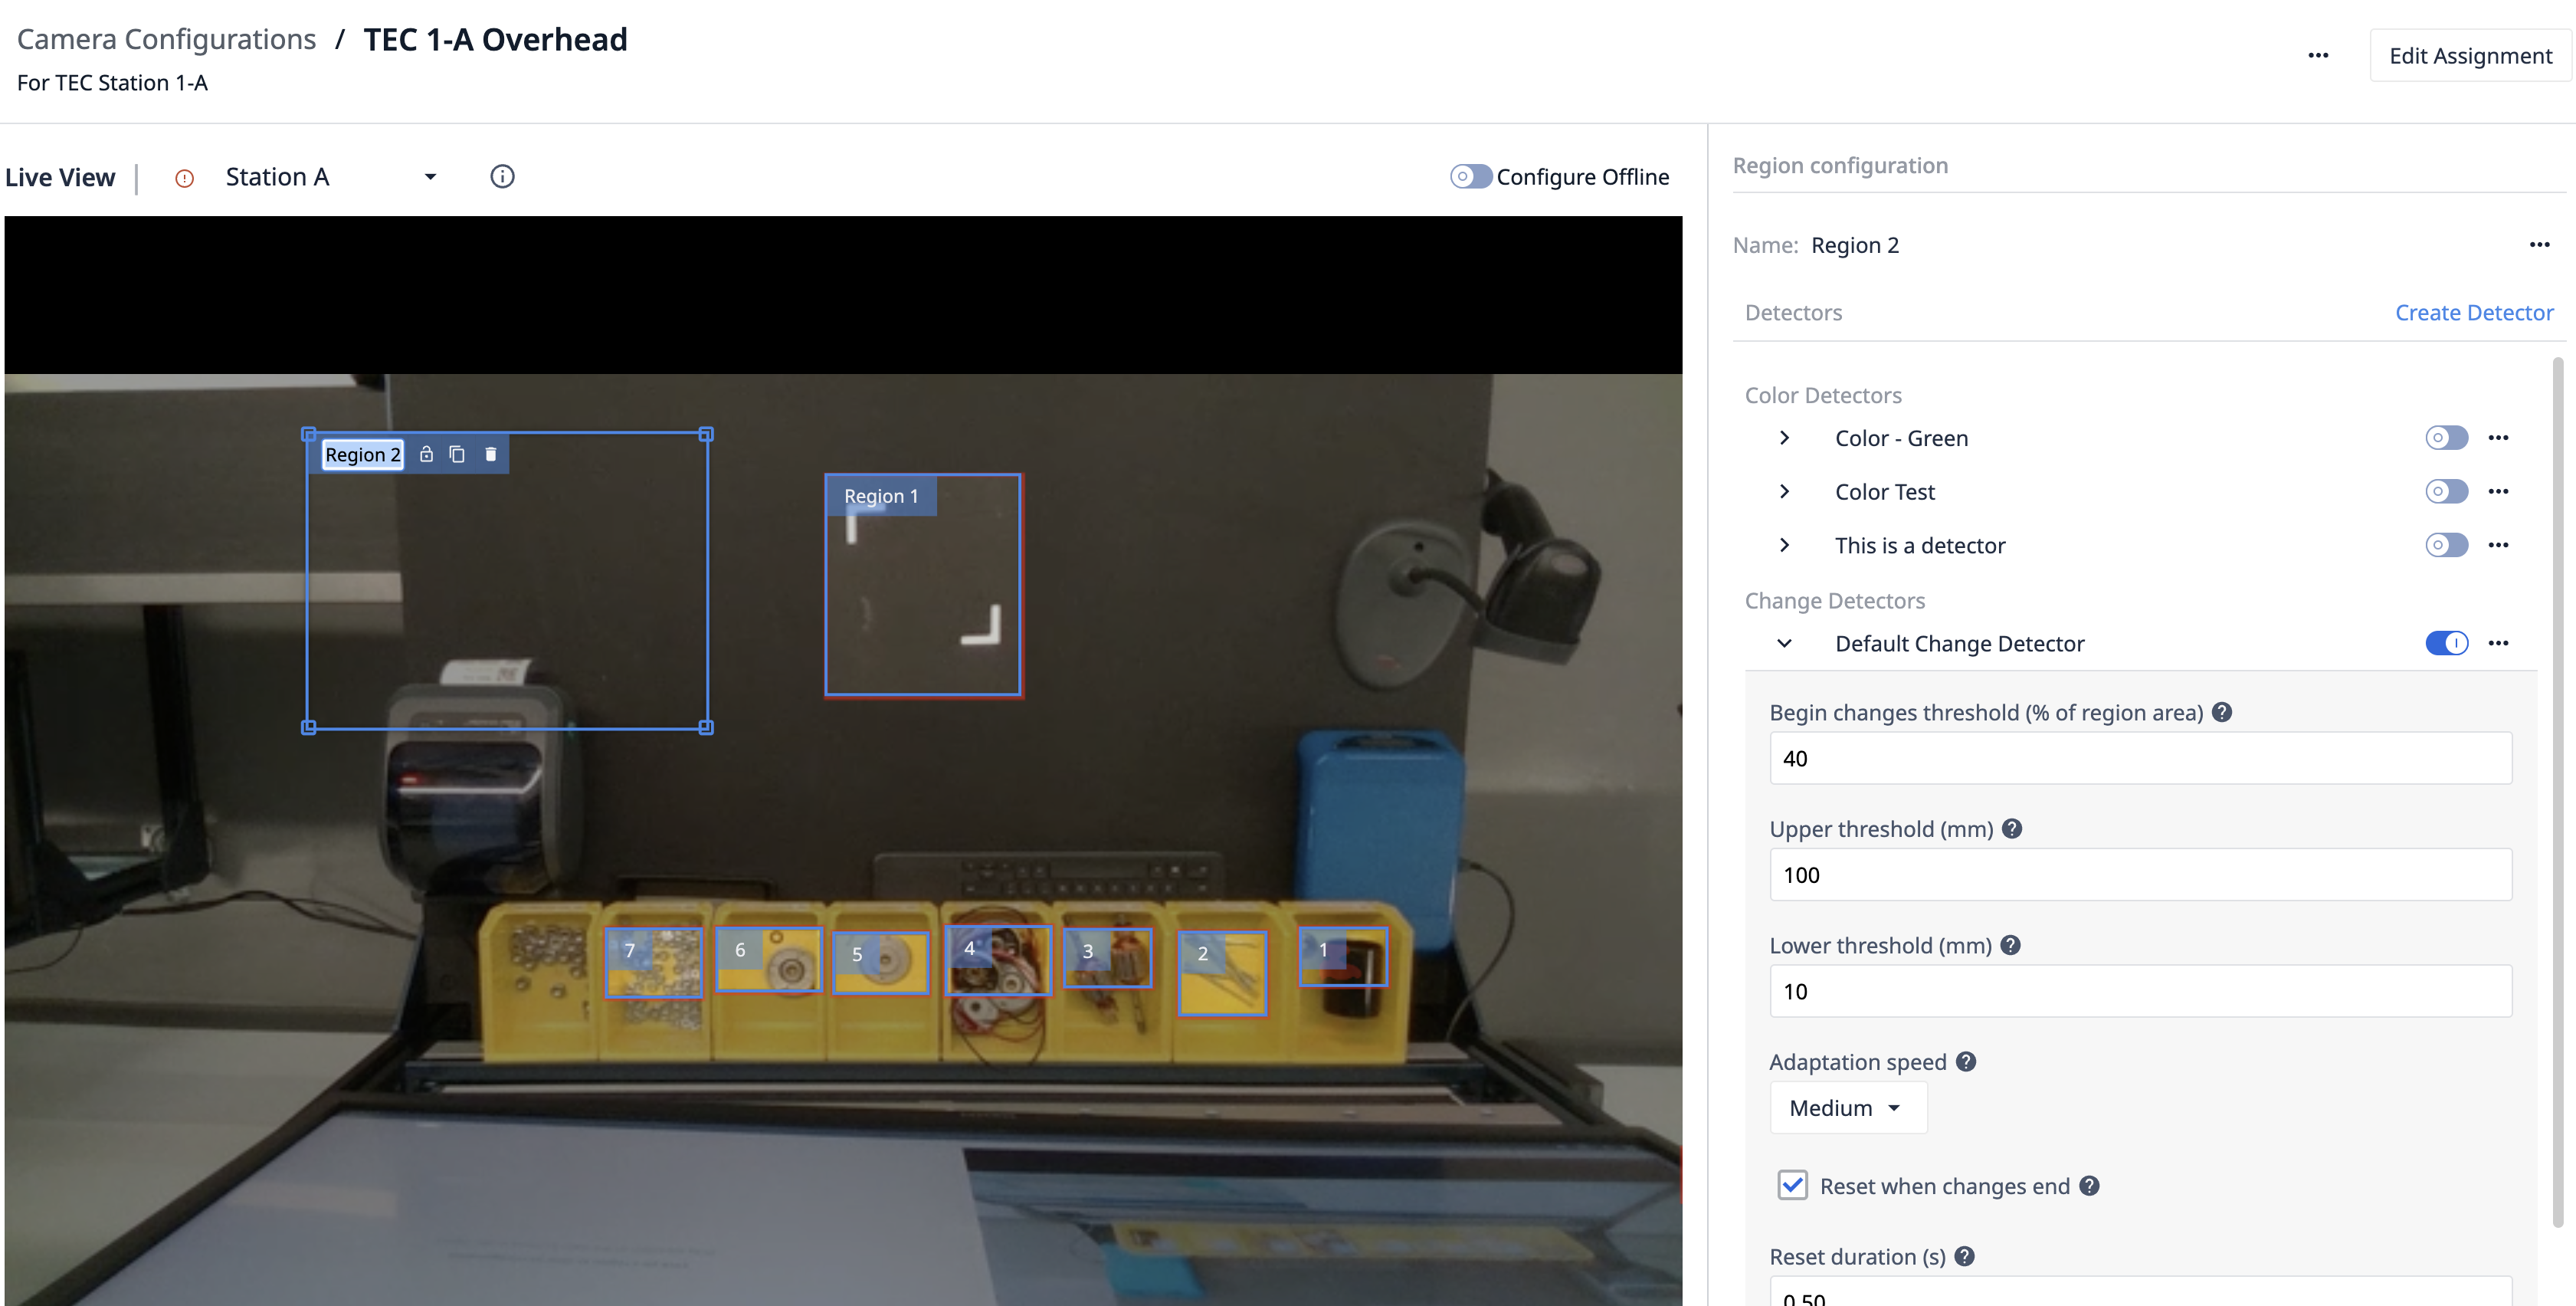
Change Detector Region Settings
You will likely need to adjust a Region's settings to yield results that fit your use case appropriately. To edit your region's settings, click on your Camera Configuration and select the regions you wish to adjust.
The following settings are available:

Begin Changes Threshold
This is the percentage of the region area that is required to change for a Changes Began event to occur. If, for example, you have a smaller region and your hand is expected to fully cover the region, you may set this value to a higher value such as 70%.
Upper & Lower Threshold
This defines the depth range you'd like to monitor.
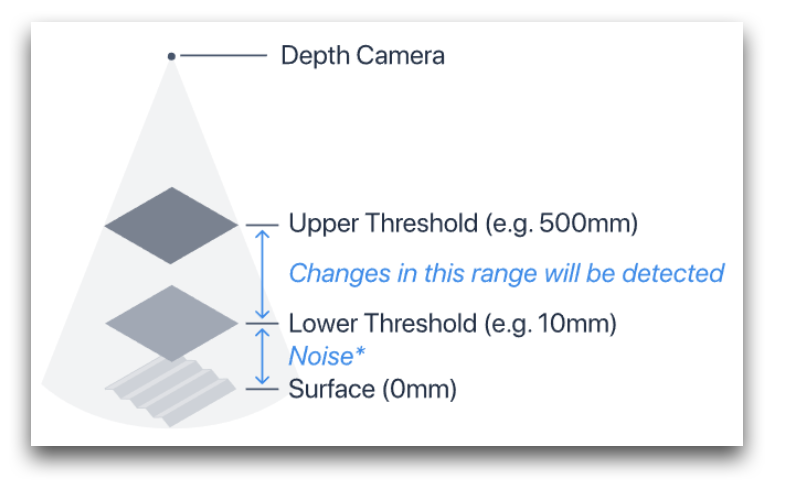
The Surface is what the depth camera captures inside your Region. In our sample images above, it's the yellow bin. The Upper & Lower Threshold are both set relative to this surface.
Objects closer to the camera than the Upper Threshold will be ignored by the Change Detector. (Ex: If an operator's arm is moving above the region, no event will be triggered.)
Similarly, objects -- and more importantly noise -- farther way from the camera than the Lower Threshold will also be ignored. Due to technical limitations, there is noise in the data reported by the depth camera. The further away the region is from the camera, the higher the noise will be. If you see flickering in your region, increase the Lower Threshold.
Adaptation Speed
Adaption speed is how quickly the region adapts to noise and changes which are too small to trigger Changes Began events. Note that with the No adaptation setting, noise and small changes will accumulate over time.
Reset When Changes End
When enabled, this makes detecting subsequent changes more robust incase the region content remains changed, even after a Changes Ended event occurs.
Reset duration
The time it takes to reset the region. No Changes Began events can occur while resetting is in progress.
Further Reading
- Using the Jig Detector
- Using the Color Detector
- Using the Vision Camera Widget in Apps
- Using the Snapshot feature in Apps
- Hardware Recommendations for Vision
Did you find what you were looking for?
You can also head to community.tulip.co to post your question or see if others have faced a similar question!