Download the app suite.
Tulip tables used in the app group
The applications in the app group utilize two key tables: Equipment & Assets and Comments and Exceptions.
The Equipment & Assets table is where we store information about the equipment, including their various statuses.
The Comments and Exceptions table is used to record unexpected events that occur during processes or comments created by operators.
These tables ensure efficient data organization and smooth operation management, keeping all relevant information in one place.
Managing Equipment Status
In the table, we track two distinct types of statuses:
Calibration Status – This reflects the equipment's calibration condition.
Cleanliness and Usage Status – This indicates the cleanliness and usability of the equipment.
For both status fields, we’ve added a time and date fields in the table to store the timestamp of the most recent status change.
These fields can be used to create automations that update equipment statuses automatically in the background based on predefined processes and conditions — without any user intervention.
To learn more about how these automations work, check out the following,
Calibration Status Reset
Equipment Status Reset.
Applications in the Equipment Logbook App Group
Equipment Management
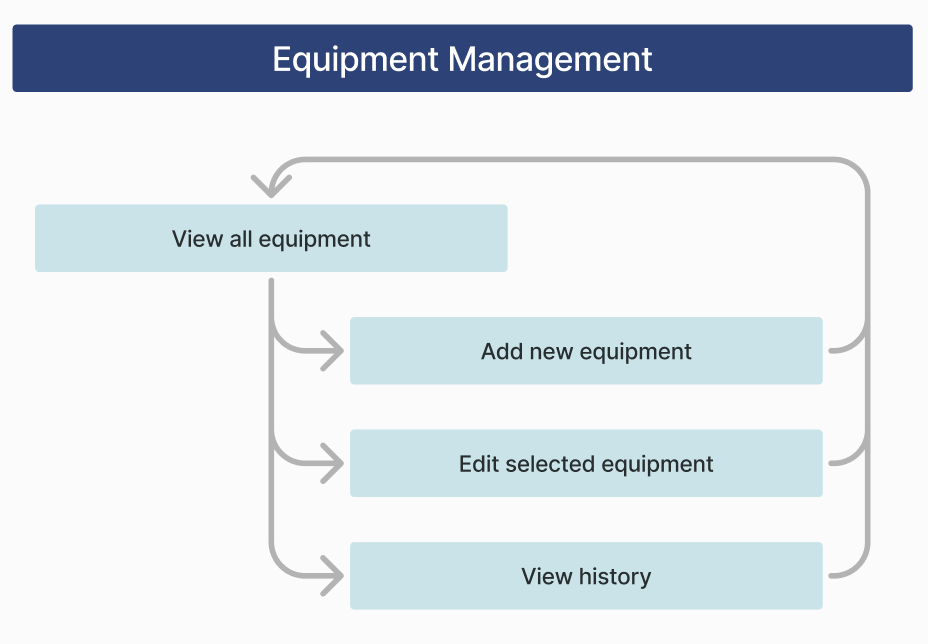
In this application, the user can create an asset in the Equipment & Assets table after providing the required information or modify the details of a selected asset. In the View history step, the user can review the audit trail of the selected asset. The audit trail can be filtered to a specific time interval by specifying a date.
Electronic Logbook for Equipment
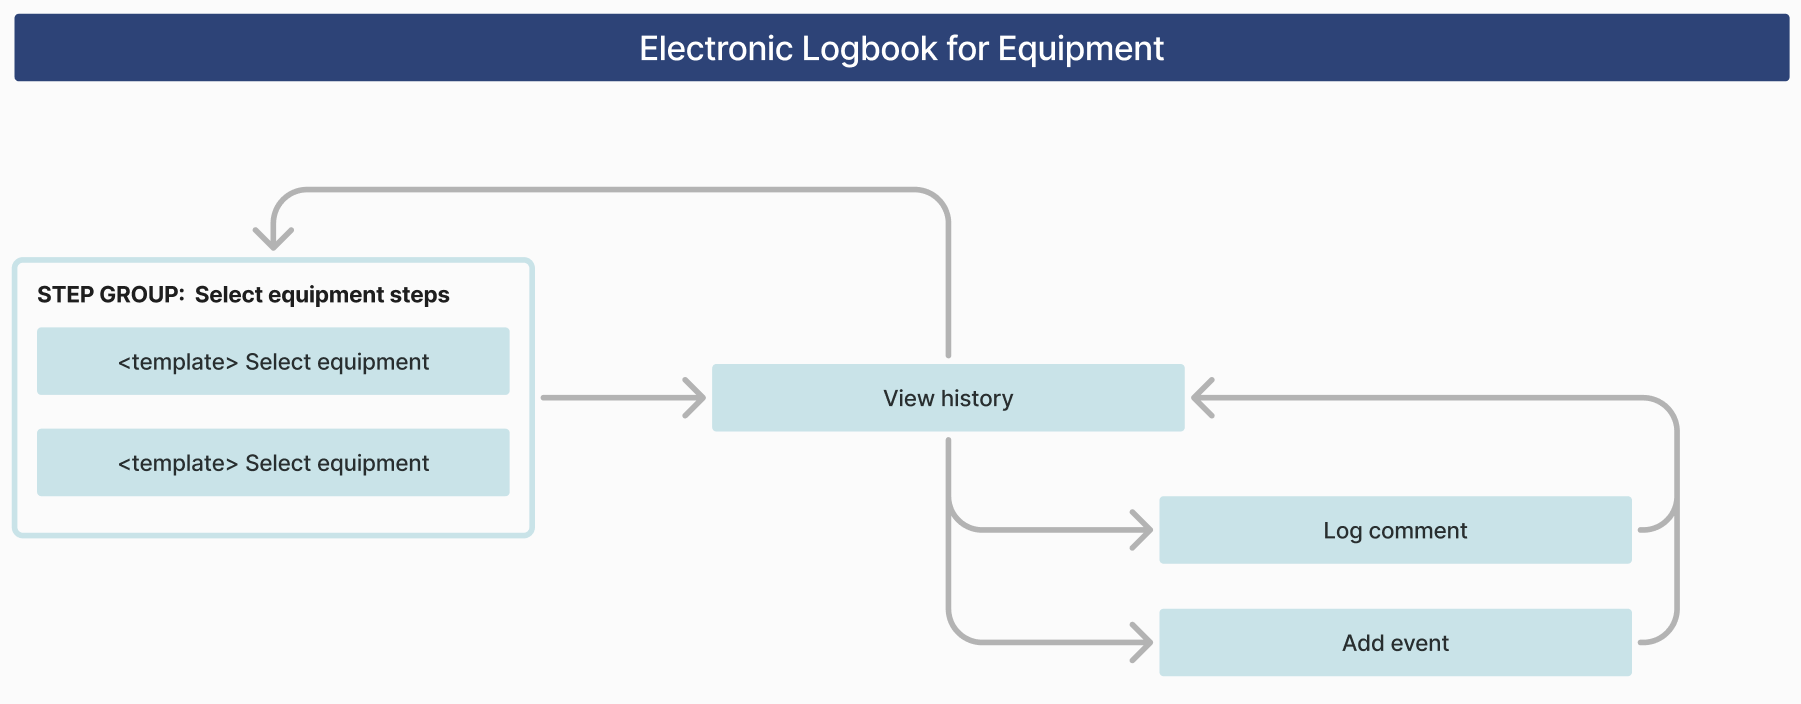
This application is the electronic version of a paper-based logbook. After selecting an asset, the user navigates to the View history step, where they can view the historical data of the asset.
The app offers two options for selecting the asset. In the first option, the equipment can be selected from a table, and in the second option, the asset can be identified using an optical barcode scanner. It’s not mandatory to use both options. Choose the one that best supports your process.
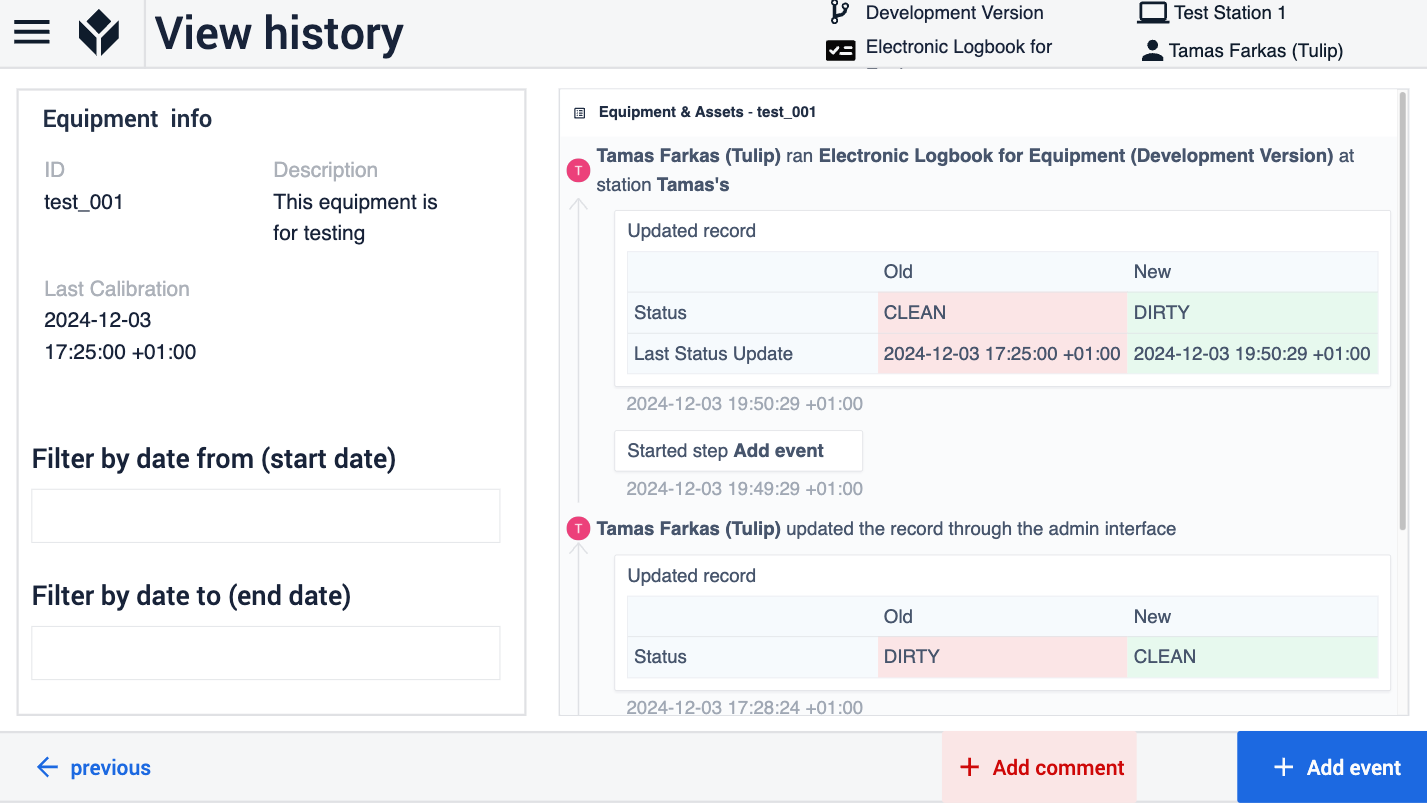
On the View history step, the user has two options. In the Add event case, the application navigates the operator to the Add event step, where the operator can manually select the operation performed on the asset. The selected operation automatically displays the asset's new status.
| Operation | Status |
|---|---|
| Cleaning | CLEAN |
| Production usage (start) | IN USE |
| Production usage (end) | DIRTY |
Pressing the Save button finalizes the change, and the app then returns to the View history step. The other option is recording a new comment in the Comments and Exceptions table.