The Quality app suite provides you with the correct tools to begin managing inspection and quality related actions. Making sure that you understand your metrics that are focused around quality to improve yield.
Prerequisites
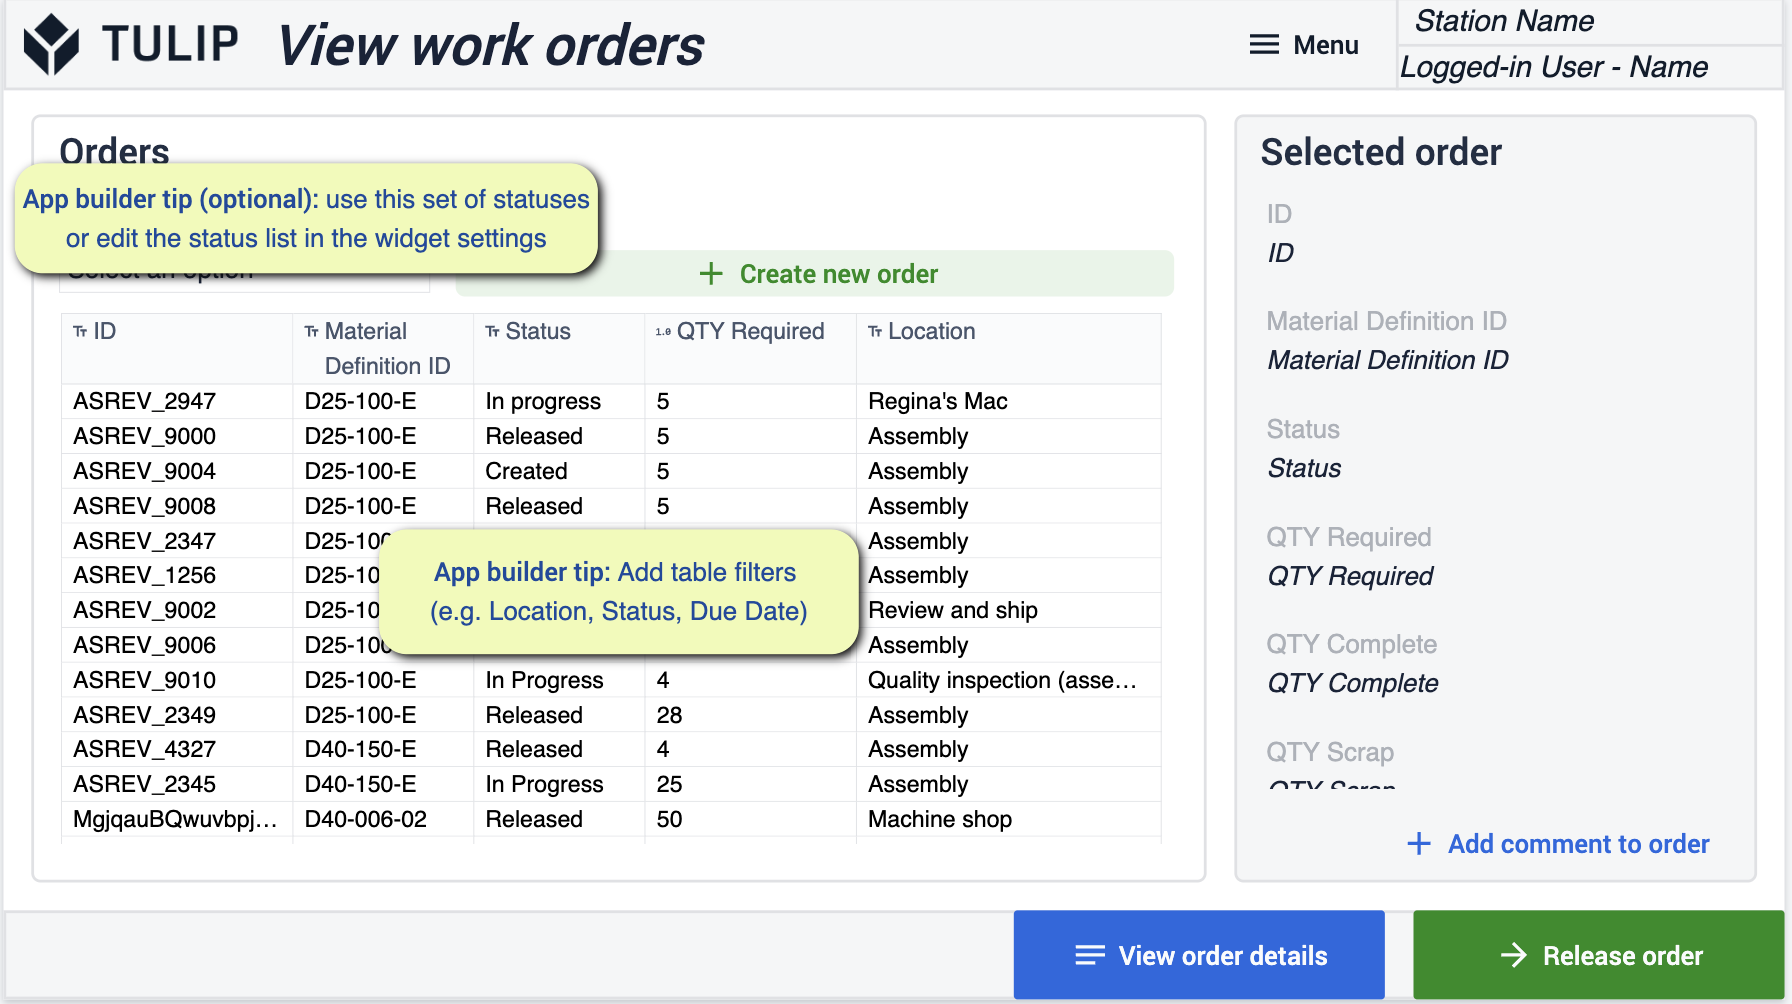
In this app suite there will be a variety of App Builder Tips to follow.
Before you can configure the app suite, ensure you're familiar with the following skills:
- Basic app building
- Tulip tables (including editing fields, using filters, and record placeholders)
Deployment
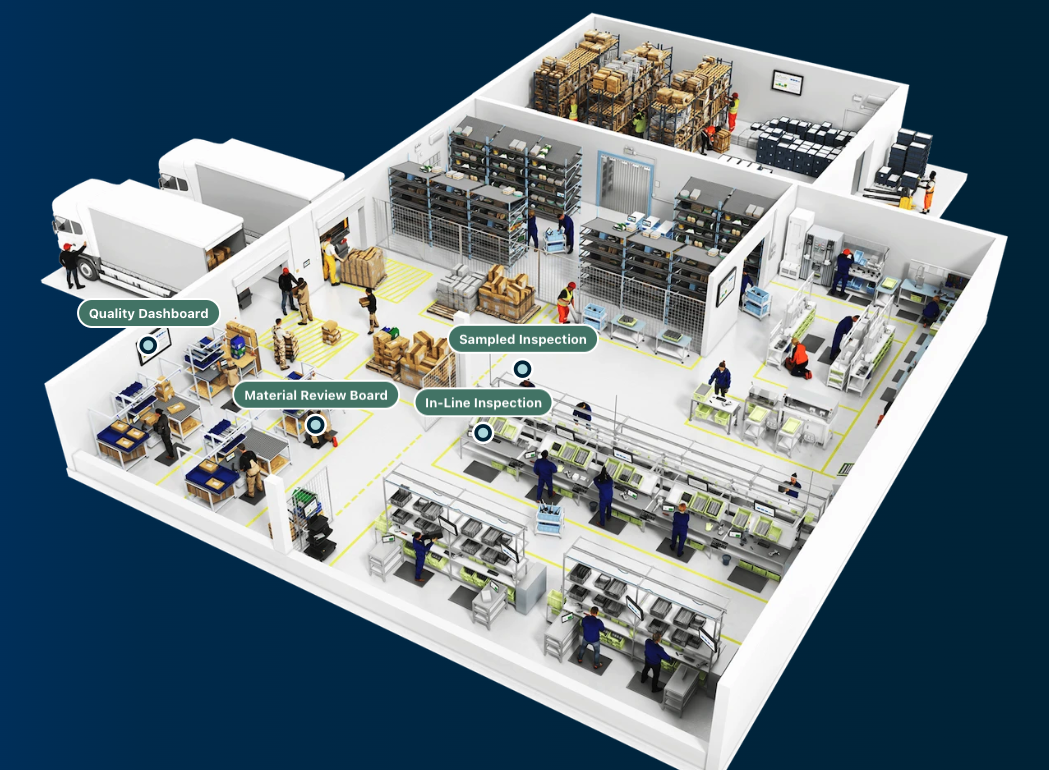
You will want to make sure that you have a proper understanding on how to deploy these applications to your desired devices and how to run them at a station. It's important to understand the flow of your business. Having a diagram of your shop floor will give you a better understanding of where you want your apps to live as you go through the process.
Connected Tables
The Tables that you will use throughout this app suite will be used and connected throughout your various applications. This allows you to have an easier user experience as well as a network of tables that can be used with development of future applications. Learn more about how the tables will minimize redundancy and maximize compatibility through using a common data model.
Get familiar with the common tulip tables used throughout the cMES.
Downloading
Click the link to the Quality Management App Suite. This will take you to the library page where you can add the app to your instance.
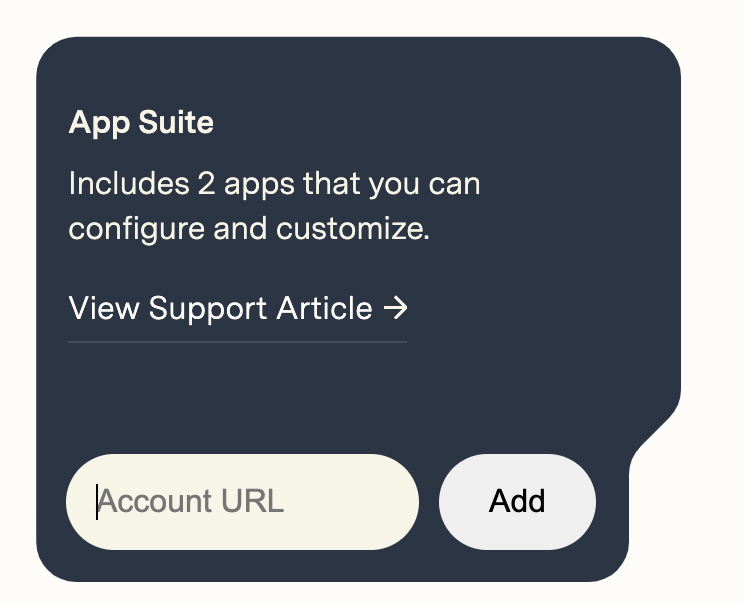
Once the App Suite has been added you will find a folder in your instance titled Quality Management. This will allow you to see all the apps that are in the Suite.
Quality Management
The purpose of this app suite is to help you better address different areas of Quality within your business by having full visibility into your Inspection process. The value that you receive from here focuses around Improving your Quality Control process to have more traceability, understand the cost of poor quality and making data driven decisions. Also a better view into defects by operators, stations, product, etc.
Configure Apps
While configuring applications, any changes made to tables need to be made across all applications for connectivity.
Defect Management
In this Application you will be able to monitor and report defect events. Organize your defect events and be able to provide appropriate rework details.
Review Defects
Here you will be able to view all defects that have been logged on the shop floor. Select the defect events that you would like to have more insight into.
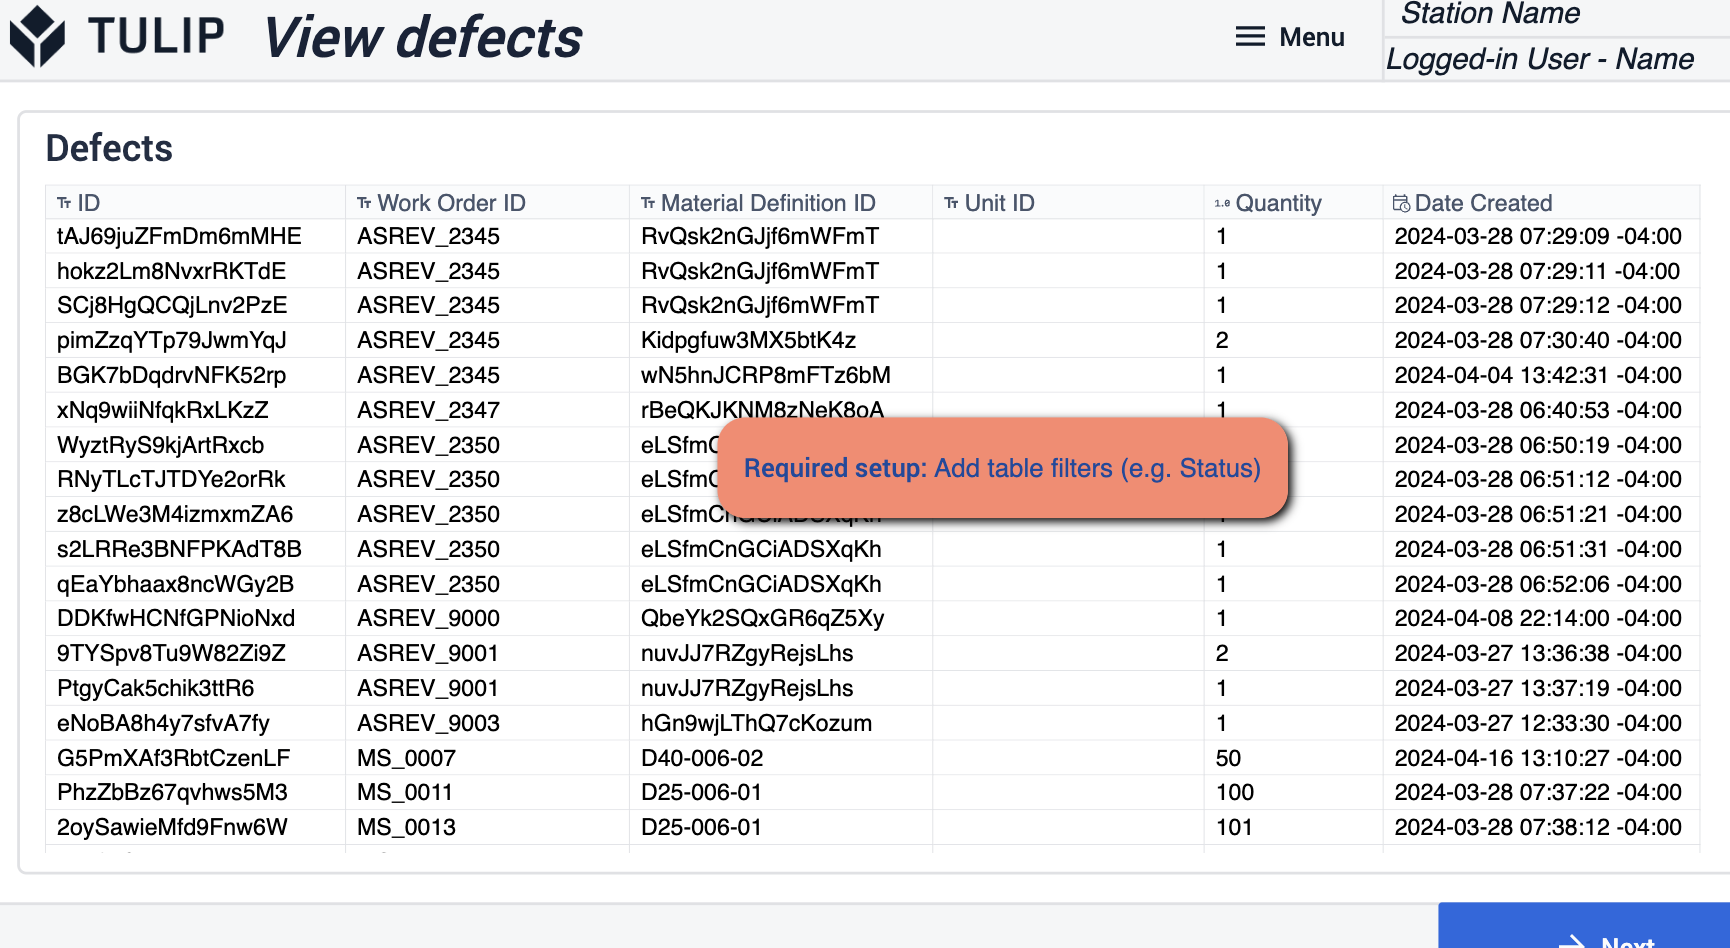
- Required changes to this step focus on adding filters to the Tulip Tables
Manage Defect -Units
This Step will allow you to view and manage the specific details that belong to the defect that you selected. Select disposition to match the status of the event.
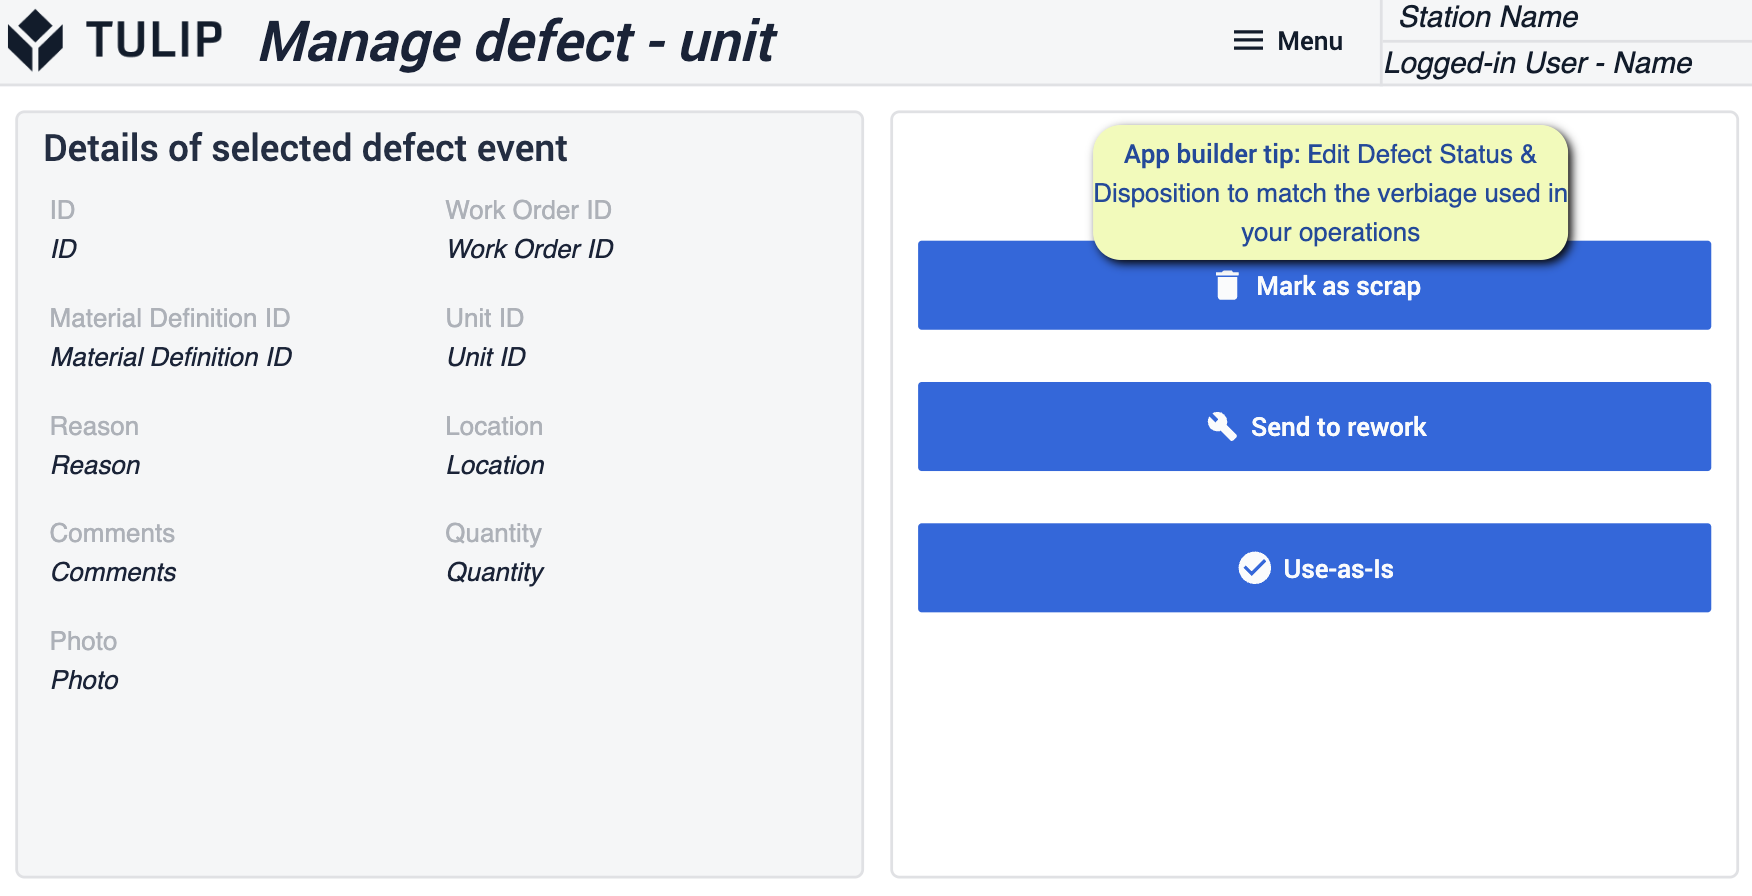
- App Builder Tip to Follow, Edit defects and dispositions to match the language used by the facility.
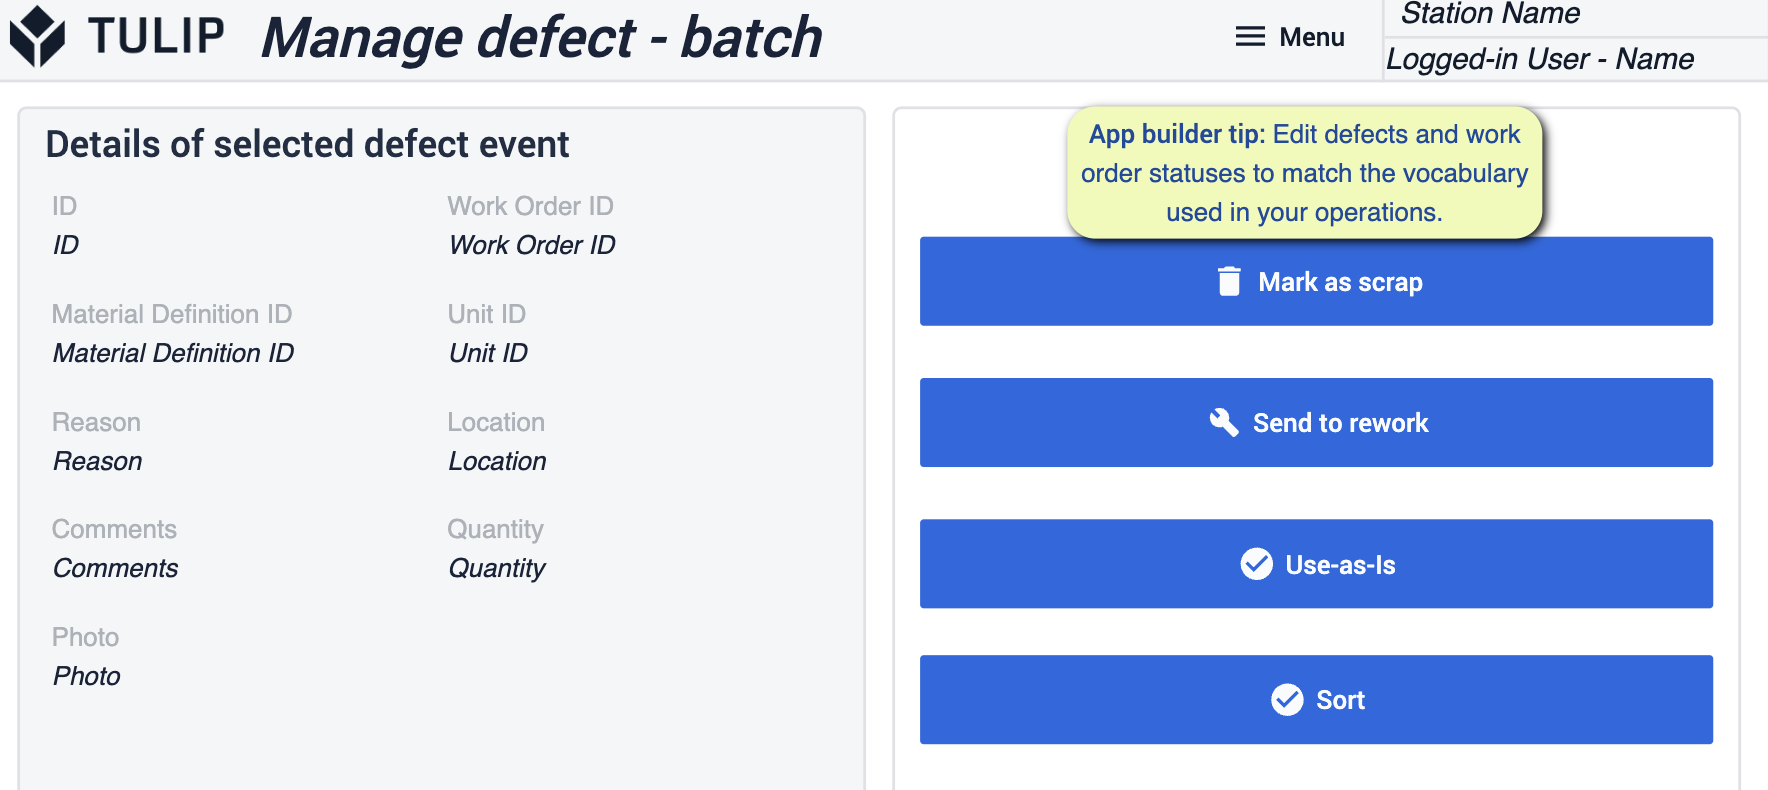
Manage Defect -Batch
This Step is a different for managing defects, more so for batch processes but follows the same principal.
Rework Details
On this step you’ll log if the rework was successful or failed and provide notes along with the defect.
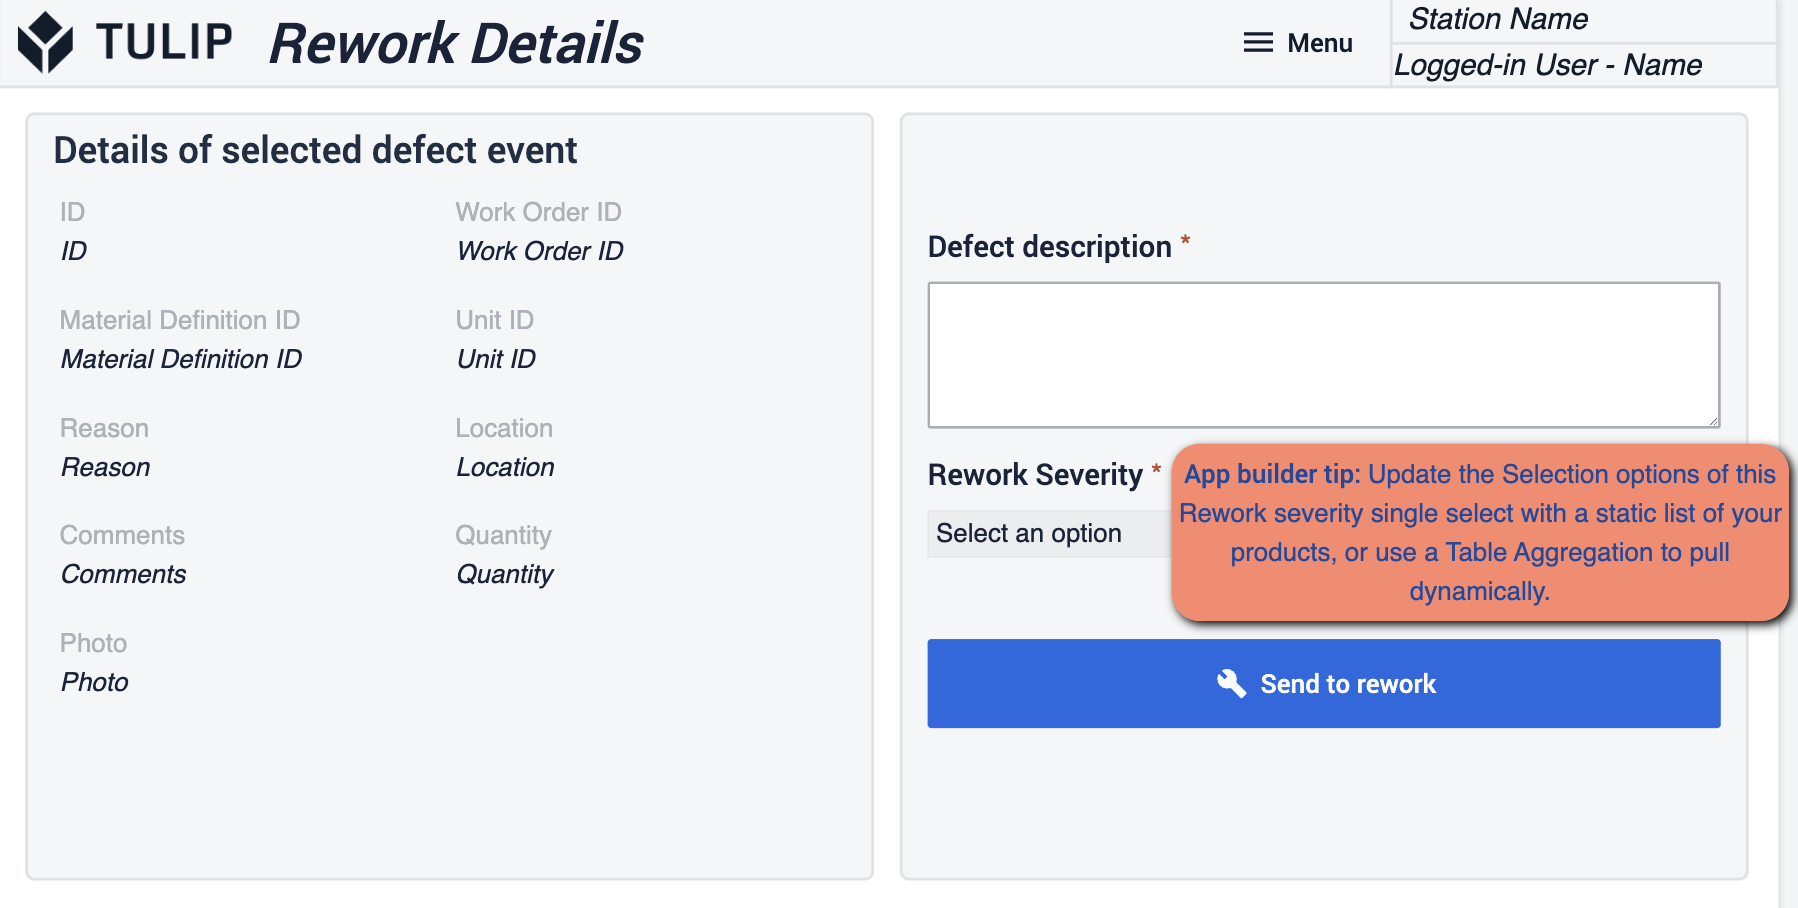
- You’ll want to make sure that you update the selection options for the rework. You can change the static values to match what your operations.
Quality Management Dashboard
The Quality Dashboard application will give you insight on the information being logged throughout the day. Gain Real time visibility to how many defects are being found and how long it takes for them to get resolved.
Quality Dashboard
This step will give a view of the tasks themselves. Actual numbers and graphs displaying key metrics.

- Required set up in this application is to make sure the time zone is changed to match your operations for proper tracking.
View Inspection Results- Batch
In this Visual Inspection section you’ll be able to view details on specific orders. Giving you insight on key metrics that you're tracking.

- The required setup here focuses around setting up filters with specific analytics that you would want to see. The type of graph and what metric that graph is trying to show.
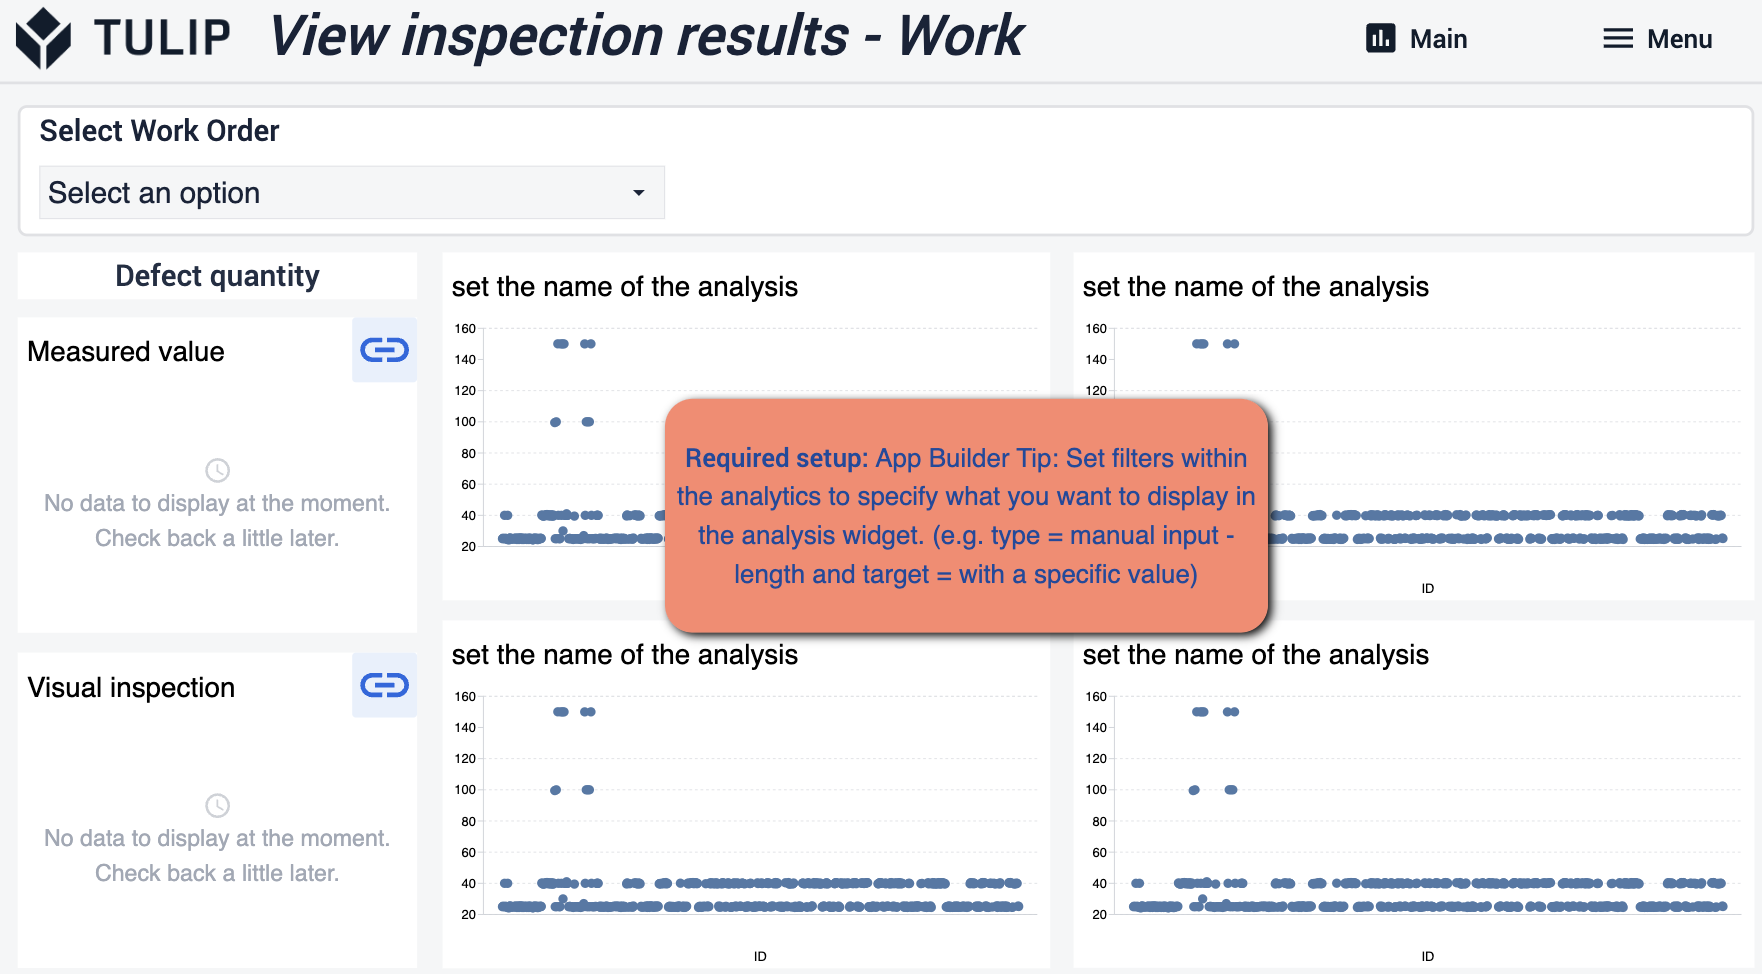
View Inspection Results-Work
This view is focuses on work orders and few different ways to approach your analytics. You'll want to follow the same tips here as well.
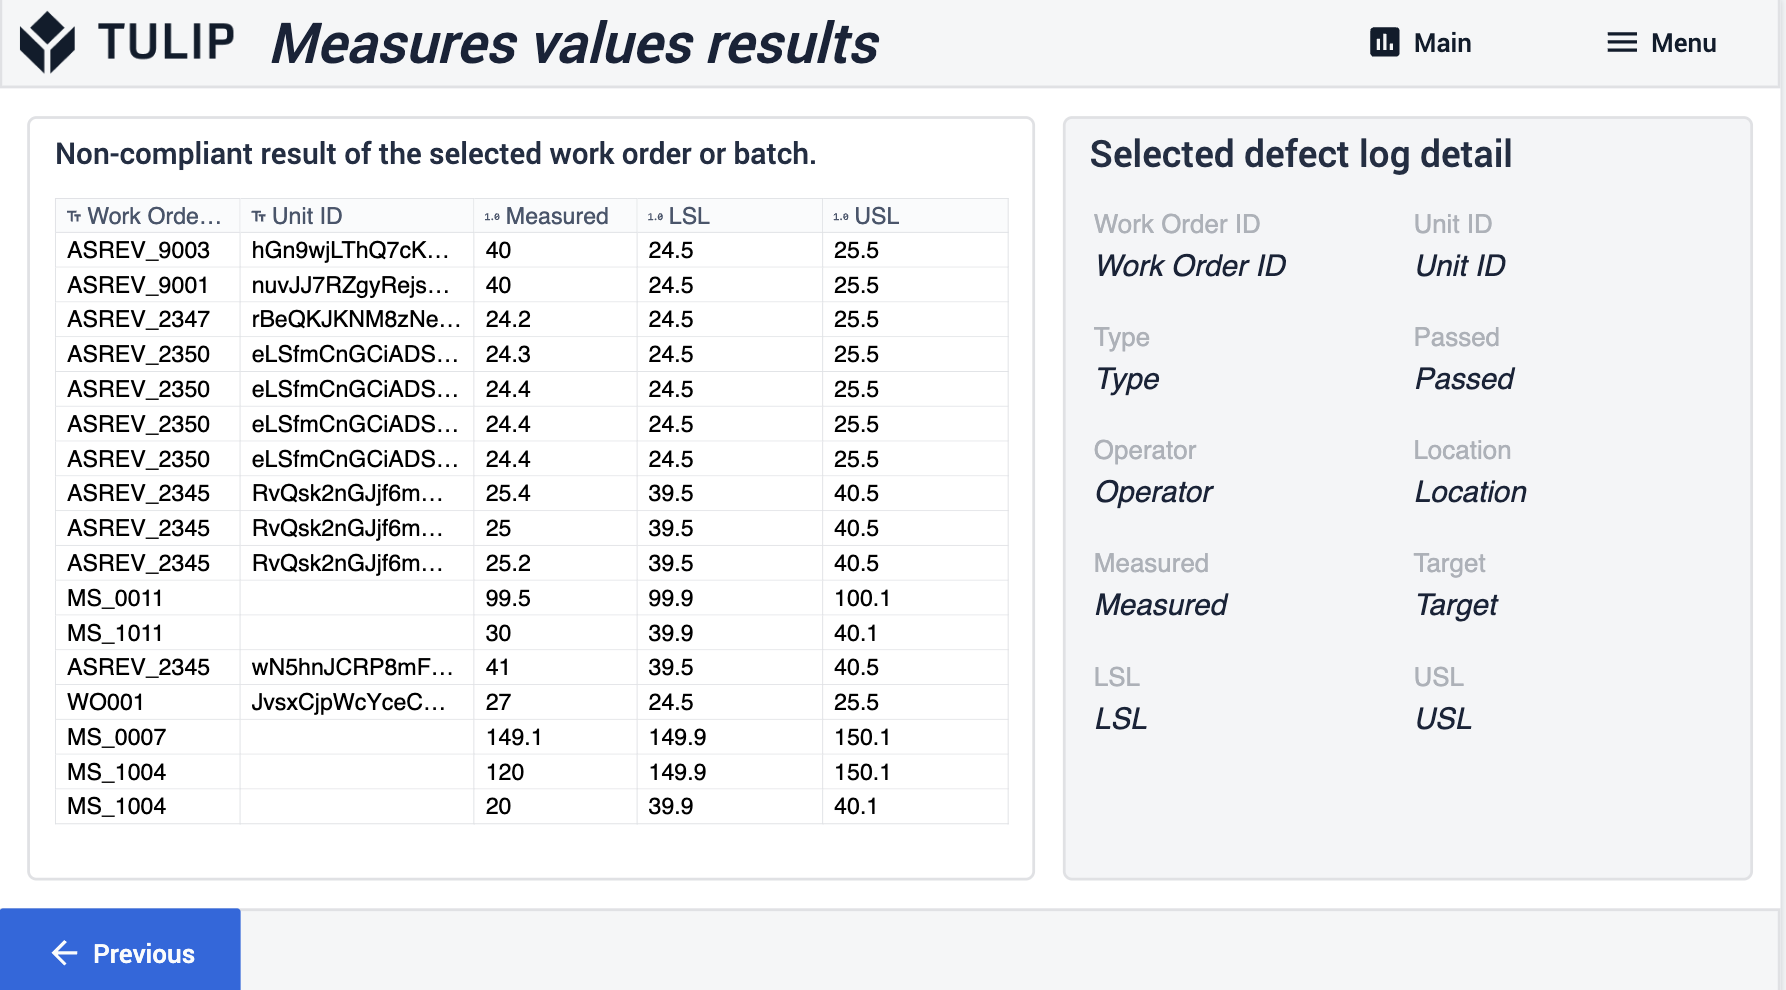
Measures Values Results
Here you will see details on the history of the work orders. Its journey through your Facility, where in the process, who’s been involved, and so on.
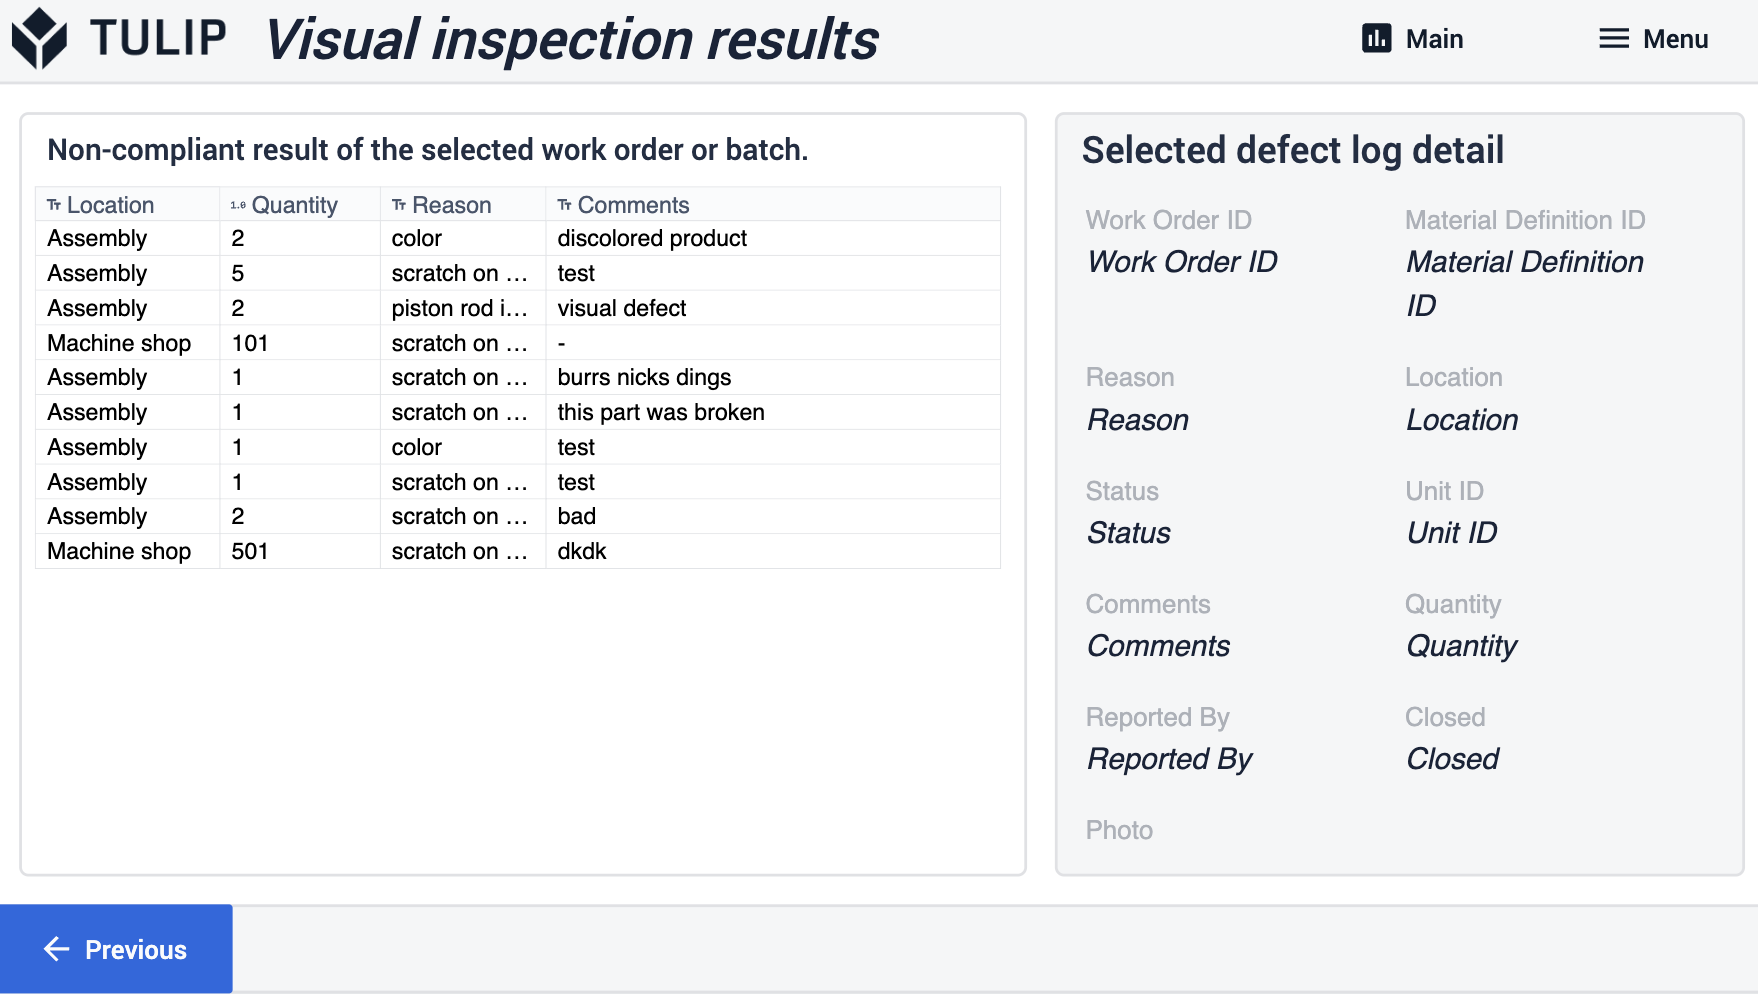
Visual Inspection Results
Quality Inspection Template
Full inspection step group template
View Batch
This step is meant to let you view all available batches that have gone through production. Show specific details on the history of this work order.
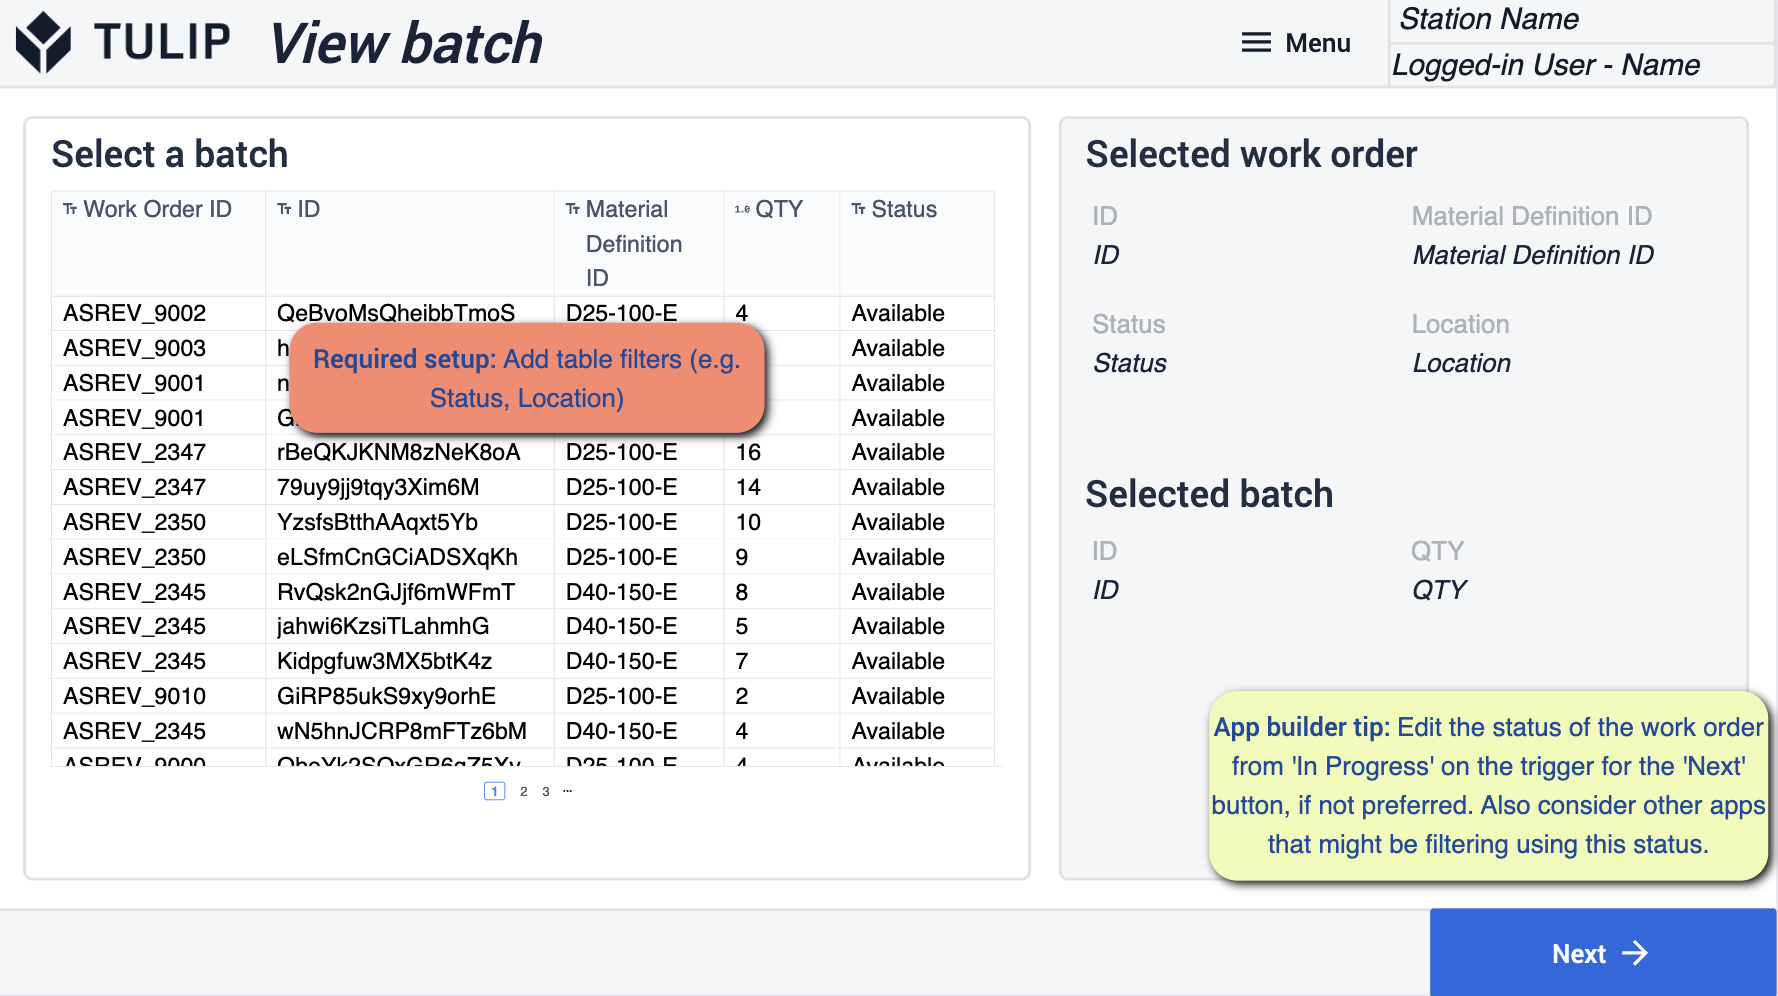
- Make sure that you add table filters to match your operations. You will want to edit the work order status to ‘In progress’ through the triggers of the next button.
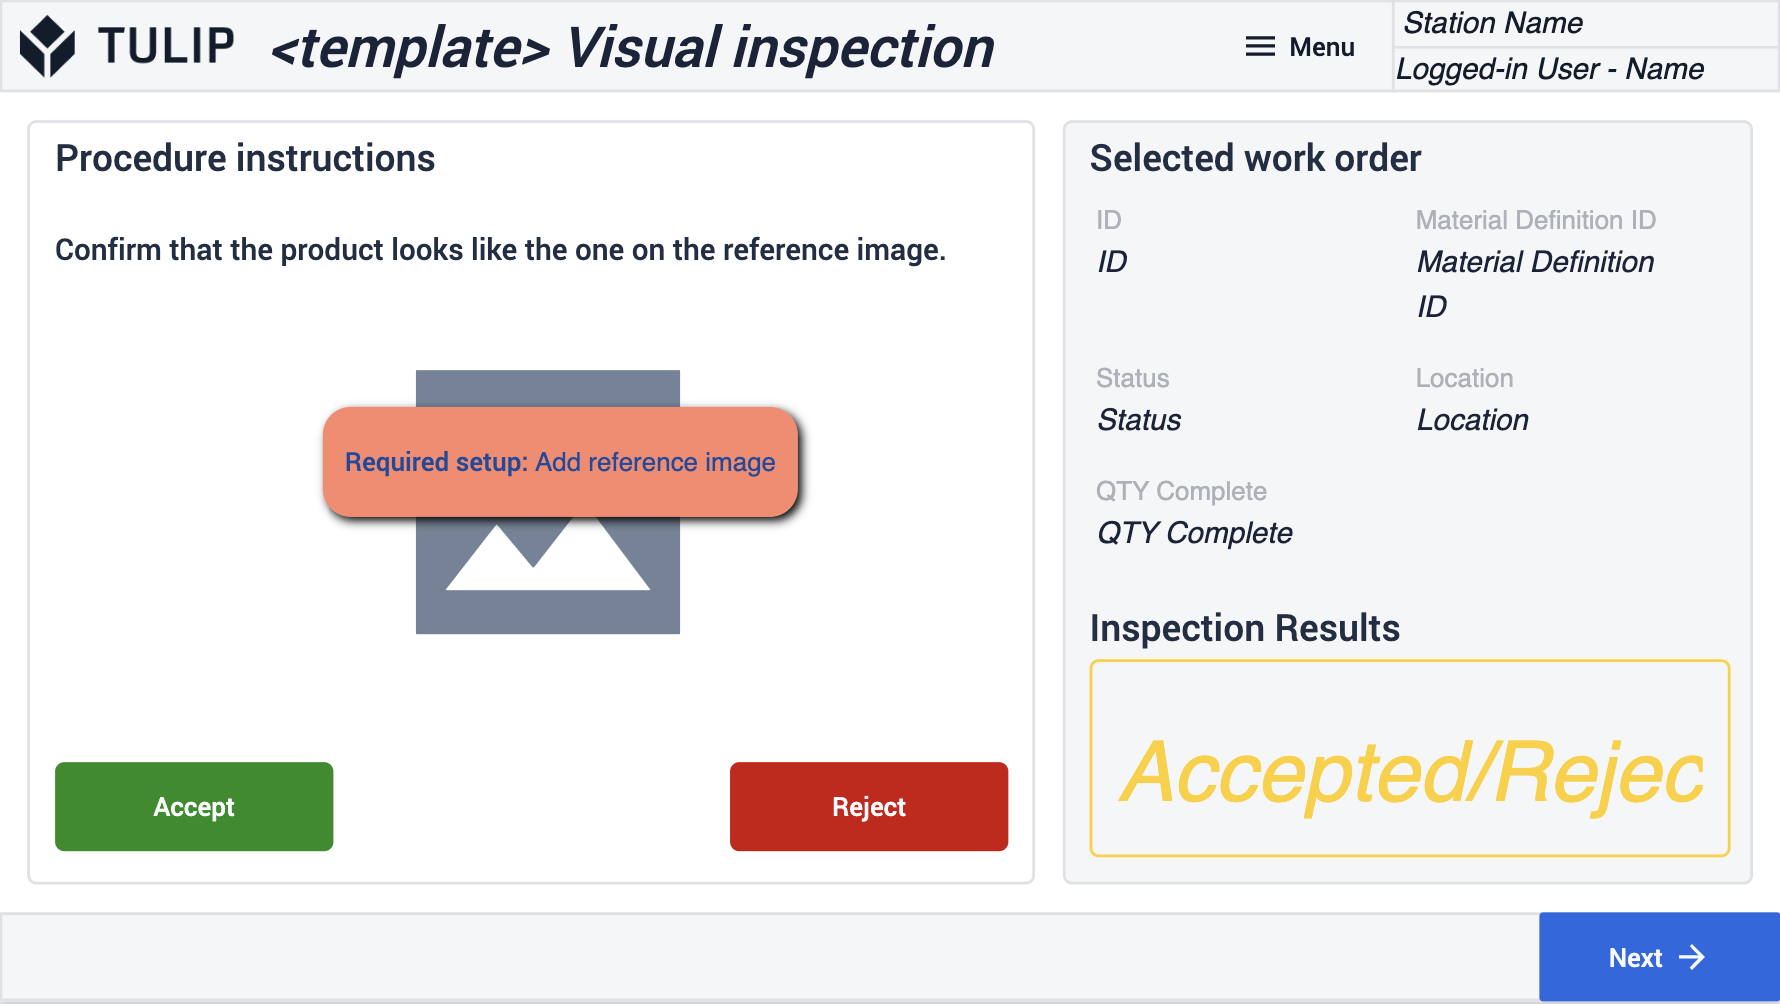
Visual Inspection (Template)
This Template is meant to visually accept the product as it comes through. The Order will either pass or fail based on the image reference that you add to this specific step.
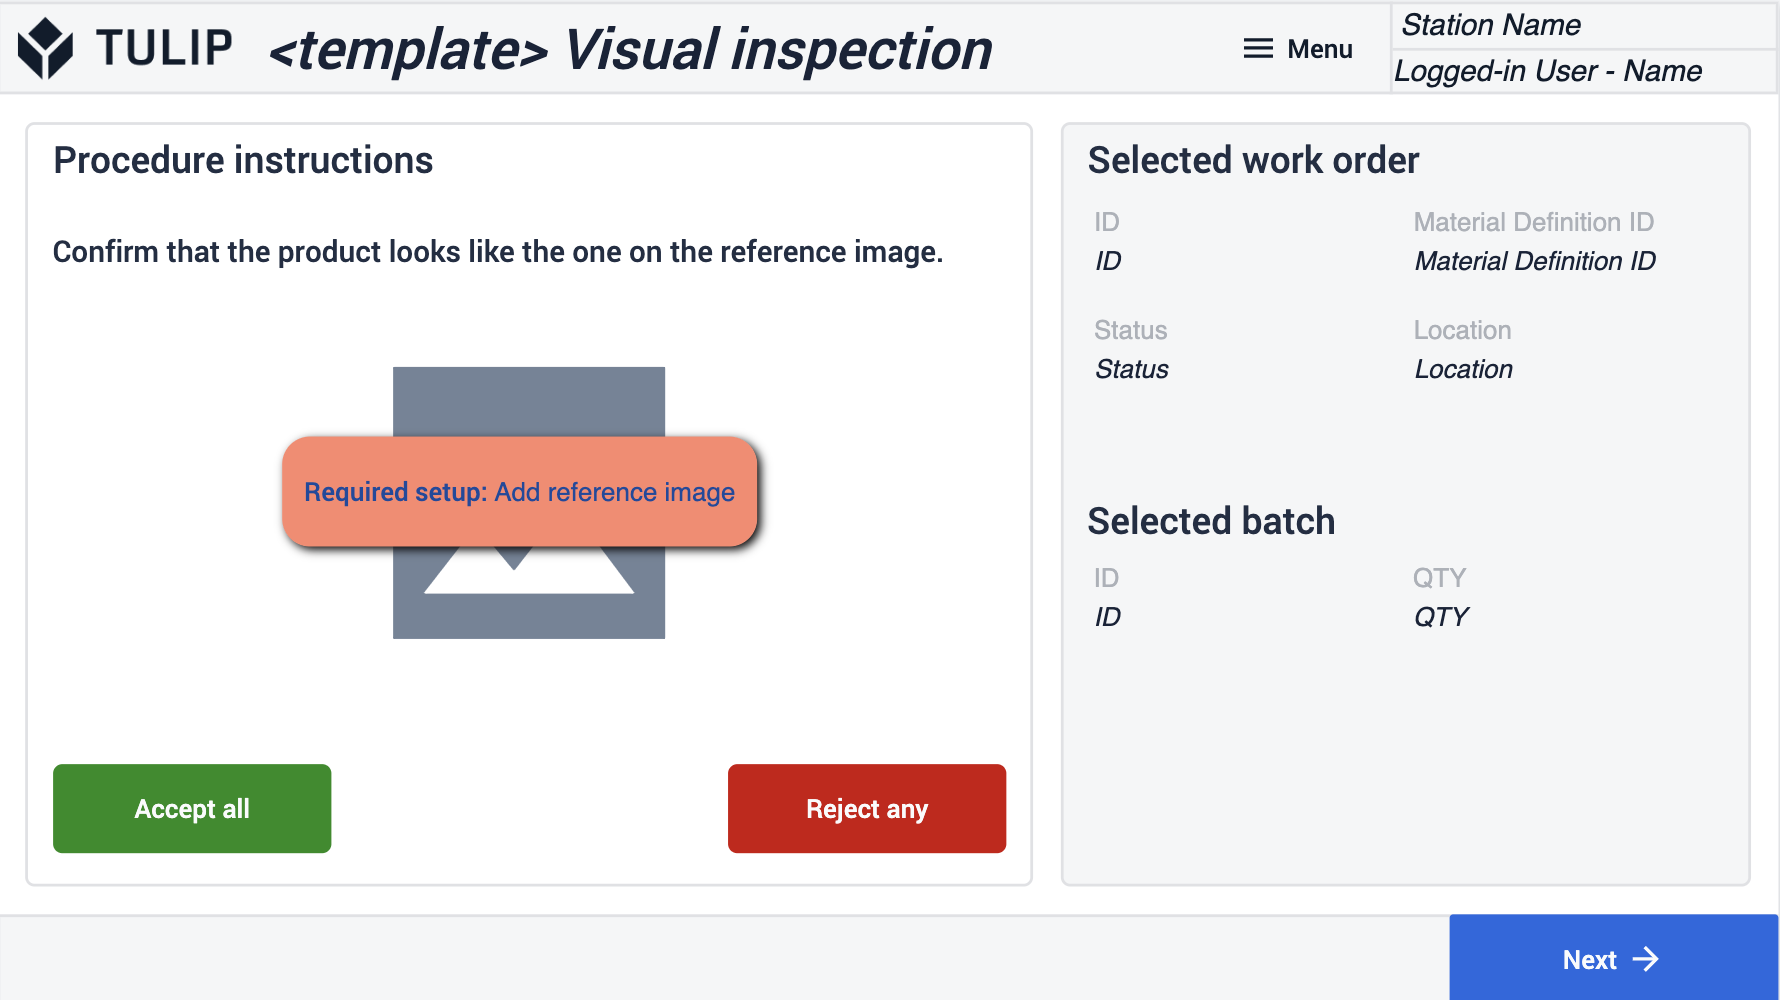
- Make sure to add a visual of an order that passes inspection.
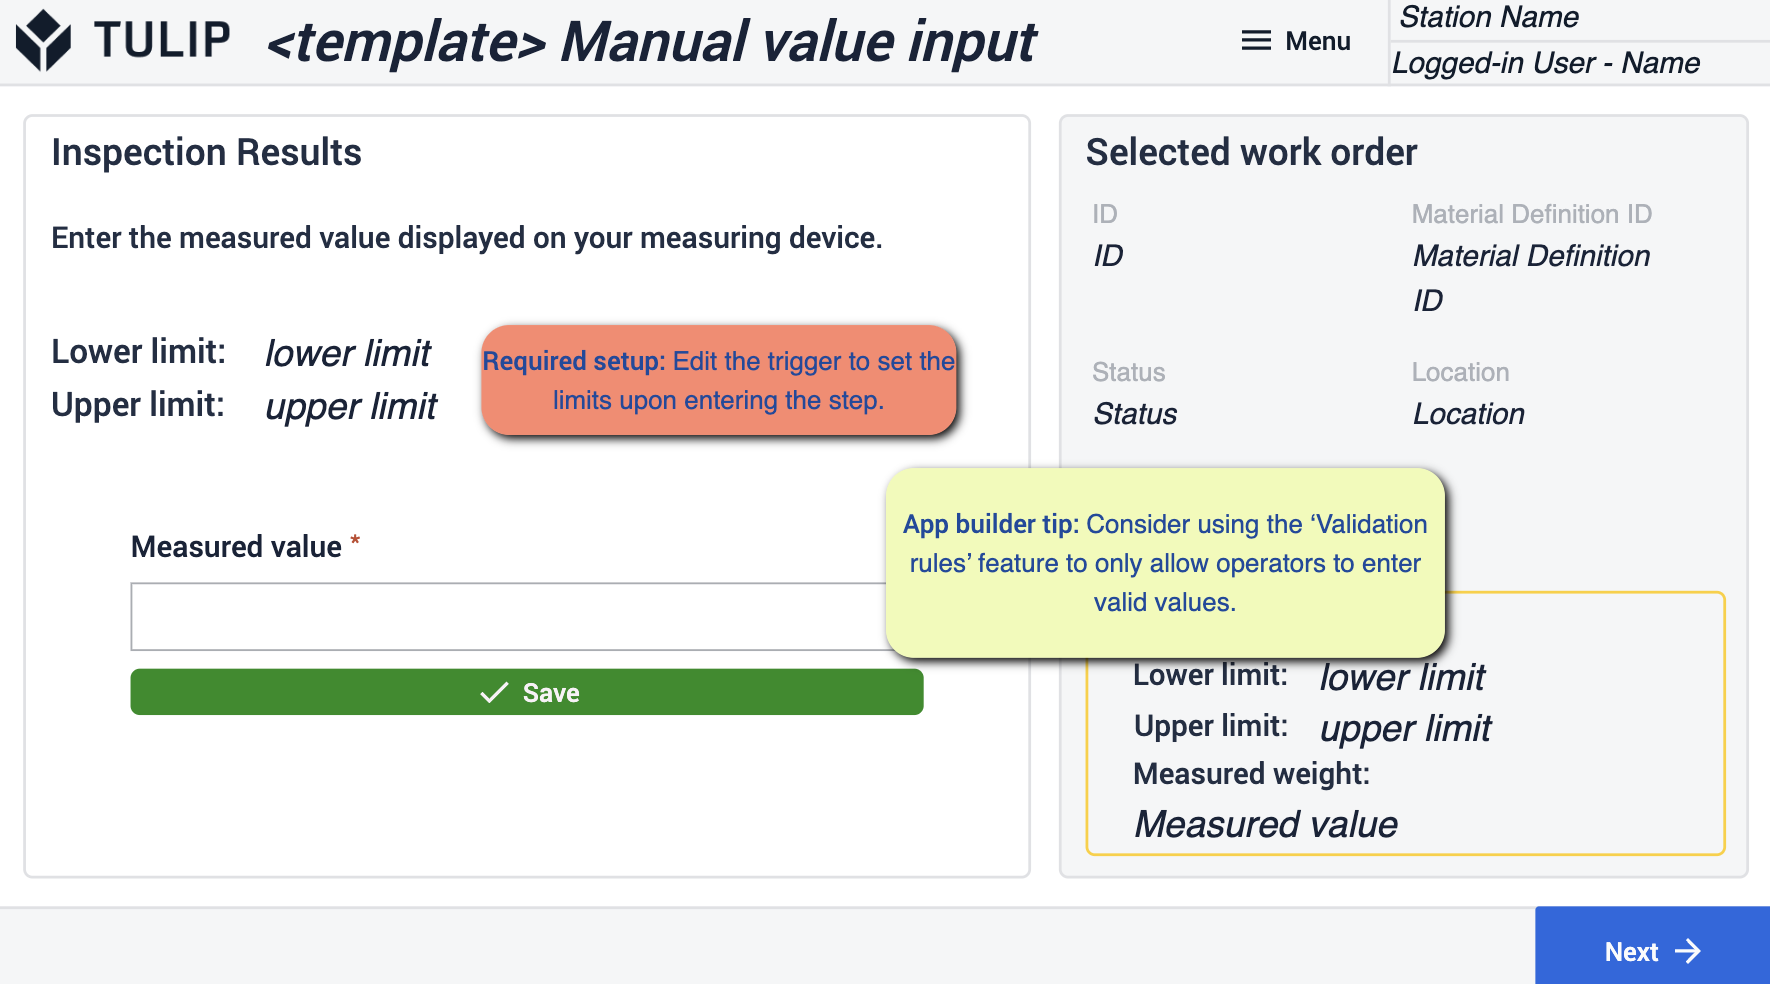
Manual Value Input (Template)
This Template is meant to be paired with your measuring device to capture set parameters that you will set for if an order passes inspection.
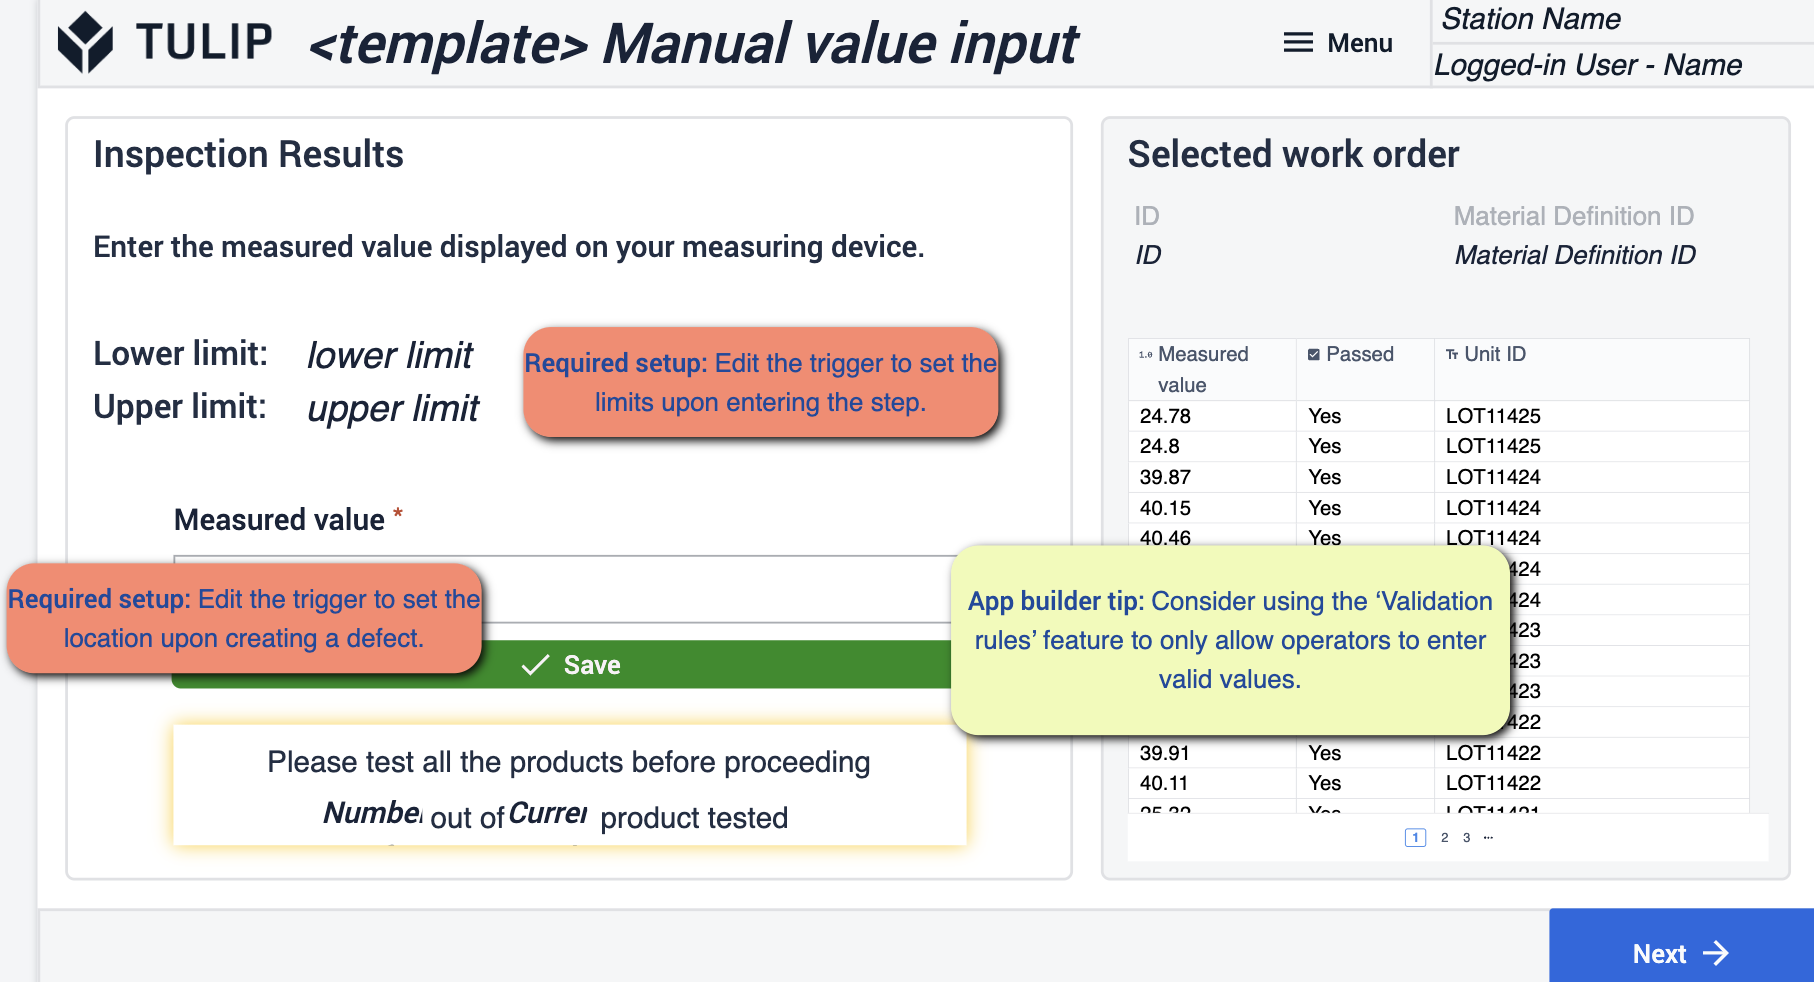
- Make sure that you edit your triggers to follow the limits that you set for passing and edit the triggers to capture the location when a defect is logged.
View Results Summary
Here you will review the orders that have gone through inspection. You can make some adjustments to the orders that you select.

- Edit Work Order Statues and locations through the triggers involved.
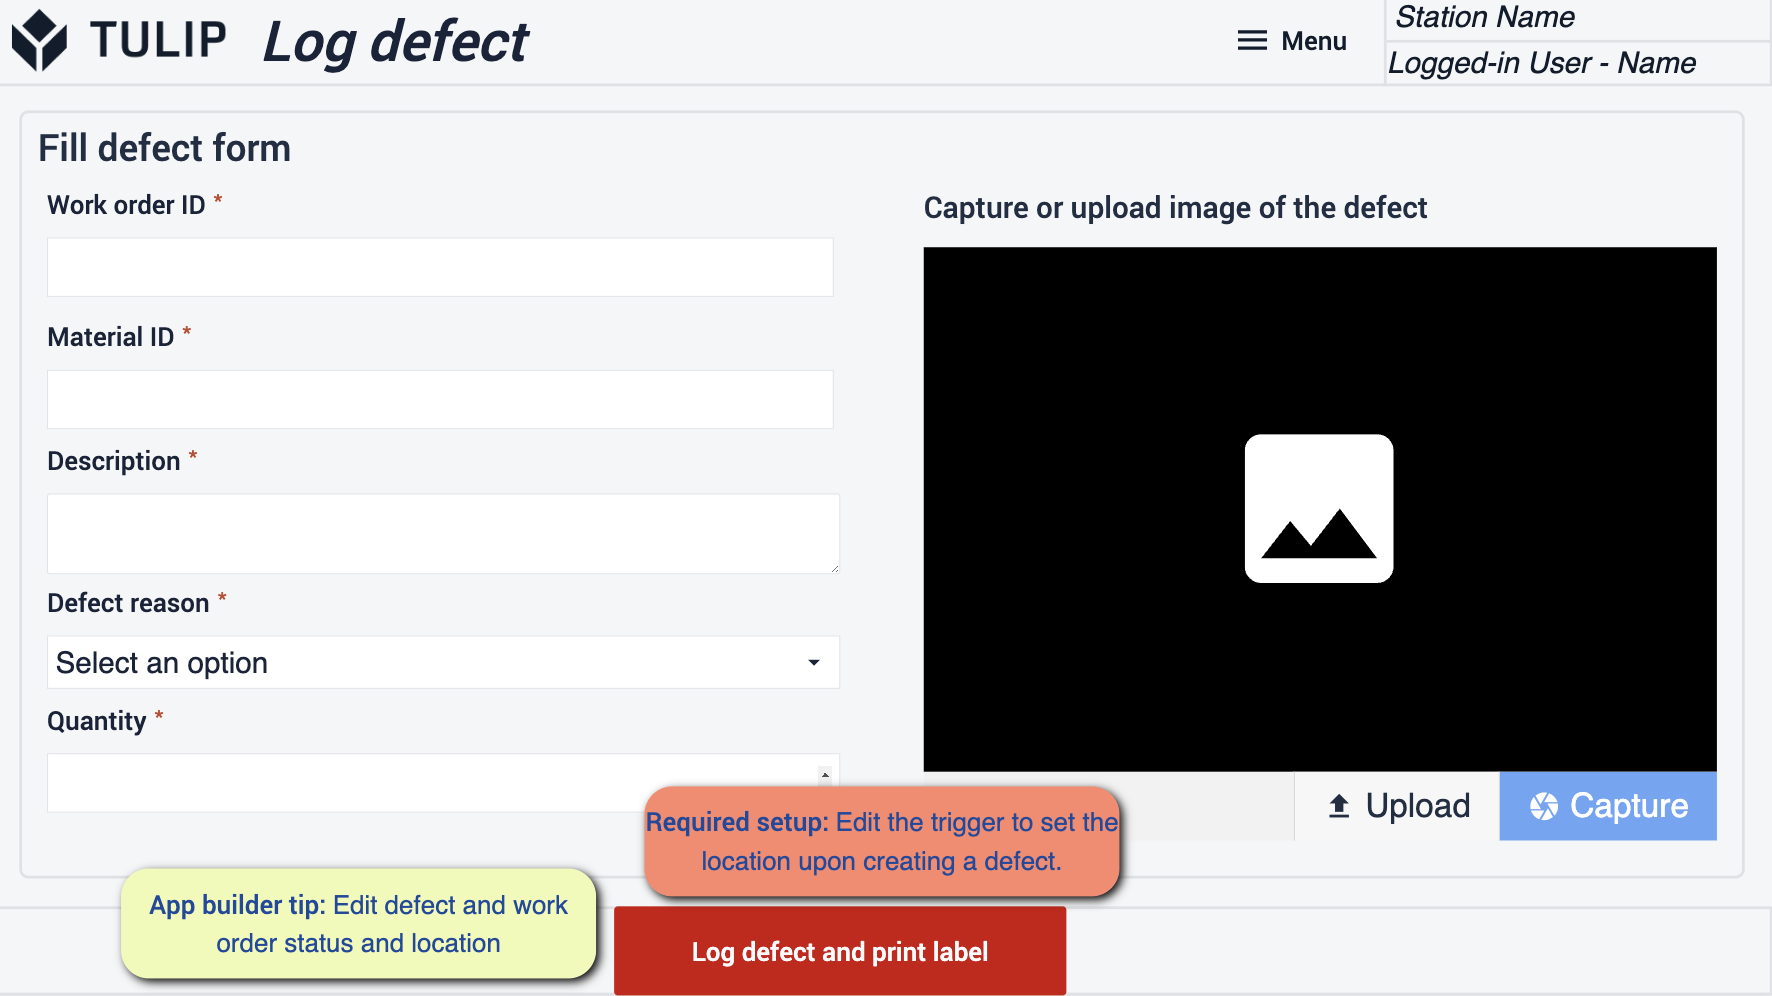
Log Defect
On this step you’ll log any defects that you find through the inspection. This will create a record and allow you to keep track of defects as they arise.

- Make sure in the application to edit the defect status and location to match your operations. You will have to edit the trigger to set the location when you log the defect.
Sampling inspection step group template
View Work Order
You will be able to see all work orders that have come in and Select the ones that you want to work on or see the history behind.
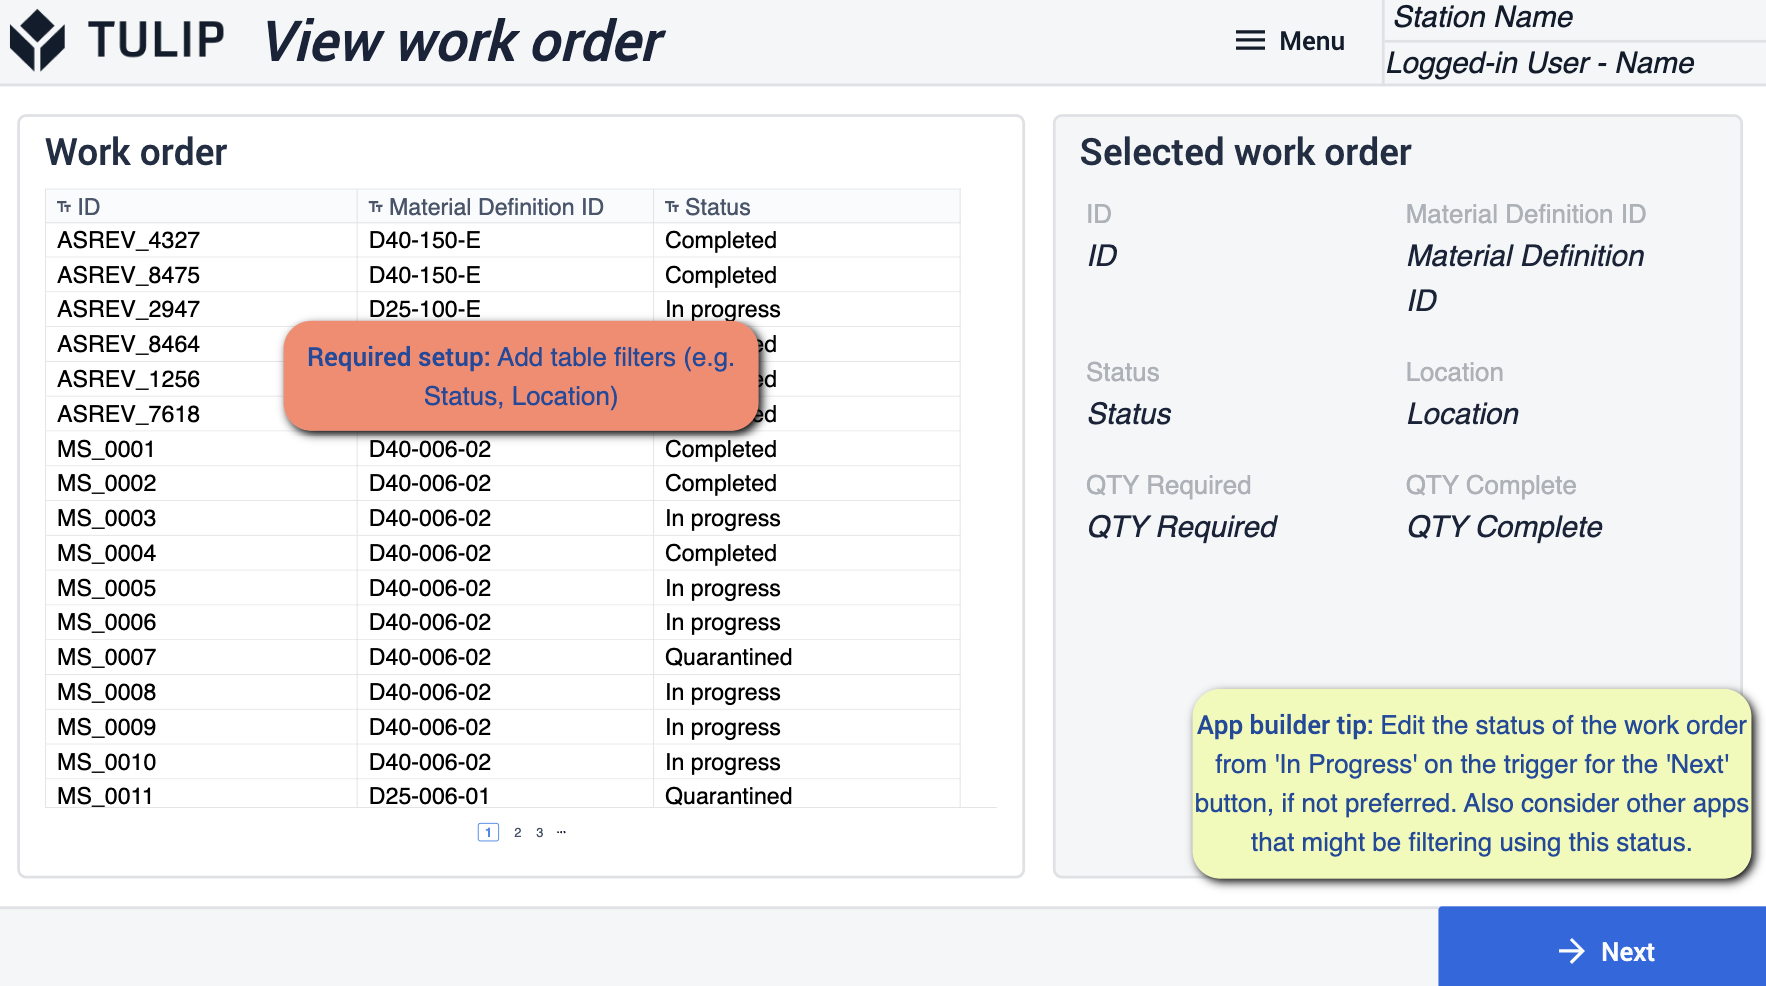
- Make sure to filter your table that matches your operations. You will want to edit the status of the work order through the triggers that are tied to the ‘Next’ button.
Sampling Instructions (Template)
This Template is meant to give you instructions to follow as you progress through selected work orders.

- Make sure to add Instructions that match what the operator will be doing. You’ll also want to make sure that you change the names of your checkboxes to match what you’re trying to capture for analytics.
Visual Inspection (Template)
This Template is meant to visually accept the product as it comes through. The Order will either pass or fail based on the image reference that you add to this specific step.
- Make sure to add a visual of an order that passes inspection.
Manual Value Input (Template)
This Template is meant to be paired with your measuring device to capture set parameters that you will set for if an order passes inspection.
- Make sure that you edit your triggers to follow the limits that you set for passing and edit the triggers to capture the location when a defect is logged.
View Results Summary
Here you will review the orders that have gone through inspection. You can make some adjustments to the orders that you select.

- Edit Work Order Statues and locations through the triggers involved. If you are not using a Kanban System follow the steps to delete the trigger around material request. If you plan to use it make sure that your statuses align with those in your Kanban System.
Log Defect
On this step you’ll log any defects that you find through the inspection. This will create a record and allow you to keep track of defects as they arise.
- Make sure in the application to edit the defect status and location to match your operations. You will have to edit the trigger to set the location when you log the defect.
Label
Create a Label that will show the history of the order once the operator has finished.

- You can edit the label to show the information that needs to be displayed.
Readiness
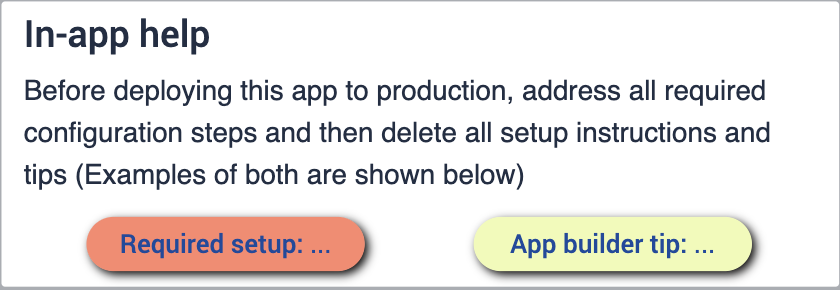
When going through the app suite it's important to make sure that you follow the App Builder Tips. These tips will be your guide to preparing your applications for deployment. It’ll be important to reference the prerequisites and make sure that you followed both the Required Steps and App Builder Tips within each step.