To download the app, visit: Library
This Article provides a summary of how the App based work instructions are structured and built.
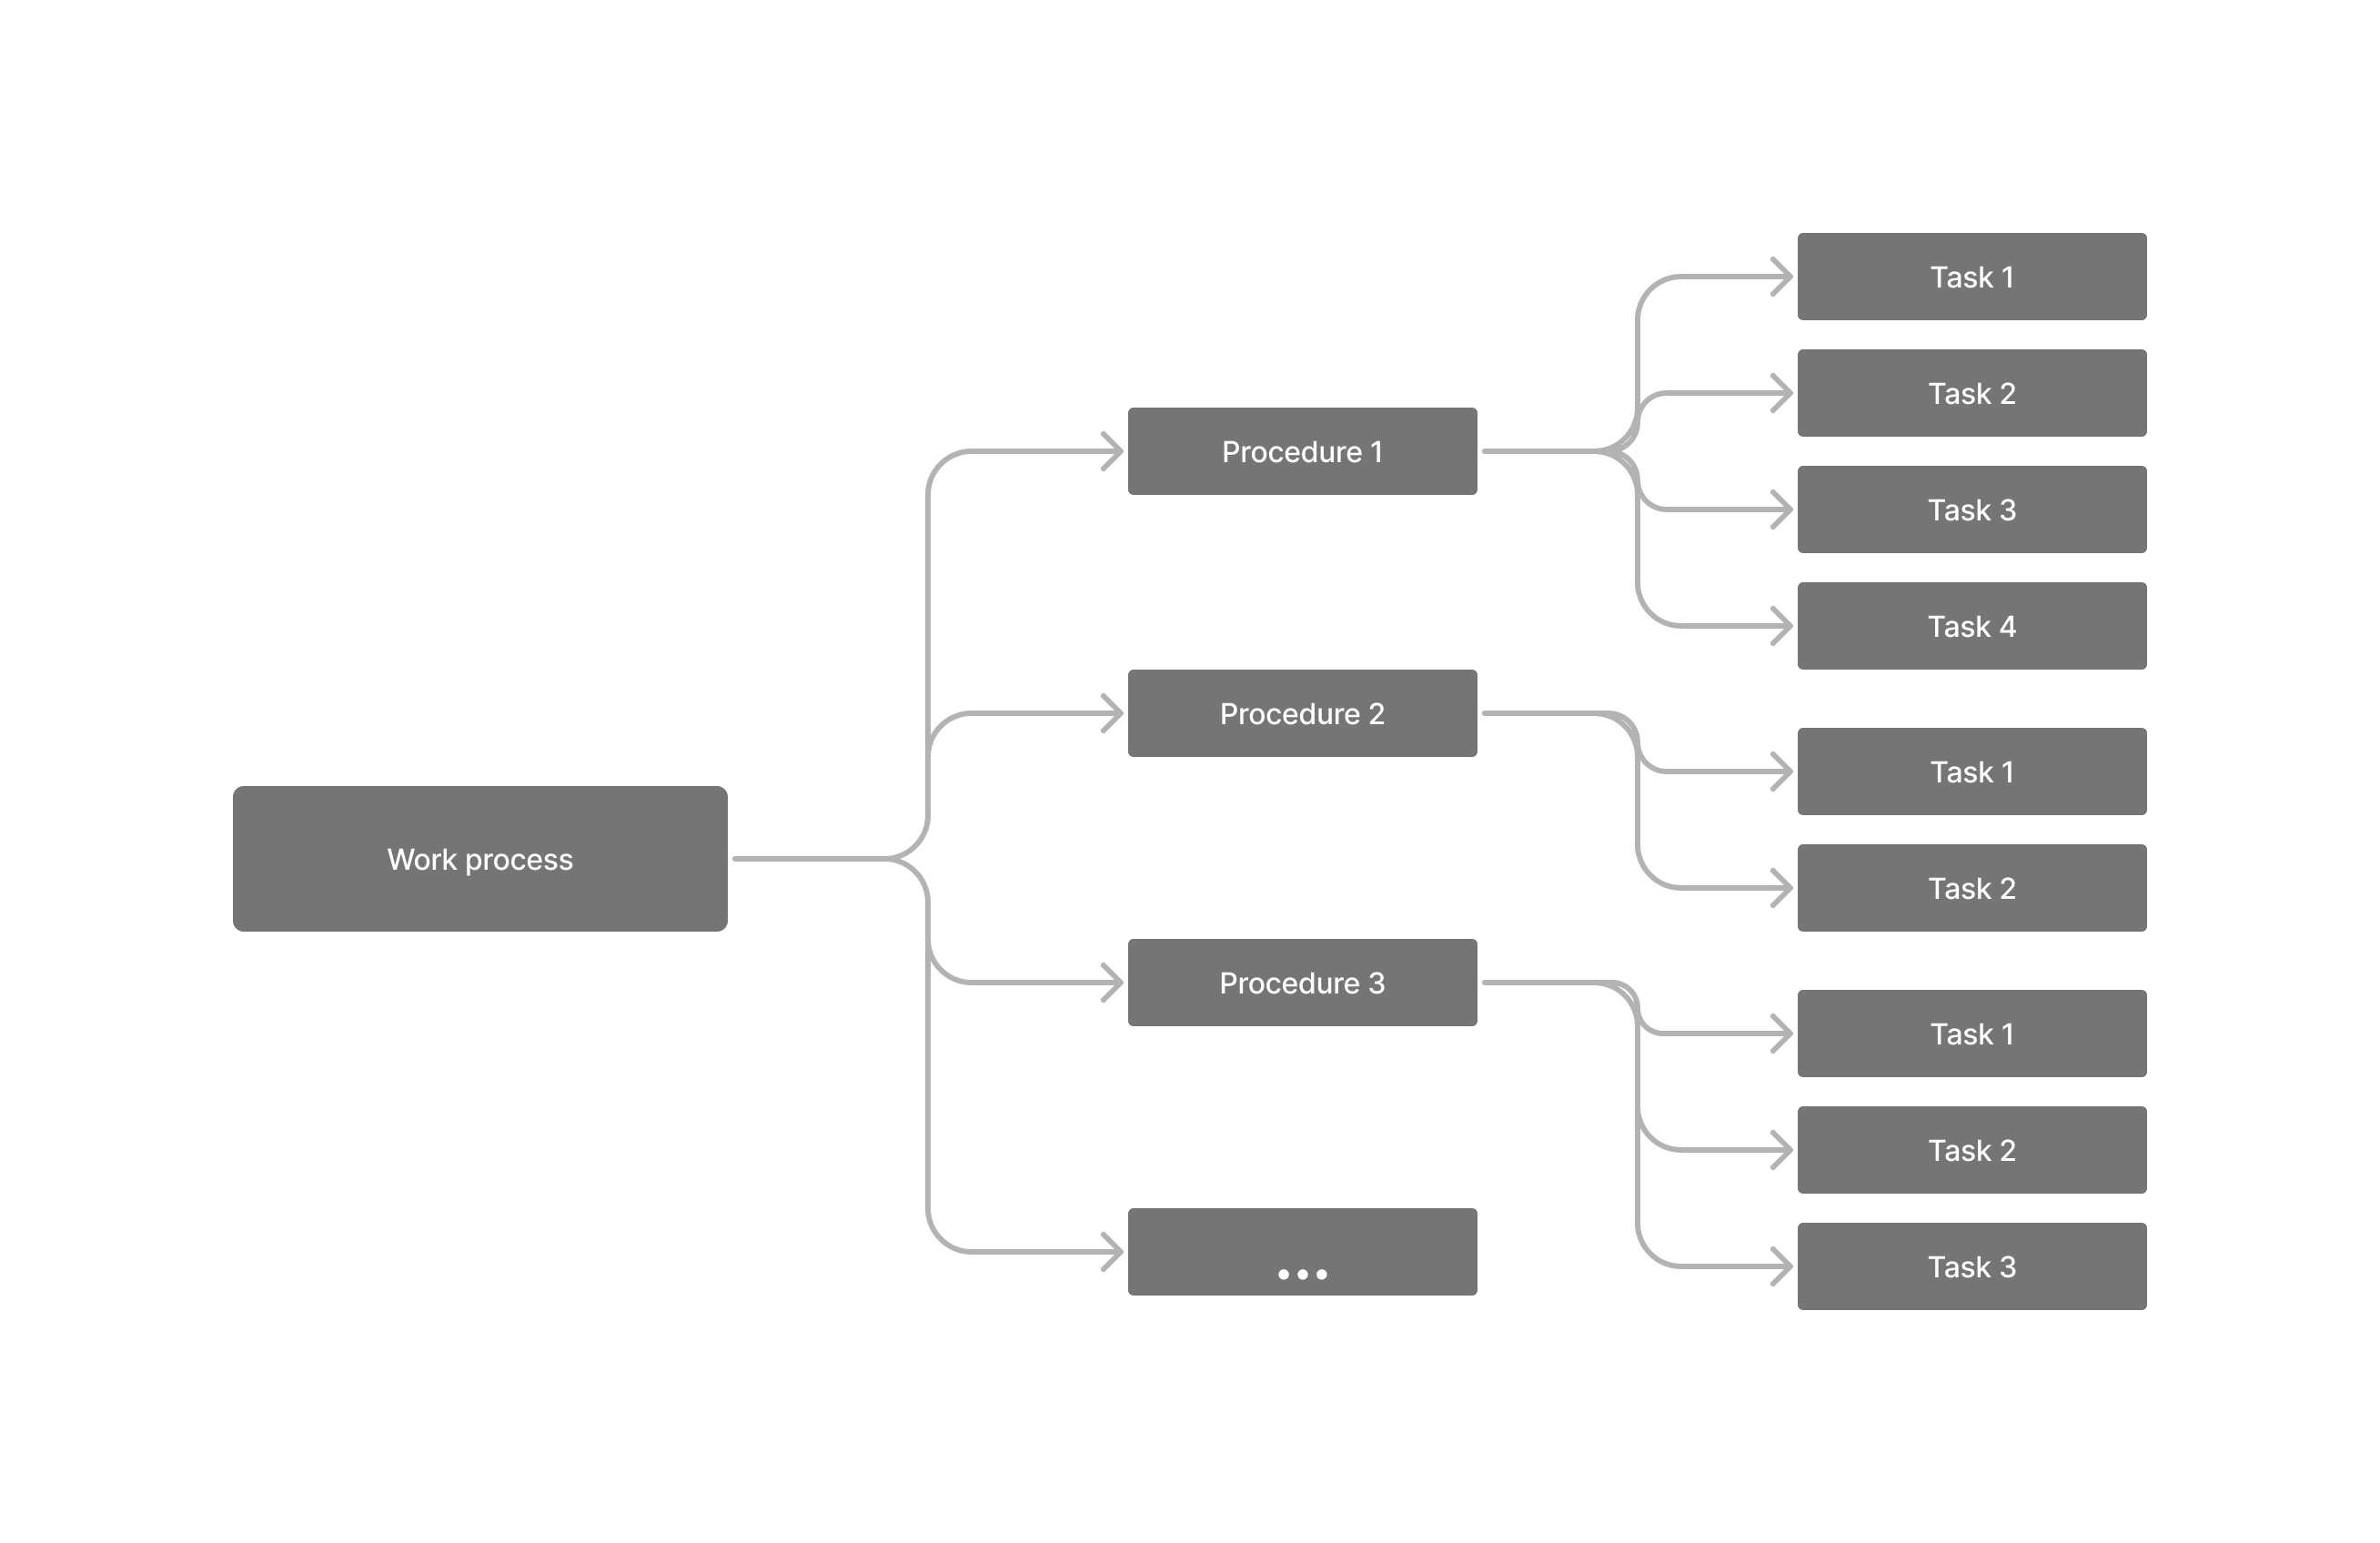
Work instructions are documents that clearly and precisely describe the procedures and tasks for operators on the shop floor. It describes individual procedures of the work process and the tasks that make them up.
Tulip’s digital work instruction templates enable the logging of Completion data (defects, defect reasons, number of output units ect.) effectively. It also provides Analytics of this data to make the planning and optimization of the work process easier.
These apps use only Variables to hold data. The history of data captured in the variables are accessible in Analytics through Completion Records.
Apps
One Task per Step
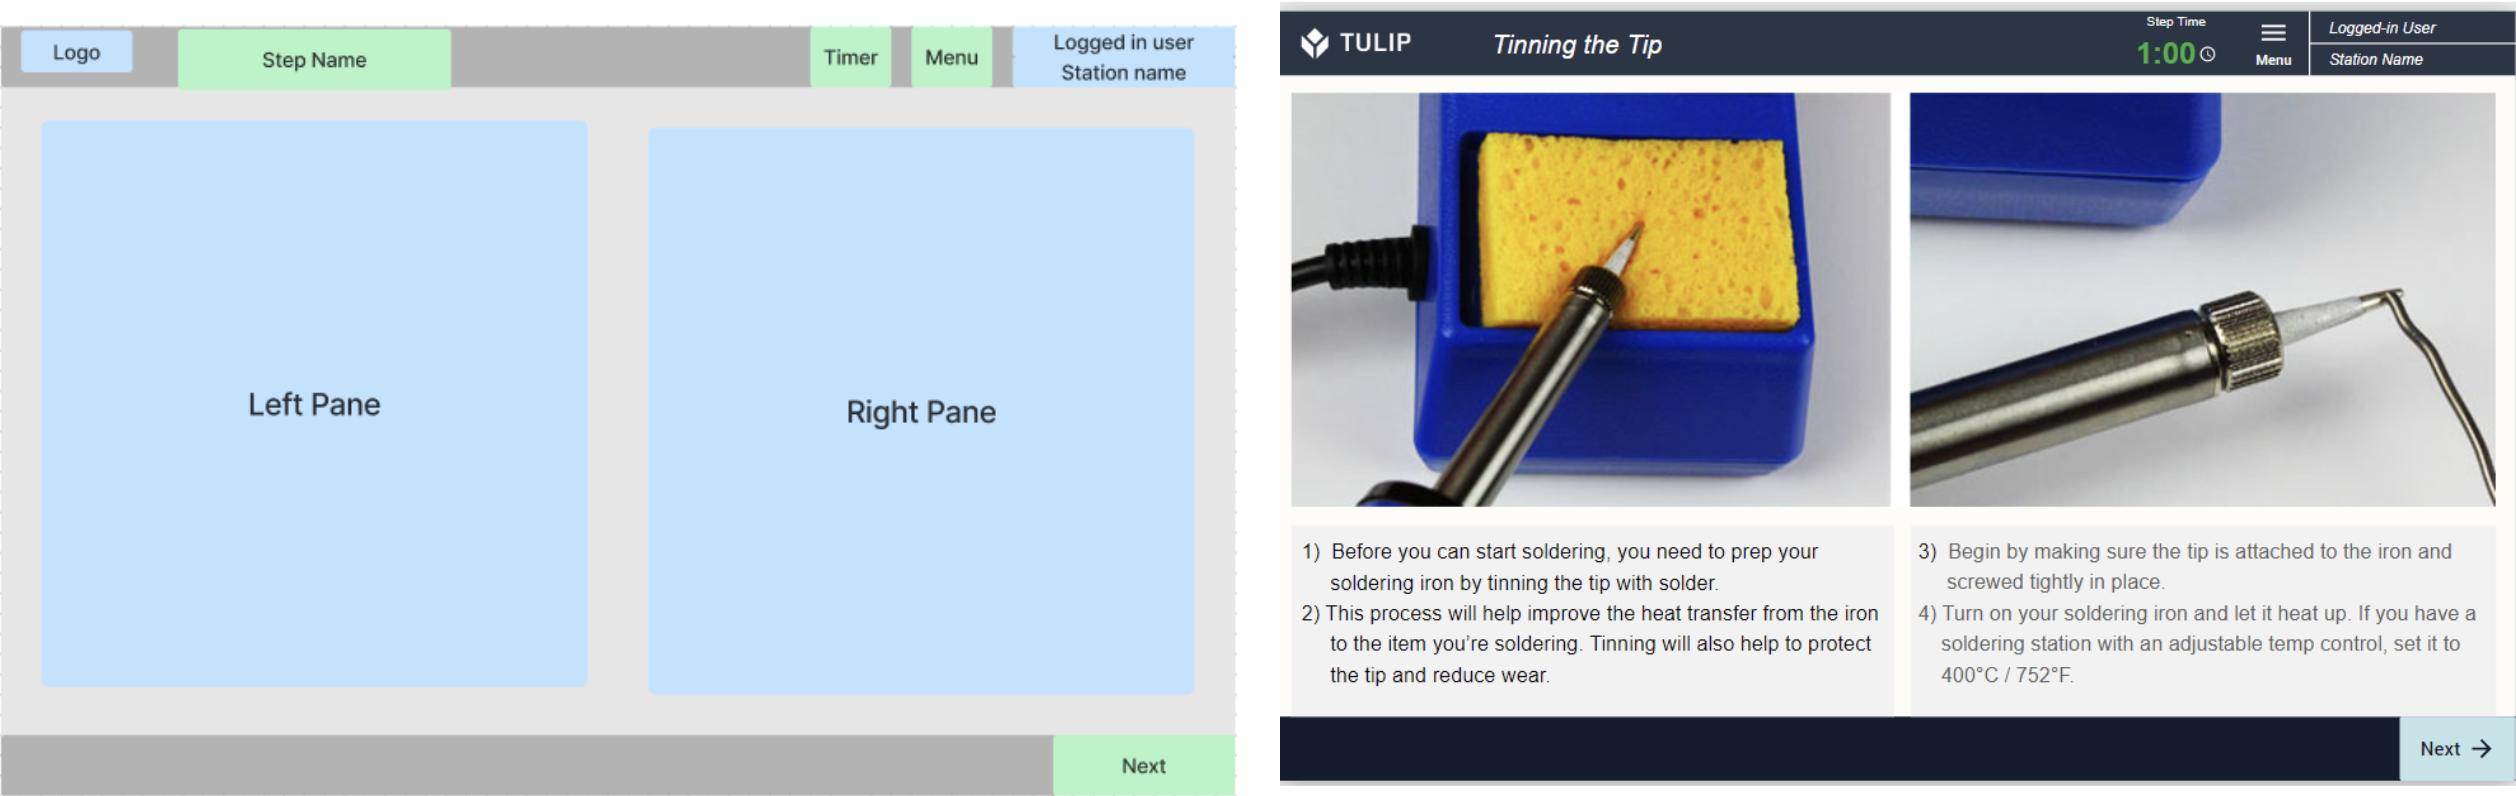
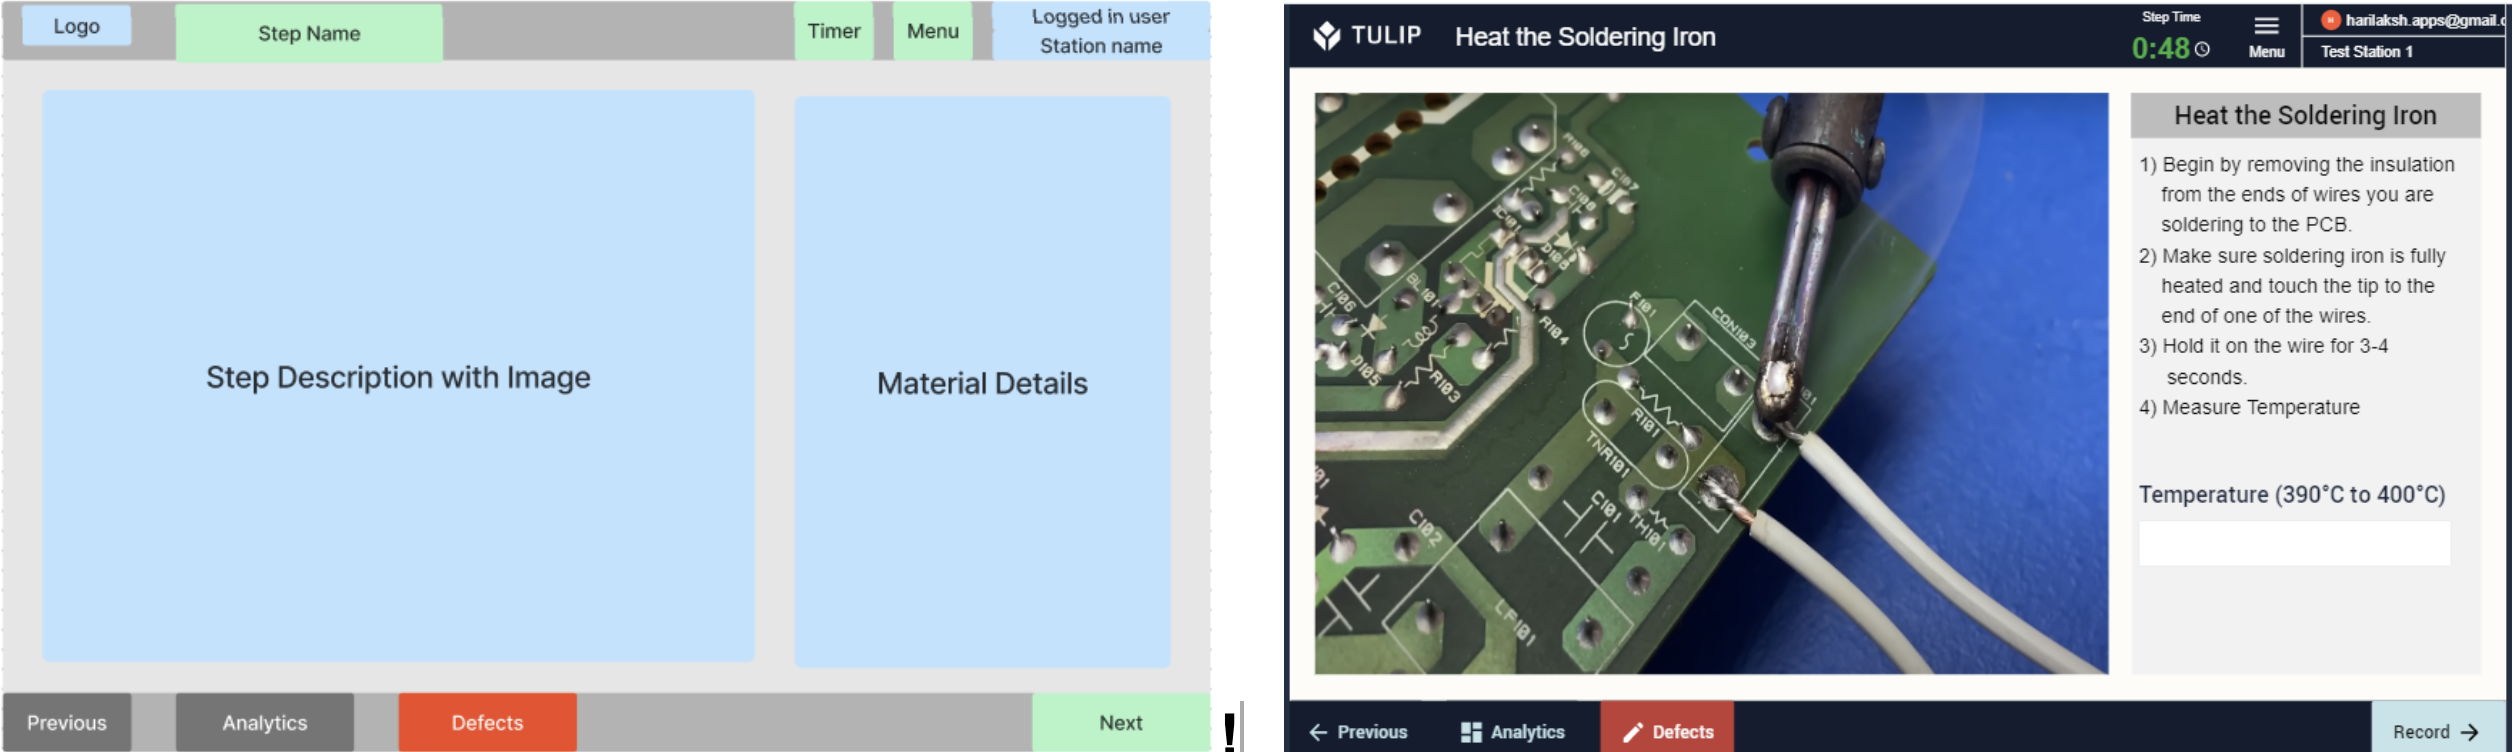
This is the simplest app based work instructions template. The user designs steps and the app displays the sequence of tasks in the specific procedure. During the execution of the task, the operator can log any possible defects with defect reason and can add notes containing the details of the defect. After all the tasks the user can select the number of outputs and save completion data. The analytics from the completion data can be viewed at any time while using the app.
Application structure
- The application is organized as per the required operation flow
- Steps are sequenced with serial numbers in the same way as the operation flow requires
- Each task is detailed with text and images in a Single Step
- Input widgets are used to collect Data and store in variables
- Clicking the previous / next button enables users to follow the sequence of tasks to be completed
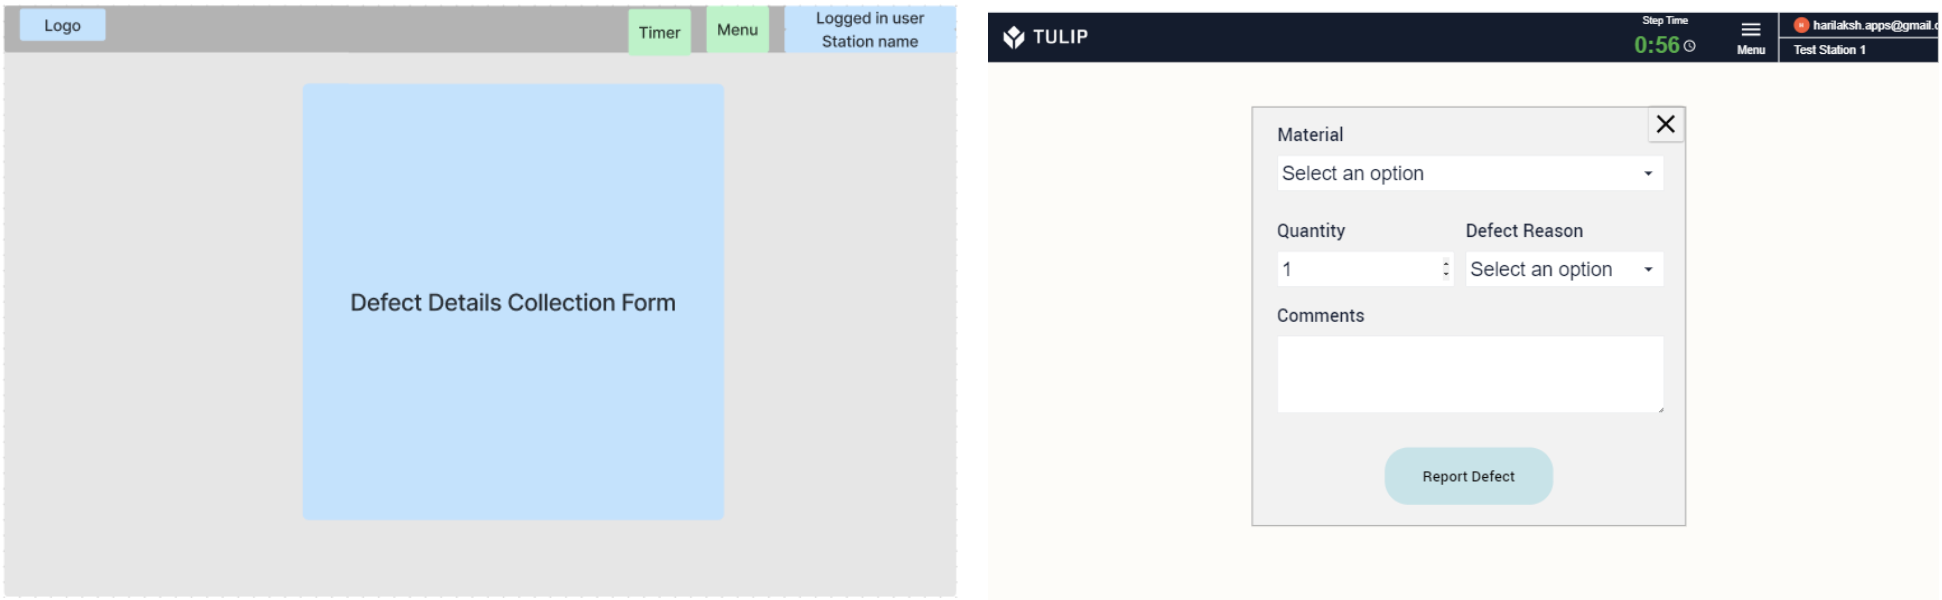
- Users can log defects from any step
- Users can navigate to Analytics/Report from any step
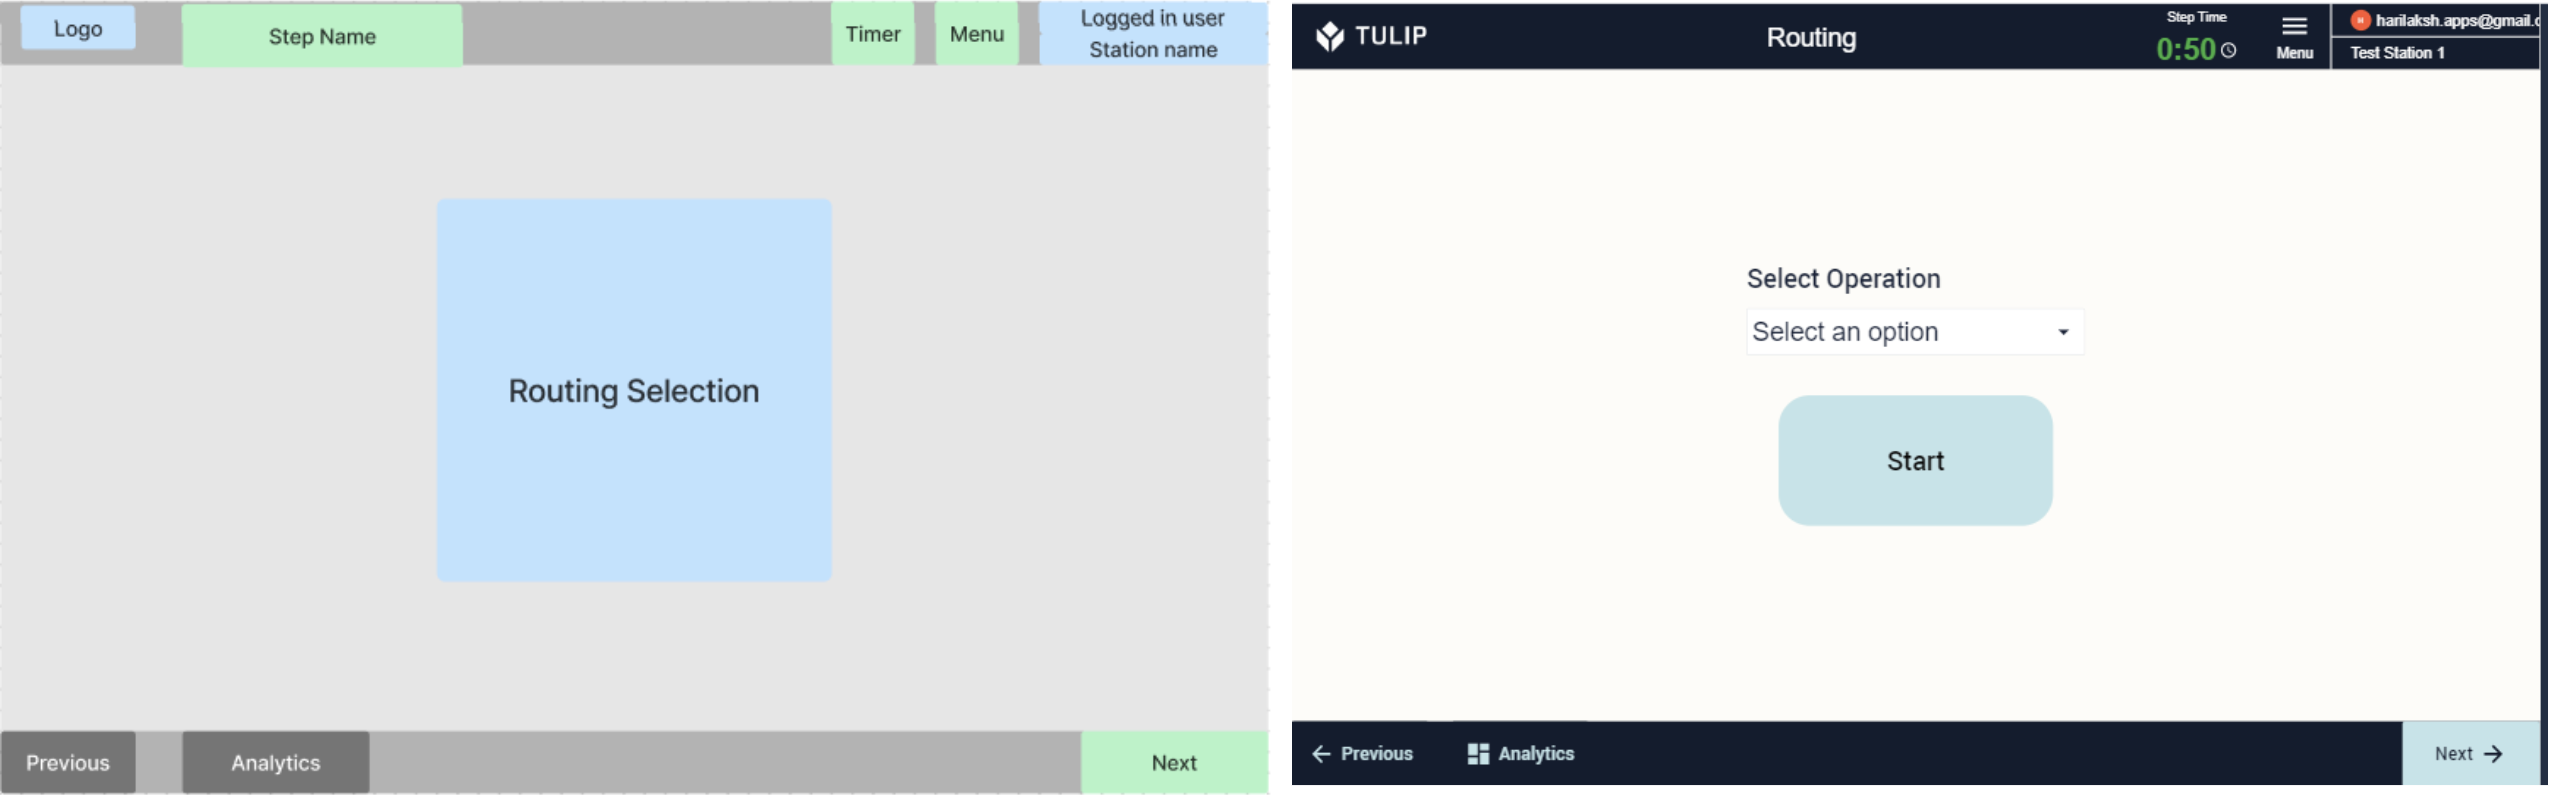
One Task per Step for Multiple Process Routings
This is the app based work instructions template having multiple process routings. The user can design steps for each routing as a step group. The first step allows users to select the desired routing and the app displays the sequence of tasks in the selected routing. During the execution of the task, the operator can log any possible defects with defect reason and can add notes containing the details of the defect. After all the tasks, the user can select the number of outputs and save completion data. The analytics from the completion data can be viewed at any time while using the app.
Application structure
- First step allows the user to select from Multiple Process Routings
- The application is organized as per the required operation flow
- Steps are sequenced with serial numbers in the same way as the operation flow requires
- Each task is detailed with text and images in a Single Step
- Input widgets are used to collect Data and store in variables
- The previous / next button press will enable users to follow the sequence of tasks to be completed
- Users can log defects from any step
- Users can navigate to Analytics/Report from any step
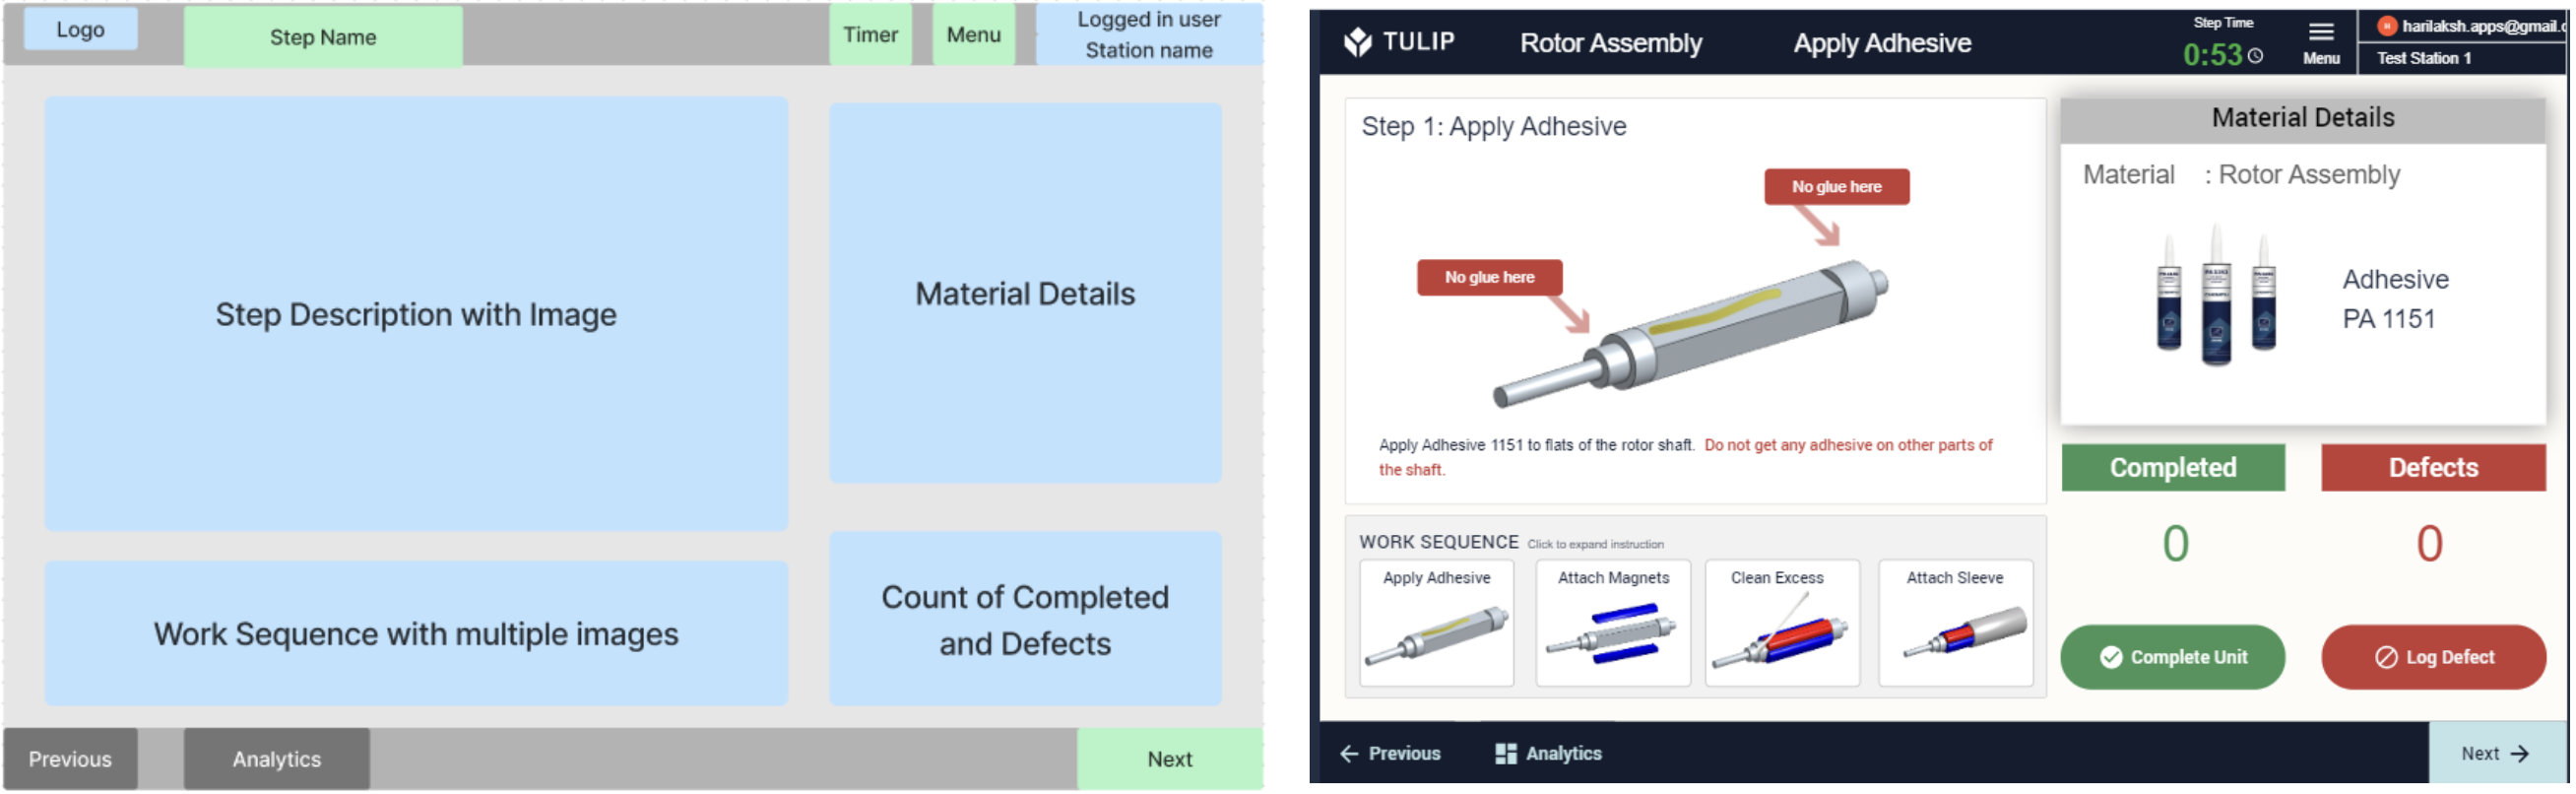
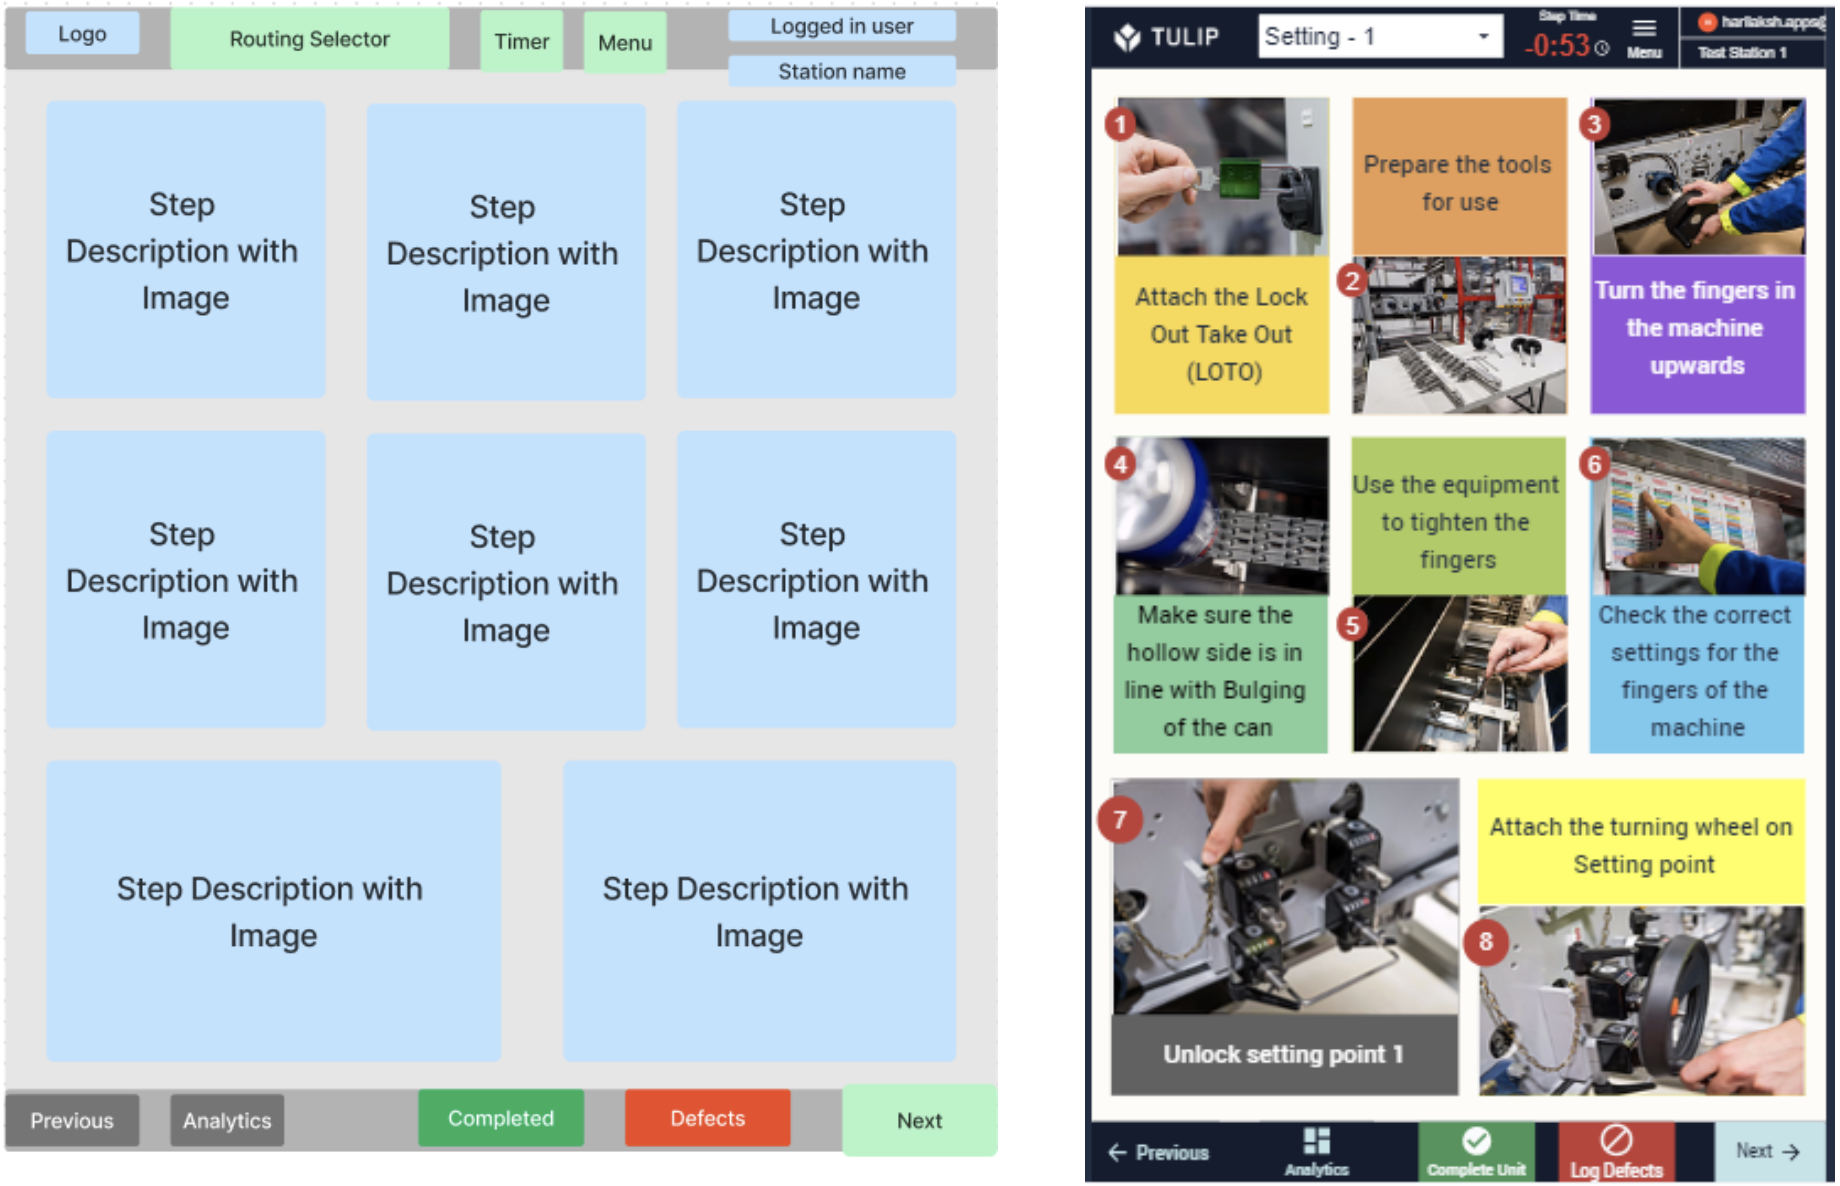
Multiple Tasks in a Single Step
This is the app based work instructions template having multiple process routings. The user can design all tasks for each routing as in a single step (Landscape mode). The first step can allow users to select the desired routing and the app displays the sequence of tasks in the selected routing. During the execution of the task, the operator can log any possible defects with defect reason and can add notes containing the details of the defect. After all the tasks the user can select the number of outputs and save completion data. The analytics from the completion data can be viewed at any time while using the app.
Application structure
- The application is organized as per the required operation flow
- Steps are sequenced with serial numbers in the same way as the operation flow requires
- Multiple tasks are combined in a Single Step
- Input widgets are used to collect Data and store in variables
- Users can log defects from any step
- Users can navigate to Analytics/Report from any step
Work Instruction Content
Work Instruction content needs to bring more clarity for the person performing the activity. Considering some or many of the below points may help.
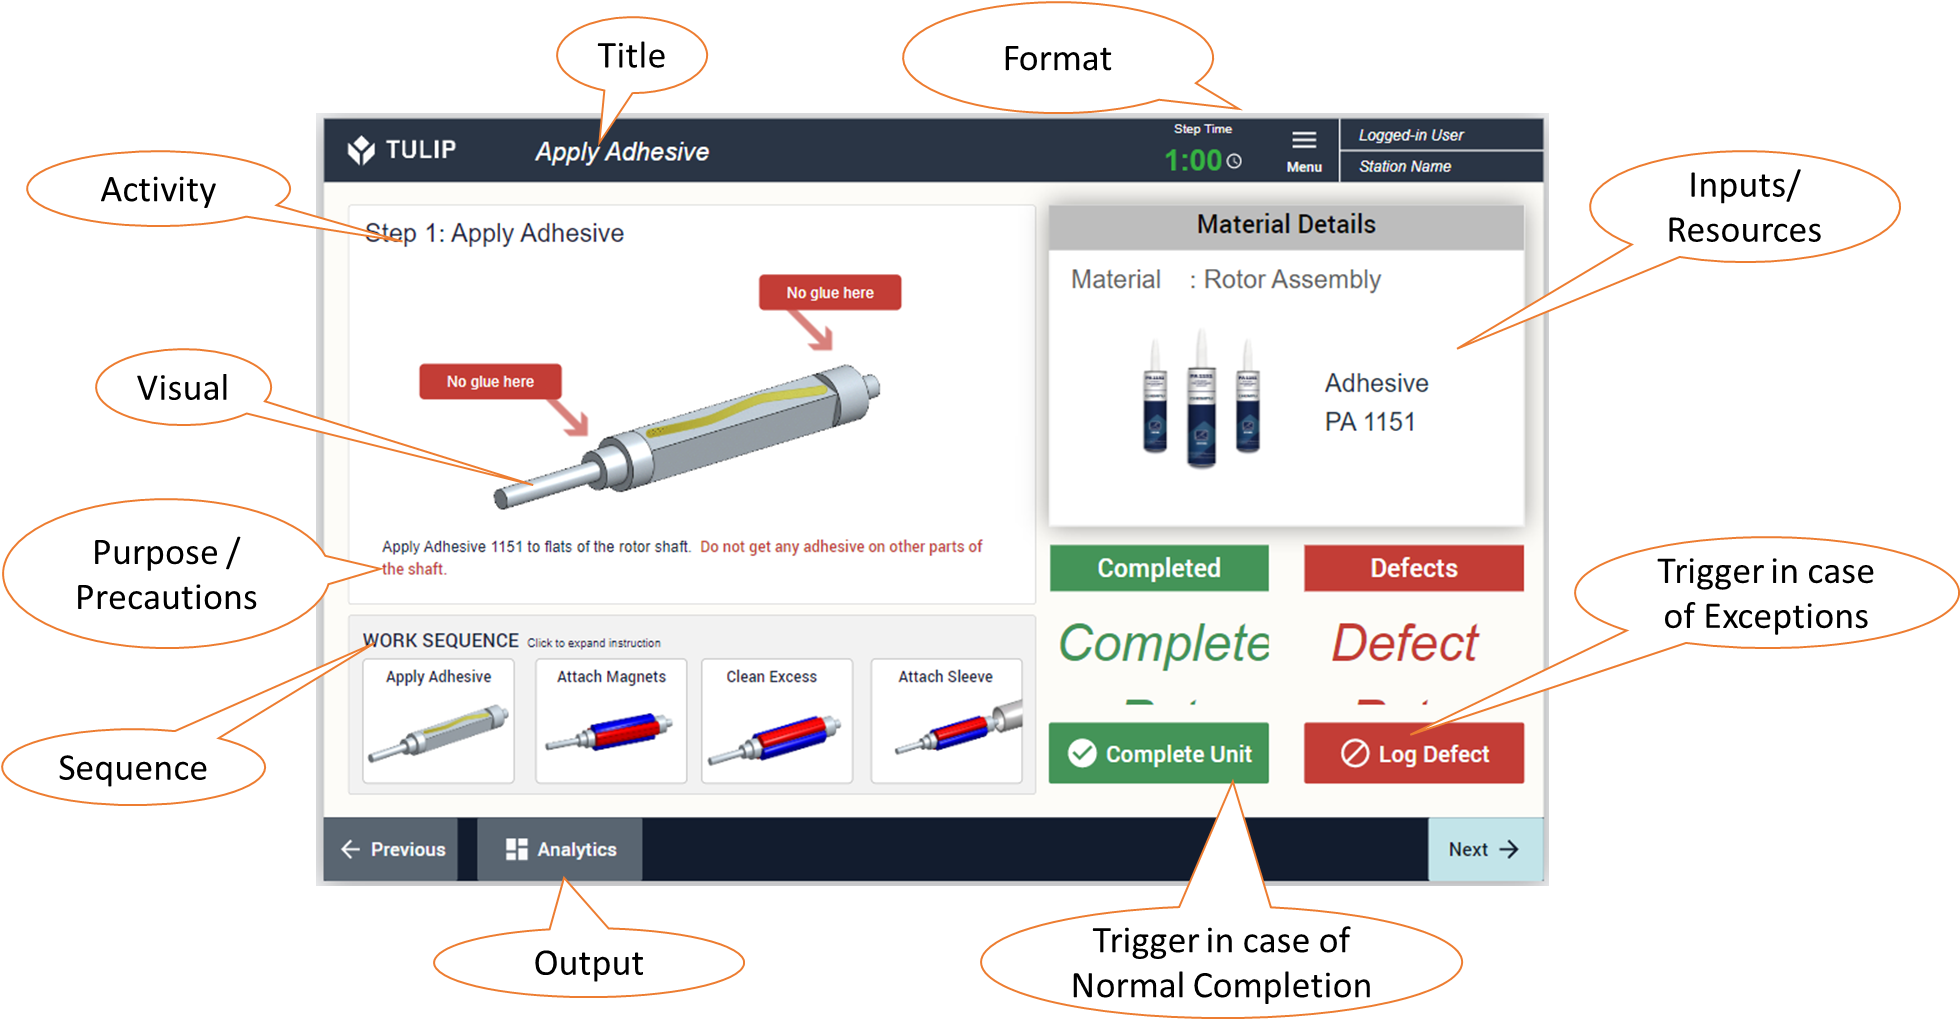
- Title - Give each activity its own title
- Purpose - Describe the detailed instructions for the work/task
- Visuals - Add static images, GIFs, or short videos to have more clarity on the task
- Step/Activity - Identify the activity for One Role. Don’t combine two roles in the same step.
- Format - Use consistent formatting for the steps
- Inputs - Describe the inputs from the operator performing the task
- Output - Objectives or expected results. Expected outcome for each step.
- Resources - List the Tools/Equipment or skills required to perform the step
- Sequence - Number each step sequentially. Step-by-step instructions for the task.
- Triggers - Instructions on when to Start and Stop during normal and in case of any exceptional situations
- Exceptions - Instructions to record exceptions, if any found
- Precautions - Describe the Safety precautions/instructions to be followed
How it works
App based work instructions are designed to describe the activity being performed, the data/exception to be captured, and report the performance or analyze the results captured.
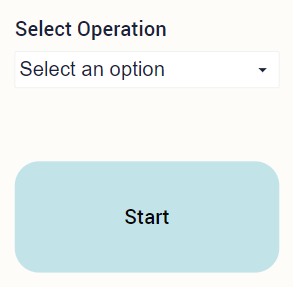
When there are multiple work instructions in the same app, then the user selects the operation in the first step and start the activity.
When there are multiple activities described in the work instruction, the first step can be the Navigation step where users can Select the operation or switch between each activity or work instruction. This enables the same app used for multiple work instructions.
The multiple steps can be accessed by using Next / Previous buttons in each step.

Accessing the Analytics / Log Defects / Recording the operation completion can be done from any step using the appropriate navigation buttons normally available in the header/footer of the step.
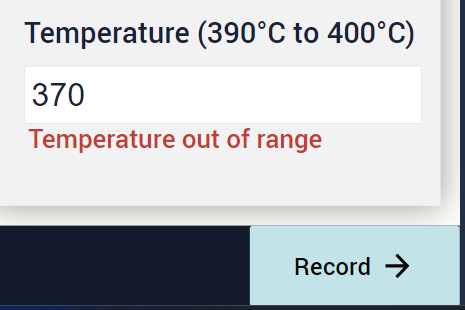
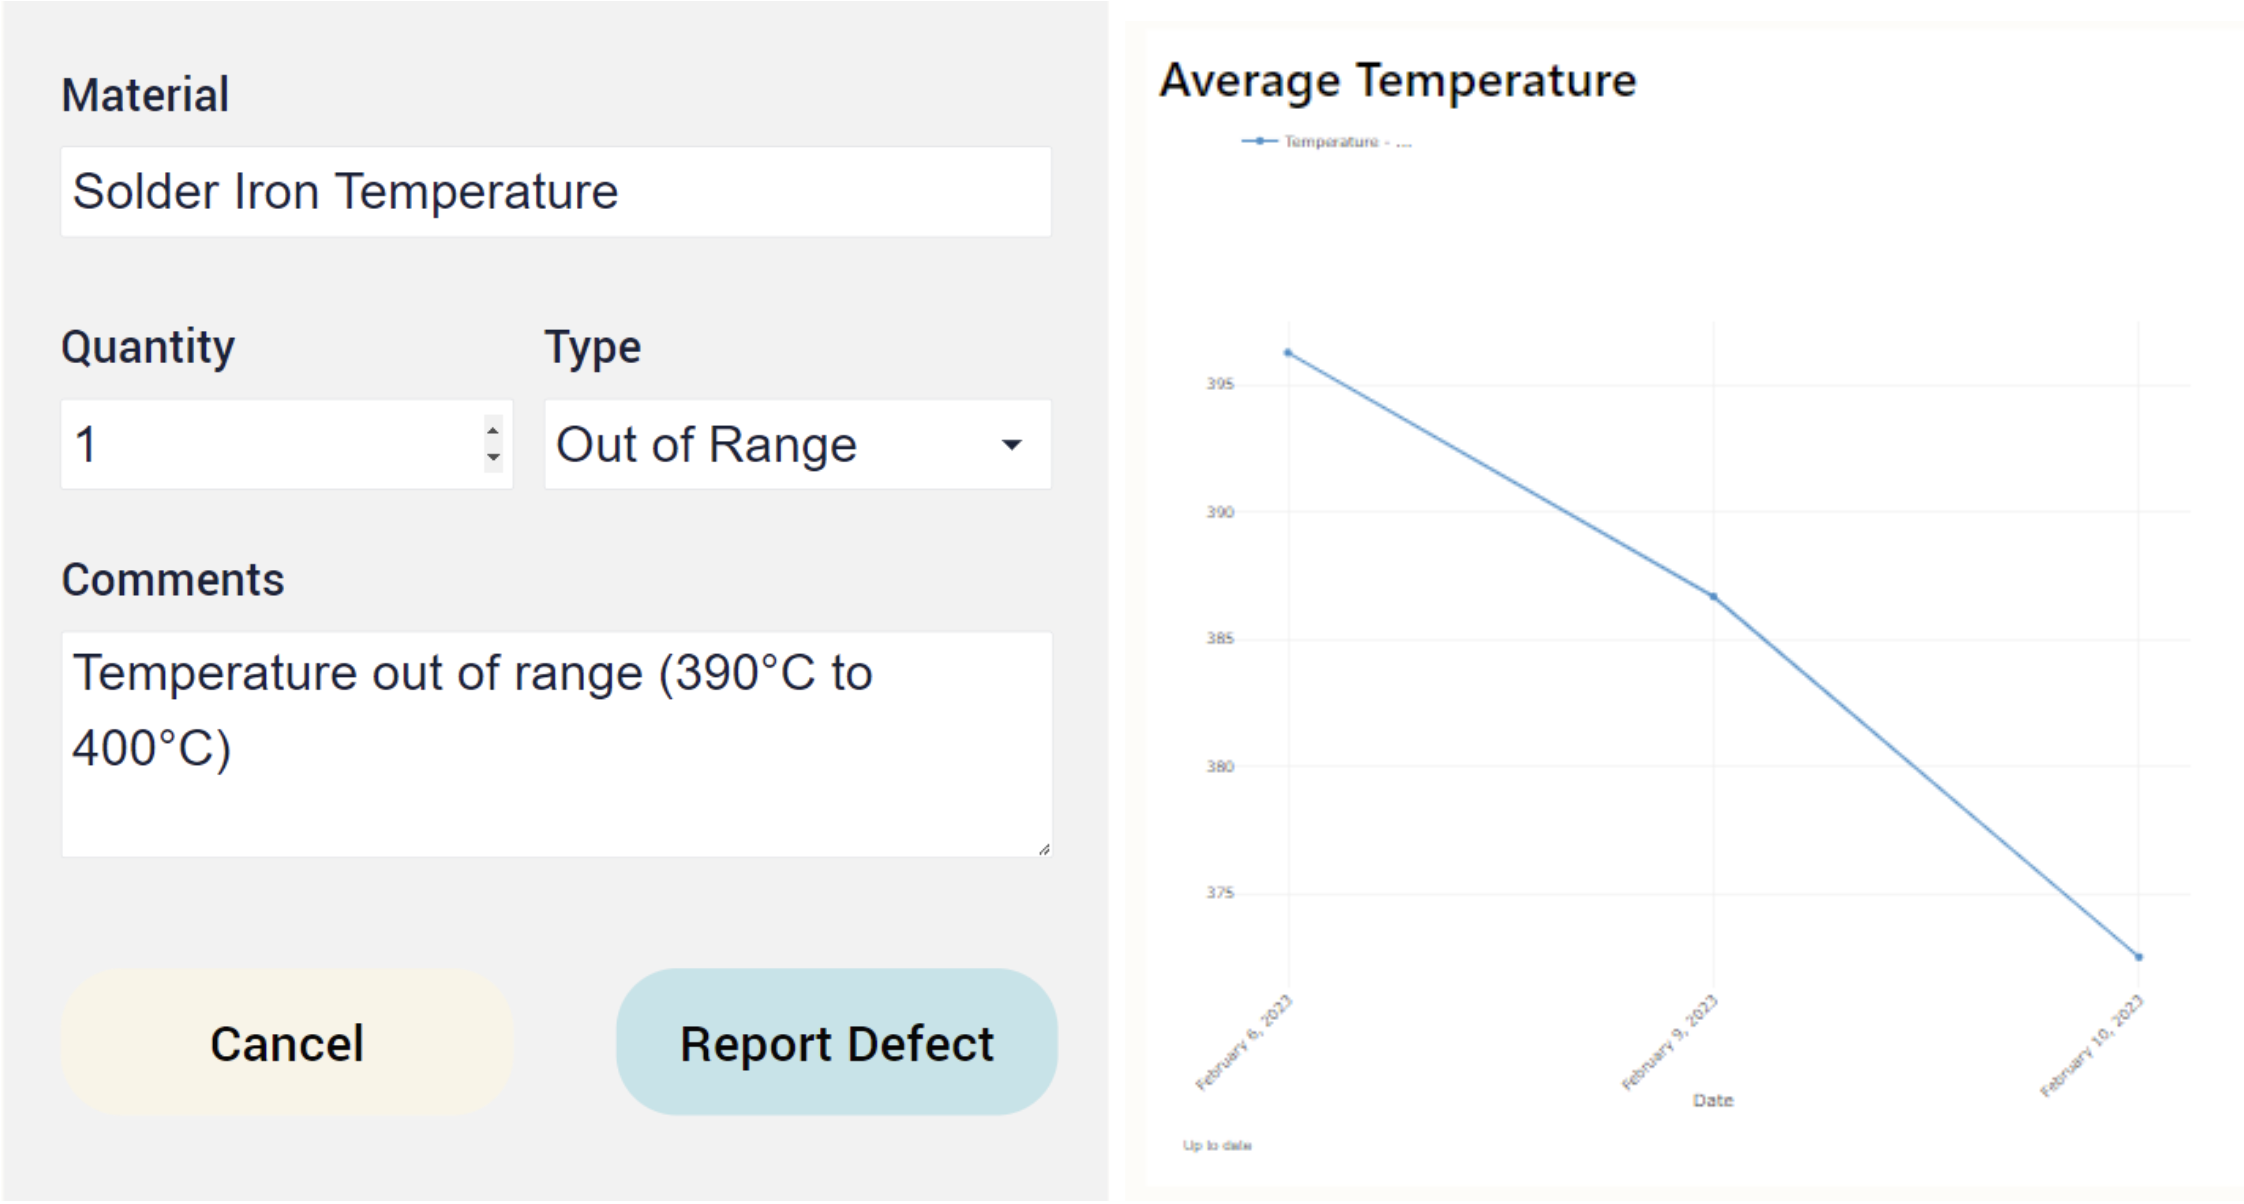
The critical information that needs to be captured while performing the step needs to be provided with user input widgets and stored in variables. The data points captured are accessible in Analytics widgets based on completion records.
Each step can be set with a target step time and a timer widget can be initiated and provide visual/audible warning at a threshold and completion of the target time.
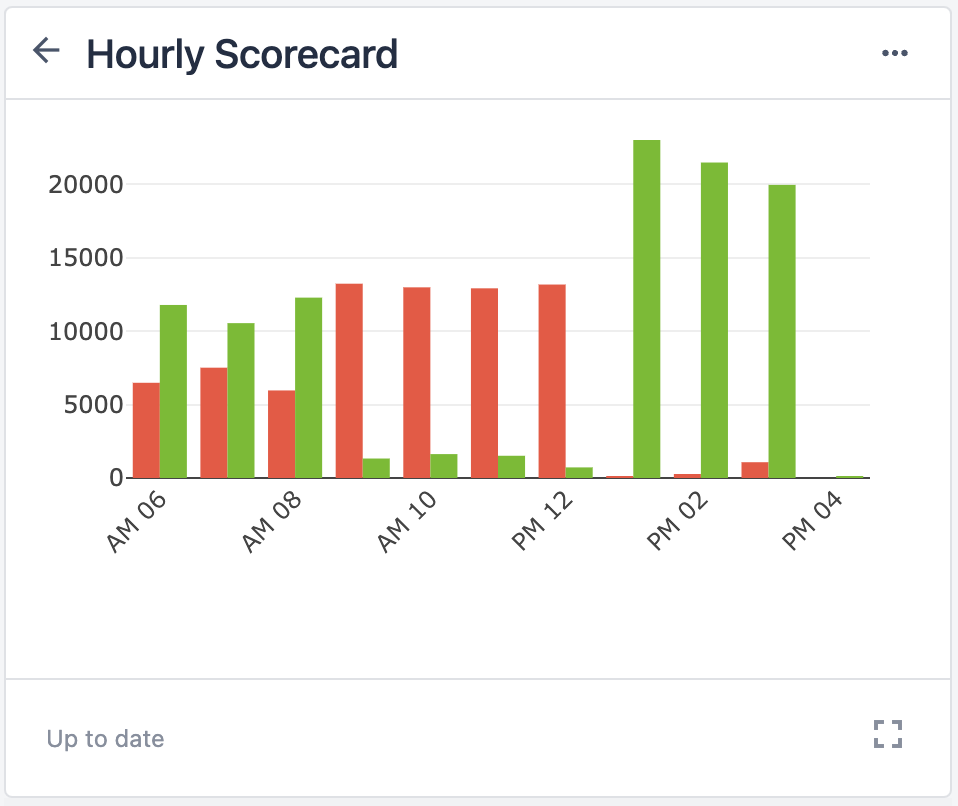
Lastly, there is a Dashboard which tracks and creates various important points of analysis, such as the
- Process completions by Date
- Process cycle time by user
- Individual Process cycle times
- Total Defects
- Total Completions
- Performance statistics by User
- Trend of the critical parameter captured
Wireframes
Some sample wireframes that can be used for writing a digital work instruction. These wireframes can be customized to suit your organization’s requirements.
Any layout designed in Base Layout will be the default layout for any new step and then specific changes to layout in a step can be done by unlocking the widget (properties in the right side bar) in that step.
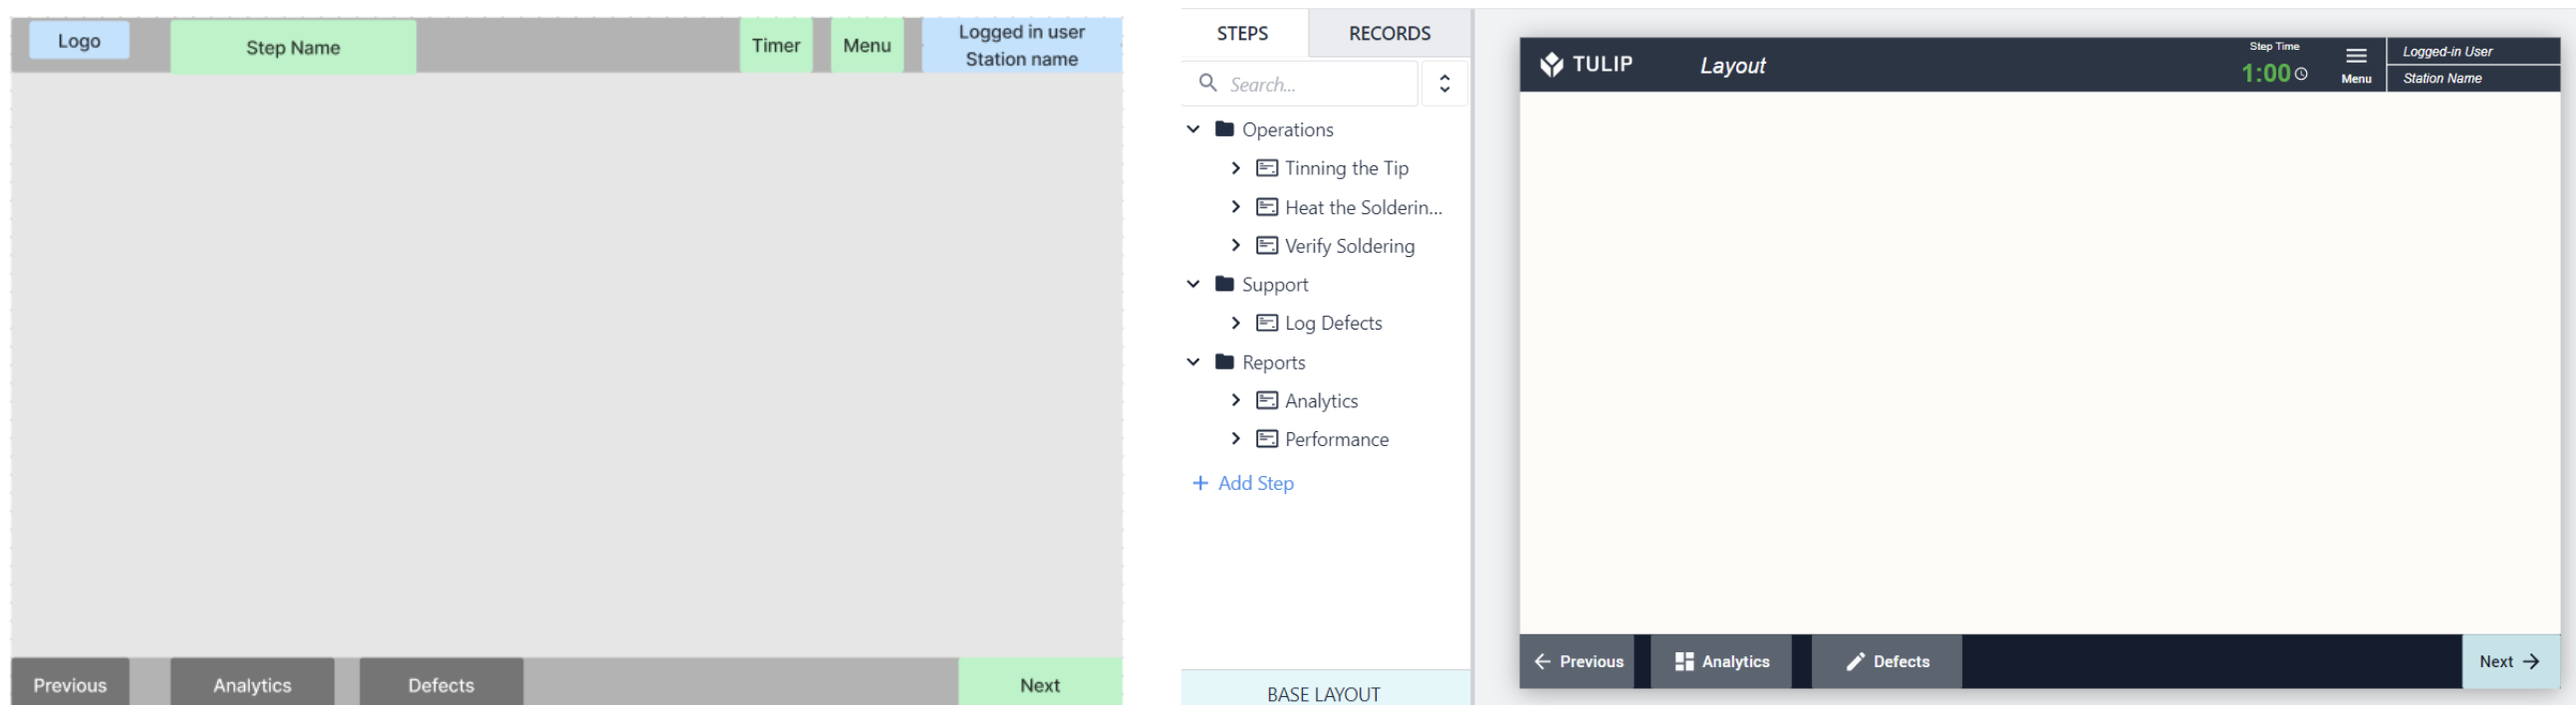
The previous, Analytics and Defects buttons in the footer designed in the Base Layout were removed in the first step as below. Other steps follows the Base Layout design.
- Routing Navigation Step - Select Operation
- Basic Work Instructions
- Work Instruction with Multiple Steps
- Single Page Work Instruction - Landscape

- Single Page Work Instruction - Portrait
- Log Defects