
A use case demonstrating how you can provide simple machine alerting for an inventory management system.
In this example, we’ll utilize Automations to update records in a table when an inventory status changes.
Scenario
You are a production manager who needs to manage and replenish inventory when quantities are low. You also want to indicate when inventory needs monitoring as it nears a particular threshold. However, you don't want to have to manually check your inventory table every hour to monitor where levels are at. The status should update on its own when the criteria for certain conditions are met.
Use Case
Solution
In this solution, we’re creating an Automation that creates Table Records to drive inventory replenishment. The automation will only trigger when inventory levels reach particular thresholds. The three statuses we’ll use are “On Target”, “Monitor”, and “Replenish”. There is also a status color associated with each of these statuses: green, yellow, and red, respectively. The goal of this solution is to increase visibility into inventory management and provide real-time updates of item quantity.
Set Up
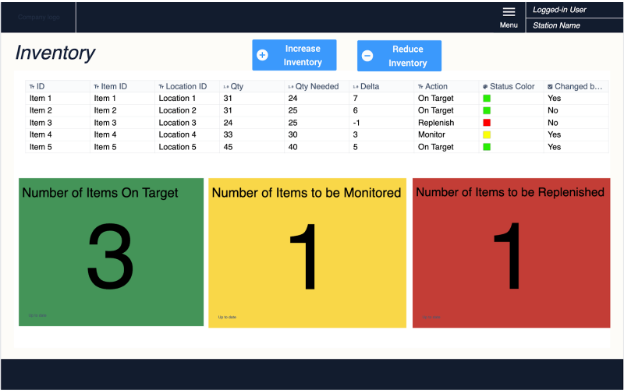
The Automation we’re going to build requires a Table to detect when records are updated. The one used in this solution is called "Inventory Alerts" which looks like the following:

We also have an app for operators to record their inventory quantity per item.
The app uses the table to reflect inventory changes. You can replicate this exact app and table set up, or create something similar for your process.
Create Automatic Updates for Table Records
Let’s first outline the workflow of what we want to automate. Starting with a flowchart or diagram of intended logic helps to identify the events, actions, and decisions that you’ll need to configure.
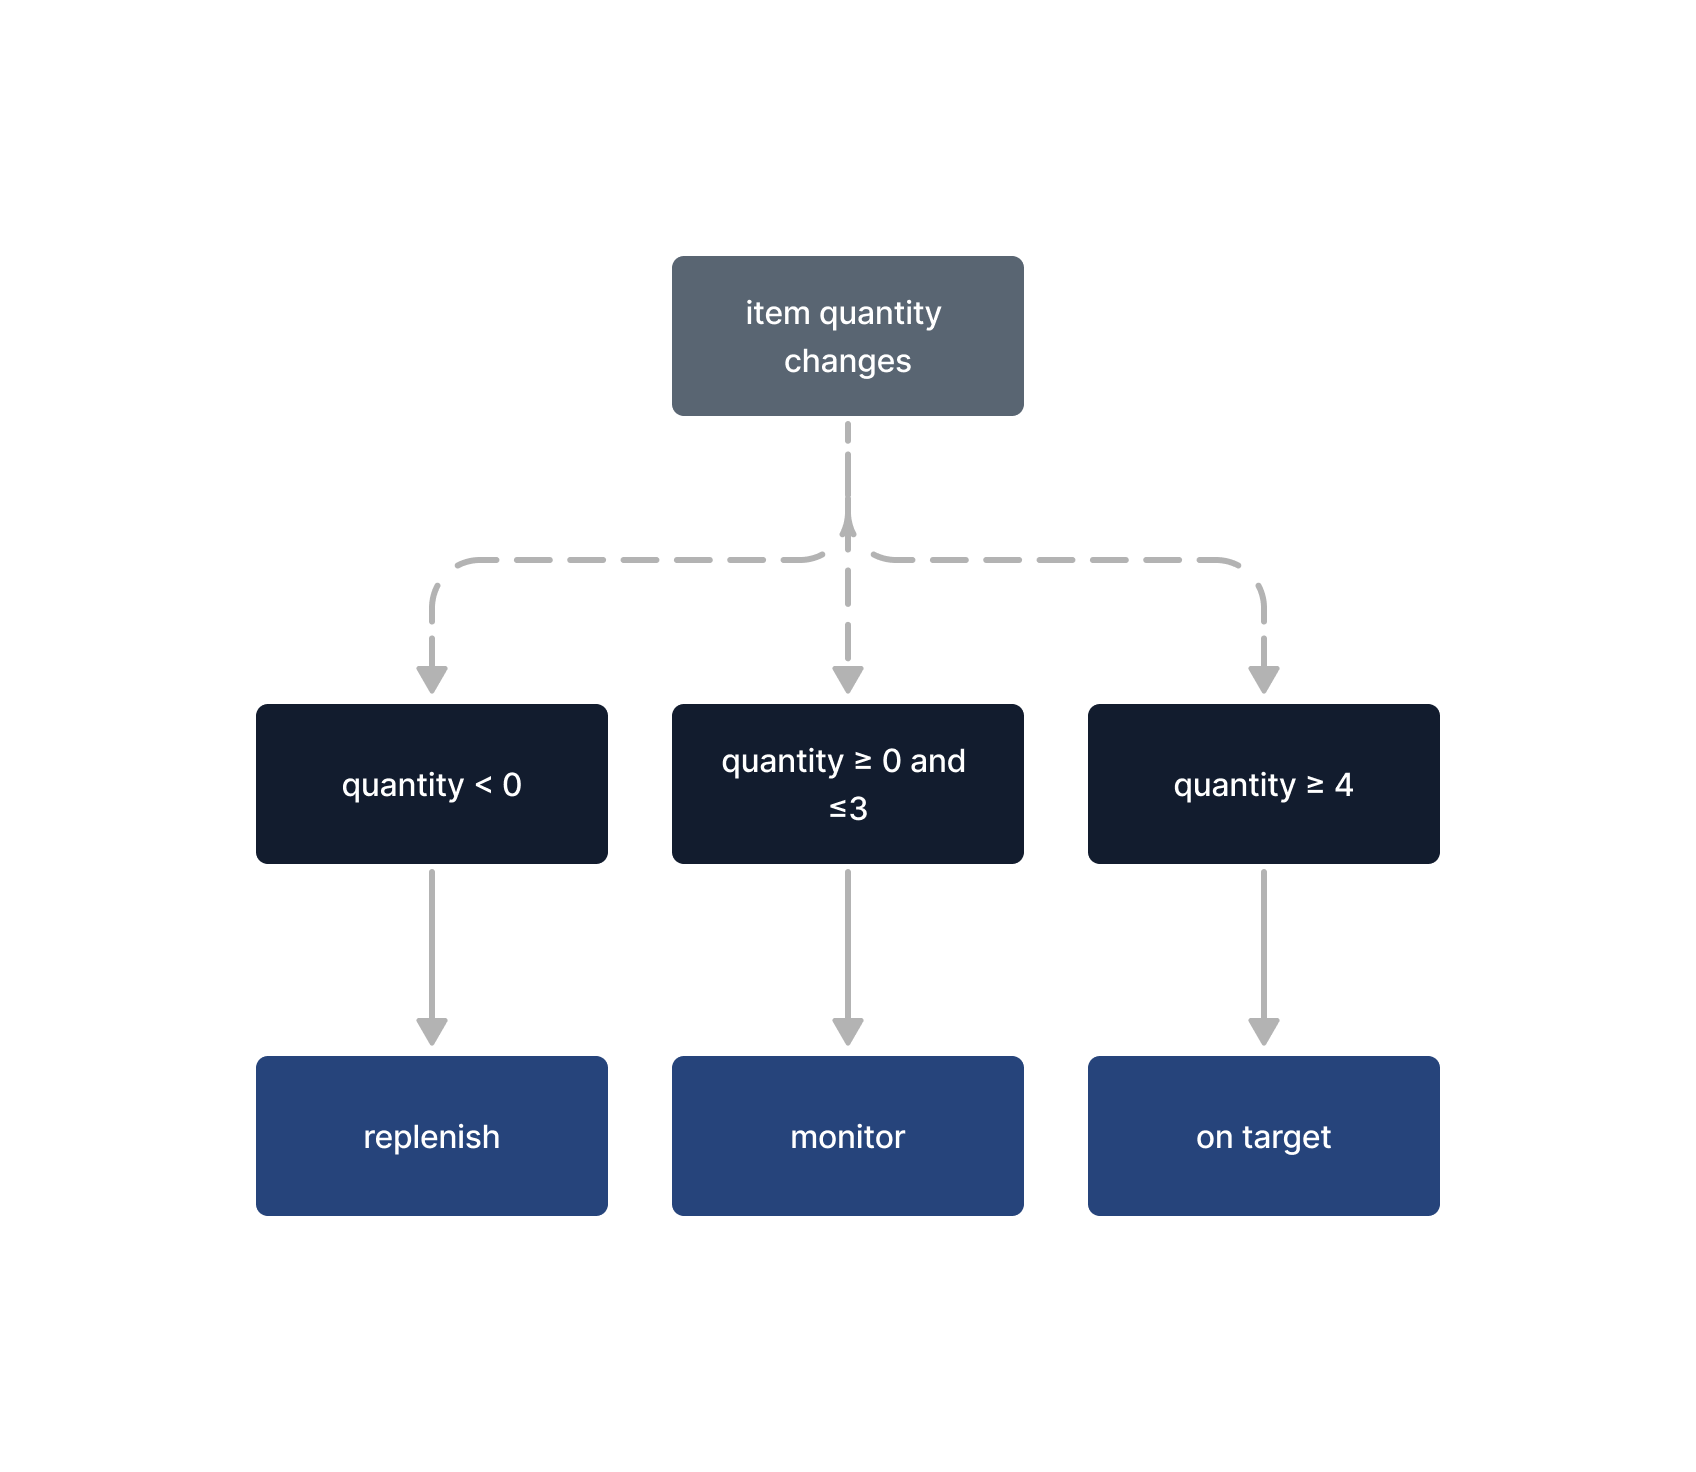
As parts are produced and inventory quantities are modified as a result of normal production, recorded changes will trigger the Automation to begin. Based on some threshold criteria, the Automation will mark the item’s inventory status as one of three possible options: "On Target", "Monitor", or "Replenish".
A basic diagram of this workflow looks like the following:
Now that we have the paths of our workflow determined, let’s create our automation.
From the Automations tab select + Create Automation, and name it “Inventory Quantity Alert”.
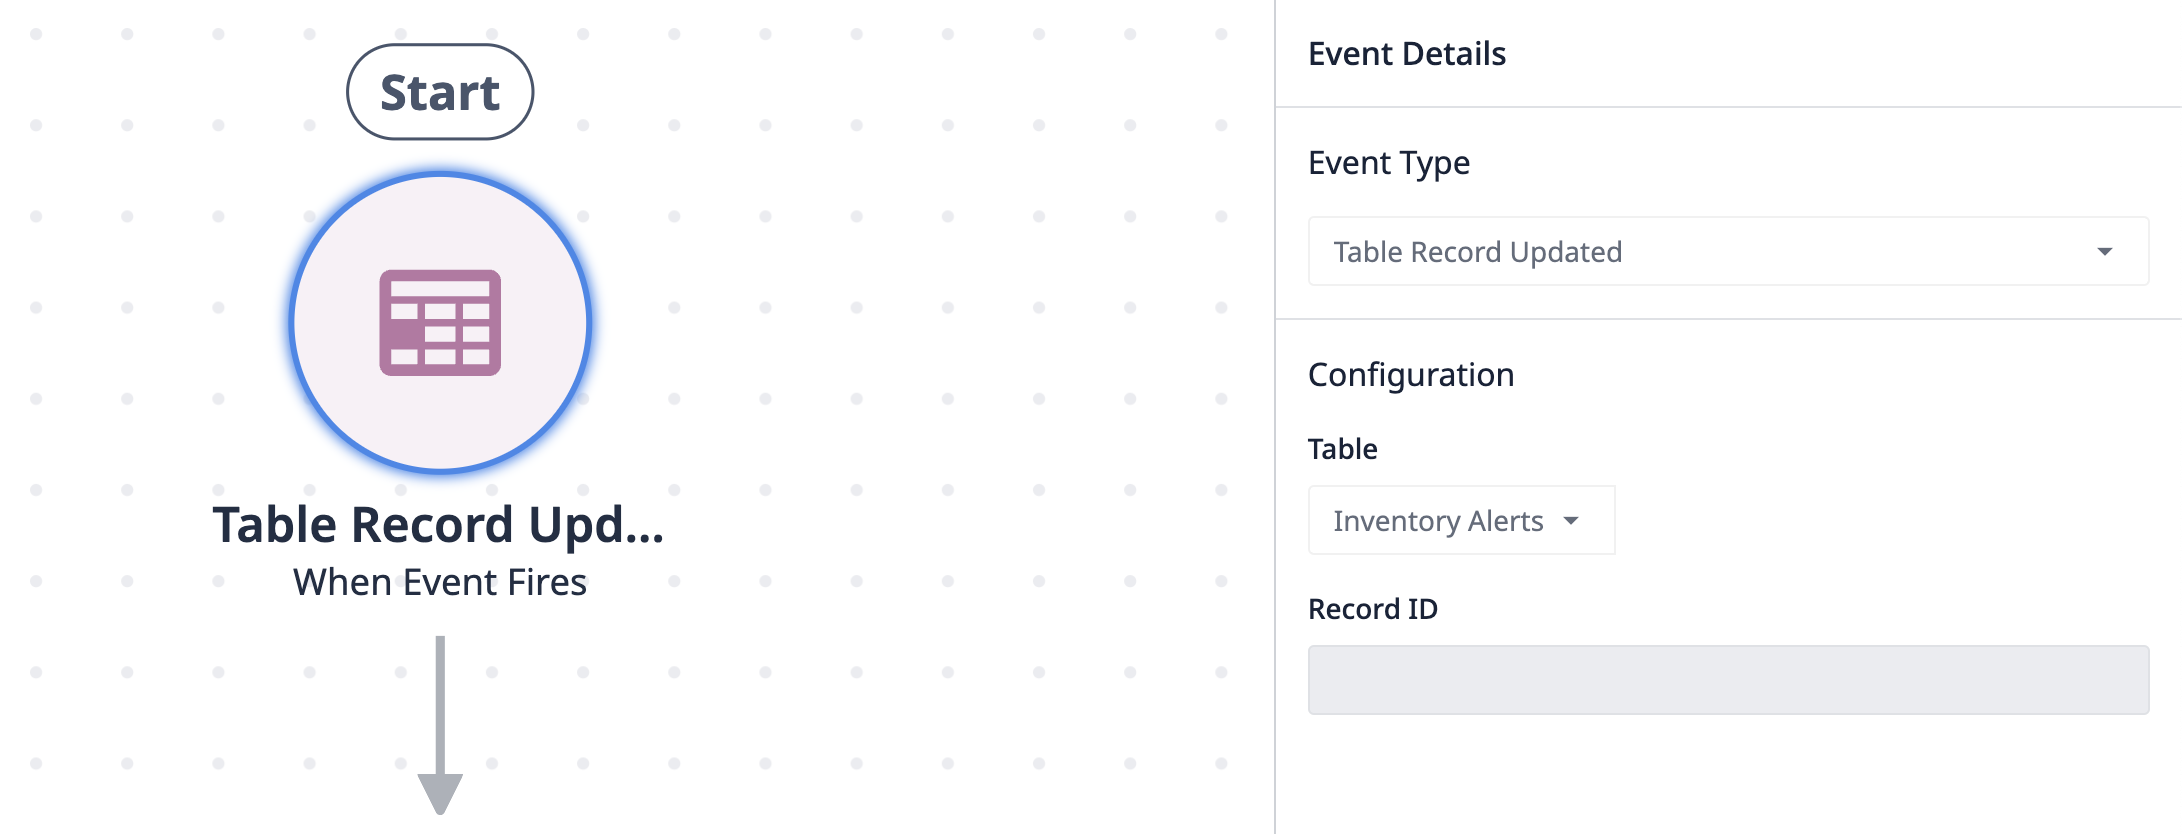
The first block–an event block–is the event type Table Record Updated. Select the “Inventory Alerts” table. This block will run the automation when a table record is updated.
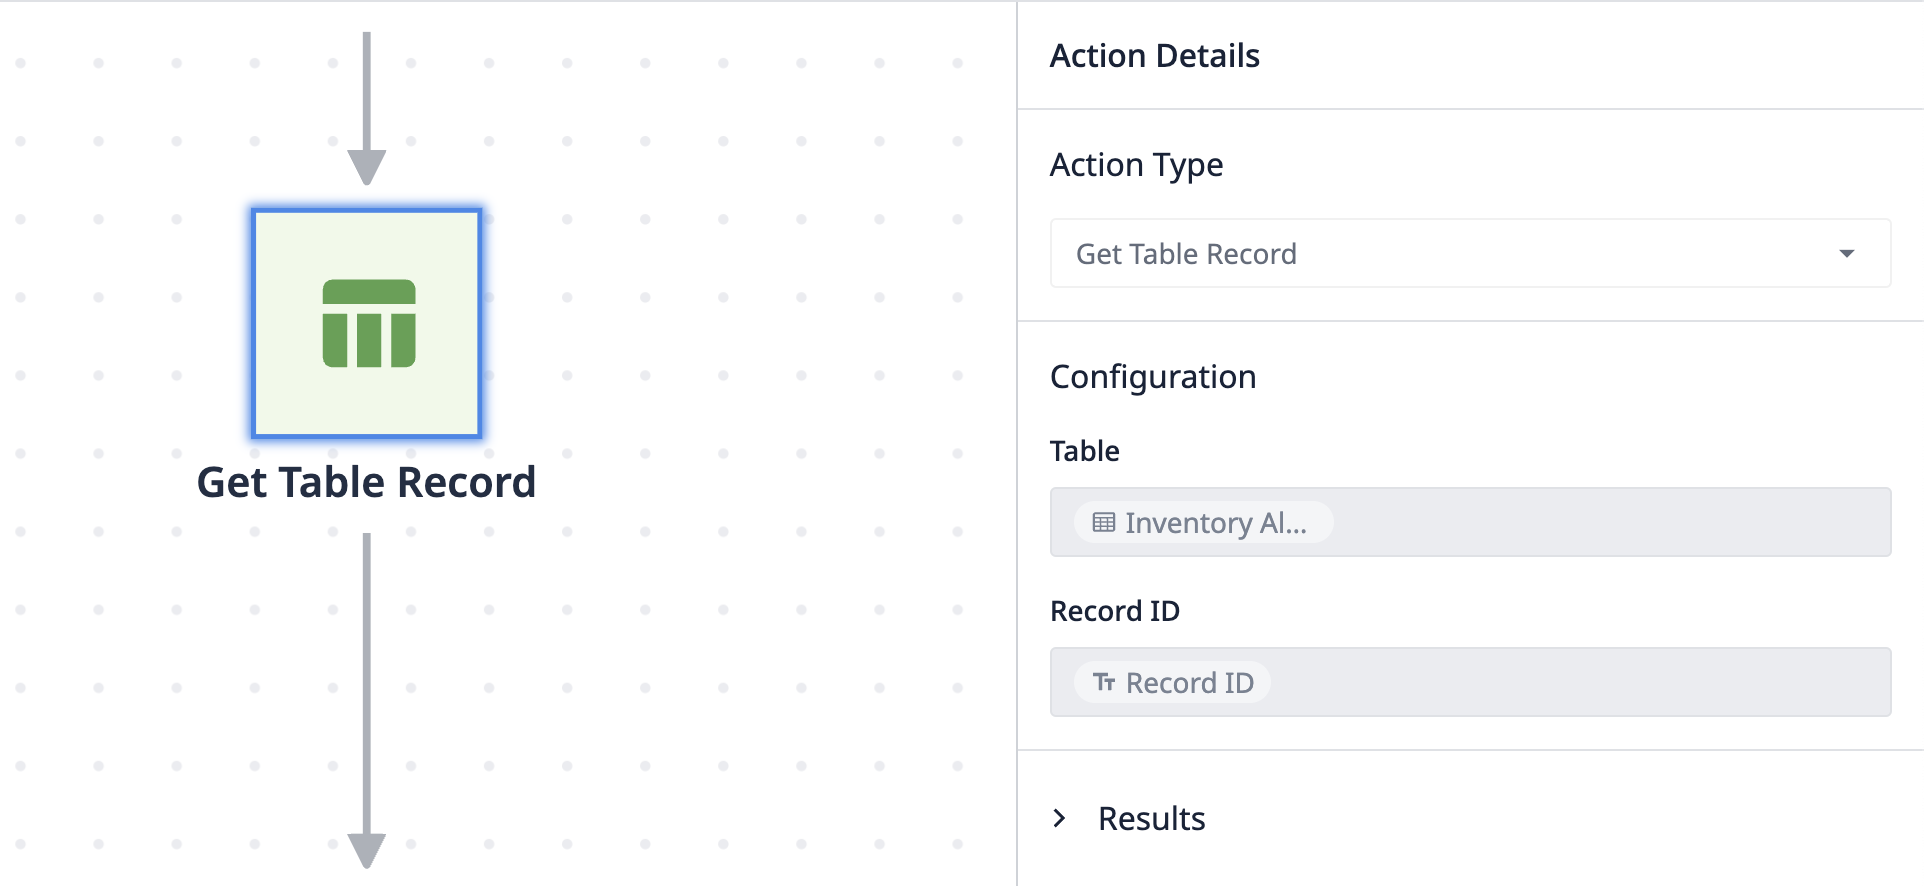
The event block simply runs when a Record updates, but in order for us to determine what that update is, we need to retrieve the actual record.
To do this, let’s create a new Action Block to Get Table Record. This is what tells the automation to do something when an event occurs. Select the Inventory Alerts table and the Record ID field. This action block retrieves the entire updated record.
Next, because we have three statuses that are dependent on different conditions, we’re going to use Decision Blocks to set up alternative paths. The automation logic goes through these blocks to decide which condition is true. We also want to create action blocks to dictate what happens if the condition is true.
The first decision block decides if the value of the field “Delta” is less than 0.
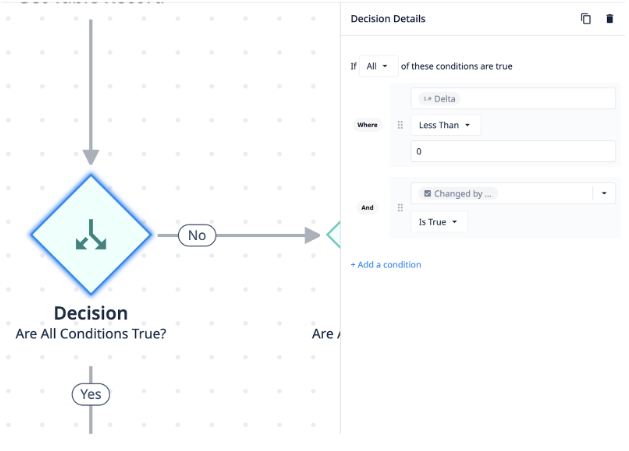
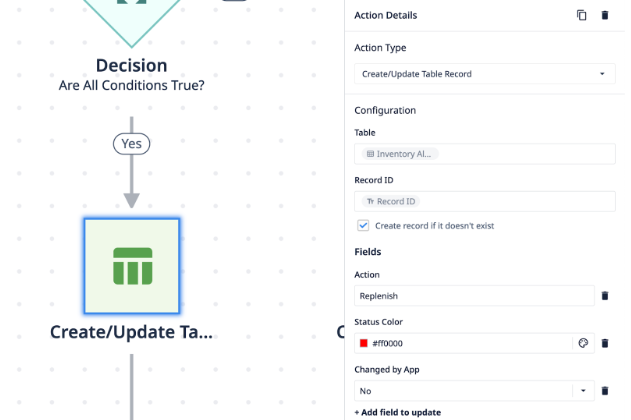
Below the decision block, along the Yes flow, create a new action block to Create/Update Table Record. This action block dictates that if the condition is true, the record will update with the text “Replenish” and the status color to red.
Now that we have our first condition, let’s create the remaining flows for alternate inventory statuses. You can choose to either duplicate blocks and reconfigure them, or continue adding new blocks.
A new decision block should branch off the No flow of the first decision block. This block decides if the value of the field “Delta” is between 0 and 3.
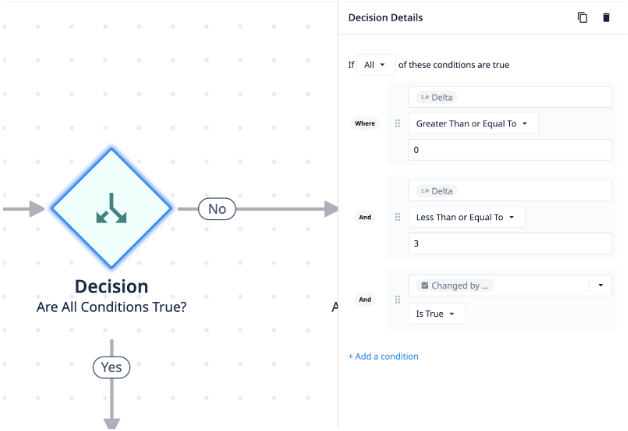
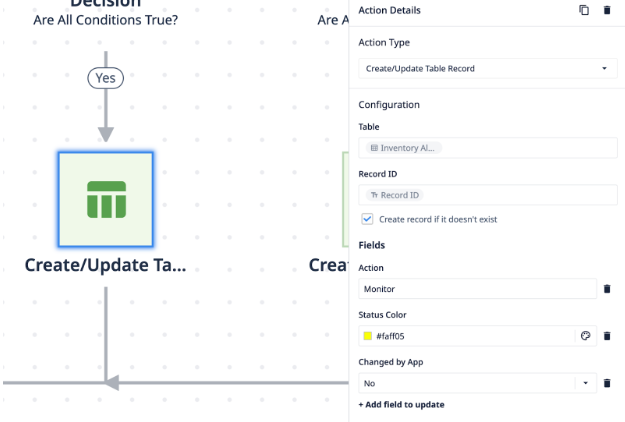
Below the decision block, along the Yes flow, create a new action block to Create/Update Table Record. This action block dictates that if the condition is true, the record will update with the text “Monitor” and the status color to yellow.
Finally, create another decision block that branches off the No flow of the second decision block. This block decides if the value of the field “Delta” is greater than or equal to 4.
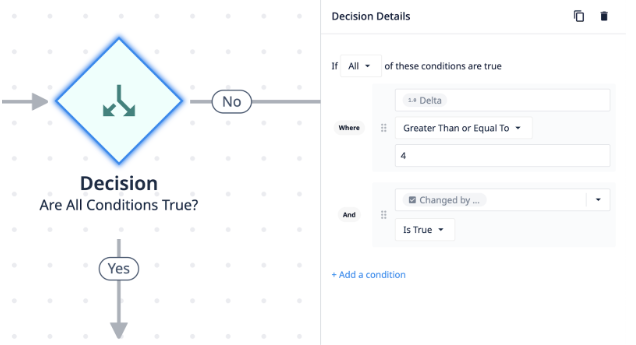
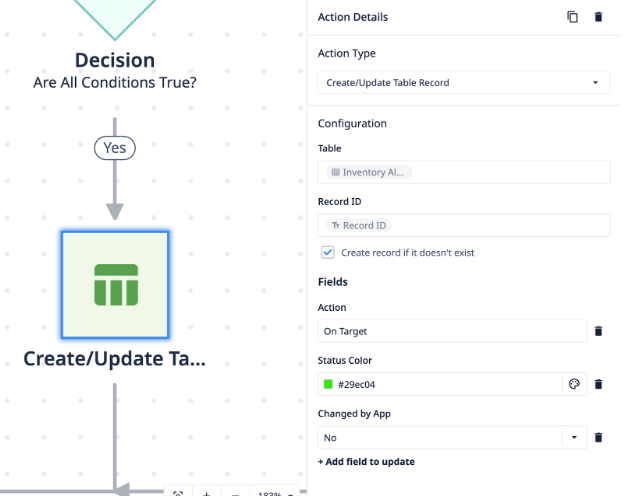
Below the decision block, along the Yes flow, create a new action block to Create/Update Table Record. This action block dictates that if the condition is true, the record will update with the text “On Target” and the status color to green.
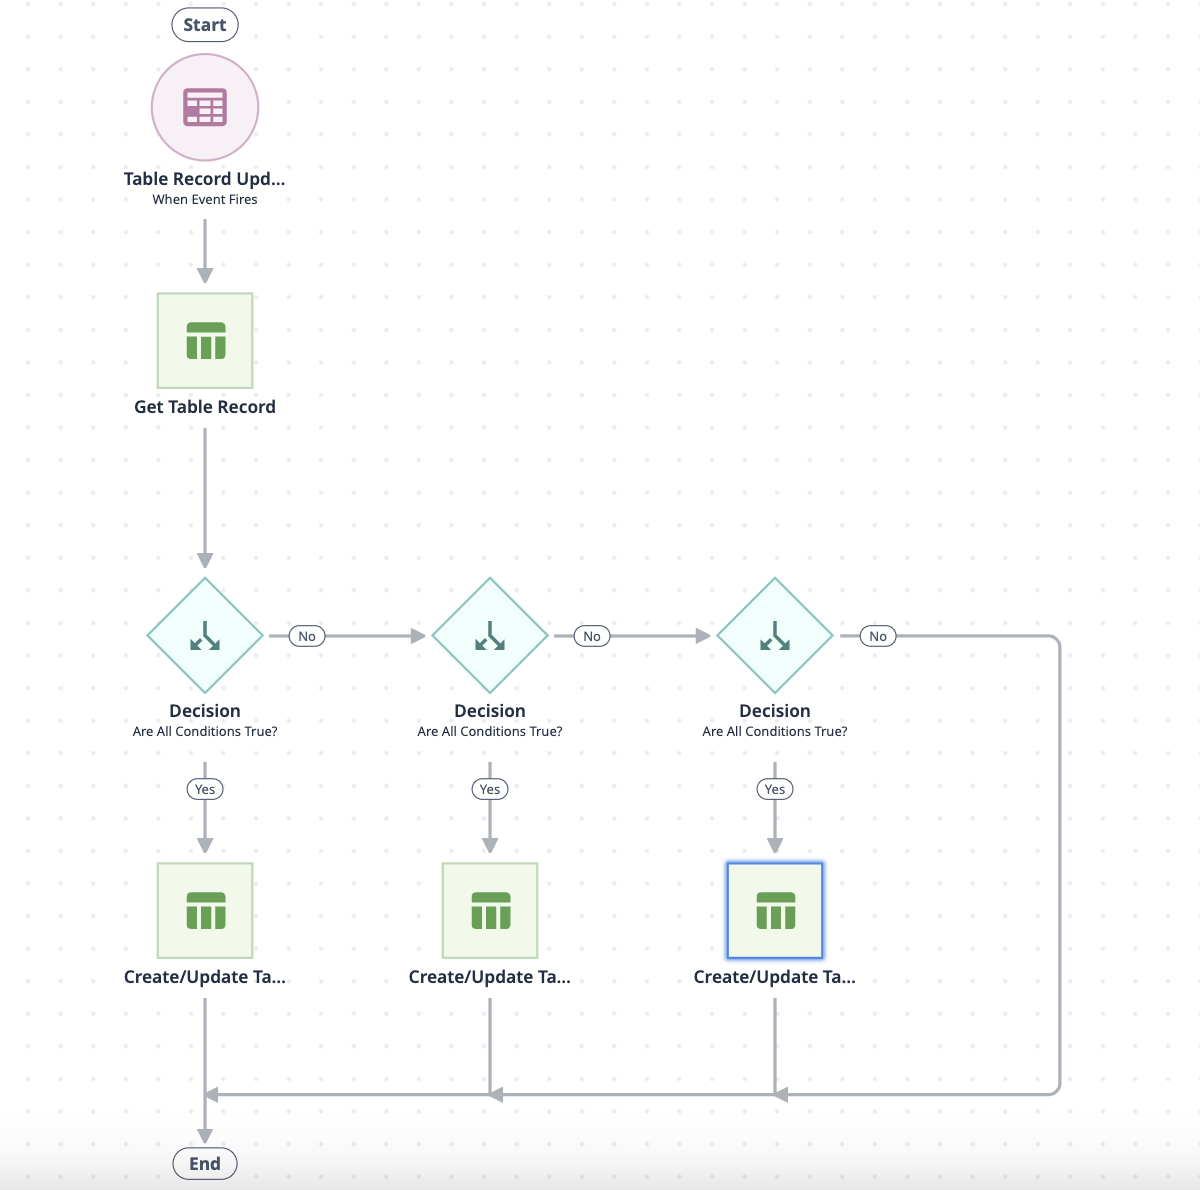
Congratulations! You now have a complete automation that updates table records according to any change in the quantity of items. Your complete automation should look like this:
One Step Further: Creating Alerts
Now that we’ve gone through a basic use-case for inventory management, let’s add one more step to set up basic alerting for when inventory quantity needs replenishment. To do this, all we need to do is add an action block off the replenishment flow.
For this action block, select Email.
Choose the user you want to send the email to.
The Subject is the email title, which should be an urgent message such as “Inventory Replenishment Required”. The Body contains the message of the email, which can be the Record ID so the recipient knows which item needs replenishment.
The action block configuration should look like the following:

Setting up alerts is just one way you can take this use-case further. If you have other ideas, head over to community.tulip.co and post your solution!
.gif)