Create and Deploy Landing AI’s Vision Models in Tulip
The Third Party Vision Integration will be available in Tulip Instances upon request.
Vision's Snapshot feature can be used with Tulip’s Third Party Integration Services to quickly build and deploy a classification vision model. By using this functionality with Landing AI, you can send pictures to test your model, and the model will classify different types of objects and learn the confidence of that classification.
In this article, you will learn:
- How to enter your Landing AI Credentials
- How to create a classification model
- How to deploy a classification model
Prerequisites
You have collected the necessary images and classified those images for your dataset (need at least 10 per class)
For examples, see:
- https://library.tulip.co/apps/vision-data-collection
- https://support.tulip.co/docs/collecting-data-for-visual-inspection-with-vision
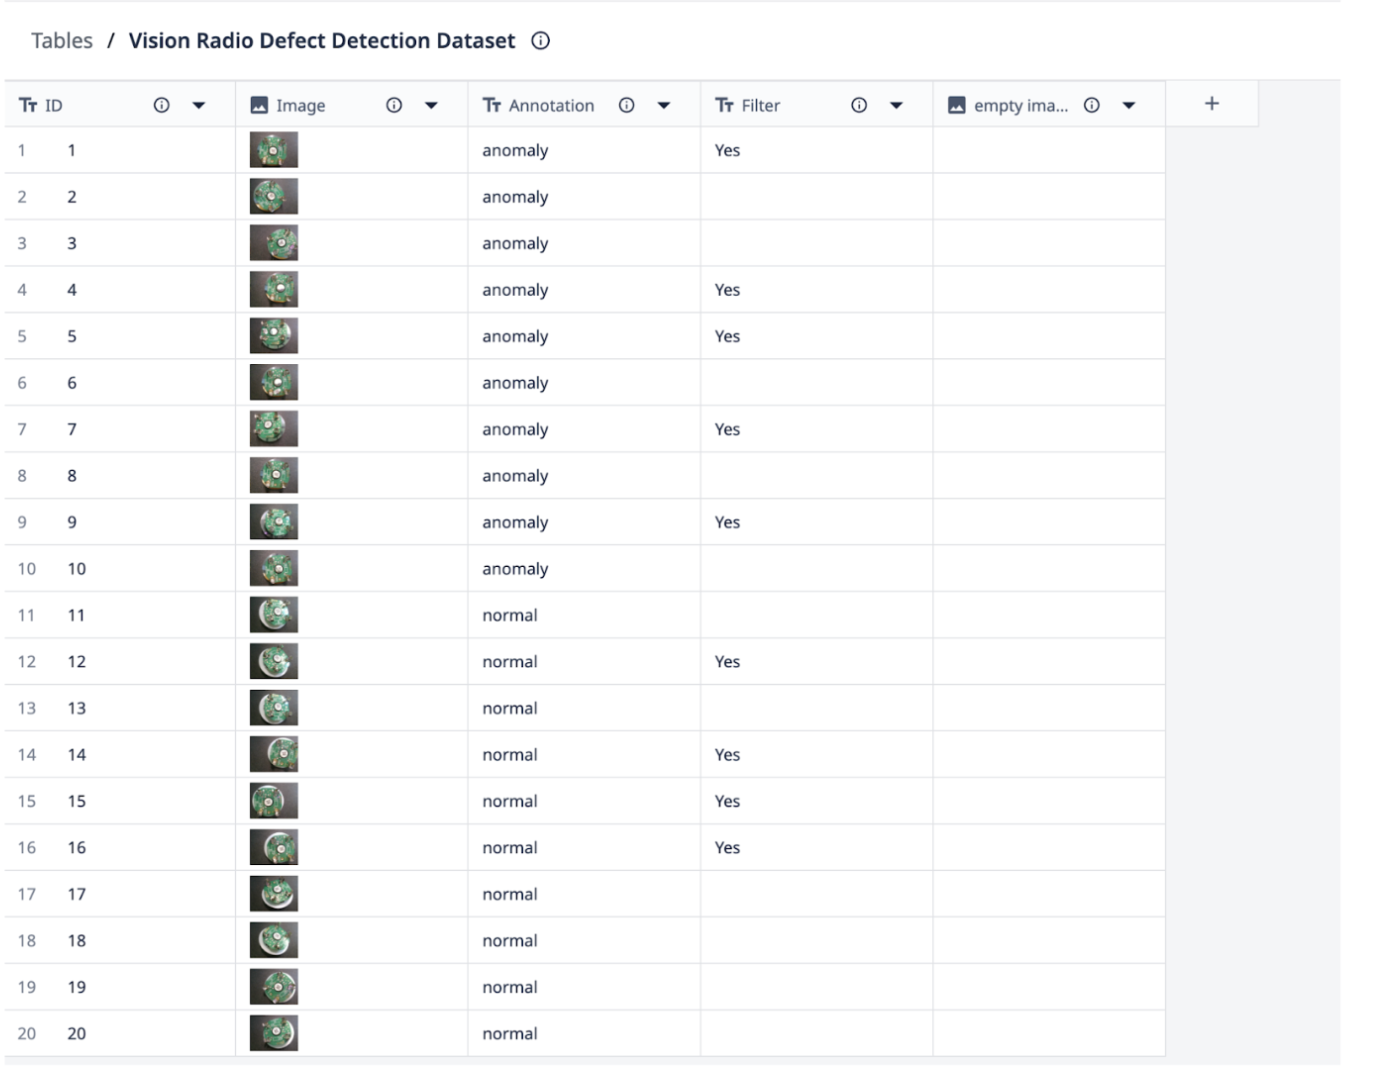
Use Case: Classifying Radio PCB as “anomaly” vs “normal”
This can be used to classify multiple states but, in this case, we’re using two for simplicity.
Enter your Landing AI credentials
-
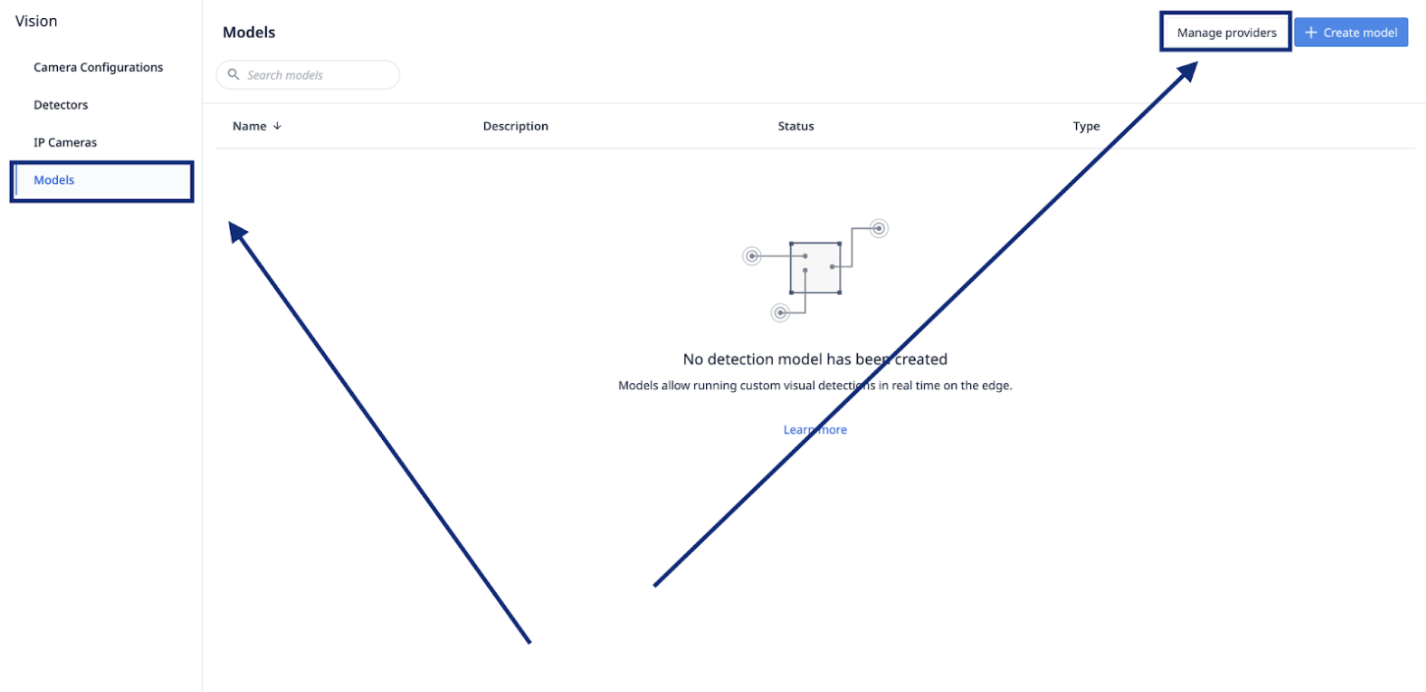
Under the Shop floor tab, select Vision.
-
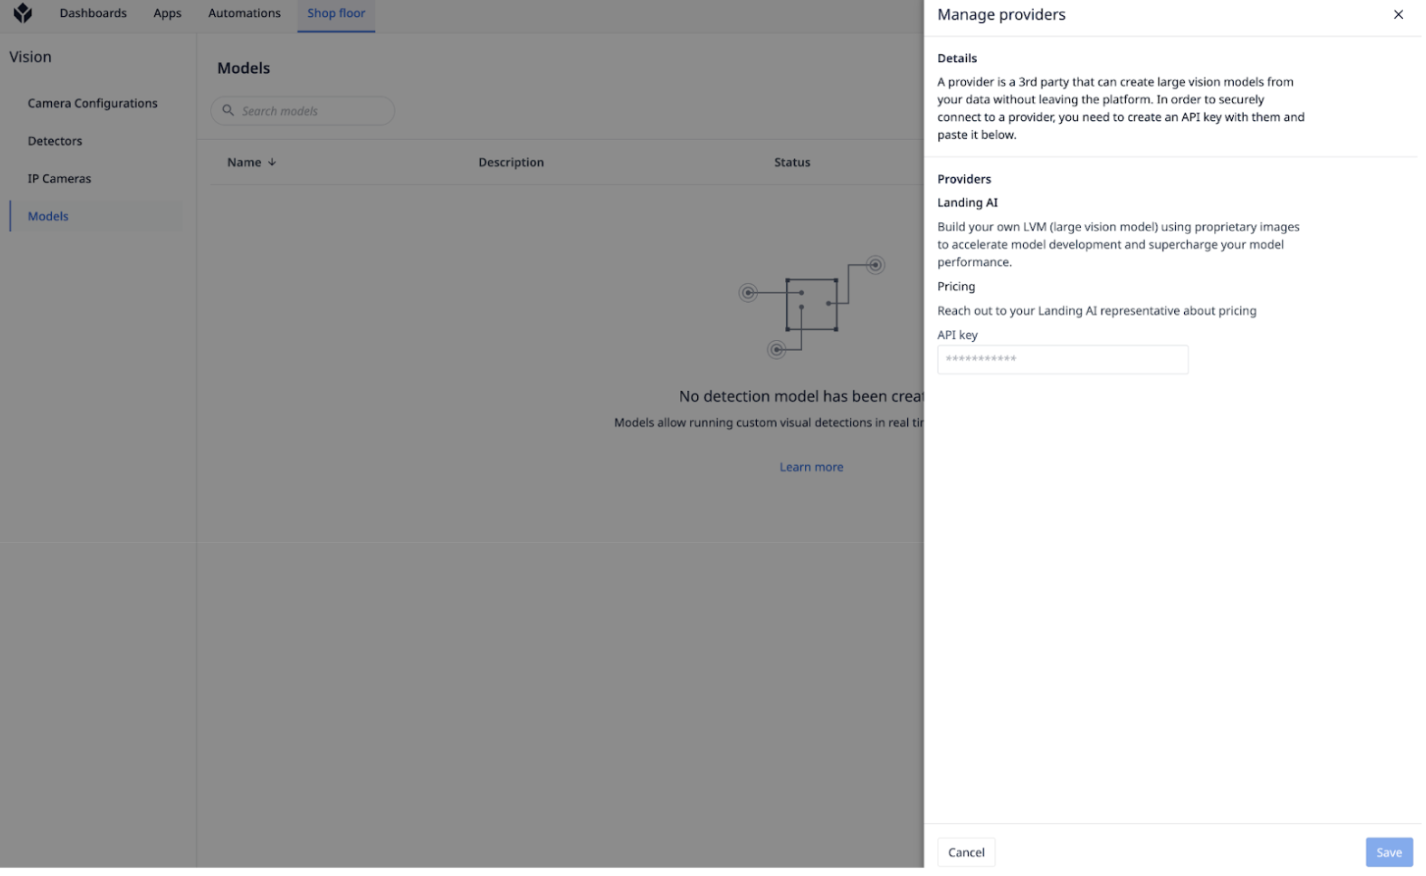
In the left side panel, select Models and then click the Manage providers button on the top right of the page.
-
Enter your Landing AI API key.
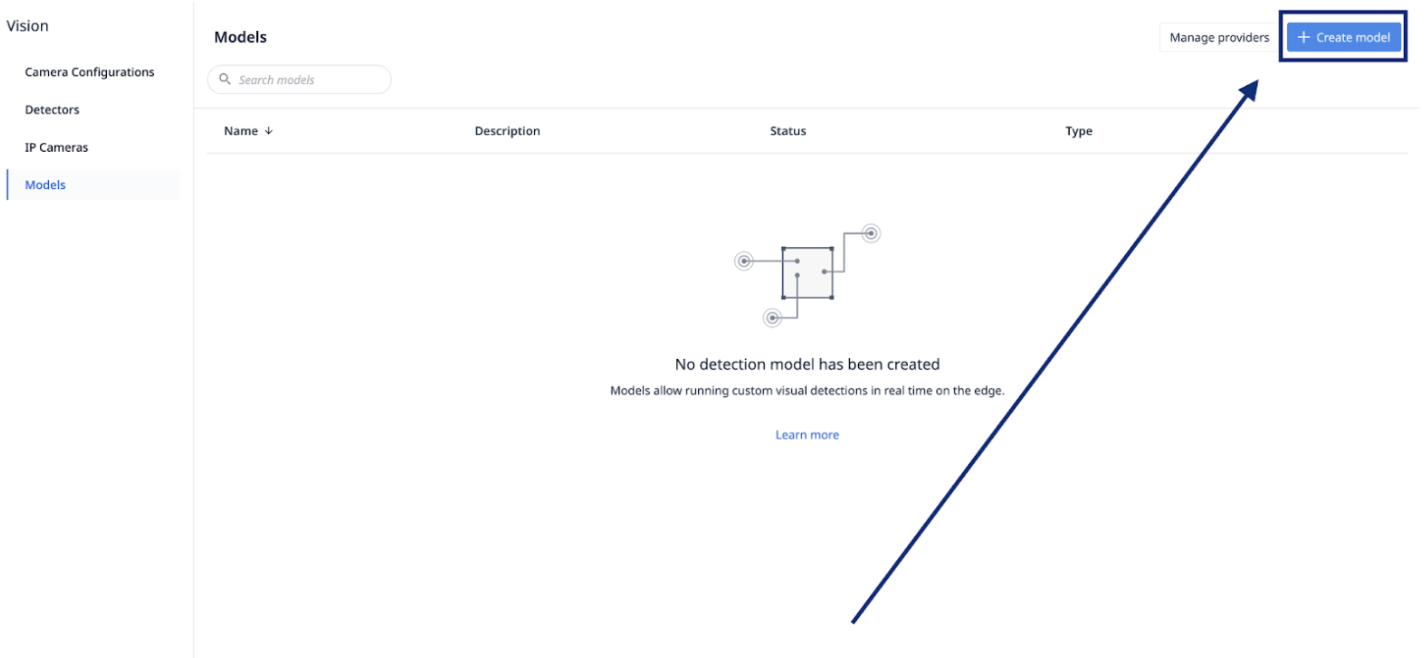
Create a classification model
Once your data set is ready, collected, and classified, hit create model. Read this article for information about how to collect your data.
Enter the name, description of the model, and the vision provider (Landing AI)
Then, enter the following fields:
- Model type - only Classification (differentiating amongst known entities)
- Tulip table - your Tulip data source
- Image - the image(s) that you want to classify
- Annotation - the label (which becomes the class) for each image
- Query - A query to limit the number of images that you choose to send
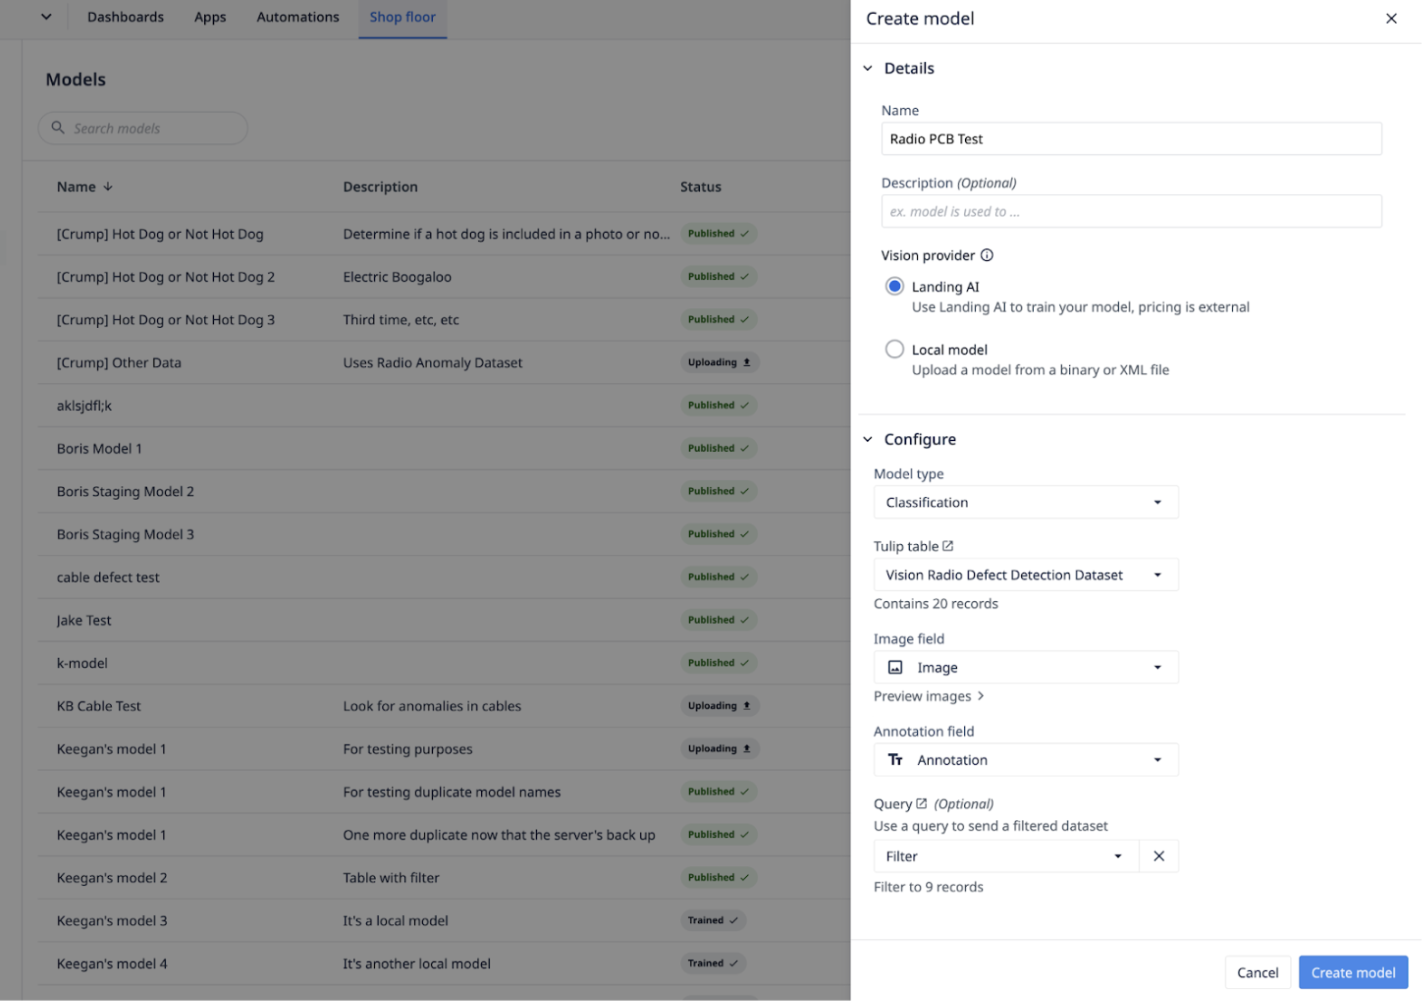
Click Create model.
Deploy a classification model
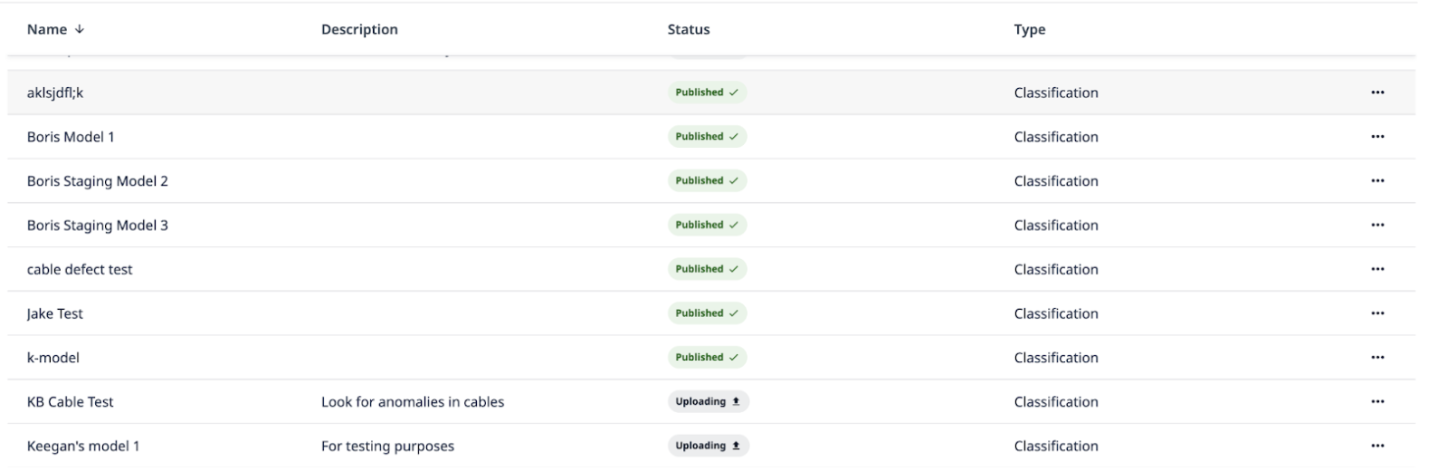
There are four statuses for classification models:
- Uploading - Currently uploading images to Landing AI
- Trained - Ready to be used
- Published - Used in an app
- Failed - The model had issues and is unable to be used
Trigger
Tulip automatically creates a connector for each model so you can readily to deploy as soon as the model is trained.
Choose the Vision AI trigger, then Run Vision Model Inference, and select the model you created. You’ll need to provide the image that you’re running the model against and a variable to store the result (i.e. the class and the confidence for that class).
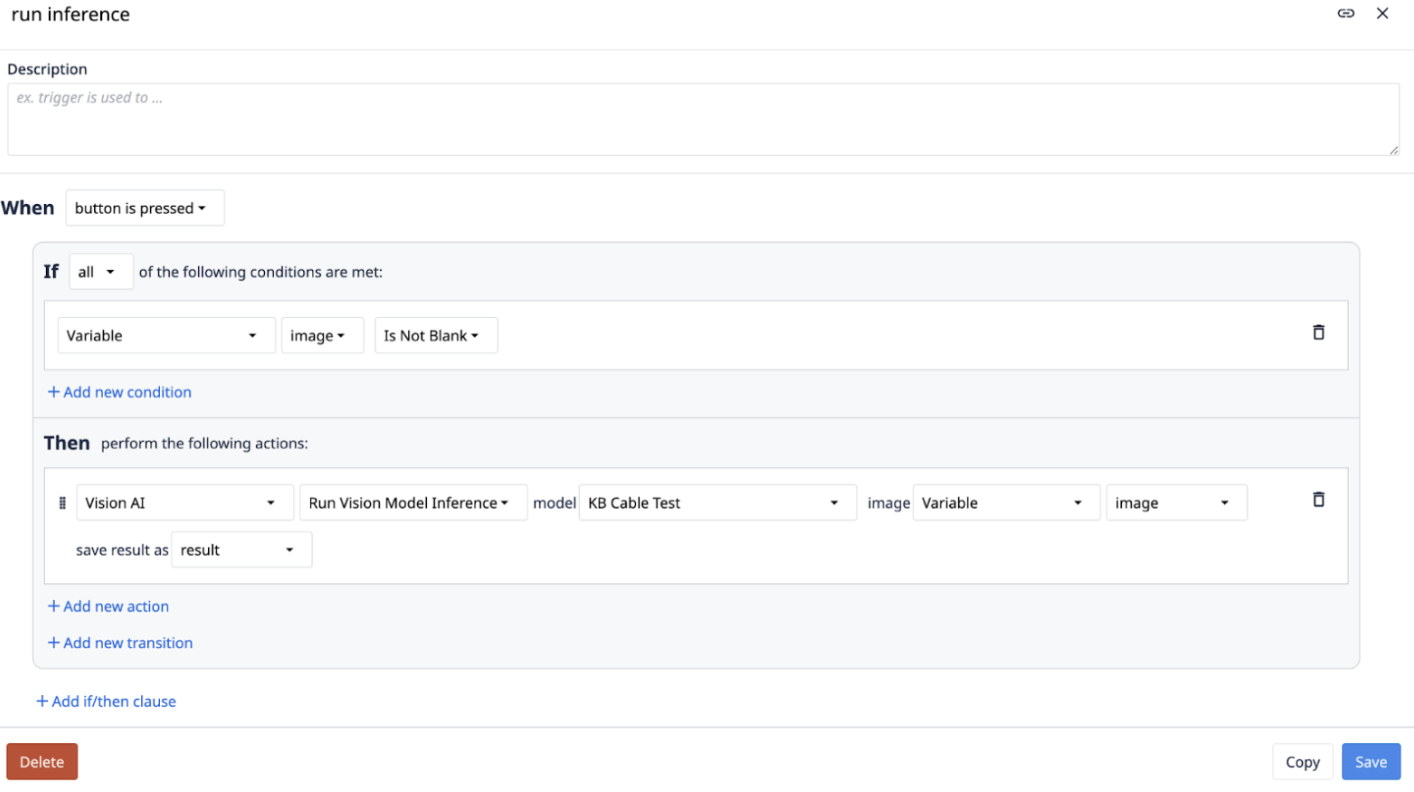
The result will return with a “label” and “score”.
Limits
- 100 Vision Models
- 20MB image size
- 10K images in a model
- 25 requests per second
Classification
- 2 classes required
- minimum 10 images per class