
はじめに
Users will not be able to have a driver run in an app until the Edge Driver Page is added. Please reach out to developer@tulip.co in the meantime.
ESP32開発ボードと入手しやすいDHT22温湿度センサーを使用して、カスタムエッジドライバーをテストする方法。
必要なもの(前提条件):*CircuitPythonが動作するLOLIN S3Mini* 選択したIDE(統合開発環境) -Visual Studio Code* Node.jsとNPM
このガイドでは、ESP32開発ボードと入手しやすいDHT22温湿度センサー用にカスタムEdge Driverを構築してテストする例を説明します。
ハードウェアの準備
この例では、CircuitPythonを実行するLOLIN S3 Mini開発ボード(ESP32-S3マイクロコントローラーをベース)を使用して、 DHT22温湿度センサーからデータを読み取ります。
DHT22センサーをESP32に配線する
DHT22センサーとS3 Miniの接続は簡単です:1. DHT22のGND(-) → S3 MiniのGNDピン2.DHT22のVCC (+) → S3 Miniの3V3ピン3.DHT22のOUT (S) → S3ミニのD1ピン(または利用可能なIOピン)
センサーデータの読み取り
CircuitPythonをセットアップするためのリンクです。
以下は、DHT22センサーから温度と湿度の値を1秒ごとに読み取り、USBシリアルインターフェース経由でJSONとしてデータを出力する簡単なCircuitPythonスクリプトです。また、各メッセージの前に "ESP: "というテキストを追加しているので、ドライバはログやブート情報などの他のシリアルメッセージを無視することができます。
このスクリプトを としてCIRCUITPYドライブに保存すると、自動的にシリアルポート経由でデータを送信し始めます:``import adafruit_dhtimport boardimport timeimport json
dht = adafruit_dht.DHT22(board.D1)
while True: print( "ESP:", json.dumps( { "temperature": dht.temperature, "humidity": dht.humidity, } ), ) time.sleep(1). ), ) time.sleep(1)```.
Edgeドライバのビルド
カスタムEdgeドライバを作成するには、Node.jsとNPMがインストールされている必要があります。Node.jsとNPMをインストールしていない場合は、このガイドに従ってください。
新しい Edge Driver プロジェクトの作成
次のコマンドを実行して、新しいEdge Driverプロジェクトを作成します。
プロンプトに従ってドライバを設定します。この例では、ドライバ名を**"esp32-diy-sensor "とし、USBインターフェースを介してS3 Miniからデータを読み込むためにシリアル**サービスを有効にします。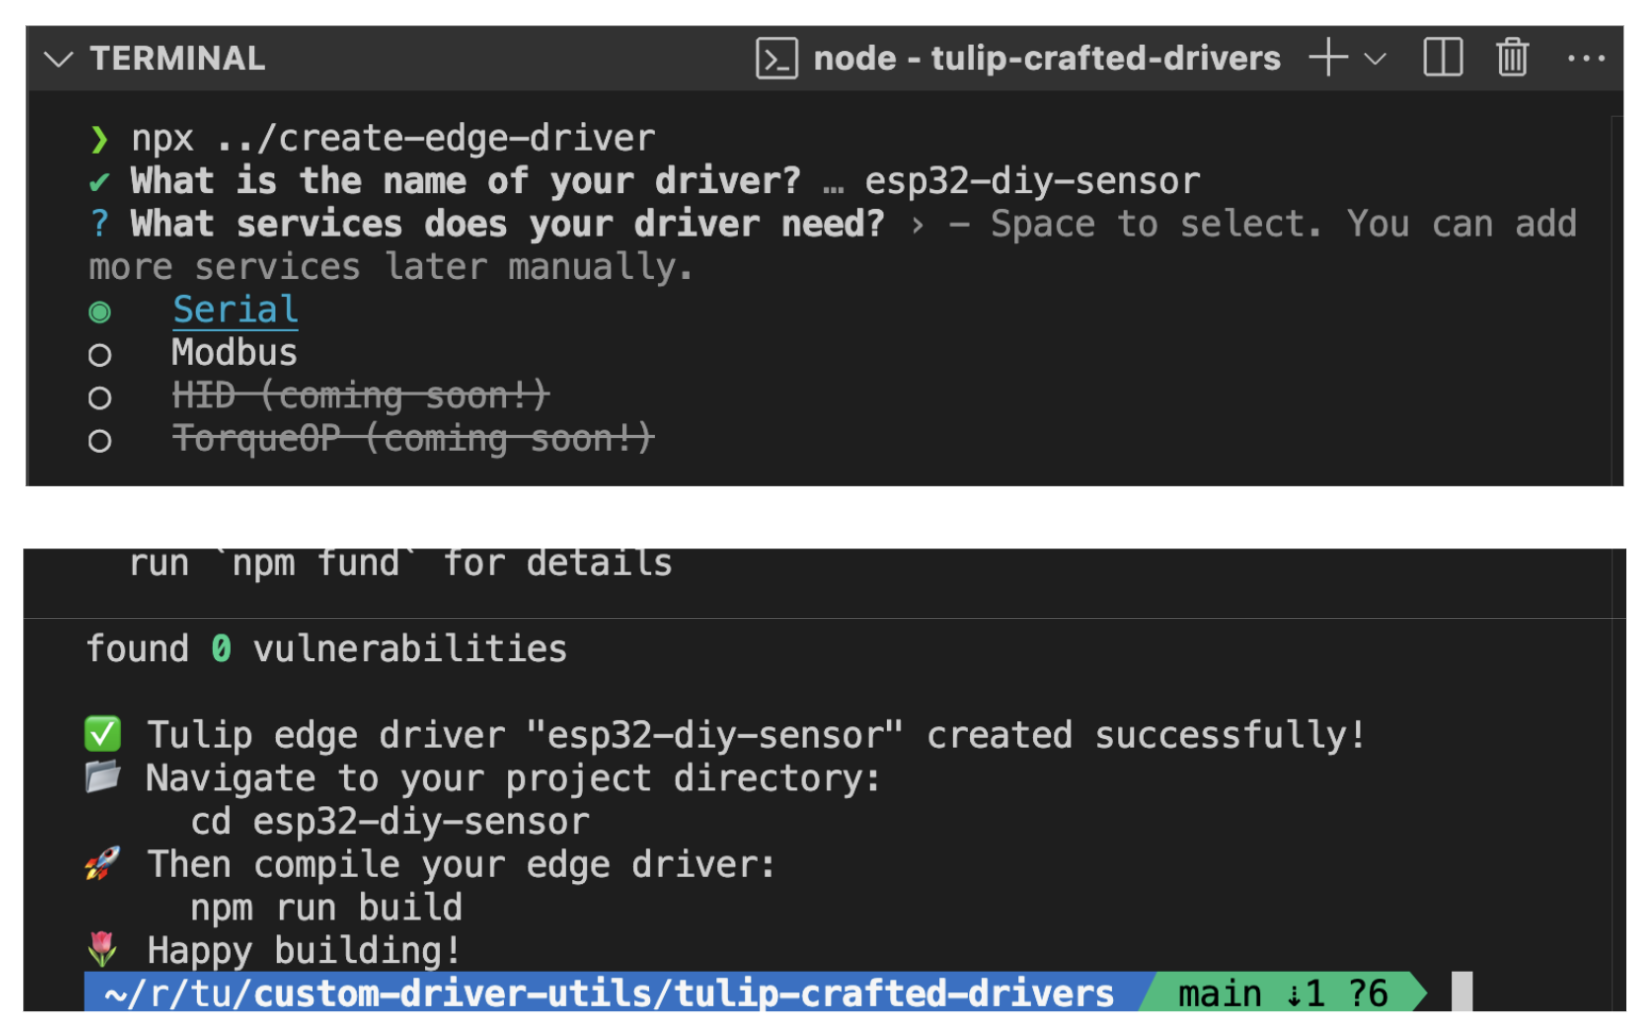 {height="" width=""}.
セットアップが完了したら、プロジェクトディレクトリに移動し、npm run buildこのコマンドを実行します:* manifest.jsonファイルを検証します.* TypeScriptコードをコンパイルします.* Tulip PlayerでロードできるJavaScriptファイルにドライバをバンドルします。
manifest.jsonの更新
まず、ドライバが実装するイベントと関数を定義する必要があります。デバイスのイベントは、Tulip Appsのロジックのトリガーとして使用できます。例えば、以下のようなアプリのトリガーを設定できます:
「センサーが測定イベントを発生したら、温度データを'Shop Floor Temperature'変数に格納する。
ドライバはまた、アプリ内のトリガに応答して実行されるデバイス関数を実装することもできます。例えば
「このボタンをクリックしたら、デバイスの'Toggle Light'関数を呼び出します。
この例では、ドライバは関数を持ちませんが、センサーが計測したときに "data "というイベントを発生させます。src/manifest.jsonファイルのfunctionsセクションを、空のままにするか、完全に削除して更新します:
json... "functions":[次にeventsセクションを更新し、"data "イベントの形を定義します。このイベントは、"temperature "と "humidity "という2つのfloatプロパティを持つオブジェクトになります:json... 「イベント":イベント": [ { "name":"data", "schema":name": "data", "schema": { "type":「object", "properties":{ "temperature":プロパティ": { "温度": { "タイプ":"float" }, "humidity":"type": { "float" }:"float" }。 } } } ],...
アップデート
次に、Edge Driver SDKを使用して、S3 MiniのUSBシリアルポートを見つけて接続し、受信したシリアルデータを読み取り、JSONメッセージを解析し、fireEvent()を使用して "data "イベントを発生させるドライバコードを記述します。src/index.tsファイルのサンプルコードを次の新しいコードに置き換えてください:
``jsedgeDriverSdk.SerialPort.listAvailablePorts().then((ports) => { const esp32port = ports.find((port) => port.productId === 33128); const serial = new edgeDriverSdk.SerialPort(esp32port.path, { baudRate: 115200, });
serial.onData((data) => { try { const decoder = new TextDecoder(); const stringData = decoder.decode(new Uint8Array(data)); const espData = JSON.parse(stringData.split("ESP: ")[1]); edgeDriverSdk.fireEvent("data", espData); } catch (error) { console.error(error); }. });
serial.open();});``この例では、ドライバの初回起動時に USB デバイスの Product ID を使用してデバイスを自動的に検索するようにしています。しかし、Edge Driver SDKは、システムによって新しいデバイスが検出されたときにドライバを起動するように設定することもサポートしています。
ドライバのビルドと実行
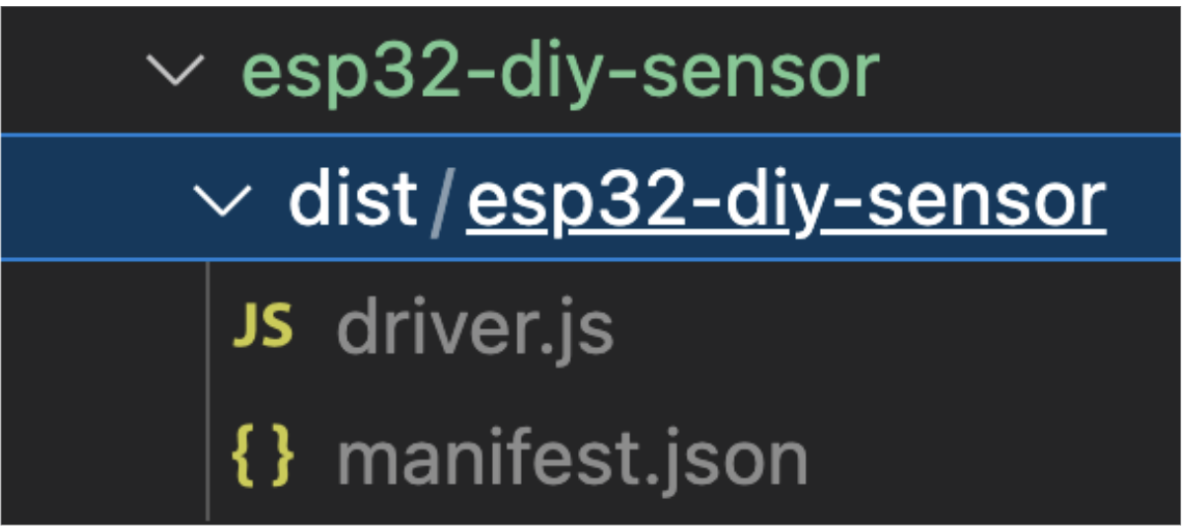
ドライバのコードと manifest.json を更新した後、ドライバを再度ビルドします。npm run buildこれにより、コンパイルおよびバンドルされた JavaScript ファイルと、検証済みのマニフェストのコピーがdistディレクトリ内に生成されます。
 {高さ="" 幅=""}。
Tulip Playerでドライバをテストする
デフォルトでは、Tulip Playerはビルトインされたドライバで動作します。しかし、Tulipインスタンスがなくても、Tulip Playerでカスタムドライバーをローカルに実行することもできます。これを行うには、ドライバのdistディレクトリへのパスを指定して、コマンドラインからPlayerを起動します。ここから Tulip Playerをダウンロードしてインストールしてください。
Windowsでは、ターミナルでsetコマンドを使用してTULIP_PLAYER_CUSTOM_DRIVERS_PATH環境変数を設定し、同じターミナルから "Tulip Player.exe "を実行します:
batC: \UsersBob> set "TULIP_PLAYER_CUSTOM_DRIVERS_PATH=C:˶UsersBobDocuments˶UsersBob> "C:˶UsersBobAppData˶Local˶tulip-player-desktop˶Tulip Player.exe"
Playerが起動したら、PlayerアプリでBrowser Developer Toolsを開き、Consoleタブに行く。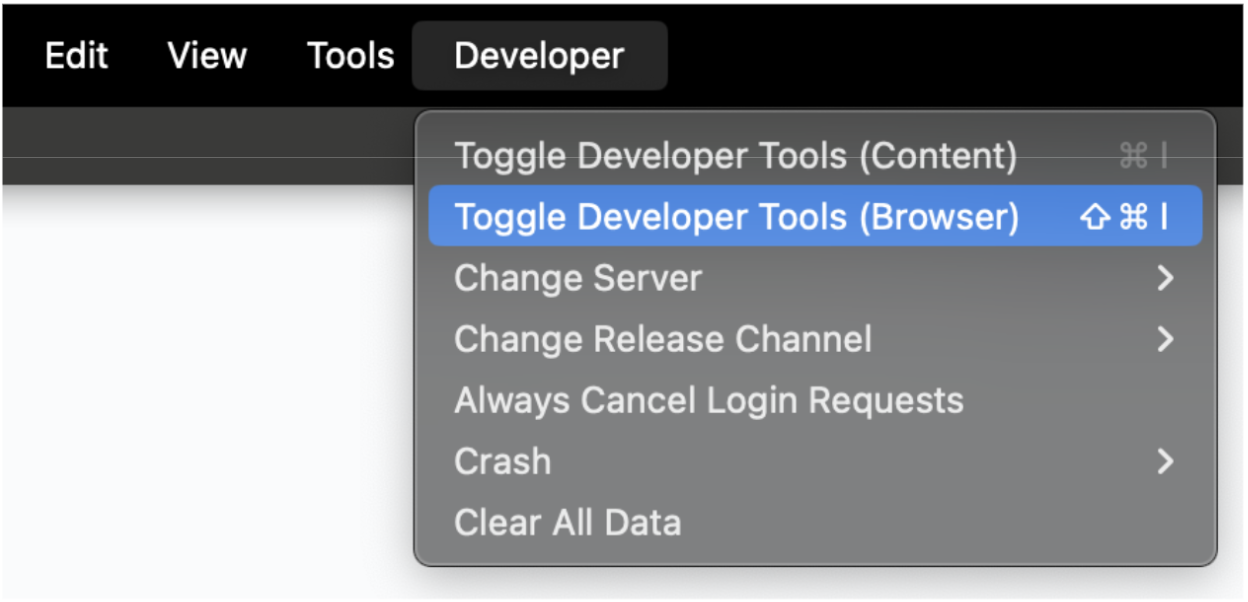 {height="" width=""}.
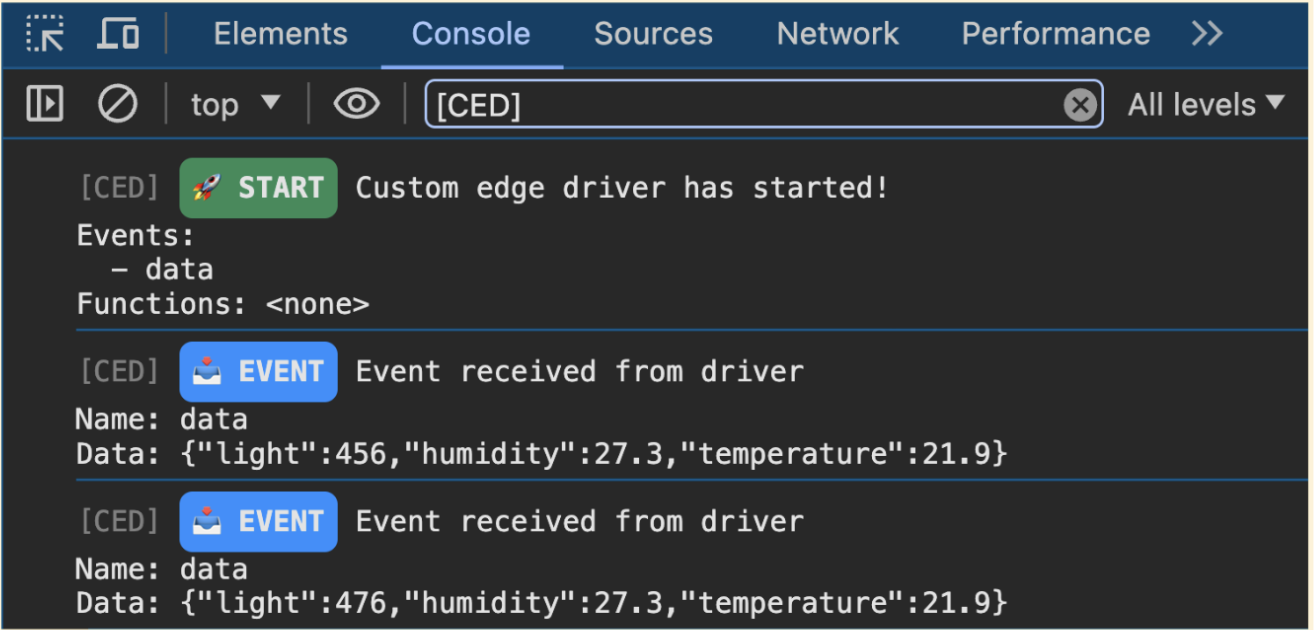
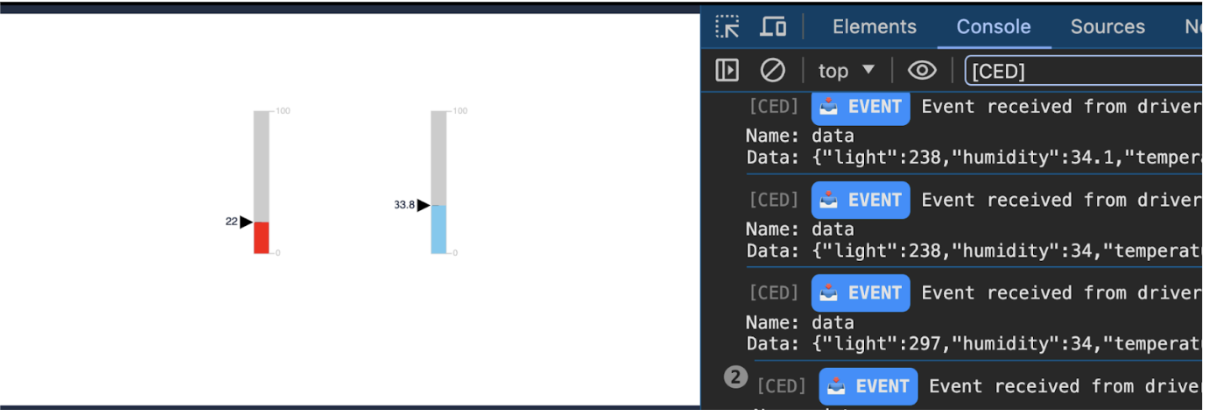
メッセージを"[CED]"でフィルタリングし、ドライバログを表示します。
 {height="" width=""} ドライバのログを表示します。
成功すれば、温度と湿度の値をリアルタイムで記録する "data "イベントが表示されるはずです。
チューリップのアプリでドライバーを使う
まもなく、カスタムドライバーをTulipインスタンスにアップロードできるようになります。それまでは、あらかじめ定義されたサンプルのドライバーをインポートすることができます。
Tulipライブラリにアクセスし、このようなインストールボタンがあるドライバーをインストールしてください。
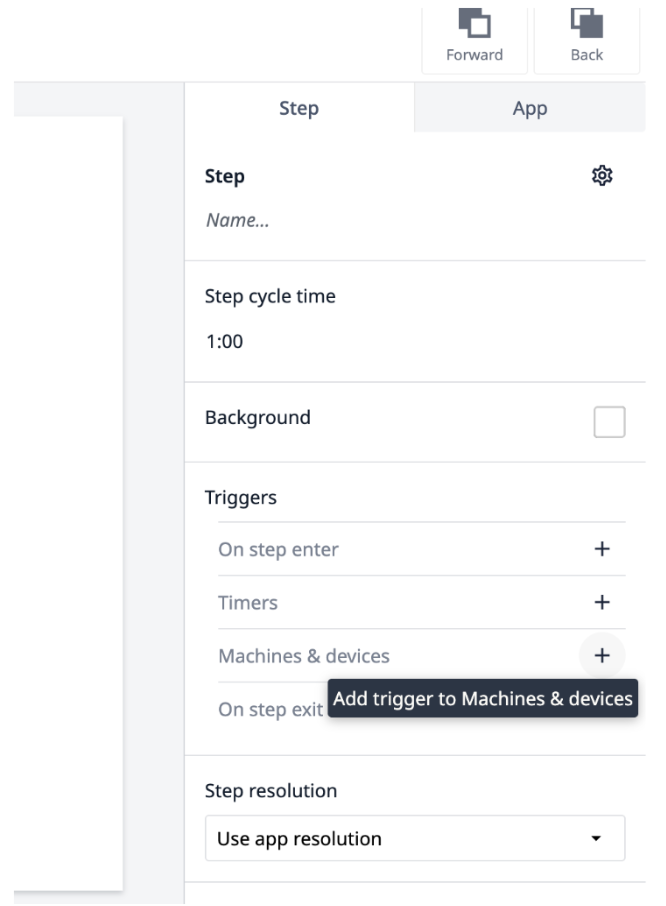
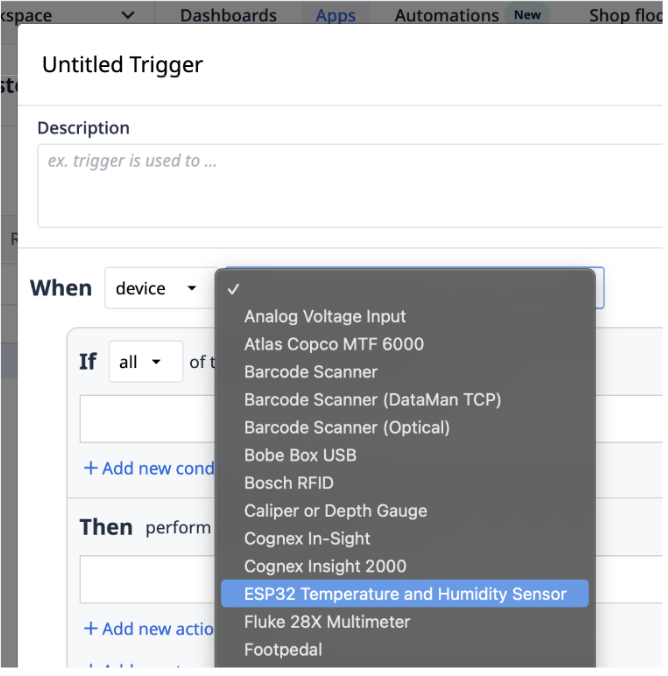
プロンプトが表示されたら、ドライバーをインストールします。新しいTulipアプリを作成し、ステップに "Machines & devices "トリガーを追加します。
 {height="" width=""}.
デバイスリストにインポートされたESP32温湿度センサーが表示されるはずです。
 {height="幅=""}」と表示されます。
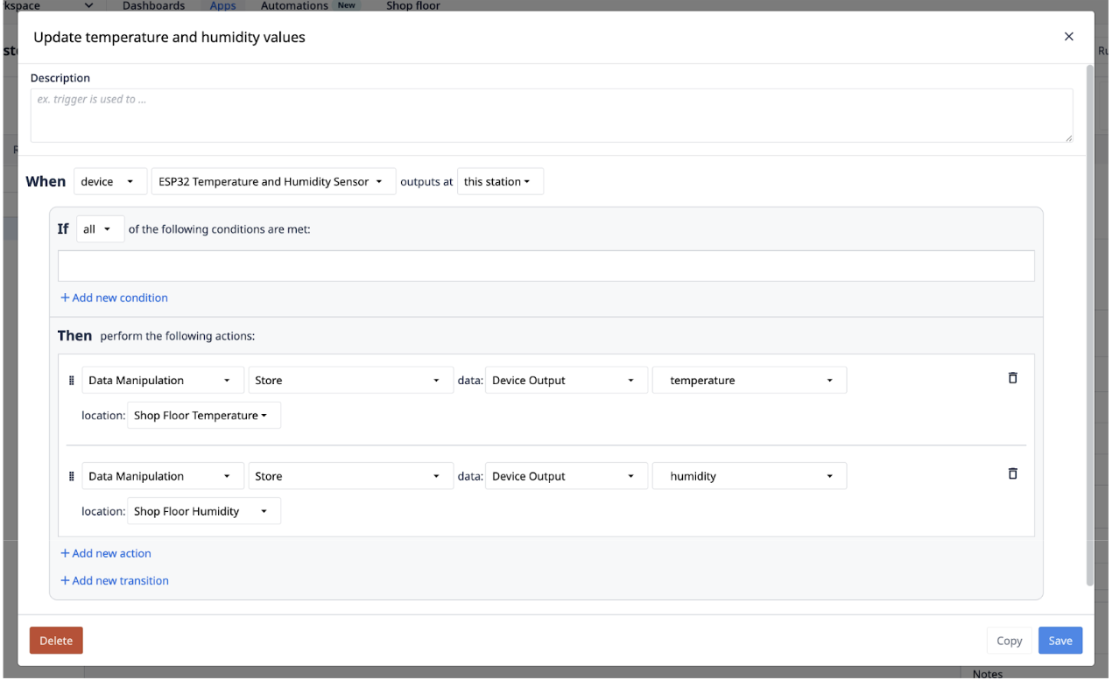
次に、センサーのライブデータでアプリの変数を更新するトリガーを作成します。
 {height=""幅=""}。
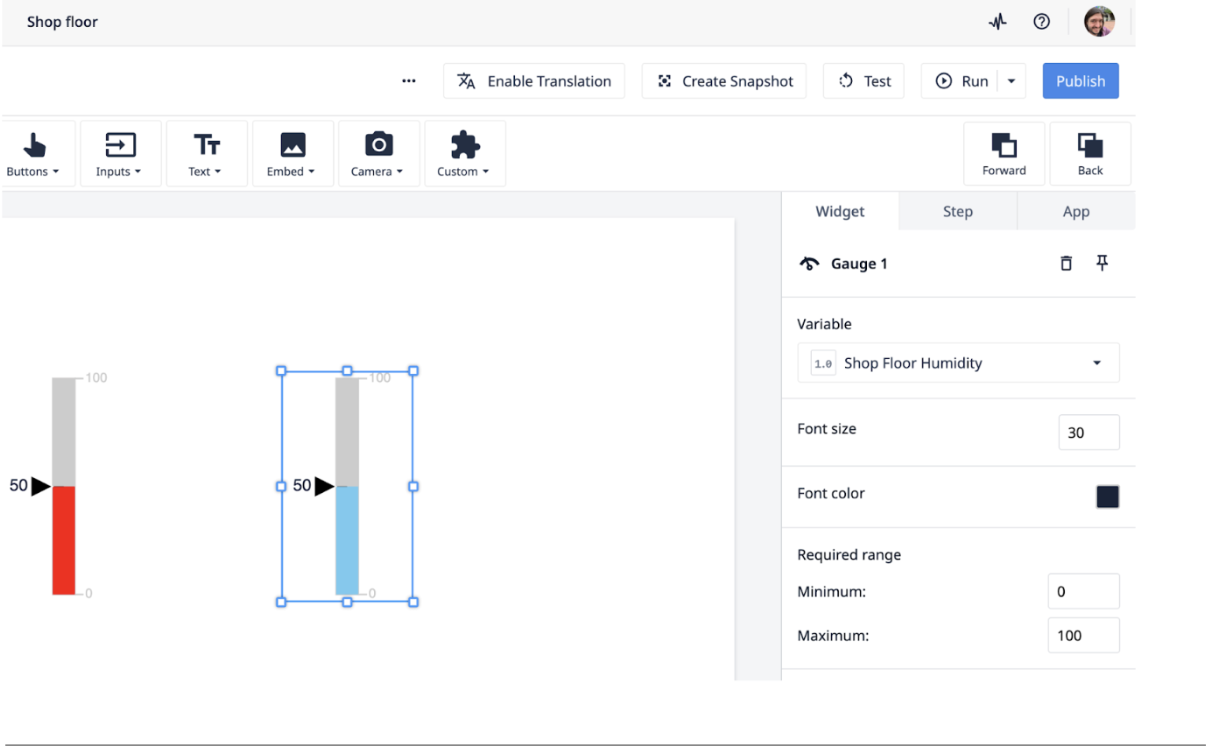
アプリで温度と湿度のデータを視覚化できるように、ステップでこれらの変数を使用するウィジェットをいくつか作成します。
 {height="" width=""} ウィジェットを作成します。
Tulipアプリの実行
アプリの設定が完了したら、Tulip Playerで実行します。すべてが正しく設定されていれば、アプリ内でセンサーの値がリアルタイムに更新されているのが確認できるはずです!
 {高さ="" 幅=""}
これで完了です!これで、TulipでカスタムEdge Driverを作成、テスト、統合することができました!