- Print
How to Configure Cognex and Tulip
This guide will walk you through setting up communication between the Cognex InSight Explorer and Tulip.
Tulip can integrate with Cognex devices that use the InSight Explorer software. This guide will walk you through setting up this integration.
This integration has been tested extensively on the Cognex InSight 2000 and should be similar from model to model.
Getting Started
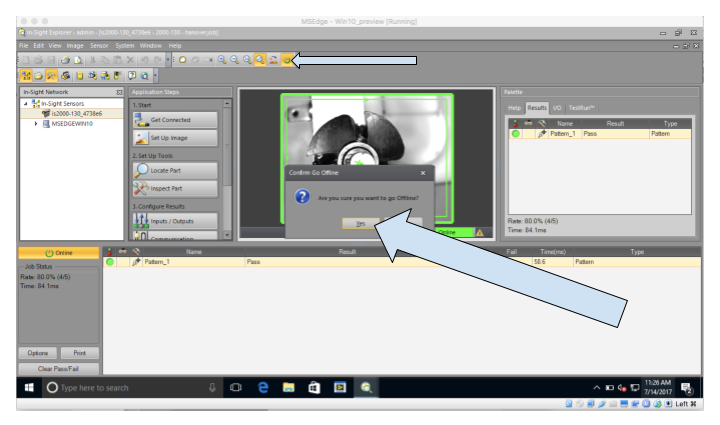
All changes to the Cognex can only be done in the offline mode. Make sure the camera is put back in the online mode after configuration for actual use.
Setting up a Job
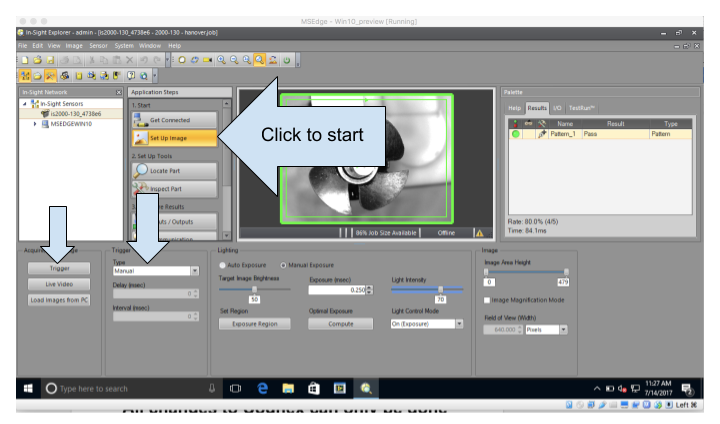
- This is where you set up the image of what a successful image looks like for the job. Make sure that the Cognex is mounted in its final position, and place the successfully assembled parts under the Cognex. Make sure that you can reliably place all future parts in the same place, so that the job can pass all successfully assembled parts.
a. Click "Set up image"
b. Take a picture of the successful part by clicking "trigger"
c. Set Type to "Manual"
- Define the pass/fail criteria for your image:
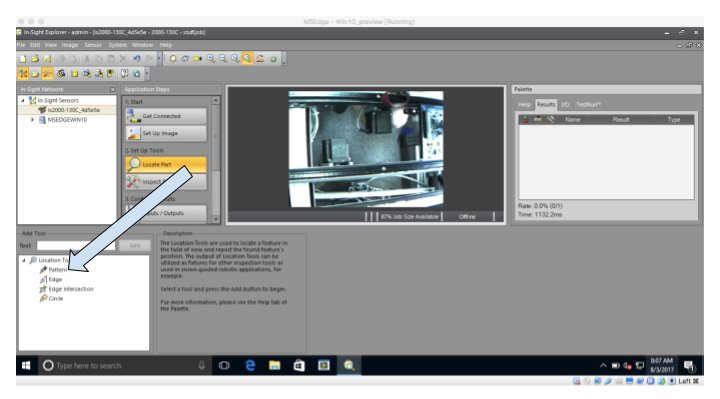
a. Click on "Locate part" to set up the location tool
b. Select the "pattern" tool
c. The green rectangle is the area of inspection.The purple rectangle is the pattern tool - it can be resized and rotated.
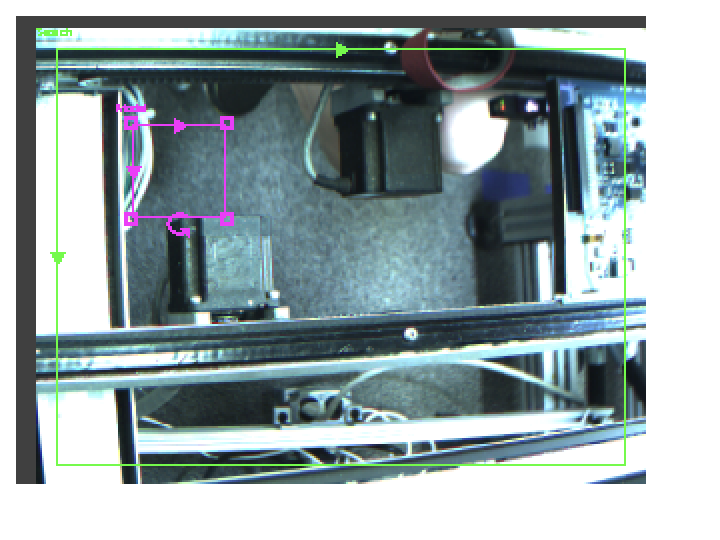
d. Move the pattern and adjust the size to the area you want to inspect. The Cognex will check the image within the purple rectangle and compare pixel by pixel. If it is similar enough, the job passes.
If not, the job fails. In this example, the job will be to check the stepper motor, contained inside the purple rectangle in the below picture.
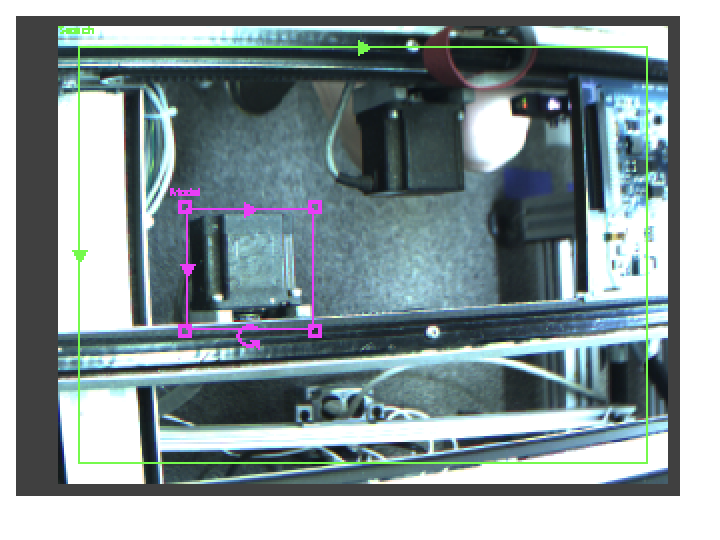
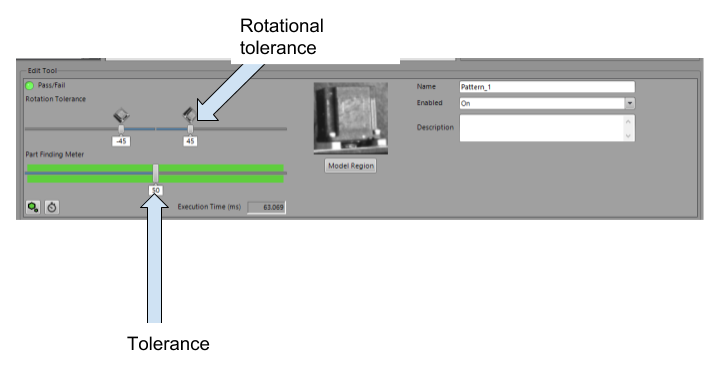
e. After you have placed the purple pattern rectangle, click "OK". This Edit Tool window appears next:
i. Adjust the tolerance based on how much variation is allowed in this location.
ii. Multiple locations can have different tolerances.
- Set up the Inputs/Outputs as follows:
a. Green LED - Job Pass
b. Red LED - Job Fail

- Set up the Connections to have the correct TCP/IP settings:
a. Click on "Communication" then "Edit"
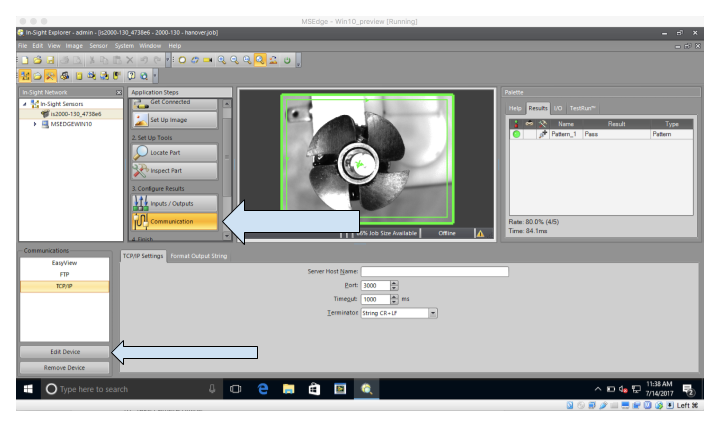
- Set Device to "Other"
- Set Protocol to "TCP/IP"
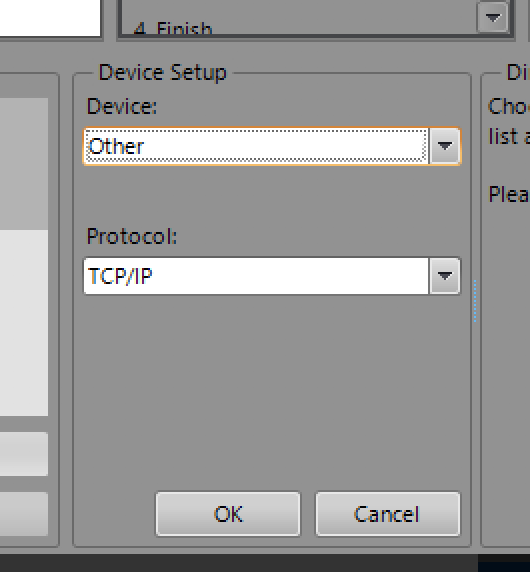
- Click on "Edit Device" then Format Output String tab, then Format String.

- Set up as seen below:
a. Leading Text: "tulip: " (There is a single space after the colon; this is important.)
b. Check "Use Delimiter"
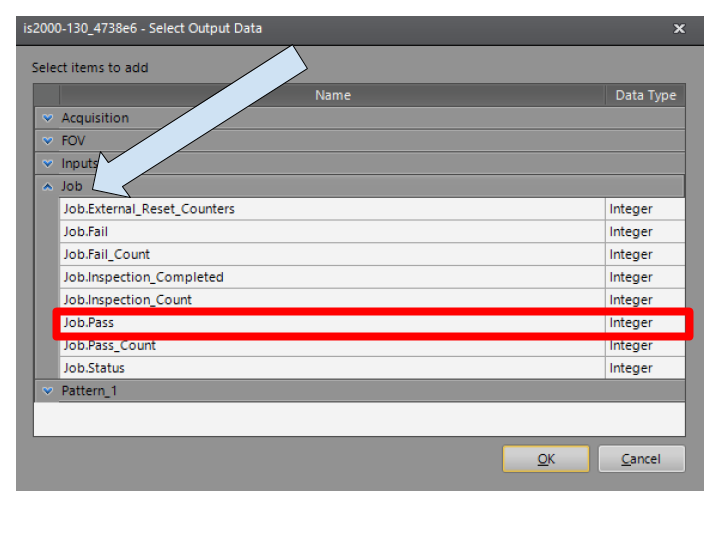
c. Click "Add" - another window (Select Output Data) should pop up.
d. In the Select Output Data window, click Job and select Job.Pass. Click "OK".
e. In the original Format String window, type in Label: "Pass " (There is a single space after the word; this is important.)
f. Click "Include Label"
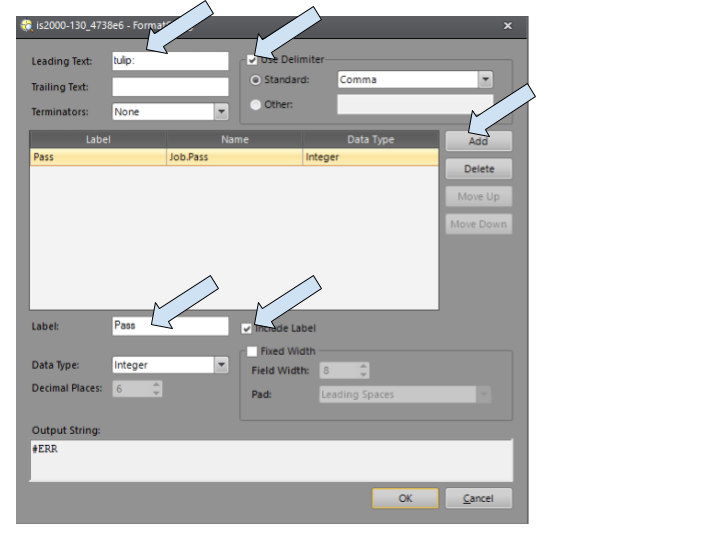
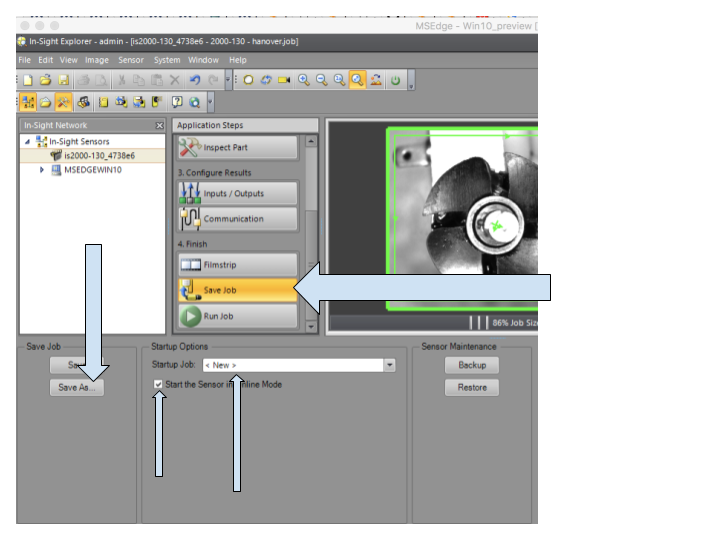
- Click "OK" to exit the FormatString window, and select "Save Job" as seen below:
a. Check "Start the Sensor in Online Mode"
b. "Save As", type the job name you prefer
c. Select your job in the Startup Job drop down
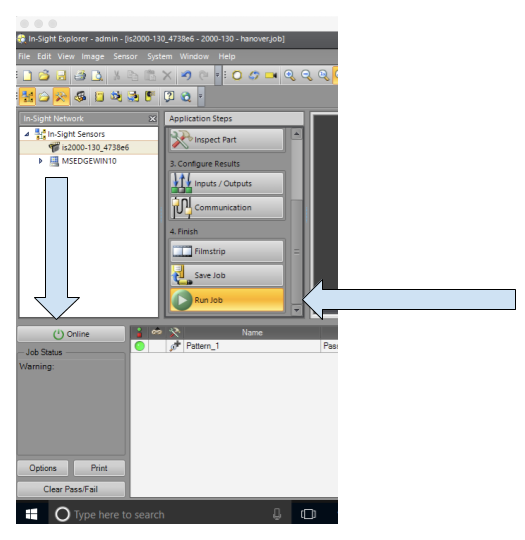
- Put the Camera in the online mode. Run the job, and make sure it passes and fails correctly. You can also run the job by pressing the "TRIG" button directly on the Cognex camera.
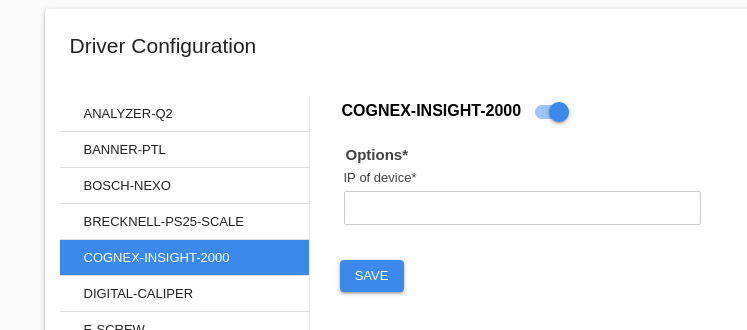
- Enable the Cognex Insight 2000 Driver in the Gateway Portal
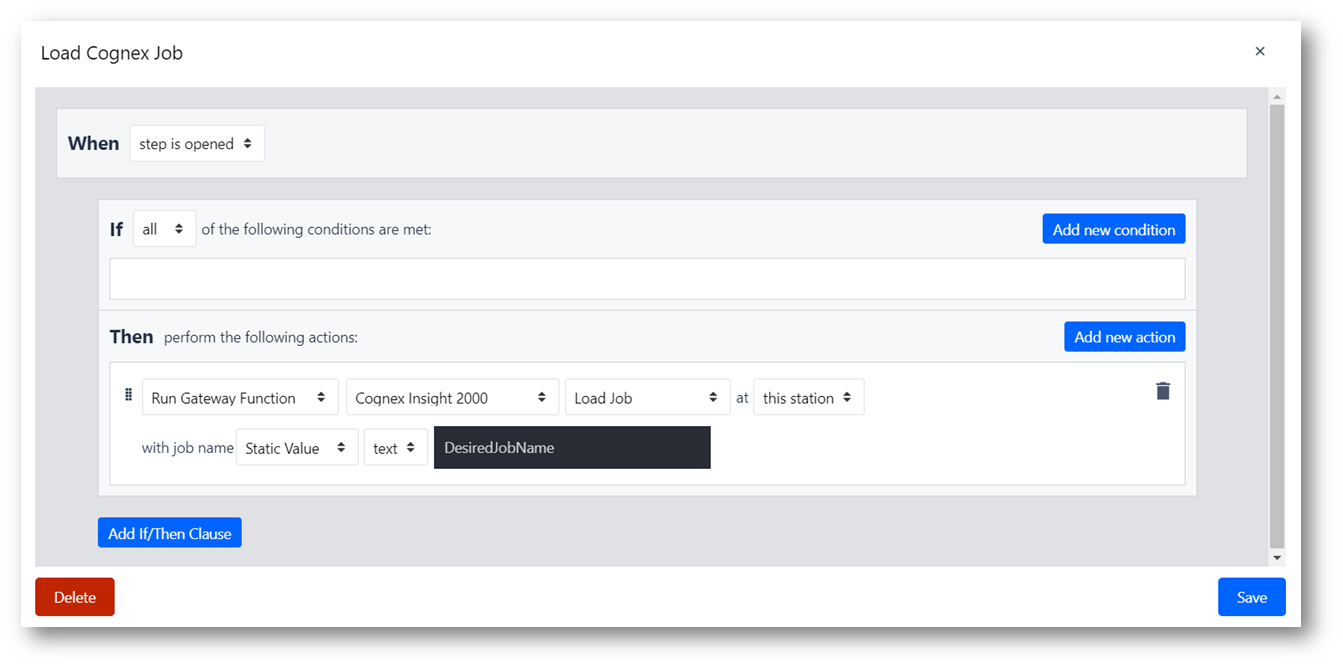
To load a particular job from your Cognex, you can set up a trigger to load your job by the name you've given it. You can have this trigger set up in a variety of ways. For example, if you want a job to load when a step is opened, you can set up a trigger such as here:
