
Creare e distribuire i modelli di visione di Landing AI in Tulip
The Third Party Vision Integration will be available in Tulip Instances upon request.
La funzione Snapshot di Vision può essere utilizzata con i servizi di integrazione di terze parti di Tulip per creare e distribuire rapidamente un modello di visione di classificazione. Utilizzando questa funzionalità con Landing AI, è possibile inviare immagini per testare il modello, che classificherà diversi tipi di oggetti e apprenderà l'affidabilità della classificazione.
In questo articolo imparerete
- Come inserire le credenziali di Landing AI
- Come creare un modello di classificazione
- Come distribuire un modello di classificazione
Prerequisiti
Avete raccolto le immagini necessarie e le avete classificate per il vostro set di dati (ne servono almeno 10 per classe).
Per esempi, vedere:* https://library.tulip.co/apps/vision-data-collection* https://support.tulip.co/docs/collecting-data-for-visual-inspection-with-vision
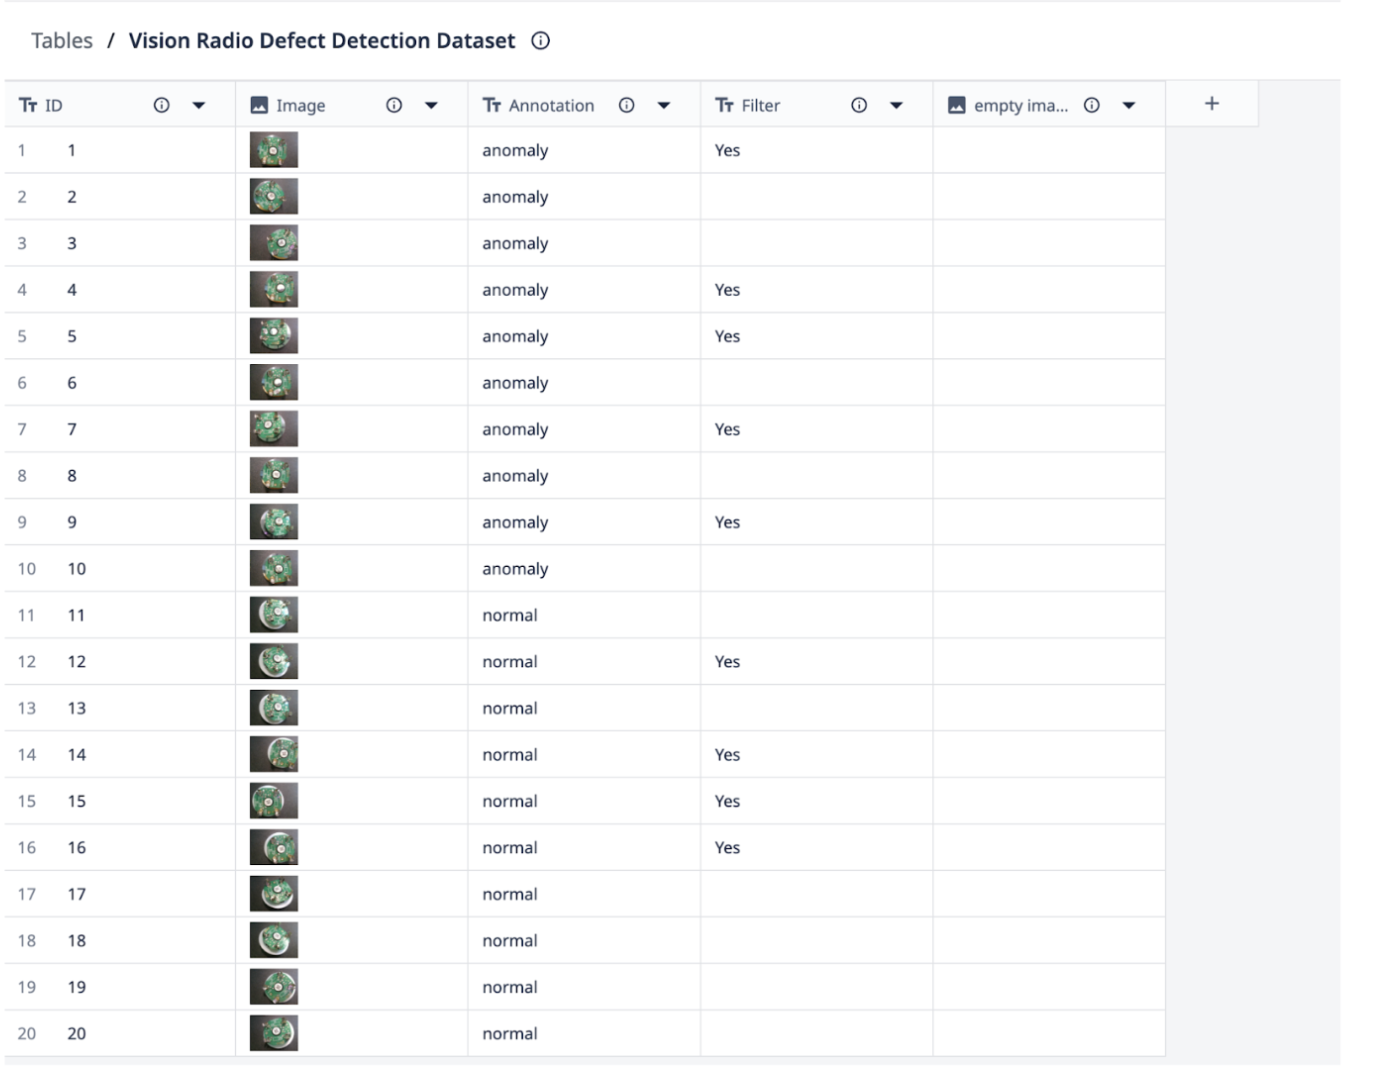
Caso d'uso: Classificazione di Radio PCB come "anomalia" o "normale".
Questo può essere usato per classificare più stati, ma in questo caso ne usiamo due per semplicità.
Inserire le credenziali di Landing AI
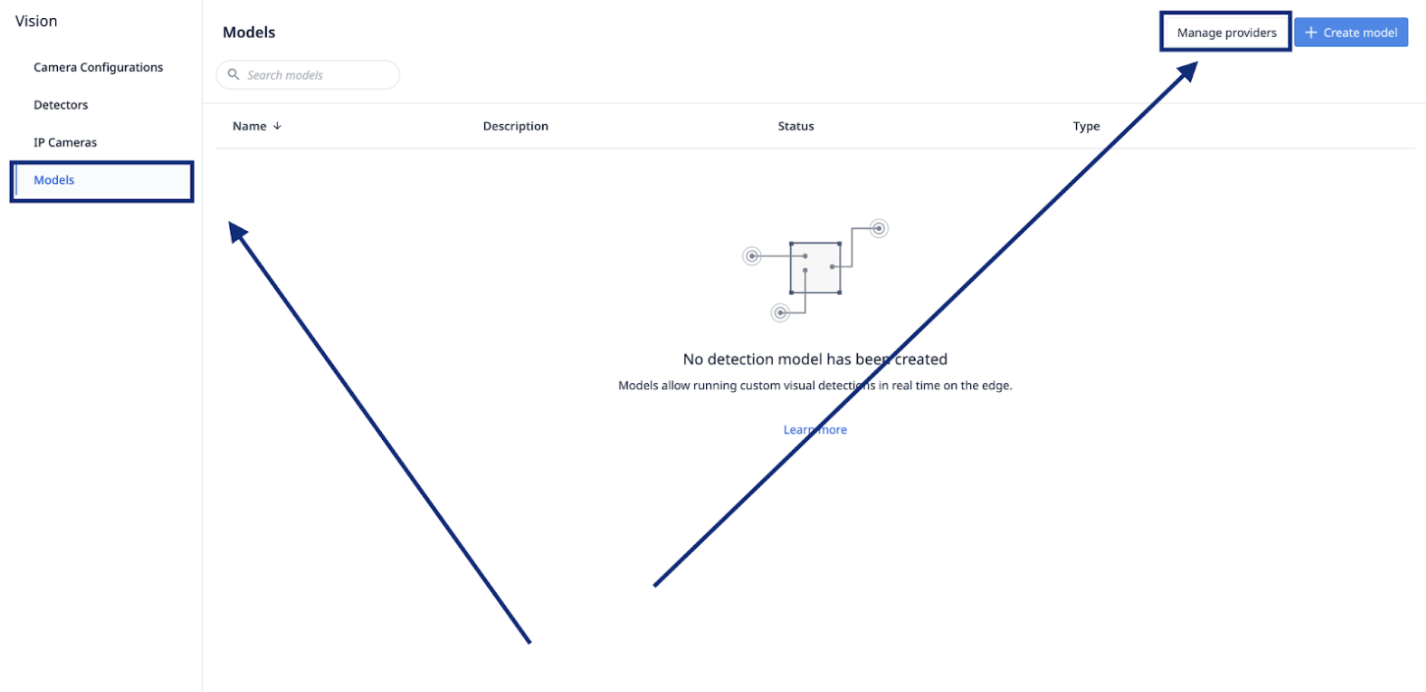
- Nella scheda Shop floor, selezionare Vision.
- Nel pannello laterale sinistro, selezionare Modelli e quindi fare clic sul pulsante Gestisci fornitori in alto a destra della pagina.
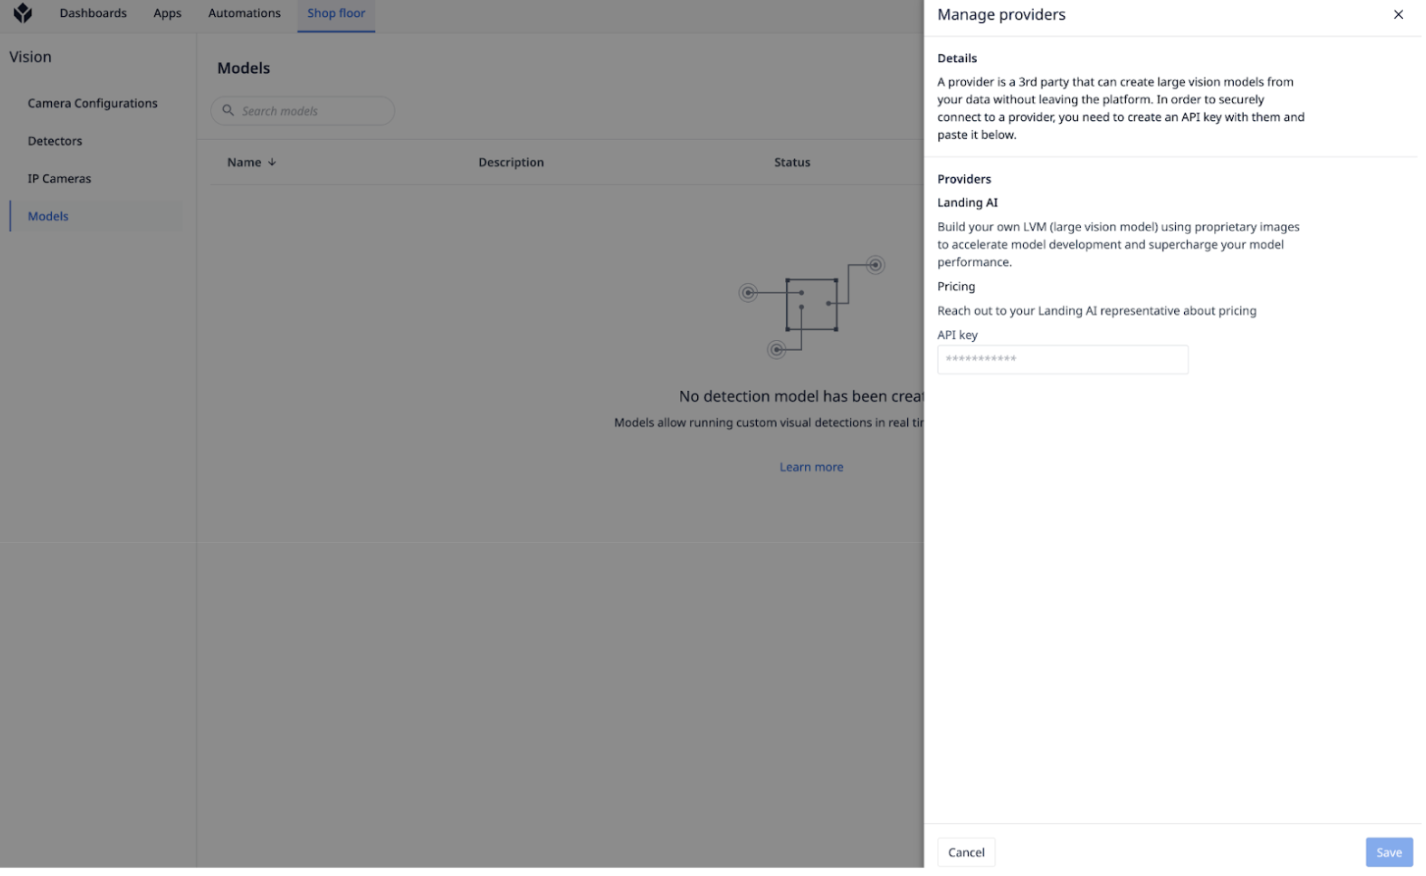
- Inserire la chiave API Landing AI.
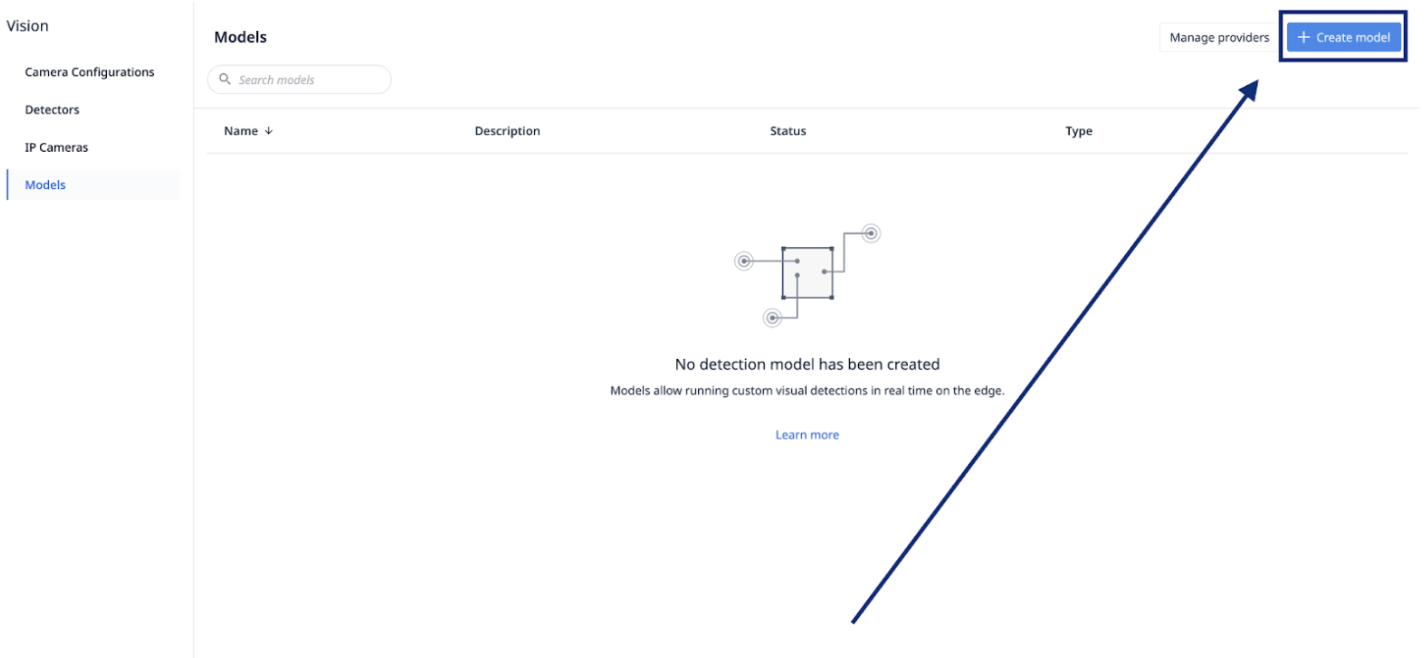
Creare un modello di classificazione
Una volta che il set di dati è pronto, raccolto e classificato, premere Crea modello. Per informazioni su come raccogliere i dati, leggere questo articolo.
Inserire il nome, la descrizione del modello e il provider di visione (Landing AI)Quindi, inserire i seguenti campi:* Tipo di modello - solo Classificazione (differenziazione tra entità conosciute)* Tabella Tulip - l'origine dei dati Tulip* Immagine - le immagini che si desidera classificare* Annotazione - l'etichetta (che diventa la classe) per ogni immagine * Query - una query per limitare il numero di immagini che si sceglie di inviare
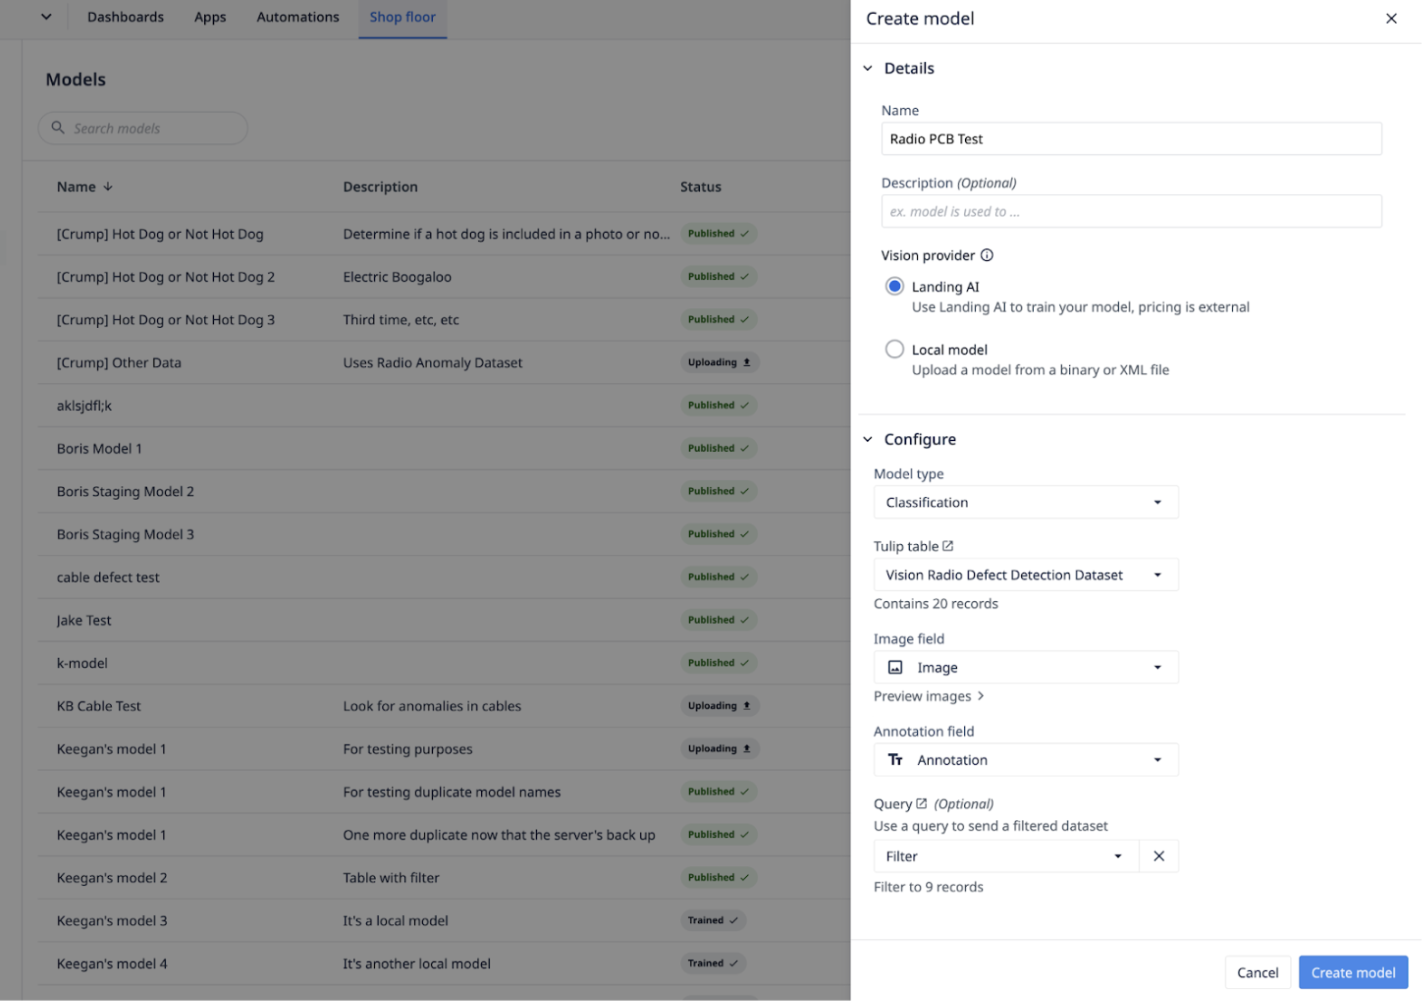
Fare clic su Crea modello.
Distribuzione di un modello di classificazione
Esistono quattro stati per i modelli di classificazione:* Caricamento - Attualmente si stanno caricando le immagini su Landing AI* Addestrato - Pronto per essere utilizzato* Pubblicato - Utilizzato in un'applicazione* Fallito - Il modello ha avuto problemi e non può essere utilizzato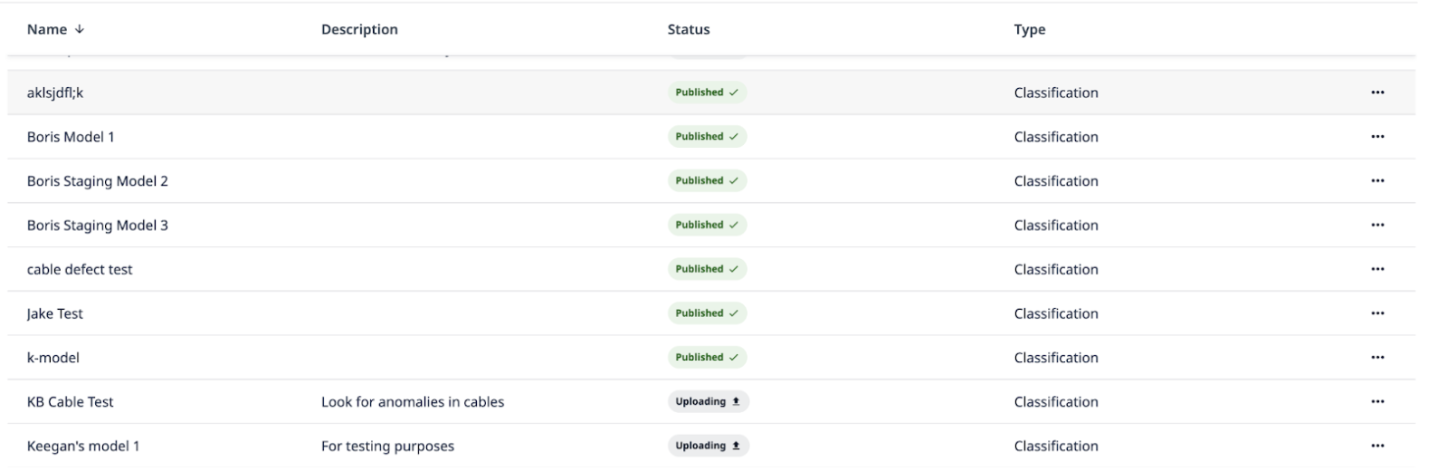
Innesco
Tulip crea automaticamente un connettore per ogni modello, in modo da poterlo distribuire prontamente non appena il modello è stato addestrato.
Scegliere il trigger Vision AI, poi Run Vision Model Inference e selezionare il modello creato. È necessario fornire l'immagine su cui si sta eseguendo il modello e una variabile per memorizzare il risultato (cioè la classe e la confidenza per quella classe).
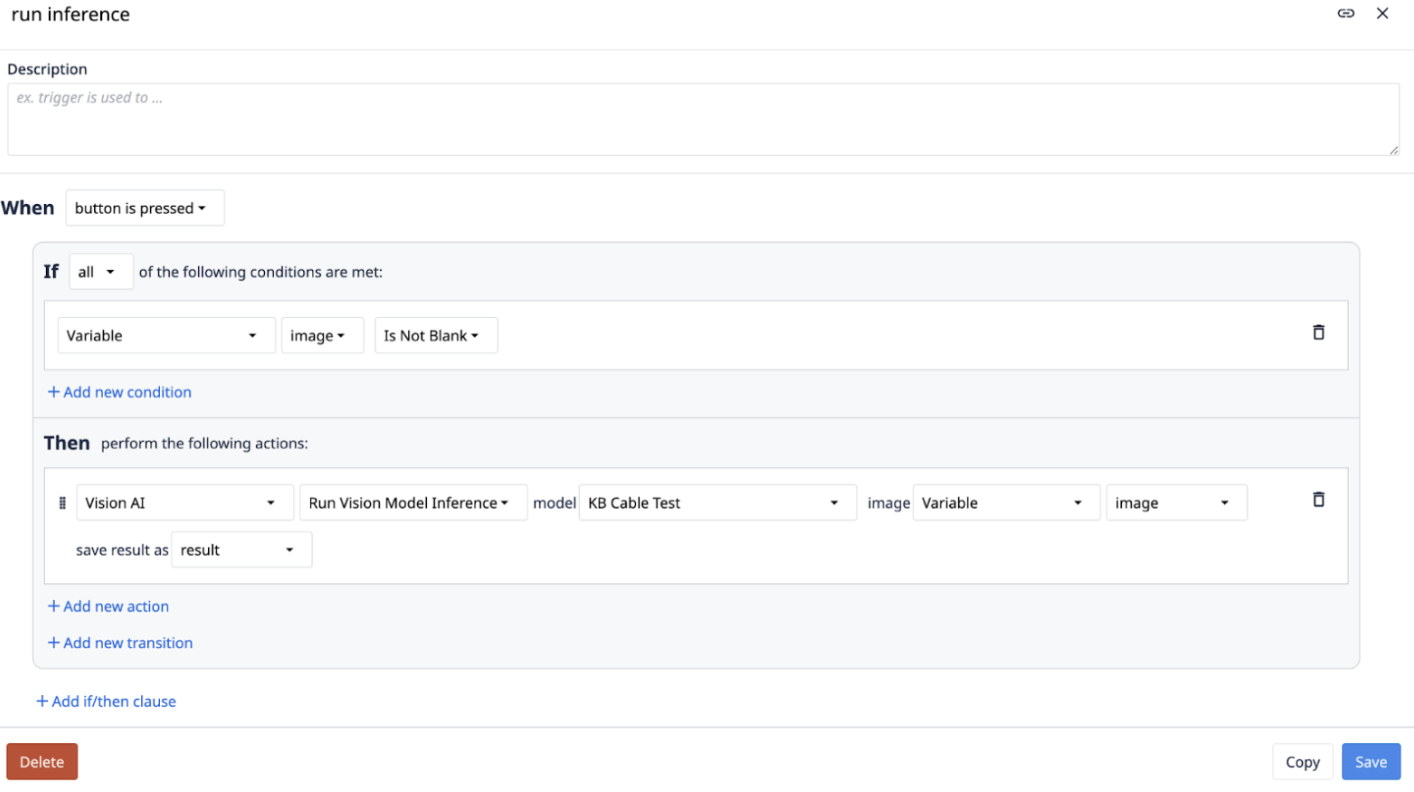
Il risultato verrà restituito con un'"etichetta" e un "punteggio".
Limiti
- 100 modelli di visione
- Dimensioni dell'immagine 20MB
- 10K immagini in un modello
- 25 richieste al secondo
Classificazione
- 2 classi richieste
- minimo 10 immagini per classe