

Learn to navigate the Tulip Automations Editor to build your automations just how you want.
Navigation
To enter the Automations Editor, you can create a new Automation via the + Create Automation button on the Automations Page. You can also edit an existing automation by clicking on one from your list and then selecting the Edit button.
How to use the editor
At the top of the page, name your automation by clicking on the Untitled Automation text.
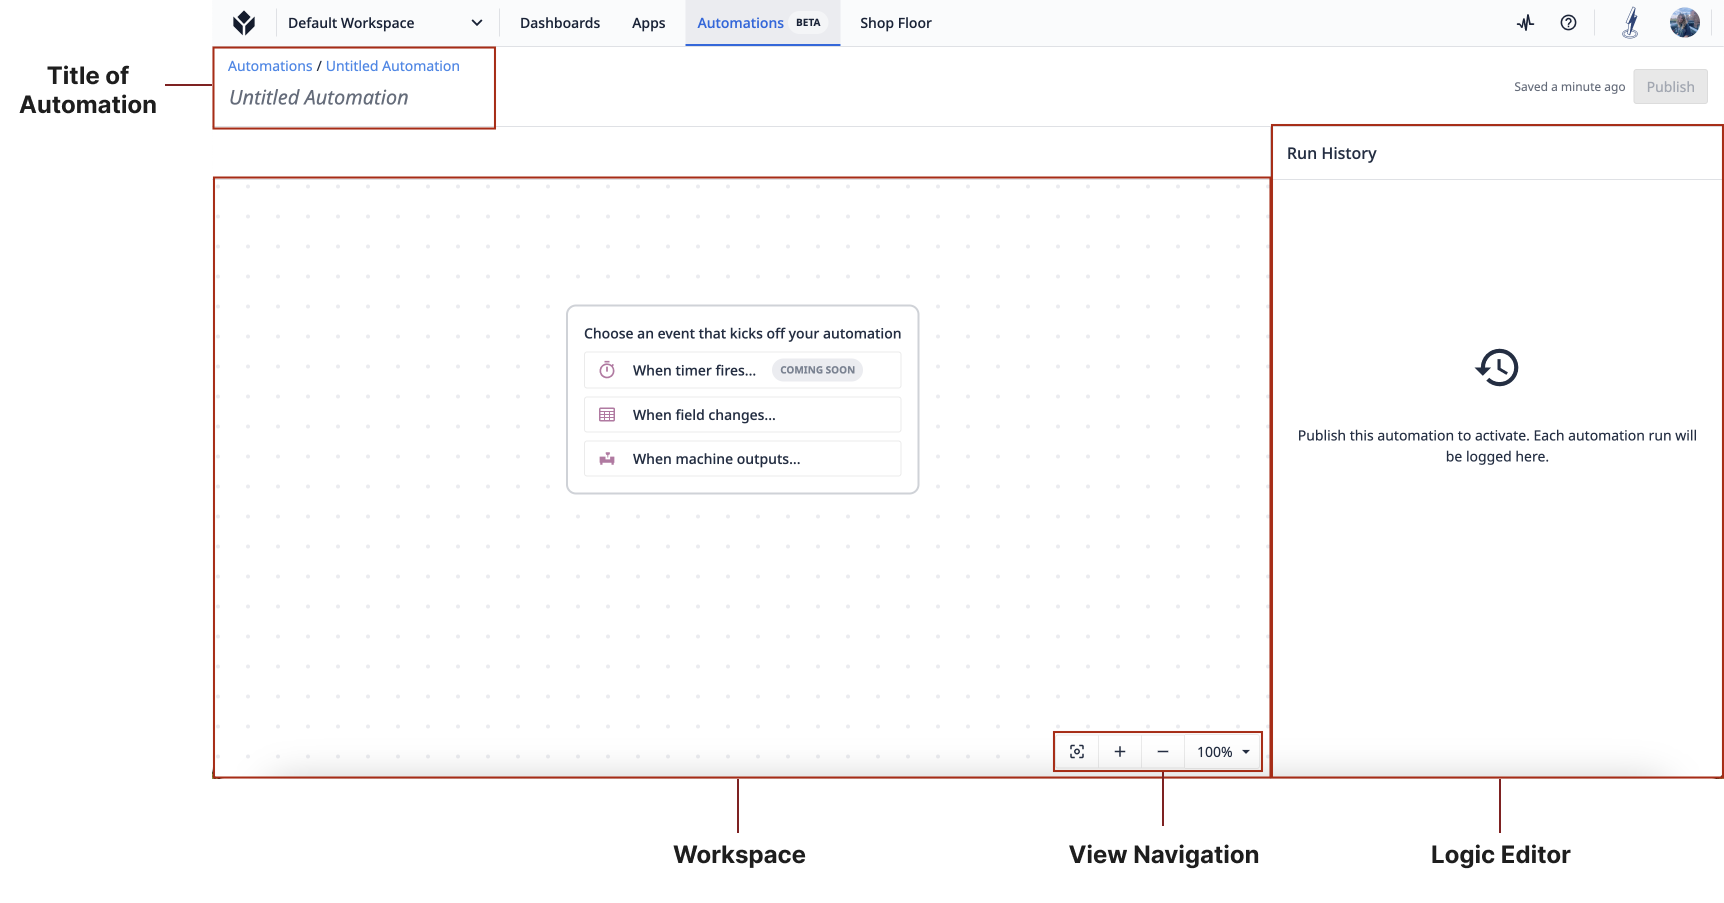
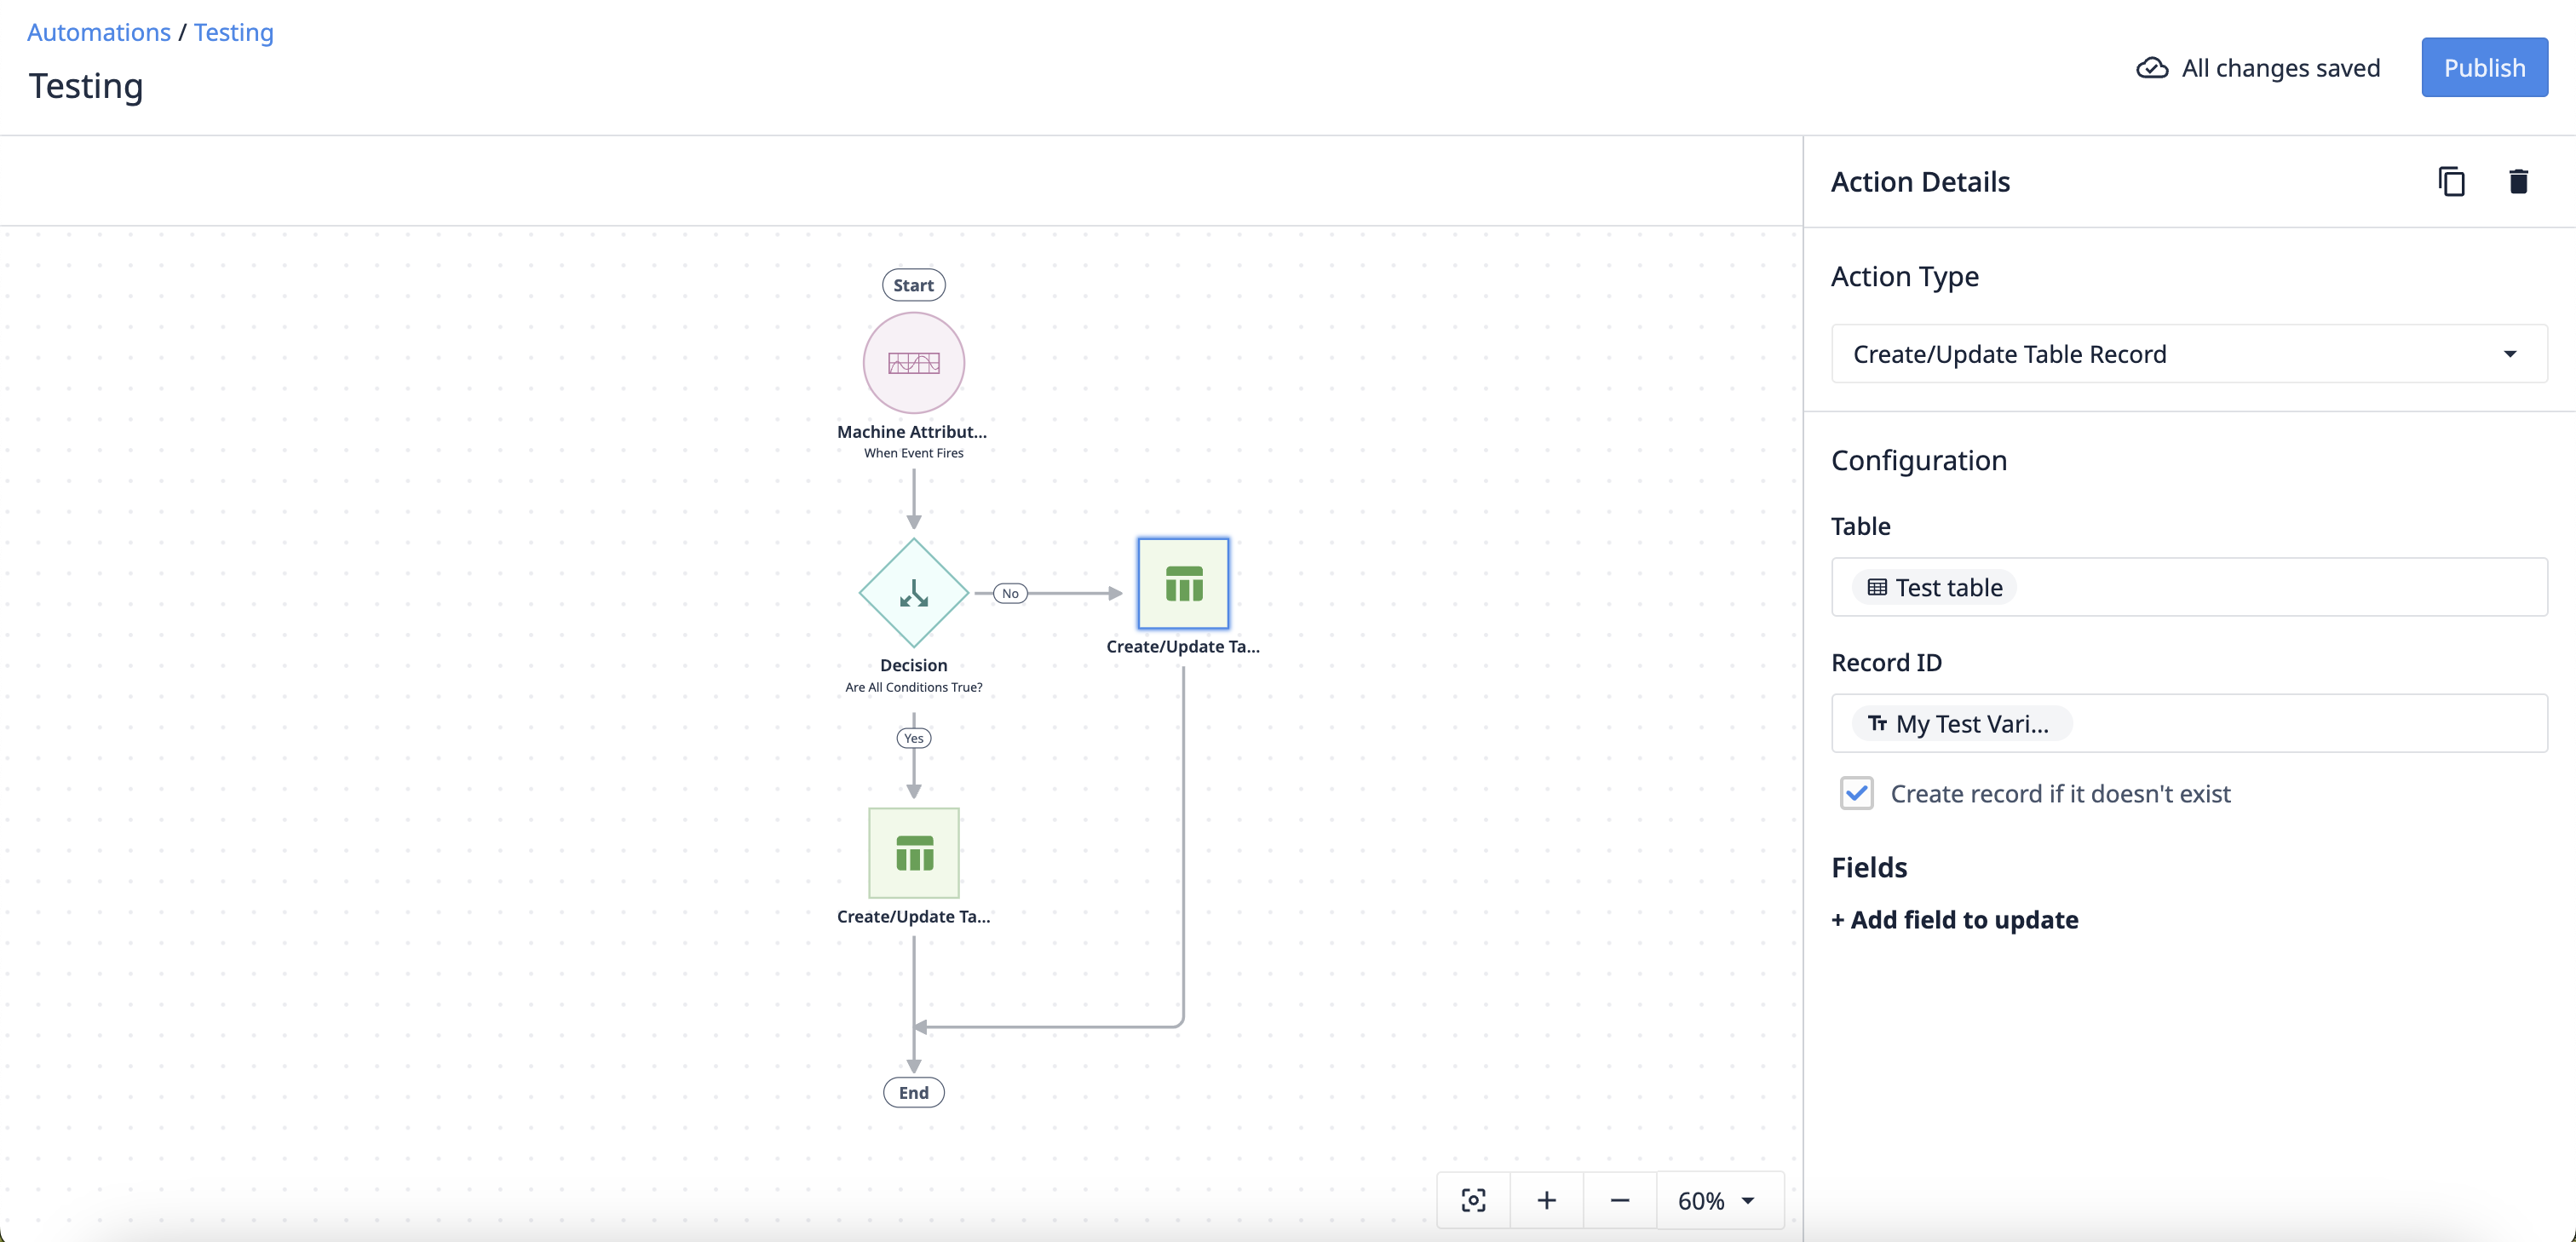
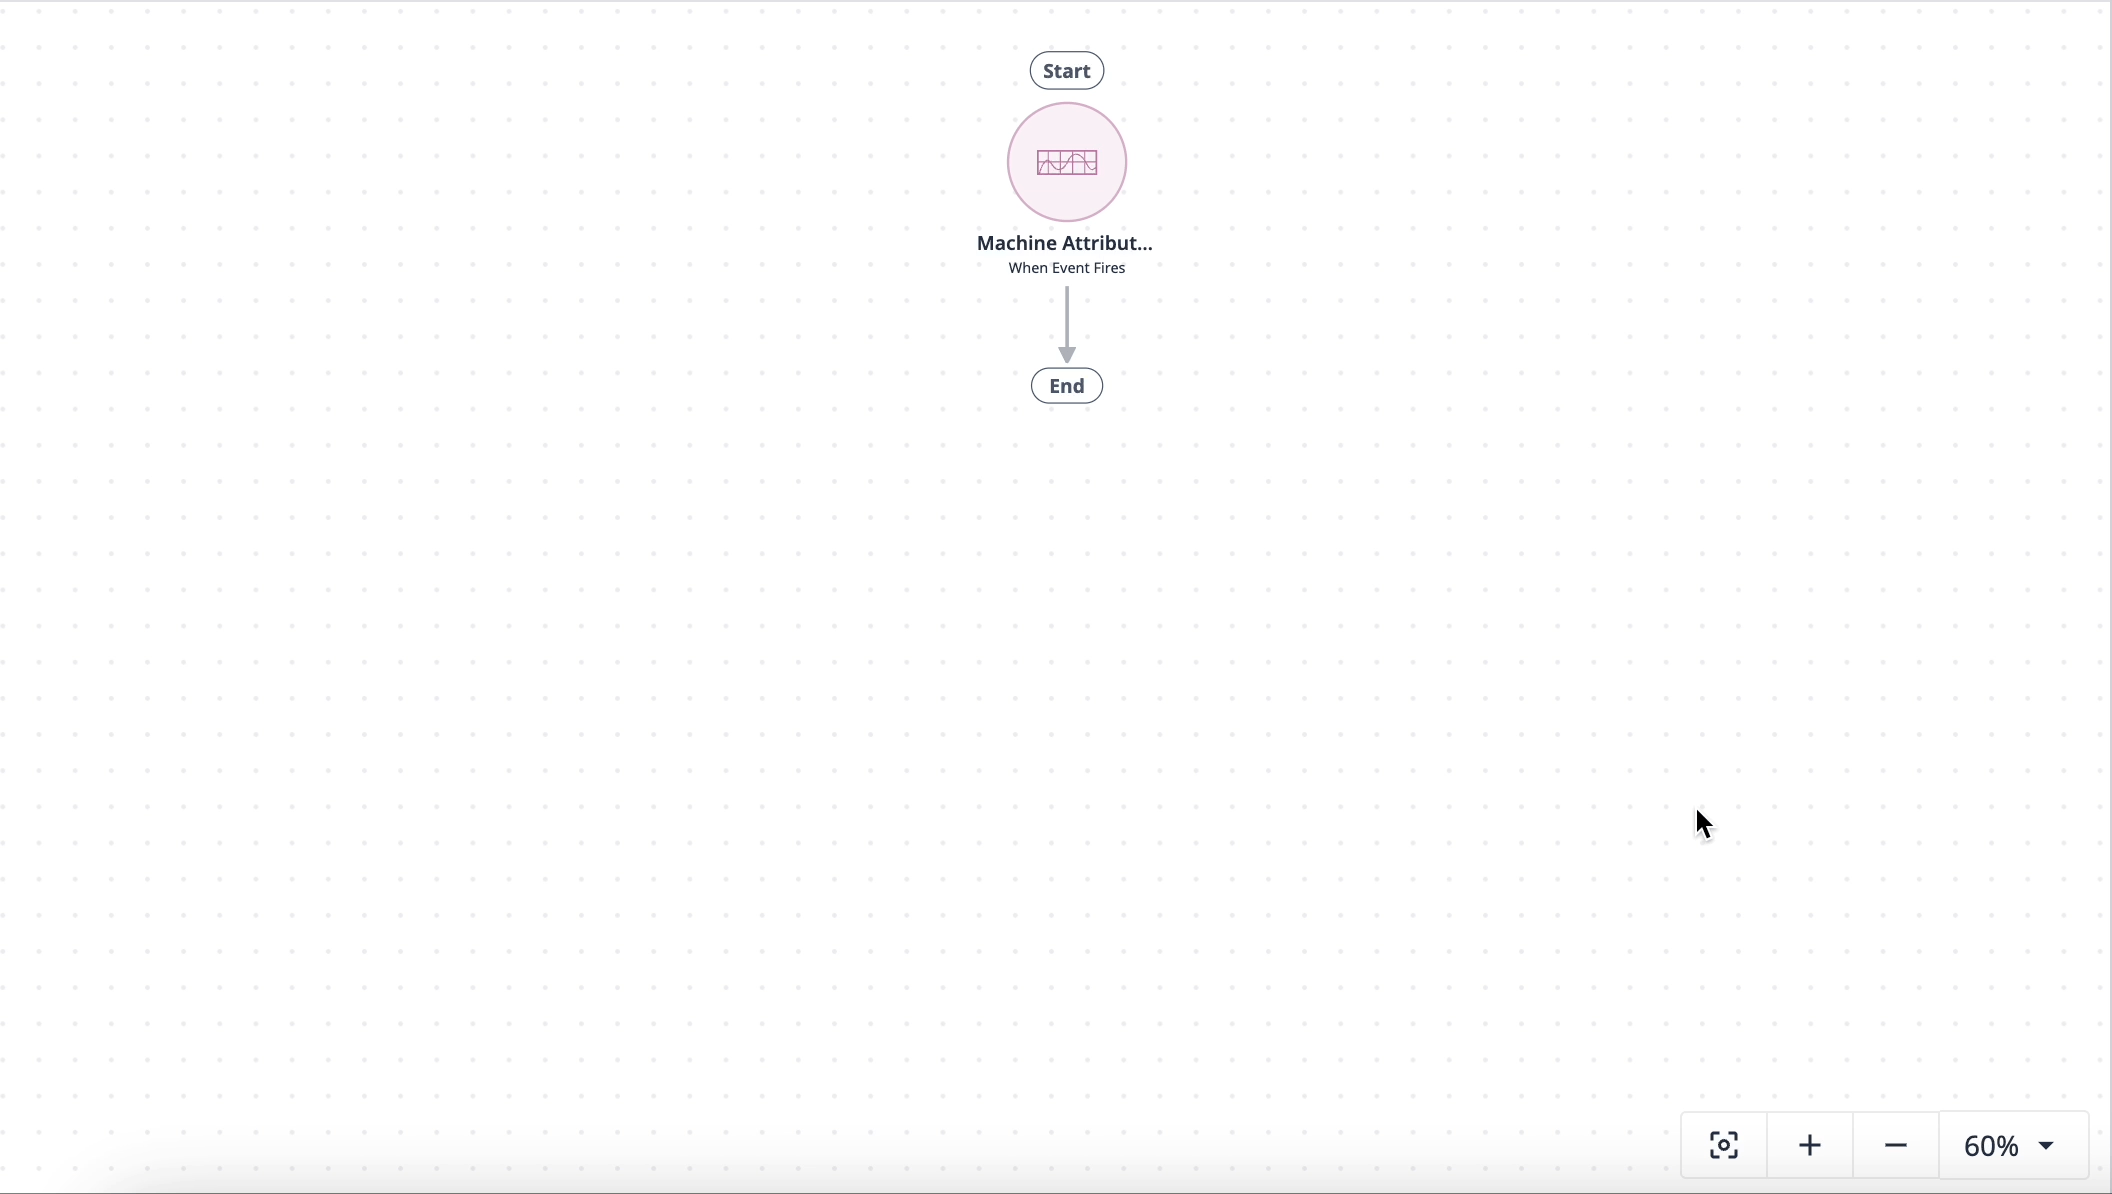
Below the title is the workspace where you build and edit the automation Workflow.
To the right of the workspace is the Logic Editor, which changes based on your selection in the workspace. It will either show the run history of the automation if no selection is made, or it will show the details of the selected Logic Block.
Initiate an automation - event types
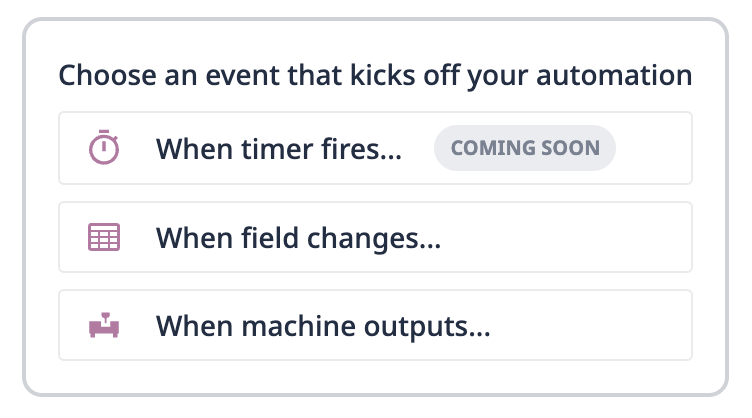
Automations begin with an event which can be a table Field change, a machine output, or a timer occurrence. Events initiate the automation logic to Run. When you create a new automation, there are seven options for a new event:
Machine Activity Updated
Requires a selection a specific machine activity field.
- On any machine
- On specific machine type
- On specific machine
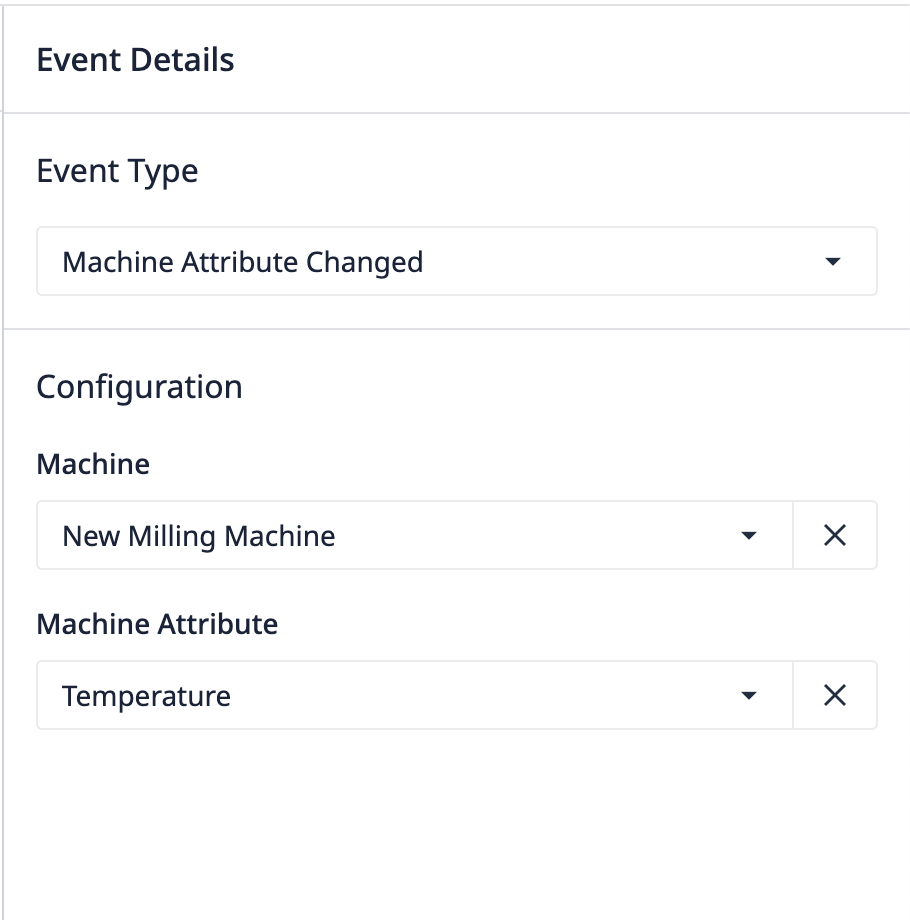
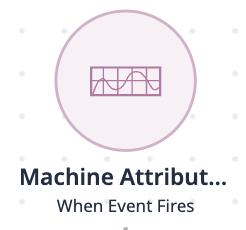
Machine Attribute Changed
Requires a selection a specific machine attribute.
- On any machine
- On specific machine type
- On specific machine
Table Row Added
Requires a selection a specific table.
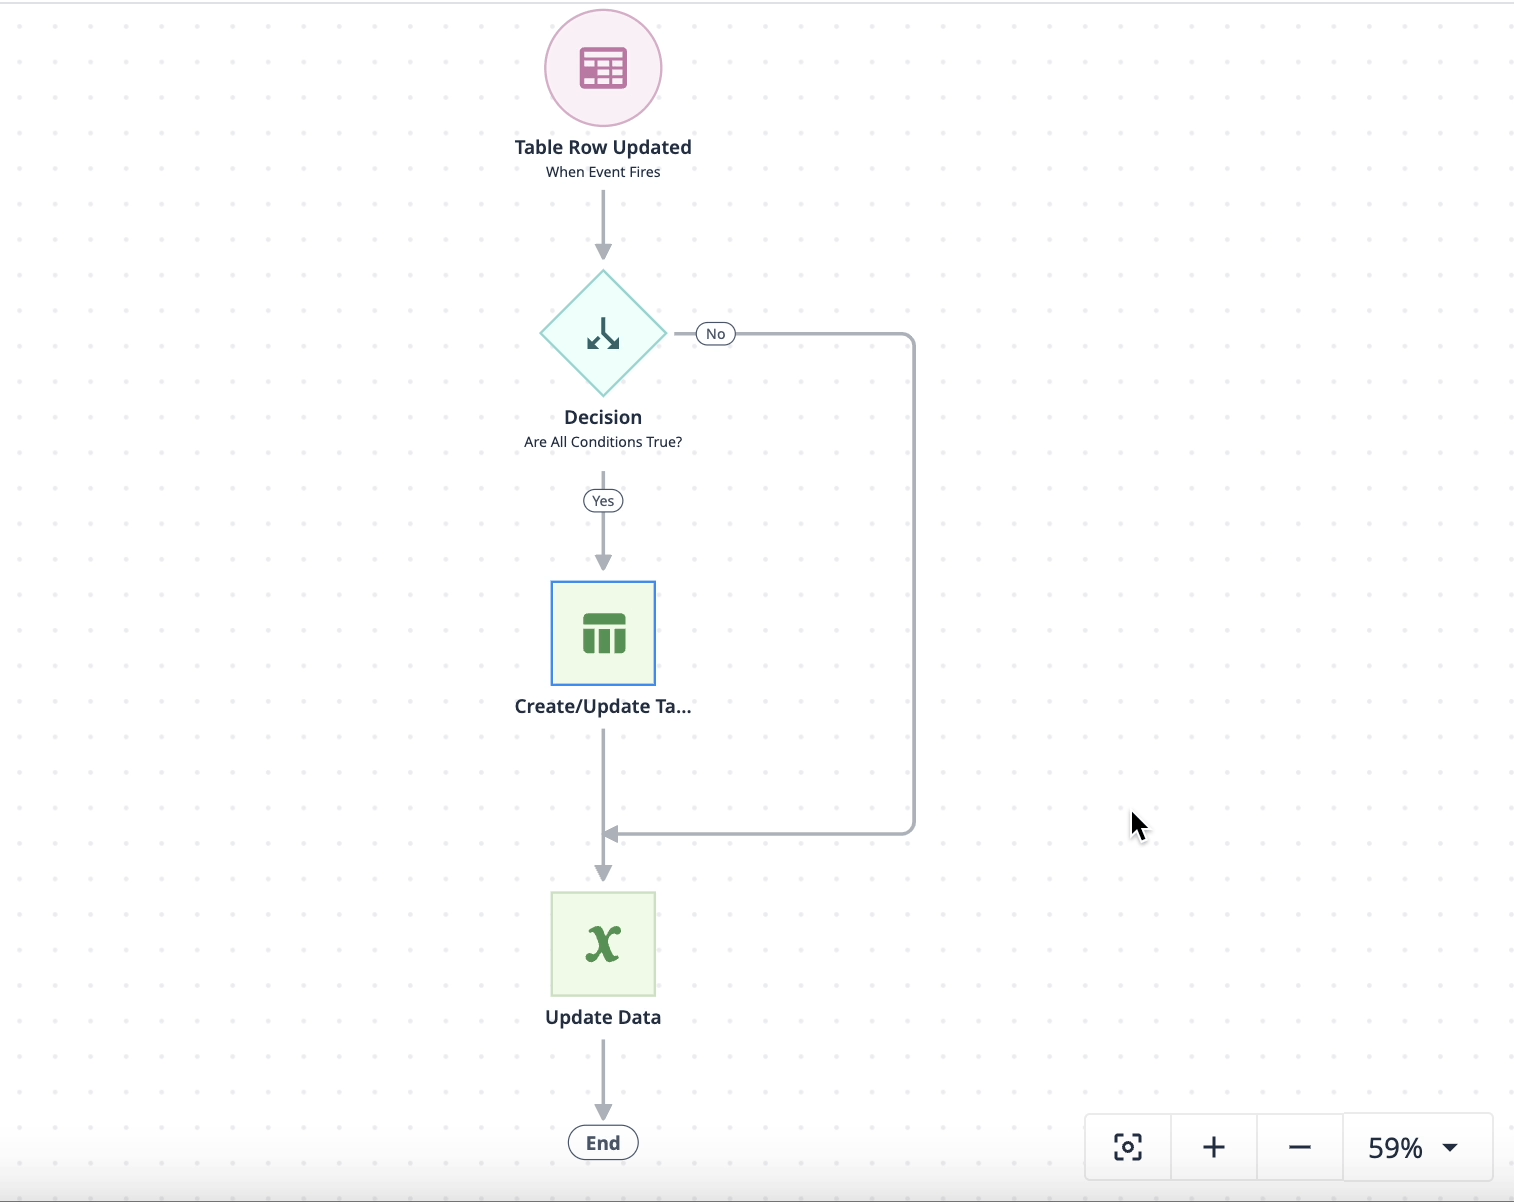
Table Row Updated
Requires a selection a specific table.
- On any field in table or a specific field
Table Row Deleted
Requires a selection a specific table.
On a schedule or timer
Allows you to select specific times at the following intervals:
- Hours
- Days
- Weeks
Insight detected (note: deprecated for new users as of r317)
For Table Record Added or Updated, a CSV upload to a table will not cause an automation to fire.
For Machine Activity/Attribute changes, any machine-based information(i.e. state) called in the automation will be based on the time of automation execution not when the automation event kick-off occured.
After selecting the type of event you want to automate for, the appropriate event block appears in the workspace and the Logic Editor allows you to configure the event or change the event type.
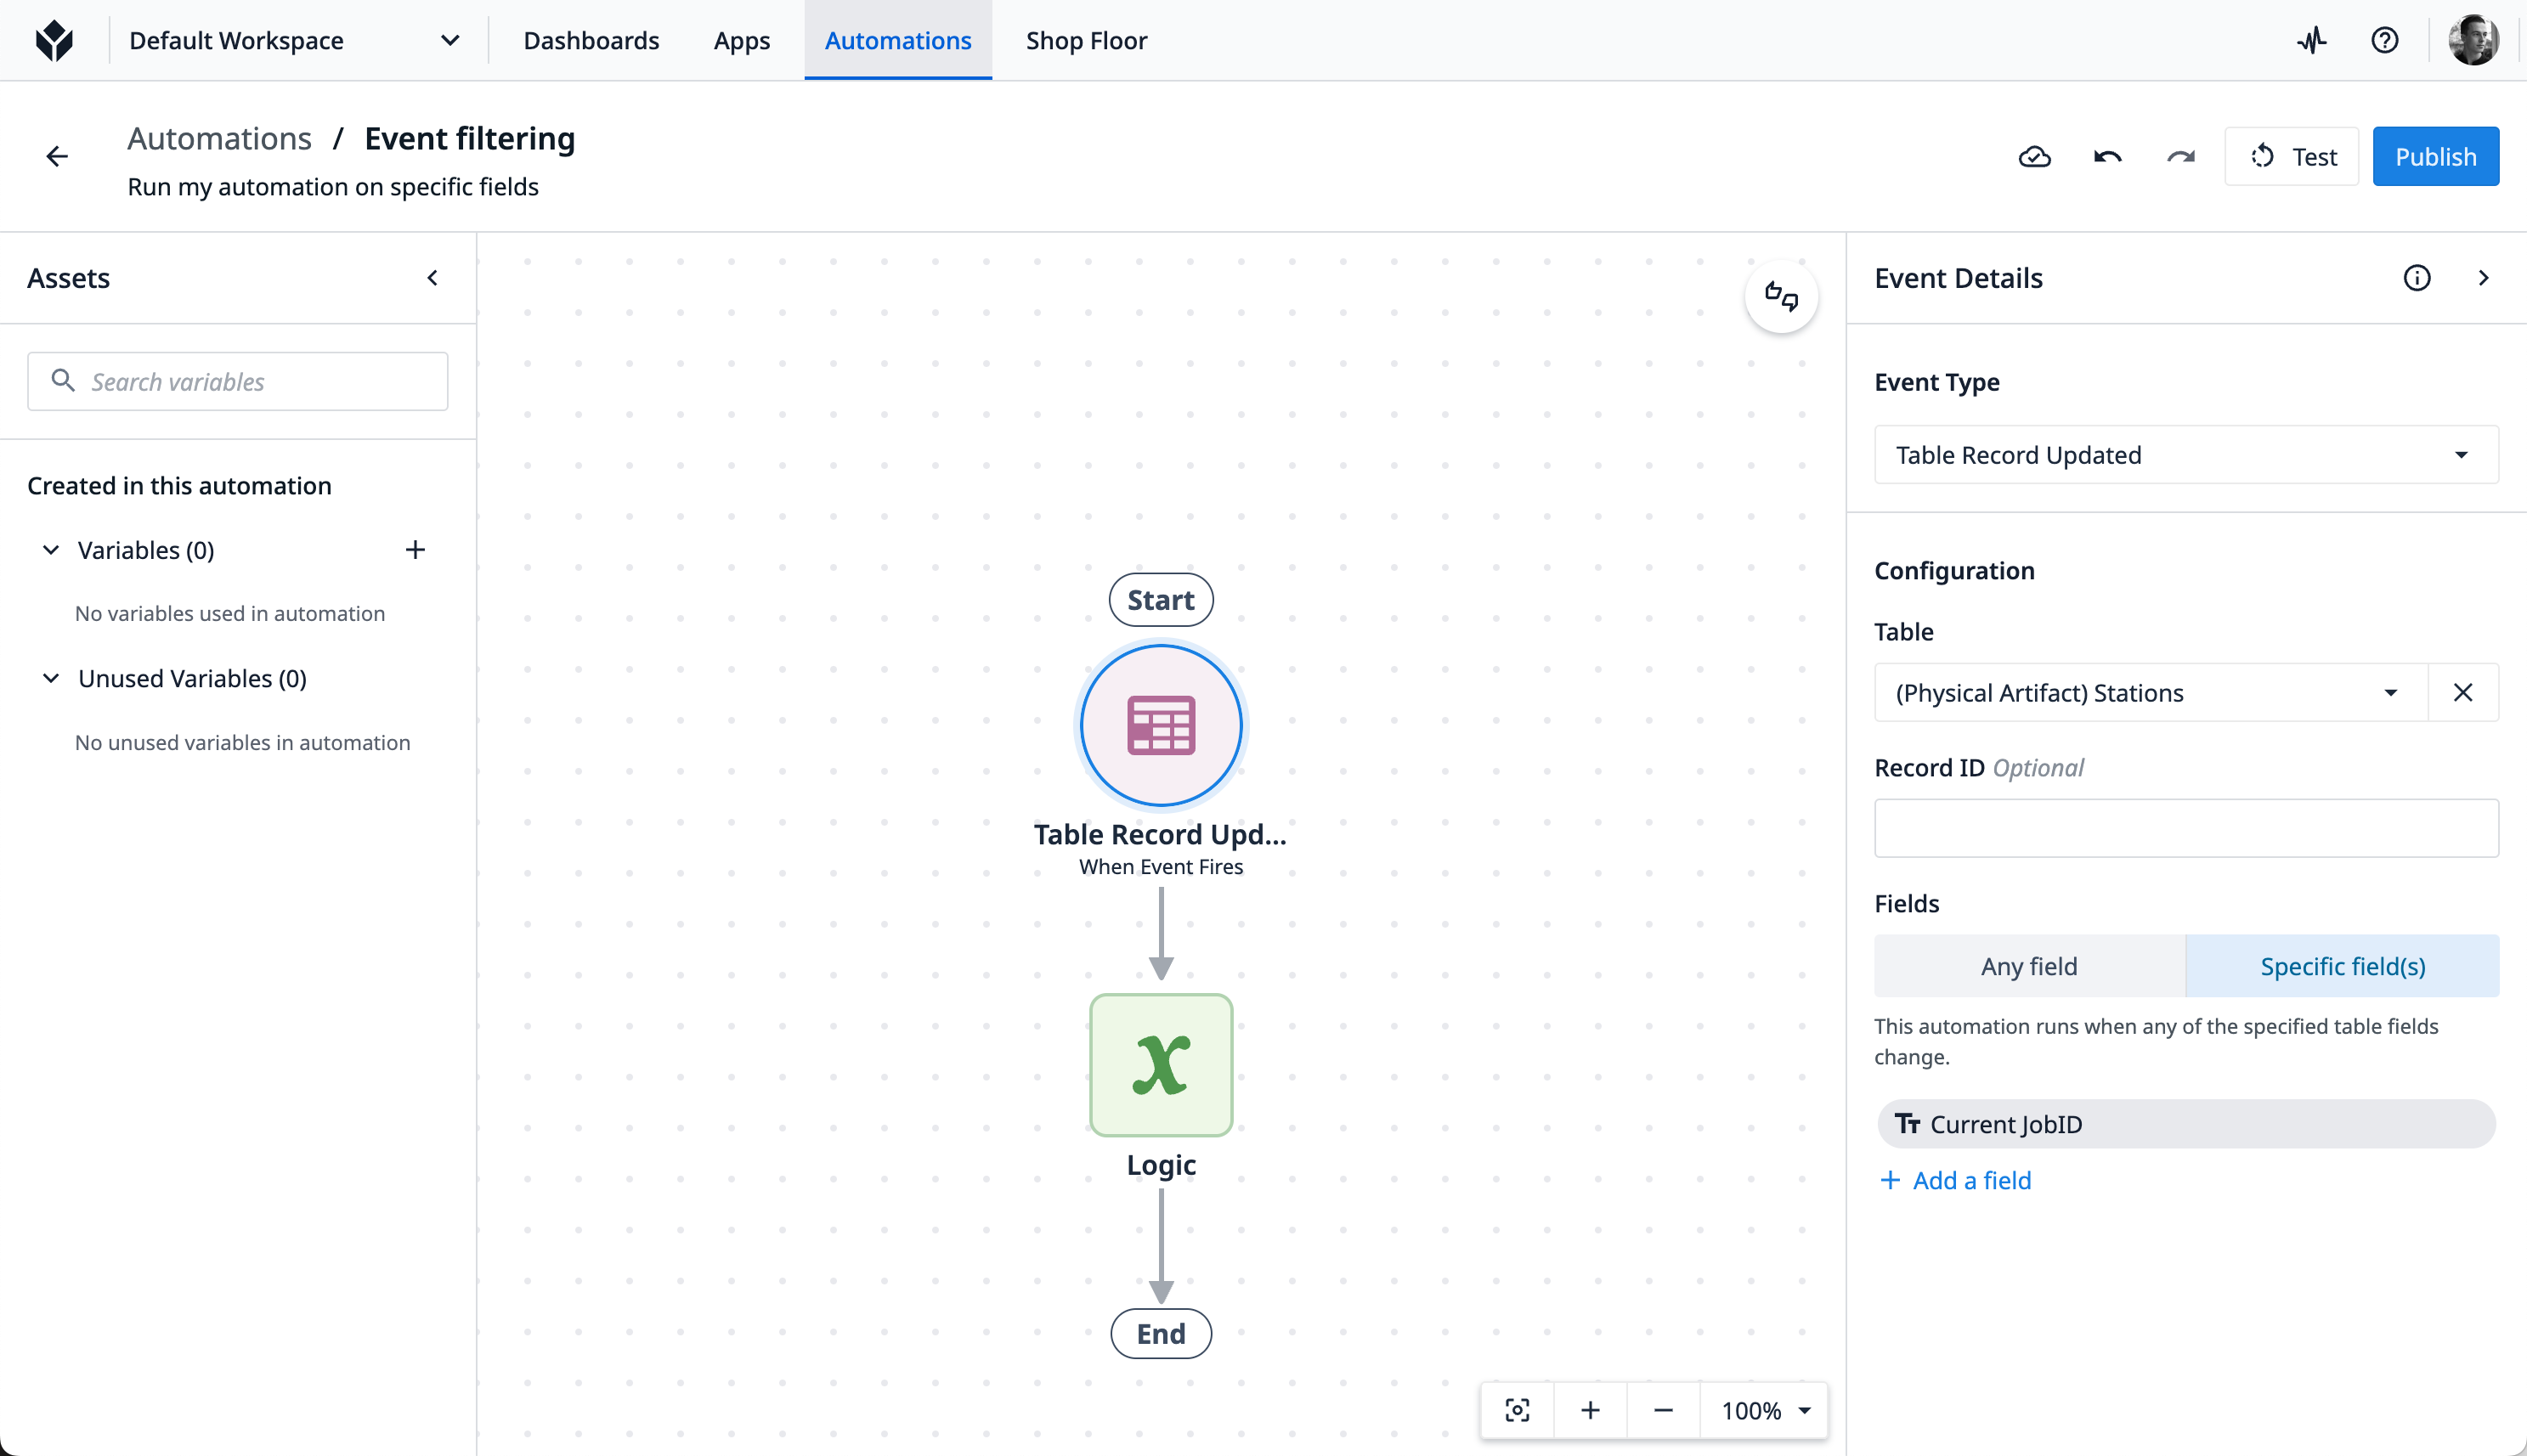
Event filtering
When configuring an automation event for table record updates, use event filtering to specify which fields from the selected table need to be updated in order for the automation to run.
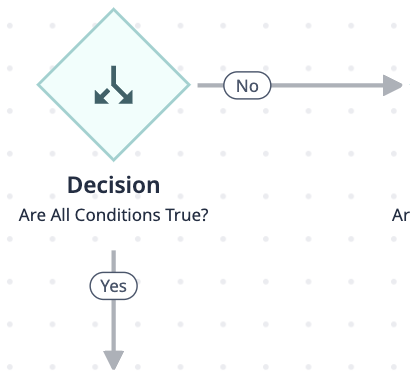
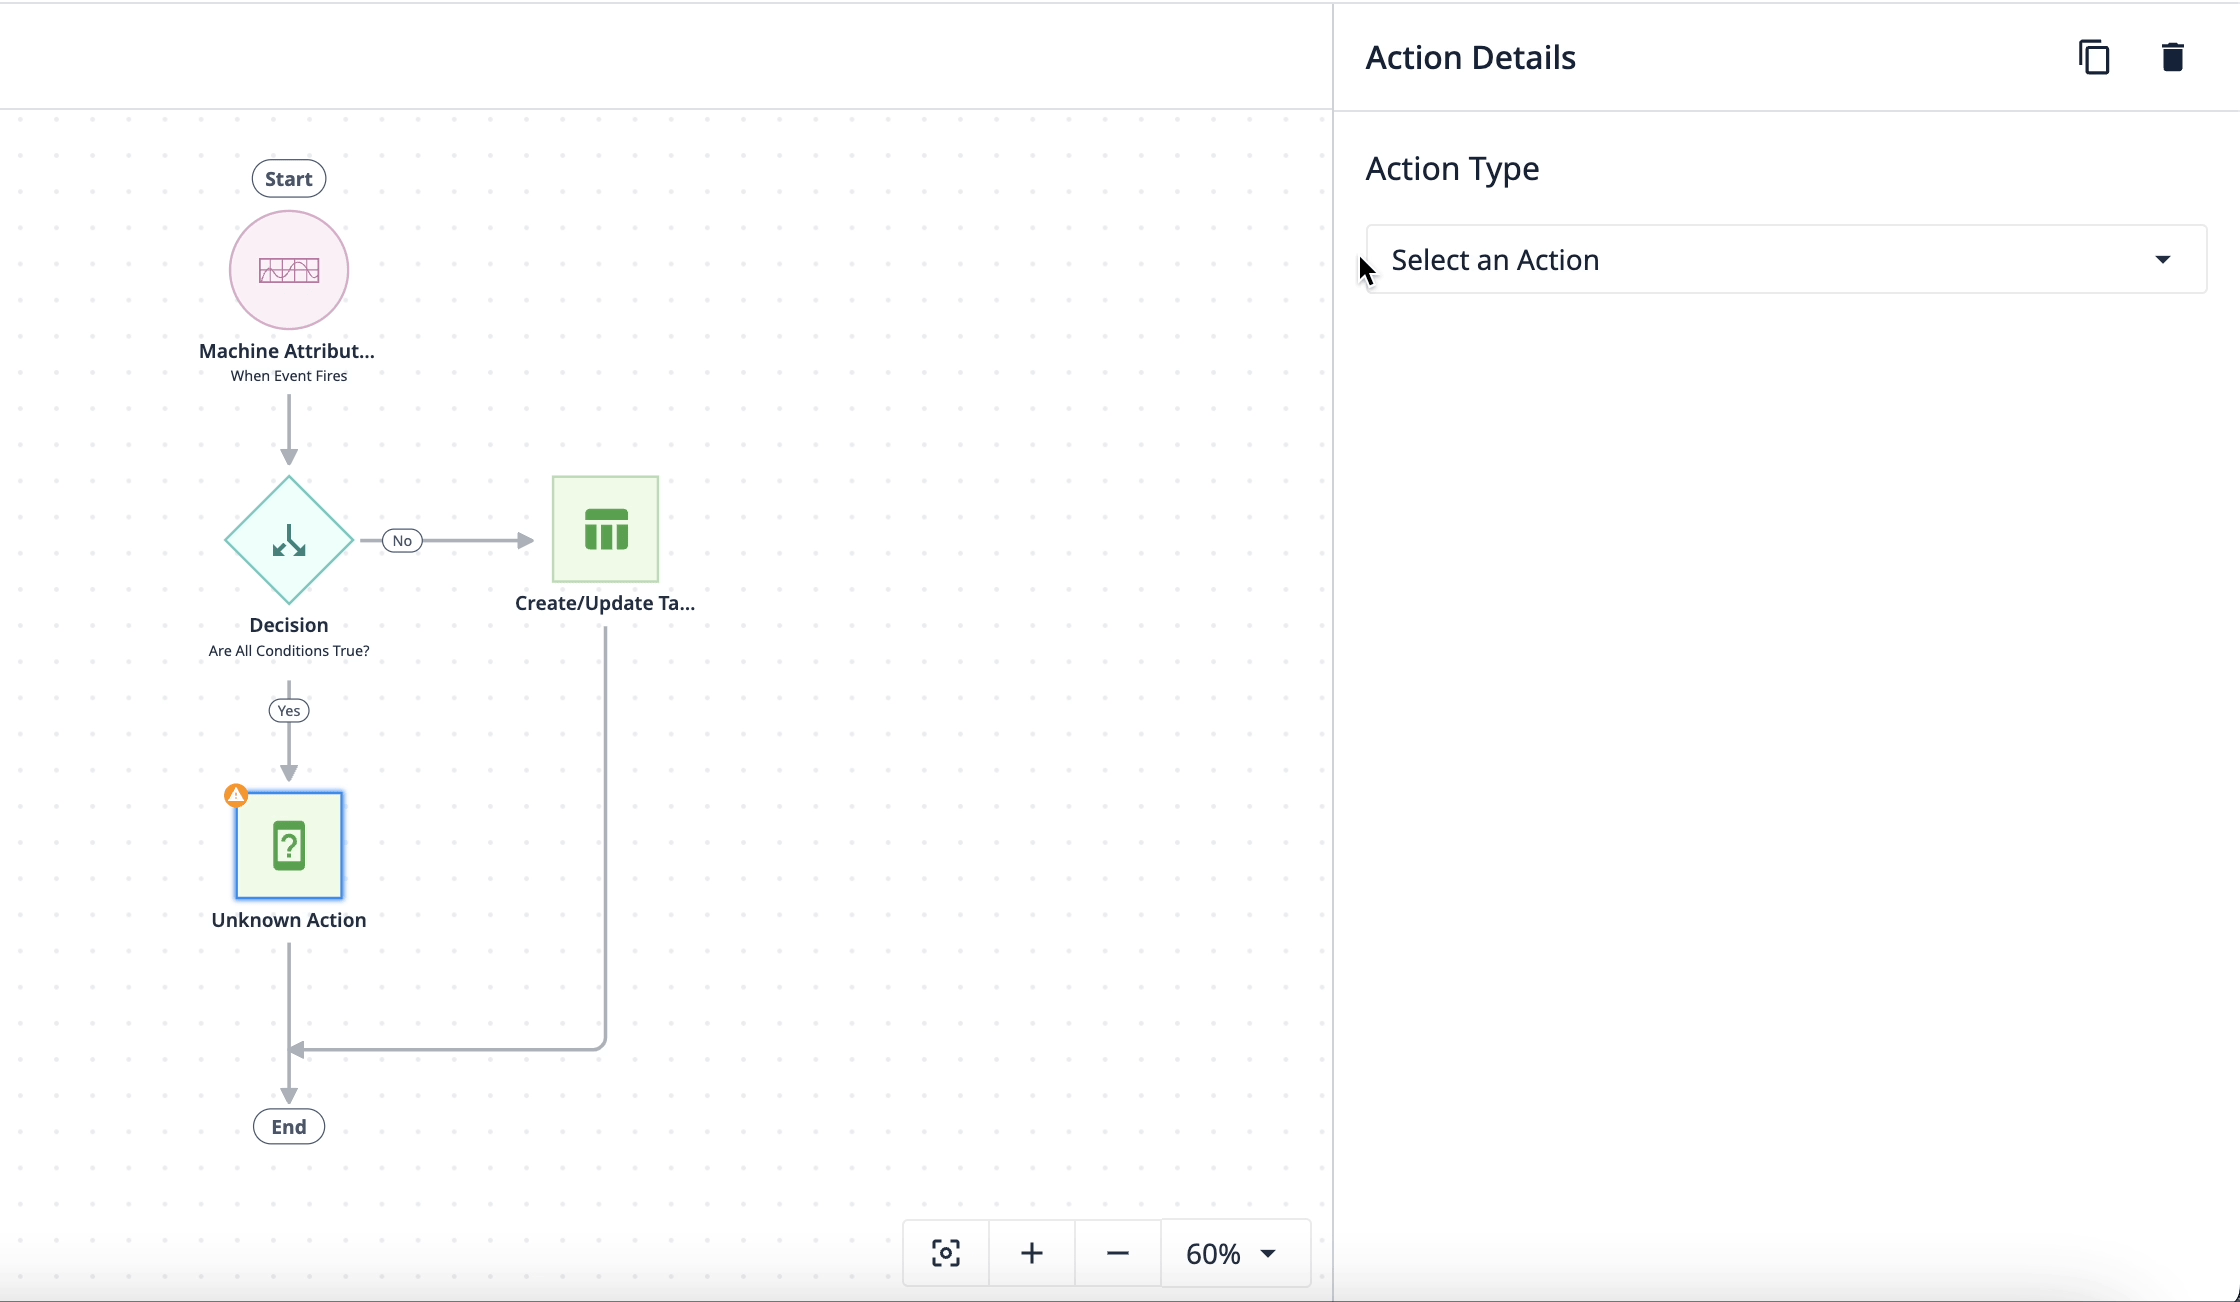
There are three different logic blocks you can use:
-
Event Blocks - Initiates the automation logic to run
-
Action Blocks - Manipulates data or alerts users, this includes reading/writing to tables, running connector functions, and more

-
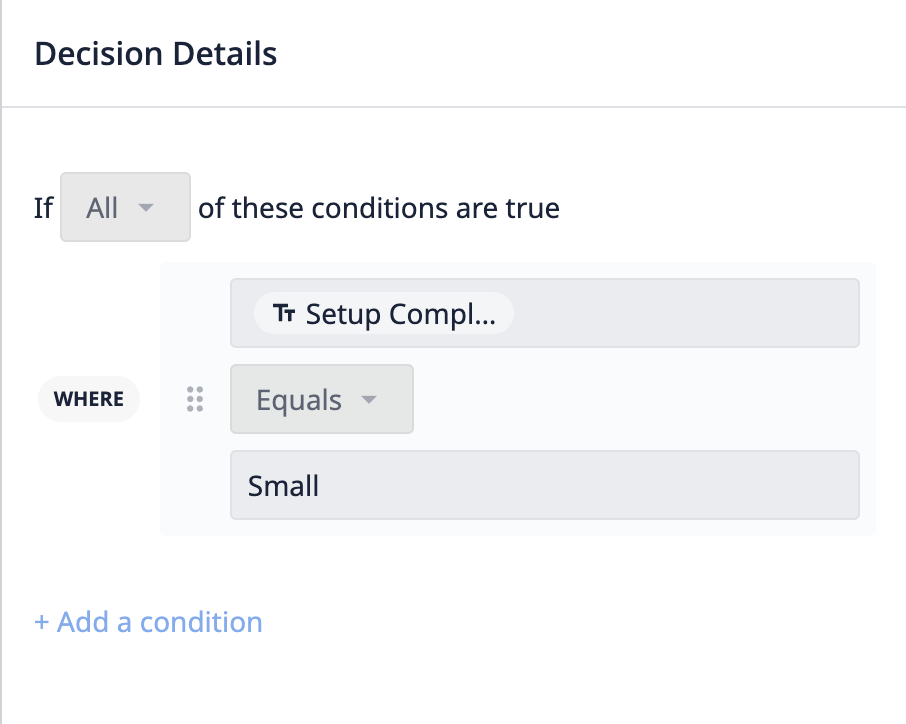
Decision Blocks - Conditional logic that always has 2 branches stemming from it–”yes” and “no”
Each logic block has different details and configuration needs. You don’t need to include every type of logic block in order to run a successful automation. For example, automations can run without an action firing. If an event sends an alert when temperature exceeds X and RPM is above Y, it would run every 5 minutes whether or not those conditions are satisfied.
Create
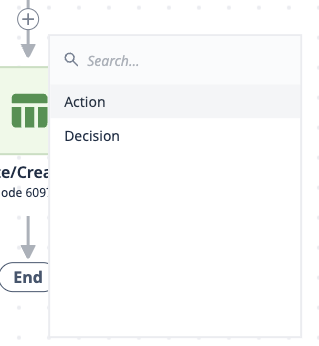
Create new logic blocks by clicking the + button on any connecting line of the flow. From here you can:
- Add a new Action Block
- Add a new Decision Block
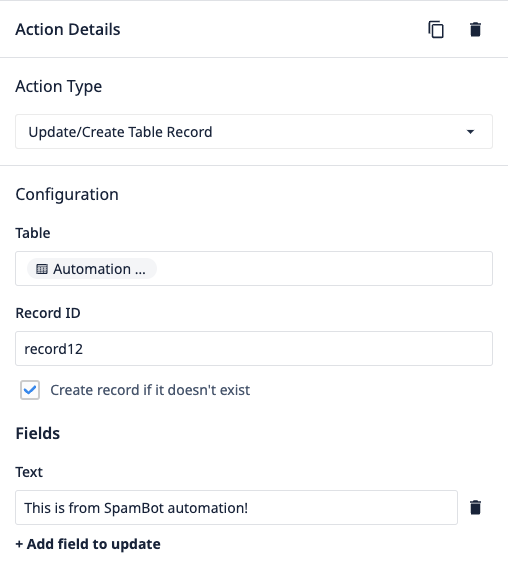
To configure the logic for each block, click on it then edit in the logic editor pane. Here are some example configurations for logic blocks:
Action blocks
Decision blocks
To duplicate or delete a block, use the icons in the top right corner of the logic editor after selecting a block. Duplicating will automatically copy the logic as well.
If you want to rearrange the order of the logic blocks, you can click and drag them to different parts of the workflow.
Publish
To publish an automation, click the Publish button at the top right of the editor screen. Only valid automations can be published. The publish button is disabled if the automation:
- Does not have at least 2 blocks (the event block plus an action or decision)
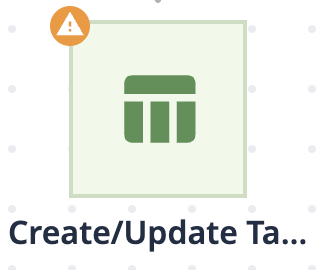
- All blocks have been configured correctly. Blocks that have not been completely configured display a warning icon.
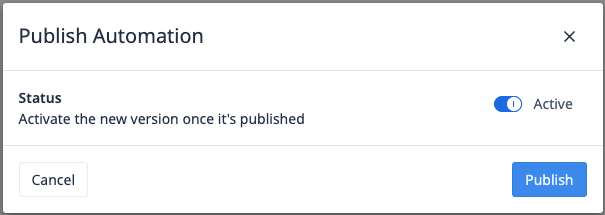
Once clicking the Publish button, a modal displays where you can:
- Toggle the active status of the Automation. This is set to "Active" by default.
- Cancel to return to the editor
- Publish the automation
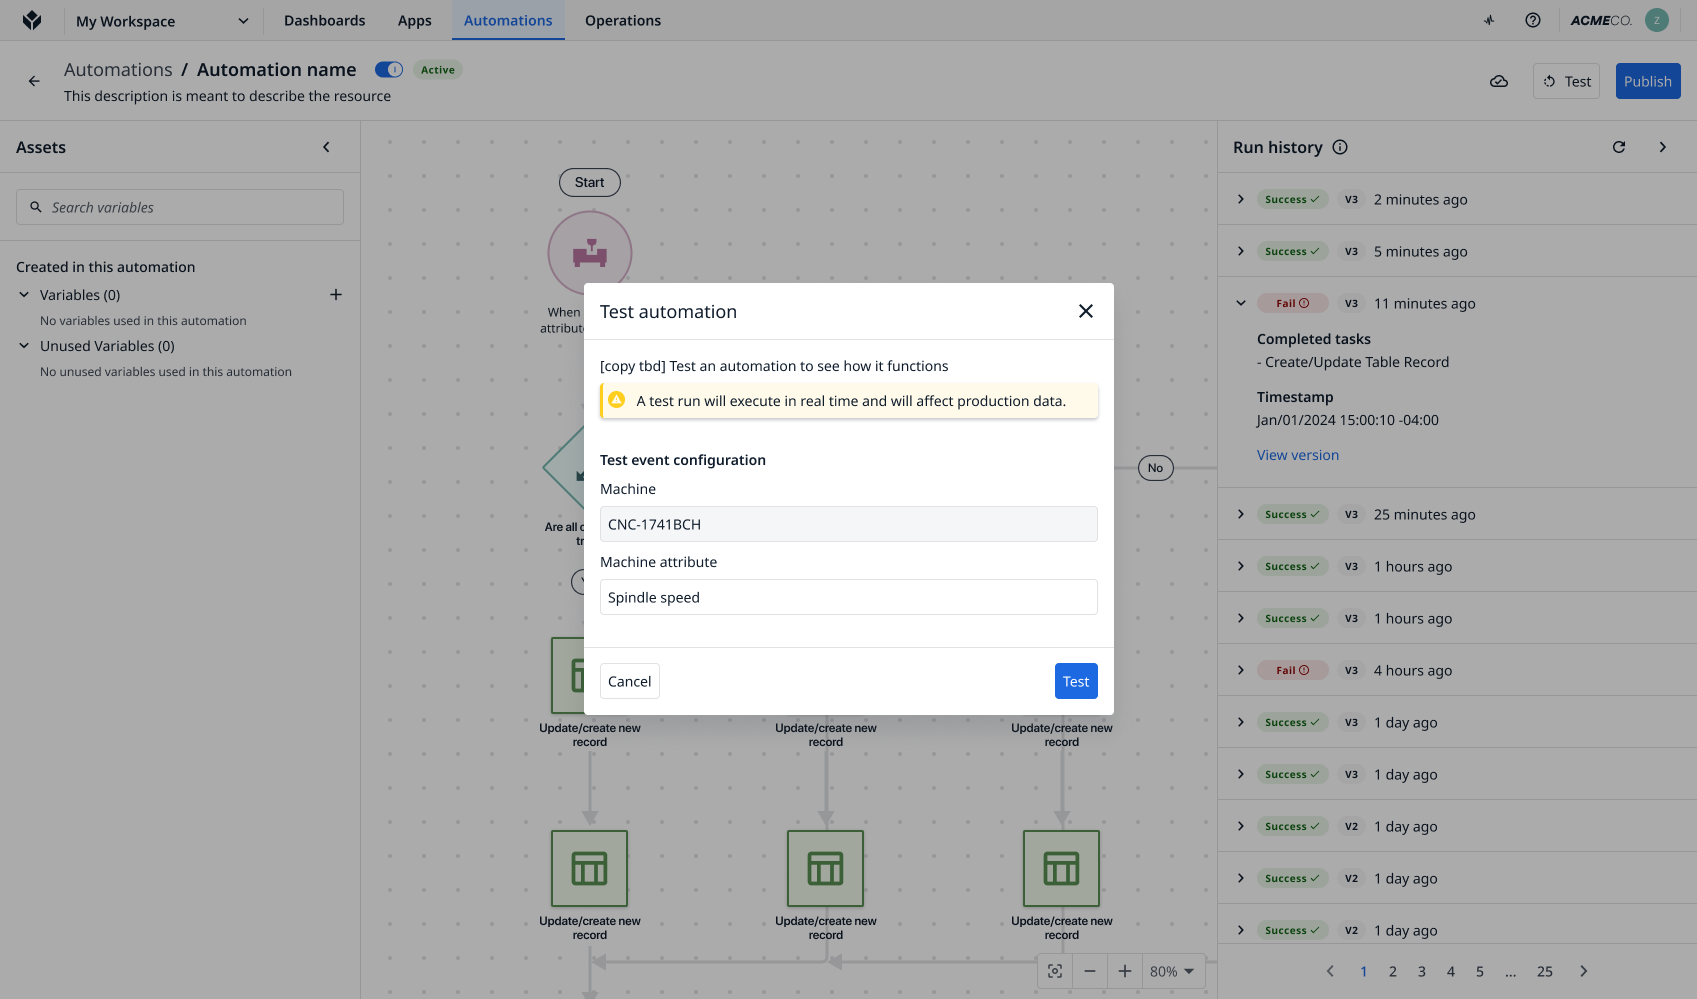
Test
Users can test their automation prior to publishing it. Like publishing, only valid automations can be tested. The test button is disabled if:
- Does not have at least 2 blocks (the event block plus an action or decision)
- All blocks have been configured correctly. Blocks that have not been completely configured display a warning icon.
You can select the environment (production, testing, development) that the connector should run in.
View/edit
You can edit all aspects of an Automation after you publish it, including the name, the event block, and any existing action or decision blocks. Any edits you make creates a new Version. You can also add, remove, or duplicate blocks and modify their configuration.
.gif)