
The Composable MES Suite provides an easy starting point for engineers who want to deploy an MES focused on creating value for their operations. This App Suite will take you through what it looks like to organize and collect data, while teaching best practices for creating value in your business.
The Production Management app suite provides a starting place to manage production workflow. Collecting detailed insight into your production allows your team to make better decisions to improve operations.
Common areas of improvement are on-time delivery, root cause analysis for downtime, and the ability to track OEE holistically (Equipment, People, material flow, etc)
Prerequisites
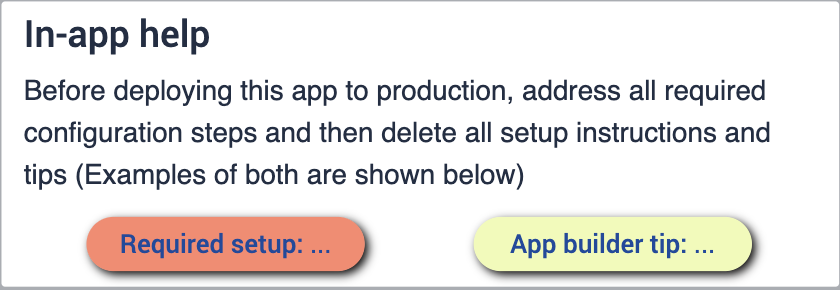
In this app suite there will be a variety of App Builder Tips to follow.
Before you can configure the app suite, ensure you're familiar with the following skills:
- Basic app building
- Tulip tables (including editing fields, using filters, and record placeholders)
Deployment
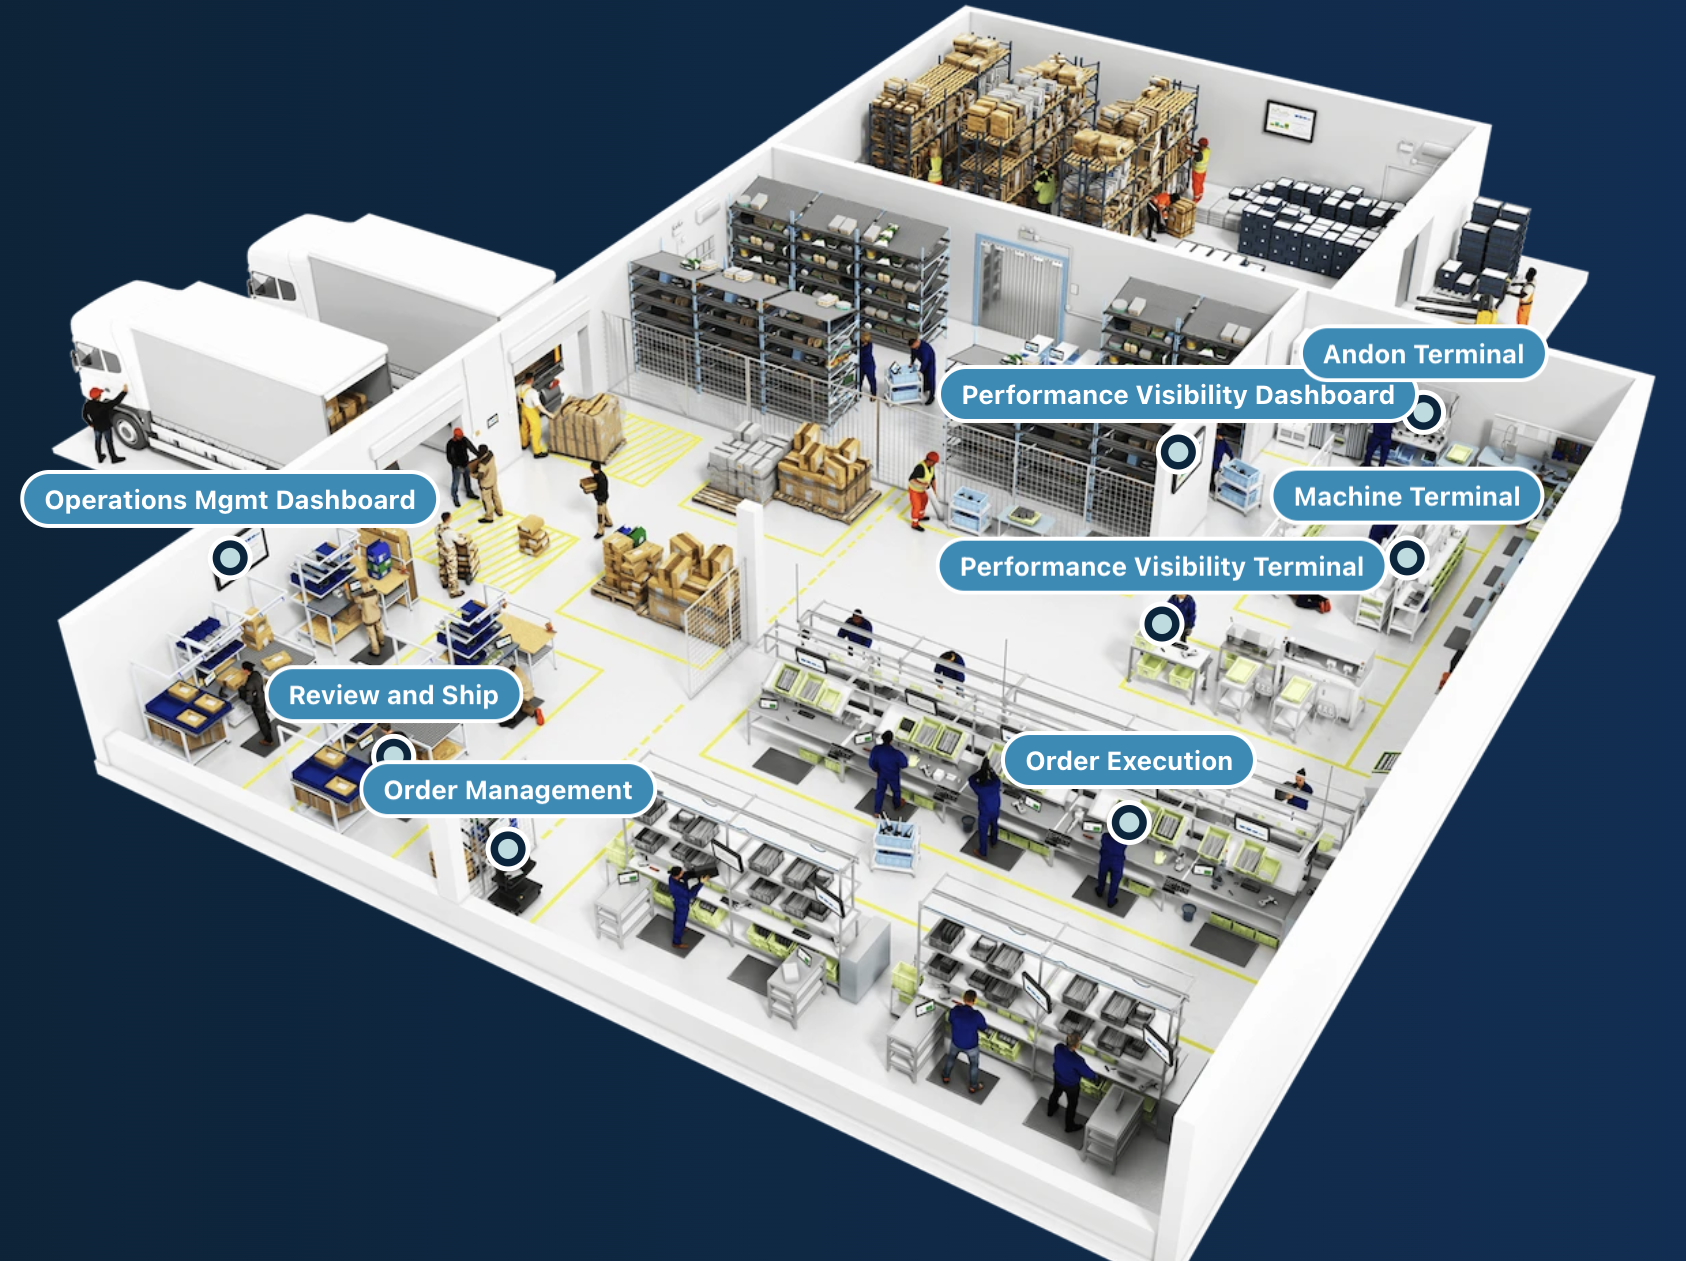
You will want to make sure that you have a proper understanding on how to deploy these applications to your desired devices and how to run them at a station. It's important to understand the flow of your business. Having a diagram of your shop floor will give you a better understanding of where you want your apps to live as you go through the process.
Connected Tables
The Tables that you will use throughout this app suite will be used and connected throughout your various applications. This allows you to have an easier user experience as well as a network of tables that can be used with development of future applications. Learn more about how the tables will minimize redundancy and maximize compatibility through using a common data model.
Get familiar with the common tulip tables used throughout the cMES.
Downloading
Click the link to the Production Management App Suite. This will take you to the library page where you can add the app to your instance.
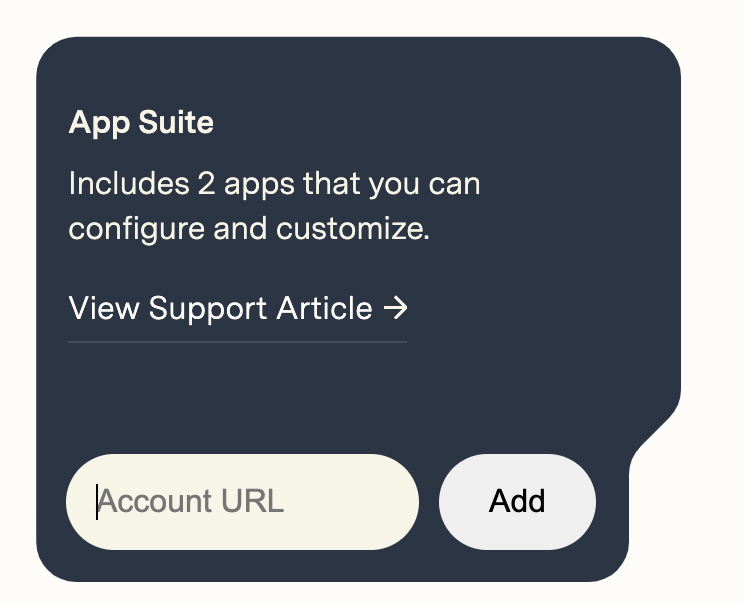
Once the App Suite has been added, you will find a folder in your instance titled Production Management that contains every app in the suite.
Configure Apps
While configuring applications, any changes made to tables need to be made across all applications for connectivity.
Andon Management
The Andon Application gives you a quick and easy way to signal issues on the floor. When an issue is flagged, alerts notify the people needed to solve the issue in real time, so action can be taken as soon as possible.
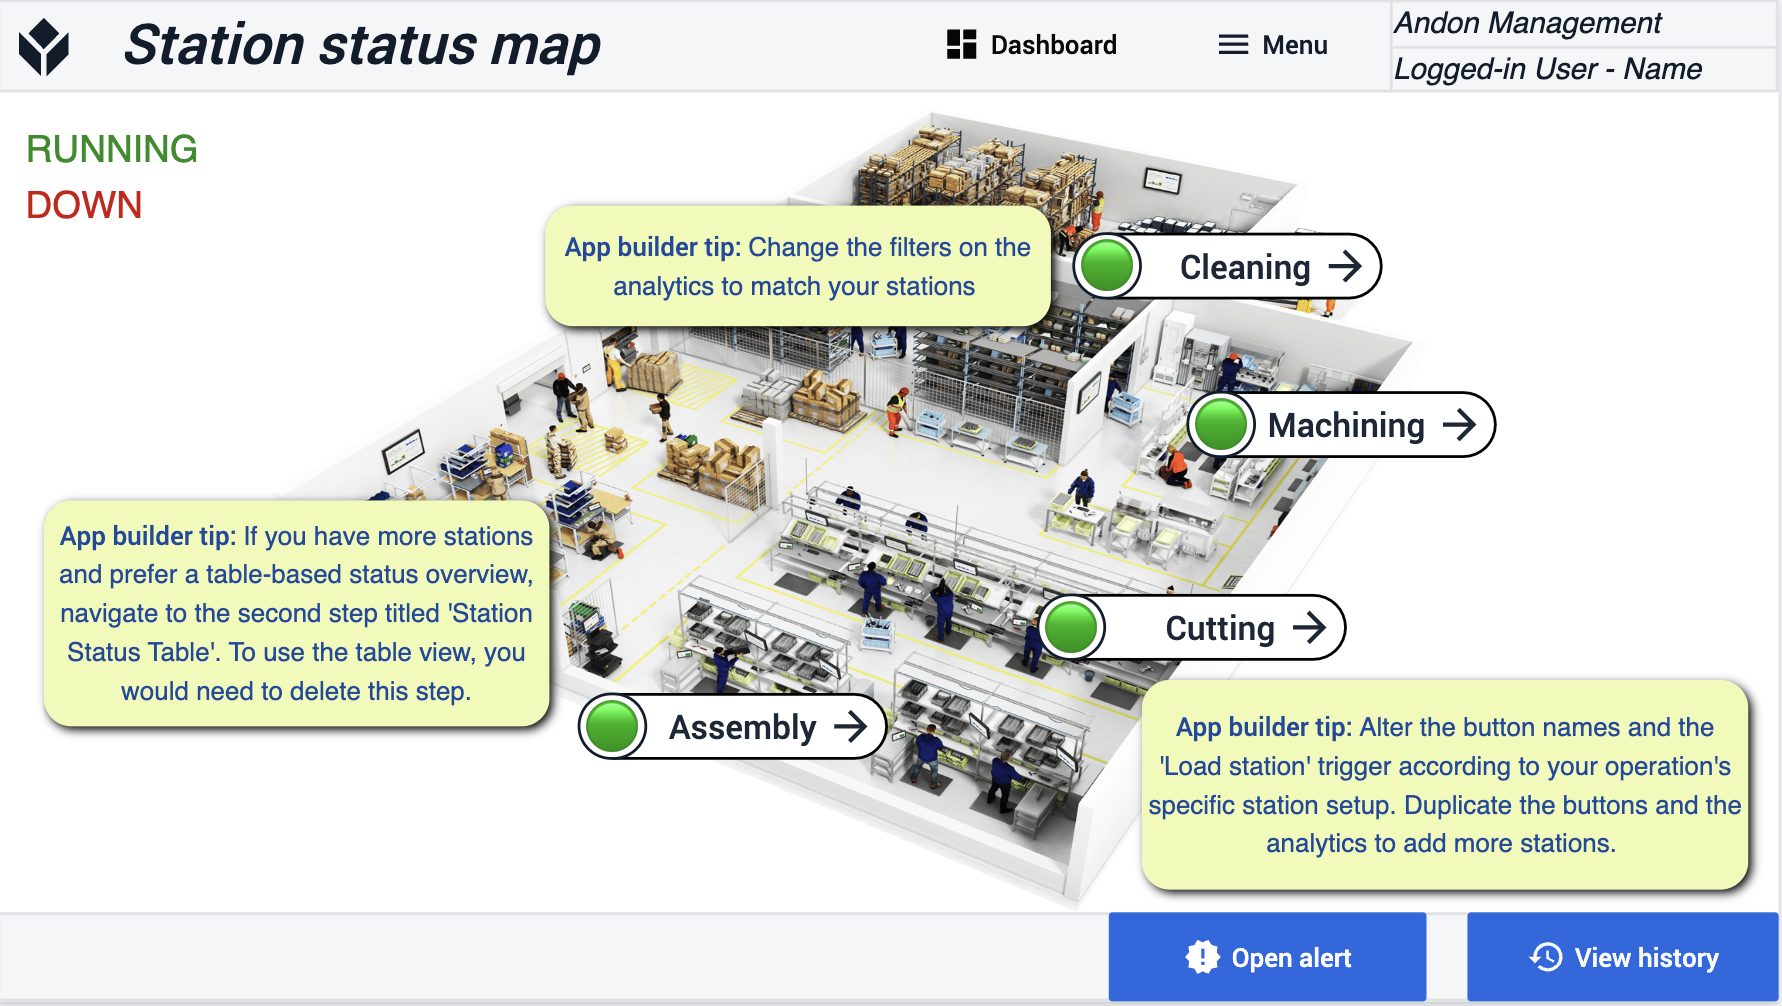
Station Status Map
When first opening the application you’ll notice ‘App builder tips’ to give users guidance for configuring the application for your shop floor. This step of the application is a visual representation of the status of your operations throughout the shop floor.
Station Status Table
Having this step here is optional. If you prefer having a table overview instead of a map then you can remove the map.
View Station Details-Alerts
See specific events that have been flagged from the shop floor. Assign these events to different users or resolve them yourself. You will also have visibility in the history behind where this event came from.
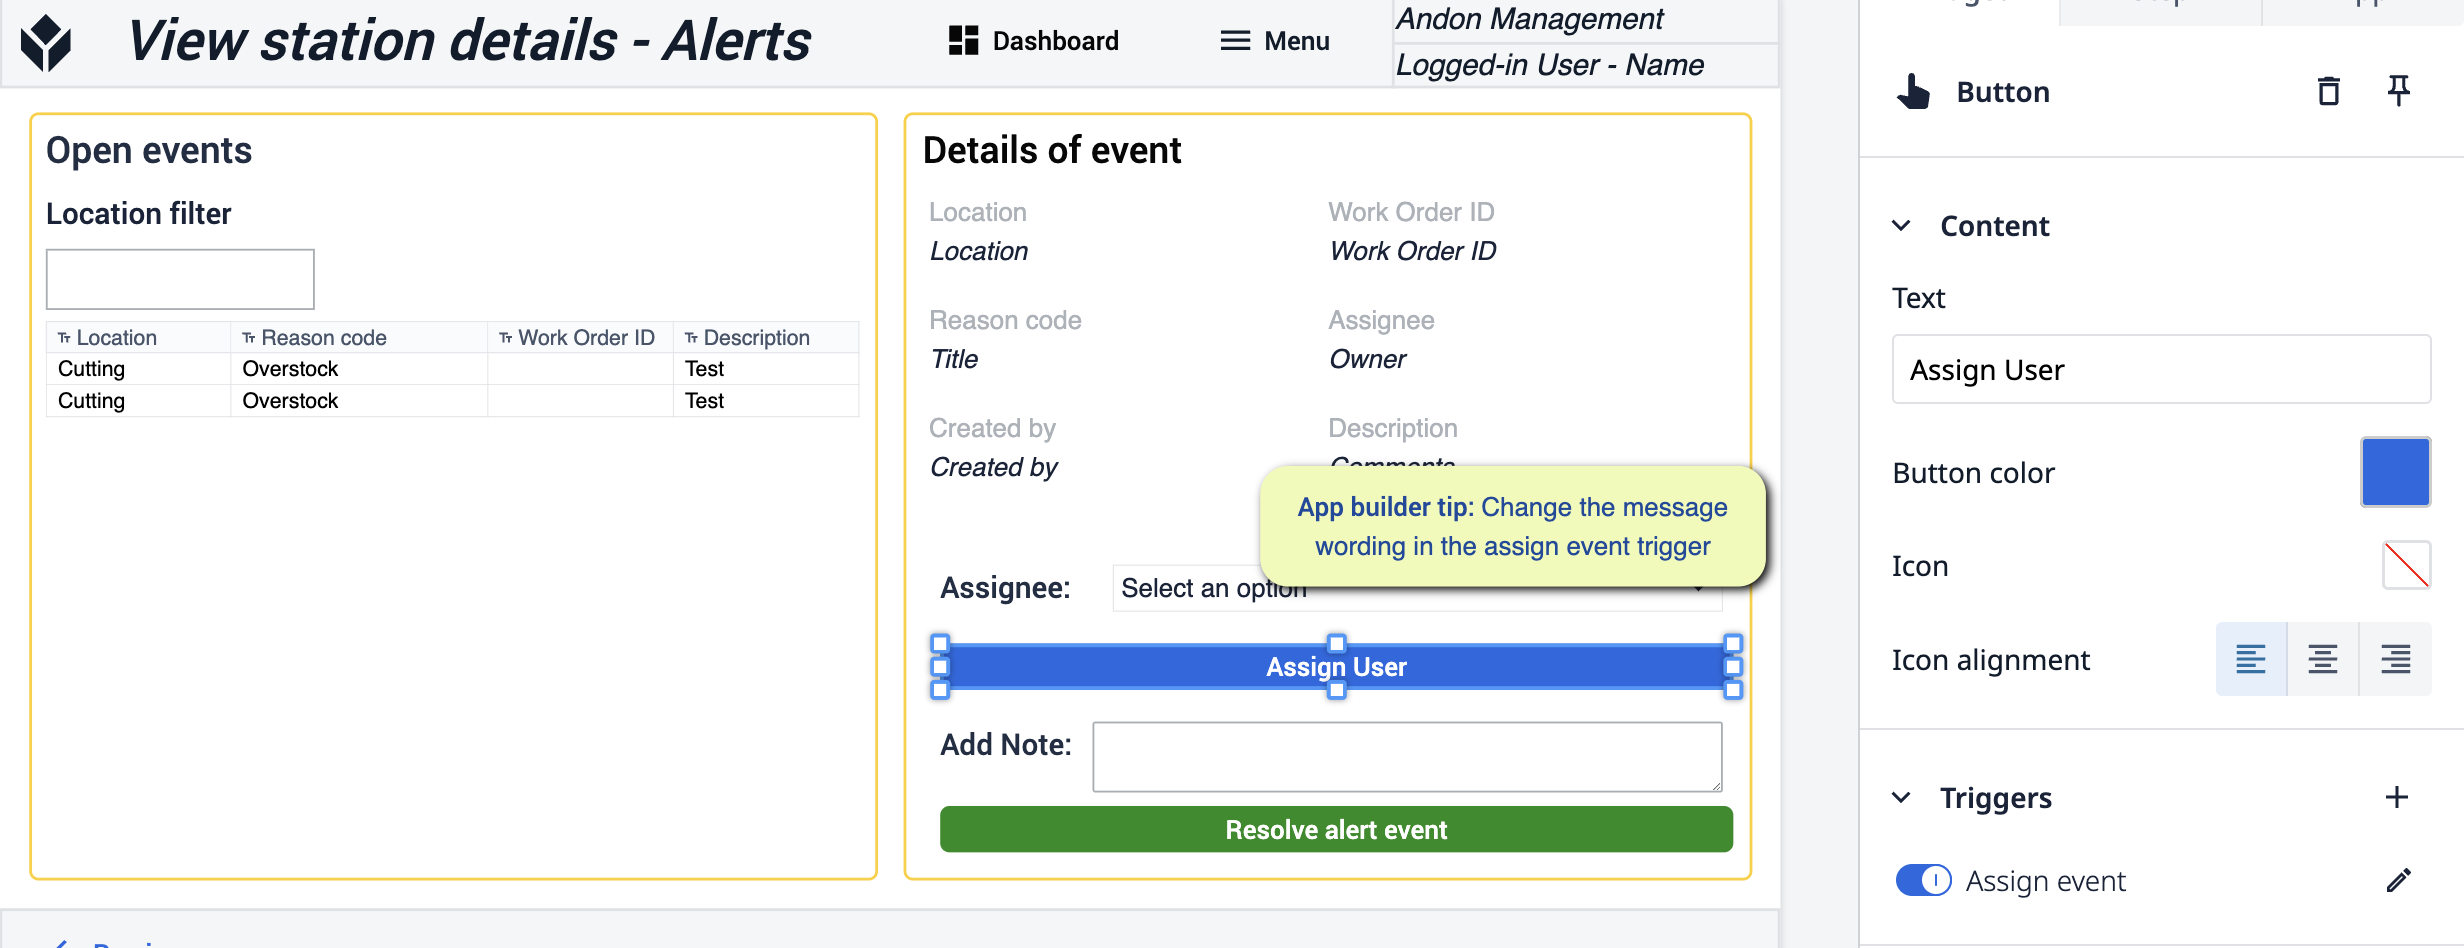
- In this step you will make changes to the trigger on the “Assign User” Button. Make the messaging fit your specific needs.
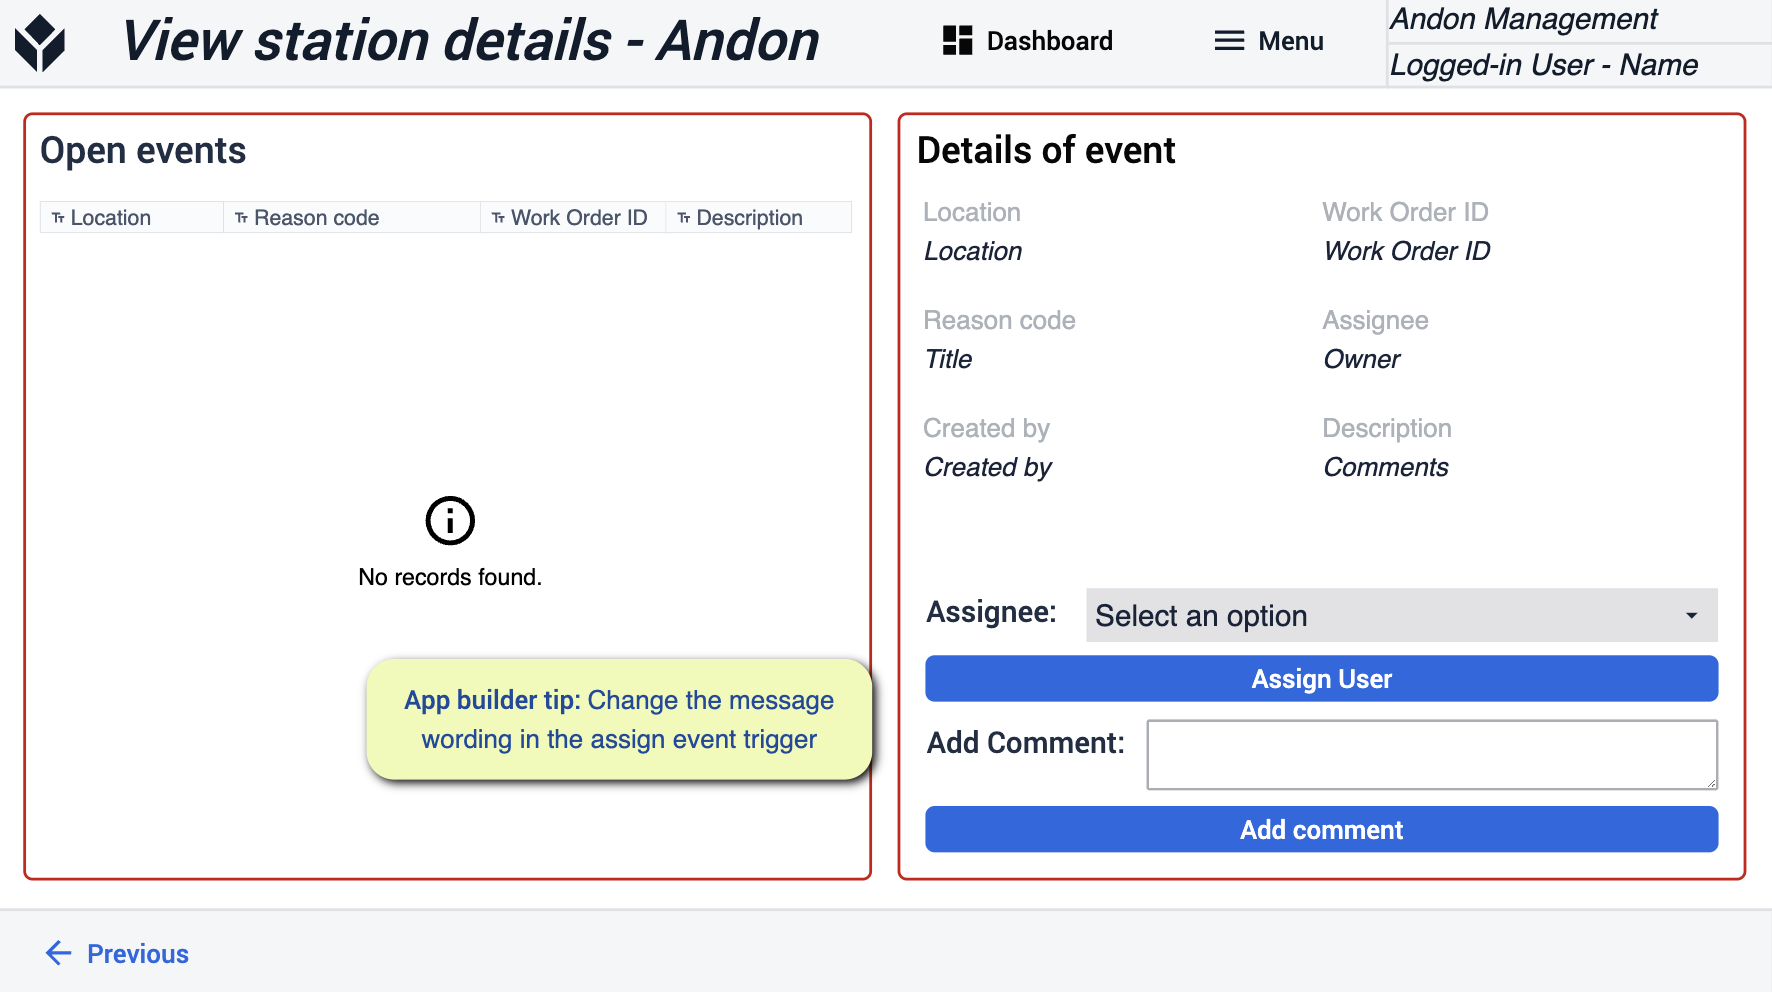
Andon
When using the Andon version of this application you will make the same changes when it comes to making changes by assigning the language in the trigger to match your process.
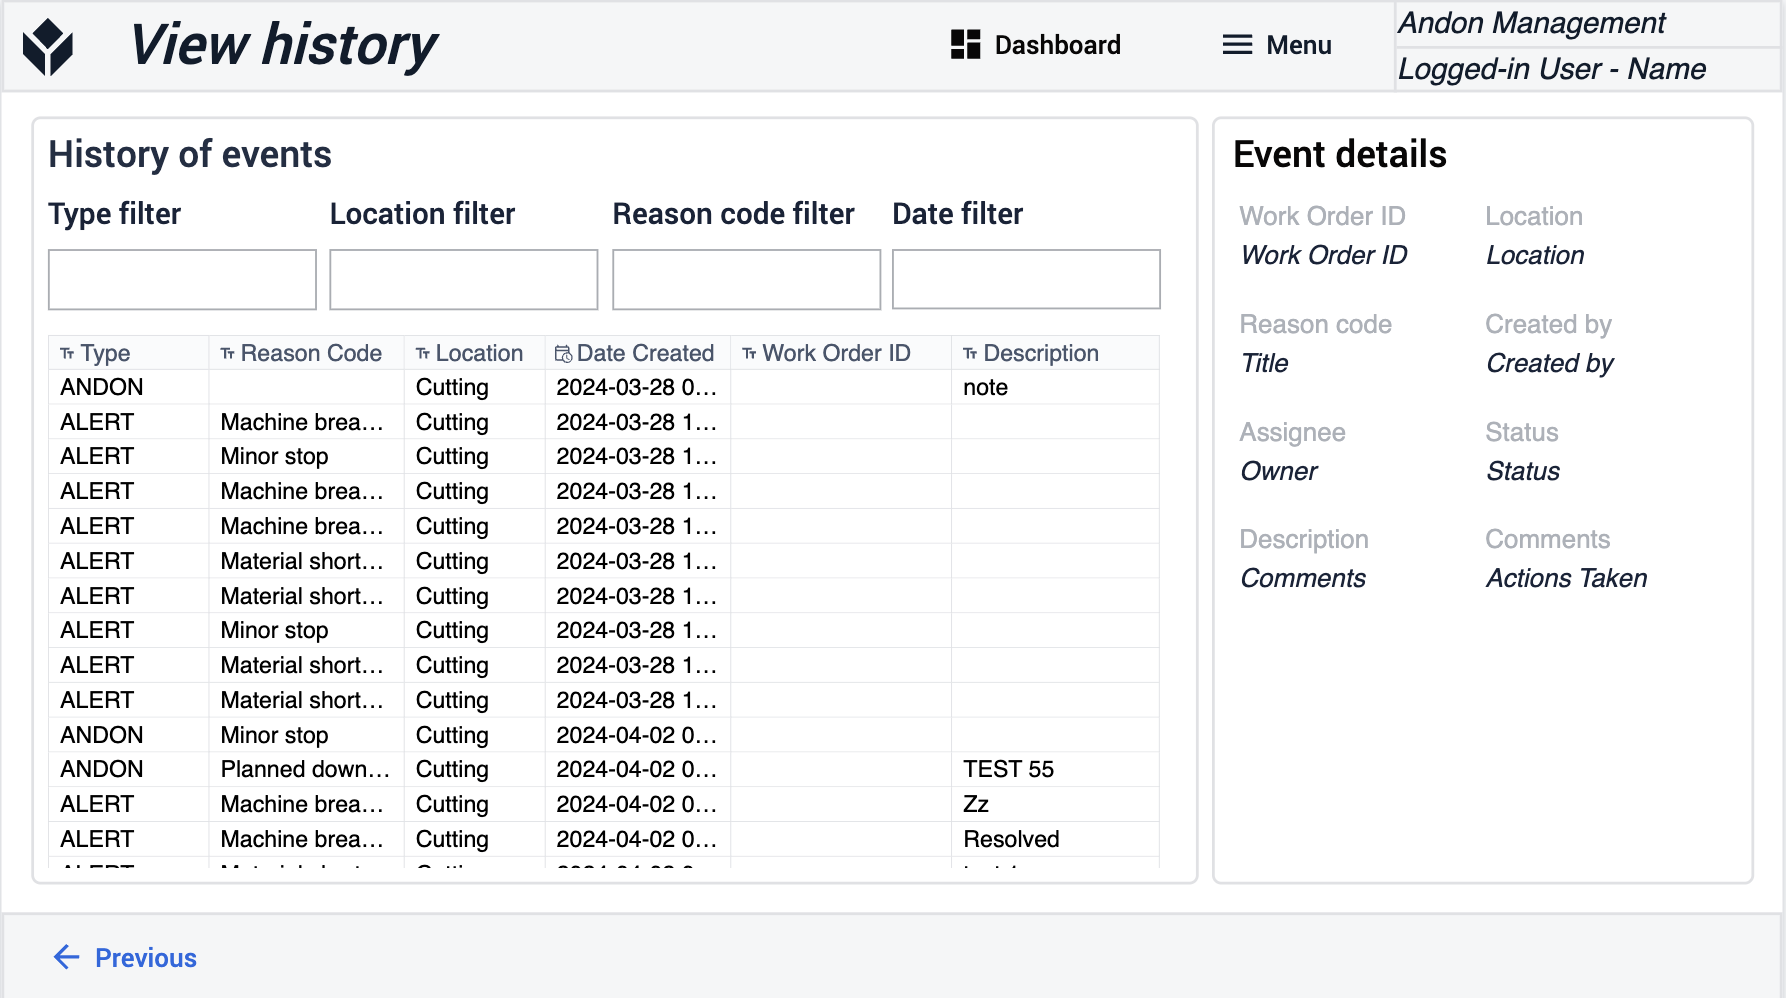
View History
View the events that have been logged throughout the application. Get more detailed insight as to what has been going on.
Dashboard
This view is so you can see the number of alerts that have happened in both categories so far and understand the time that is lost on these events.

Machine Monitoring Terminal
This Machine Monitoring Terminal app is built to track machine utilization and performance. Giving operators a way to add more context to report downtime, log production rates, and details on the parts being produced. For supervisors, there is a clear overview of key metrics Surrounding OEE.
Select Order
On this step you will be able to see and select work orders to start for production.
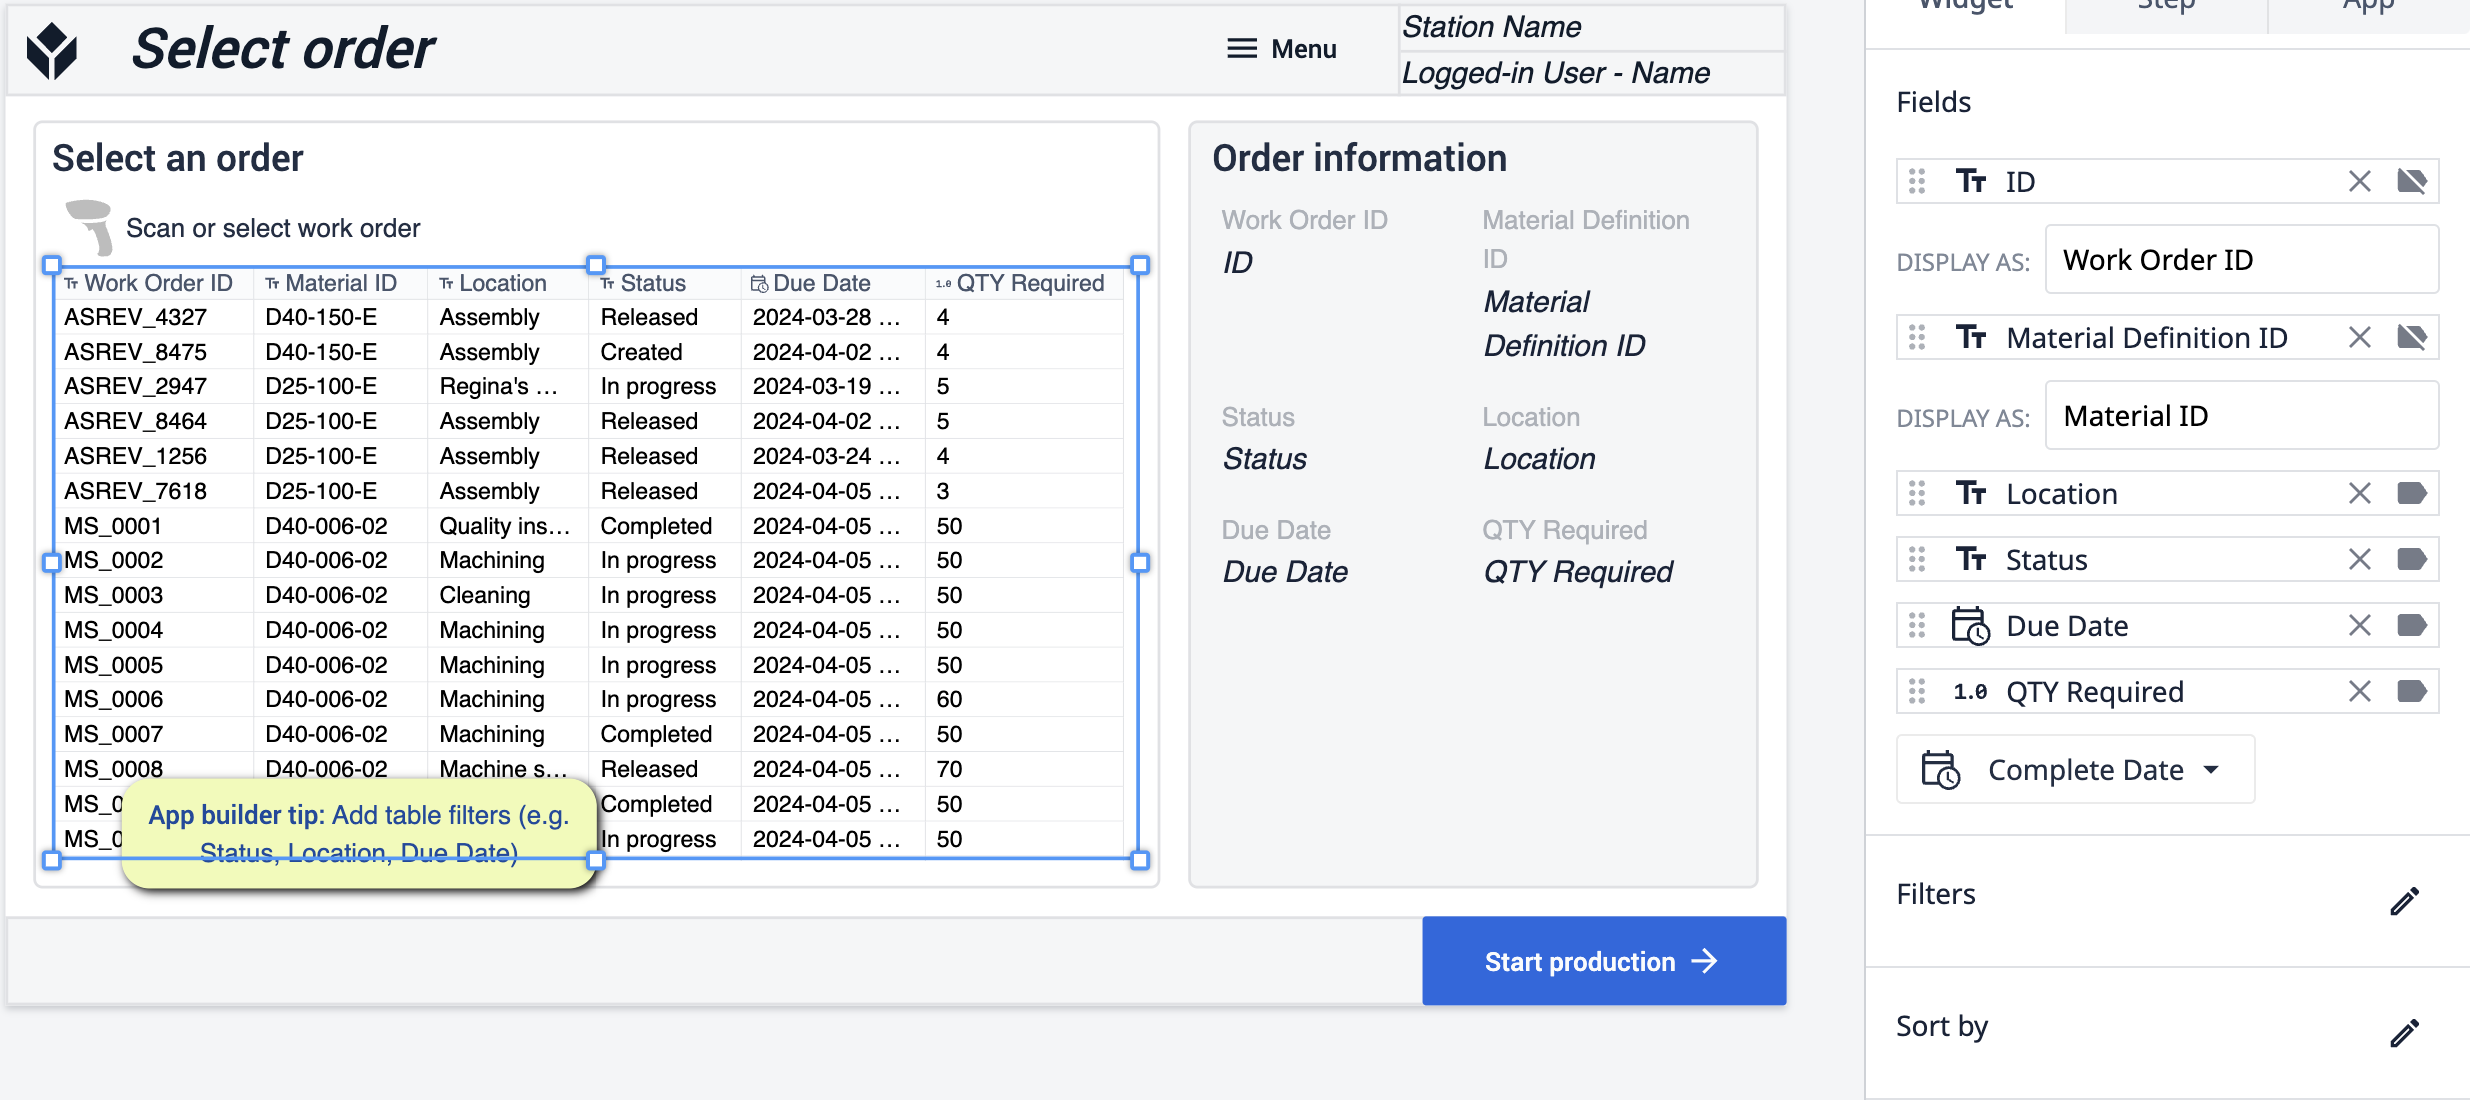
- On this step in the application you can make changes to the table as needed. add filters based on the fields you need to track. Make sure to click on the table to see that it is updated with your preferences
Machine Terminal
Here you will be able to see the uptime and downtime of the selected machines. Track the performance through parts made and defects that have been tracked.
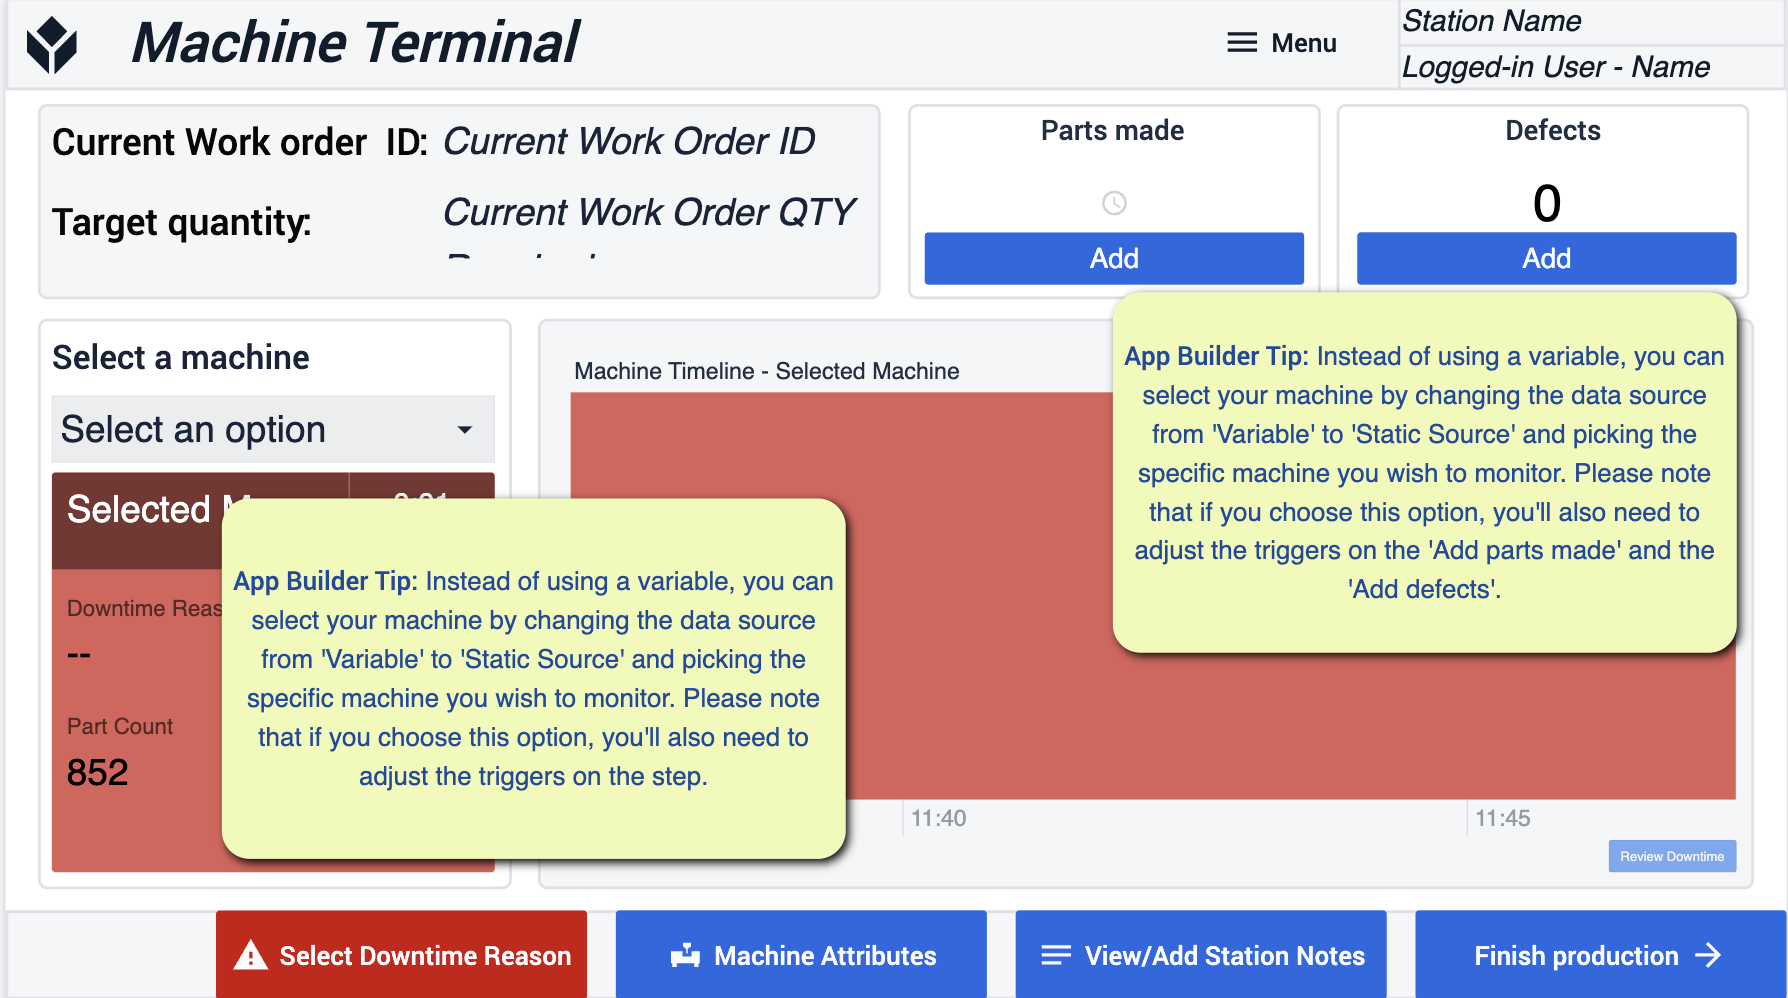
- Follow the App Builder Tips on how you’d like to configure your machines. Focus on making sure that we can connect the machines through pre-built Variables.
Select Downtime Reason
When you have a machine that has gone down, select a reason for why that machine has gone down for better insight into performance and visibility in other steps of the application.
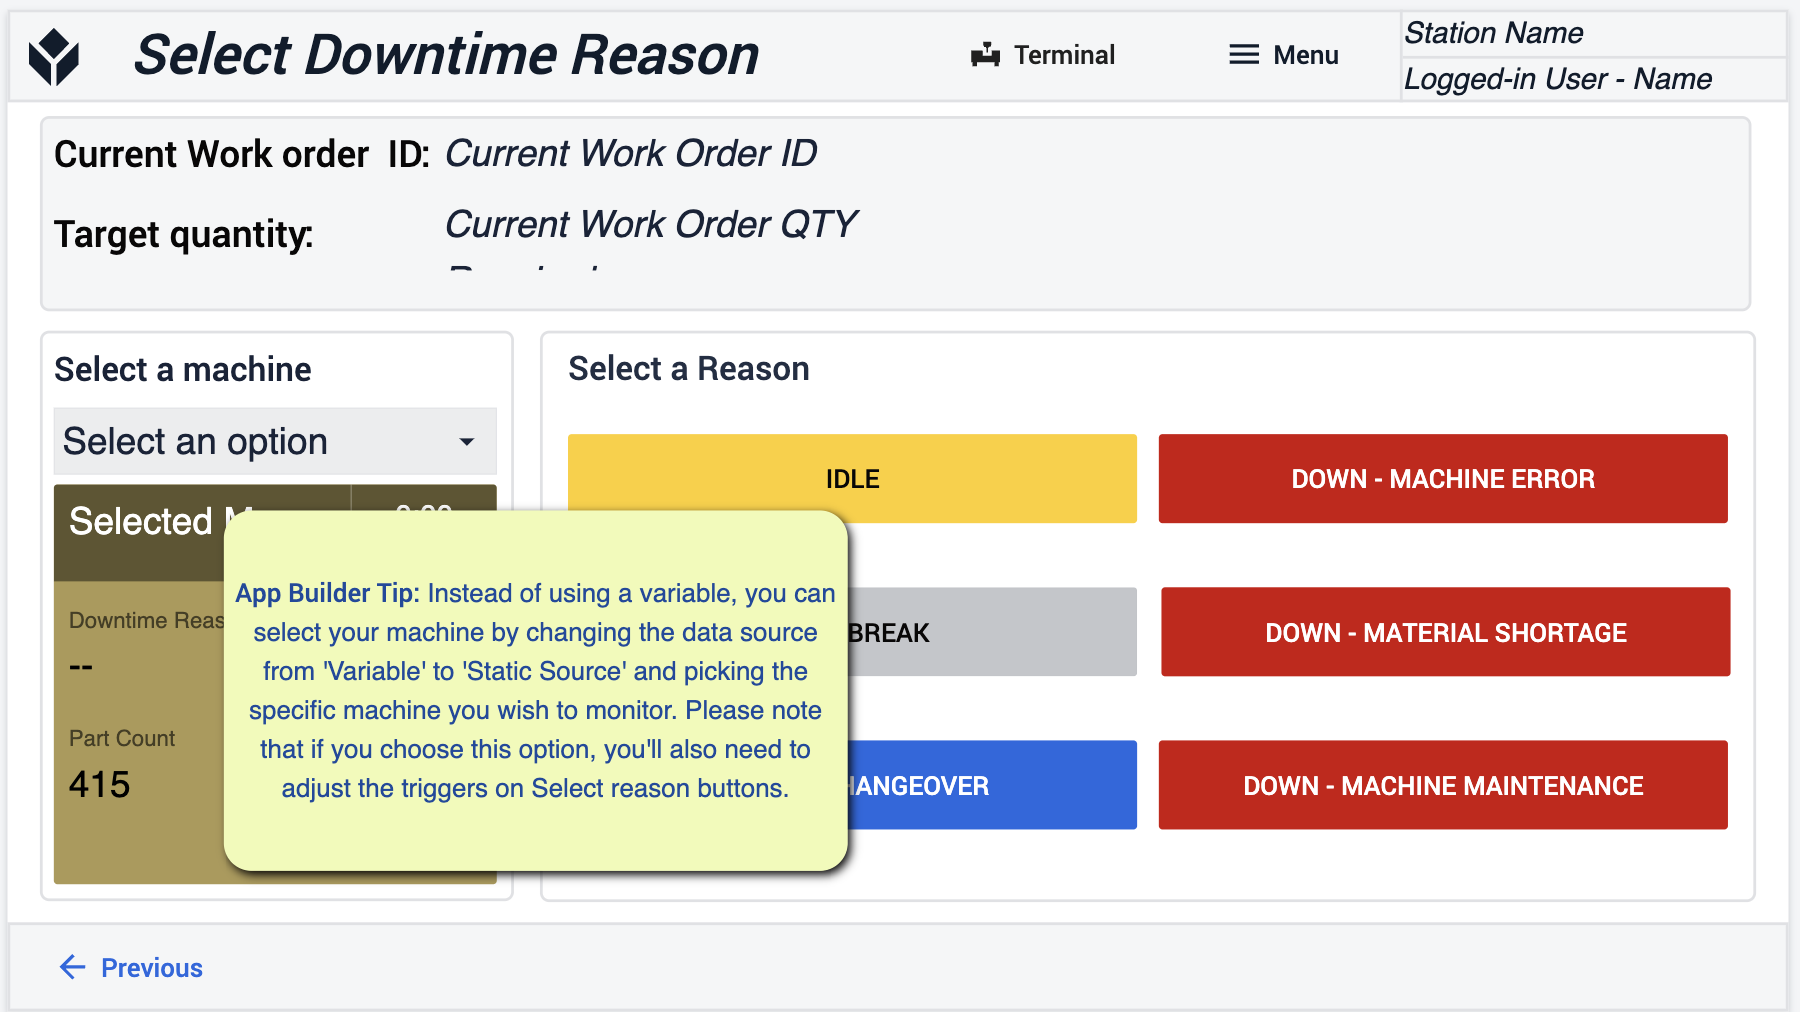
- Changes made here should match the same format as other changes made to your machine data source.
Analytics
Here you can see your daily metrics and have a quick understanding of overall performance. Keeping track of these metrics will be important for making decisions.
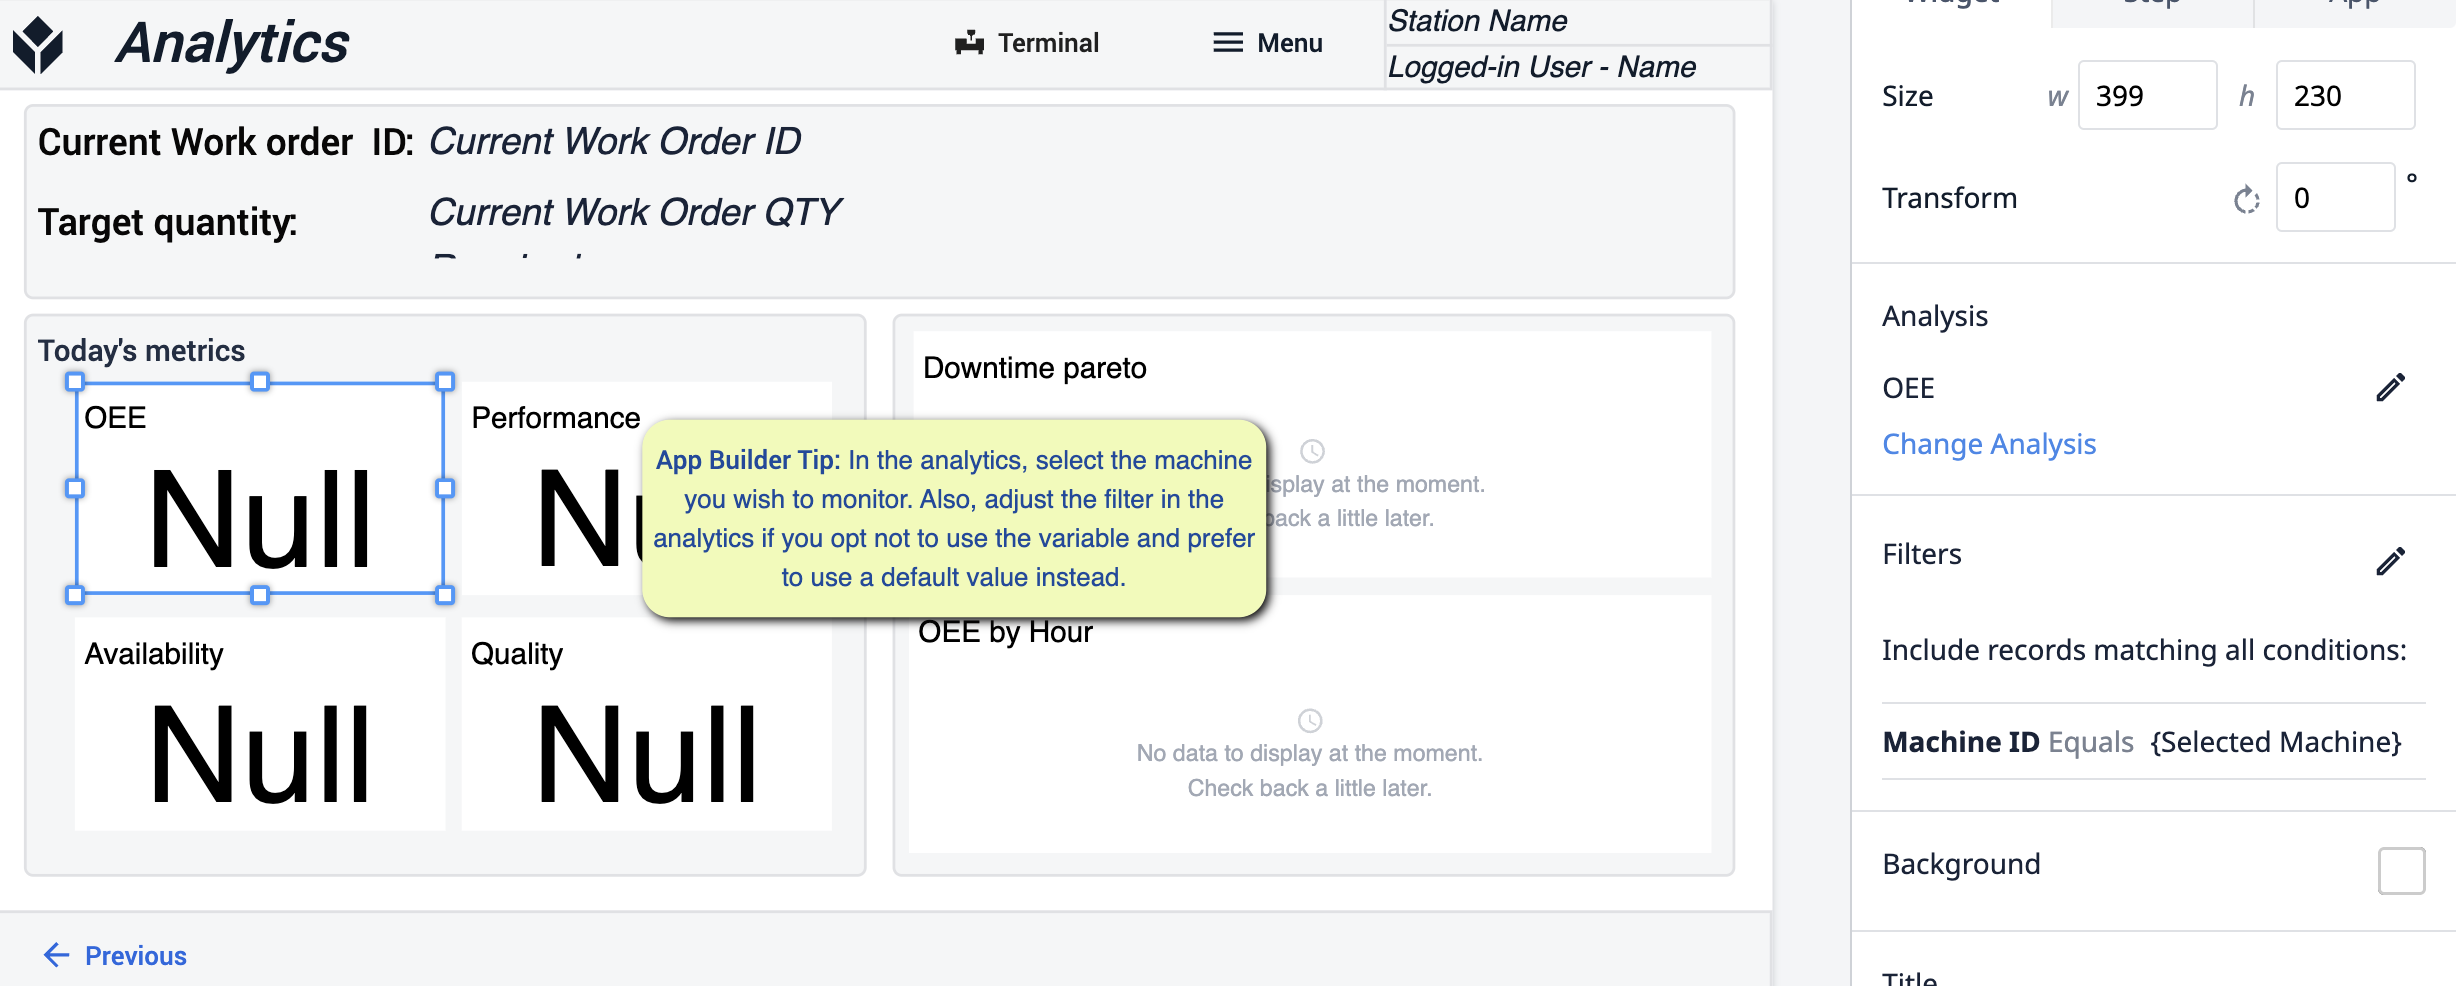
- On this step you will get more detailed analytics on machine performance on a machine-to-machine basis. . Use the analytics filters to determine which machine(s) you would like to gather insights from.
Attributes
In this section you will select a machine to better understand the down time reason.
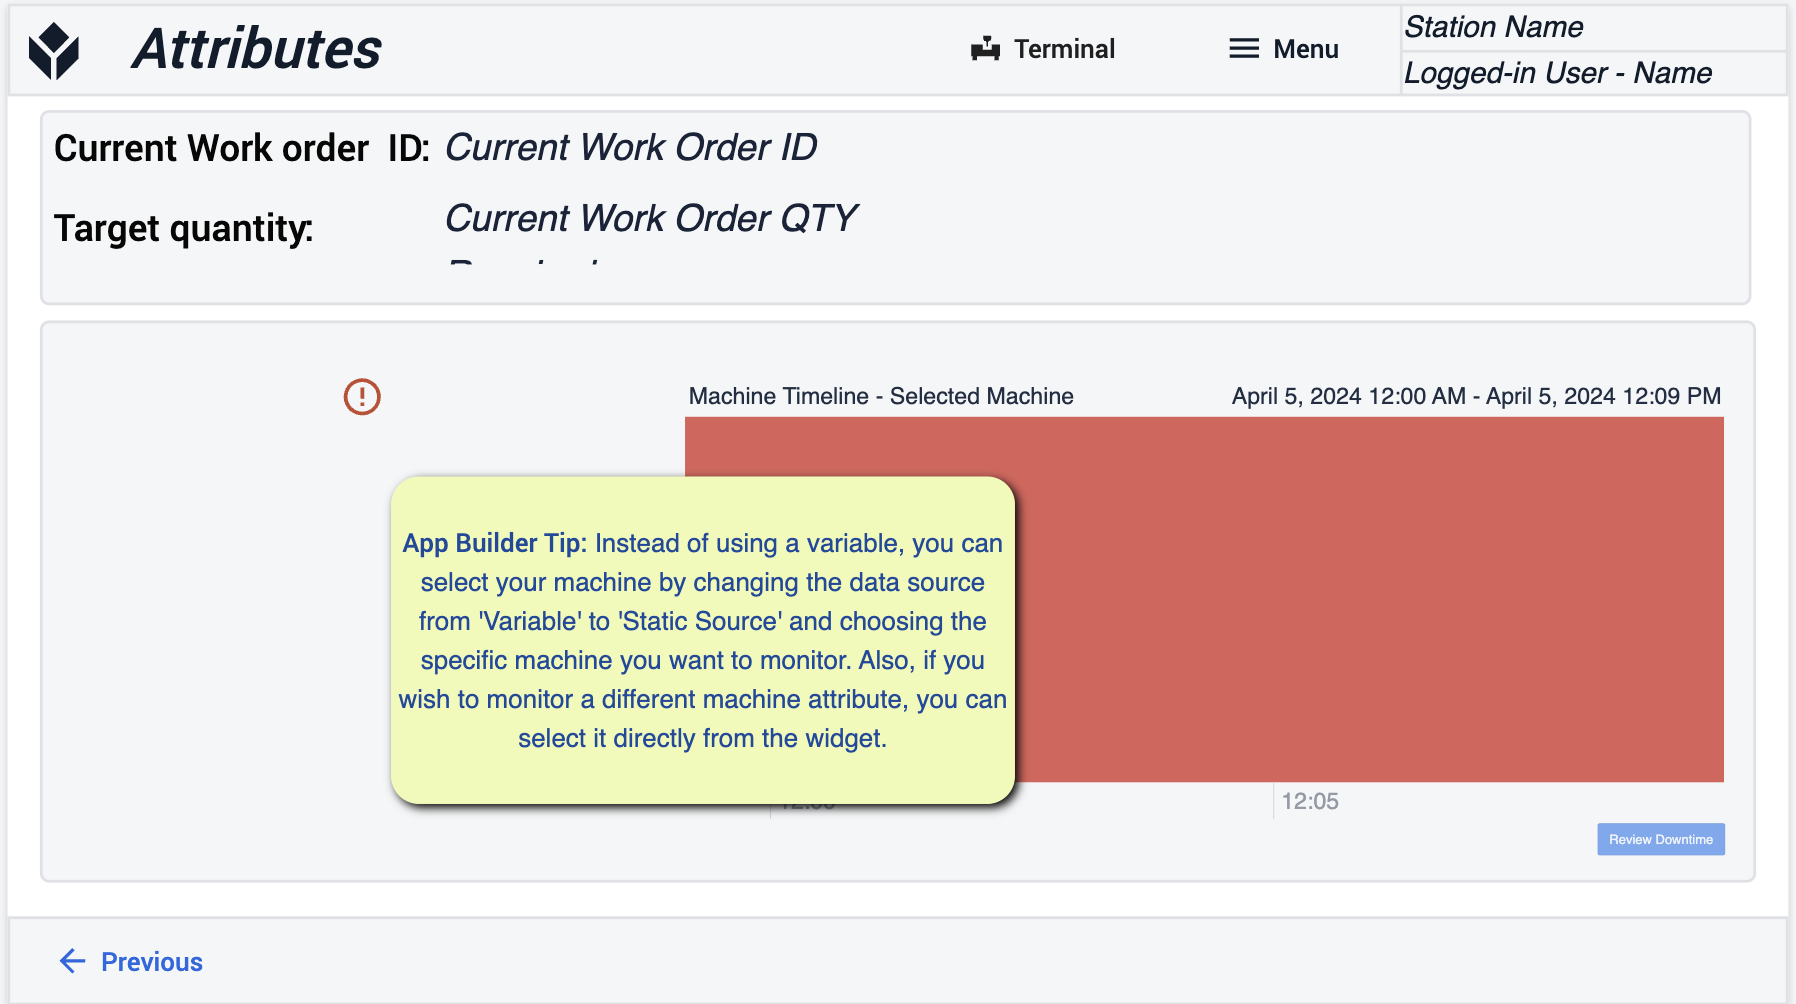
- Downtime reasons will be set by you and for this step you’ll want to follow the same app builder tips to populate your machine data source.
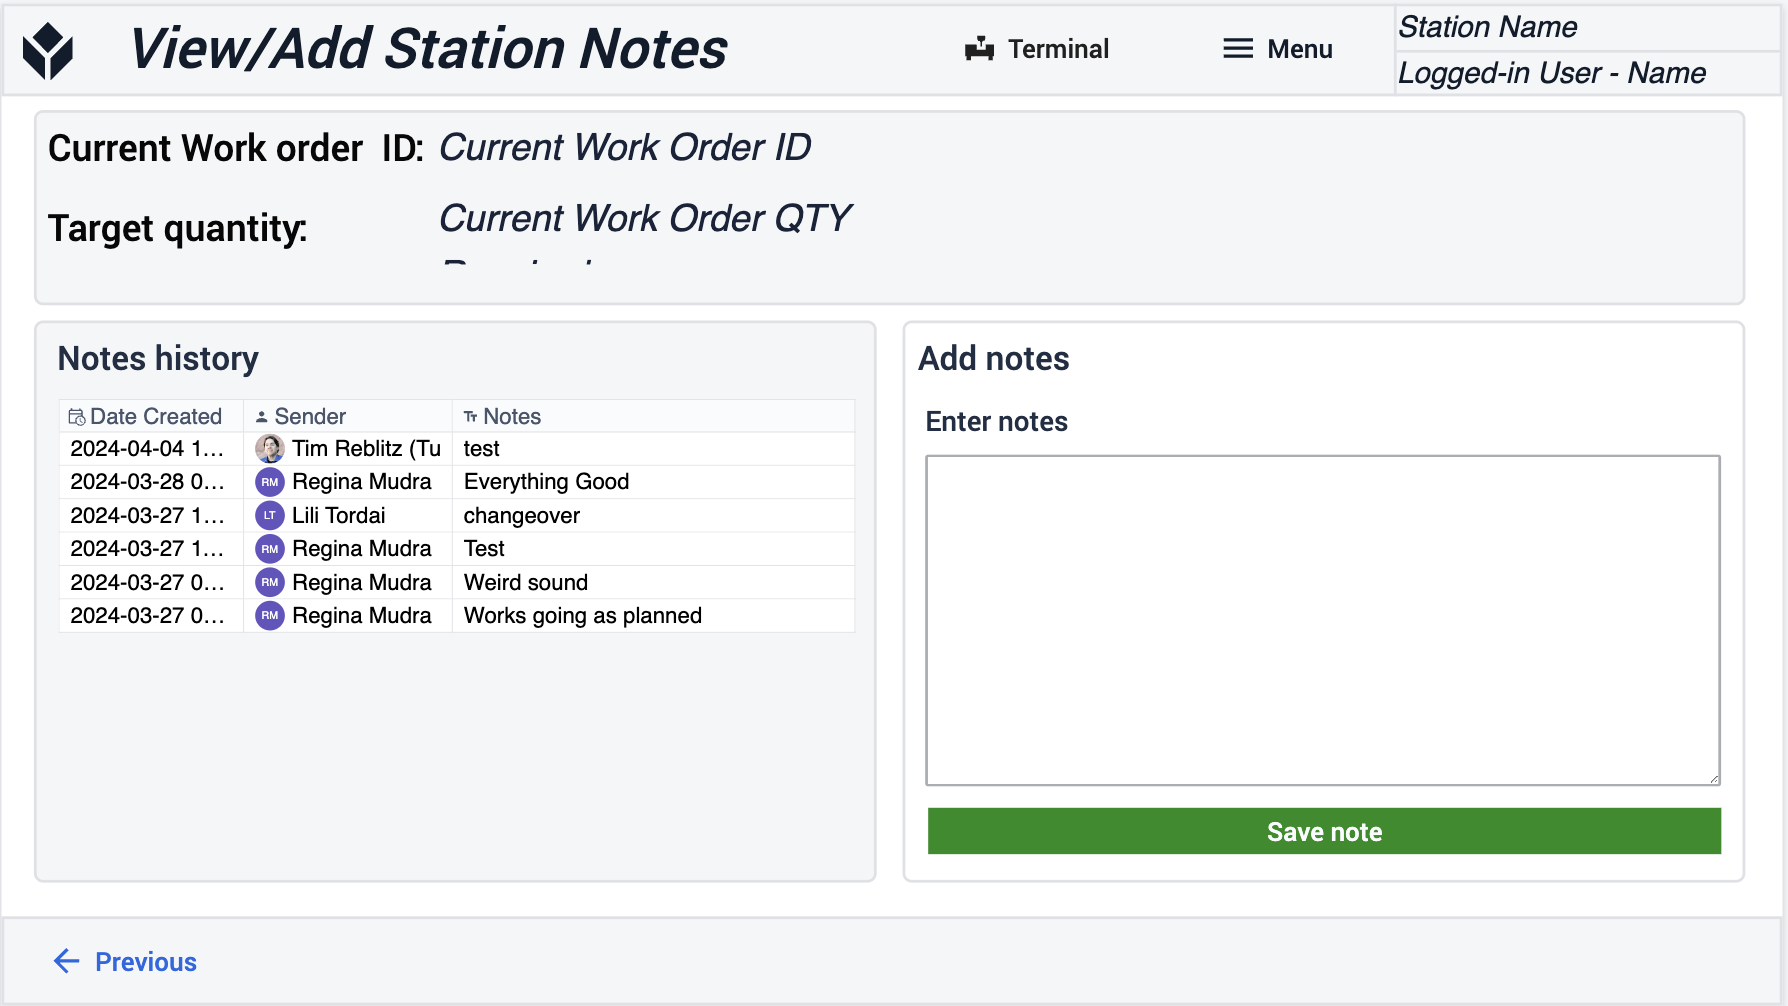
View/Add Station Notes
You can see existing notes from other operators for machine activity and add your own notes. Providing clear visibility into the history of the specific machine.
Order Execution
In this Application you will have complete visibility into the status of all work orders from Created, In-progress, Completed, and Released. See not only the scope of your operations but have ability to Trace back orders at any part of its life time.
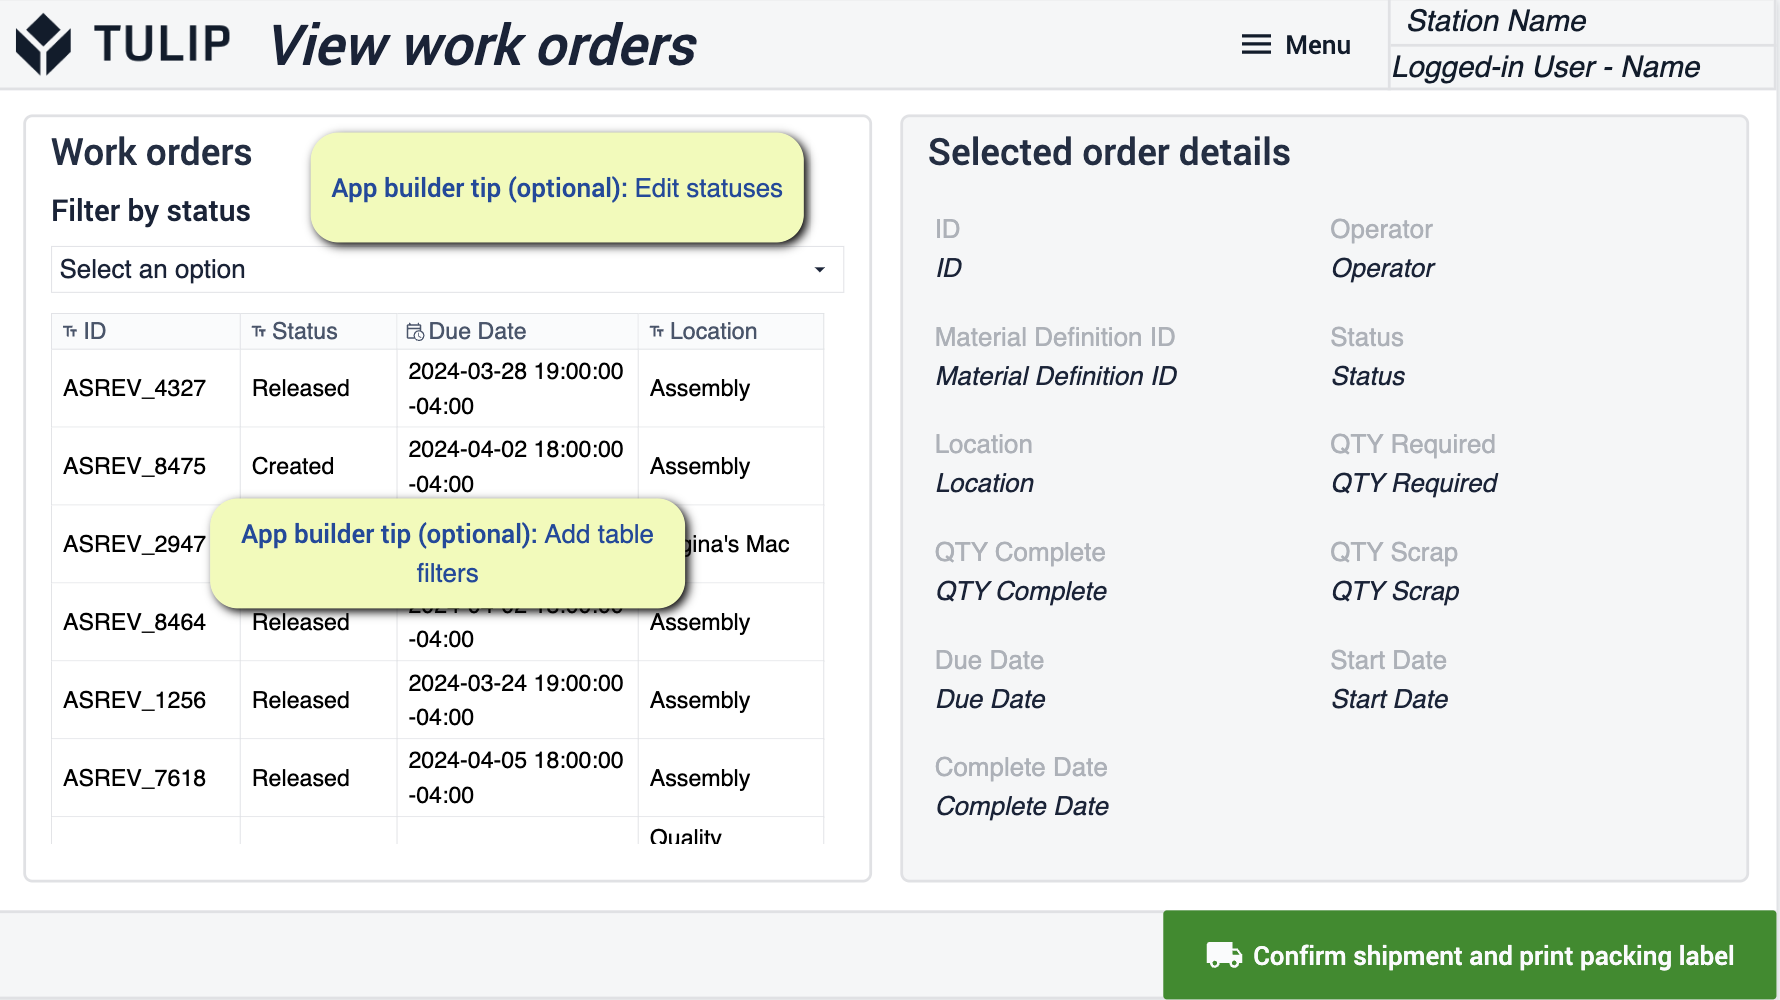
View Released Work Orders
This step is where you will first see all the work orders that are available to you or that have already been completed.
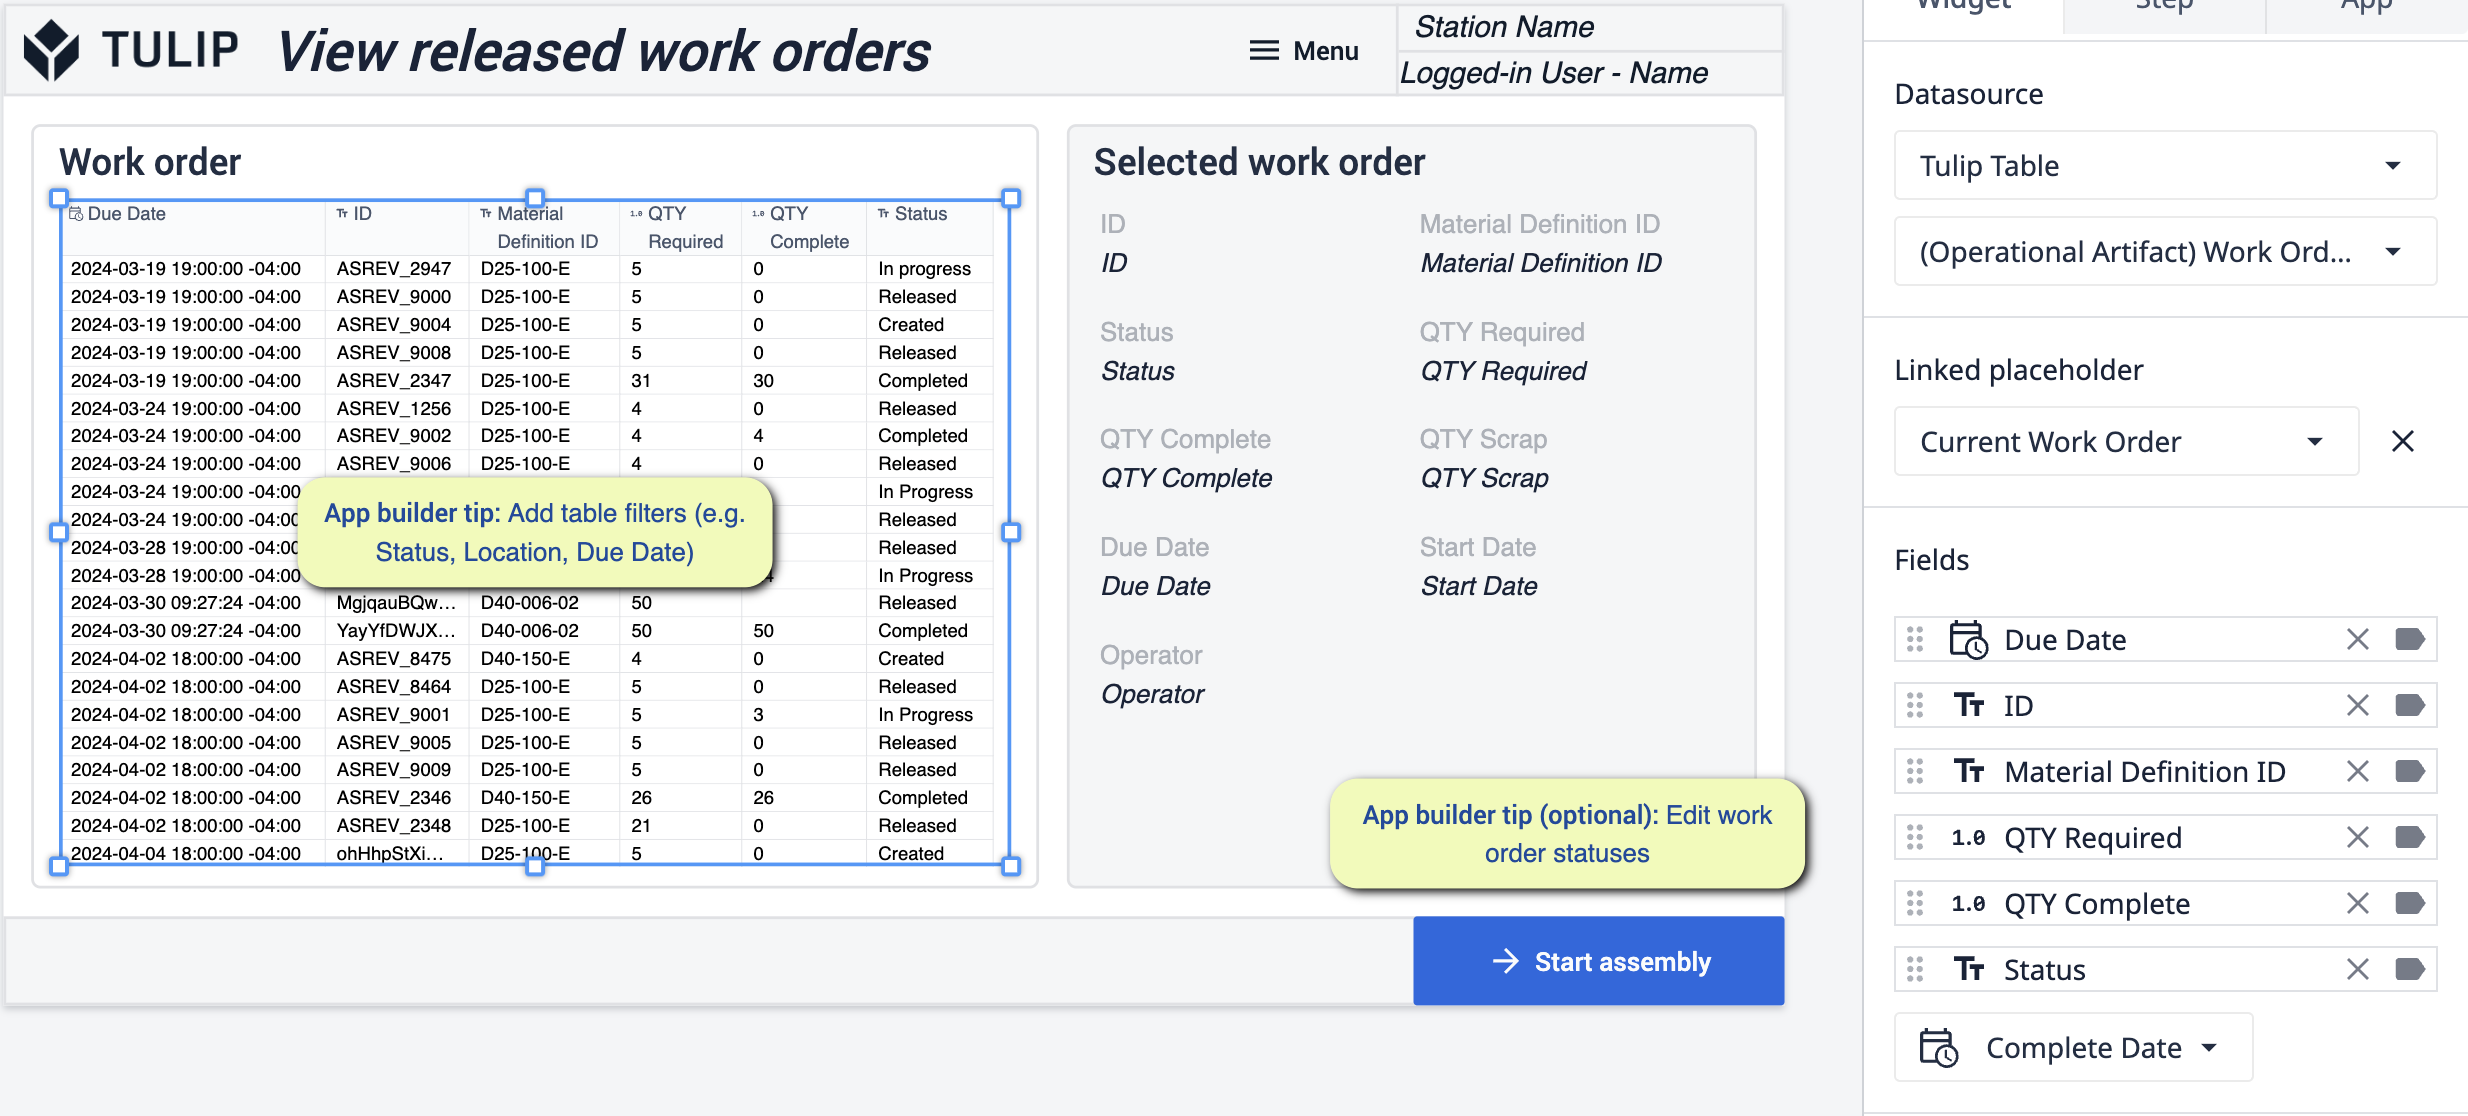
- In this step you will be able to see all the work orders that are being tracked. Changes that can be made to this step focus around adding filters to your table and editing fields. An optional step here would be to edit work order statuses.
Work Order In progress
On this step you will follow the set of instructions to complete the work order that was selected previously. You will also be able to make adjustments to for how much of the order is being completed as time passes.
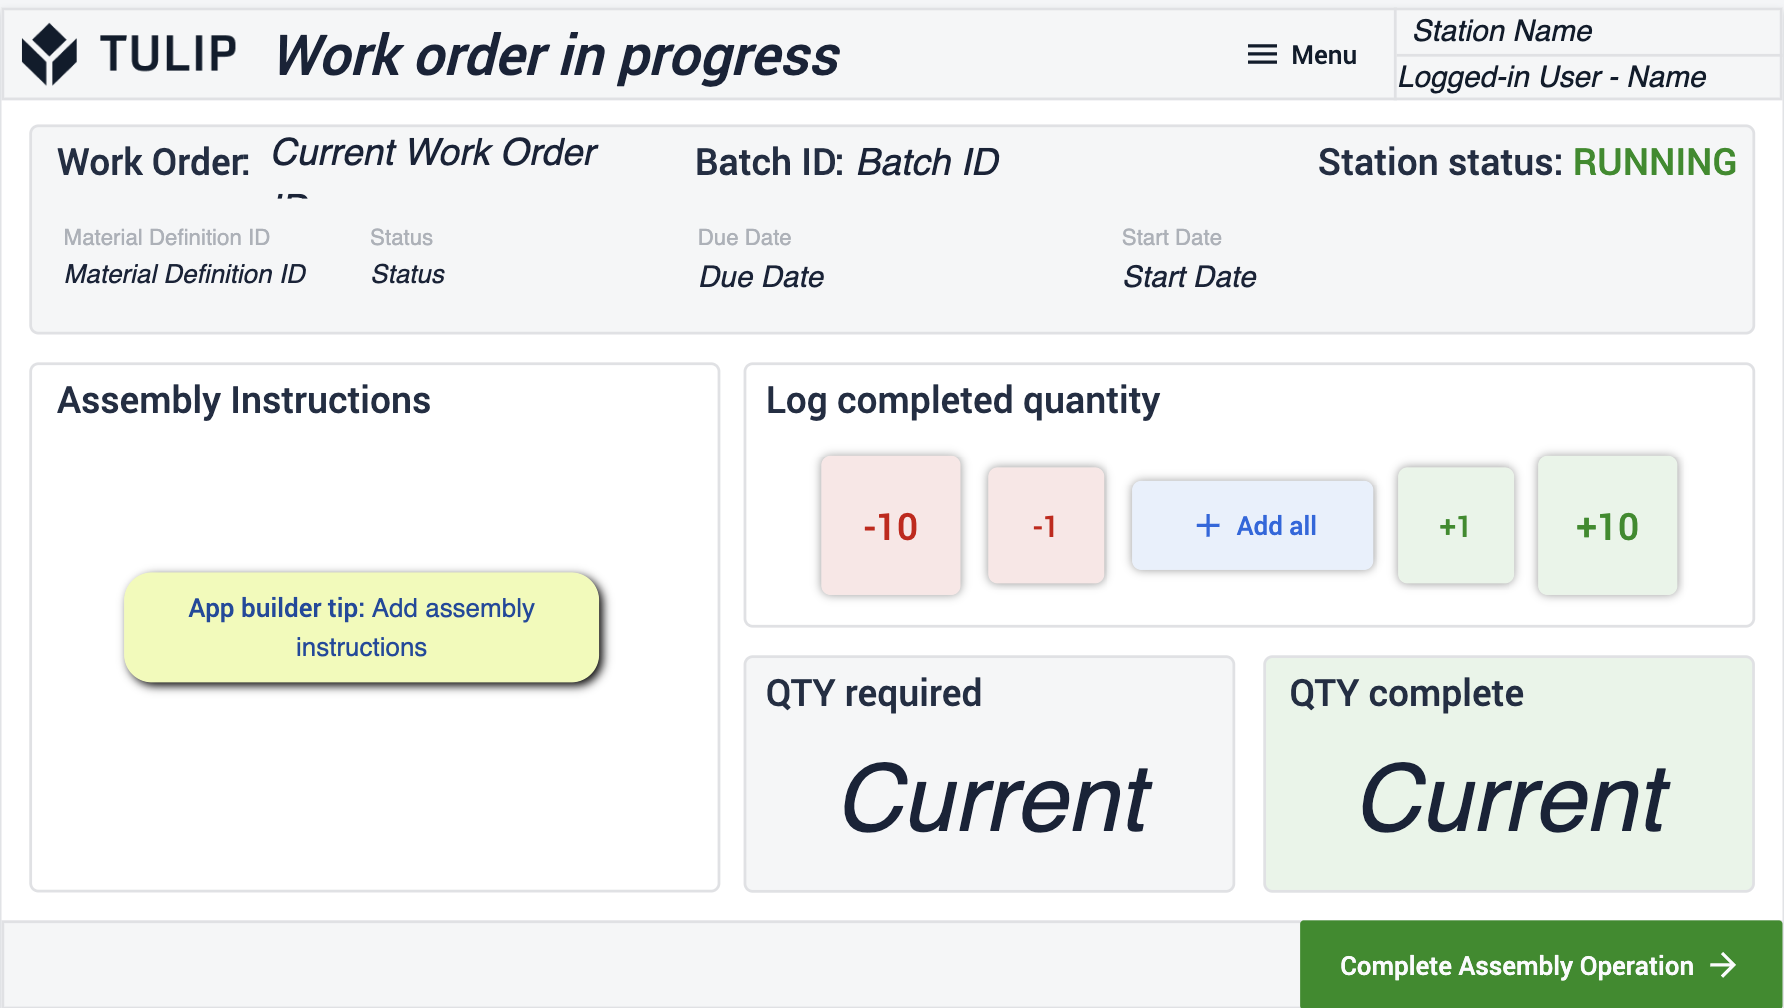
- Here you will be able to begin logging in the progress of the order that you are working on. The configuration this step needs is the addition of assembly instructions. This could come in the form of detailed text instructions, CAD files, Videos, etc
Confirmation Completion
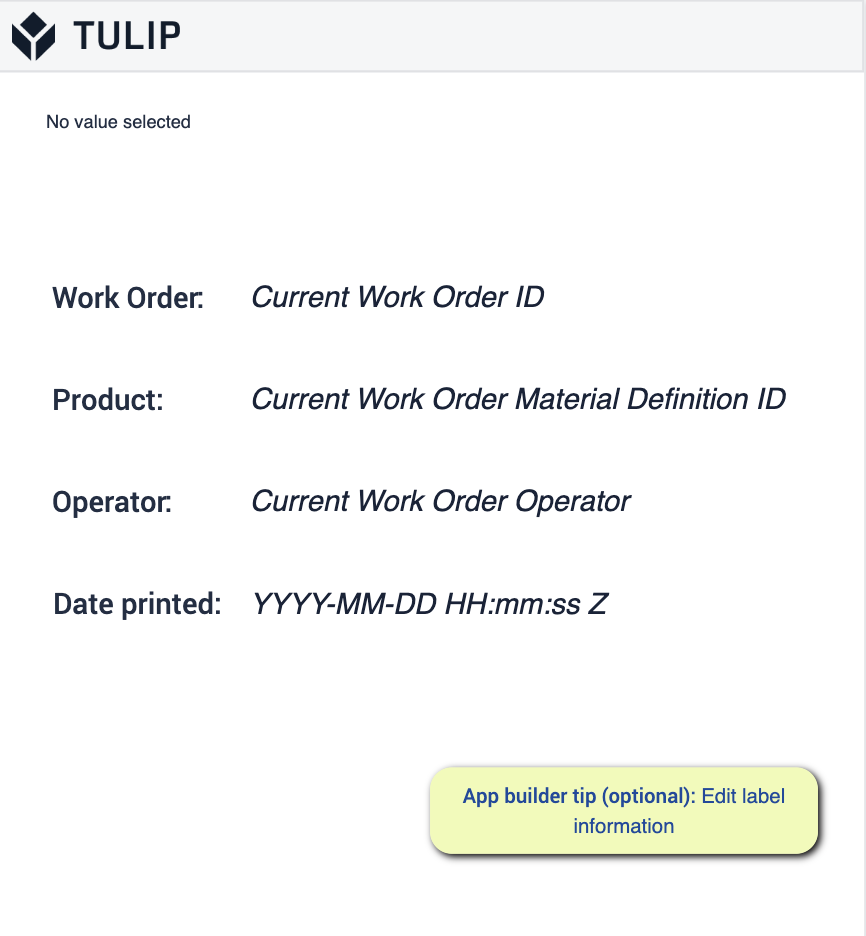
Here you will be able to print the label for the completed job, this will make sure that the order is always able to be tracked if needed as the history still lives with you .
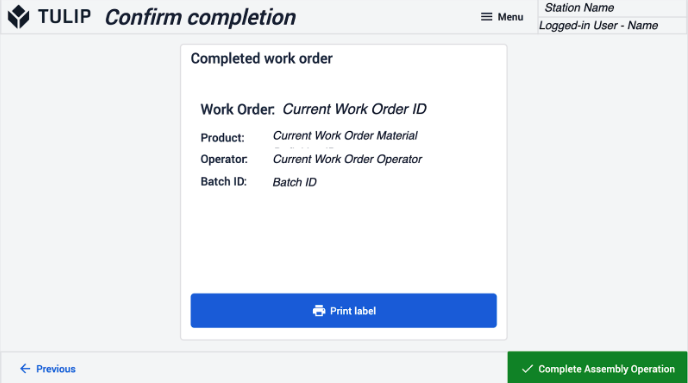
Label
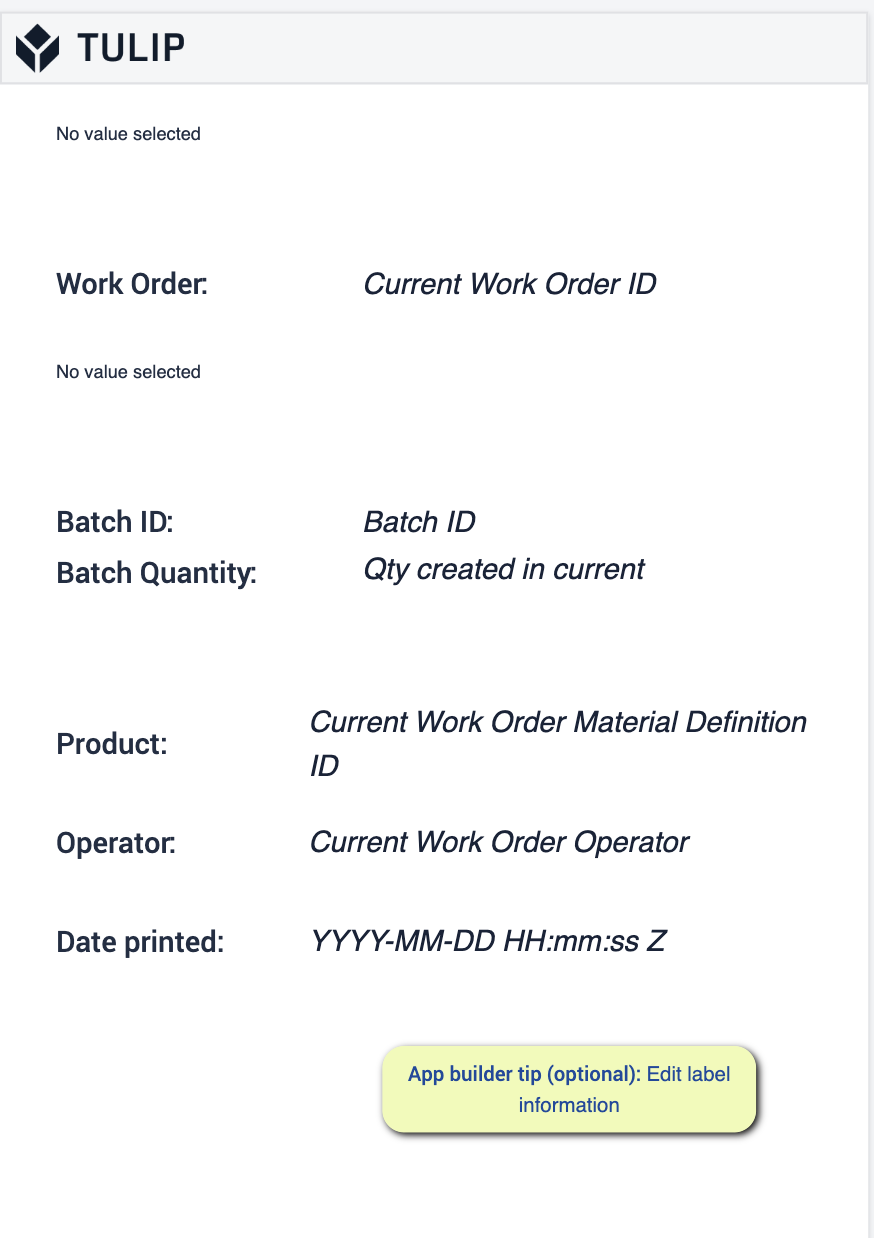
- This is what your label will look like and an optional step here is having the ability to edit the information that’s displayed on the label.
Order Management
Use of this app focuses around creating and tracking orders as they move across production. Have full visibility and control over the jobs that are being done.
View Work Orders
On this step you will be able to view the work orders and gather more insight by selecting the orders you would want to see.
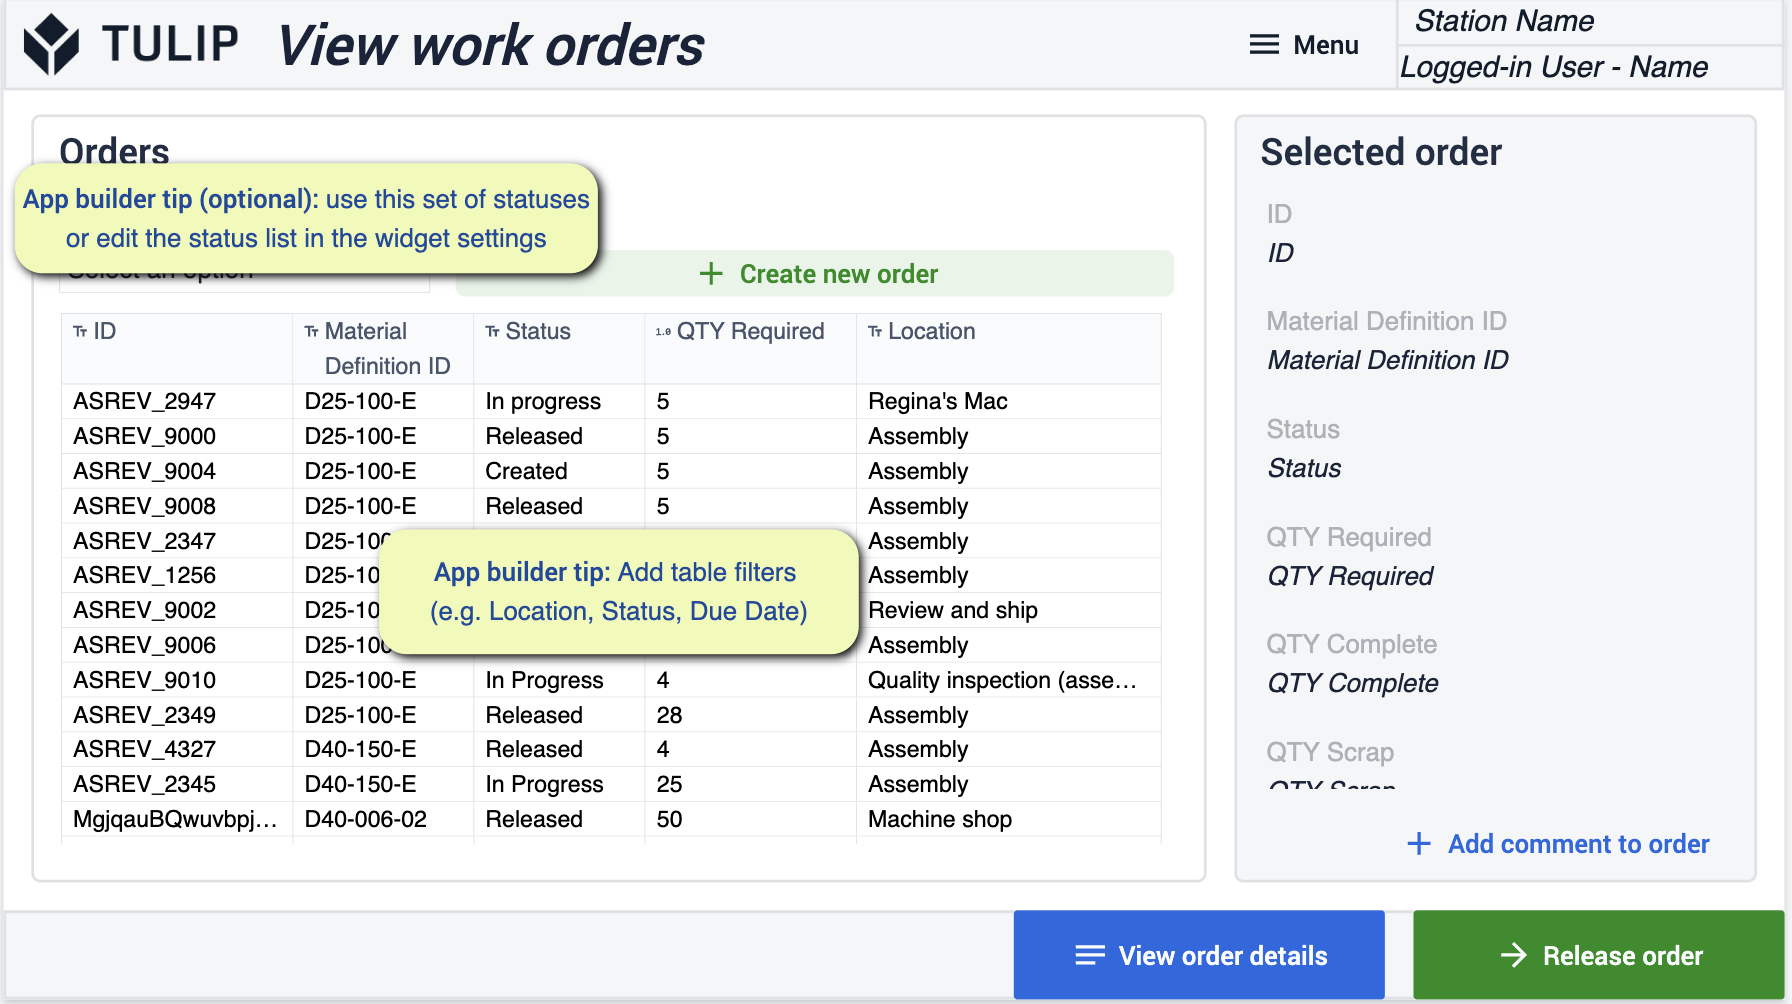
- Make changes by filtering the table and fields to fit your needs. As an optional task feel free to change the statuses that are being used to match your business needs.
Create Work Orders
This step gives you the ability to manually create work orders as needed. Add these orders straight into production for operators to have access.
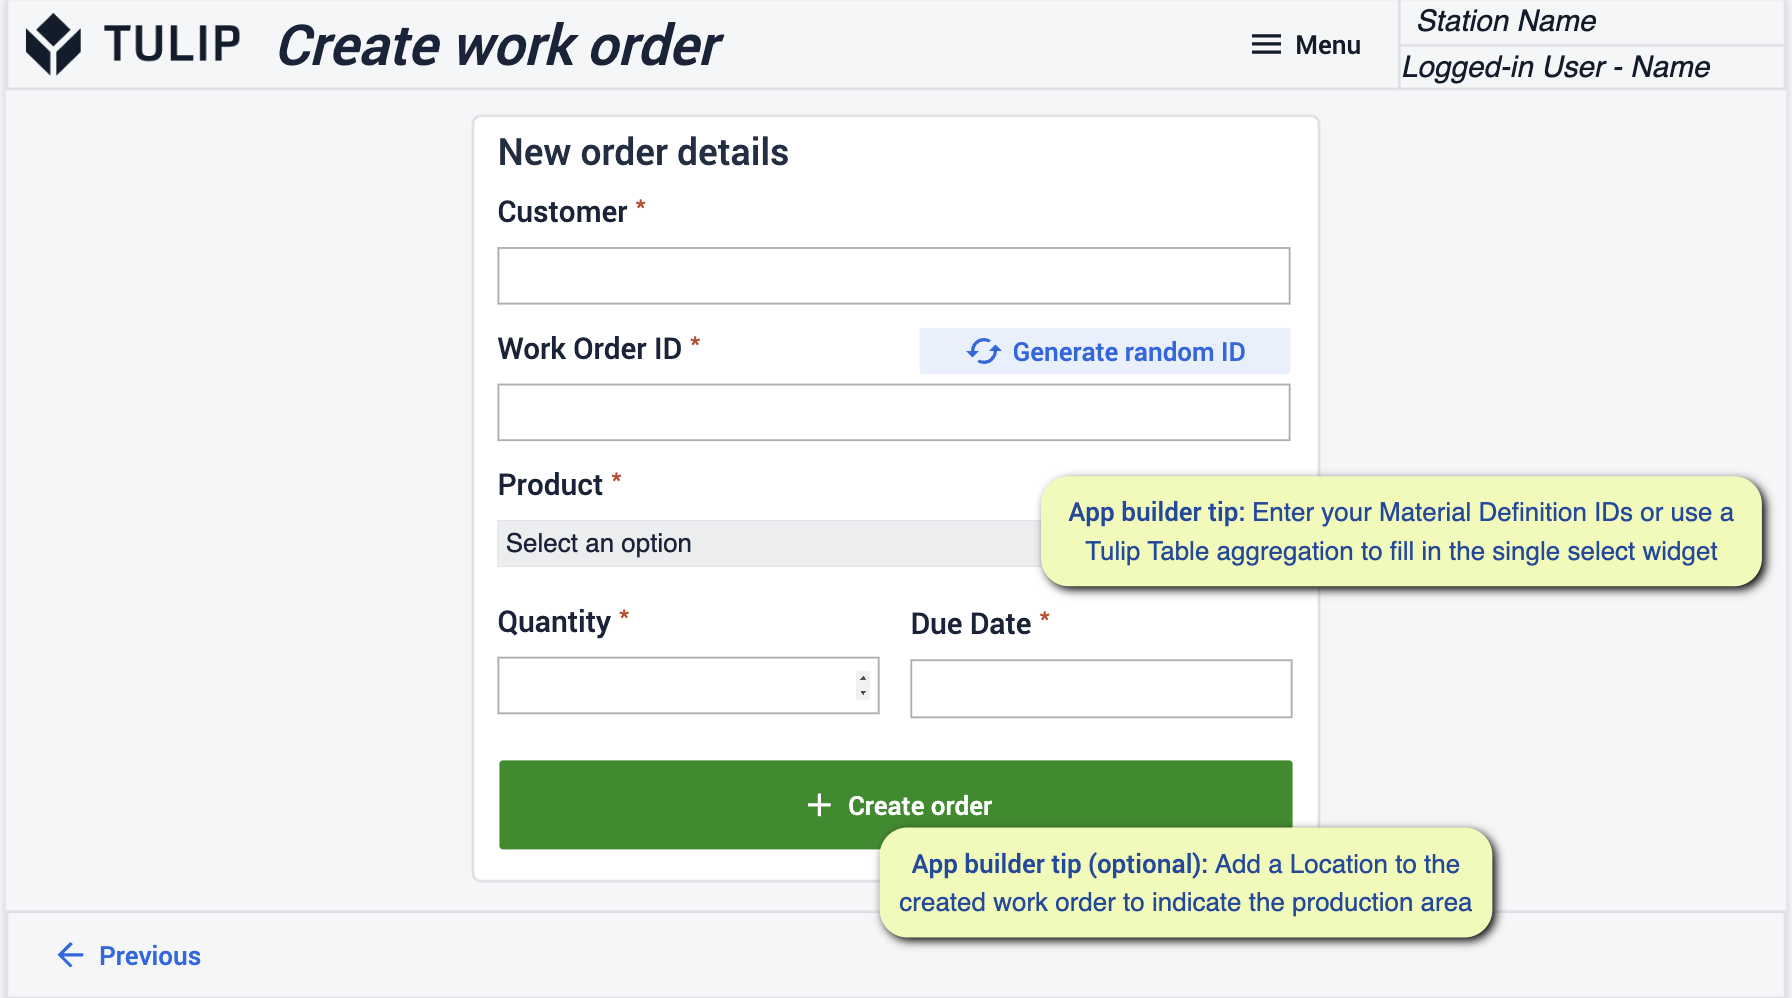
- Make sure to enter your Material ID’s or use Table Aggregations to fill by single select widgets
View Work Order Details
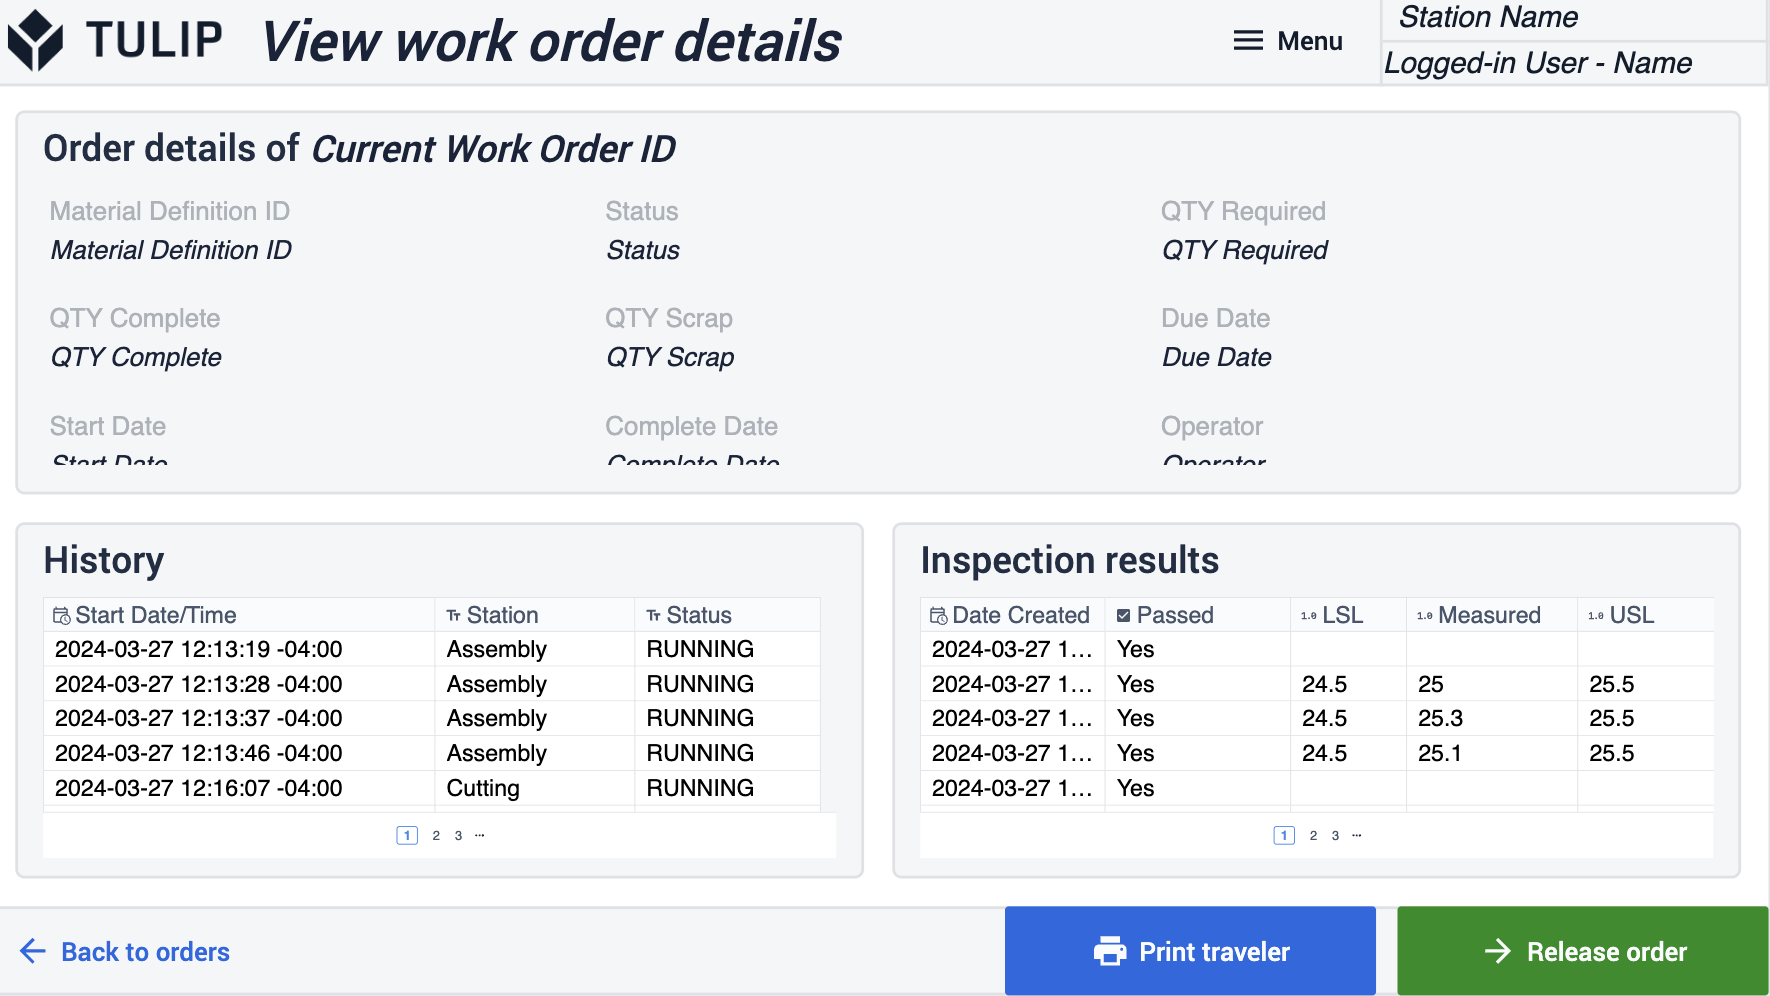
- On this step you’ll go into more detail from the previous work order view. Here you can also print out the information if needed.
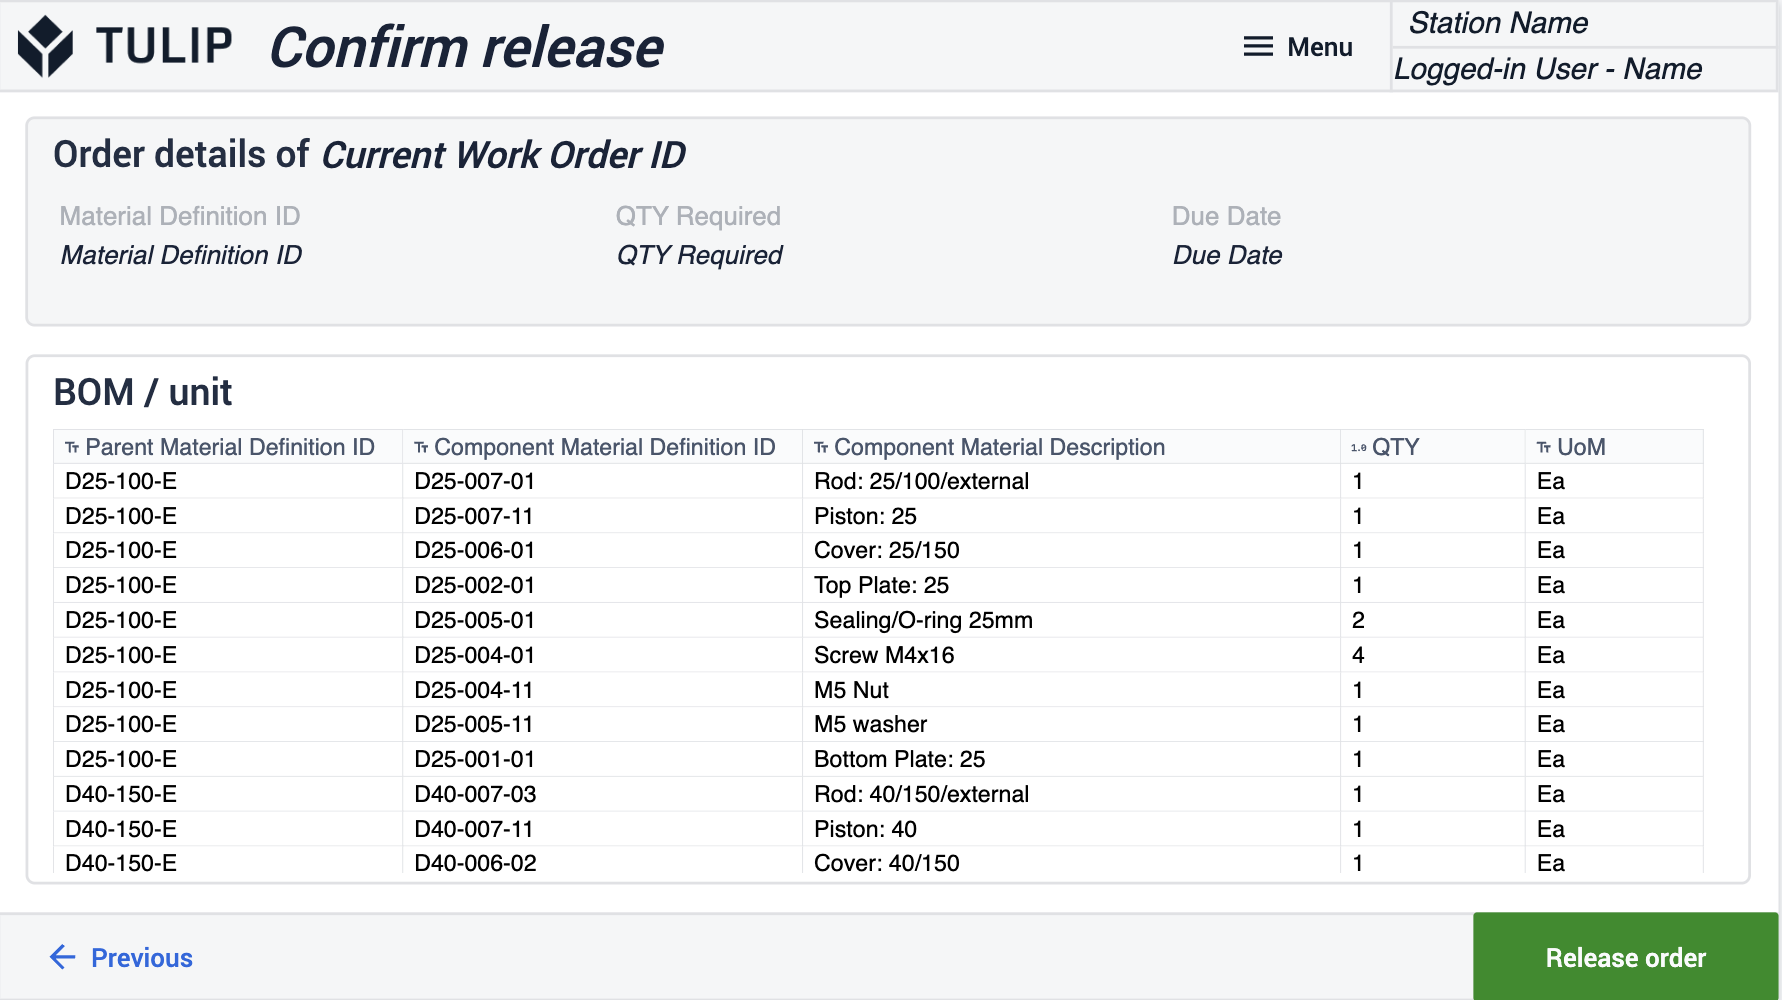
Confirm Release
This step is showing detail on the material that comes along with the specific orders and how much of it you are using.
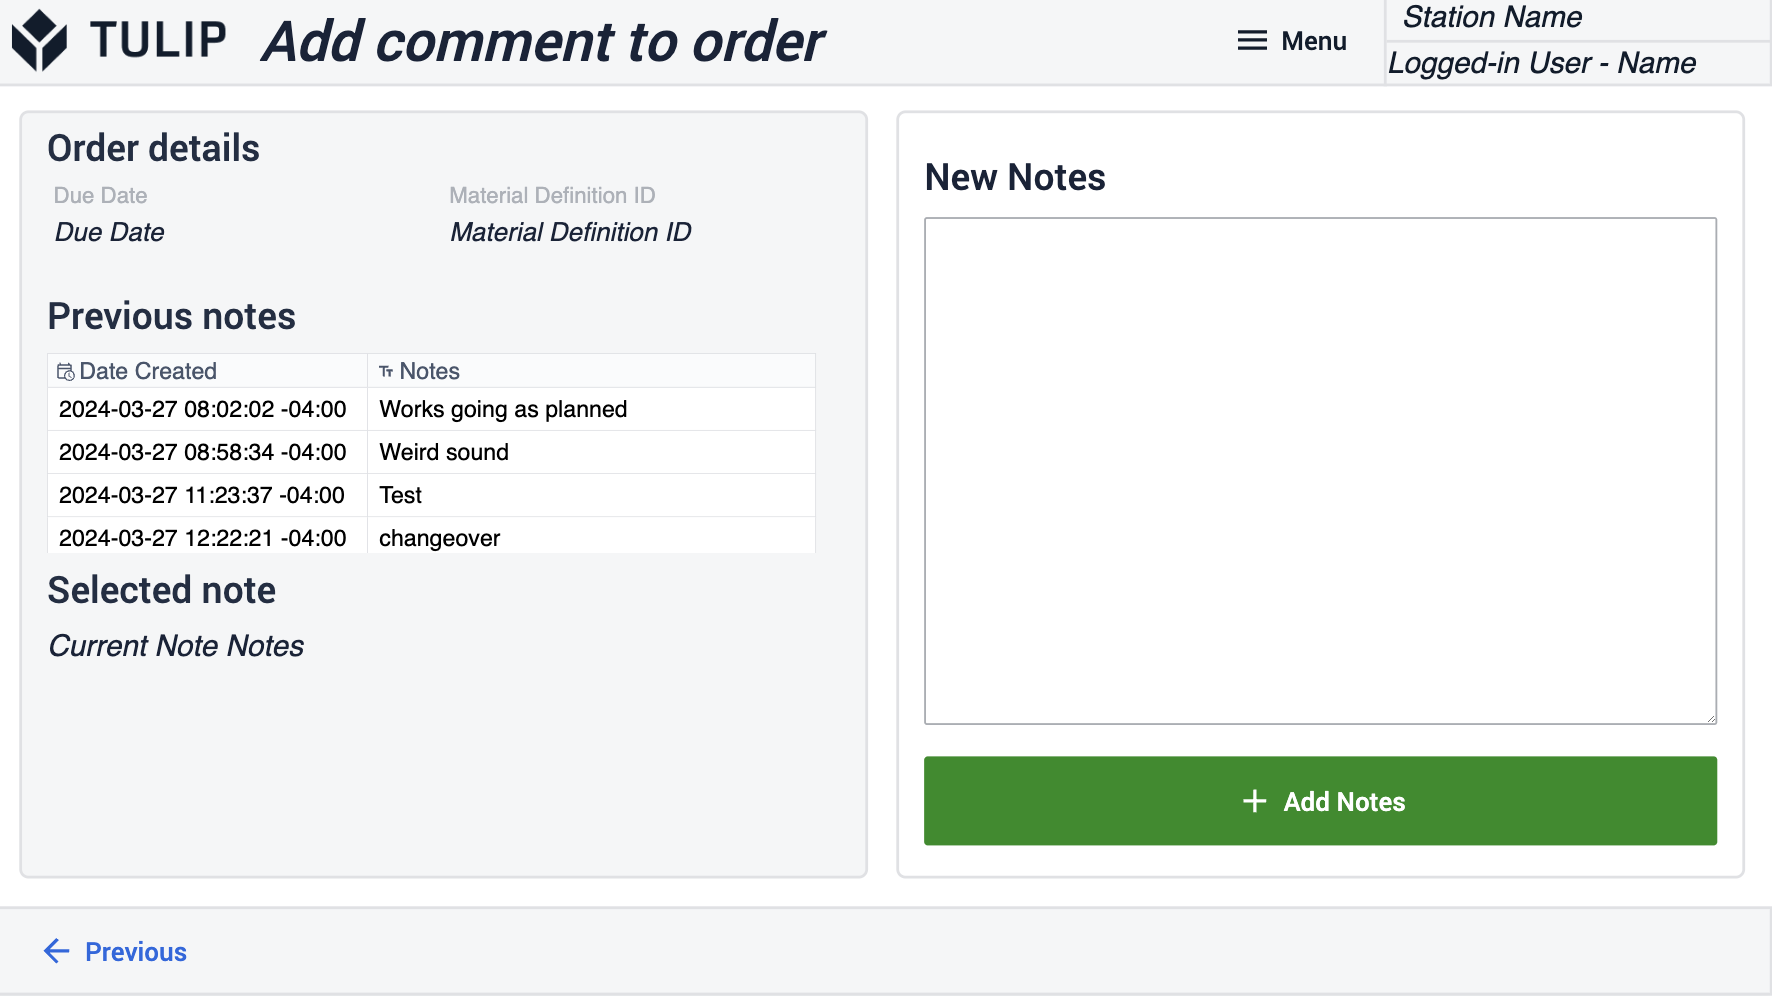
Add comment to order
Add comments in a specific order to leave behind a record of what's working, why a process might have taken long, and why a process might have gone well. Let the operators communicate back to management quickly.
Traveler
This Step is to show over all the History of the work order. Who is it for, what went into it, when does it need to be done etc.
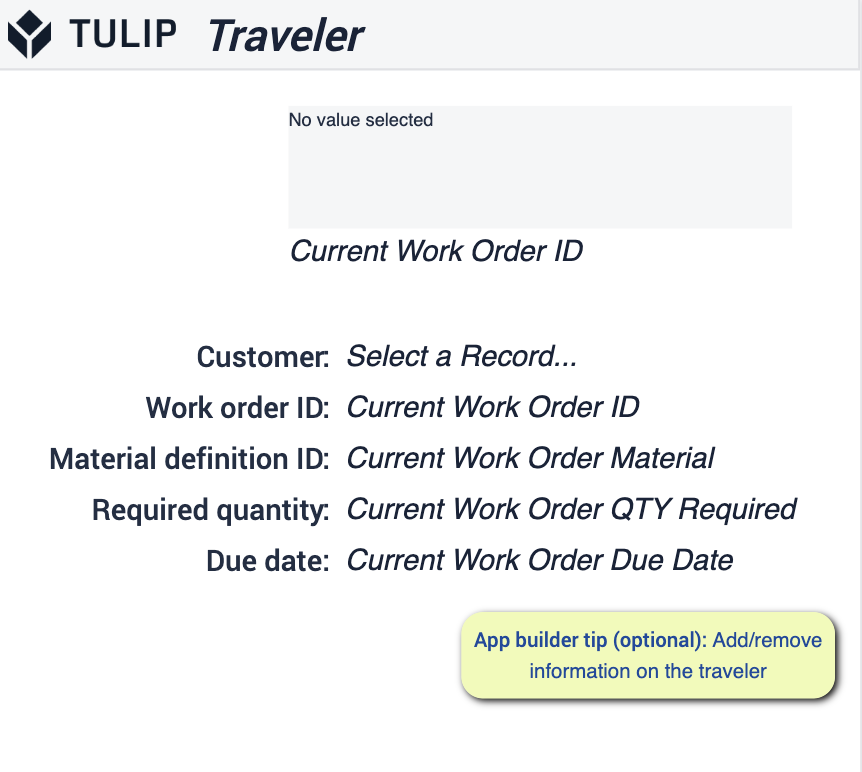
- You can either add or remove information that needs to be displayed at this step.
Learn more about Order Tracking.
Performance Visibility Terminal
Using this application gives you the ability to capture high level performance data as parts are being produced by either a person or machine. Here Operators will be able to log data around machine activity and production analysis.
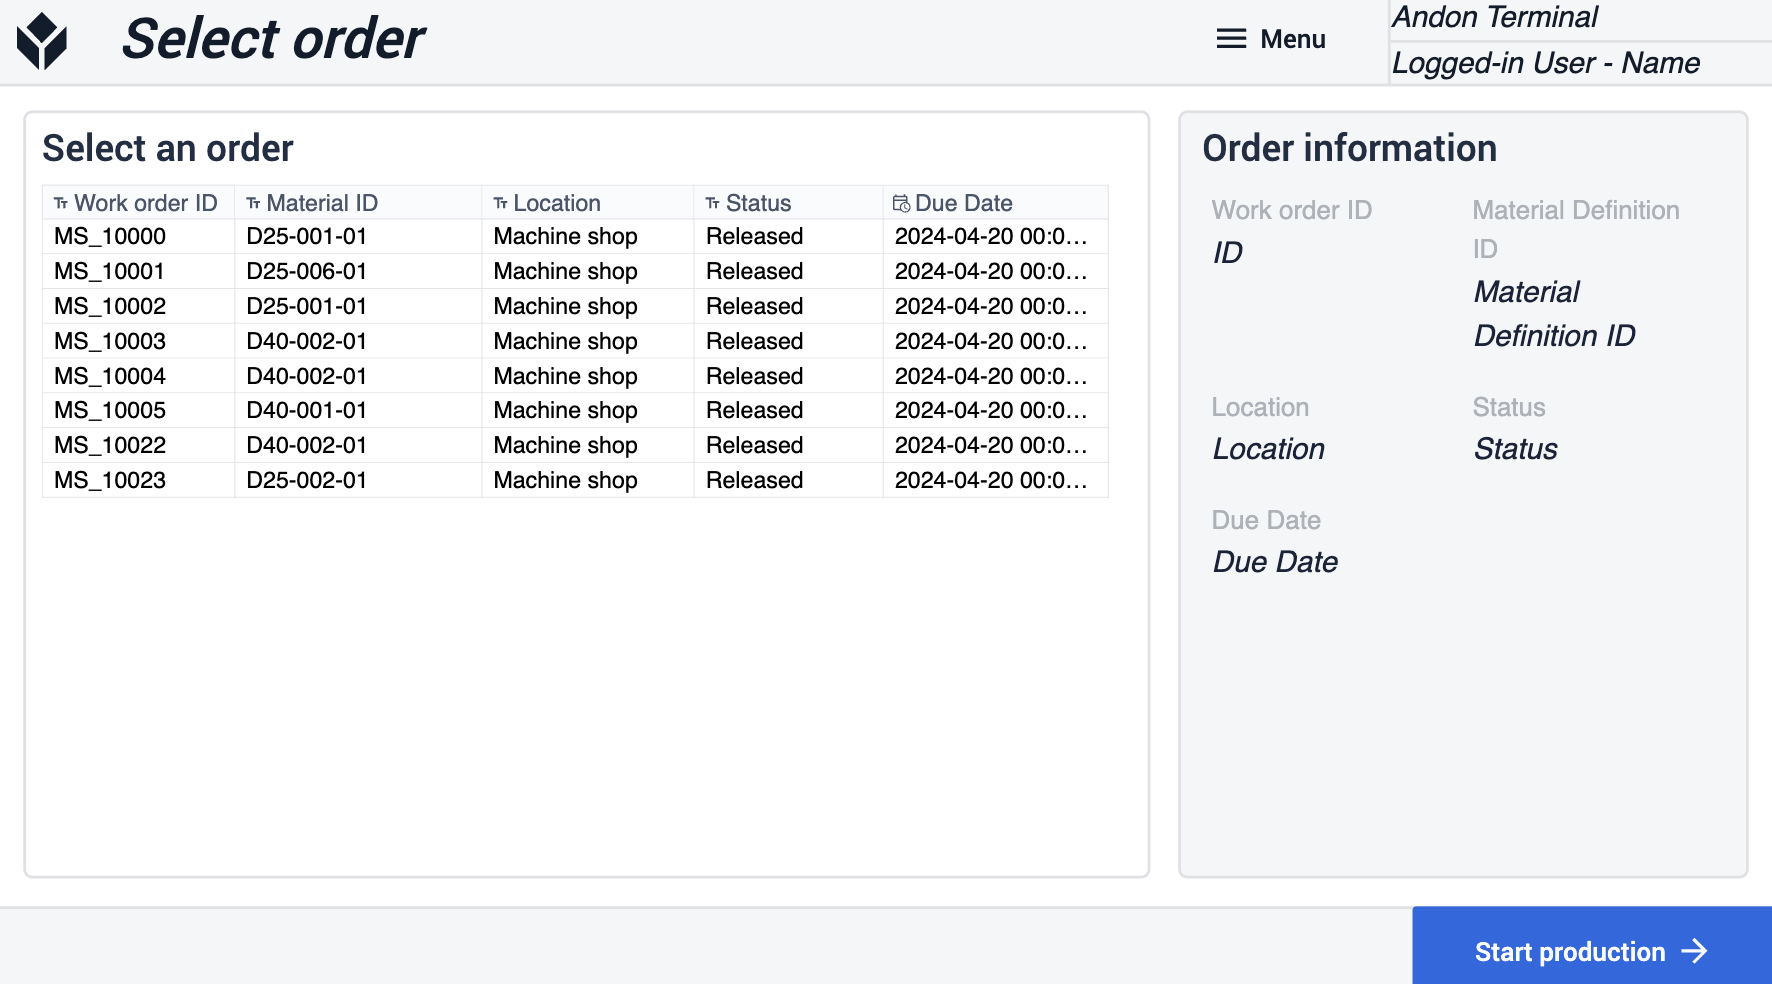
Select Order
This step will allow you to select work orders to begin production. See details on the types of your orders that are in production as well as where they are.
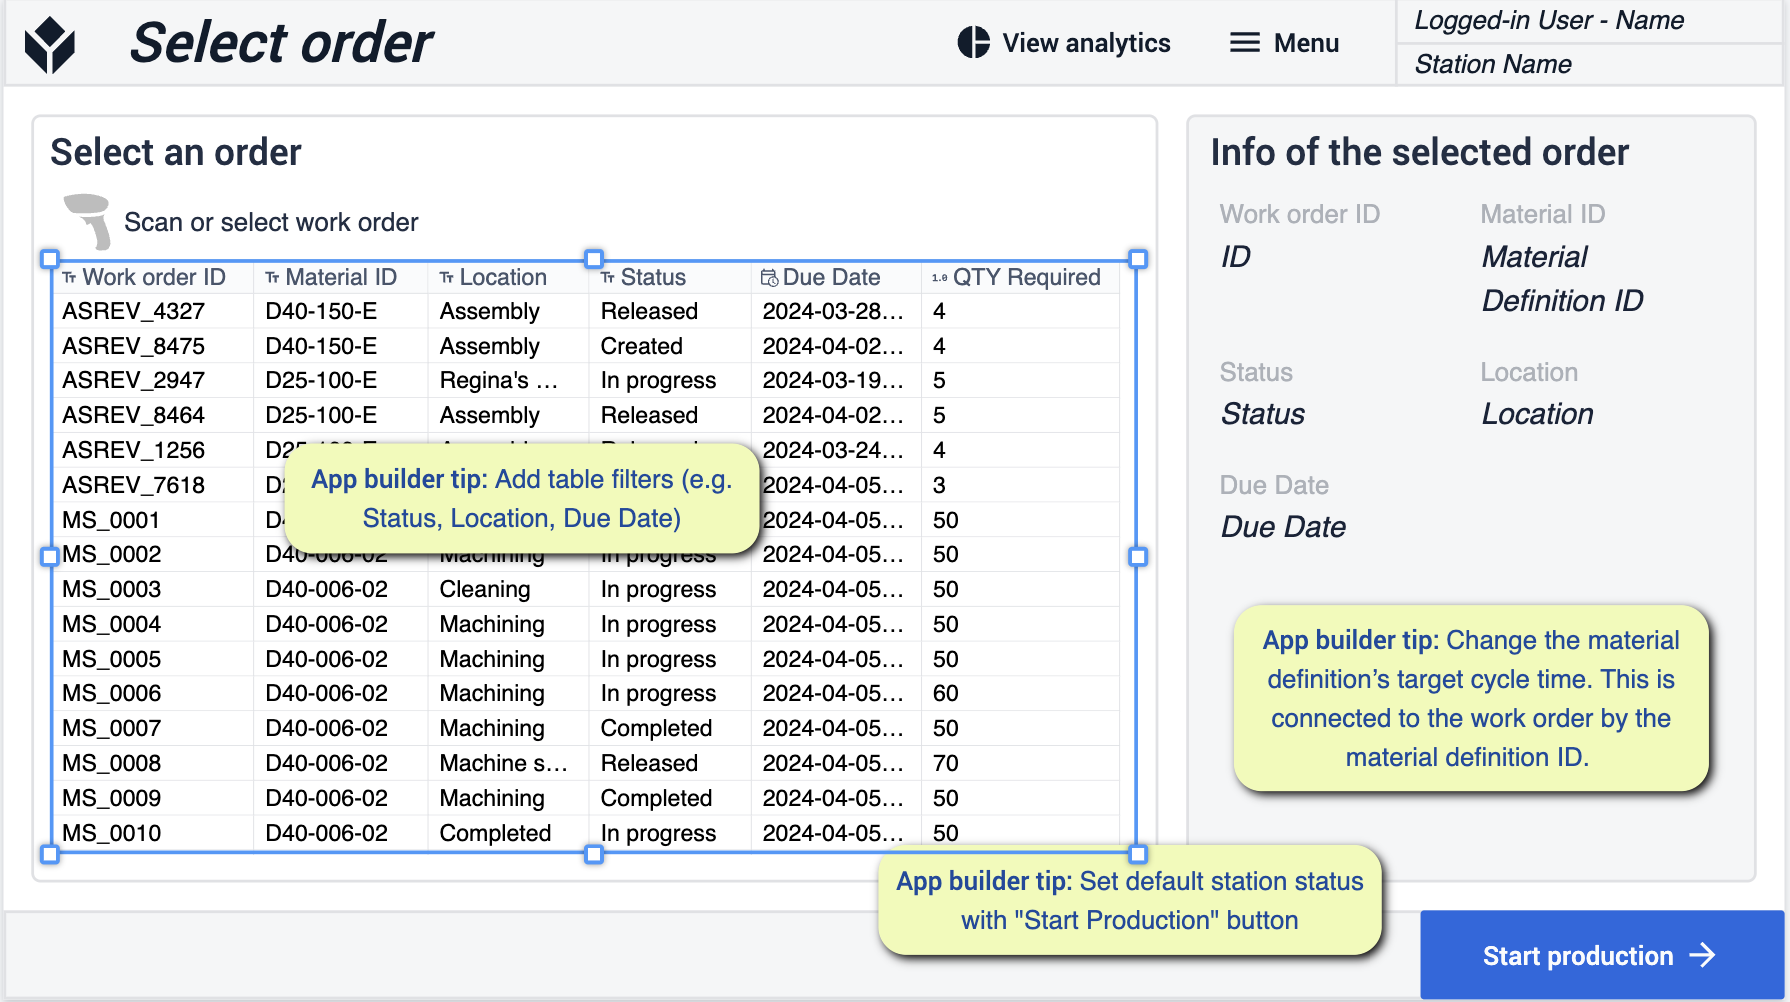
- Similar to the work order selection before you will make changes to your table as needed. Pay attention to particular changes around Material Definition and the Station Status.
Main
This step is meant to help you display the status of the specific station you are working from. As well as help capture good vs defective parts.
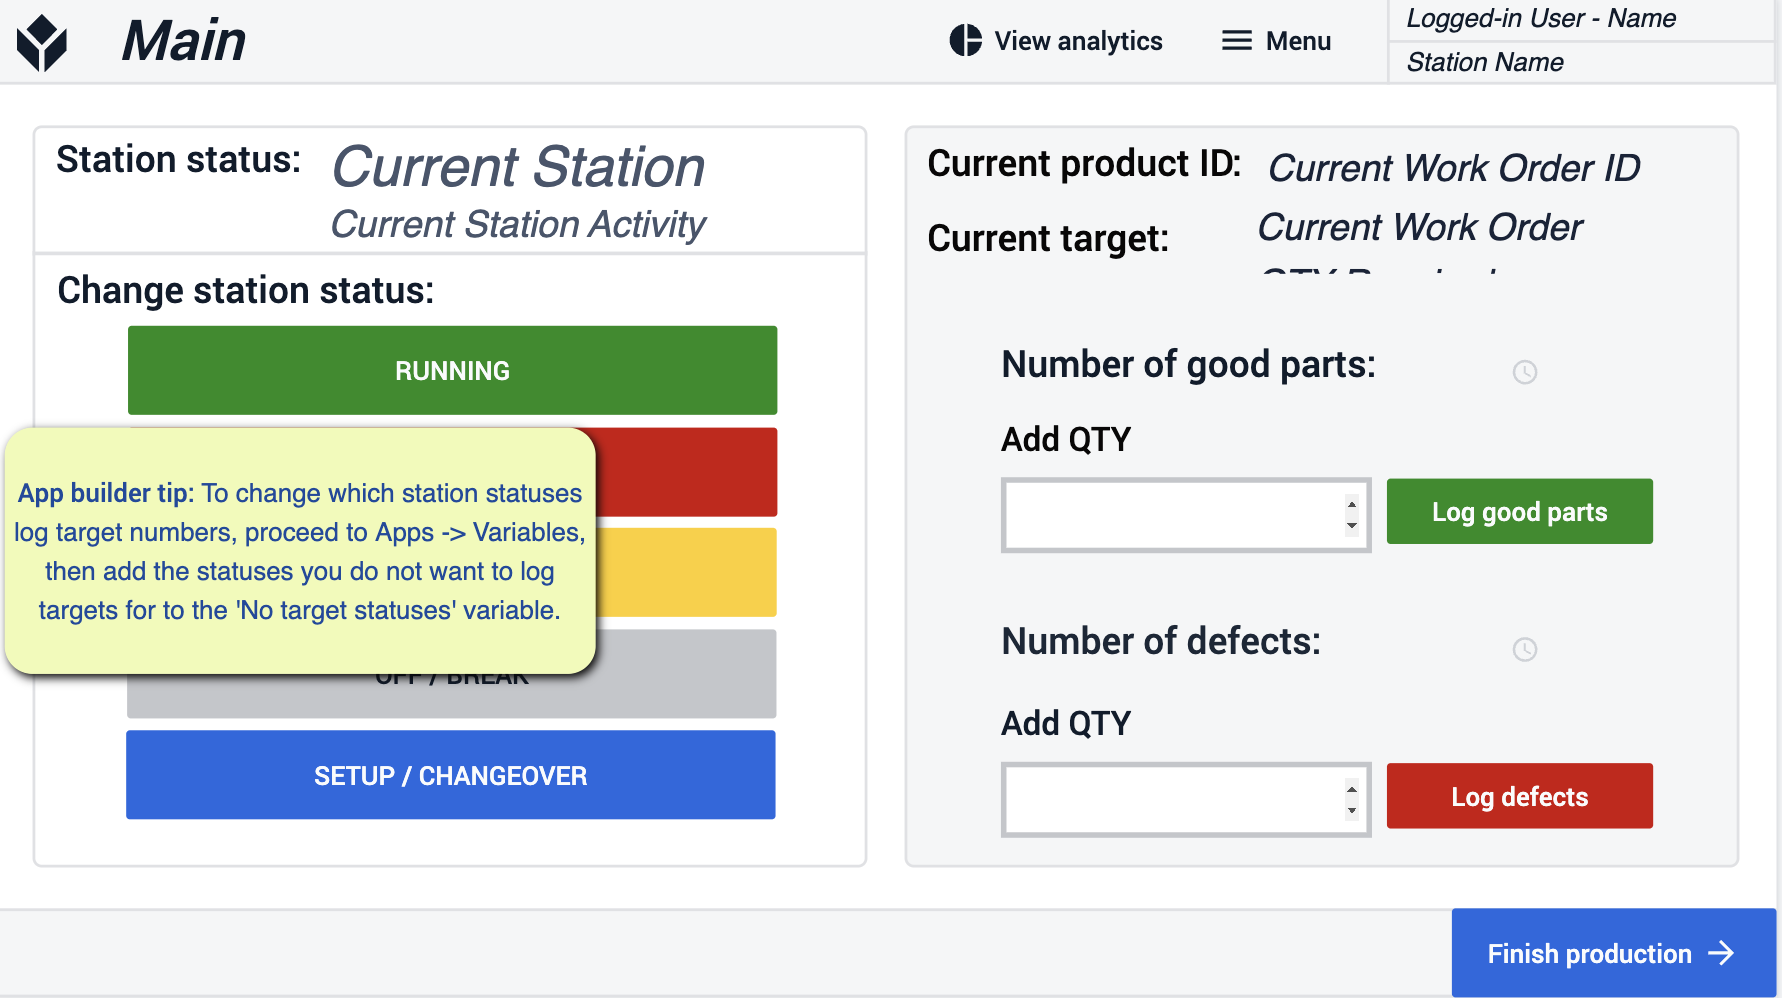
- Make sure to follow the steps labeled to display the correct station statues.
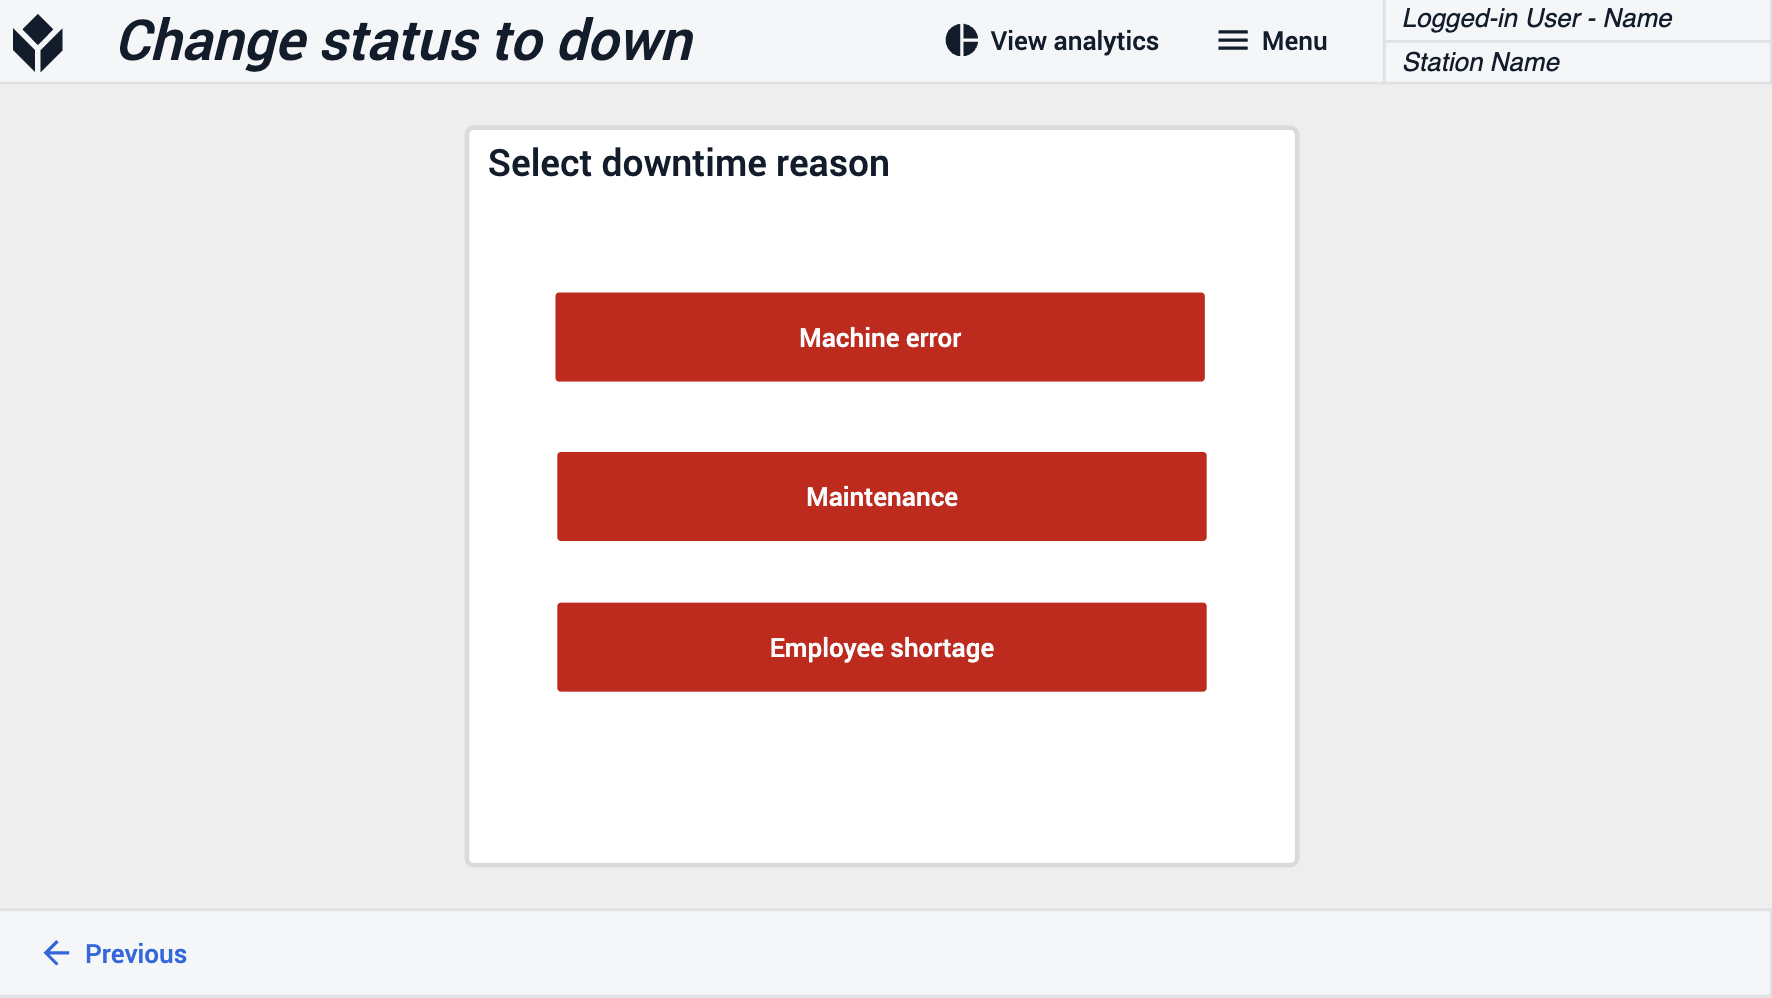
Change Status to down
You will be able to select downtime reasons based on why a machine would be down. Set the reasons that make sense to your operations.
Analytics
See detailed information for the performance of your machines for the specific day or week.
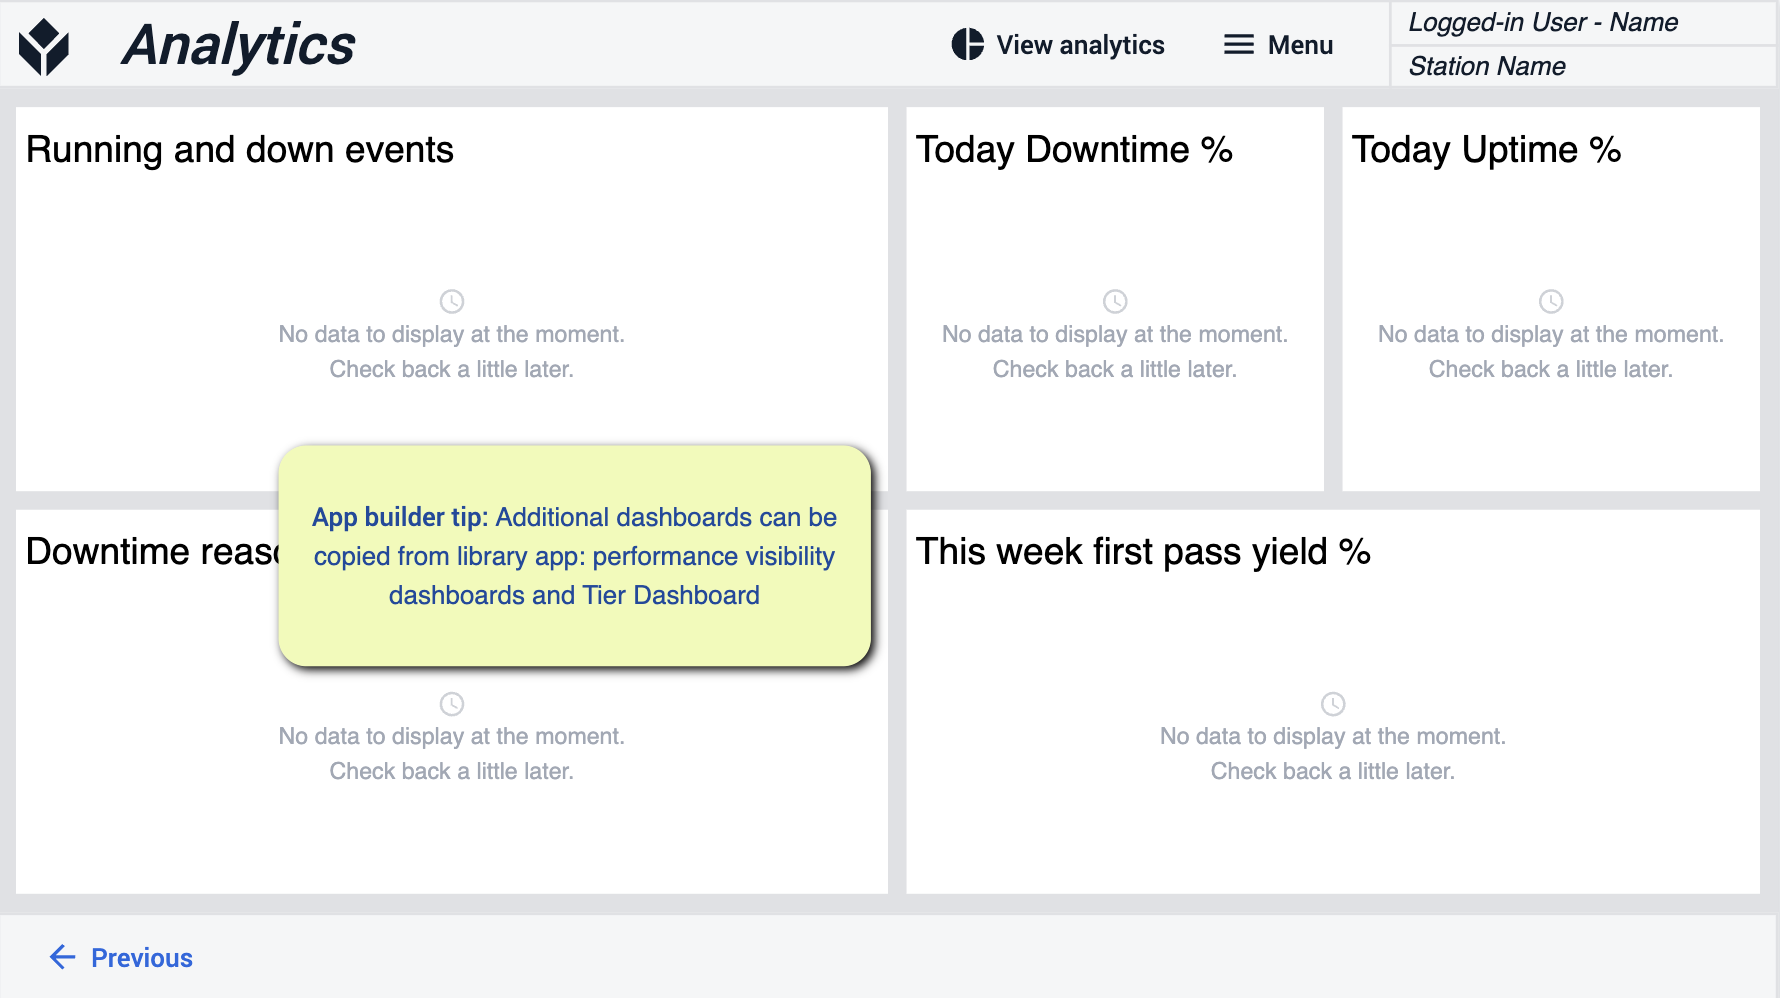
- If you would like to have an extra variety of views you can always add more from the library
Andon Terminal
The Andon app allows you to view and select open orders, execution of orders, and creation of downtime events if needed. Once an order is executed, it can be marked as closed.
Select Order
Main Page
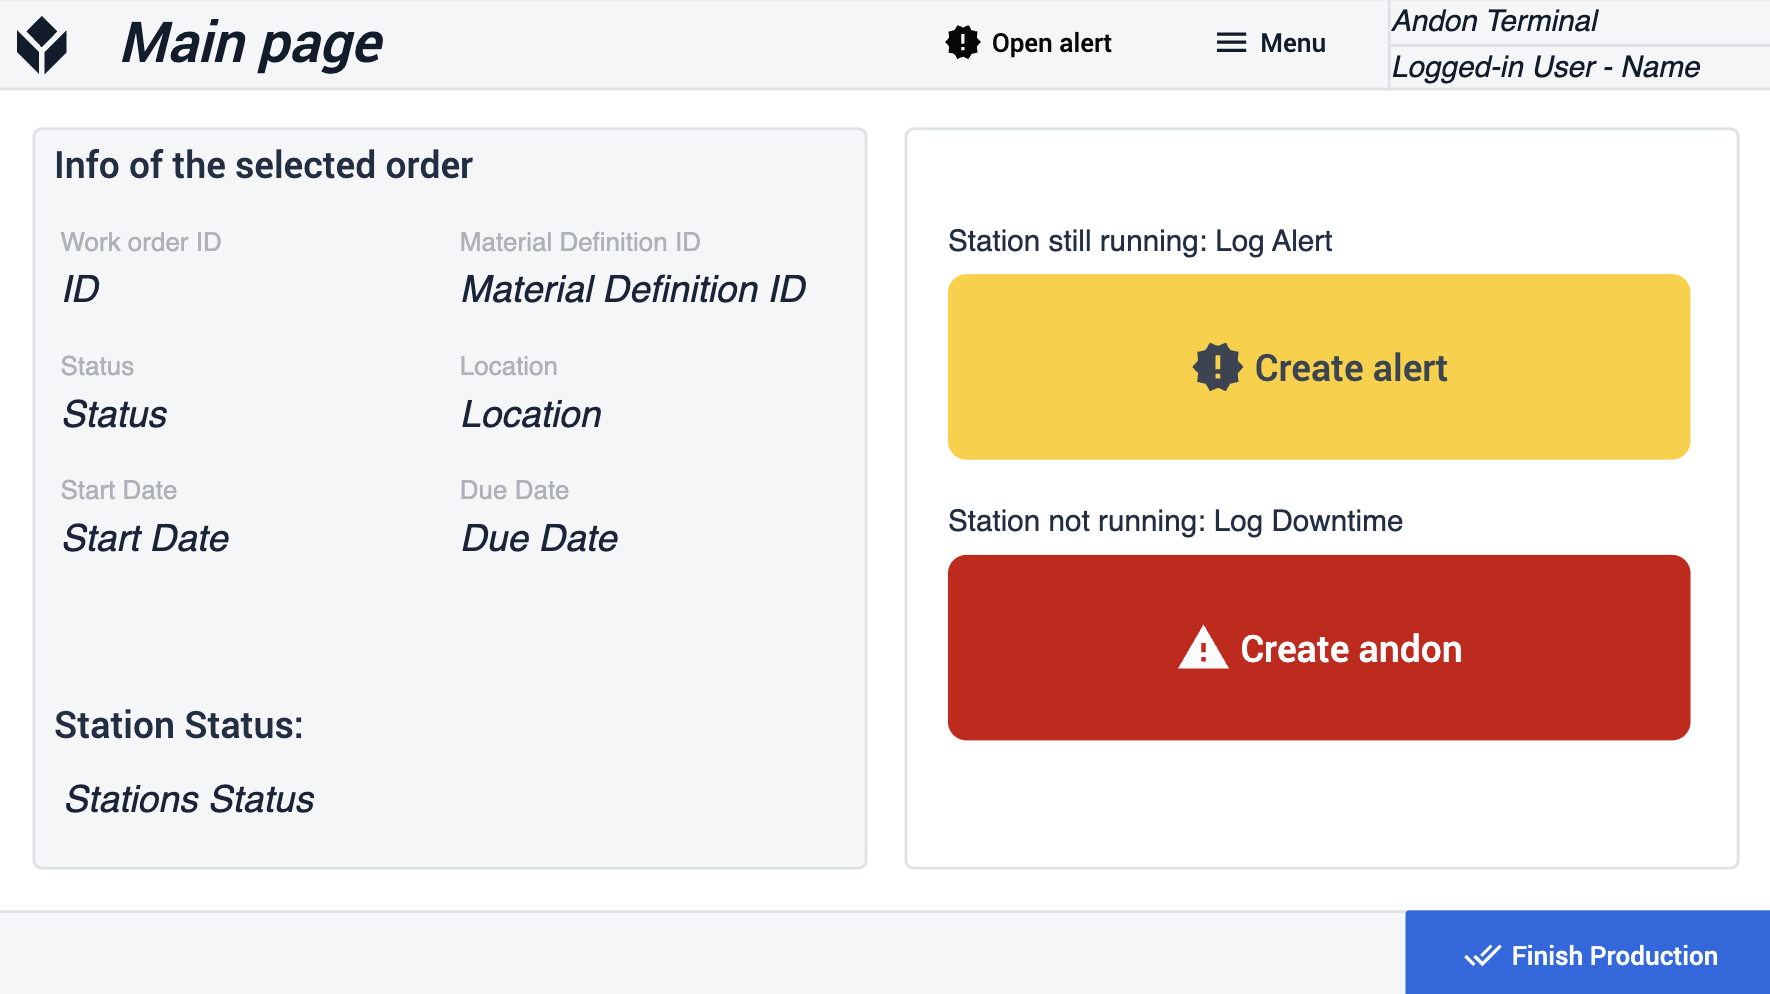
Andon
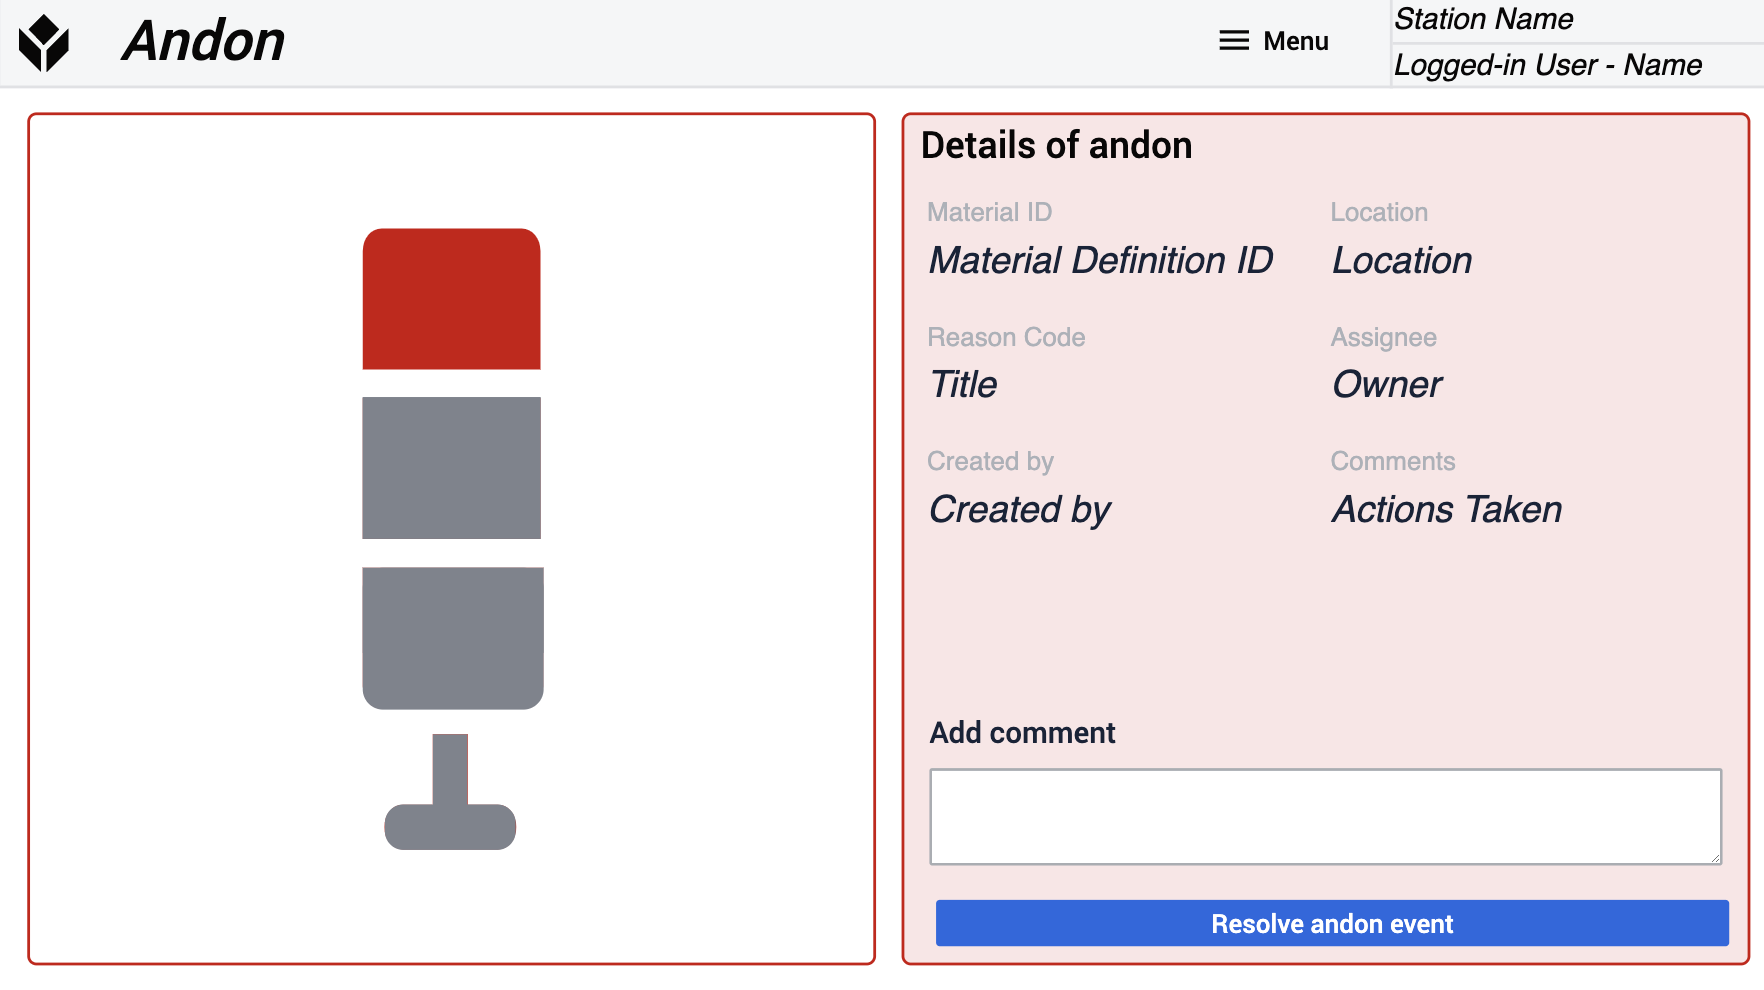
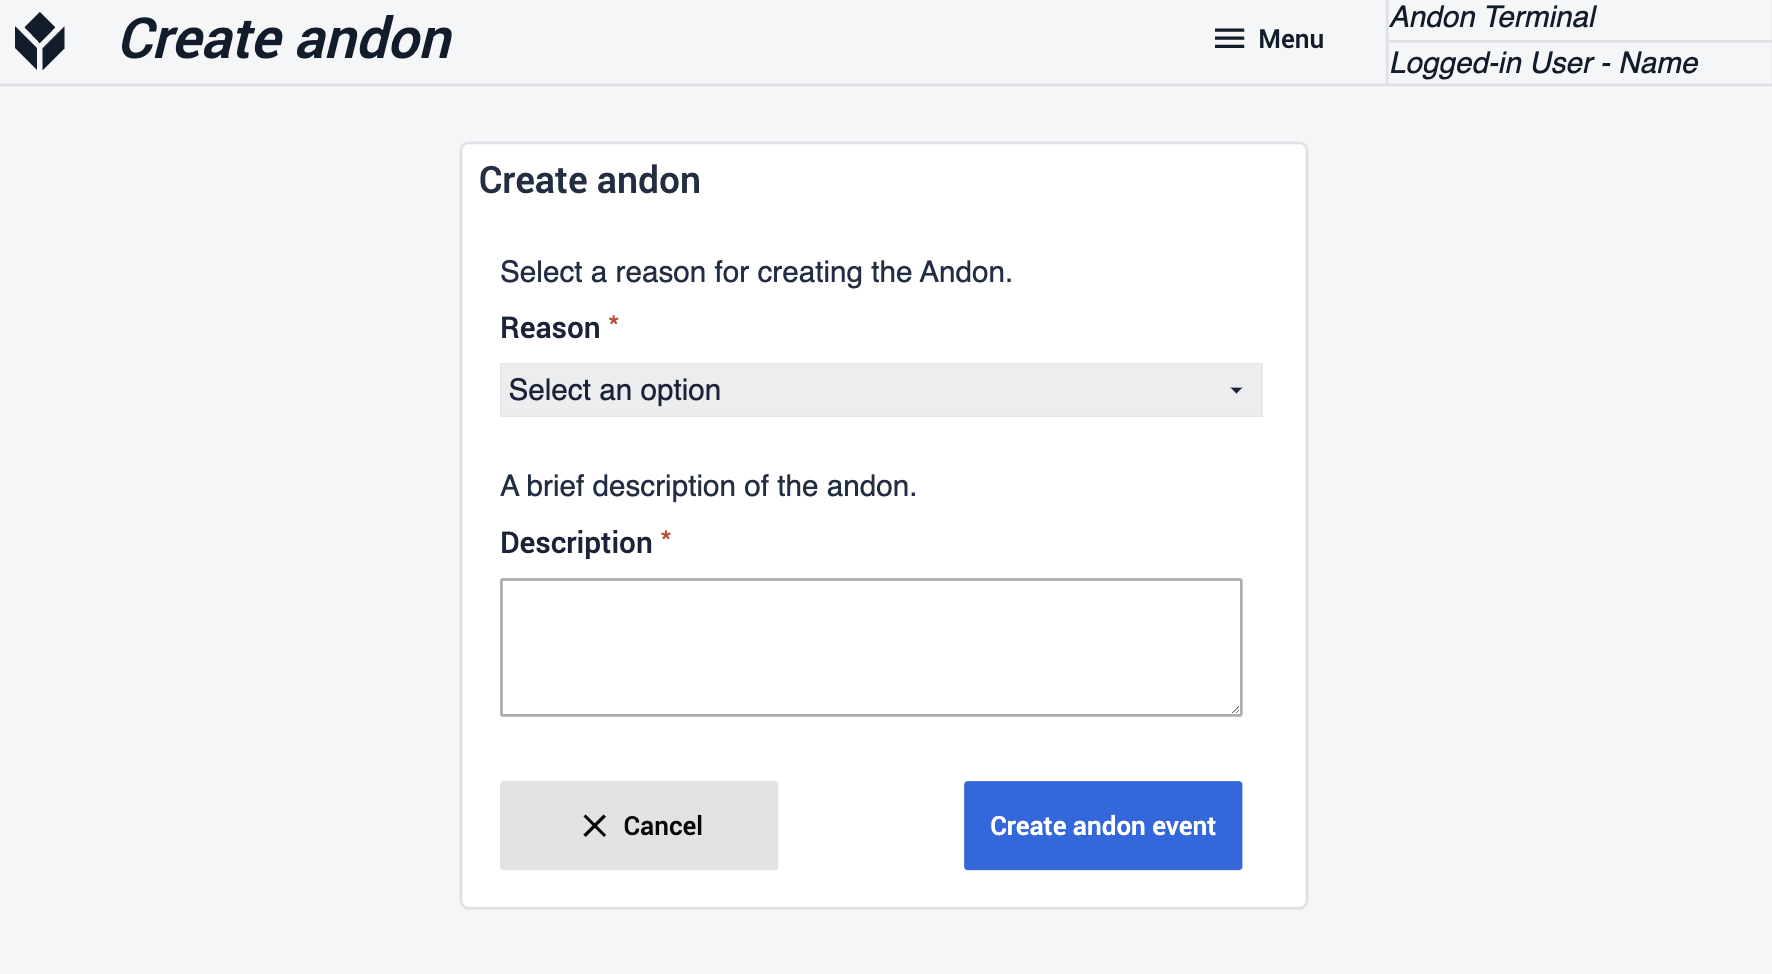
Create Andon
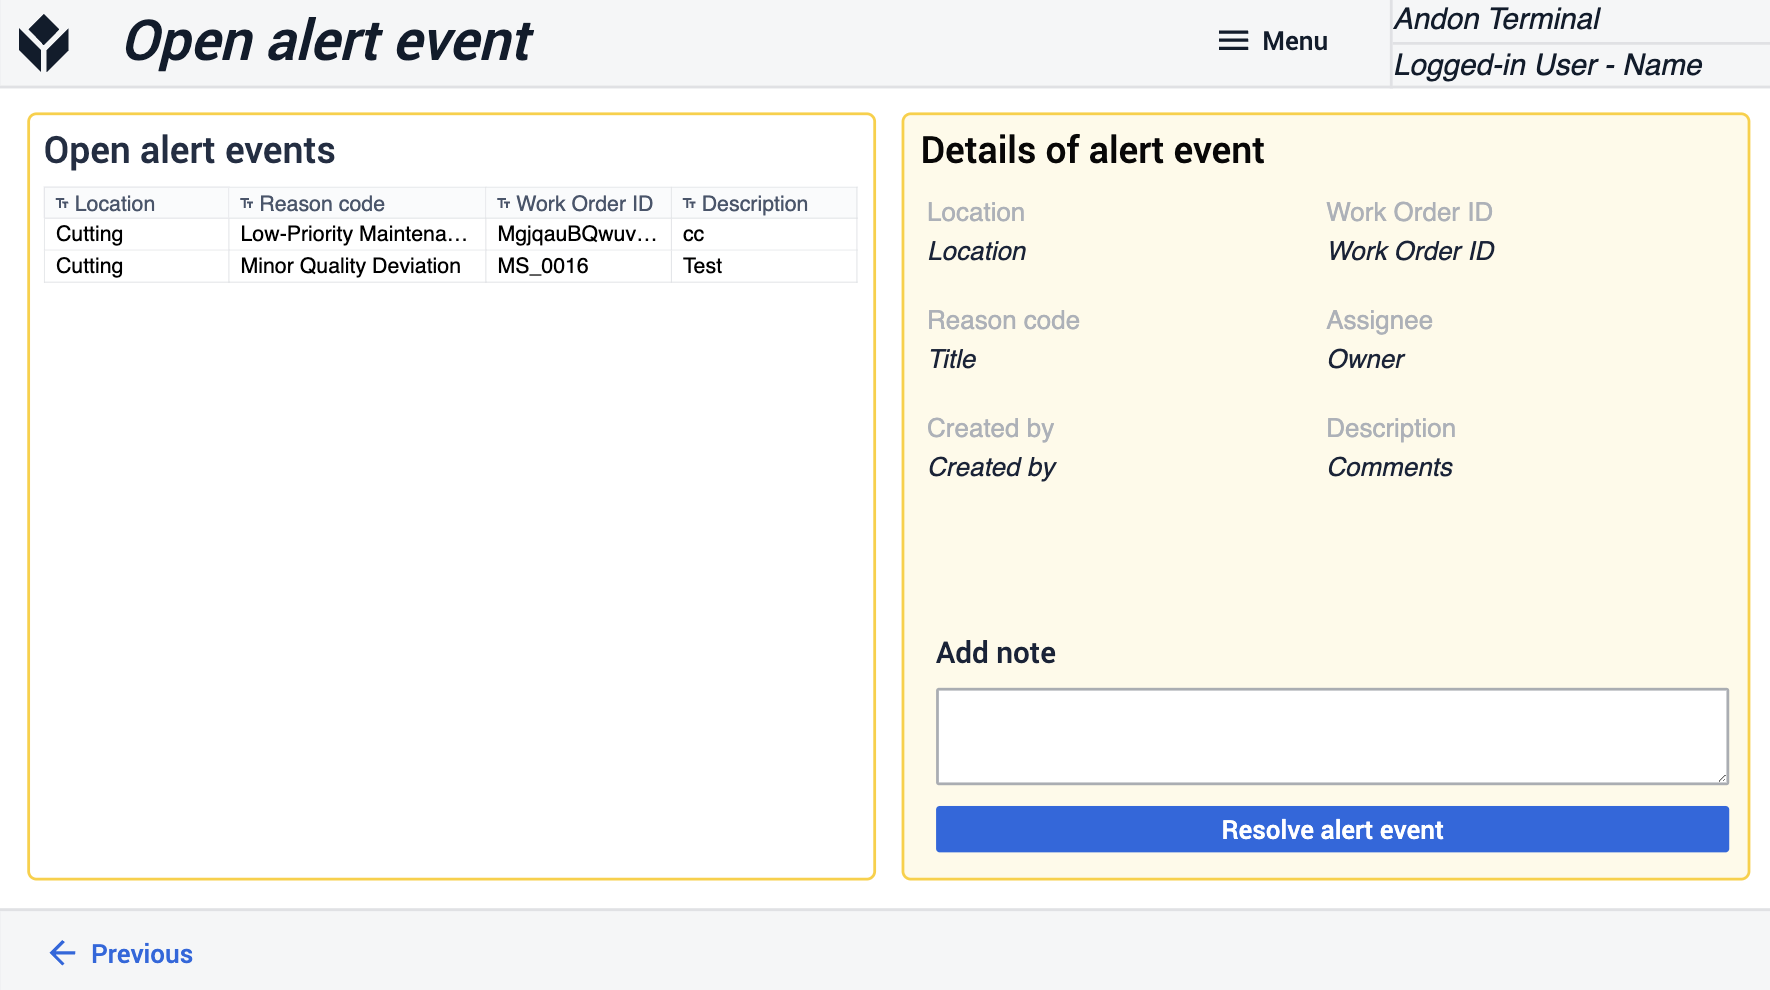
Open Alert Event
Performance Visibility Dashboard
This Dashboard is used for overseeing the data that is captured on the floor. Maximize your uptime by tracking first-pass yield , CycleTime, and Pareto Charts.
Operations Management Dashboard
The purpose of this app is to provide a deeper dive into key metrics such as performance, quality, safety, and availability. You will gain much more insight into your operations.
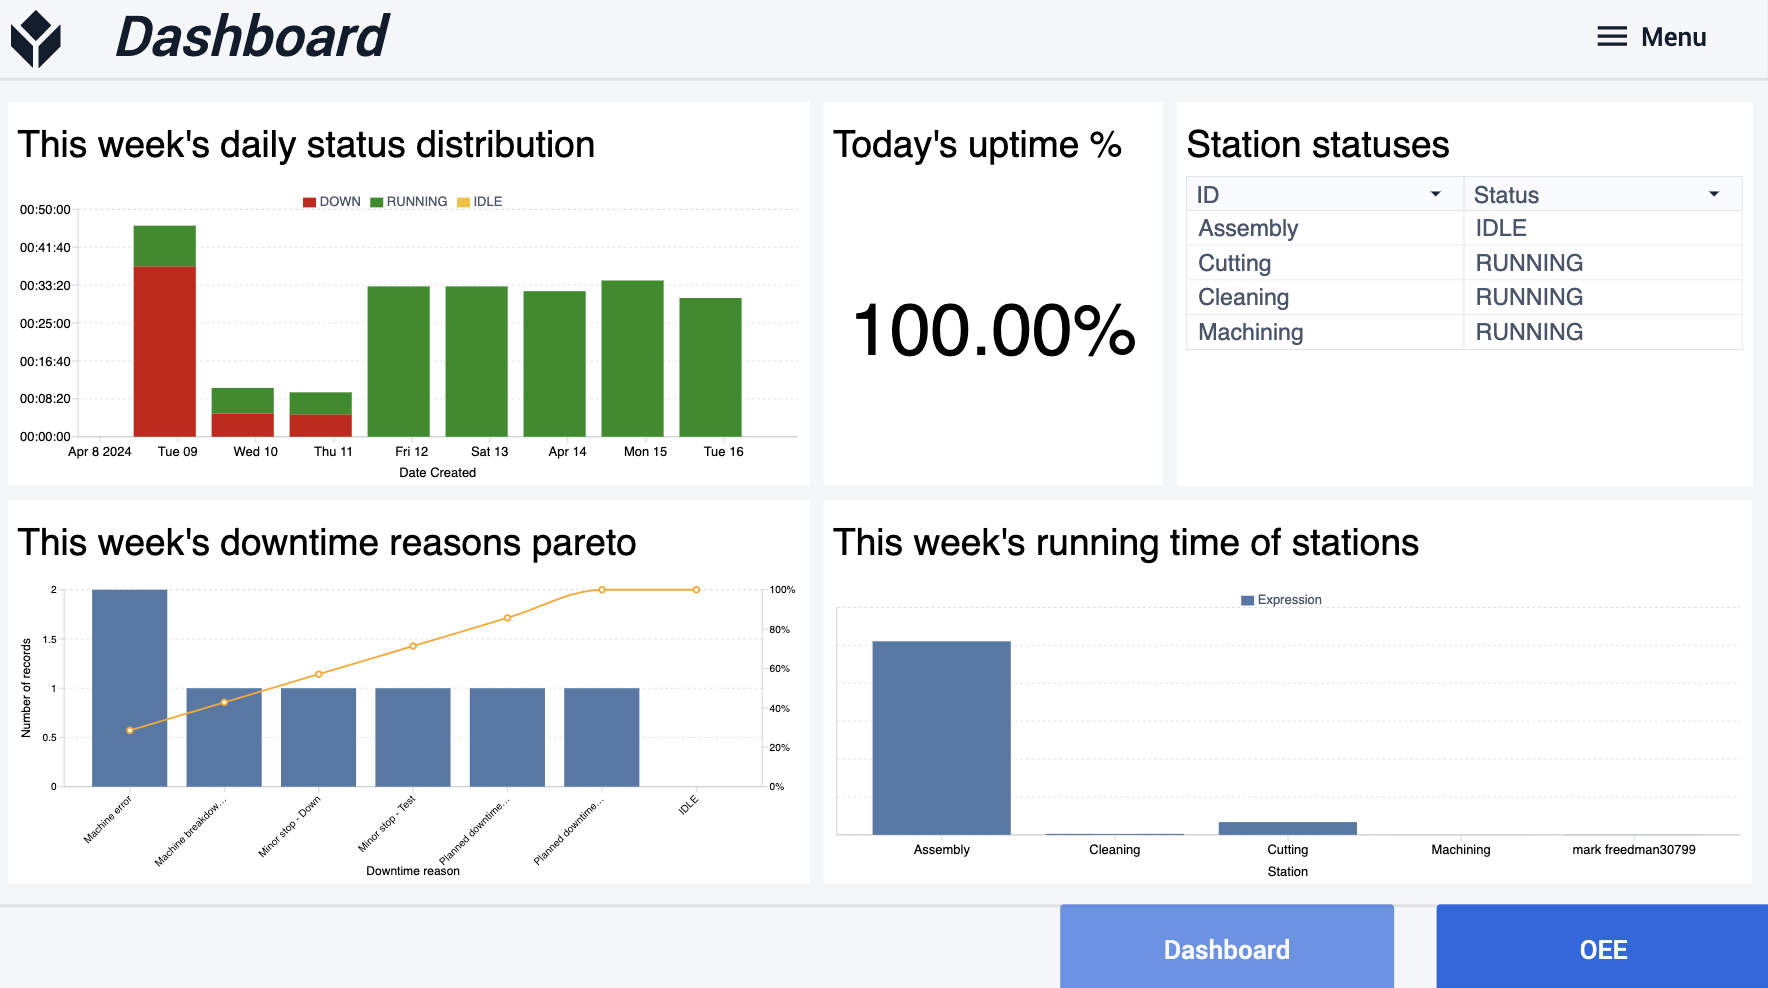
Dashboard
Here you will have a dashboard view for some of your key floor metrics. Having solid metrics allows for you to focus on areas that might need more attention.
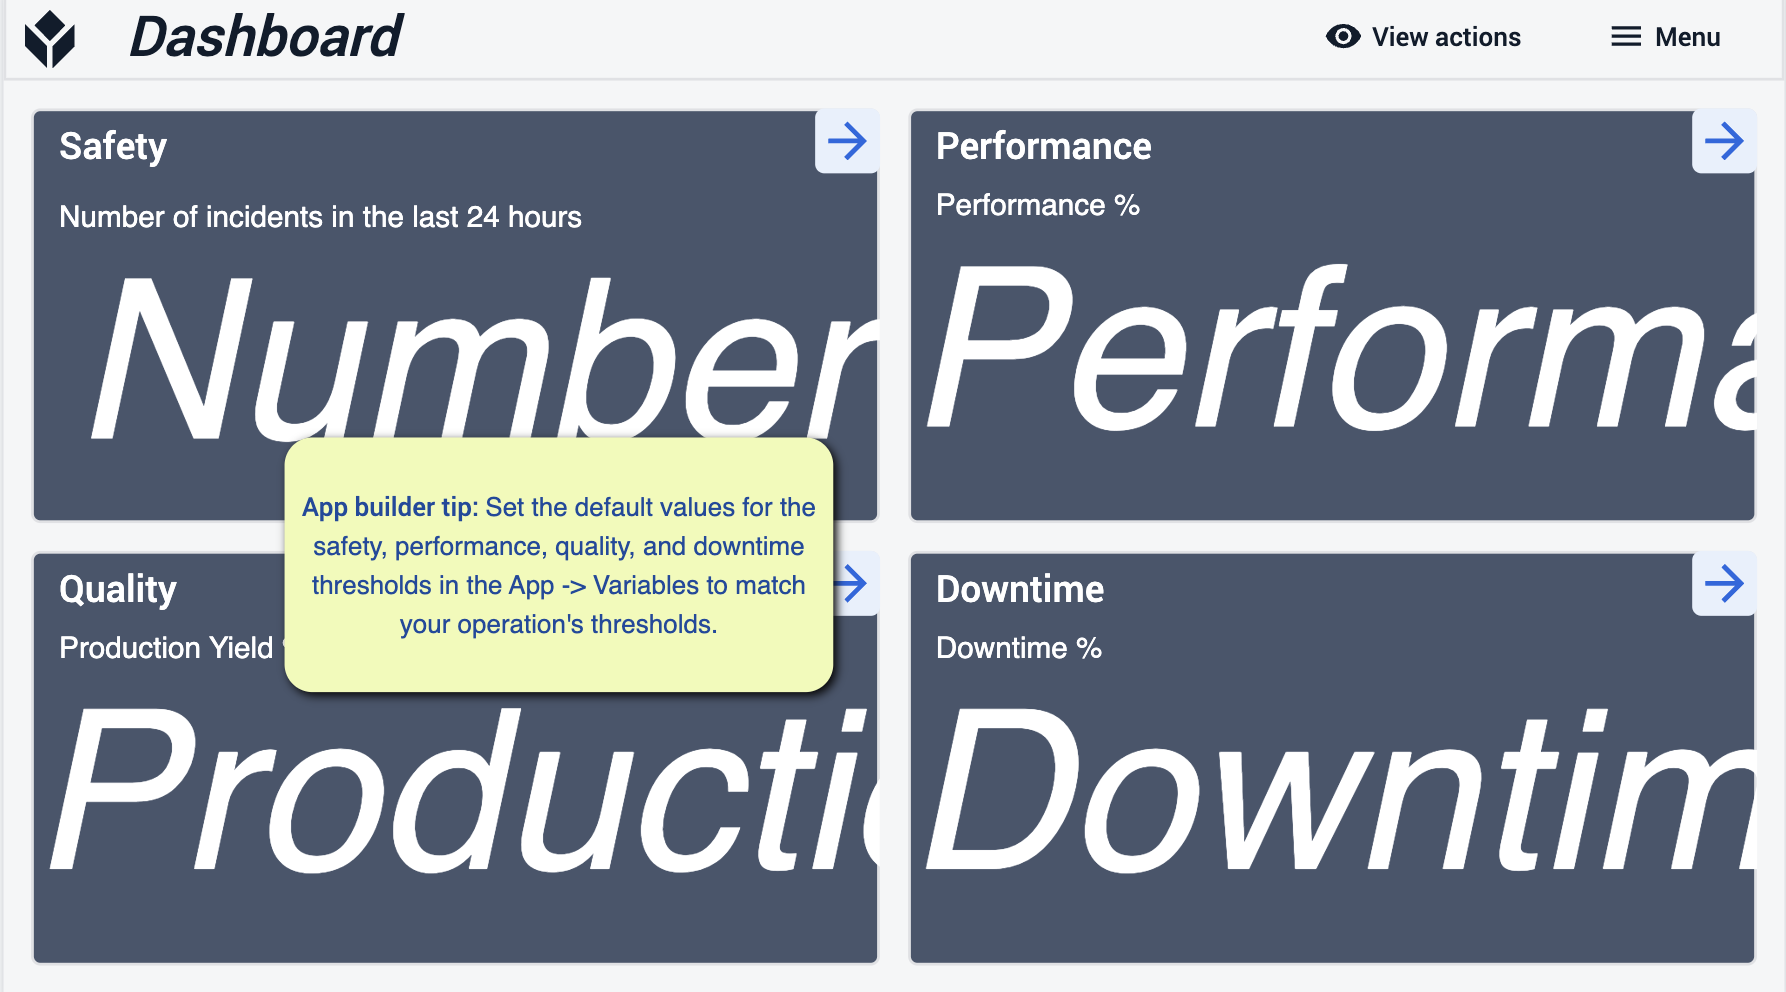
Make sure to set default values for all these metrics so they match your operations.
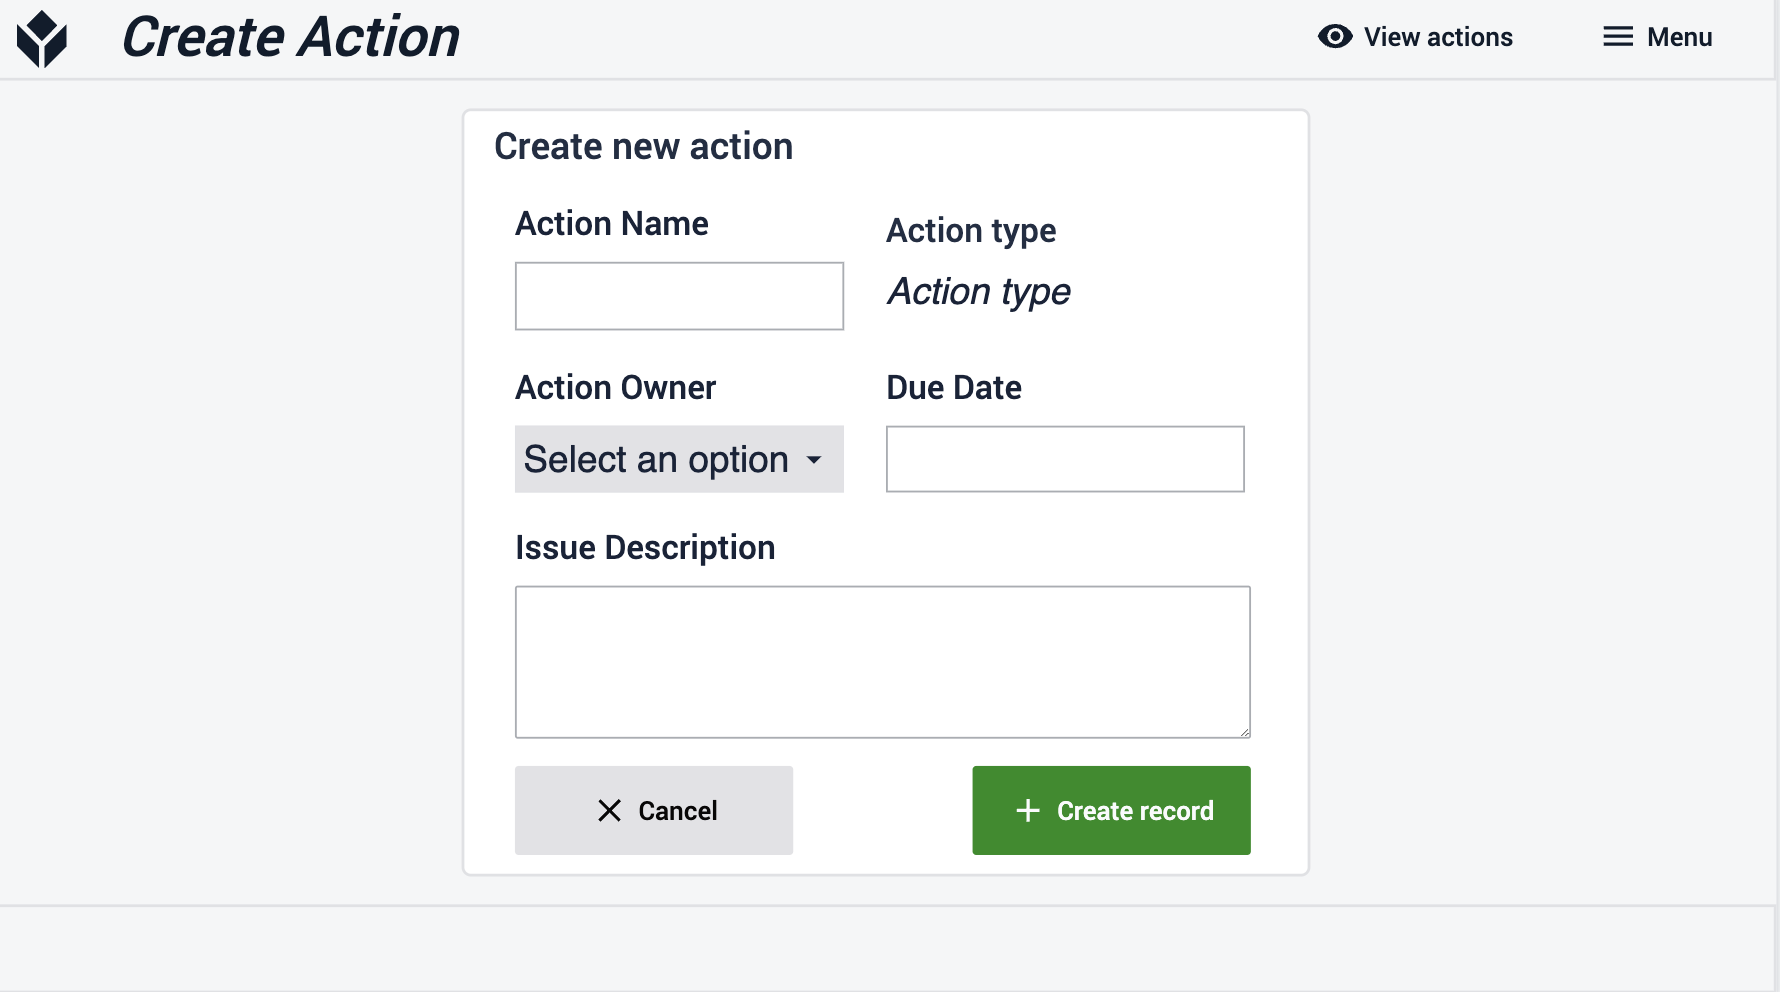
Create Action
Here create a new record for actions involving downtime reasons for you to keep track of new issues as they arrive.
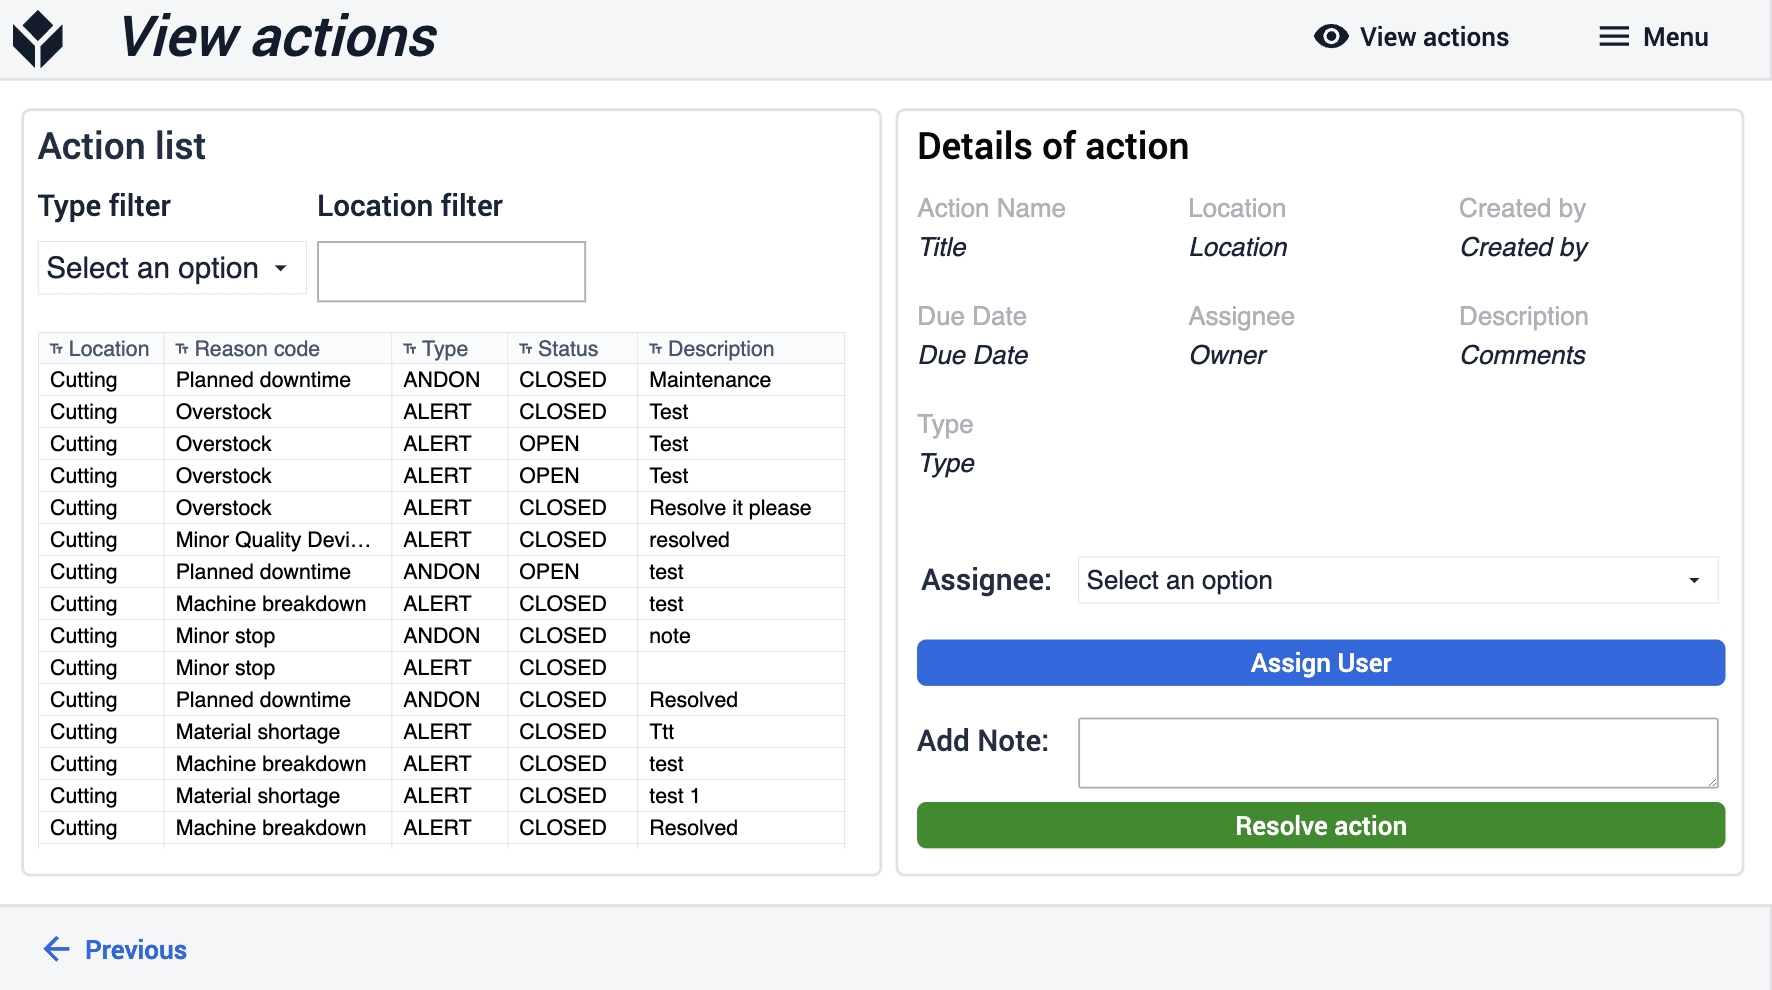
View Actions
Here you will have visibility for both open and closed actions, this will allow you to always review where these tasks are coming from.
Review and Ship
The Review and Ship app allows you to process the review and approve the shipment of final products. This app provides visibility into work order details and management of shipping details, like final reviewal and label processing. The Review and Ship app works together with the rest of the apps in the Production Management App Suite.
View Work Orders
Take a look at your work orders before shipping them out. Gain visibility into the history of the order as it went through production.
- Optional changes to this step focus around changing table filters and statuses.
Packaging Label
You will be able to select work orders that are ready for shipment. Print the appropriate labels to keep track of history even after departure.
Readiness
When going through the app suite it's important to make sure that you follow the App Builder Tips. These tips will be your guide to preparing your applications for deployment. It’ll be important to reference the prerequisites and make sure that you followed both the Required Steps and App Builder Tips within each step.
