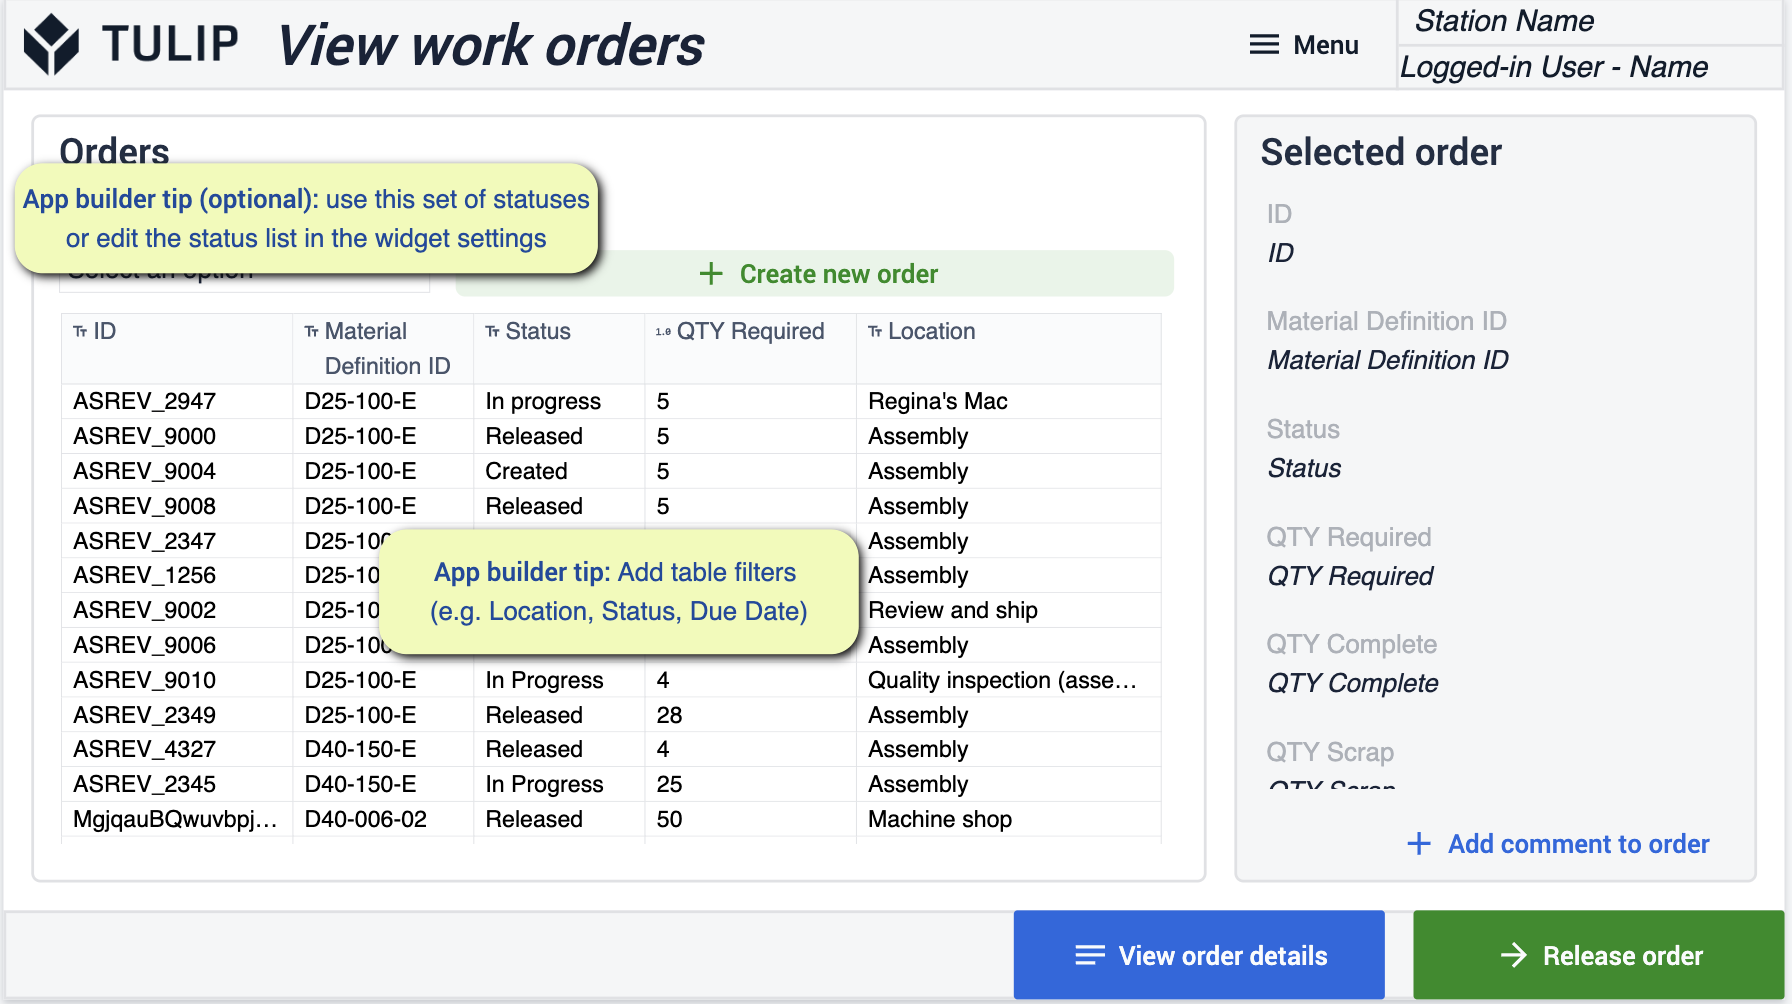
Pakiet aplikacji Inventory pozwala zarządzać kompleksowym przepływem zapasów w operacjach. Dzięki możliwości zarządzania przepływem zapasów będziesz w stanie usprawnić proces zamawiania, aby zoptymalizować przepływ materiałów.
Wymagania wstępne
W tym pakiecie aplikacji znajduje się wiele wskazówek dla twórców aplikacji. 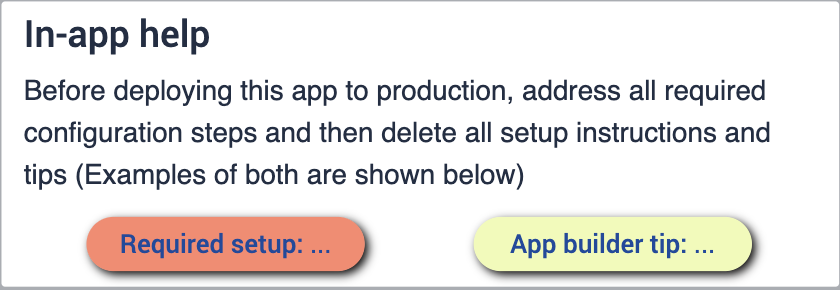
Zanim będziesz mógł skonfigurować pakiet aplikacji, upewnij się, że znasz następujące umiejętności:
- Podstawowe tworzenie aplikacji
- Tabele Tulip (w tym edytowanie pól, używanie filtrów i symboli zastępczych rekordów)
Wdrażanie
Upewnij się, że dobrze rozumiesz, jak wdrożyć te aplikacje na wybranych urządzeniachi jak uruchomić je na stacji. Ważne jest, aby zrozumieć przepływ swojej działalności. Posiadanie diagramu hali produkcyjnej pozwoli ci lepiej zrozumieć, gdzie chcesz, aby twoje aplikacje działały podczas całego procesu.
Połączone tabele
Tabele, których będziesz używać w tym pakiecie aplikacji, będą używane i połączone w różnych aplikacjach. Pozwala to na łatwiejsze korzystanie z aplikacji przez użytkowników, a także na tworzenie sieci tabel, które mogą być wykorzystywane przy tworzeniu przyszłych aplikacji. Dowiedz się więcej o tym, jak tabele zminimalizują redundancję i zmaksymalizują kompatybilność dzięki wykorzystaniu wspólnego modelu danych.
Zapoznaj się ze wspólnymi tabelami tulipanów używanymi w cMES.
Pobieranie
Kliknij łącze do pakietu Inventory App Suite. Spowoduje to przejście do strony biblioteki, na której można dodać aplikację do swojej instancji. 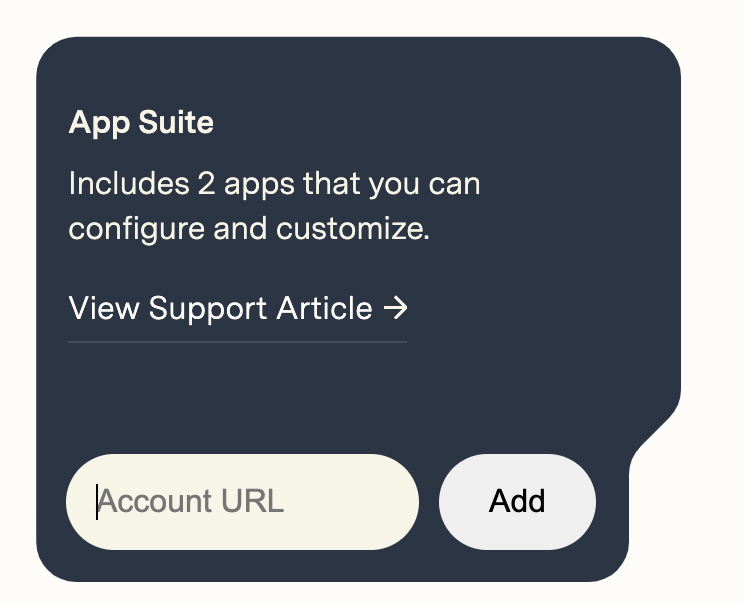
Po dodaniu App Suite w instancji pojawi się folder zatytułowany Inventory. Umożliwi on wyświetlenie wszystkich aplikacji znajdujących się w pakiecie.
Inventory Material Systems
Ten pakiet aplikacji koncentruje się na poprawie przepływu materiałów i maksymalizacji zapasów w procesie montażu. Zapewnia lepszy wgląd w to, dokąd trafiają materiały w celu zwiększenia dokładności zapasów.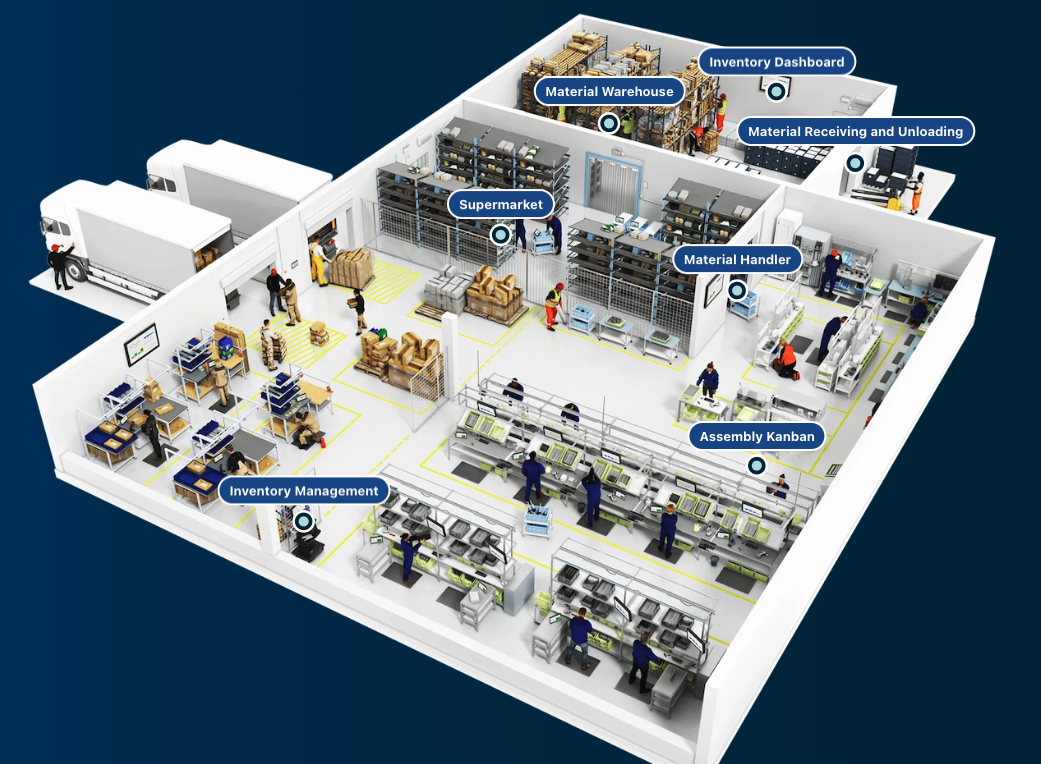
Konfiguracja aplikacji
While configuring applications, any changes made to tables need to be made across all applications for connectivity.
Żądanie materiałów
Ta aplikacja pozwala usprawnić tworzenie formularzy zapotrzebowania na materiały.
Żądanie materiałów
Na tym etapie będziesz mógł poprosić o materiały, których potrzebujesz, wybierając je.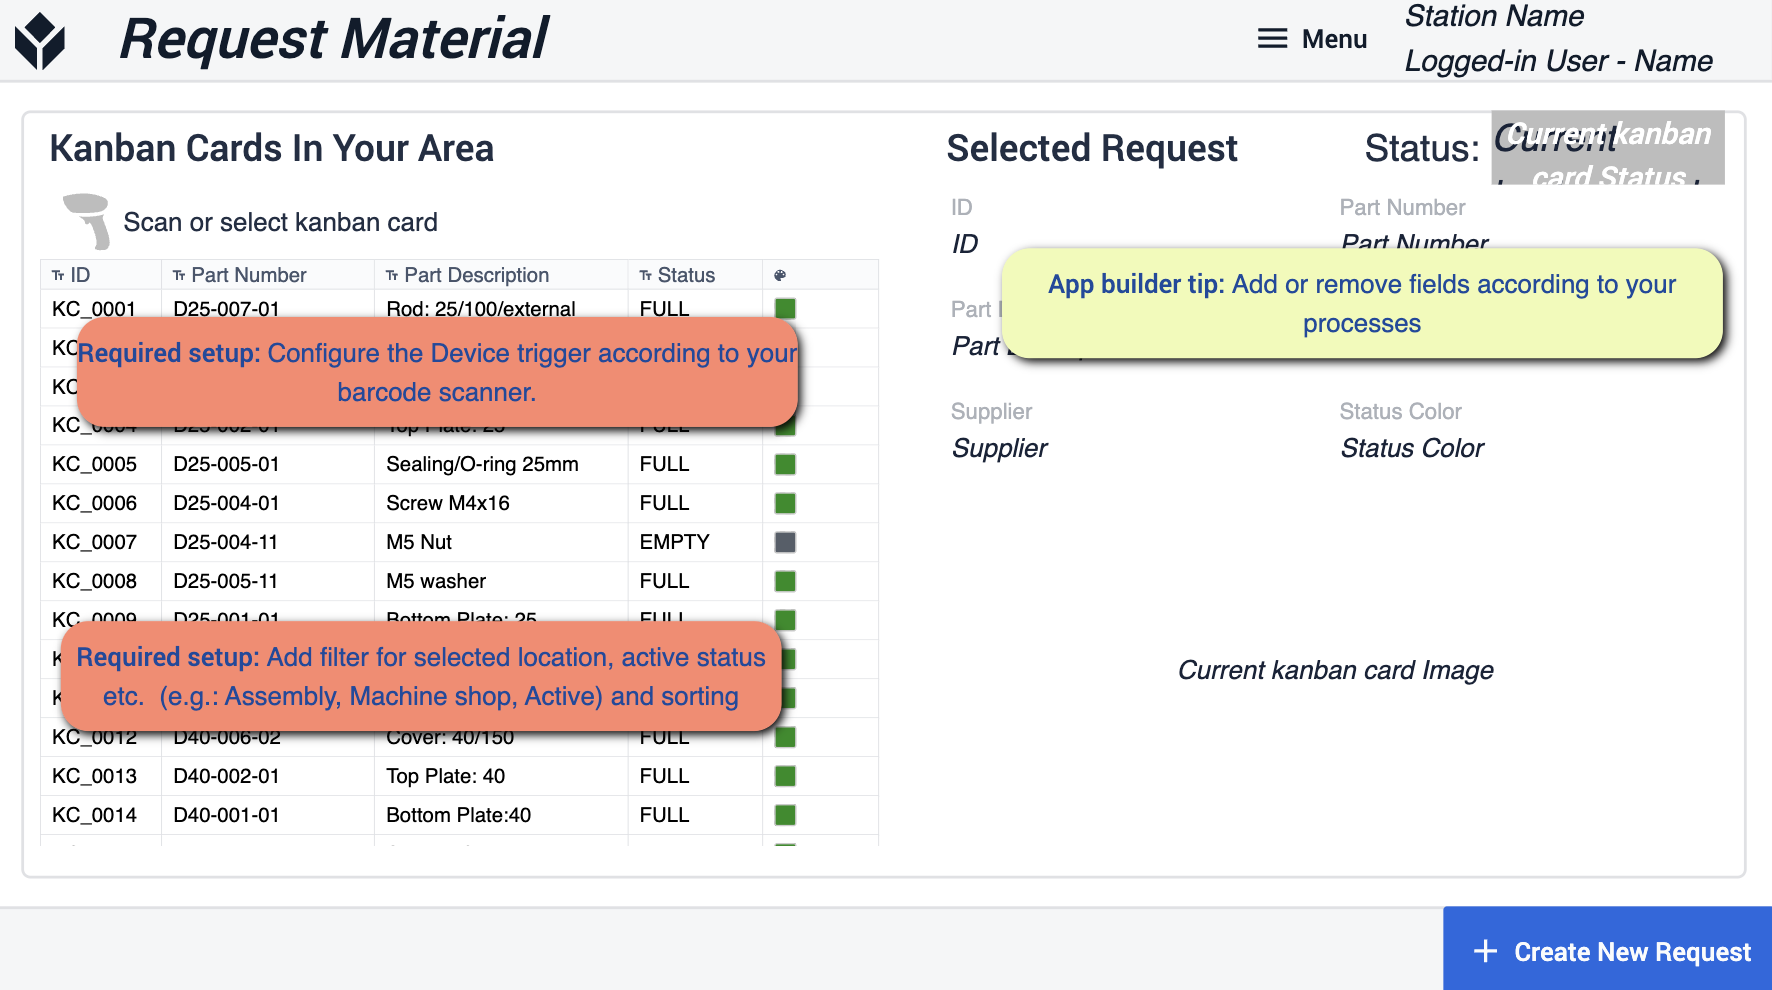 {height="300" width=""}* Wskazówki dotyczące tworzenia aplikacji koncentrują się na dodawaniu filtrów dla wybranej lokalizacji i aktywnych statusów. Konieczne będzie skonfigurowanie używanego urządzenia do skanera kodów kreskowych. W razie potrzeby możesz usunąć niektóre pola, aby dopasować je do swojego procesu.
Potwierdzenie
Na tym etapie otrzymasz widok swojego żądania przed jego utworzeniem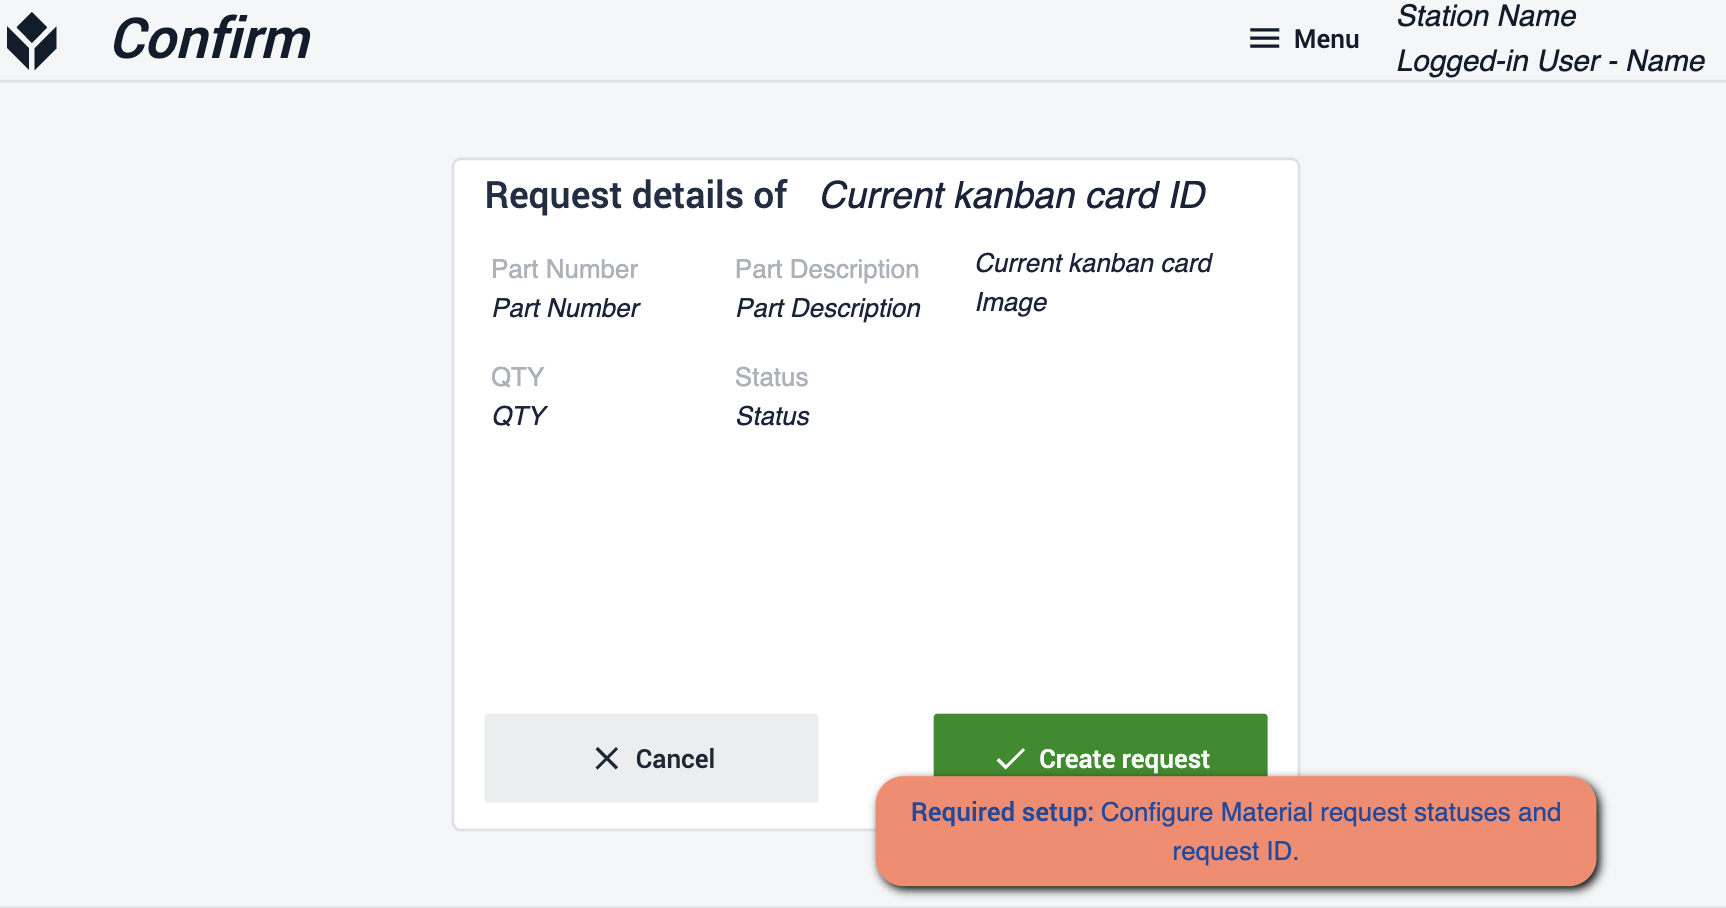 {height="300" width=""}* Tutaj będziesz chciał upewnić się, że skonfigurowałeś statusy żądań materiałowych i identyfikator żądania. Pozwoli to upewnić się, że żądanie trafi tam, gdzie faktycznie powinno.
Panel zapasów
Ten pulpit nawigacyjny ma na celu zapewnienie pełnego zakresu operacji. Co dzieje się w każdej lokalizacji w ramach procesu i gdzie przemieszczają się materiały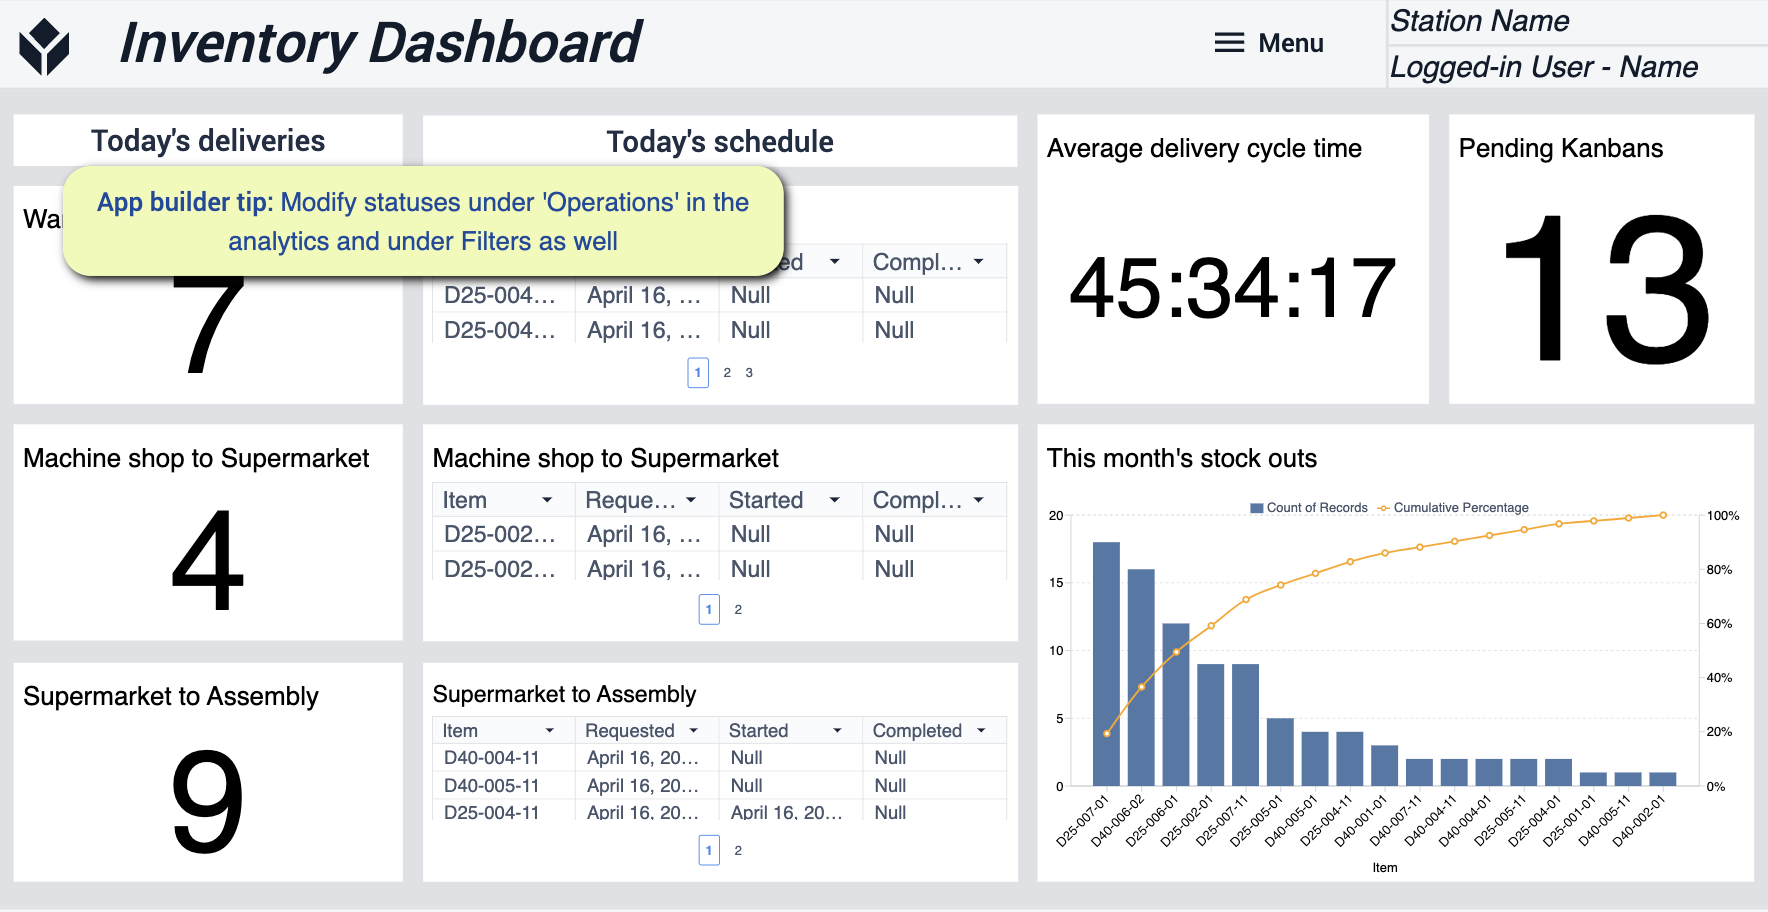 {height="300" width=""}* W przypadku tej aplikacji należy zmodyfikować statusy w sekcji "Operacje", aby upewnić się, że analizy odpowiadają potrzebom.
Załadunek i odbiór materiałów
Celem tej aplikacji jest pomoc w śledzeniu i obsłudze nowych materiałów, które są odbierane.
Strona główna
Ten ekran ma pomóc w kierowaniu użytkownika do różnych funkcji aplikacji.
Przyjazd ciężarówki
Śledzenie ciężarówek dostarczających materiały. Prowadzenie rejestru tego, co faktycznie otrzymałeś.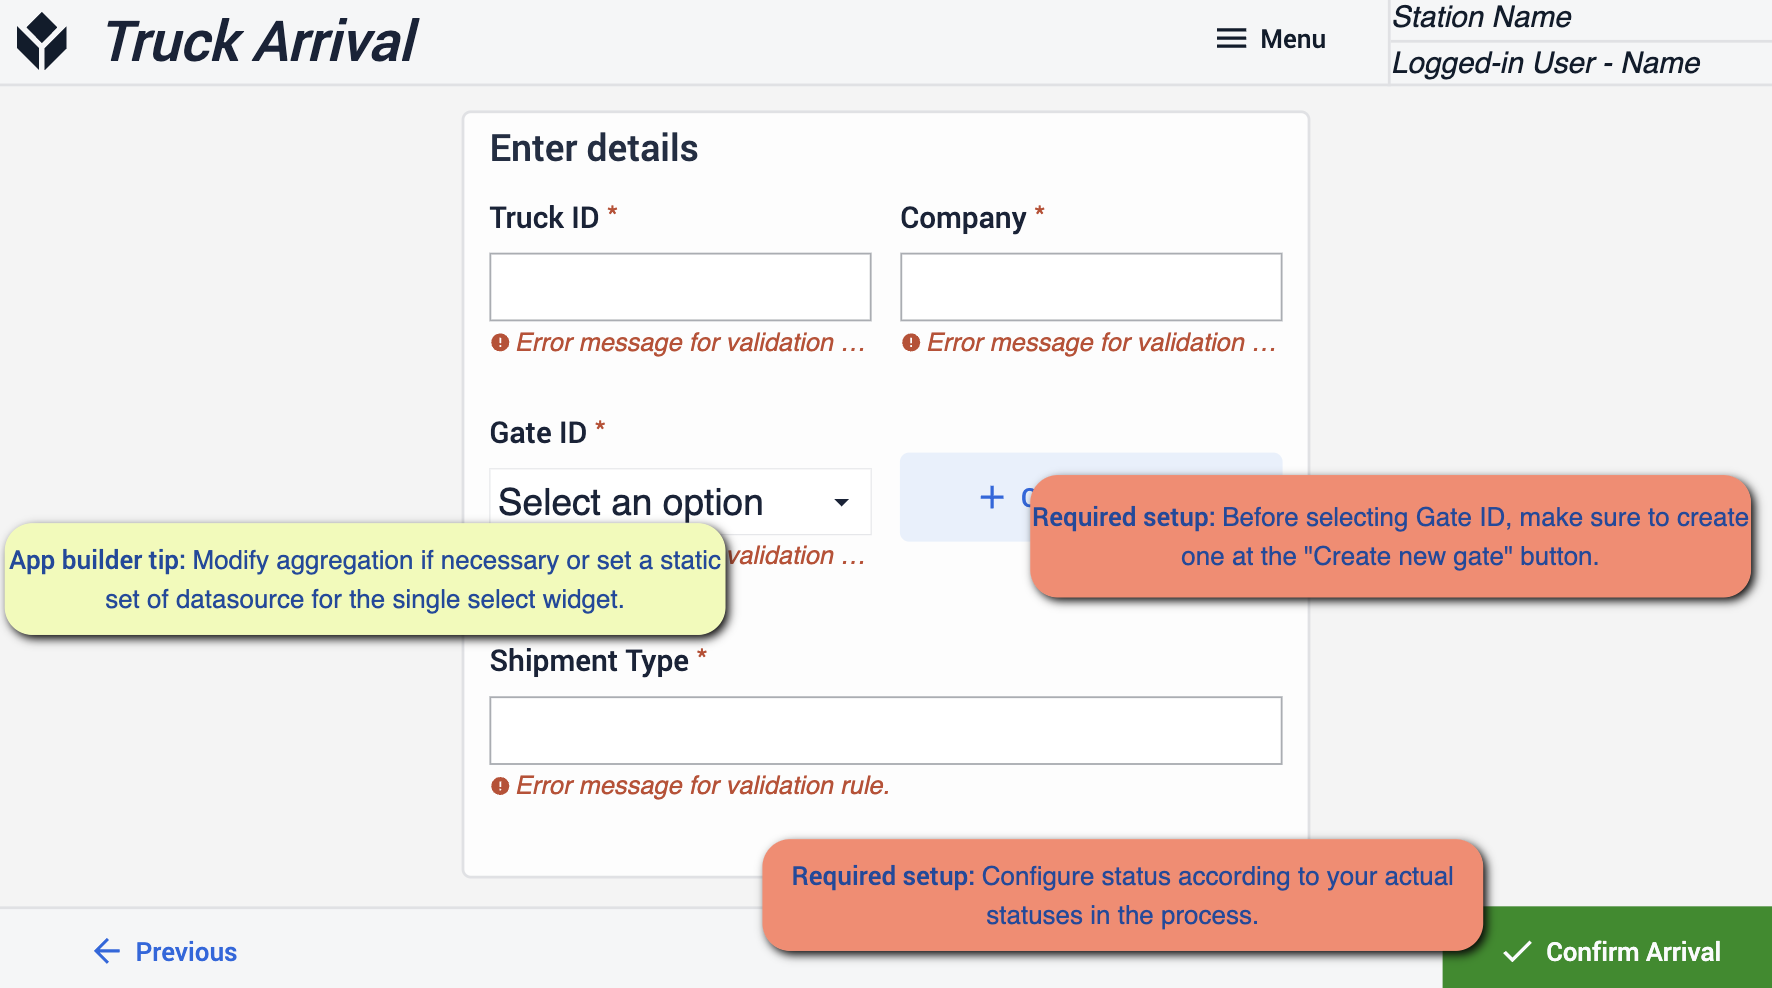 {height="300" width=""}* Jeśli chodzi o ten krok, ważne będzie, aby użyć przycisku "Utwórz nową bramę" przed wybraniem bramy, w ten sposób będziesz mieć bramę do wyboru. Upewnij się, że Twój status odpowiada statusom, które są zaangażowane w Twój proces.
Prześlij obraz
Ten krok ma na celu upewnienie się, że przybycie materiałów zostało zarejestrowane. Zachowaj wizualny dowód przybycia przesyłki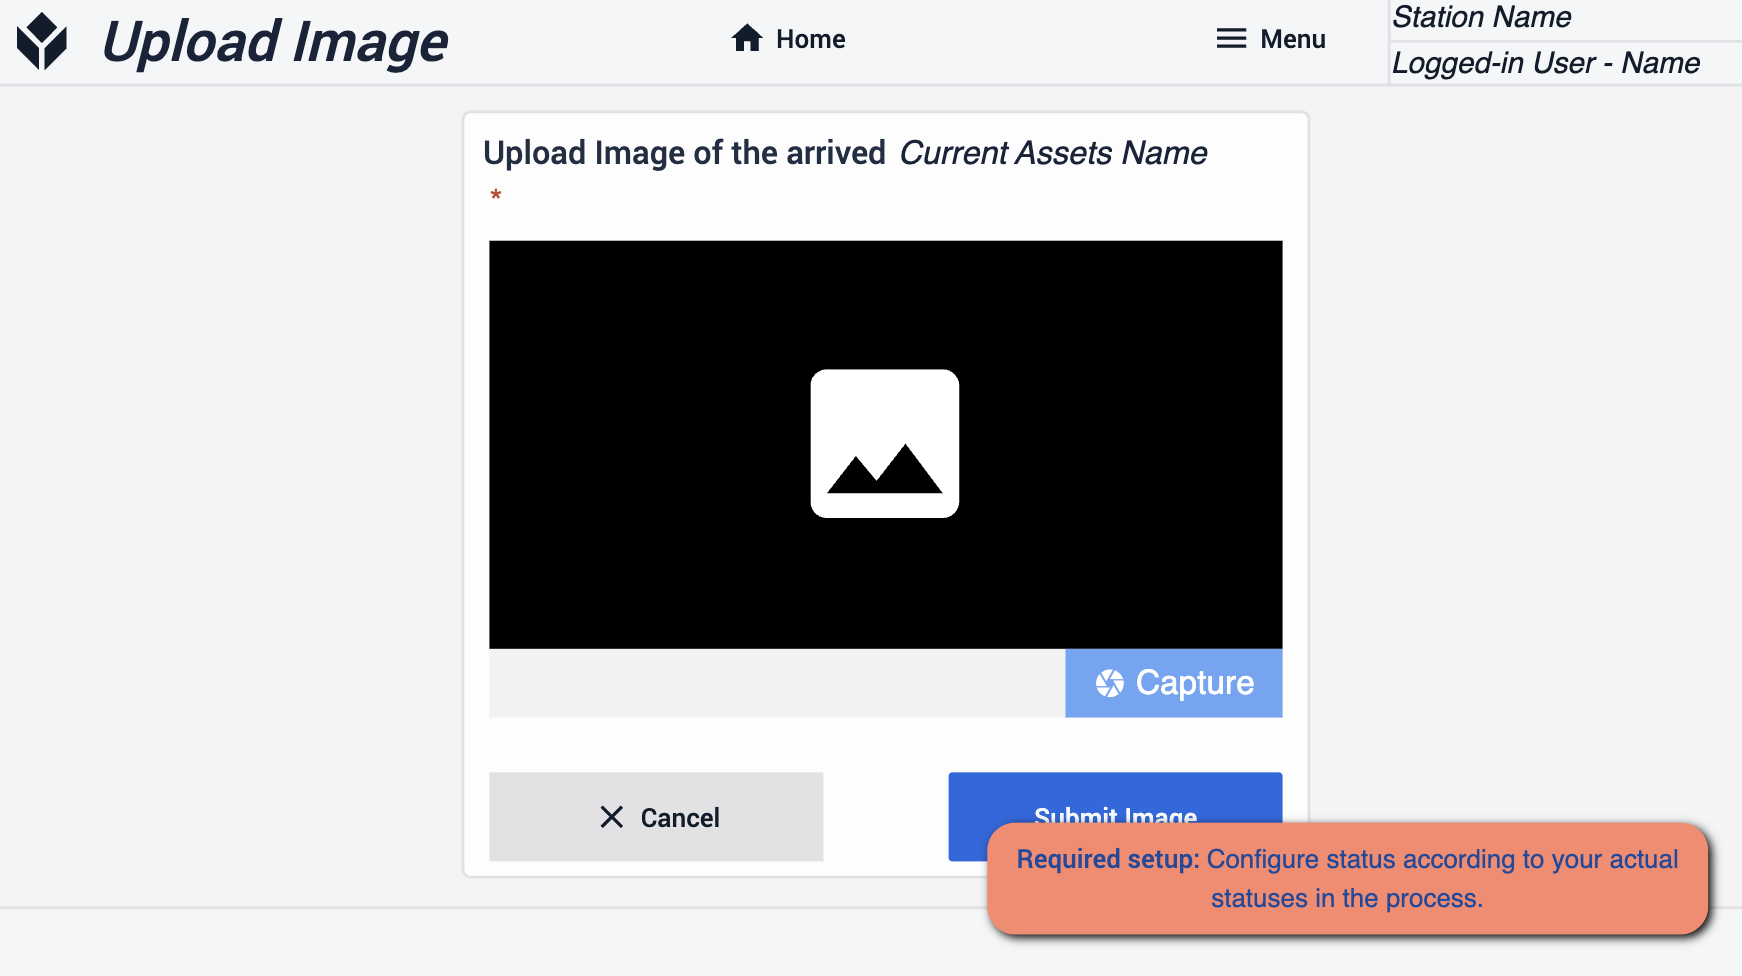 {height="300" width=""}* Upewnij się, że Twoje statusy pasują do Twojego procesu.
Tablica FIFO
Na tym etapie uzyskasz wizualizację wszystkich zamówień, które dotarły.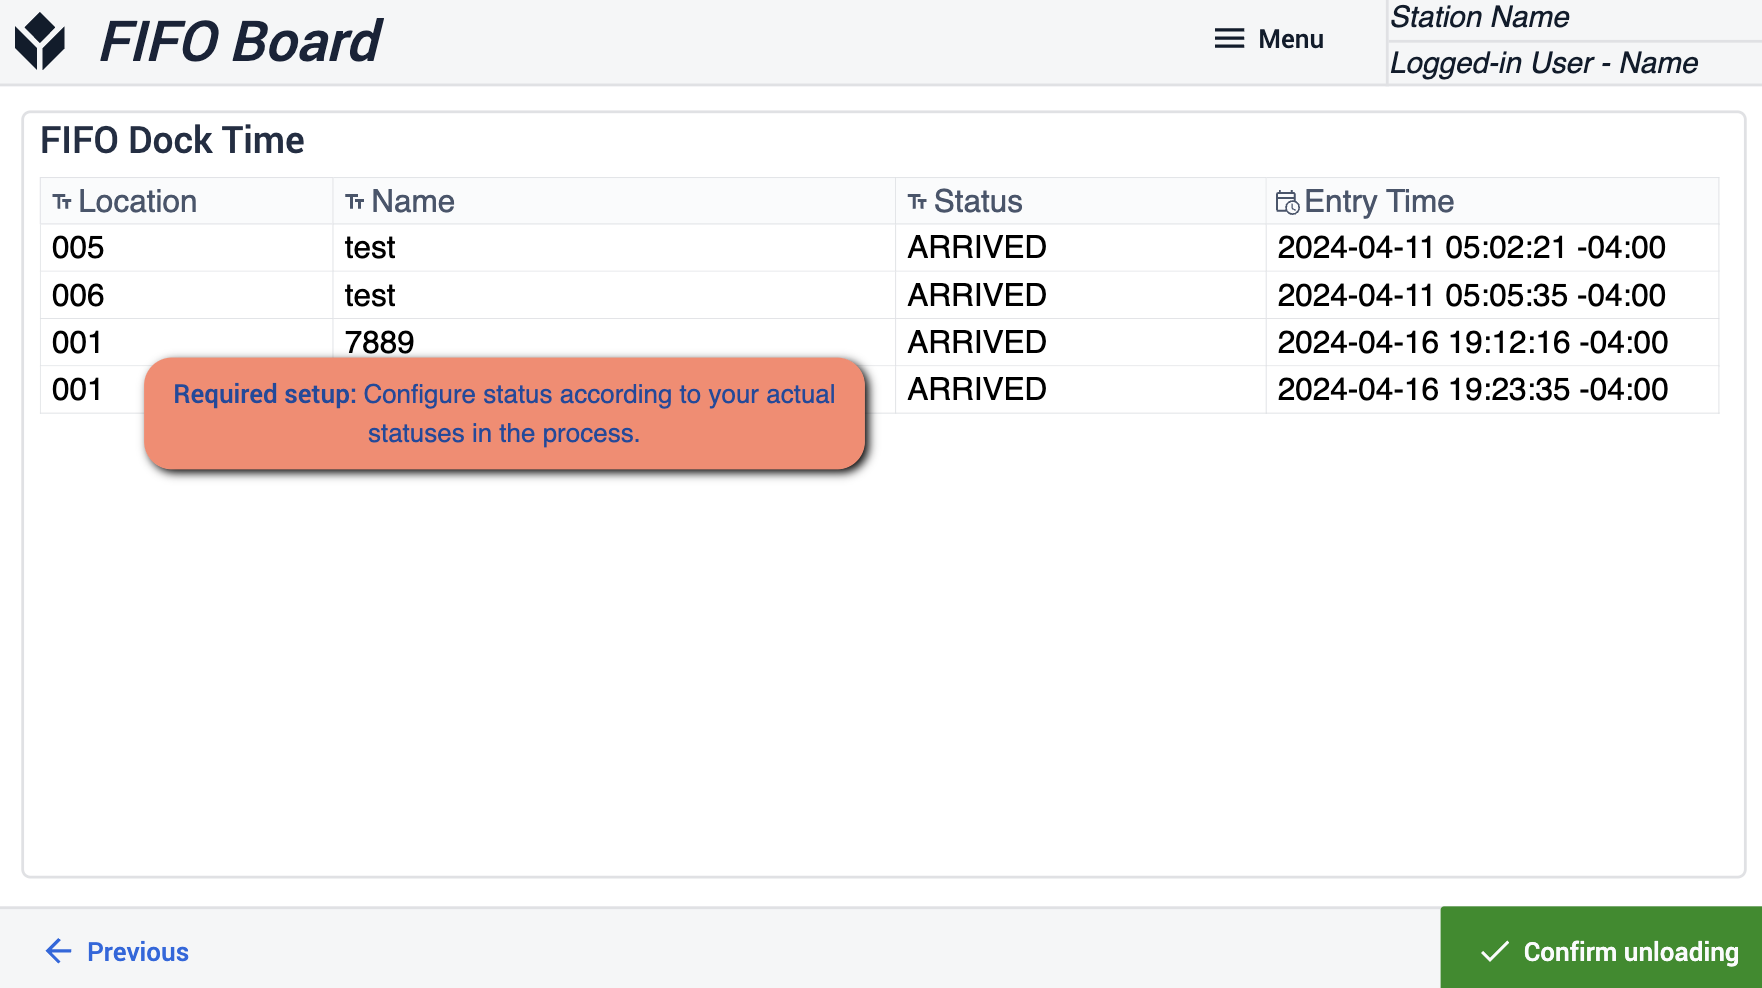 {height="300" width=""}* Upewnij się, że Twoje statuetki pasują do Twojego procesu.
Potwierdzenie rozładunku
W tym miejscu należy upewnić się, że fakt rozładowania materiału został zarejestrowany.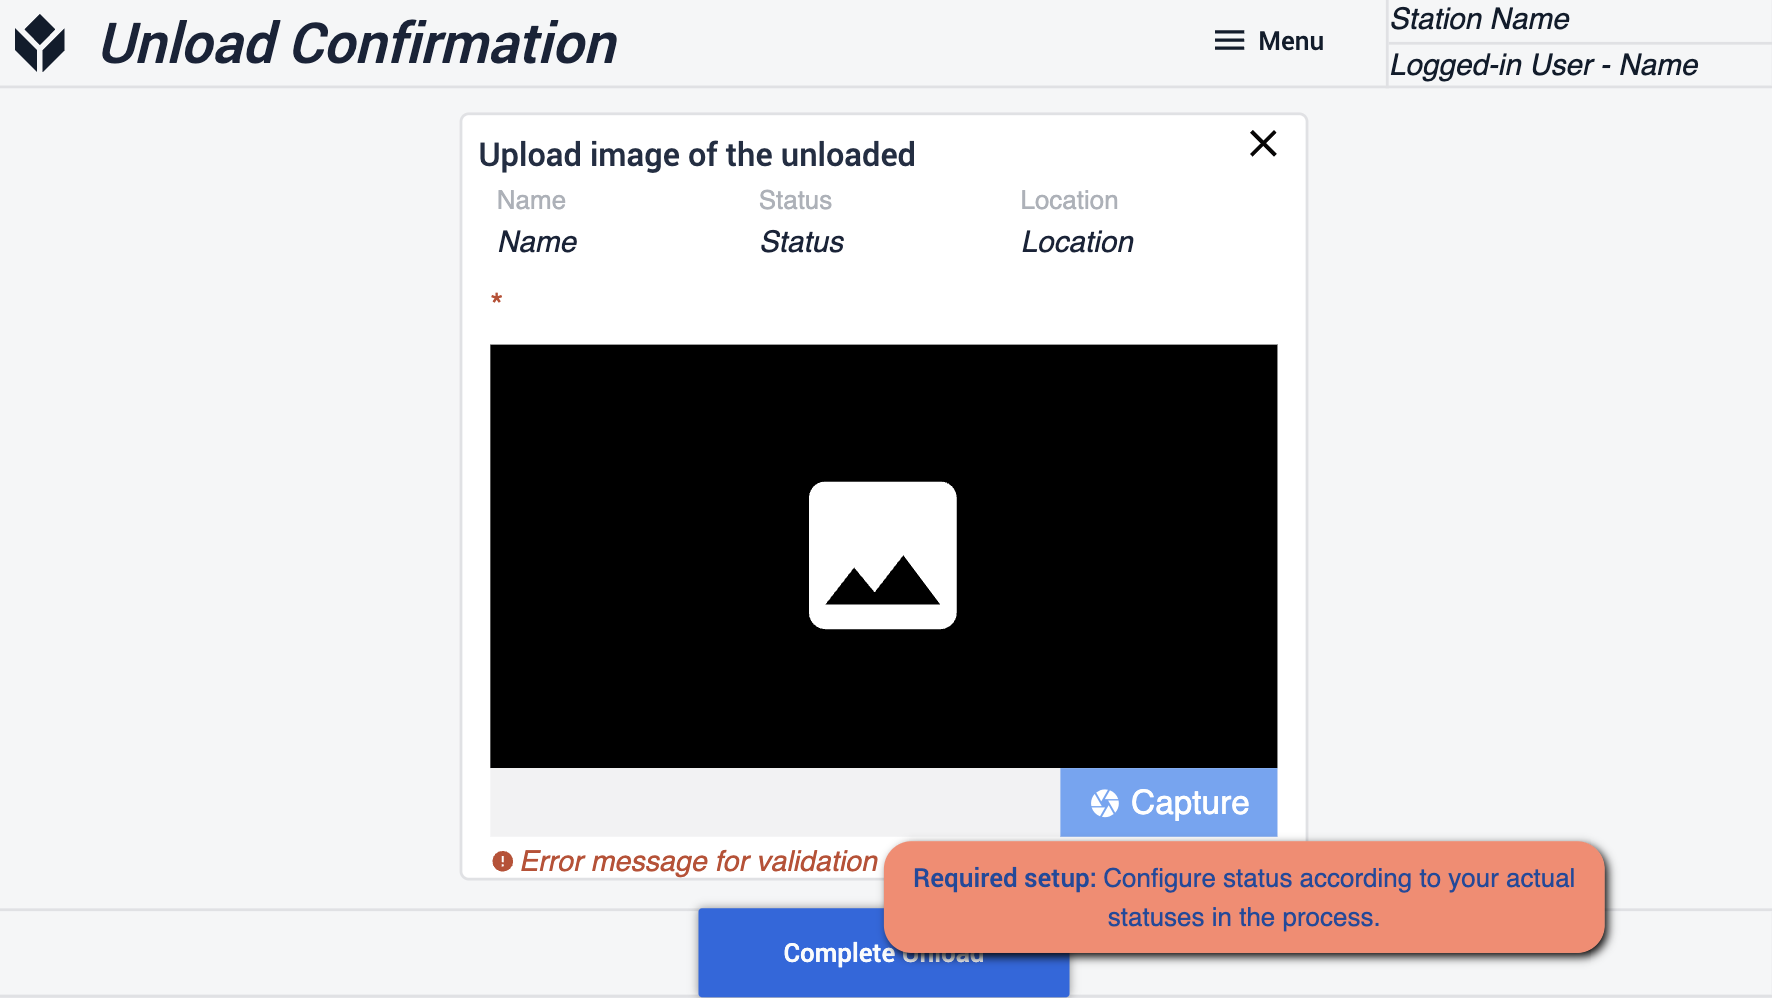 {height="300" width=""}* Upewnij się, że figury są zgodne z procesem.
Dodaj nową bramę
W tym kroku będziesz mógł utworzyć nowe bramy do odbioru materiałów.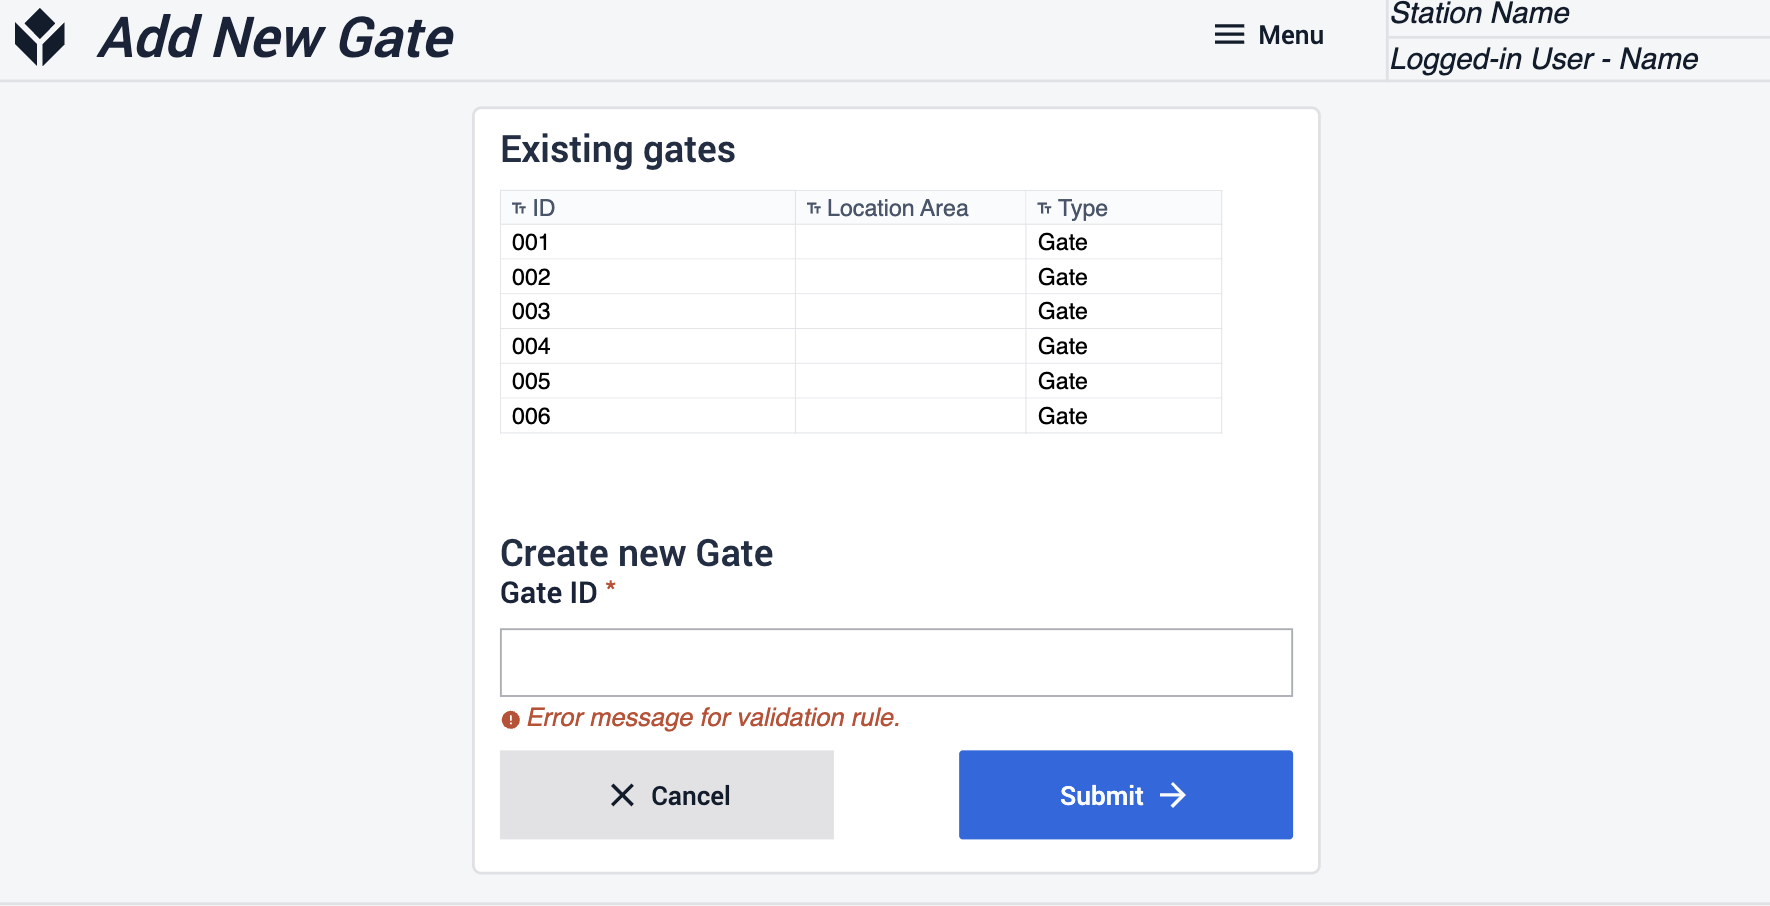
Wyświetl historię
Ten krok umożliwia dostęp do informacji o wcześniejszych przyjazdach i wyszukiwanie określonych danych, które zostały przechwycone.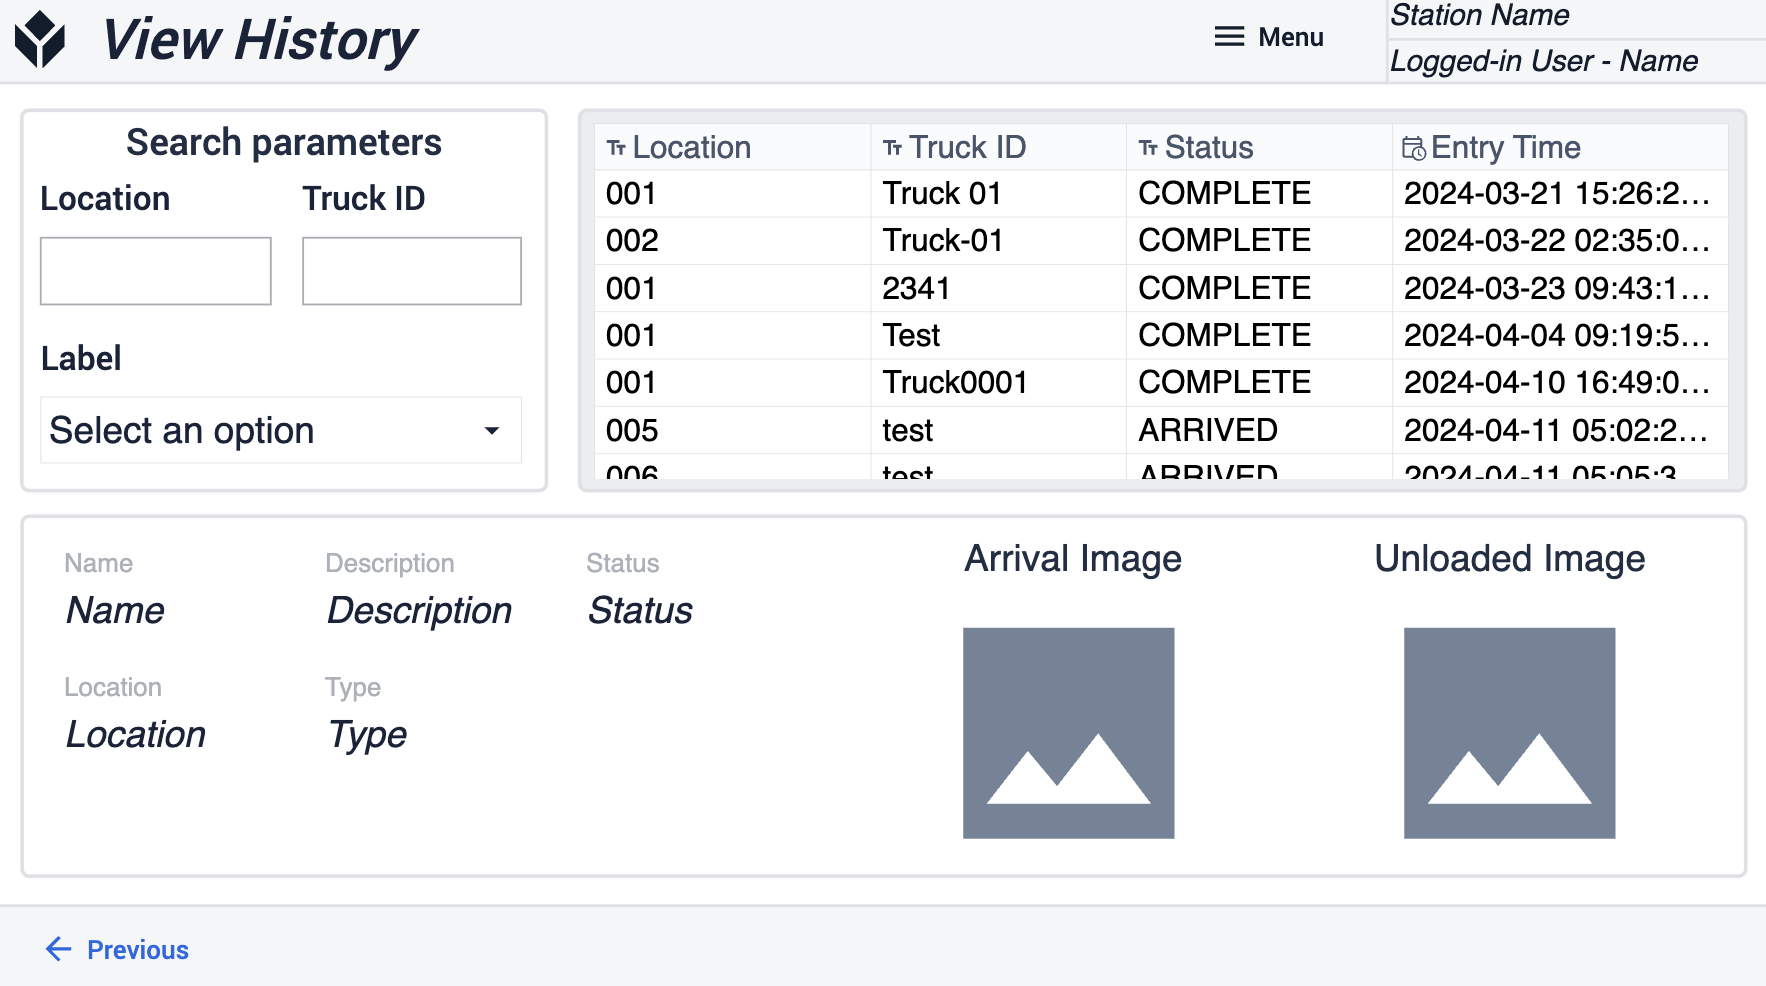
Uzupełnianie zapasów
Ta aplikacja może usprawnić uzupełnianie i przemieszczanie materiałów poprzez ograniczenie ręcznego wprowadzania danych i kosztów administracyjnych, umożliwiając pracownikom skupienie się na zadaniach o większej wartości dodanej.
Wyświetlanie otwartych zamówień materiałów
Na tym etapie uzyskasz wgląd we wszystkie oczekujące zamówienia materiałów. Zobacz szczegóły dotyczące tego, gdzie pobrać materiały i gdzie muszą one zostać dostarczone.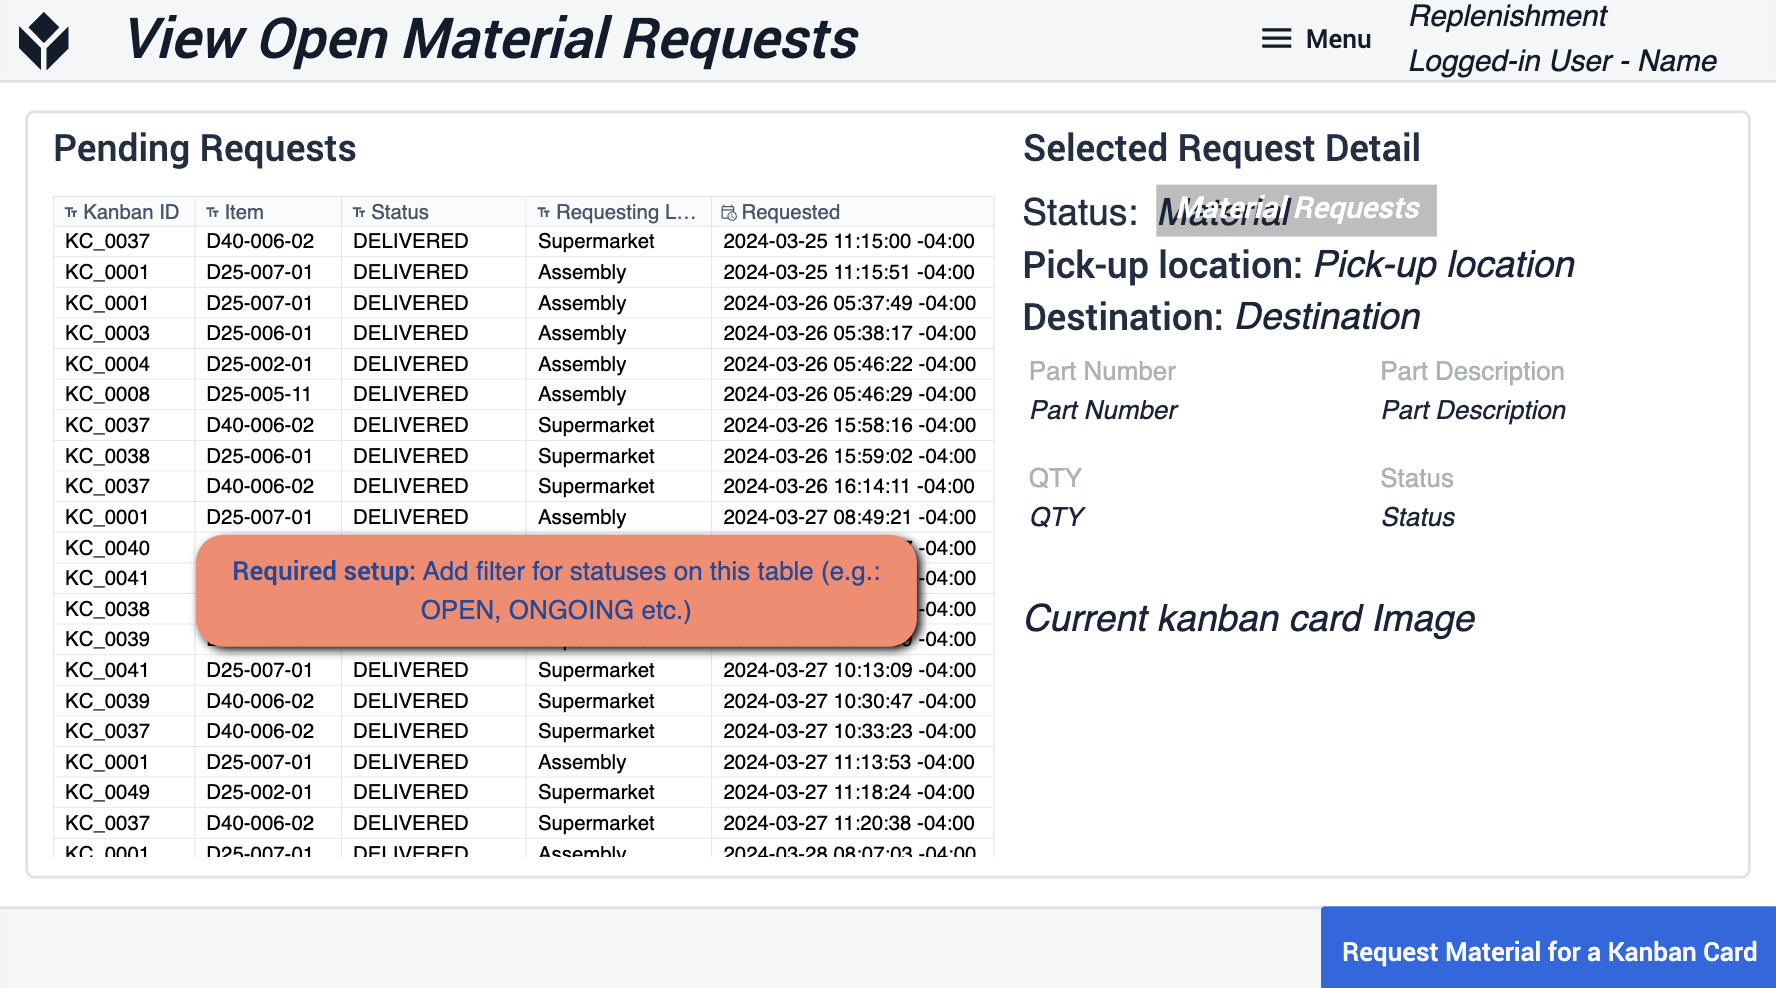 {height="300" width=""}* Dodaj filtry do tabeli, aby dopasować je do statusów, których używasz w swoich operacjach.
Wybierz kartę Kanban
Tutaj możesz zeskanować karty Kanban dla materiałów w wyznaczonym obszarze. Daje to wgląd w to, ile materiału znajduje się w magazynie.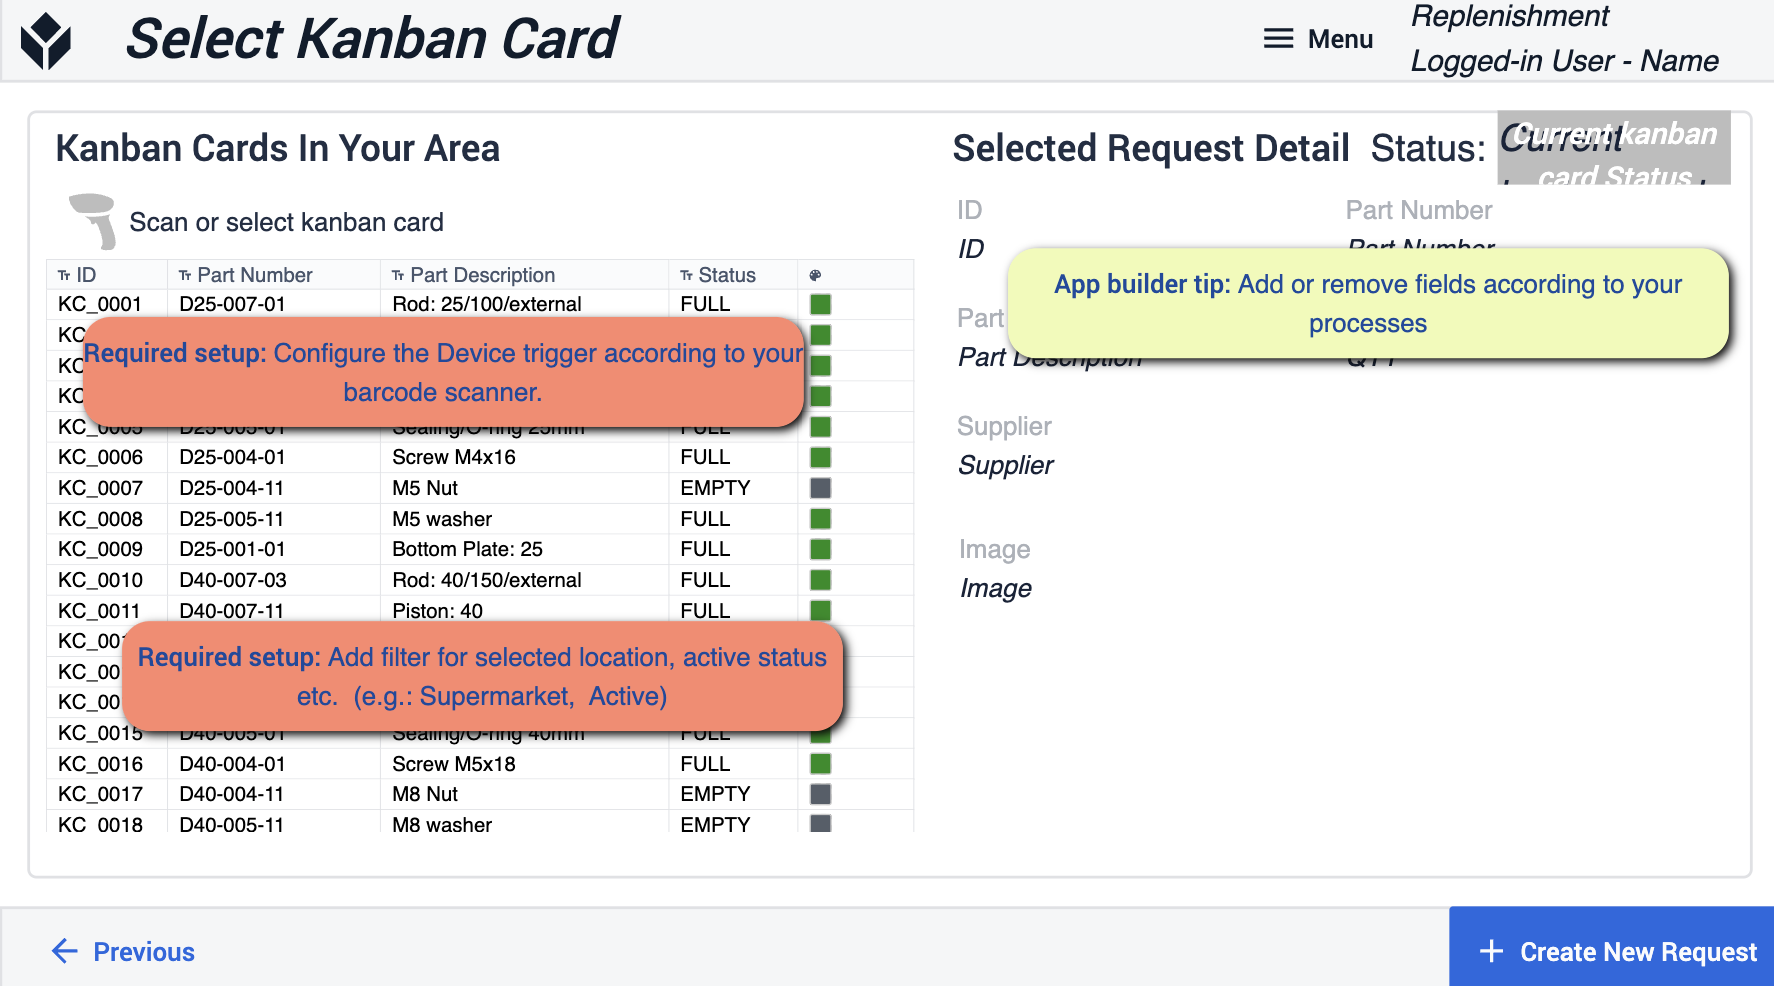 {height="300" width=""}* Wskazówki dla twórców aplikacji, które należy śledzić, koncentrują się na dodawaniu filtrów dla wybranej lokalizacji i aktywnych statusów. Konieczne będzie skonfigurowanie używanego urządzenia do skanera kodów kreskowych. W razie potrzeby możesz usunąć niektóre pola, aby dopasować je do swojego procesu.
Potwierdzenie żądania materiału
Po wybraniu żądania materiału, ten krok będzie miał na celu potwierdzenie samego żądania.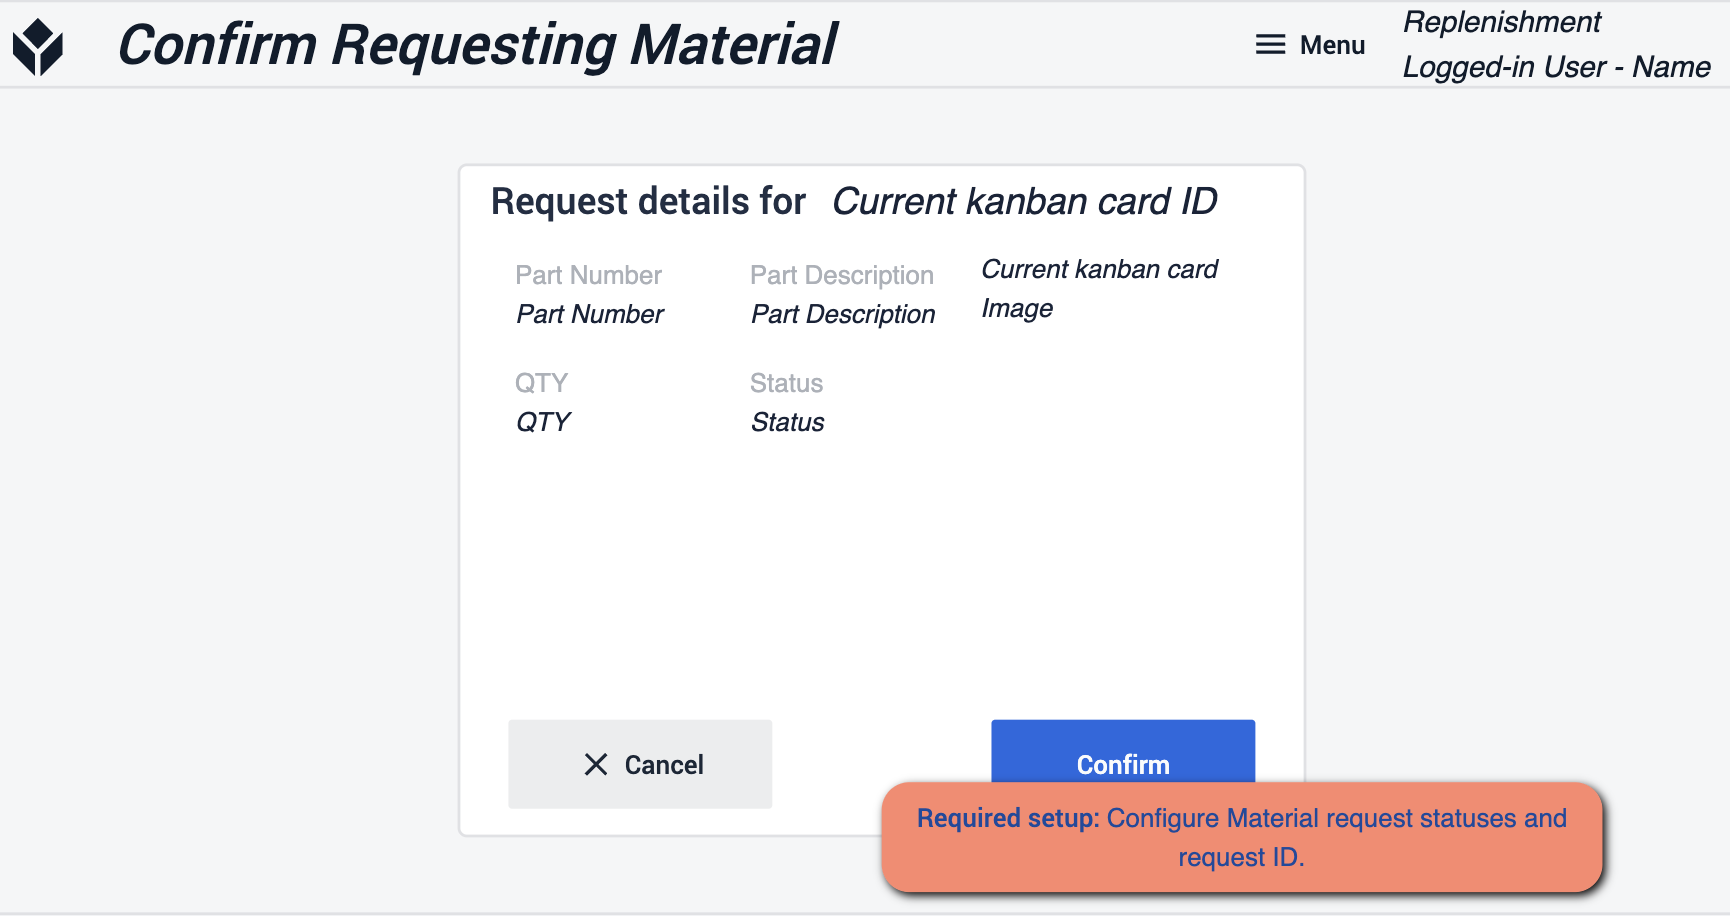 {height="300" width=""}* Tutaj będziesz chciał upewnić się, że skonfigurowałeś statusy żądania materiału i identyfikator żądania. Pozwoli to upewnić się, że żądanie trafi tam, gdzie faktycznie powinno.
Zarządzanie zapasami
Ta aplikacja umożliwia zarządzanie i przeglądanie pozycji magazynowych. Dane będą przechowywane i wyświetlane w tabelach, które można również zmieniać, aby dopasować je do zmian zachodzących na podłodze.
Ekran główny
Ekran główny będzie narzędziem nawigacyjnym do poruszania się po różnych krokach w tej aplikacji.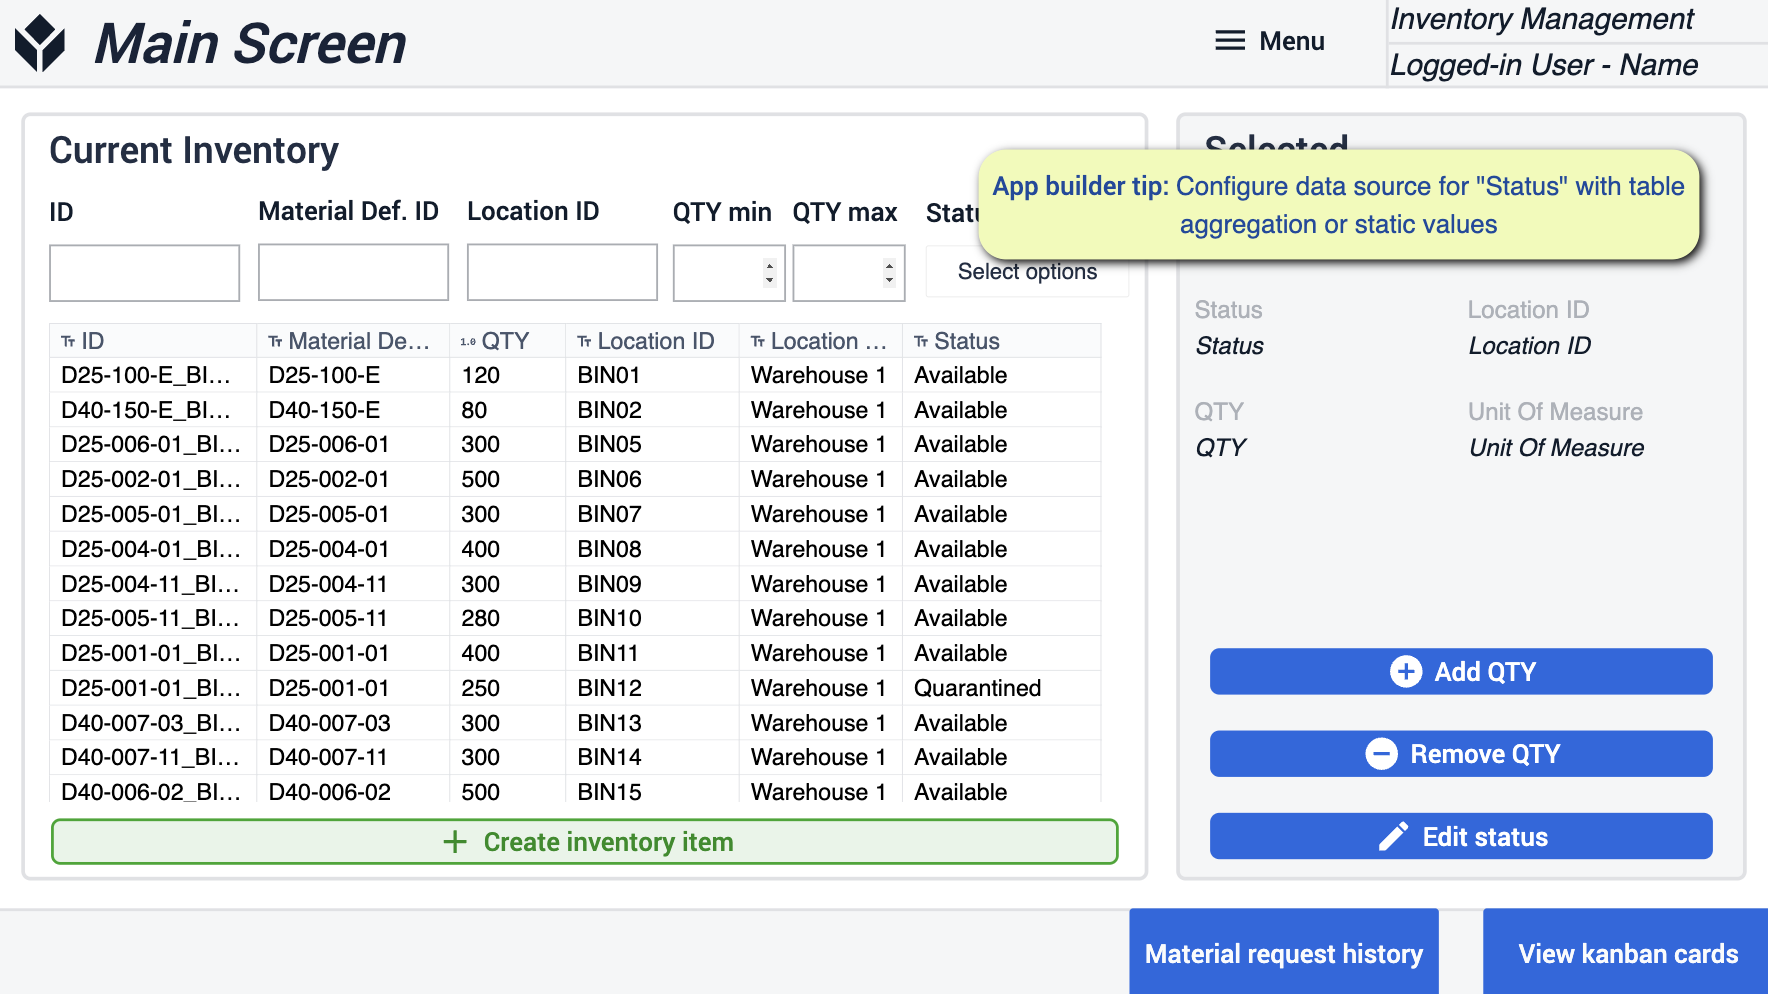 {height="300" width=""}* Tutaj będziesz chciał skonfigurować źródła danych dla "Statusu" z wartościami statycznymi lub agregacjami.
Usuń QTY / Dodaj QTY
W tych krokach będziesz mógł dodać lub usunąć żądaną ilość do wybranych pozycji zapasów.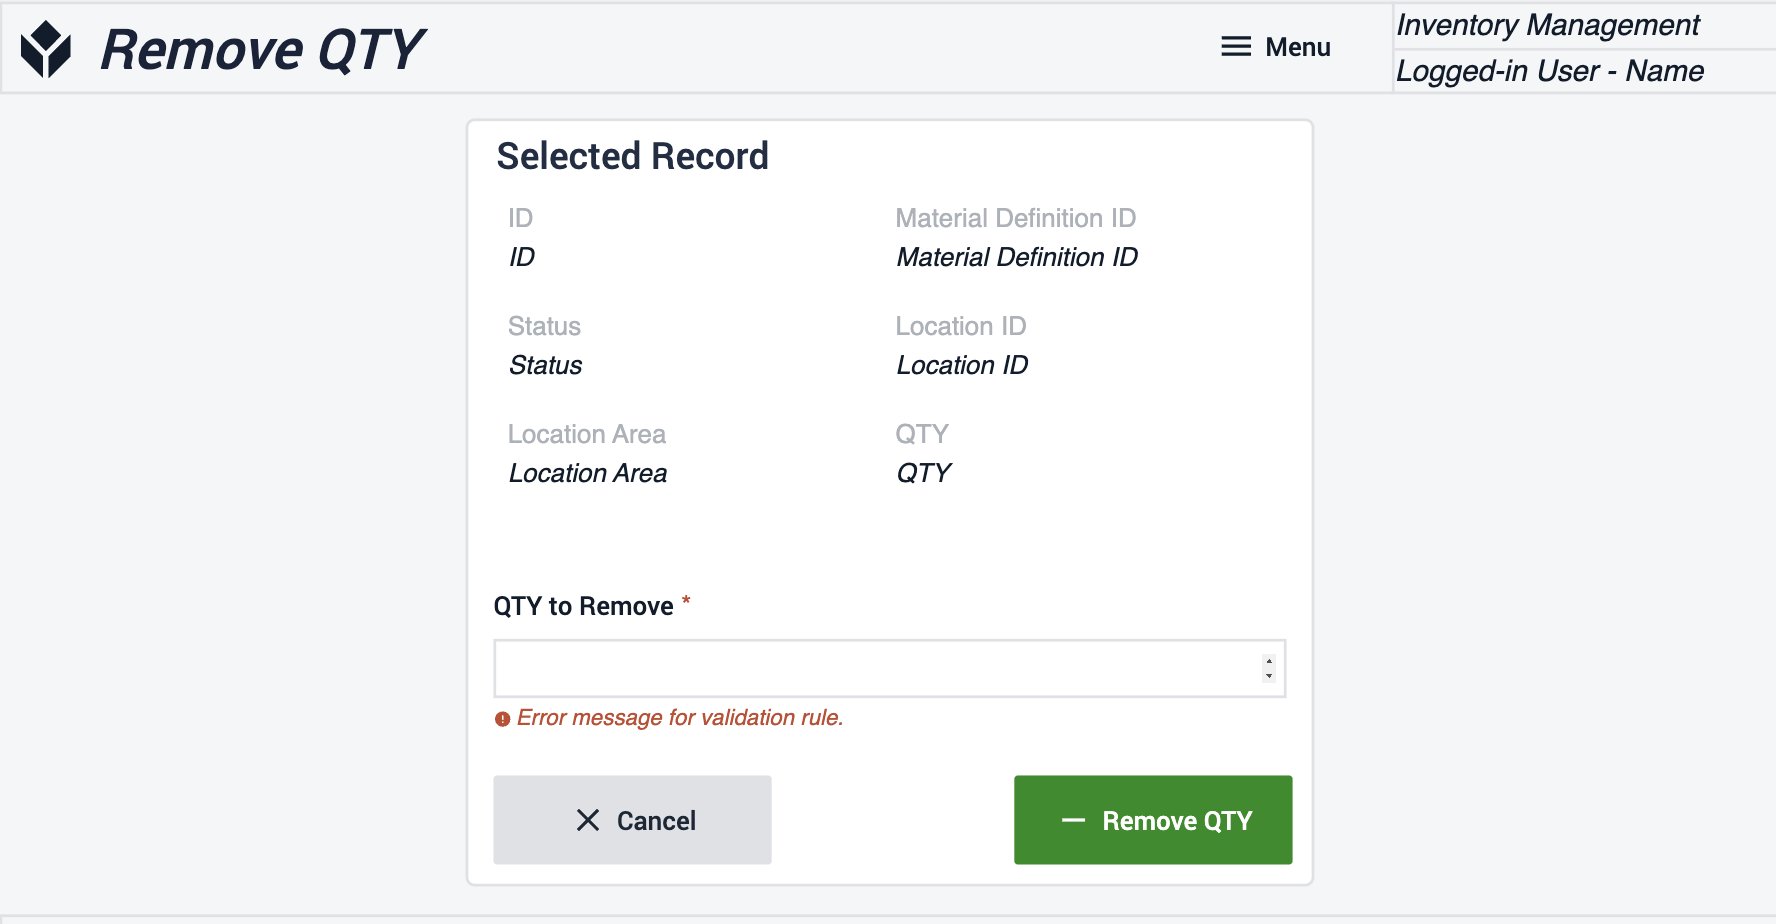
Edytuj status
W tym miejscu można edytować status pozycji w magazynie. Określ ilość przedmiotów, które chcesz zmienić. 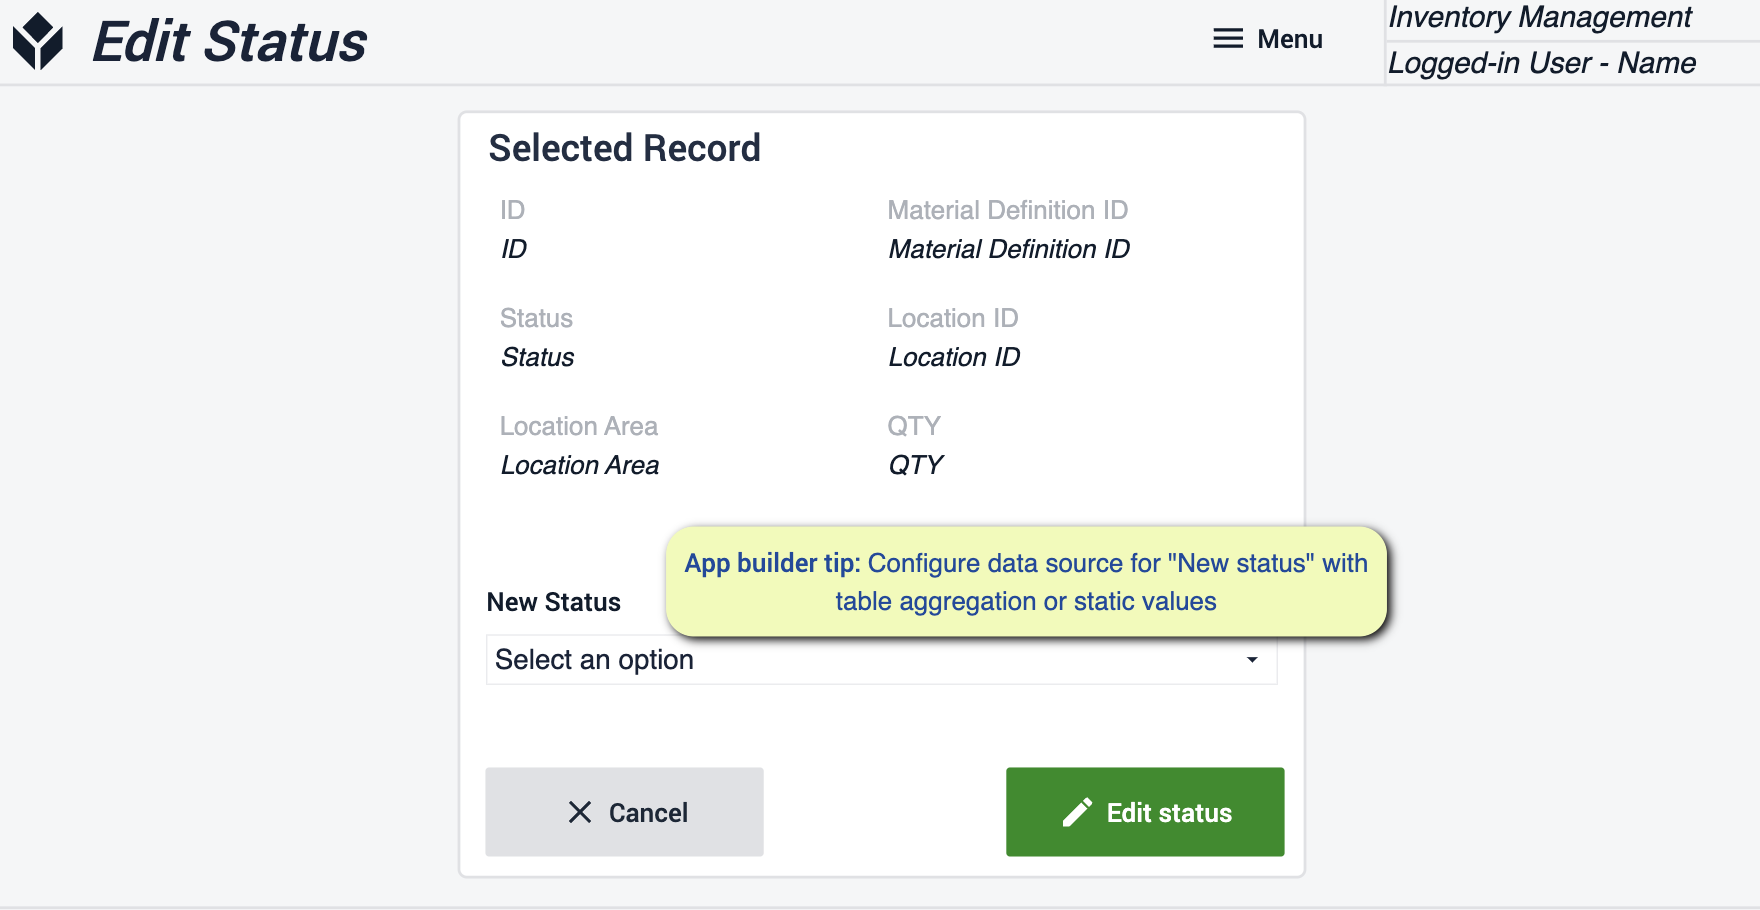 {W tym miejscu należy skonfigurować źródła danych dla "New Status" z wartościami statycznymi lub agregacjami.
Tworzenie pozycji zapasów
Utwórz nowe pozycje magazynowe, wypełniając wymagane pola i zapisując je w bieżącym magazynie.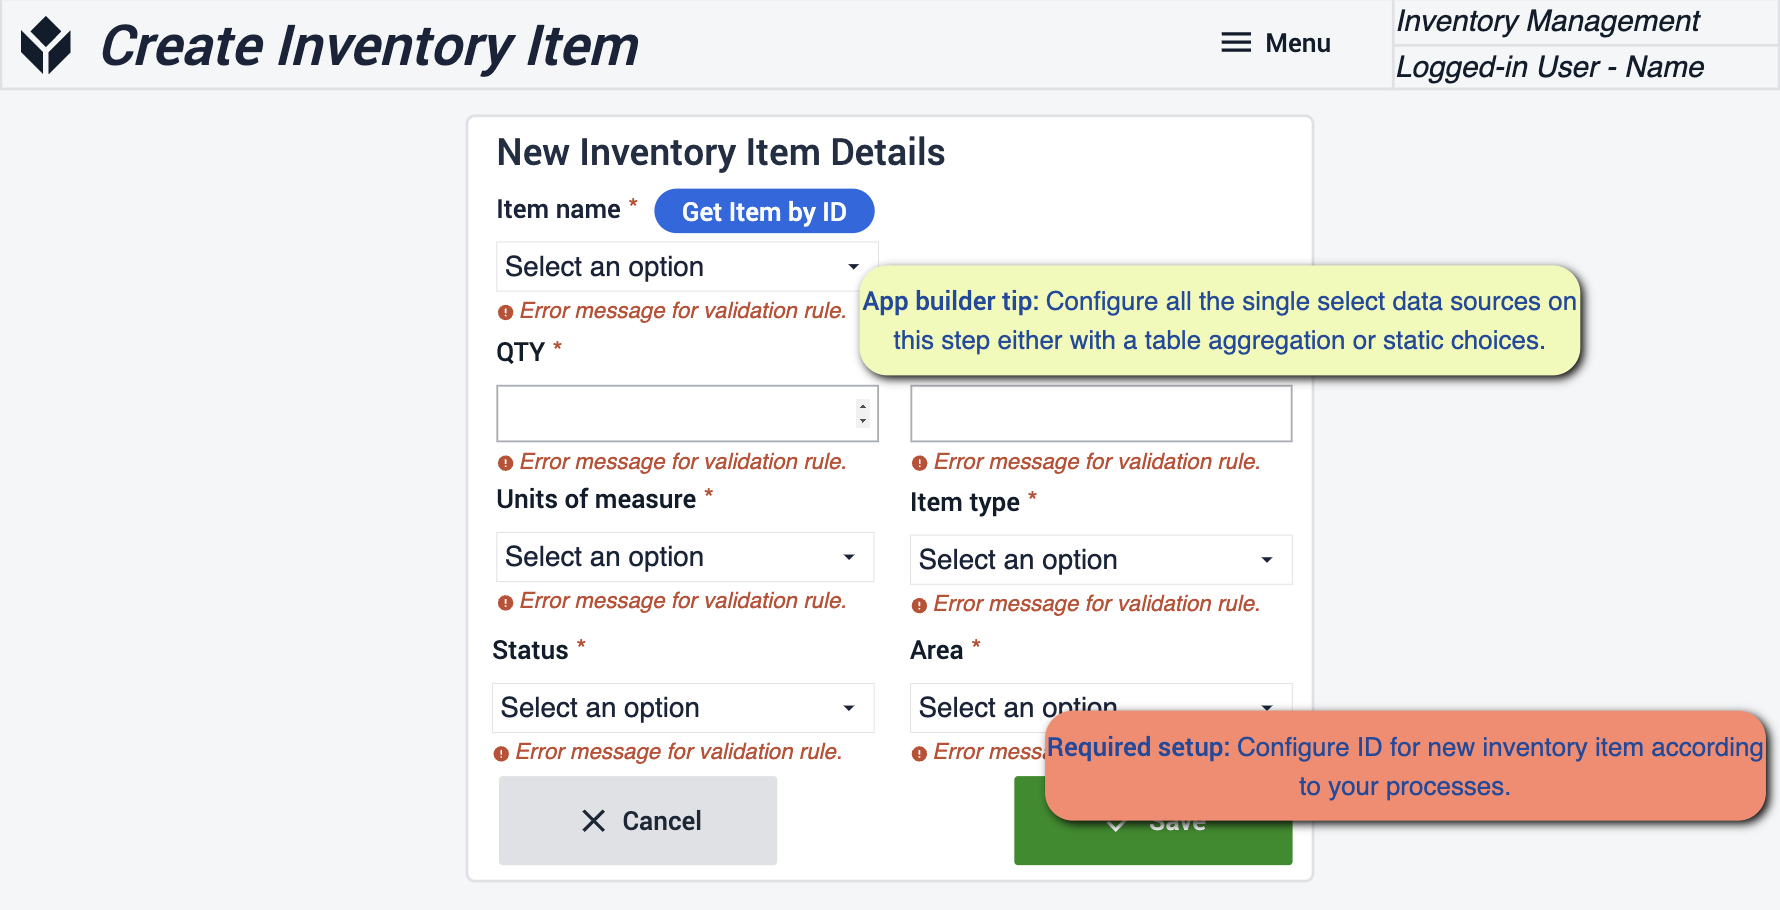 {height="300" width=""}* W tym kroku należy skonfigurować wszystkie źródła danych za pomocą agregacji tabel lub wartości statycznych. Ważne jest również, aby skonfigurować identyfikator nowych pozycji zgodnie z procesem.
Wyświetlanie kart Kanban
W tym miejscu można wyświetlić wszystkie utworzone karty Kanban. Będziesz mieć możliwość drukowania etykiet i tworzenia nowych kart. Jeśli niektóre karty mają pasujące właściwości, możesz utworzyć duplikat tej karty ze zmianami.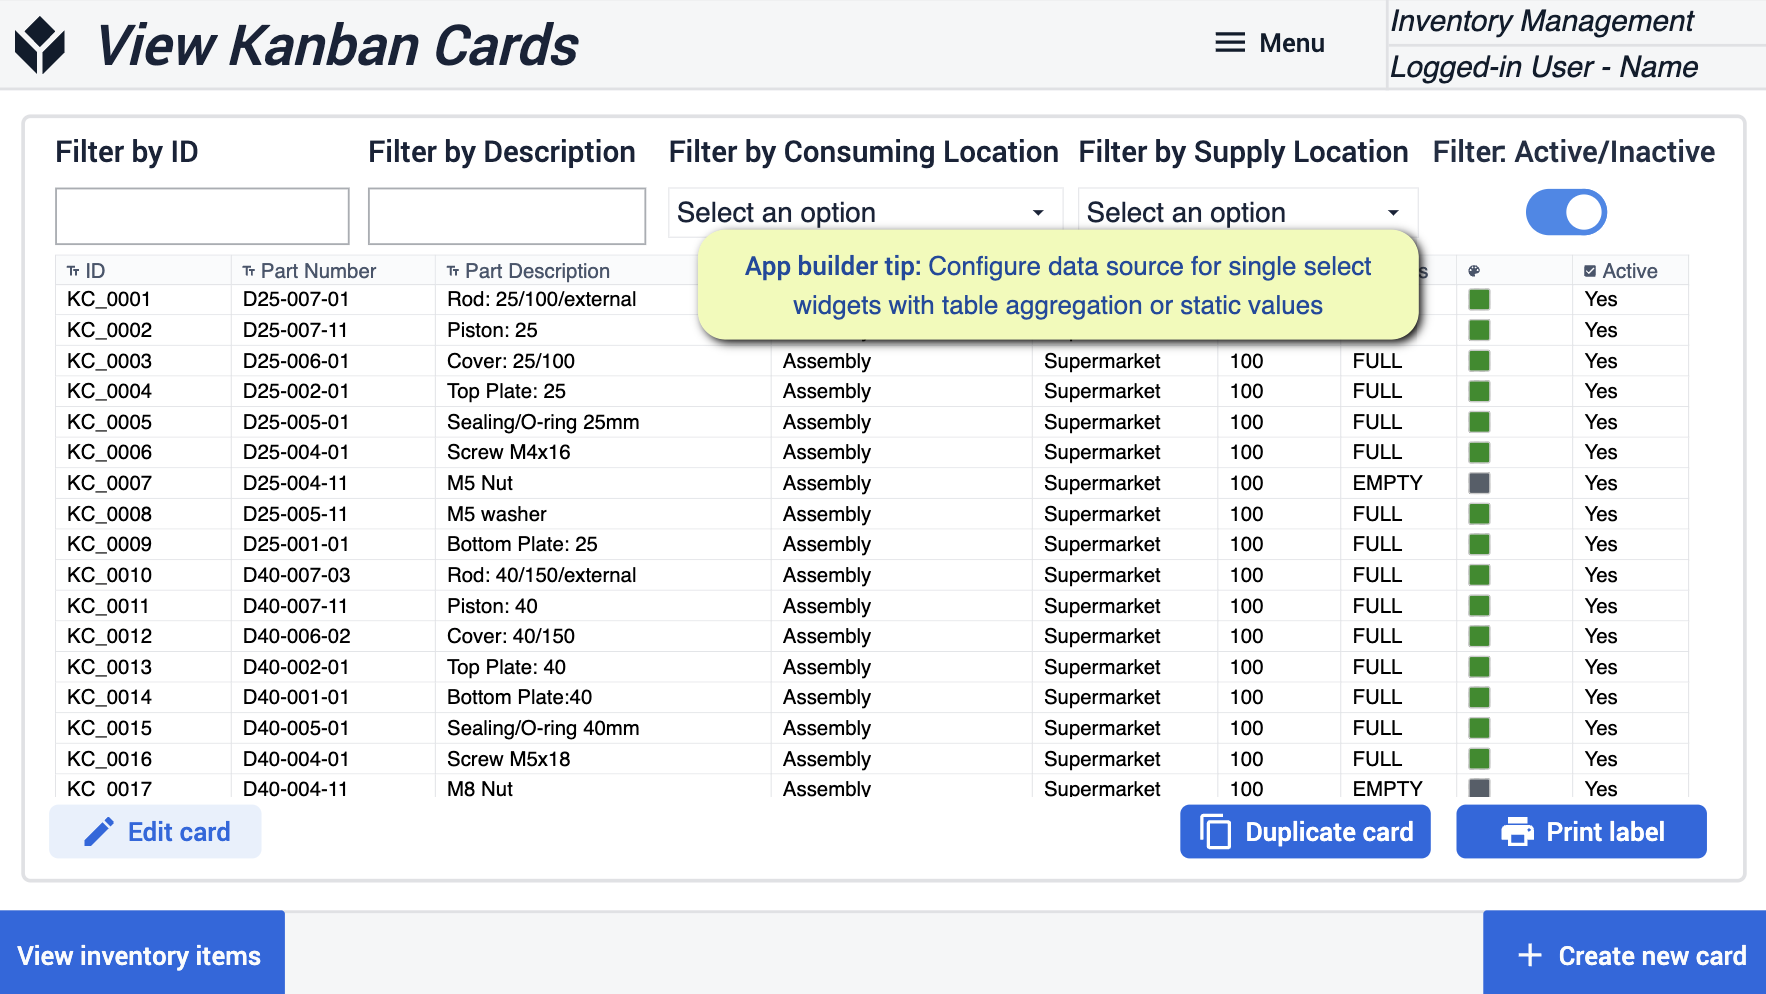 {height="300" width=""}* Wskazówki, których należy przestrzegać w tym miejscu, to skonfigurowanie źródeł danych dla widżetów pojedynczego wyboru z wartościami statycznymi lub agregacją tabel.
Edycja karty Kanban
W tym miejscu można dokonać zmian w karcie Kanban. W tym kroku możesz dezaktywować lub aktywować kartę.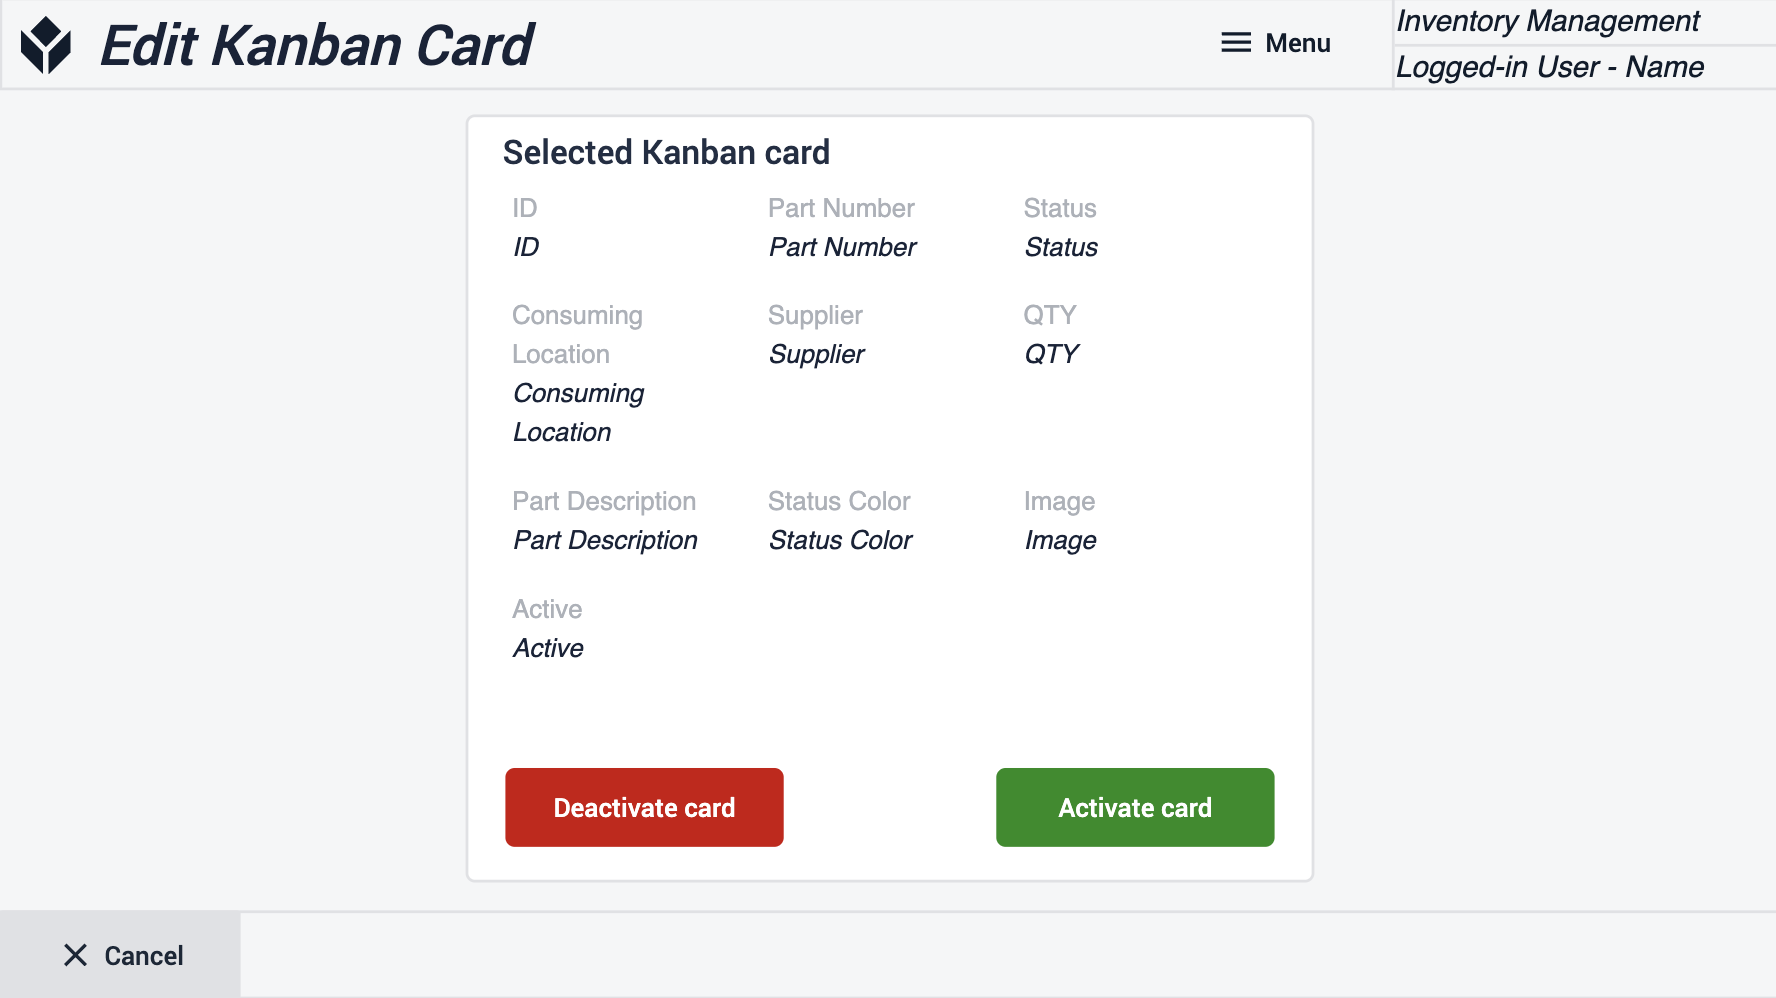
Tworzenie karty Kanban
Aby utworzyć kartę, wypełnij wszystkie wymagane pola.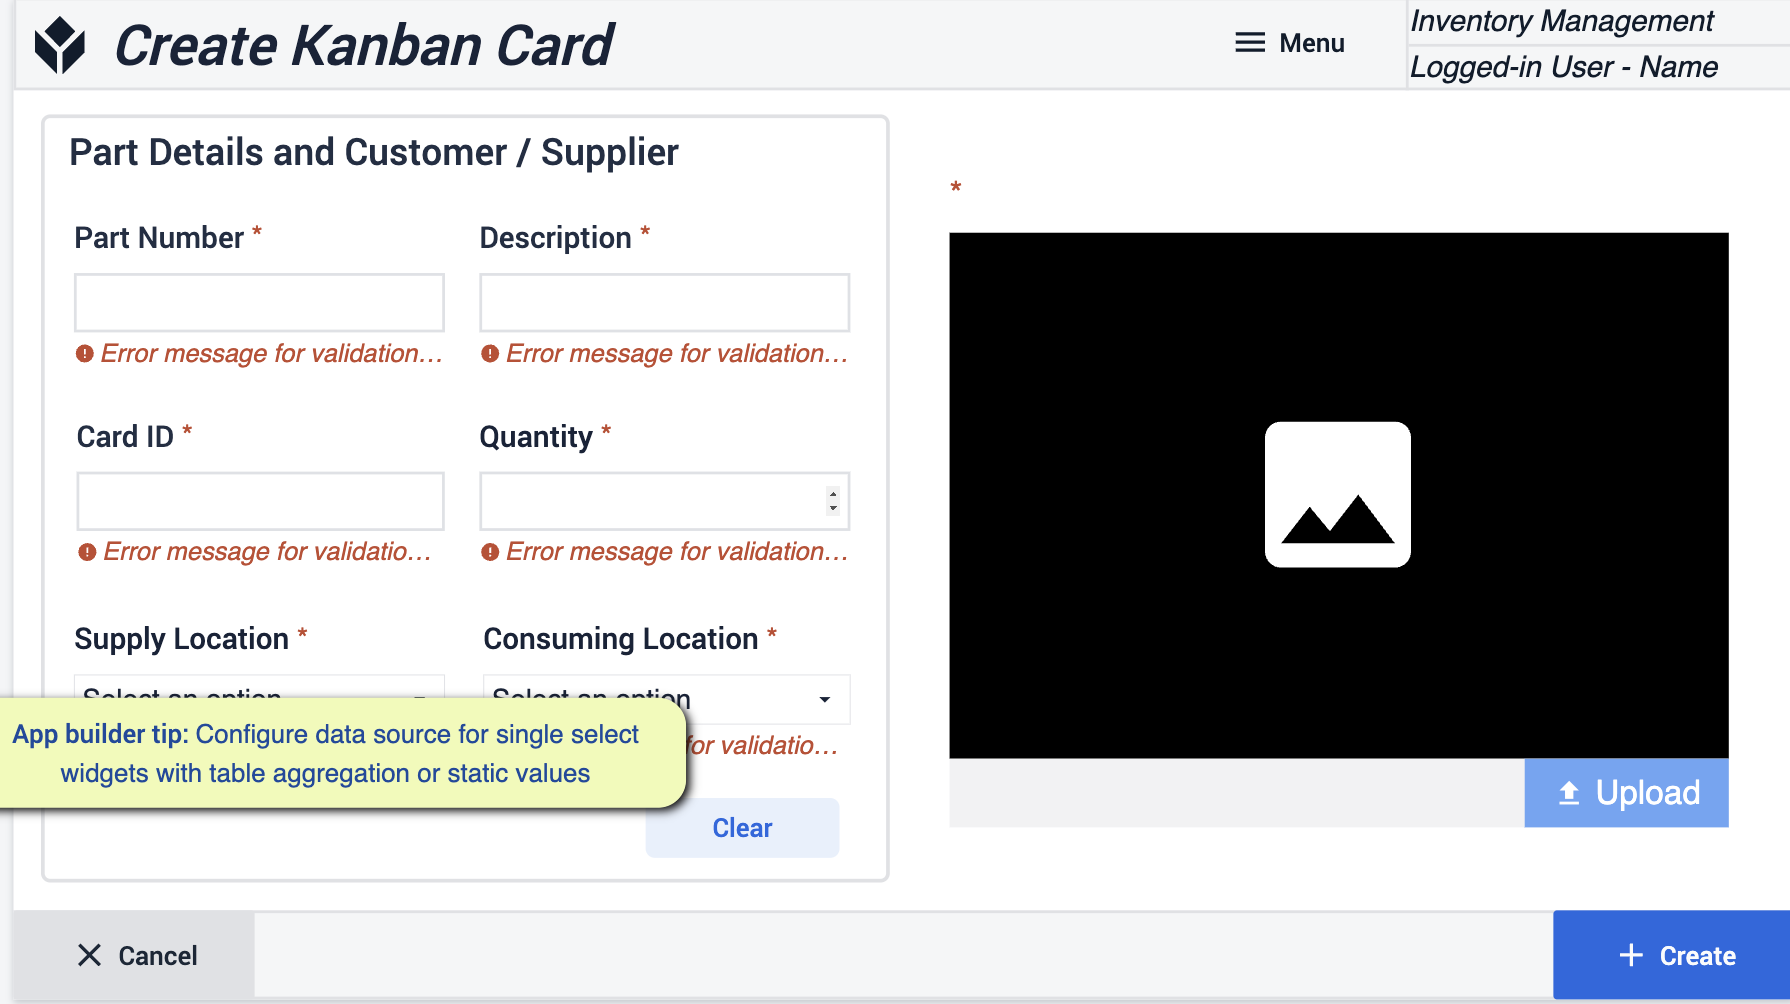 {height="300" width=""}* Wskazówki, których należy przestrzegać, to skonfigurowanie źródeł danych dla widżetów pojedynczego wyboru z wartościami statycznymi lub agregacją tabel.
Drukuj etykietę
Utwórz etykietę swojej karty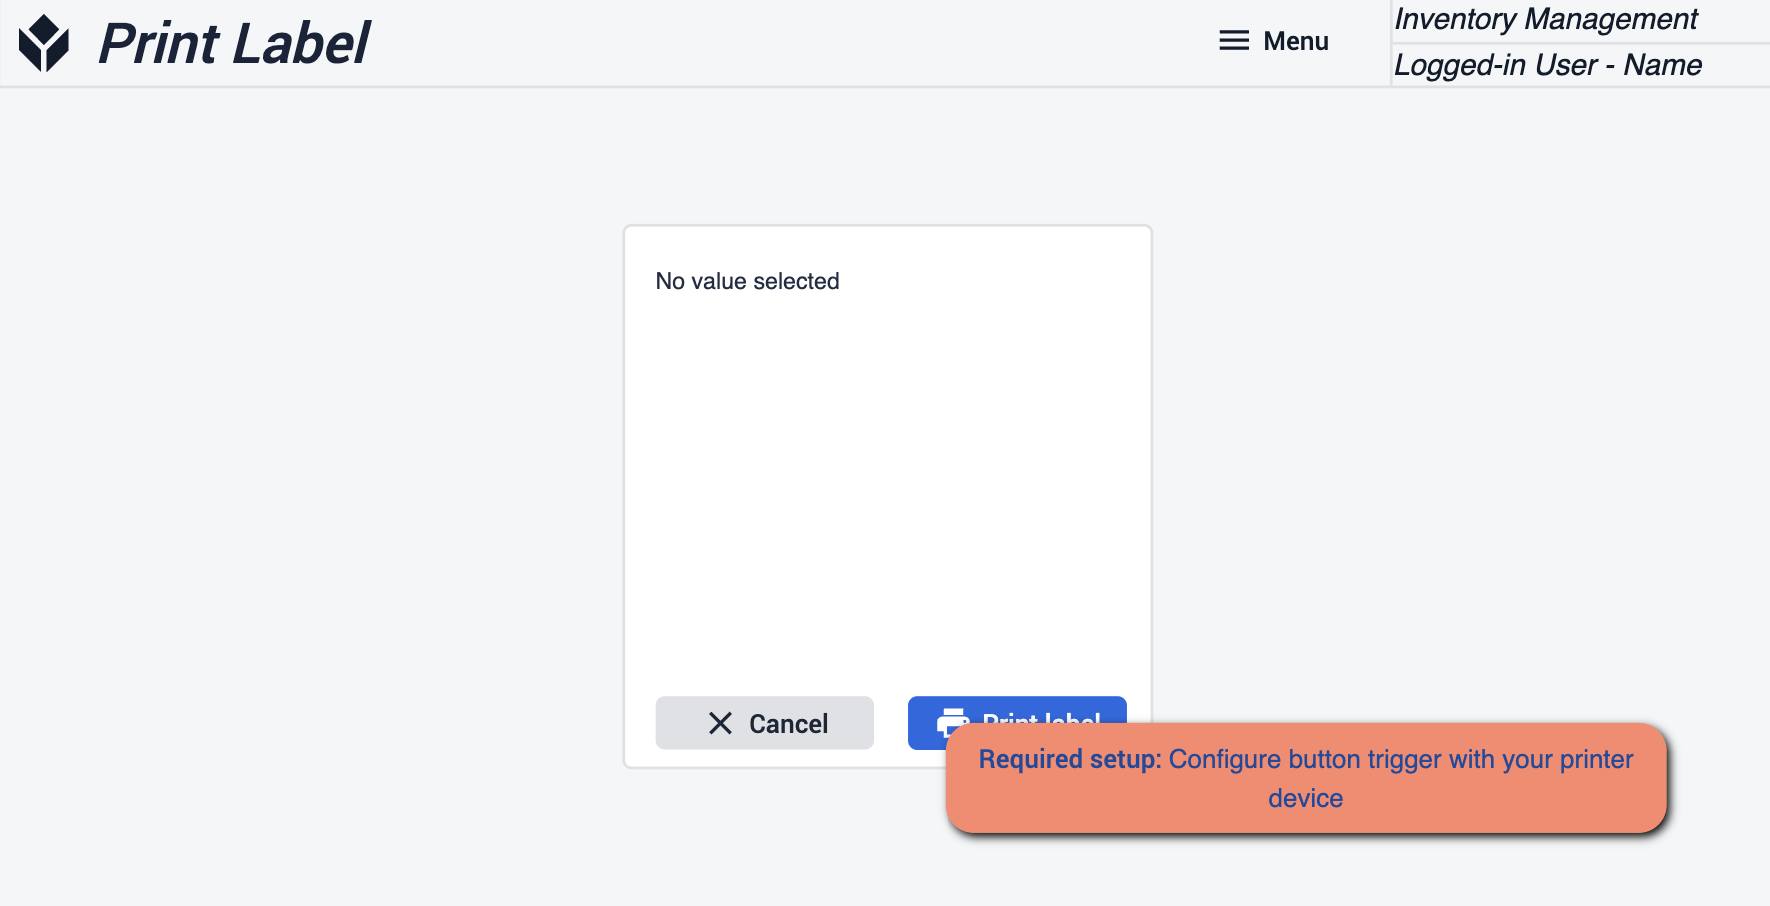 {height="300" width=""}* Upewnij się, że przycisk "drukuj etykietę" jest skonfigurowany w urządzeniu do drukowania etykiety.
Historia żądań materiałów
Zobacz historię wszystkich zamówionych materiałów. Wybierz zamówienia, aby uzyskać więcej informacji na temat ich historii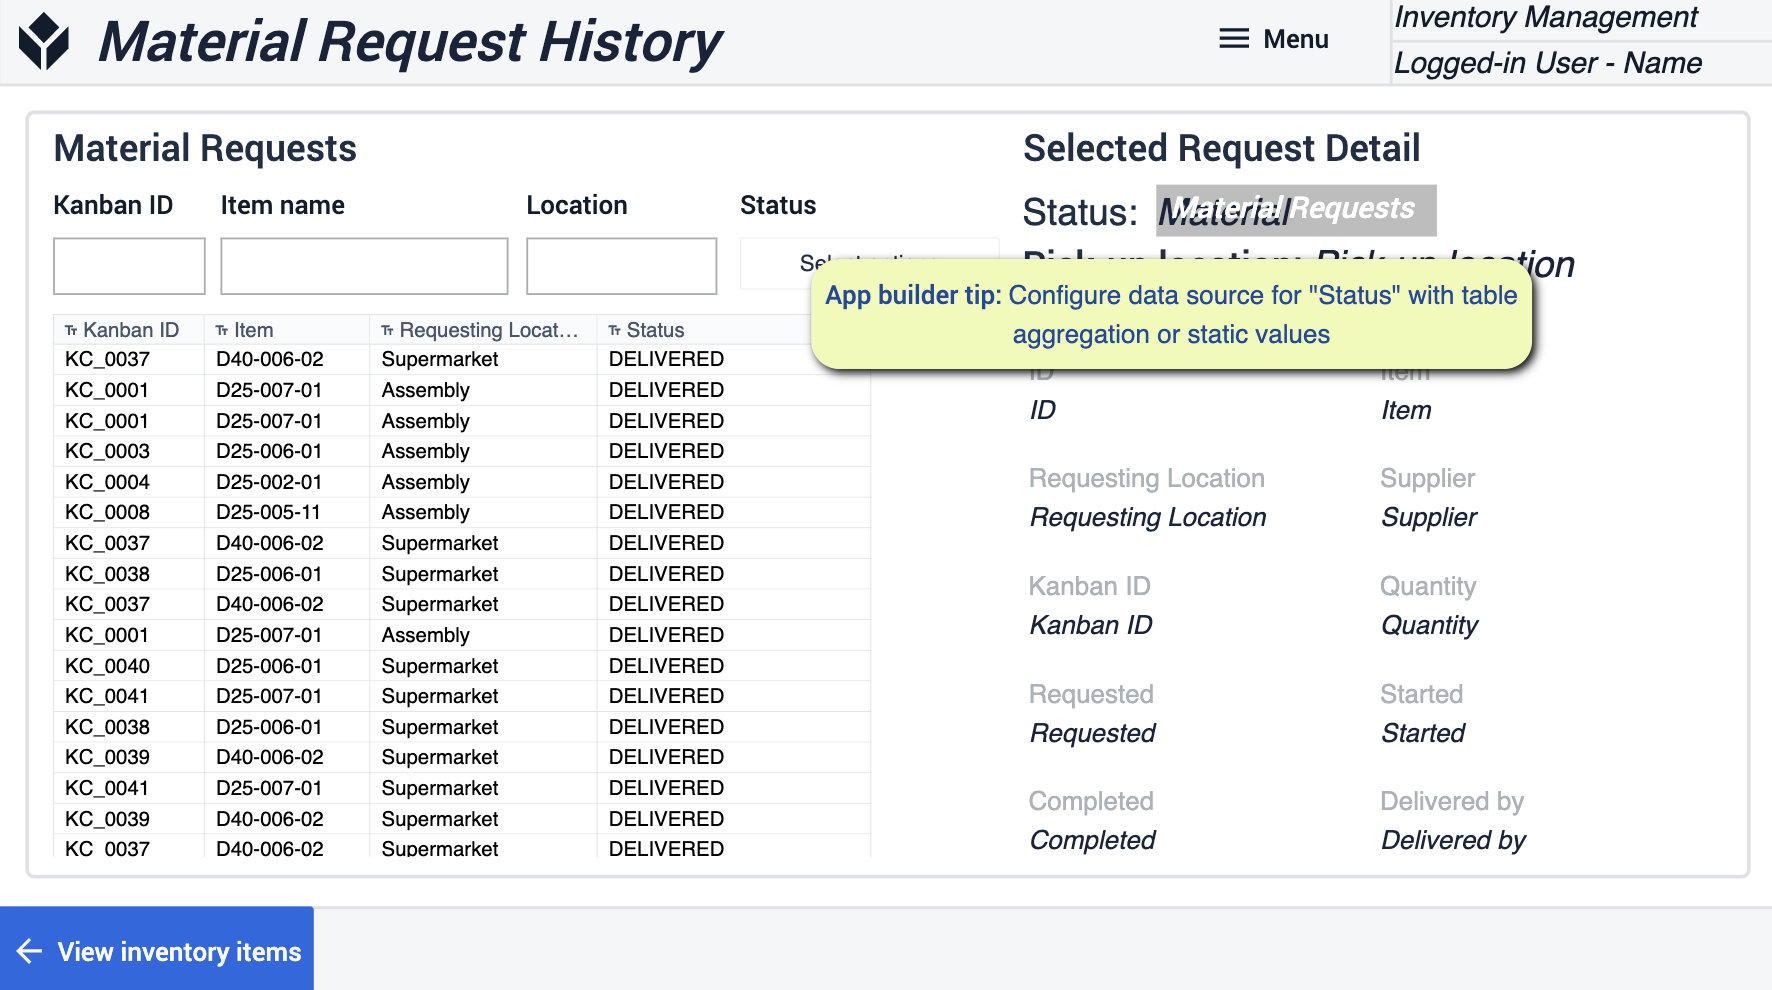 {height="300" width=""}* Upewnij się, że źródło danych dla "statusu" jest skonfigurowane z agregacją tabel lub wartością statyczną.
Magazyn materiałów
Ta aplikacja mobilna umożliwia użytkownikom przesyłanie materiałów do Tulip, znacznie zwiększając dokładność inwentaryzacji. Łatwa i prosta w użyciu, pomaga digitalizować nowo przybyłe materiały tak szybko, jak to możliwe.
Strona główna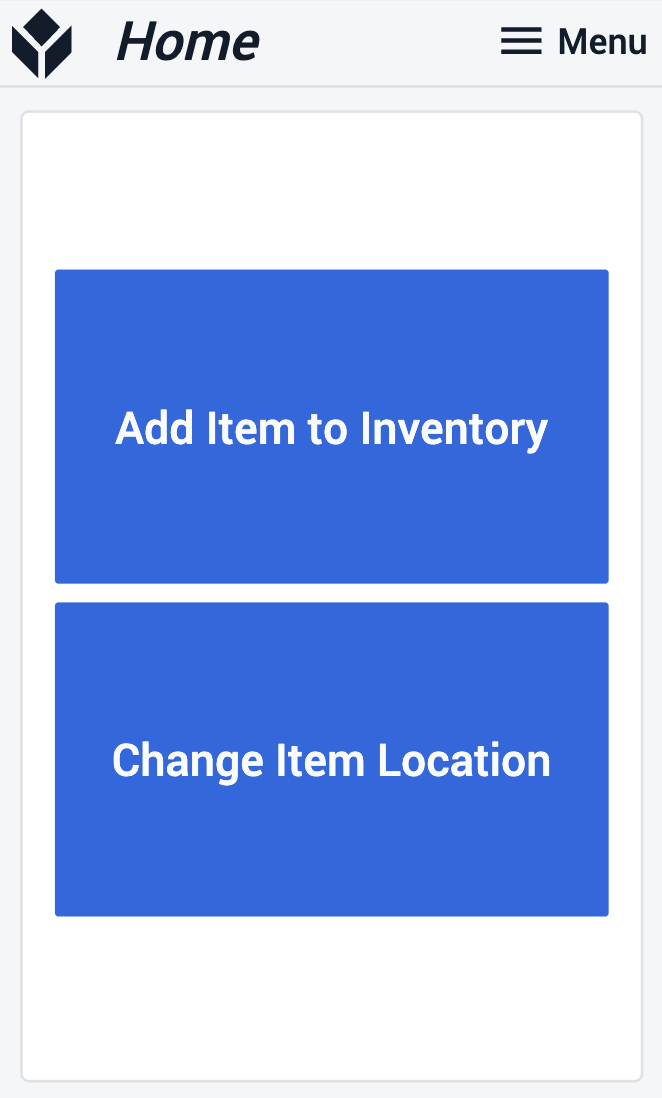
W kroku Home użytkownik musi wybrać przepływ, w zależności od tego, czy jest to zupełnie nowy przedmiot do dodania do inwentarza, czy też istniejący przedmiot, który wymaga przeniesienia.
Scan Item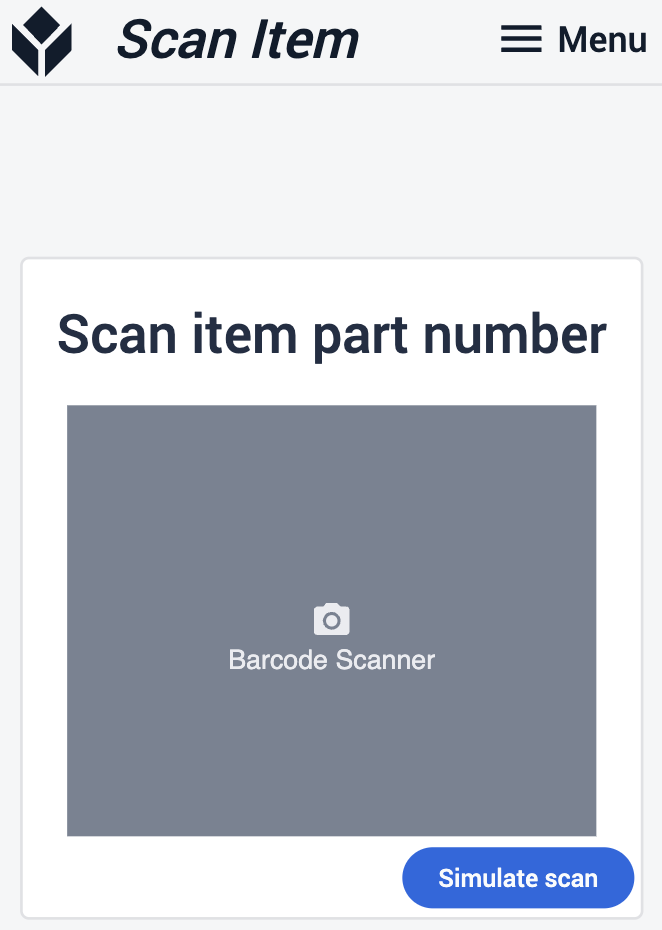
W kroku Scan Item można zeskanować przedmiot za pomocą kodu kreskowego lub skanera optycznego.
View Item Info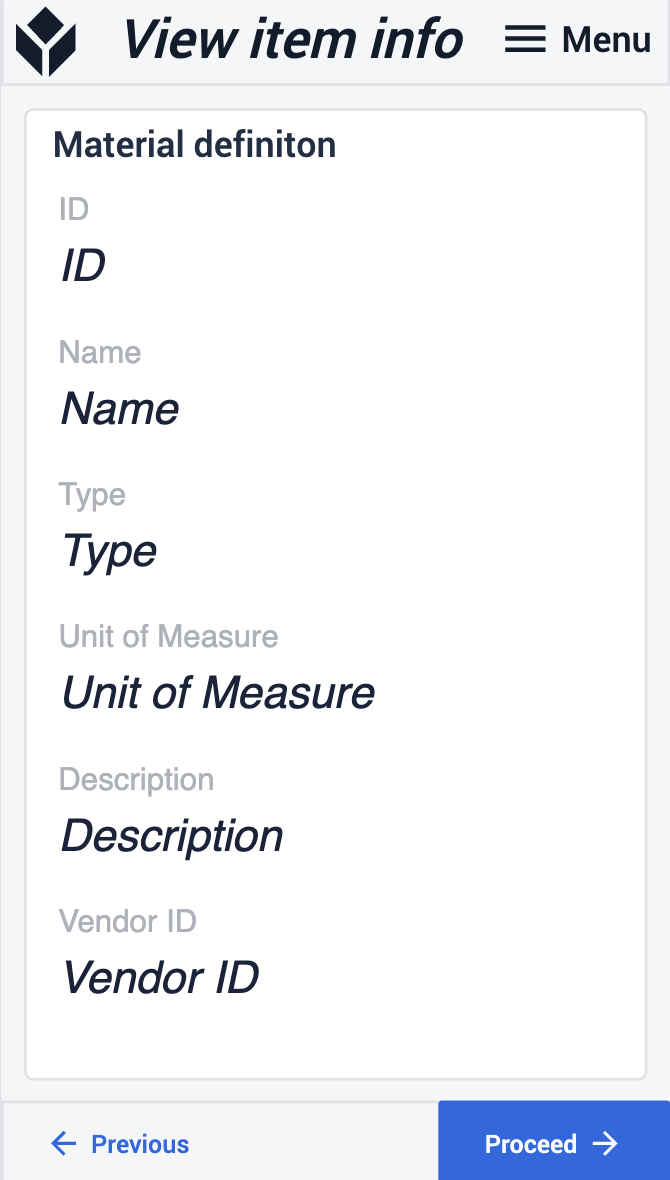
Type Item Quantity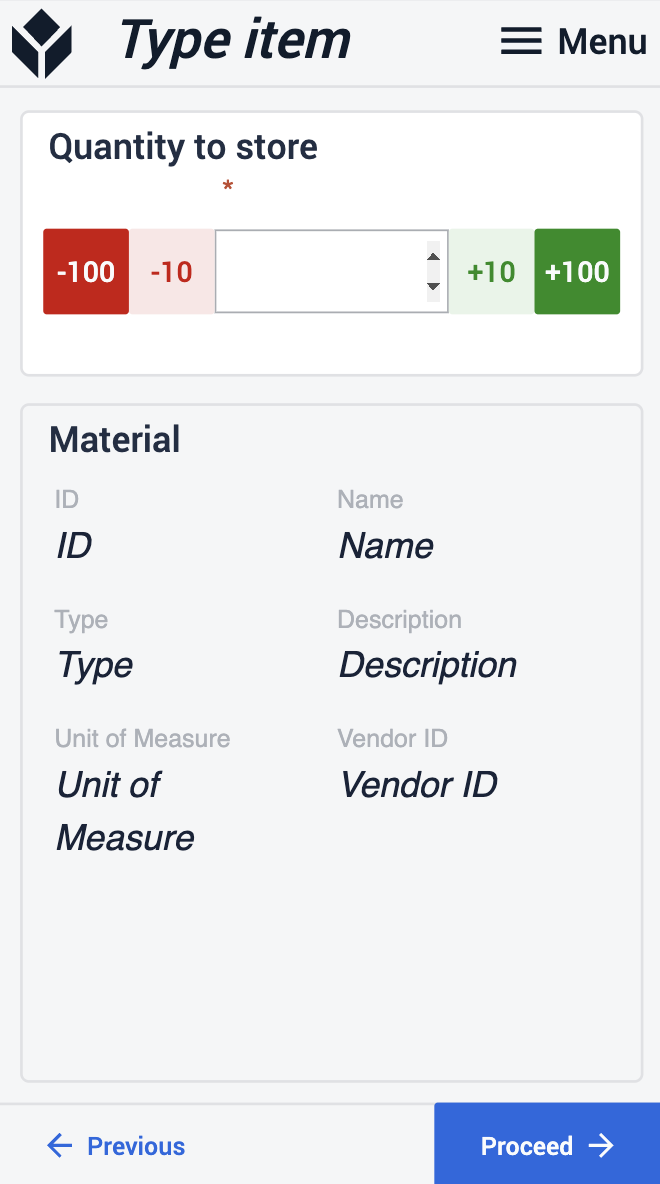
Po zeskanowaniu przedmiotu i wyświetleniu wszystkich jego szczegółów wpisz ilość, którą chcesz przechować lub przenieść między lokalizacjami. Pamiętaj, że jeśli zdecydujesz się przenieść przedmioty, nie możesz wpisać większej ilości niż przechowywana w oryginalnej lokalizacji.
Scan Location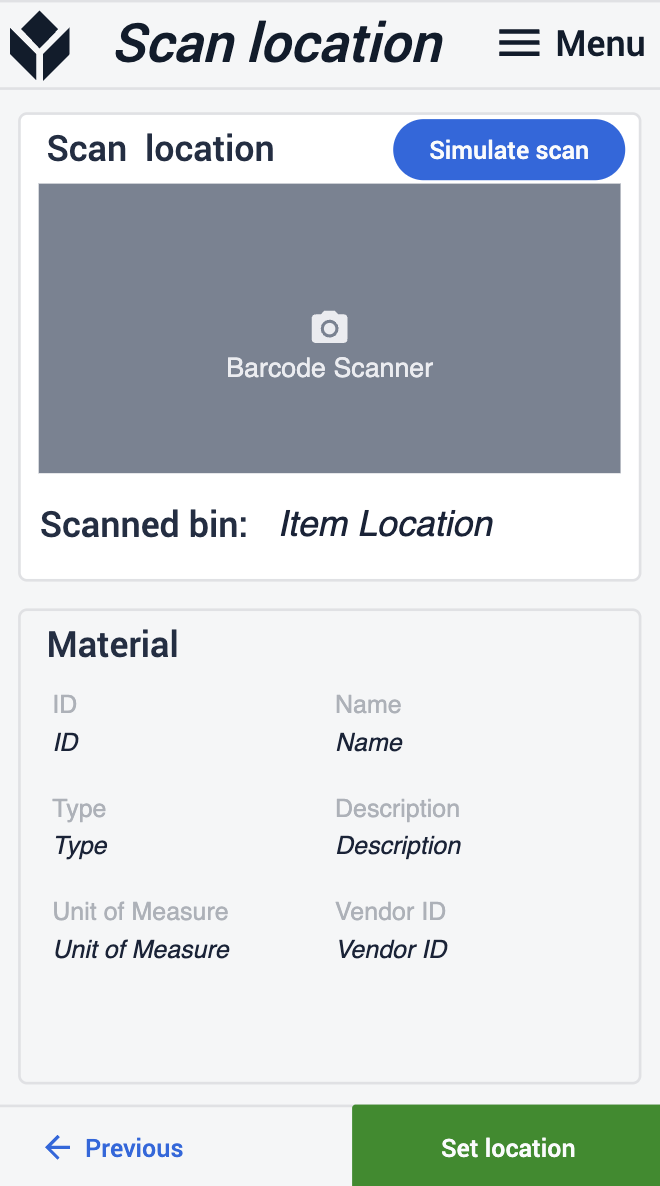
Inventory 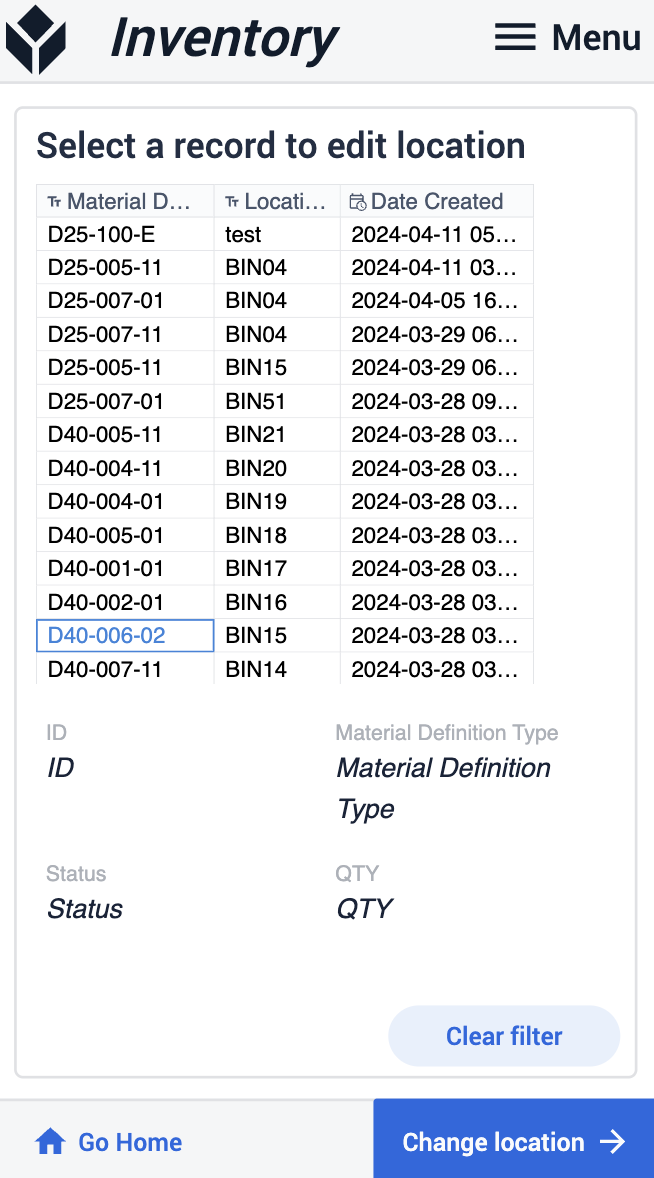
W następnym kroku zeskanuj nową lokalizację, w której chcesz przechowywać przedmioty. Po zakończeniu, w kroku Inventory możesz sprawdzić, czy przechowywanie lub przenoszenie zakończyło się sukcesem.
Material Mover
Ta aplikacja pozwala mieć kontrolę nad ruchem materiałów w całym zakładzie.
Kanban Request
Tutaj zobaczysz wszystkie złożone wnioski Kanban. Szczegółowe informacje można wyświetlić po wybraniu żądania.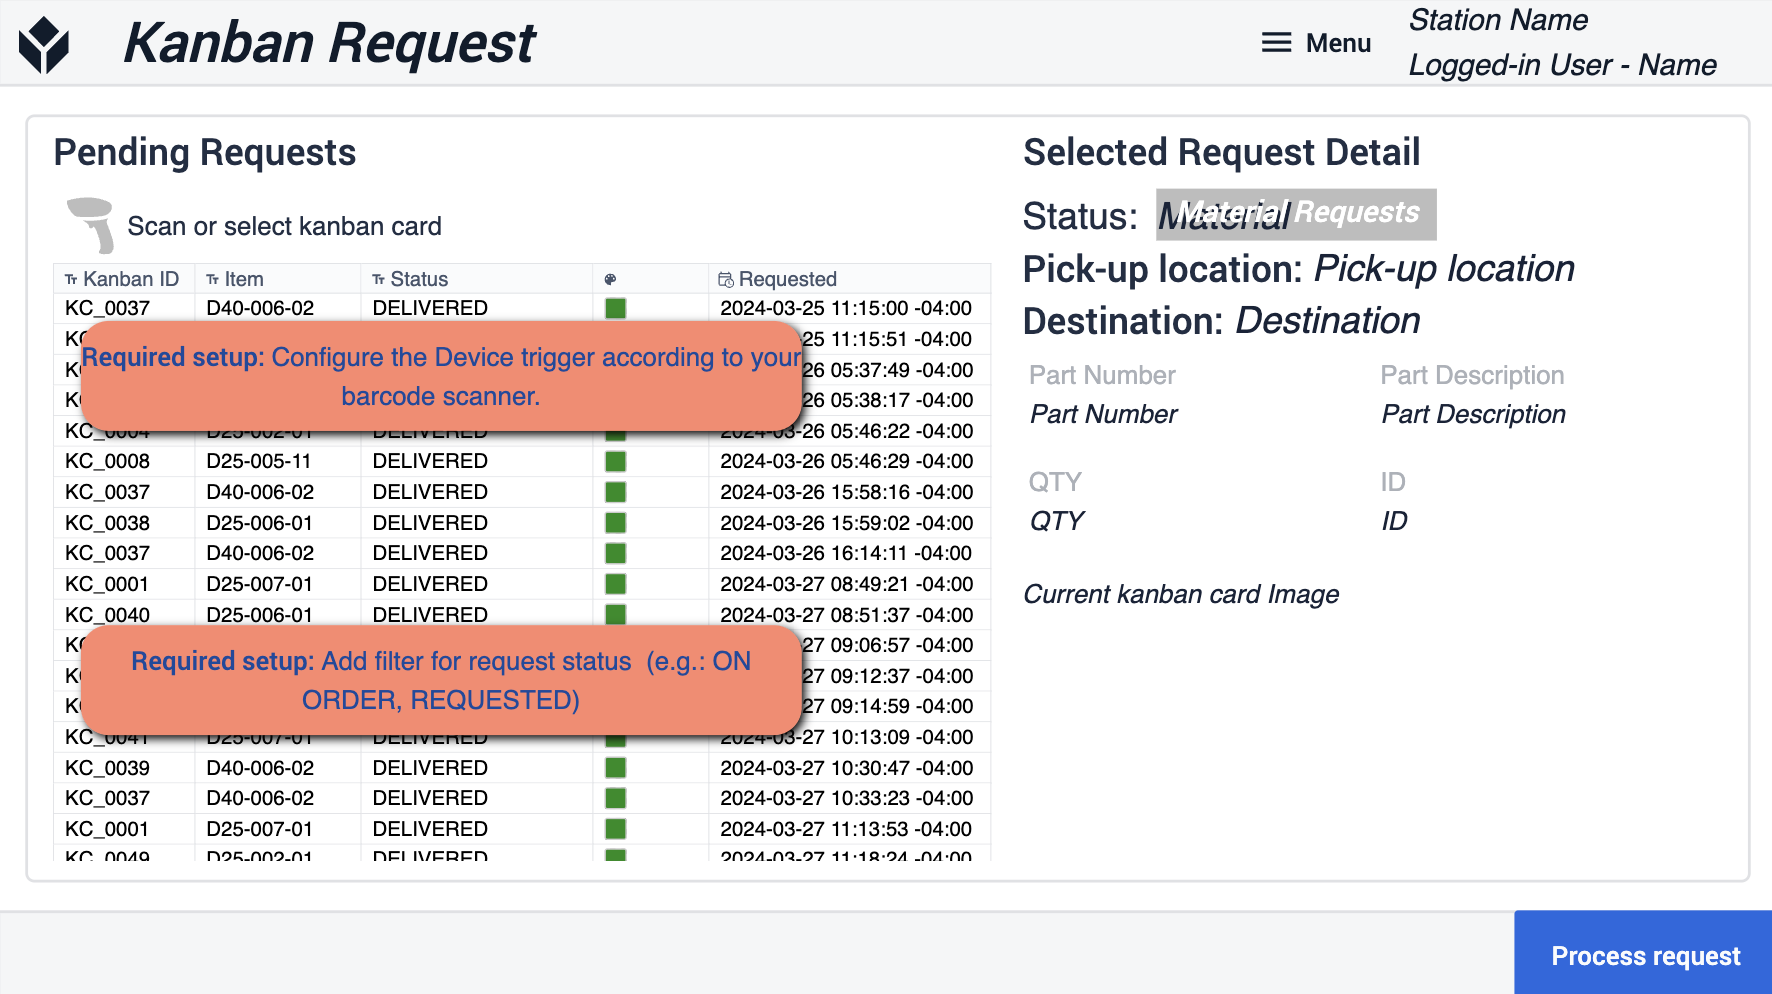 {height="300" width=""}* Na tym etapie należy skonfigurować wyzwalacz urządzenia zgodnie ze skanerem kodów kreskowych. Jak również dodać filtry do statusu żądania, aby dopasować je do swoich operacji.
Potwierdź
W tym kroku potwierdzisz faktyczne żądanie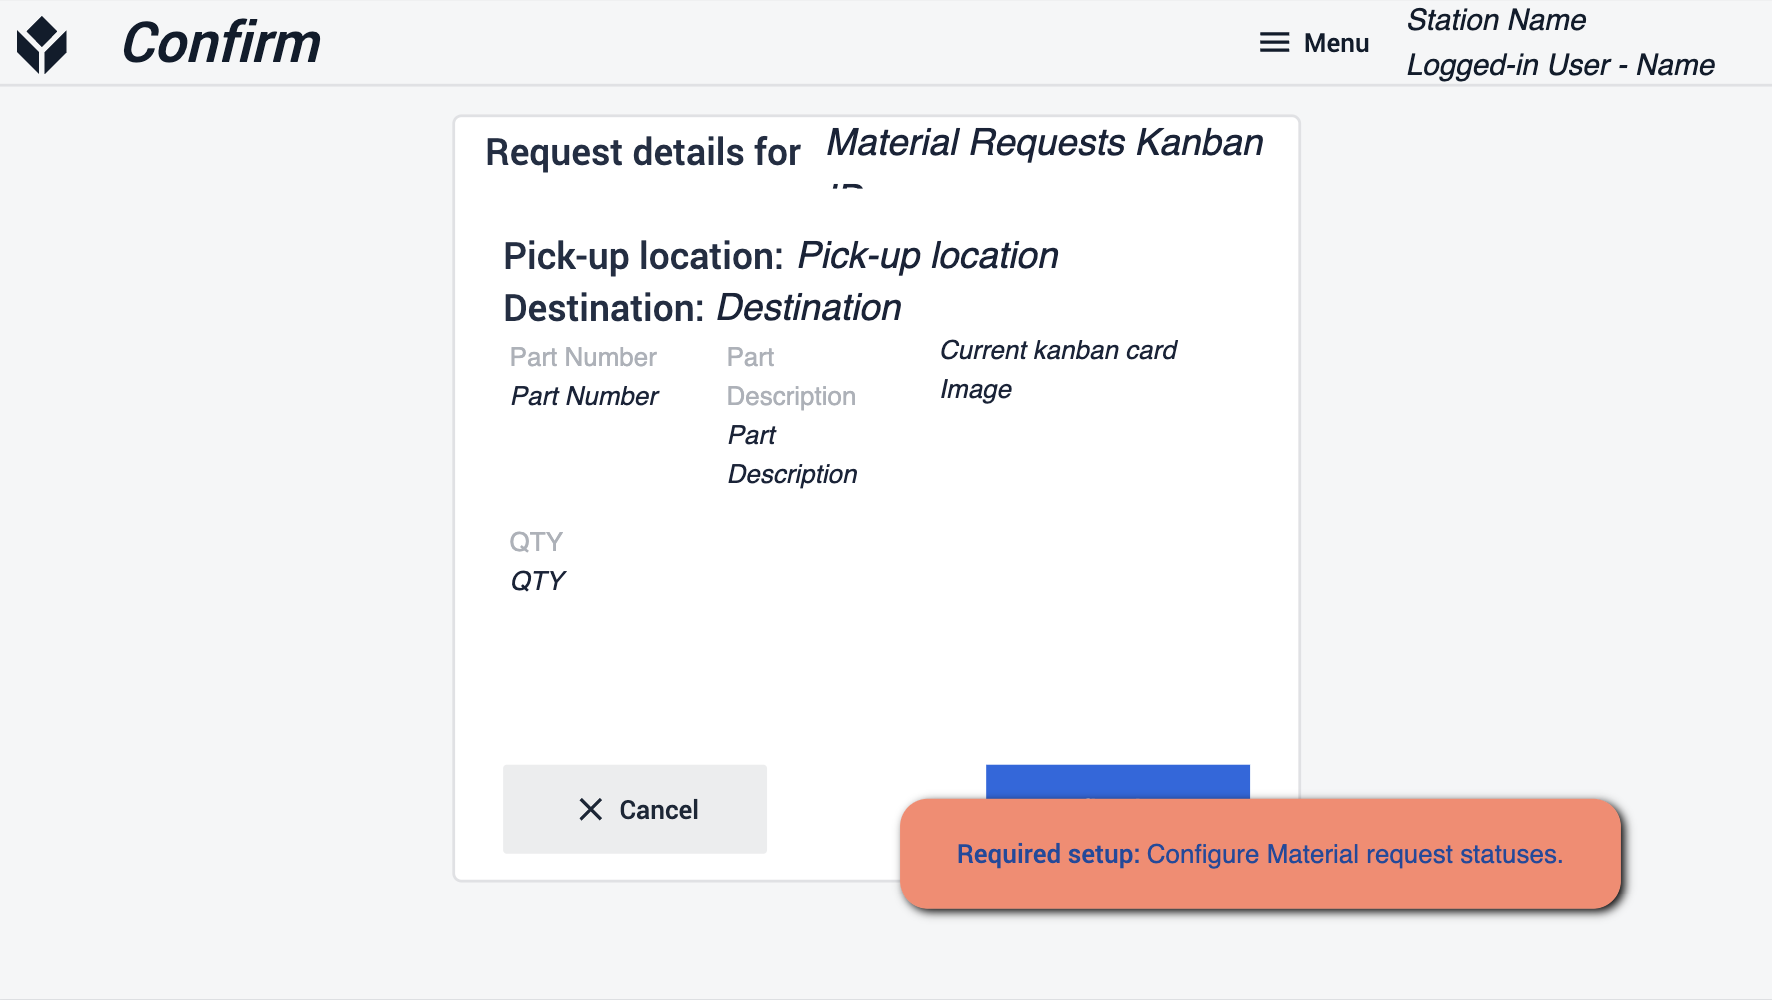 {height="300" width=""}* Upewnij się, że skonfigurowałeś status żądania materiału tak, aby aktualizował się po jego zakończeniu.
Gotowość
Podczas przechodzenia przez pakiet aplikacji ważne jest, aby upewnić się, że postępujesz zgodnie ze wskazówkami App Builder Tips. Wskazówki te będą przewodnikiem w przygotowaniu aplikacji do wdrożenia. Ważne jest, aby odnieść się do warunków wstępnych i upewnić się, że wykonałeś zarówno wymagane kroki, jak i wskazówki App Builder w każdym kroku.