
To download the app, visit: Library
The Litmus Edge platform goes well beyond legacy connectivity of the past, and brings real-time analytics, ML model execution, visualizations, and actionable decision-making to the edge so your team can have real-world revenue impact.
We are an offline first, edge deployed solution that exists inside the customers’ secured network, utilizing the existing assets, and providing full connectivity both 250+ southbound to floor assets, and northbound to IT and cloud spaces.
Purpose
This app guides you through all the scenarios on how to connect Litmus and Tulip.
Setup
The available integration methods between Litmus and Tulip include:
OPC UA
https://docs.litmus.io/litmusedge/product-features/opc-ua-server
In this link you can find more about OPC UA server
To integrate Litmus with Tulip, follow these steps:
- Check the OPC UA server configuration in Litmus Edge.
- Ensure that the configuration matches with Tulip's OPC UA data source.
- Click the test button and then save the configuration.
- Upon successful connection, start leveraging Tulip Machine Monitoring by mapping OPC UA data to Machine Attribute that define aMachine Type.
Node-Red
Litmus Edge Flows are built on Node RED, a visual programming tool that allows you to program without typing in code. The tool displays relations and functions visually and provides the ability to create JavaScript functions.
There are two available flow nodes:
- Machine Attribute
- Table API node
Machine Attribute node
Navigate to Shop Floor -> Machines, and select the machine you want to connect to. Then navigate to the configuration and choose the attribute.
Copy the machine ID and attribute ID from Tulip Machine Attribute Configuration. Enter it into the Tulip Attribute Node in Litmus Edge.
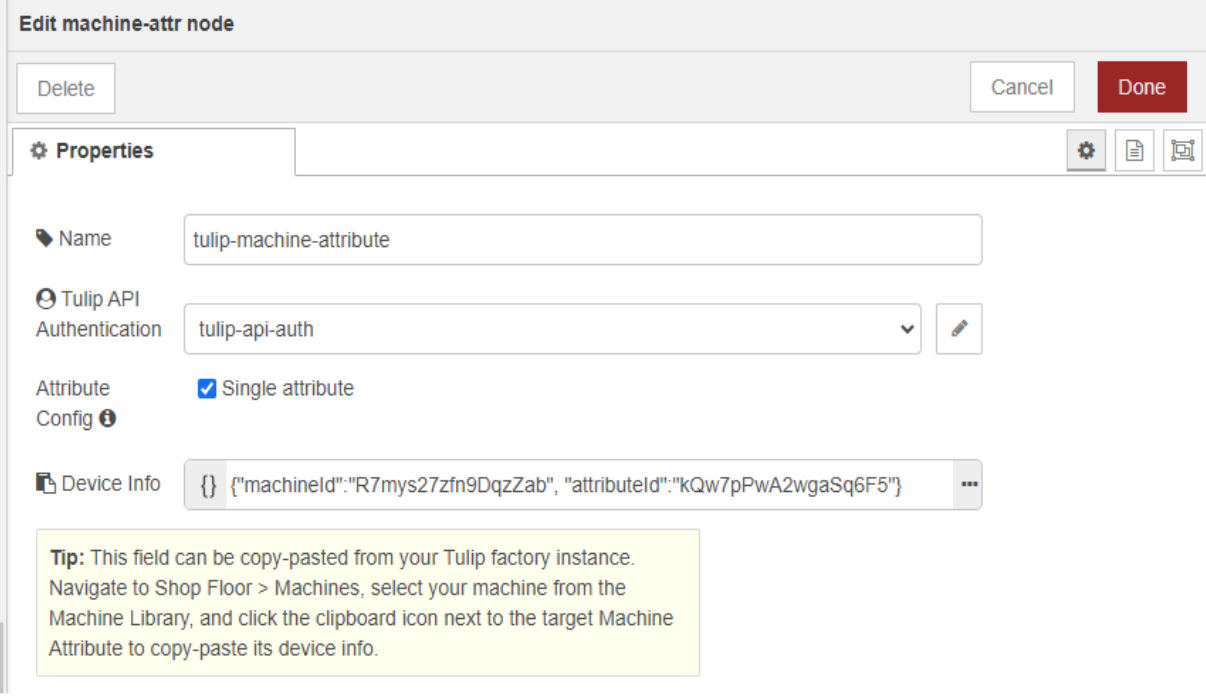
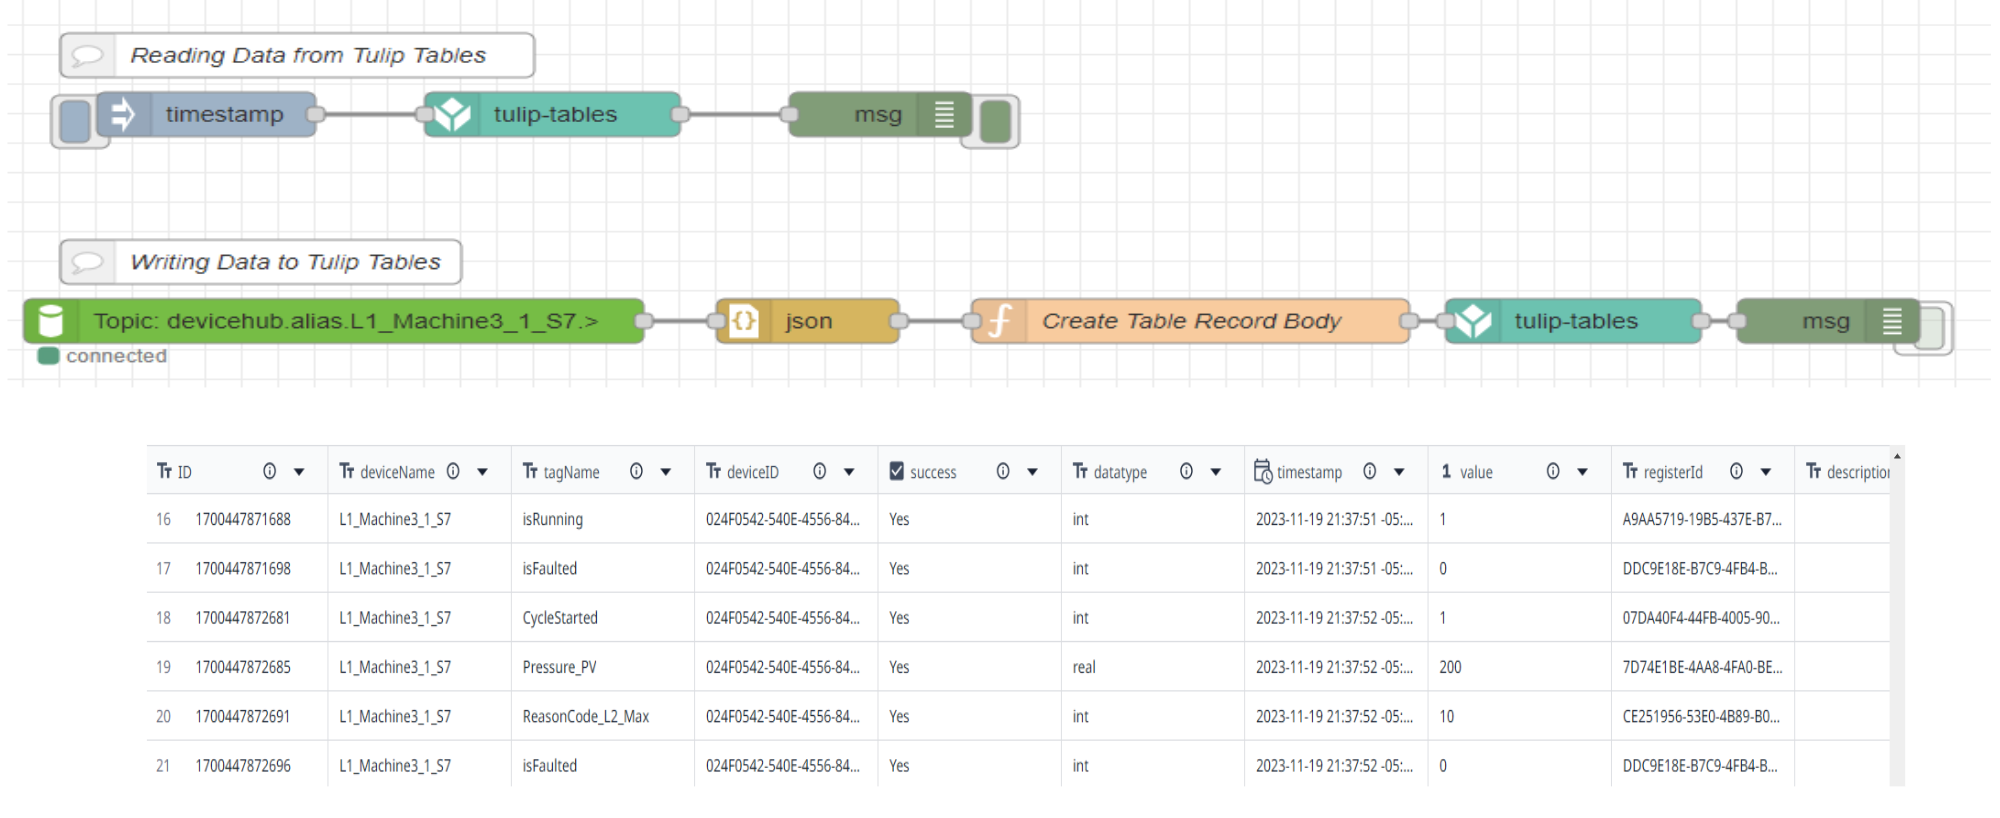
Table API node
Litmus Edge offers the capability to query data in Tulip Tables through the Tulip Tables API Node. With this node, you can read and write data from Tulip Tables. Follow these steps:
- Configure Tulip API Authentication credentials and the Tulip Table ID.
- For reading data, set up the query type, options, and filters. The table data will be displayed in Litmus Edge Flows Debug window.
- For writing data, configure the JSON payload that will be published to the payload.
MQTT
Litmus Edge has the capability to host an MQTT broker as an application. By utilizing Litmus Edge Integration, you can initiate publishing and subscribing to topics in the MQTT broker. This enables the connection of Tulip to the MQTT Broker in Litmus Edge, allowing Tulip to subscribe to the data.
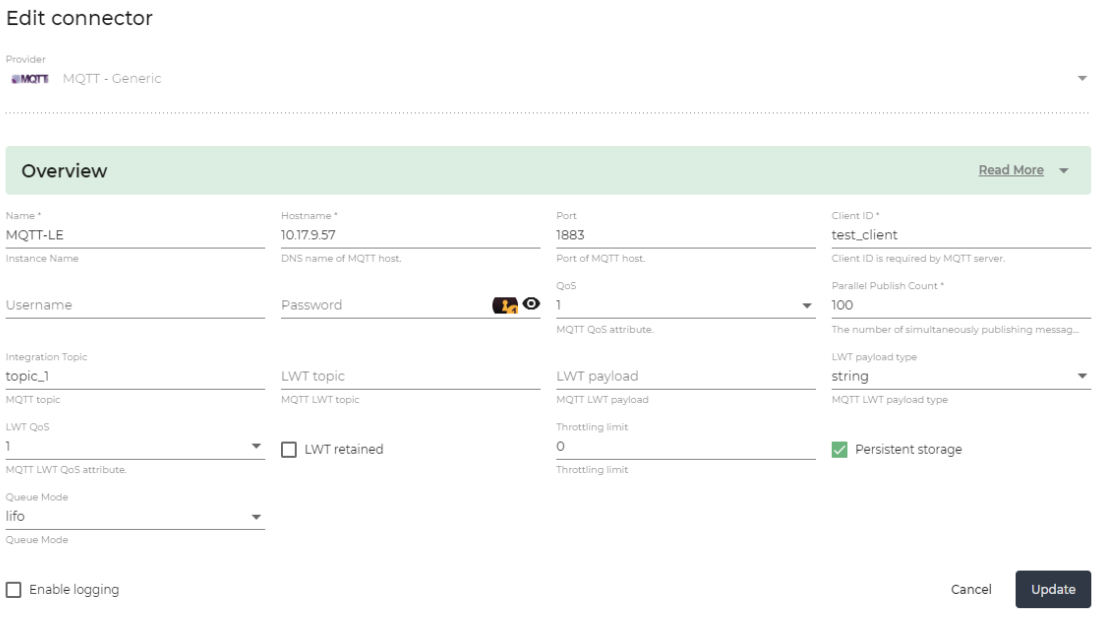
To set up an MQTT Integration in Litmus Edge for publishing data, follow these steps:
- Configure MQTT Integration: Access Litmus Edge and set up the MQTT Integration. Specify the relevant details, such as the broker address, port, and authentication credentials.
- Define Publishing Topics: Identify the topics to which you want to publish data. This includes specifying the format and content of the data.
- Start Publishing: Once the MQTT Integration is configured, initiate the process of publishing data to the designated MQTT broker. Litmus Edge will handle the communication
Note: The MQTT broker can be running either internally or externally to Litmus Edge, depending on your specific setup and requirements.
To set up Tulip as an MQTT Datasource, follow these steps:
Establish MQTT Connection in Tulip:
- Access the Tulip platform and configure Tulip as an MQTT Datasource.
- Provide the necessary details such as the MQTT broker address, port, and authentication credentials.
Define MQTT Topics:
- Specify the MQTT topics from which you want to receive data in Tulip. These topics should align with the data you want to monitor.
Map Tulip API Data to Attributes:
- Upon successful connection, start leveraging Tulip Machine Monitoring. Map the received MQTT data to Tulip "attributes" that define the machine type.
- This mapping allows you to visualize and analyze machine data within Tulip's Machine Monitoring capabilities.

Did you find what you were looking for?
You can also head to community.tulip.co to post your question or see if others have faced a similar question!
.gif)