In this walkthrough, you will:
- Create an input form on a step using input widgets
- Save input data to variables and a table
- Review table records on a step
In this walkthrough, you’ll learn how to store data in an app and also store input data from an app to a table.
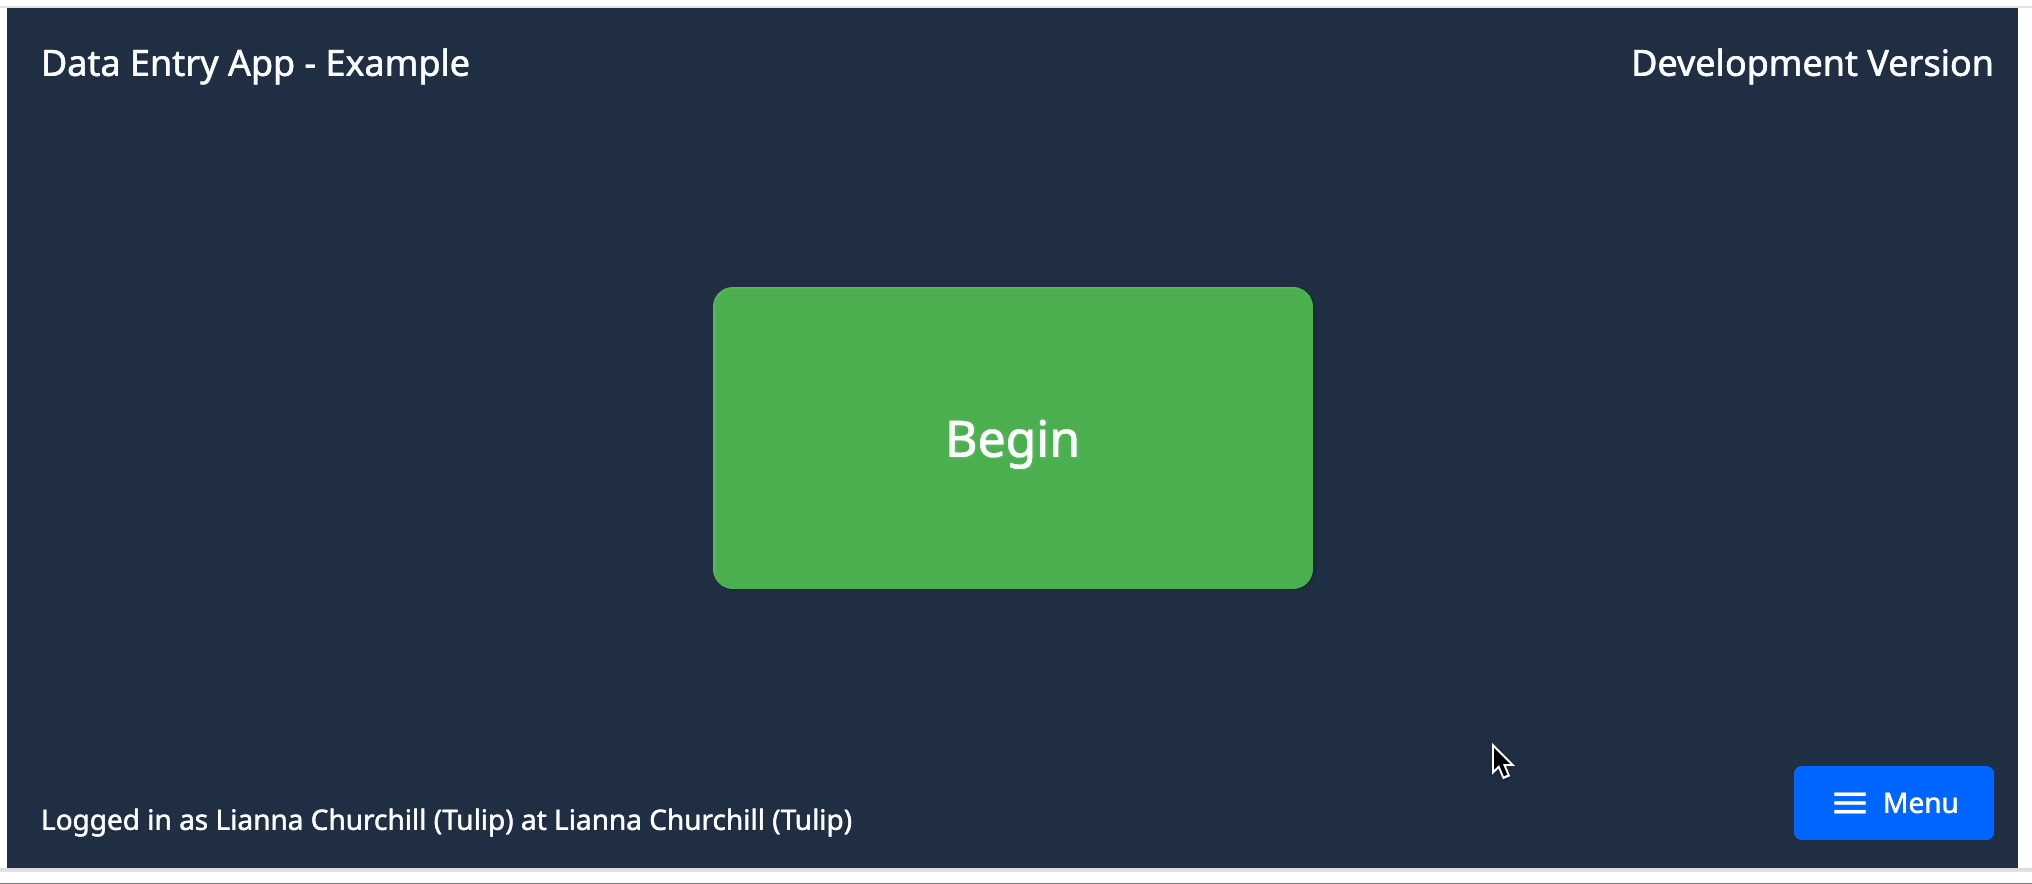
At the end of both exercises, you’ll have a data entry app that will look like this:
Exercise 1: Save input data to app
In this exercise, you will create a basic step that saves input data to variables.
Create a new app
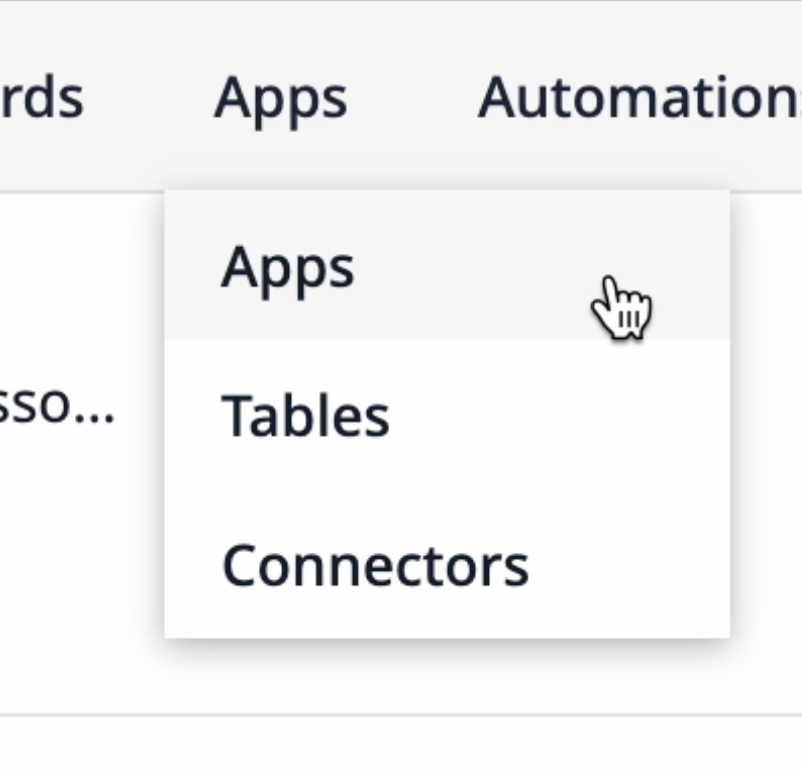
-
In the Apps tab, click Apps.
-
Click + Create App in the top right corner.
-
Name the app “Data Entry Form - Example”. Optionally, you can add a description so other users know what this app is for.
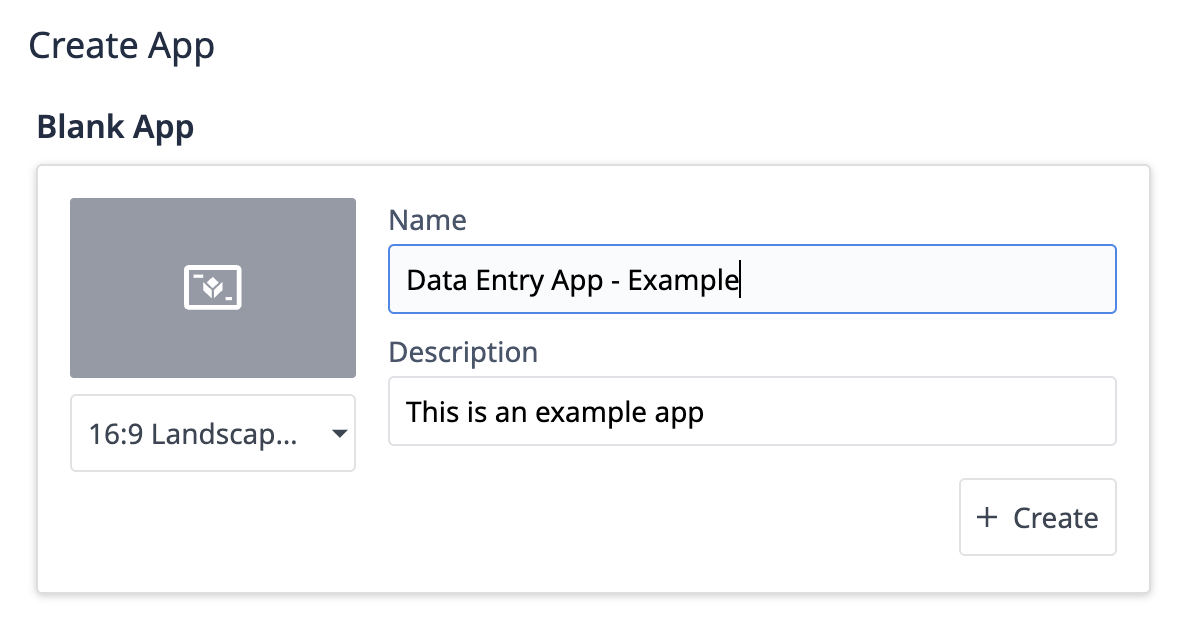
-
Click + Create.
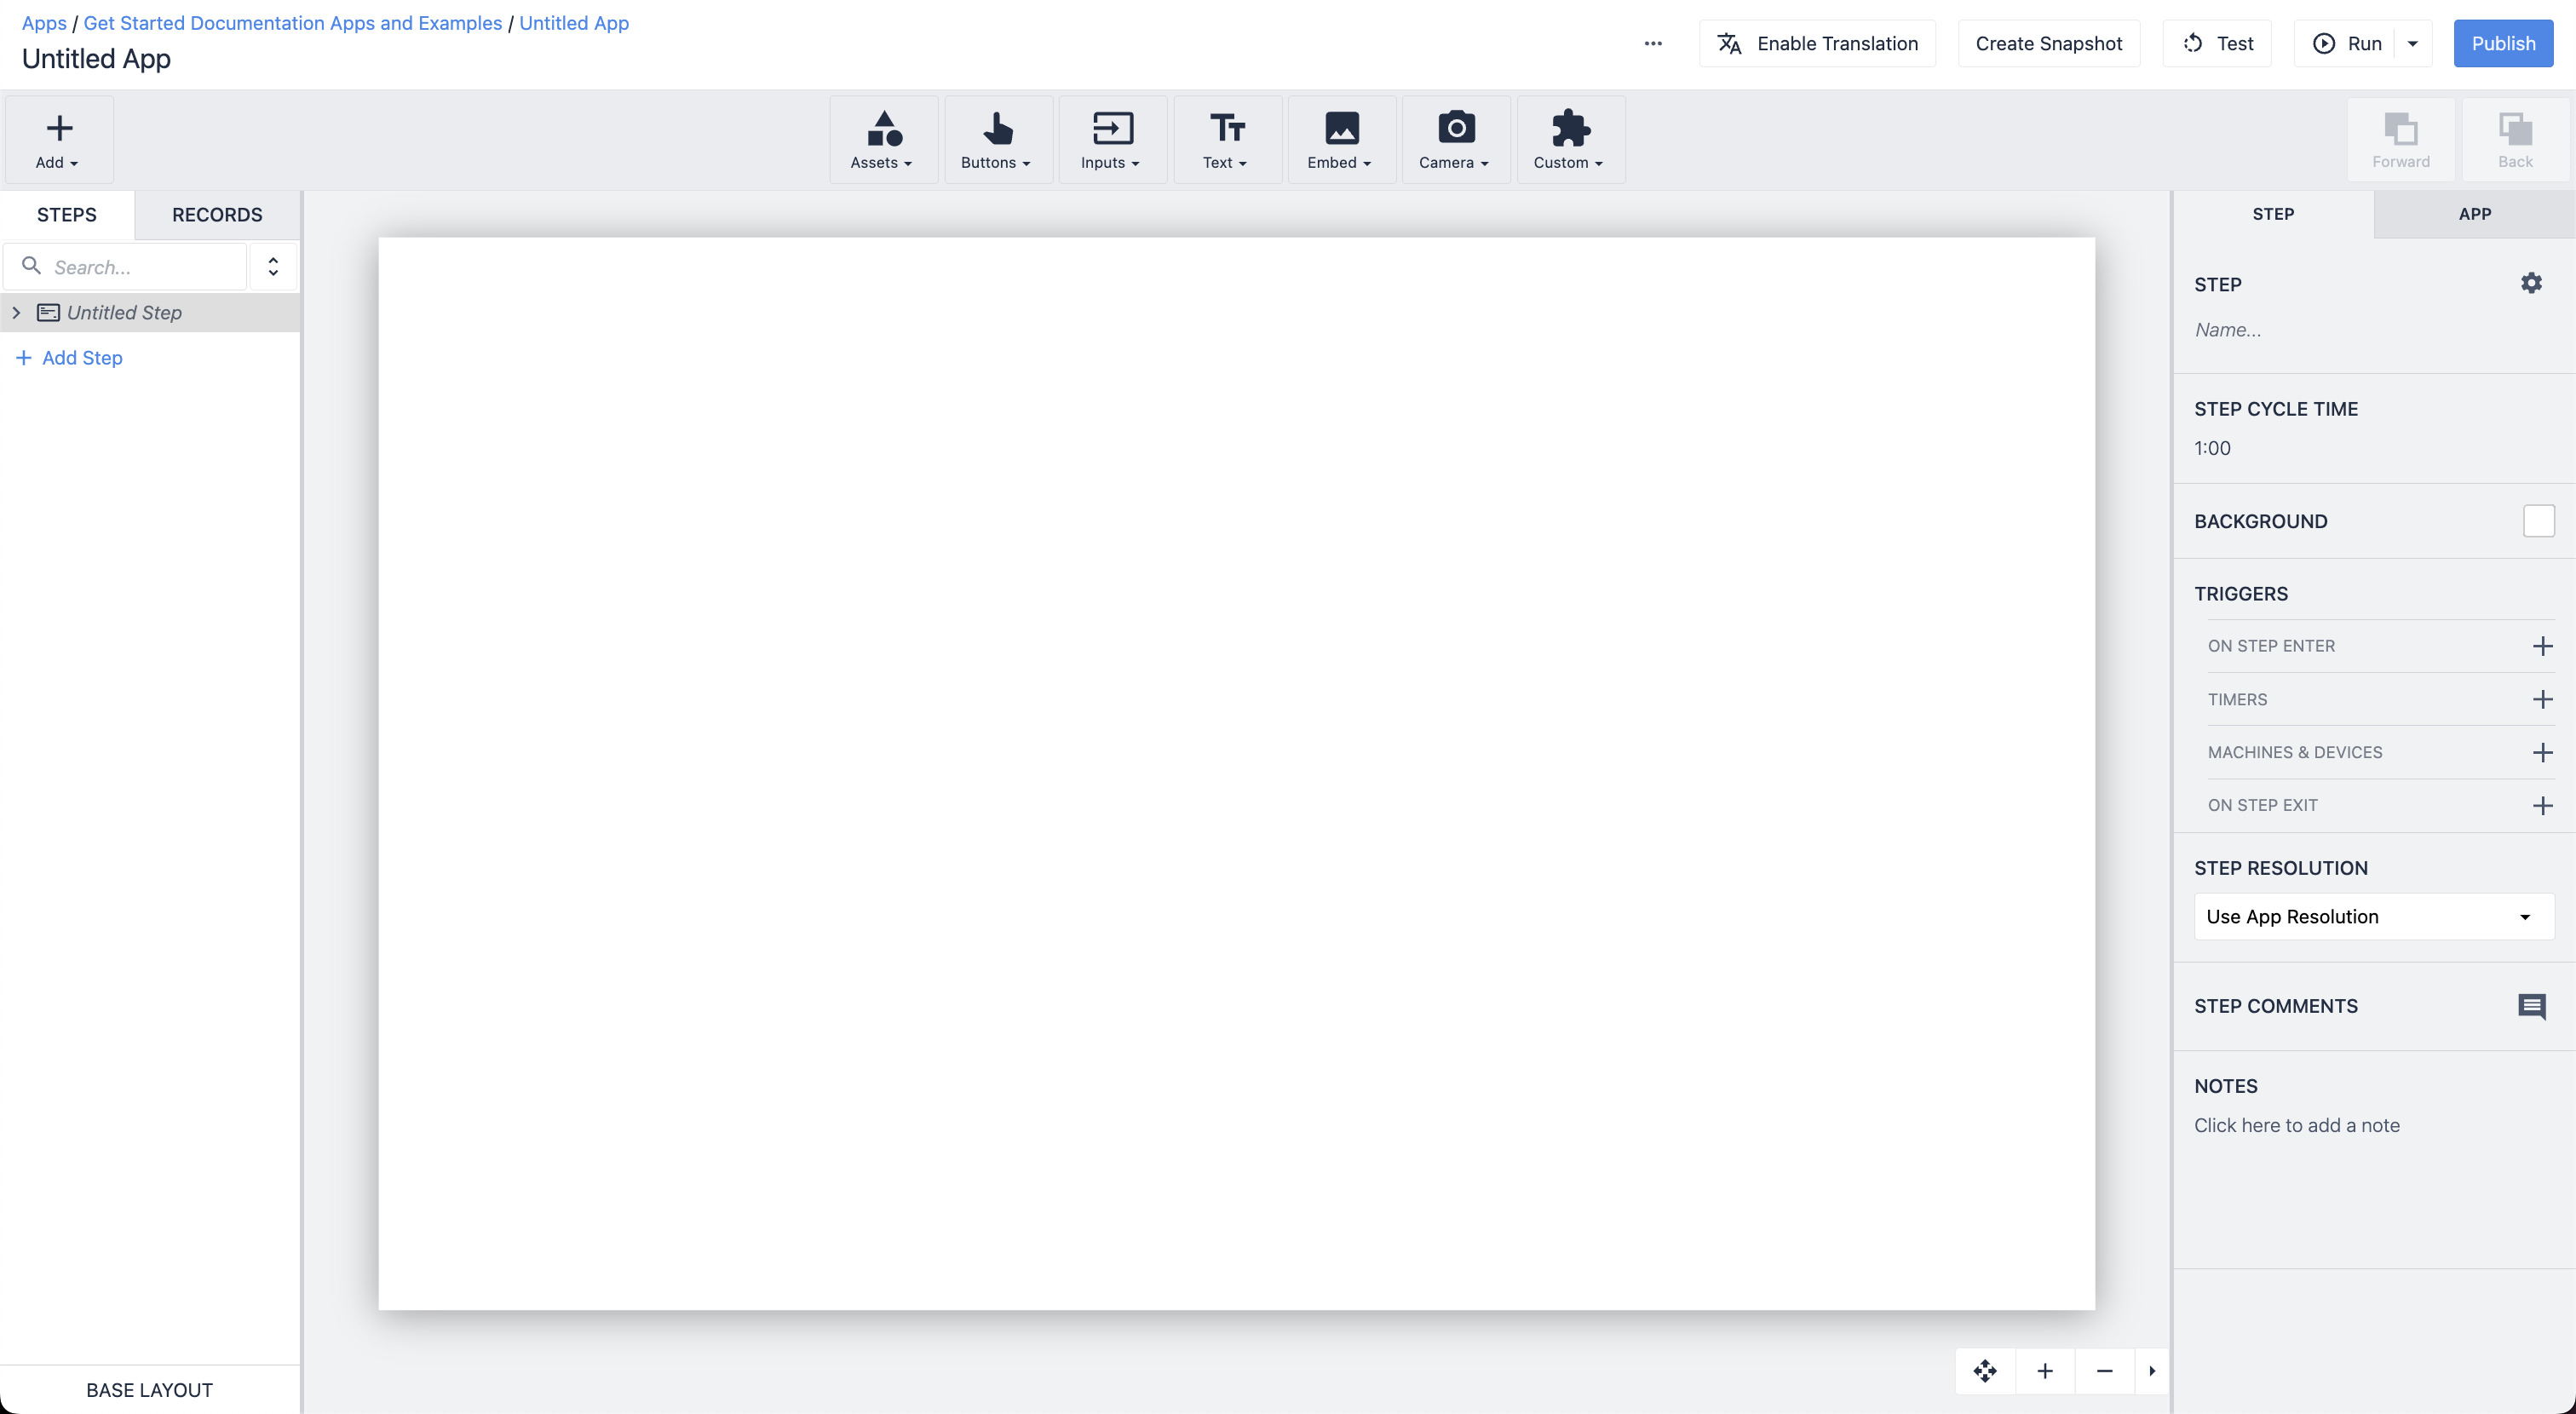
From the app details page, you can either click Edit in the top right corner, or click the Untitled Step name to enter the App Editor.
Add input widgets with variable data sources
- Click the Inputs tab and select Checkbox.
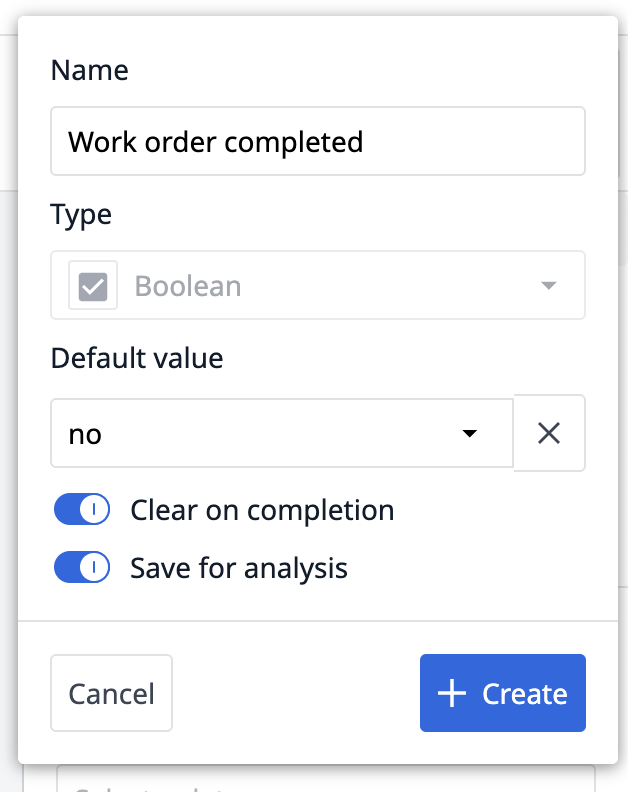
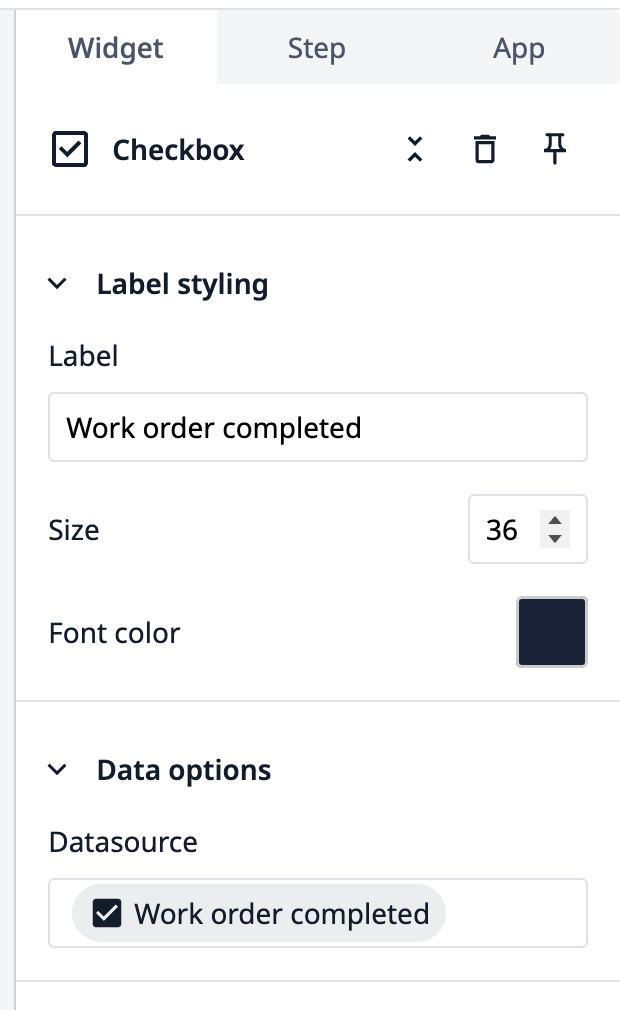
- In the Side pane, name the Label: “Work order completed”.
- Under Datasource, click the empty box and then + Add variable.
- Name the variable “Work order completed” and change the Default value to no. Click + Create.
The widget configuration will look like this:
- Add a Date picker widget from the Inputs tab.
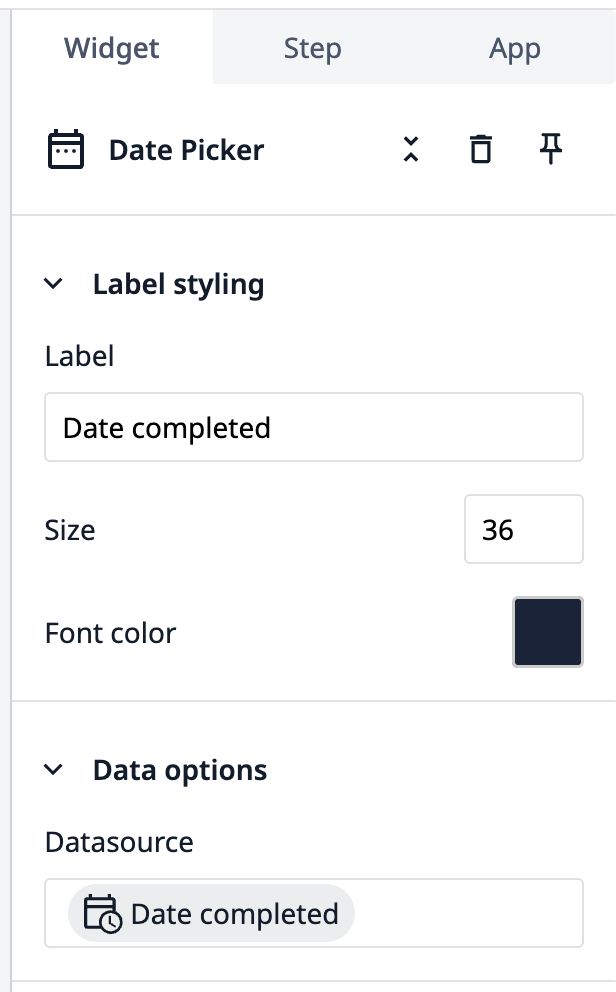
- In the Side pane, name the Label: “Date completed”.
- Under Datasource, click the empty box and then + Add variable.
- Name the variable “Date completed” and click + Create.
The widget configuration will look like this:
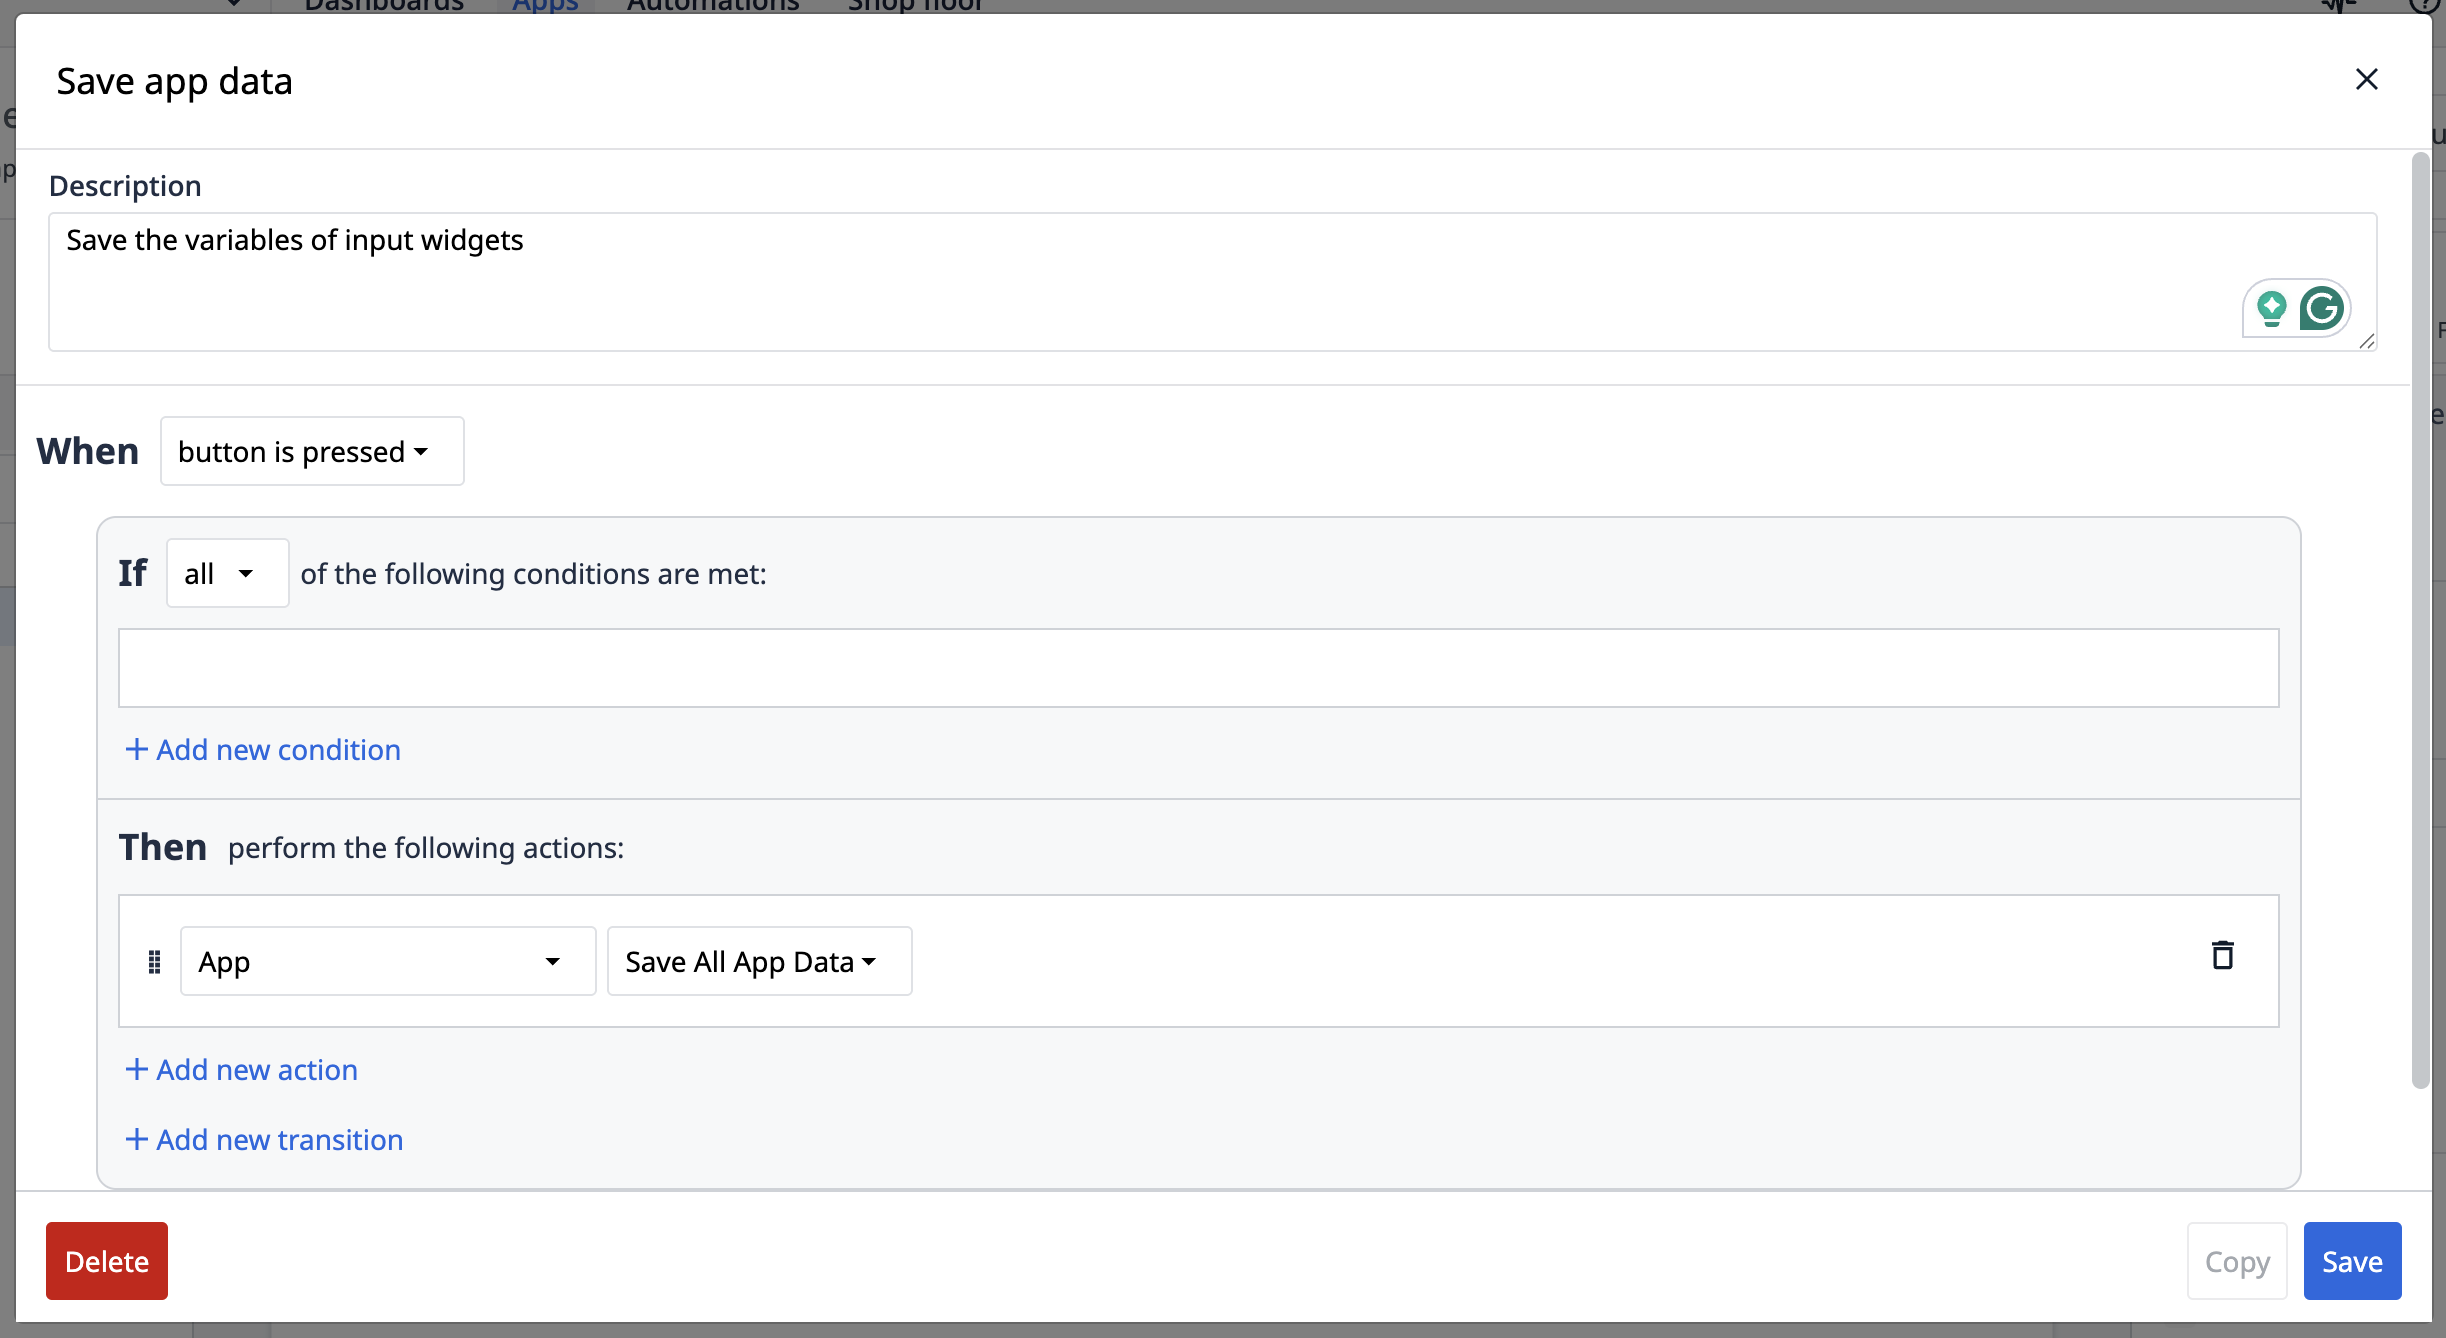
Create a trigger to save input data
- Click to Buttons tab and select Submit.
- In the Side pane, click the + plus sign next to Triggers.
- Title the trigger “Save app data”.
- Under the Then section, select App from the dropdown. Then select Save All App Data. Click Save.
Now you have a basic data entry step that uses variables to store values. Here is what the app looks like when you Test it in Developer Mode:
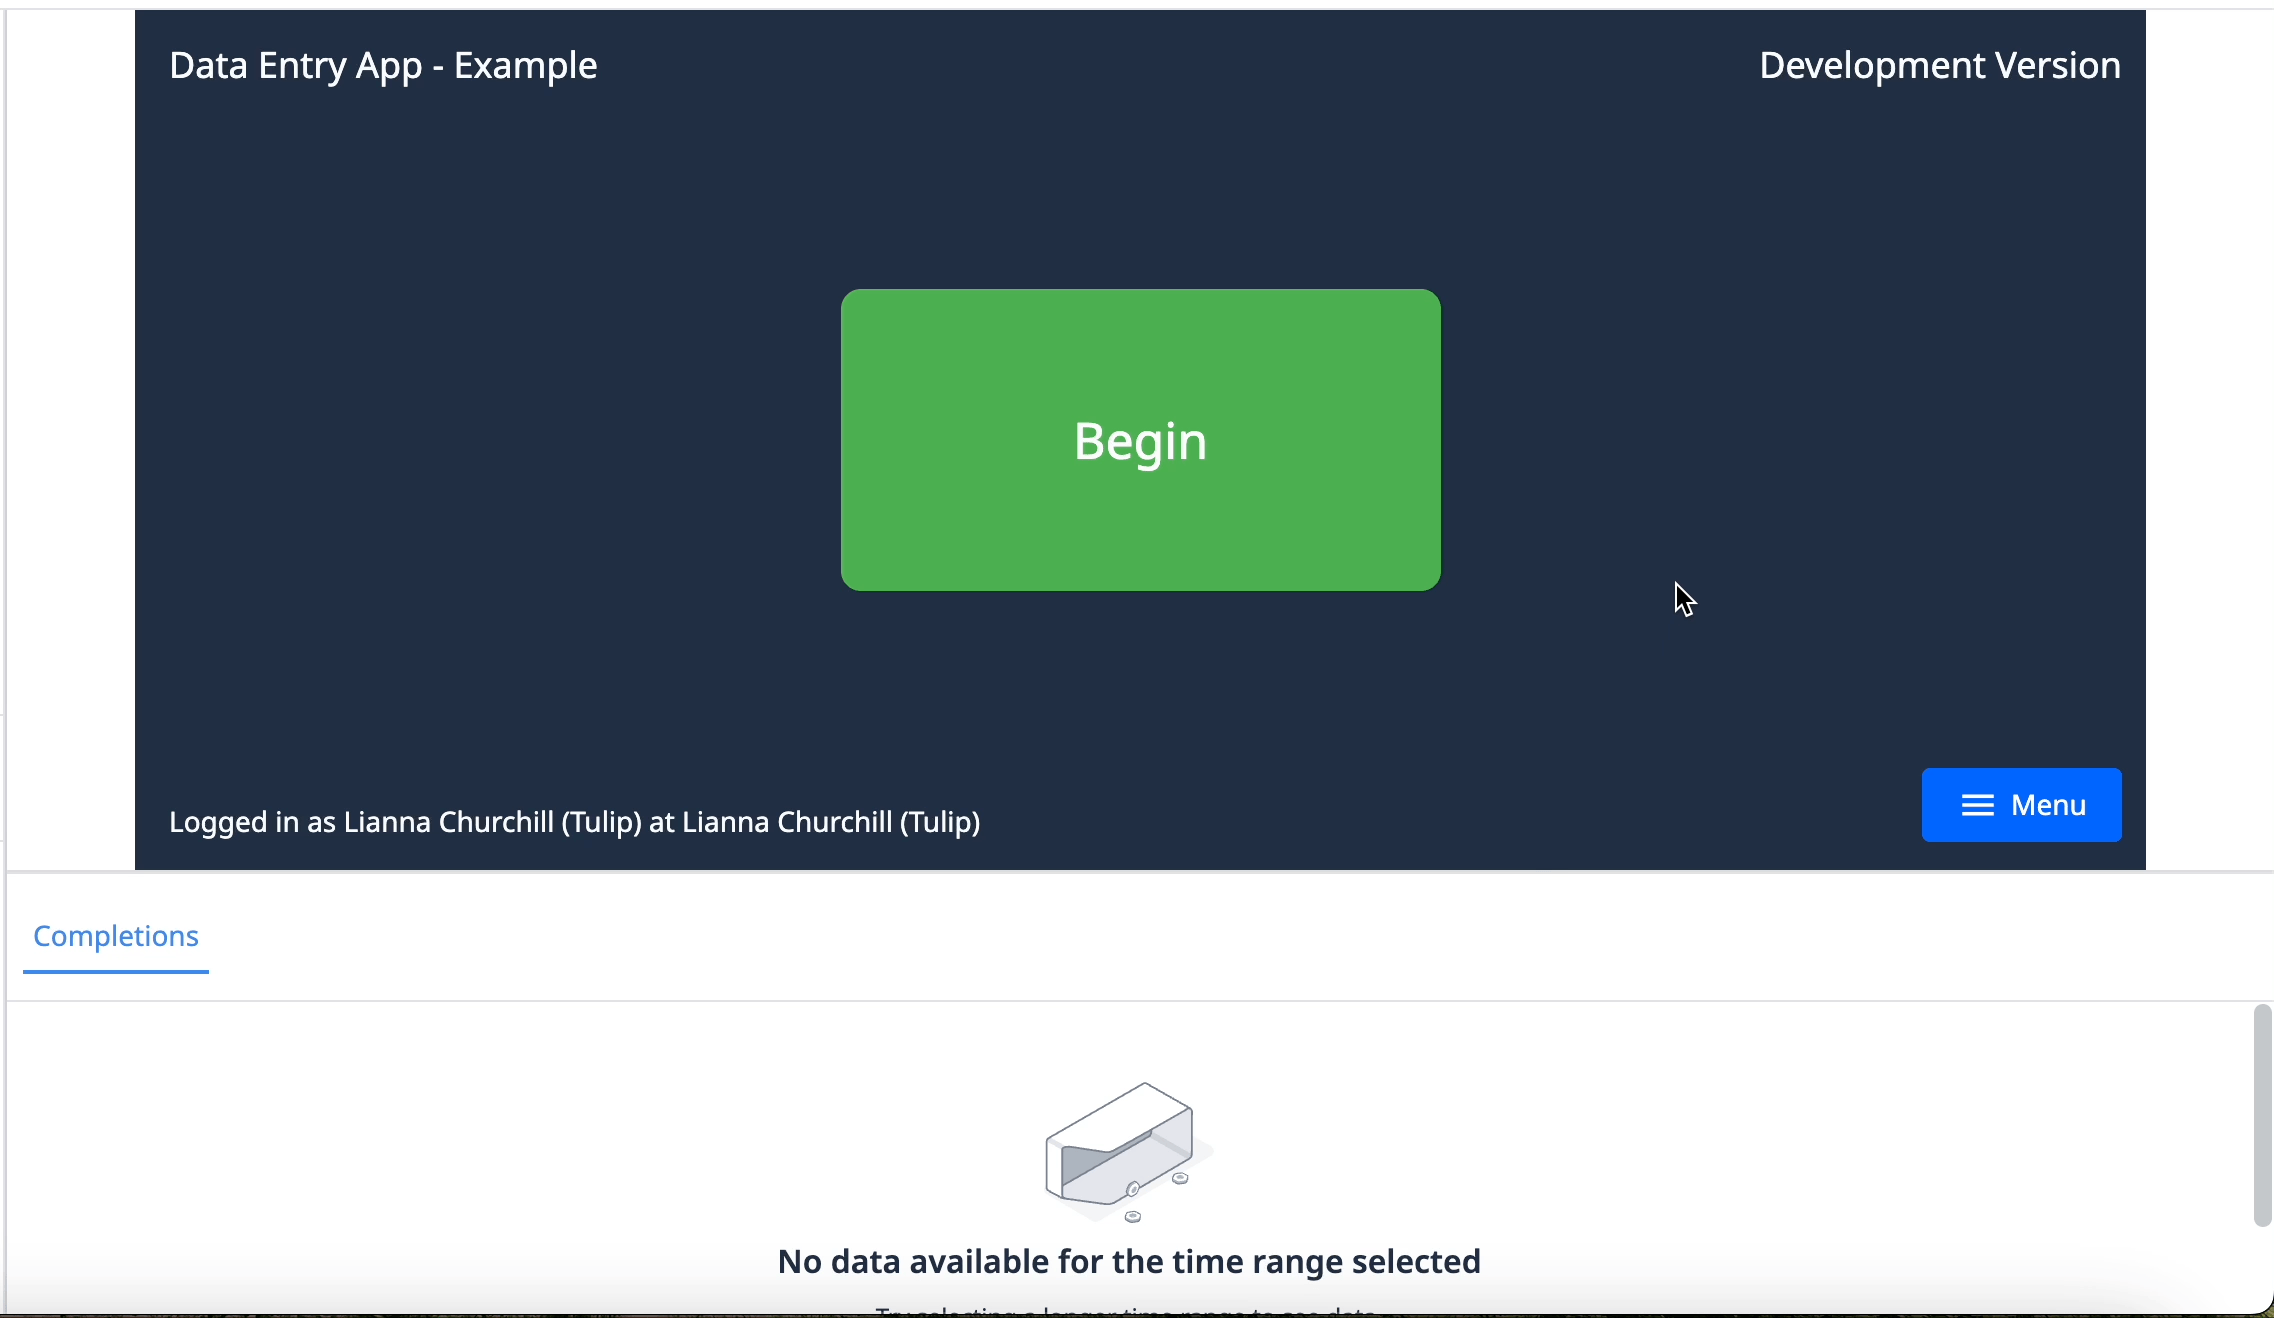
Notice that the variables store into completions data, which you can see below the step screen.
Exercise 2: Store input data to table
In order to follow this walkthrough, you must first complete the exercises in Build Your First Table.
In this exercise, you will create a data entry step that saves values to a Work Orders table. You will also be able to view the records in the table from the app step.
- Add a new step and name it “Exercise 2”.
Add the table to the app
-
Click the Records tab and select + Add table.
-
Select the Work Orders table, then click Add.

-
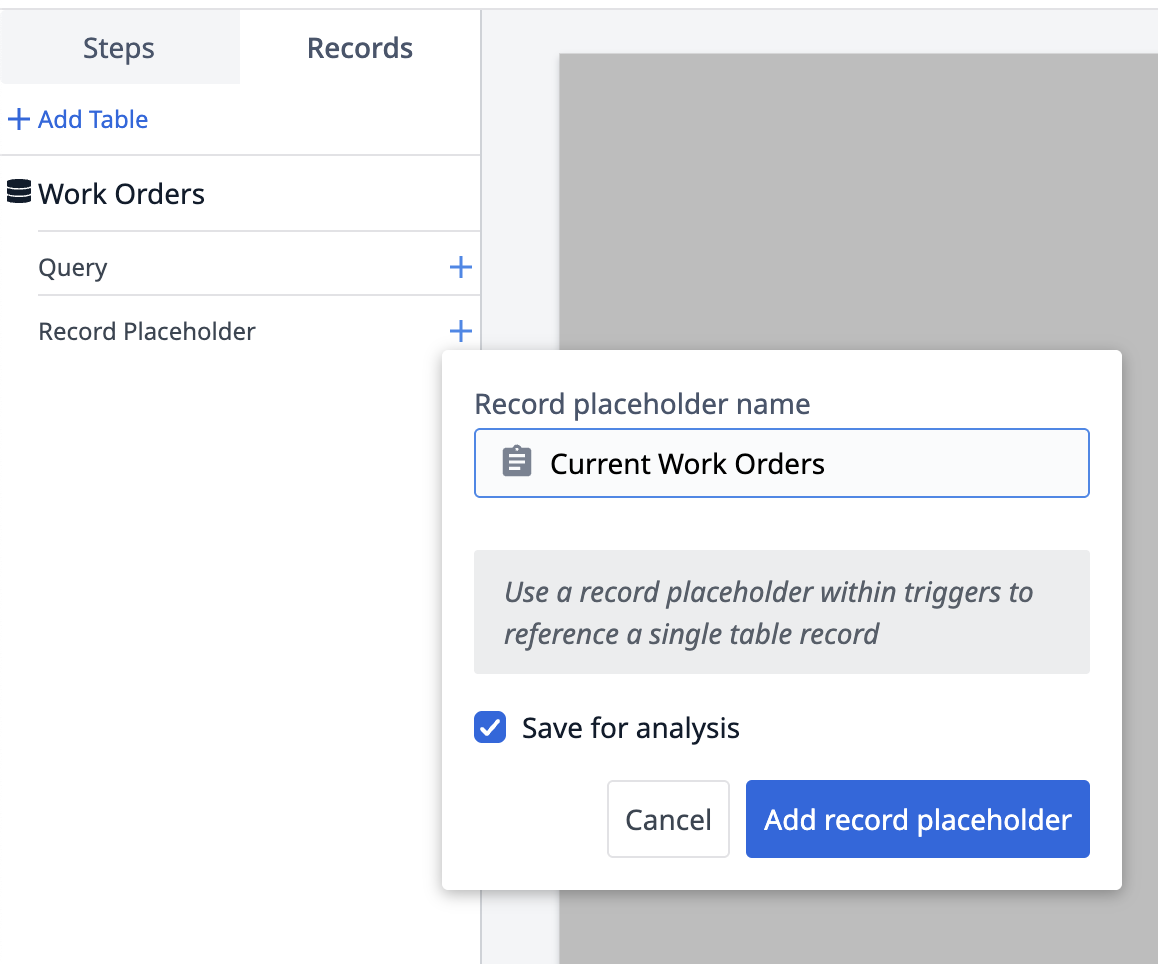
Click the + icon next to Record Placeholder.
-
Name the record placeholder: “Current Work Orders”. Click Add record placeholder.
Create the data form inputs
-
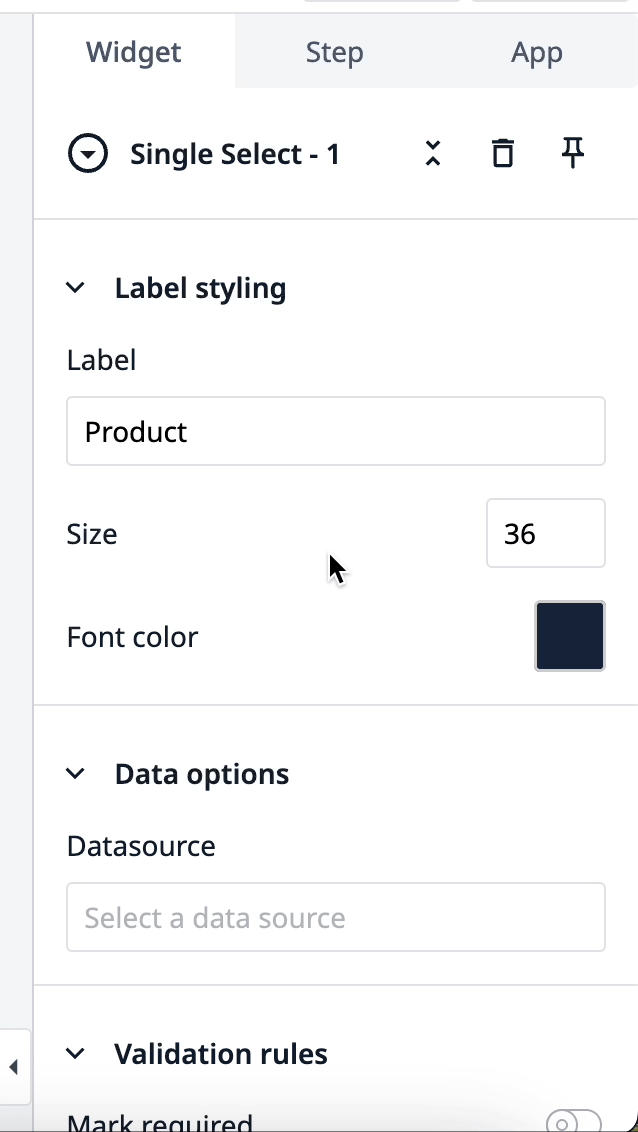
Click Inputs and select the Single select.
-
In the Side Pane, label the widget: “Product”.
-
Under Data options, click the blank Datasource field and then + Add variable.
-
Name the variable “Product” and then click + Create.
-
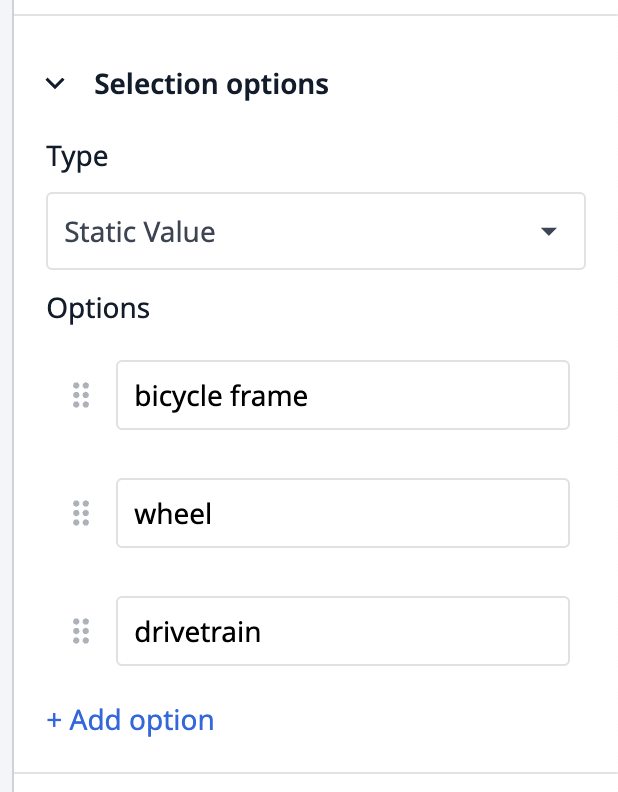
In Selection Options, add the following options:
- Bicycle frame
- Wheel
- Drivetrain
-
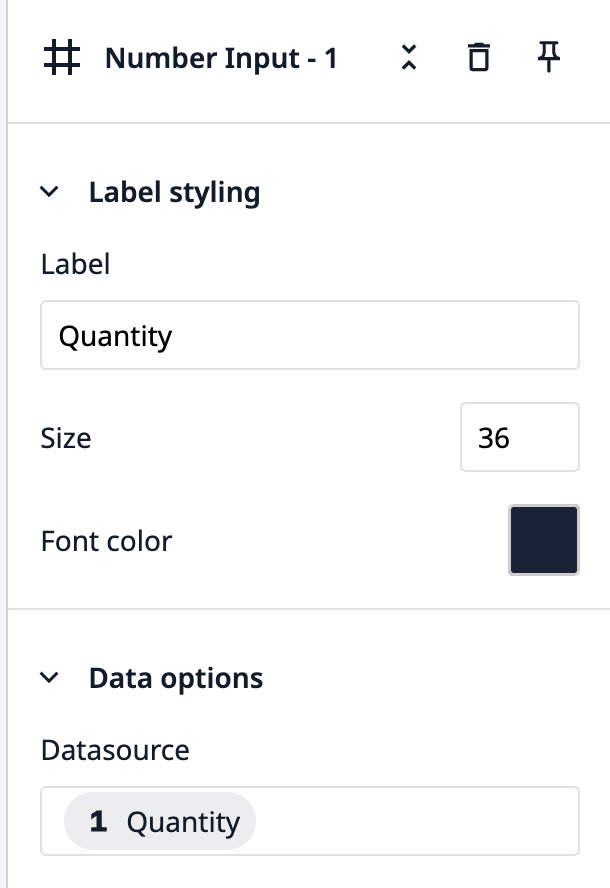
Add a Number Input widget to the step.
-
Name the label: “Quantity”.
-
Under Data options, click the blank Datasource field and then + Add variable.
-
Name the variable “Product” and then click + Create.
-
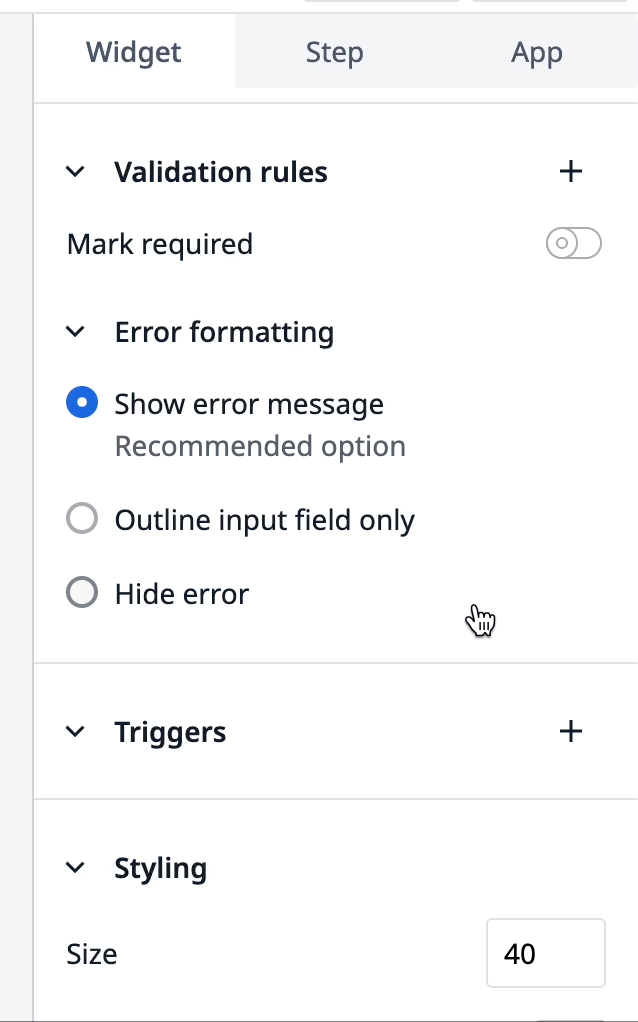
Under Validation Rules, click + to add a rule.
-
Select Greater Than and type “0” as a static value.
Create button trigger to store input values
- Add a button to the step.
- In the side pane, add text: “Create work order”.
- Under Triggers, click +.
- Name the trigger: “Store input values to new Work order record”.
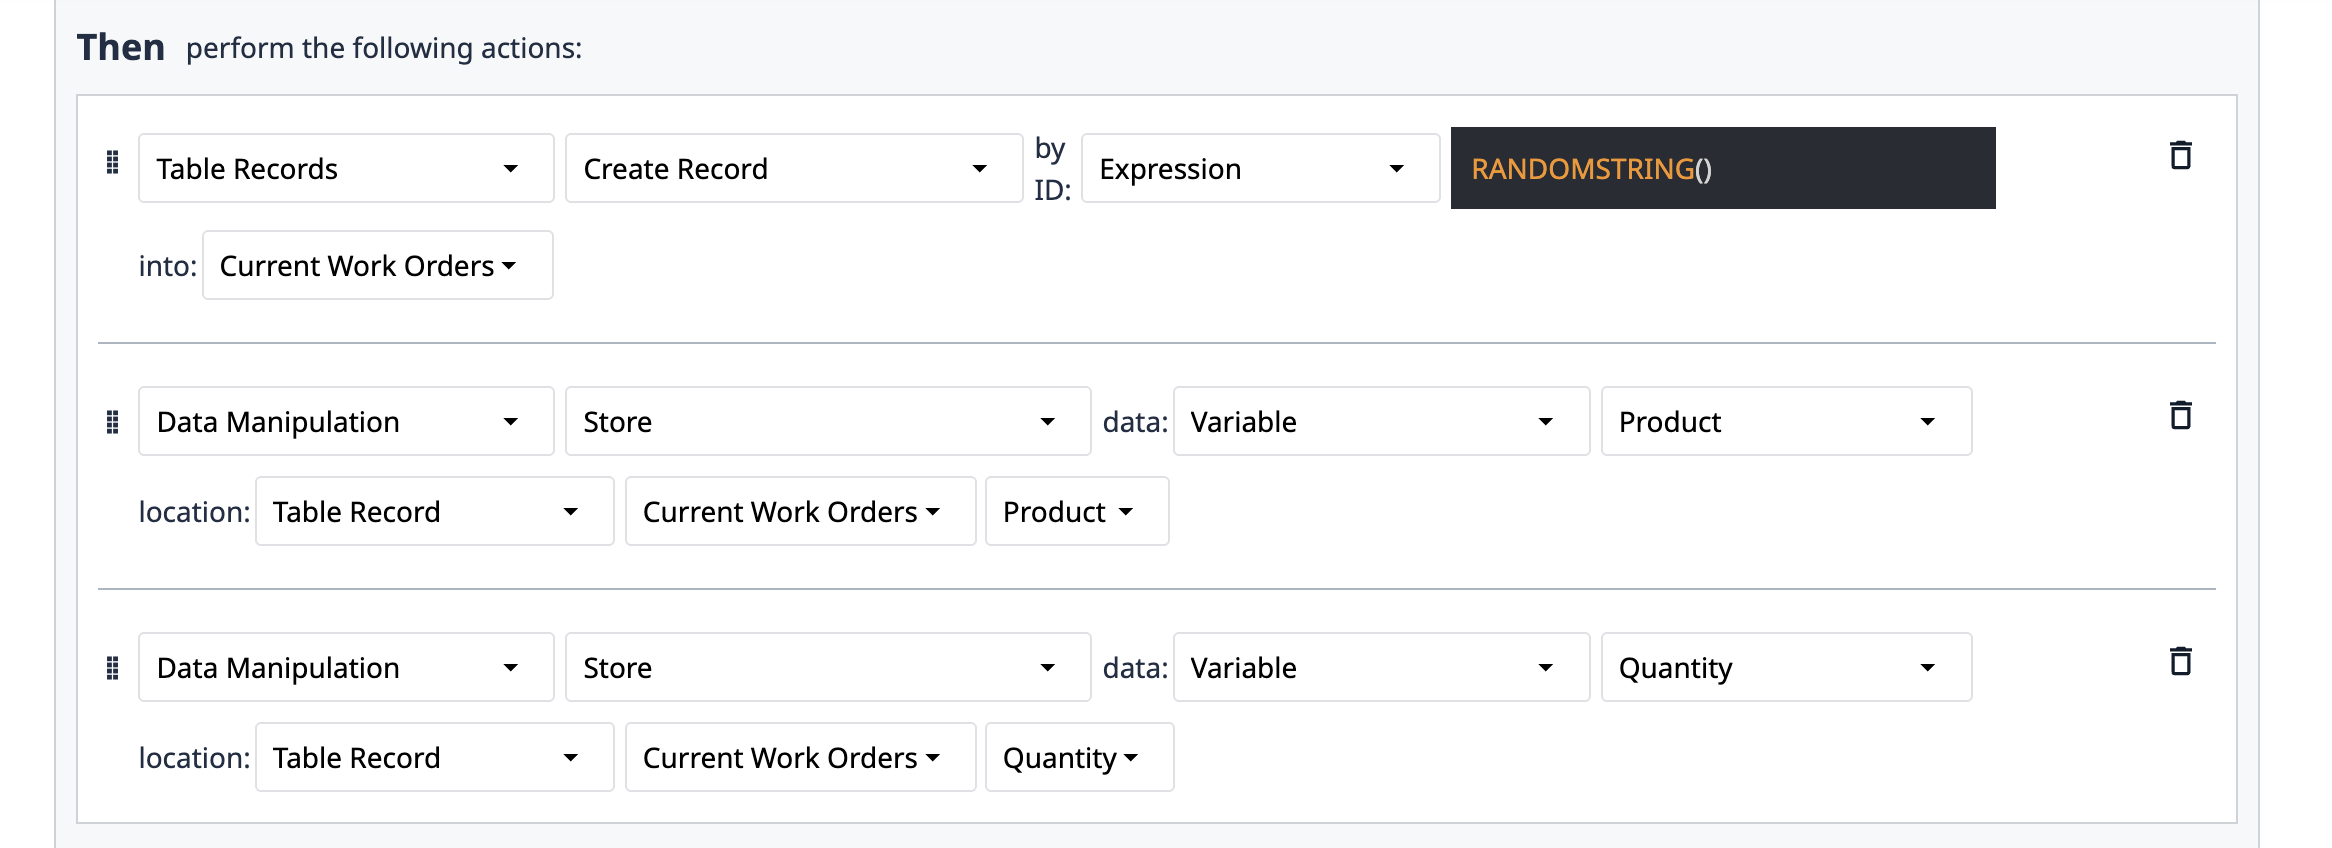
- Add the following actions to the trigger:
- Table records → Create record → Expression:
RANDOMSTRING()→ Current Work Orders - Data manipulation → Store → Variable → Product → Table record → Current Work Orders → Product
- Data manipulation → Store → Variable → Quantity → Table record→ Current Work Orders → Quantity
View Work orders table in step
-
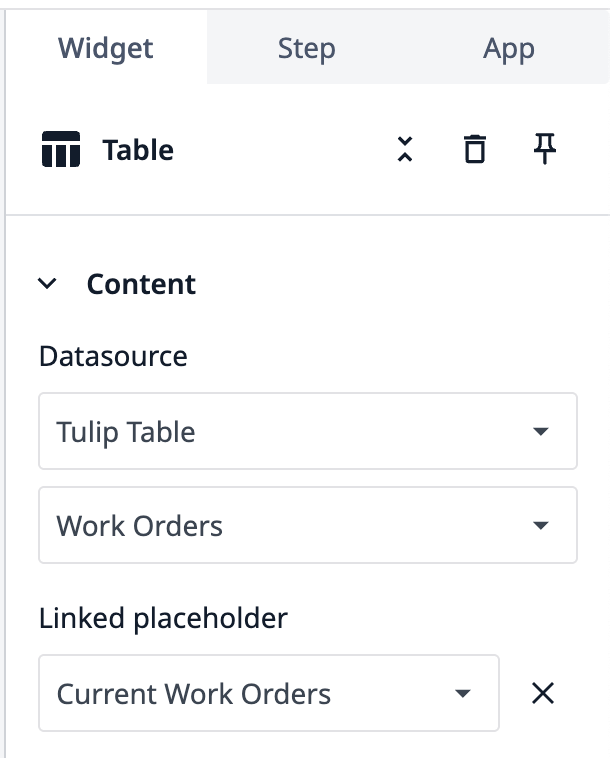
Click Embed and select Interactive Table.
-
In the Side Pane under Datasource, select Tulip Table.
-
In the next dropdown, select the Work Orders table.
-
Under Linked Placeholder, select Current Work Orders.
-
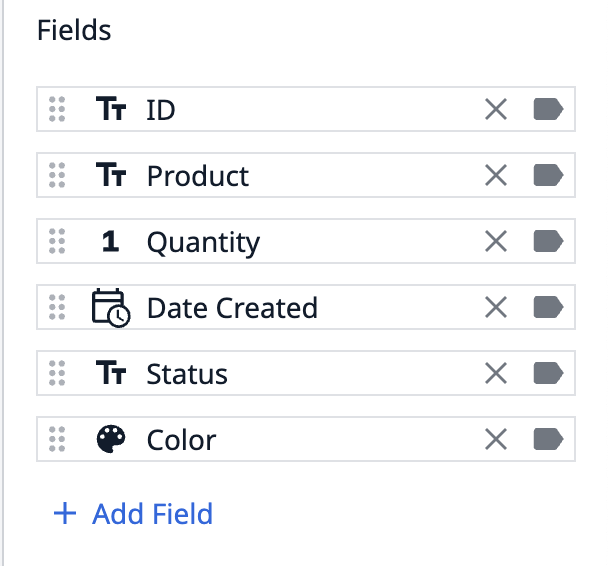
Under Fields, add the following fields:
- ID
- Product
- Quantity
- Date Created
- Status
- Color
- Click and drag the squares around the widget to adjust the dimensions and see all the fields.
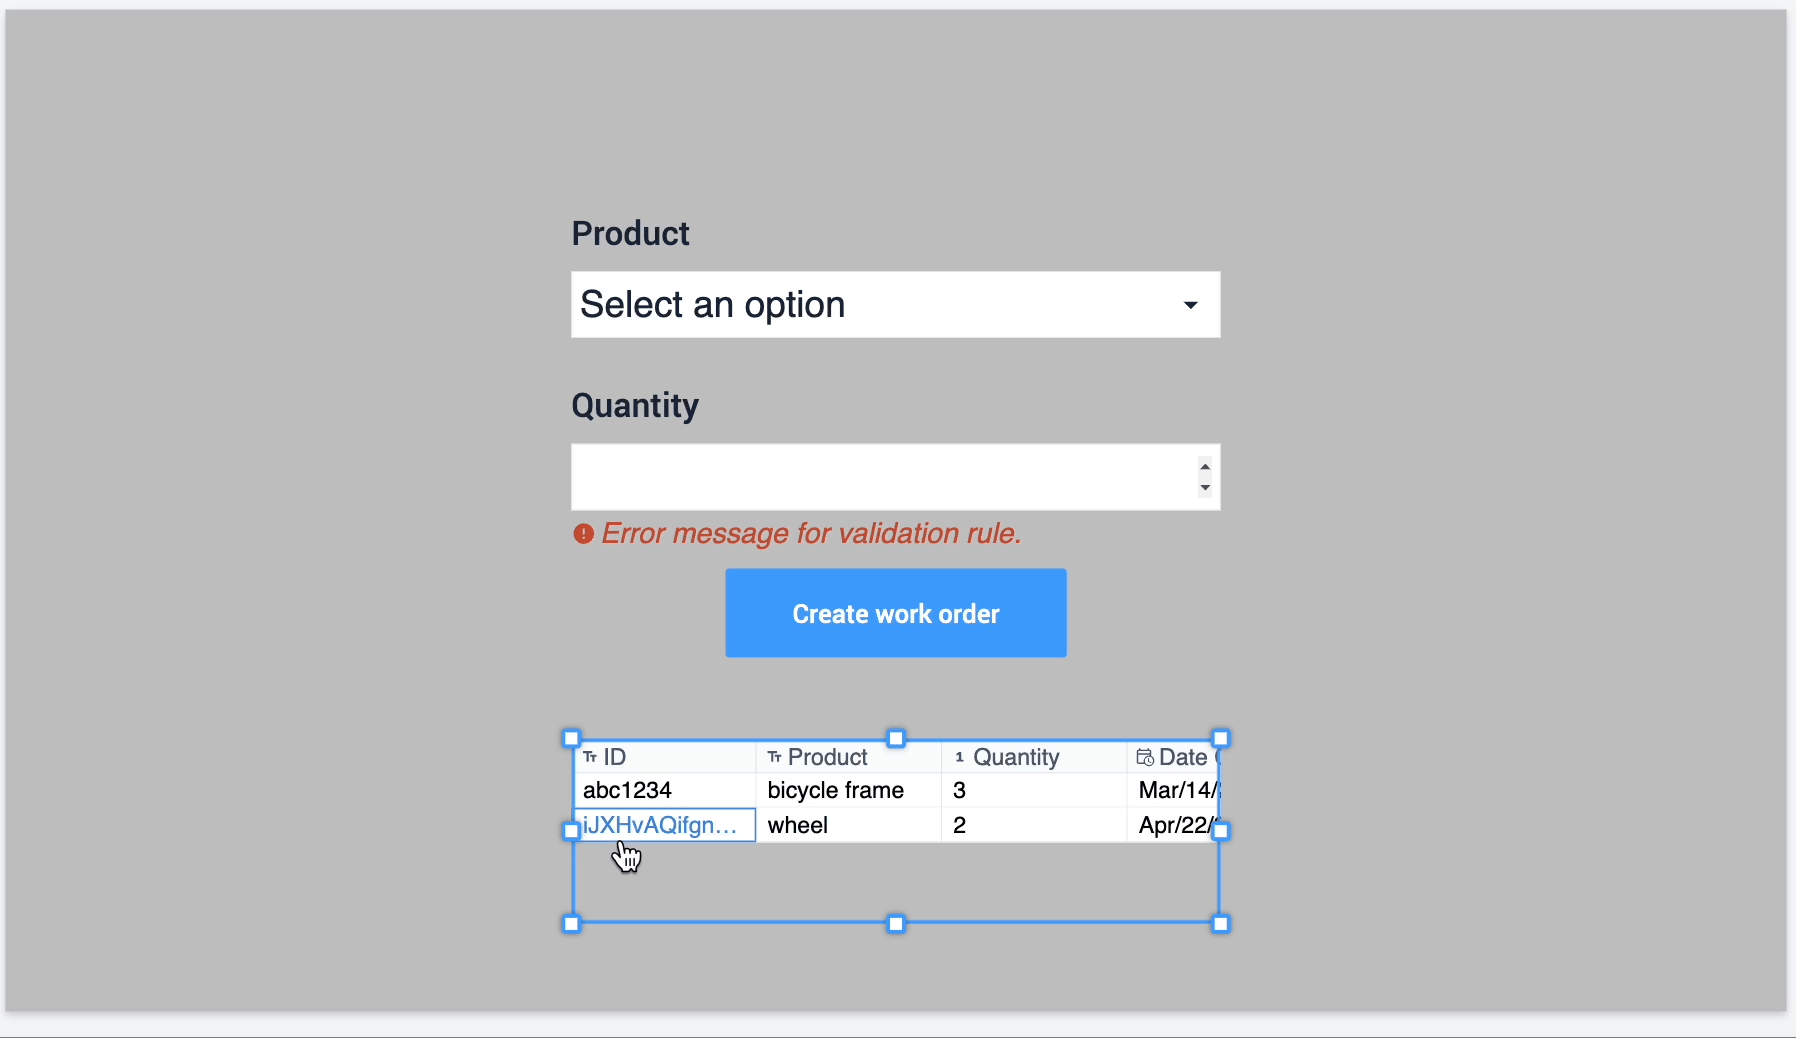
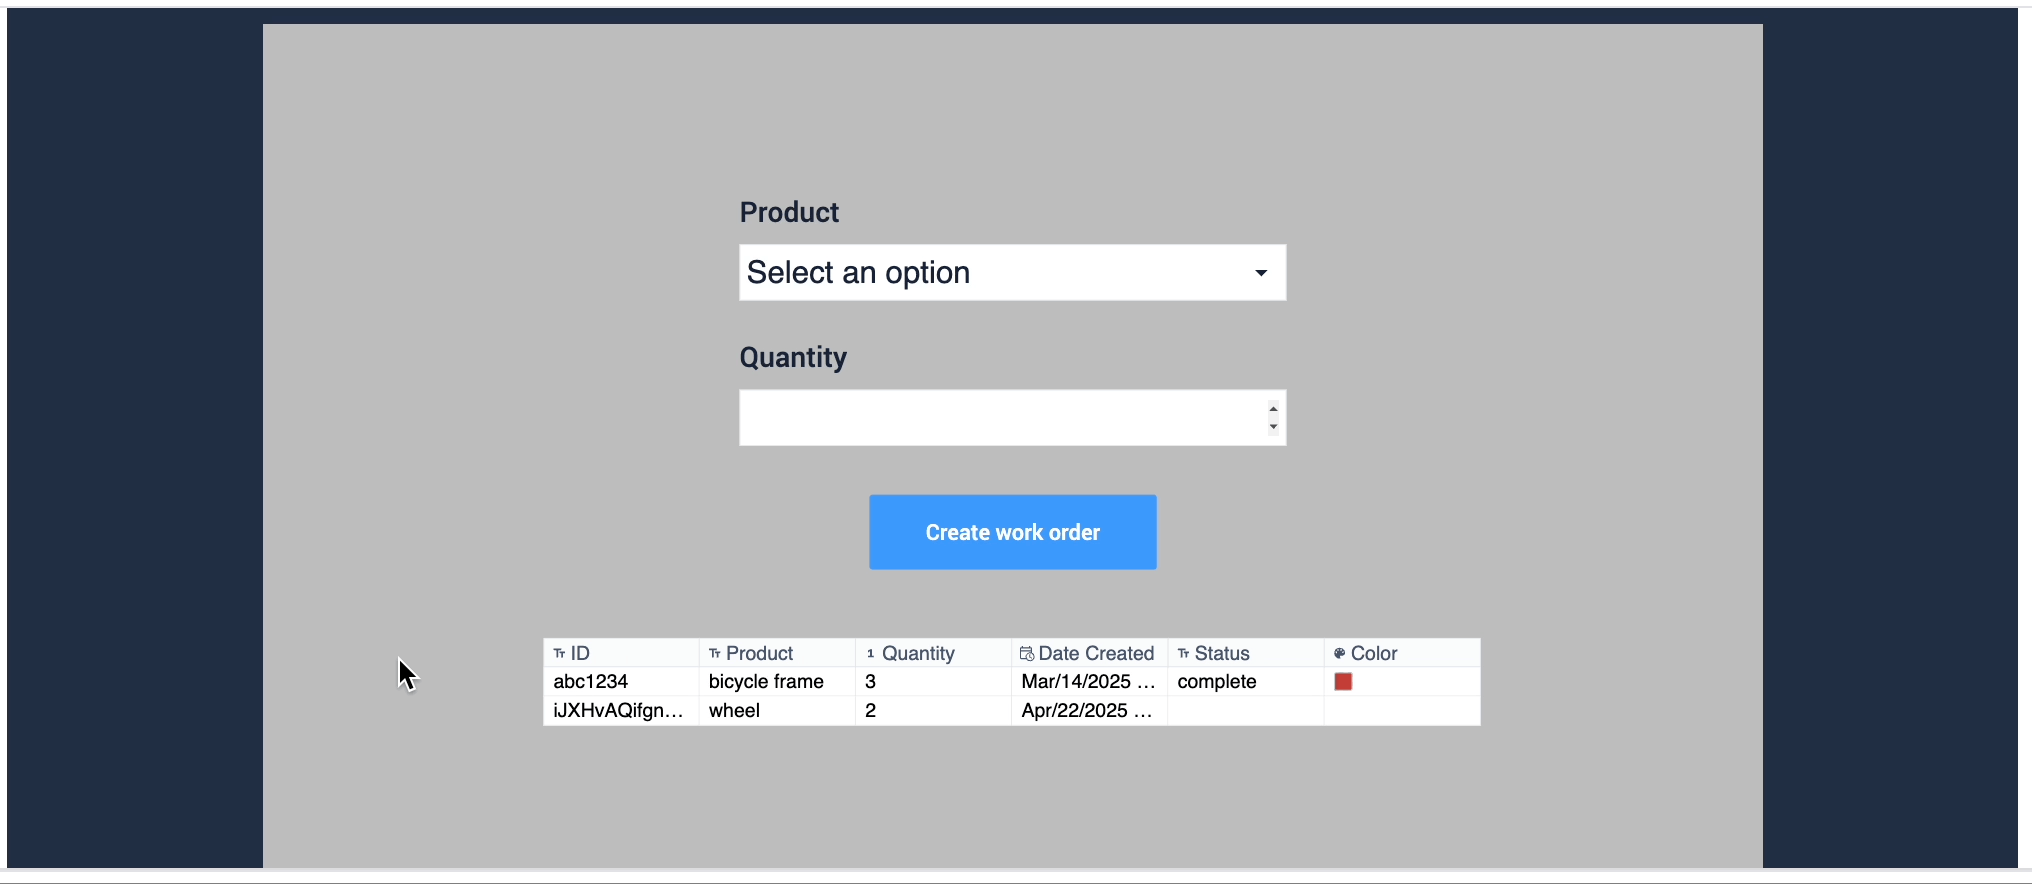
Now you have a data entry form that stores variables into a record placeholder and creates a table record from the current placeholder. Here is what the step looks like when you test it in Developer Mode:
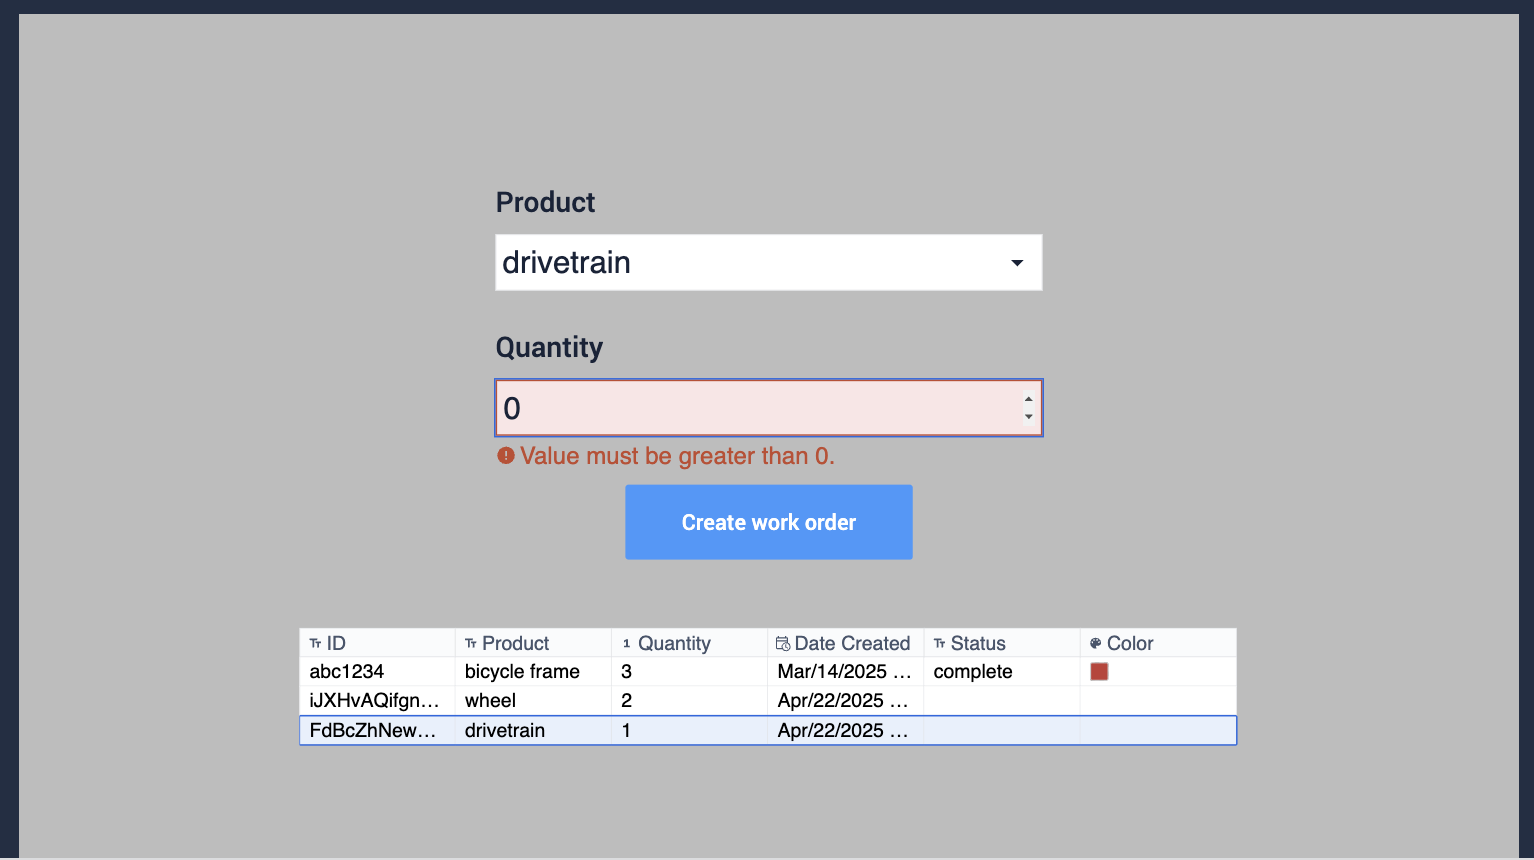
If you type “0” in the quantity, you’ll notice an error message that prompts the user to input an acceptable value. This is possible from the Validation Rule you set on the widget.
Next Steps
Now that you've created a data entry form, learn about app building or how to visualize data: