Setting up a Tulip I/O Gateway
- 30 Sep 2022
- 1 읽을 분
- 기여자
- 인쇄
Setting up a Tulip I/O Gateway
- 업데이트 날짜 30 Sep 2022
- 1 읽을 분
- 기여자
- 인쇄
The content is currently unavailable in Korean. You are viewing the default English version.
기사 요약
이 요약이 도움이 되었나요?
의견을 보내 주셔서 감사합니다.
Setting up a Tulip I/O Gateway
Warning
**On November 1, 2021, Tulip will no longer sell I/O Gateway devices, this article still applies to Edge IO and Edge MC devices. Learn More
Here's how to set up a new Tulip Gateway for the first time.
Here's how to set up a Tulip I/O Gateway using the Gateway Portal. In order to set up a gateway, you need:
- To be an administrator of a Tulip account
- Google Chrome
- Power Outlet
- Wired Ethernet Connection
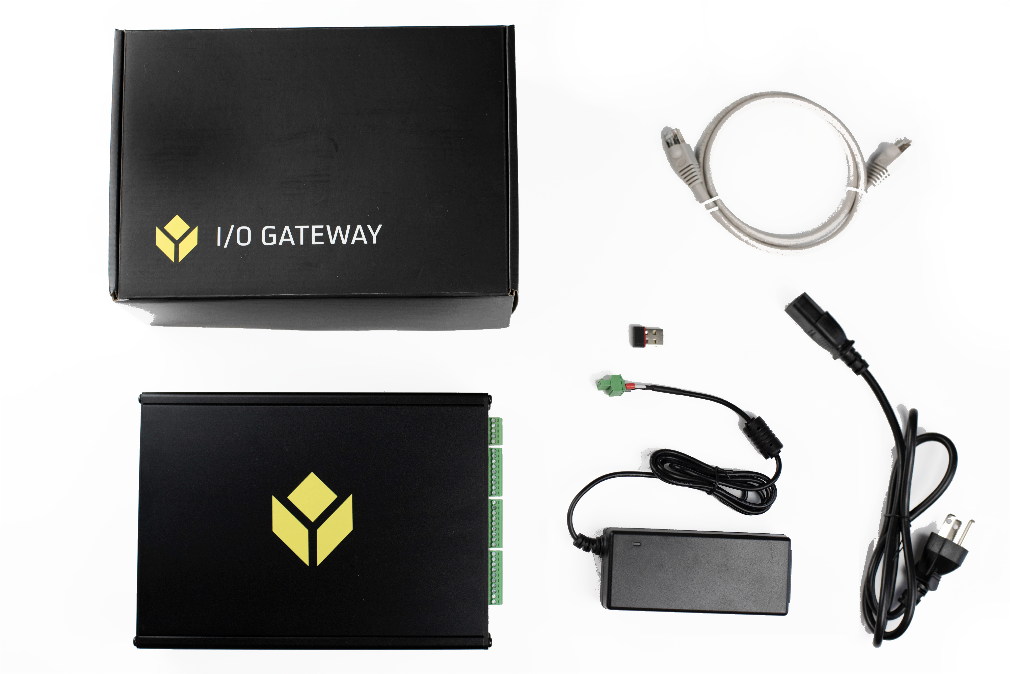
The Tulip I/O Gateway box includes:
- Tulip I/O Gateway
- Wi-Fi USB dongle
- 24V Power Supply
- 3-foot Ethernet cord
Connect the I/O Gateway to Power
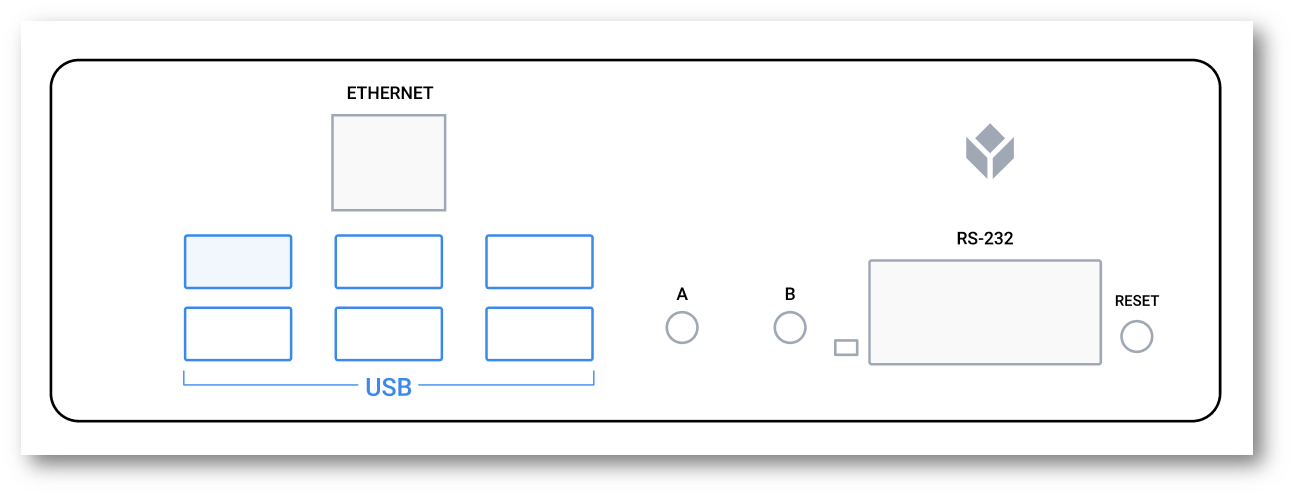
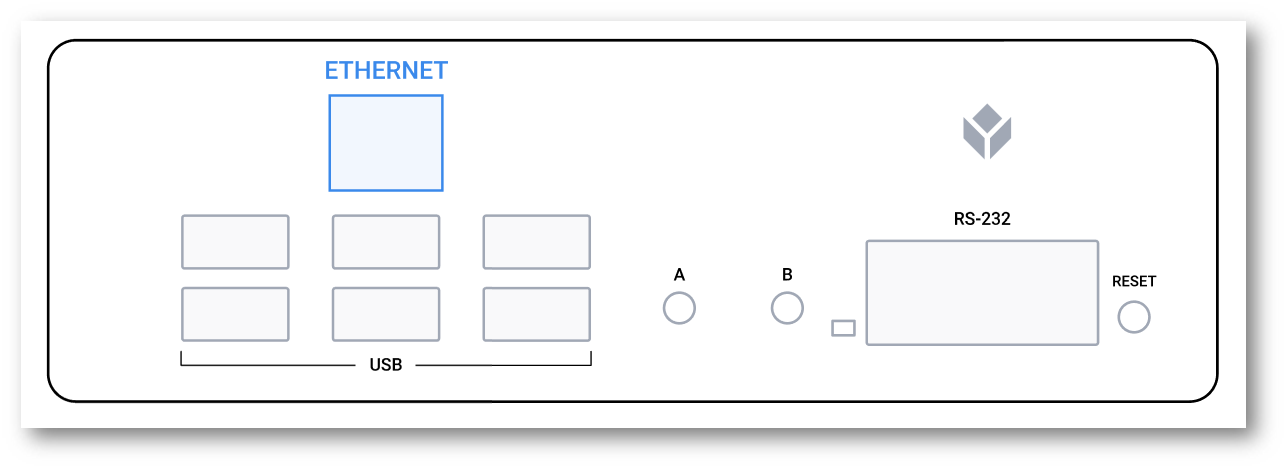
- Plug in Wi-Fi USB Dongle into an available USB Port.
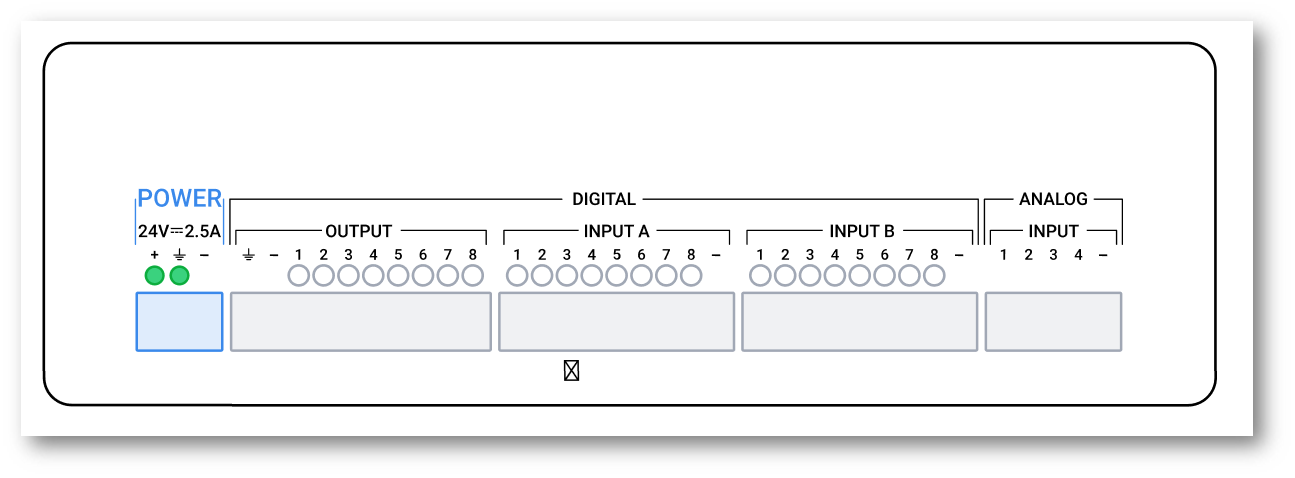
- On opposite side, plug in wires for power.
- Plug other end into a power outlet
- Verify two lights above the pins are on
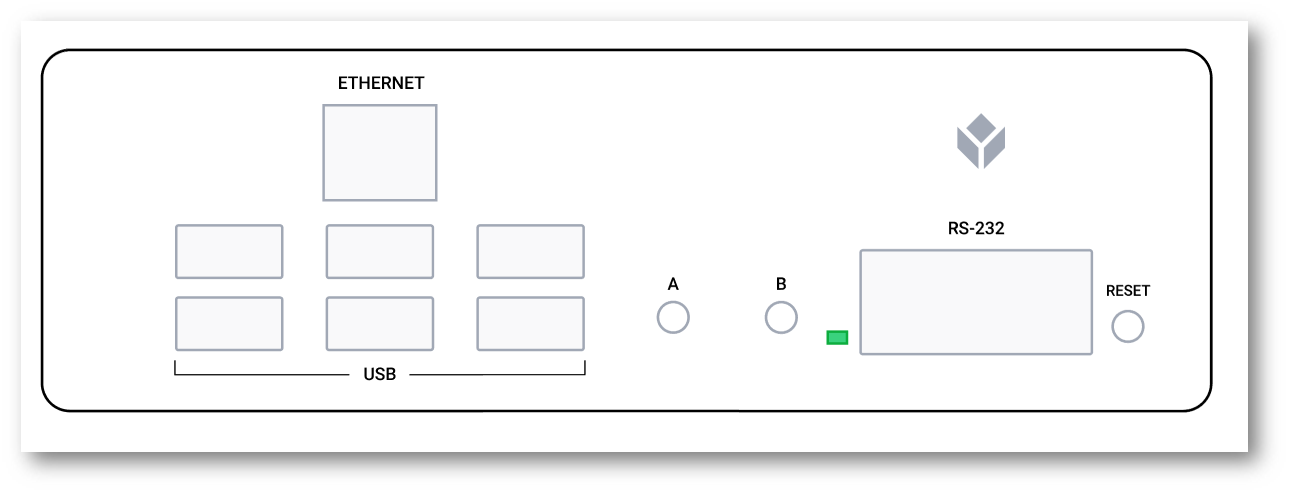
- On USB side, verify green light is blinking (may take up to 30 seconds)
- Plug Ethernet cable into Ethernet jack
- Plug other end into active Ethernet outlet
Next Step:
Register the gateway to your Tulip Account
Once you are done registering the I/O Gateway, it is time to setup the Factory Kit USB Devices.
이 문서가 도움이 되었습니까?