Purpose
SQL and HTTP Connector Functions send "Outputs" to apps as objects or arrays. Learn how to manipulate the objects in apps.
In this article you will learn…
- How to use "Outputs" from a Connector function in an app
How To Use Outputs from Connector Functions In Apps
Arrays and Objects are two popular data structures that are used in many programming languages. Tulip utilizes these both of these data structures in Connector Functions:
- When a SQL connector function outputs multiple rows, the output is sent to an app as an array full of objects
- When an HTTP connector function returns an output with an array in it, the array will appear in an app as an array full of objects.
- When a SQL connector function outputs a single row, or a HTTP connector function has any output, the values are stored as key/value pairs in an object
Objects can only be created automatically upon the successful completion of a Connector function.
This guide will show you how Connector Function outputs are automatically organized. Then, you will see how to use these outputs in apps.
Collecting Output from Connectors
Imagine that you want to pull all the data about a specific operator from a SQL database based on their Tulip badge ID.
To do this, you would write a SQL Connector function that takes badge_id as an input, and saves all the operator’s information in an output. In this case, the output is called group_name. This is what it would look like:
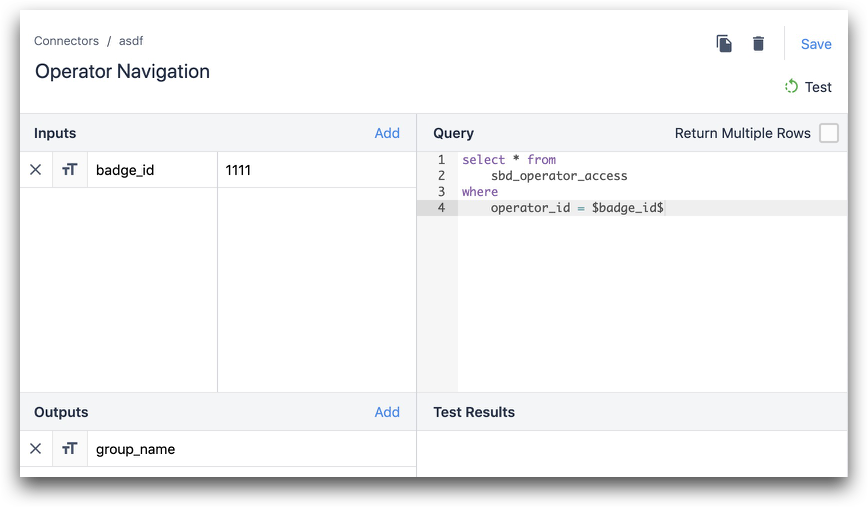
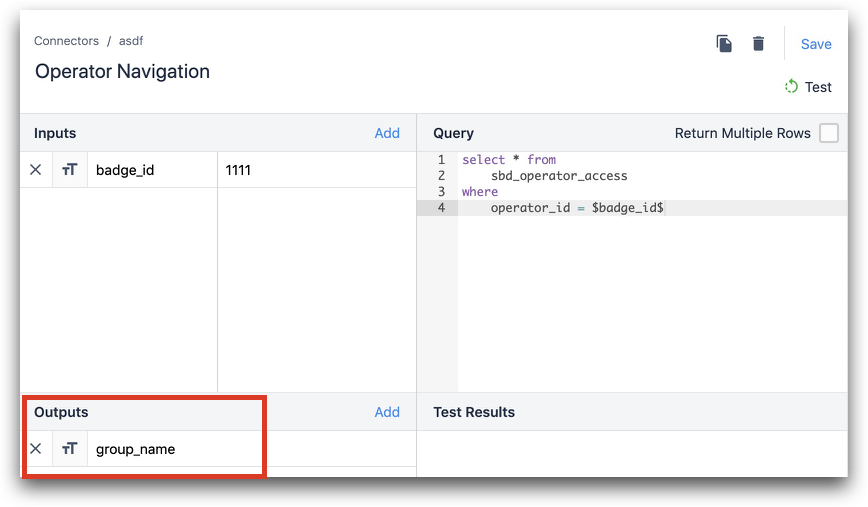
This function has one output, group_name, which is stored as a string. This is based on the “Text” label in the Outputs section.
In fact, when you create a Connector function, there is no option to store output as an array or object. Here are the permitted data types from the "Outputs" section.
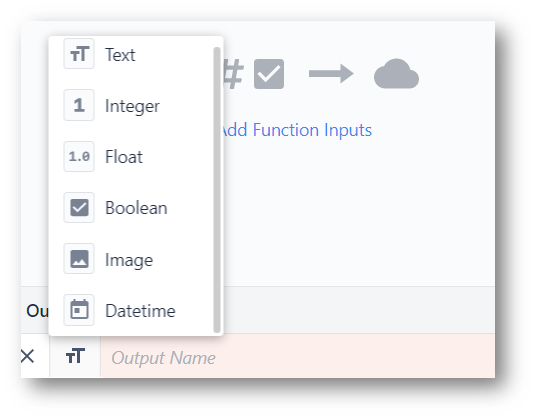
So, you must store it as “Text”, then manipulate it in the Trigger Editor.
Run this function in the Trigger Editor to store the output in an Object.

- "Run Connector Function" connector: "SBD - Test" "Operator Navigation"
- badge ID: "Static Value" "text" "2222" and save result as: "Variable" "test_var"
In this case, you are using a value of 2222 as the input, and storing output in a variable called “test_var”.
Using Objects In An App
In the example above, we took an output called group_name and then saved it in a variable called test_var. The App Variables view show that this variable is actually an object with one property called “group_name”.

In fact, if the Connector Function had multiple outputs, each one would be stored as a new property of the object called “test_var” that was created in the Trigger. This allows you to organize all the outputs of one function call in one place.
You can test out the outputs of the function by adding some Variable text to your app and then selecting the variable from the Widget tab of the Side Pane.
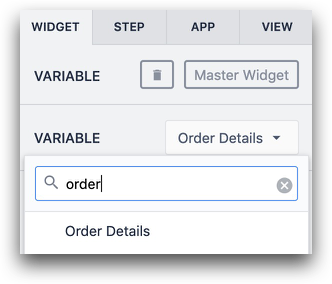
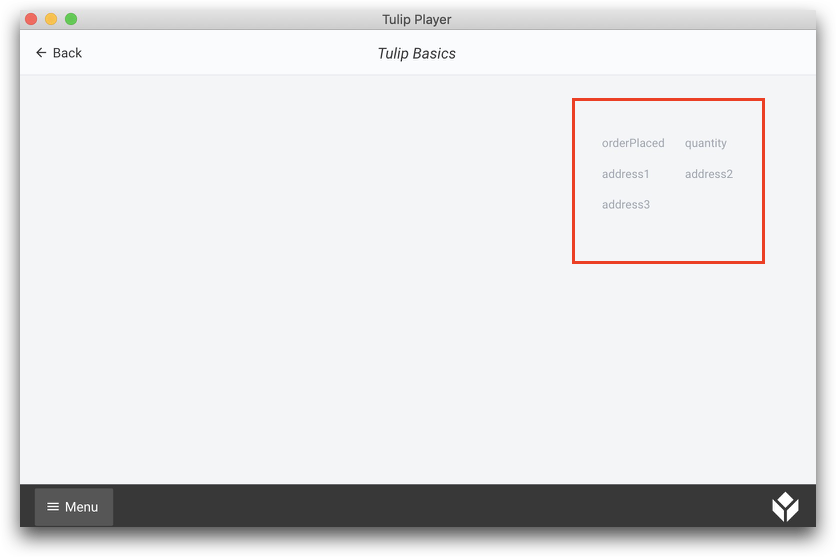
In this case, we have a variable called "Order Details" that stores an object with 5 fields:
- orderPlaced
- quantity
- address1
- address2
- address3
As soon as you select the object from the Variables search box, you will see all 5 fields populate in your app with labels based on the names of the properties. You may need to expand the variable text field to see all of them at once.
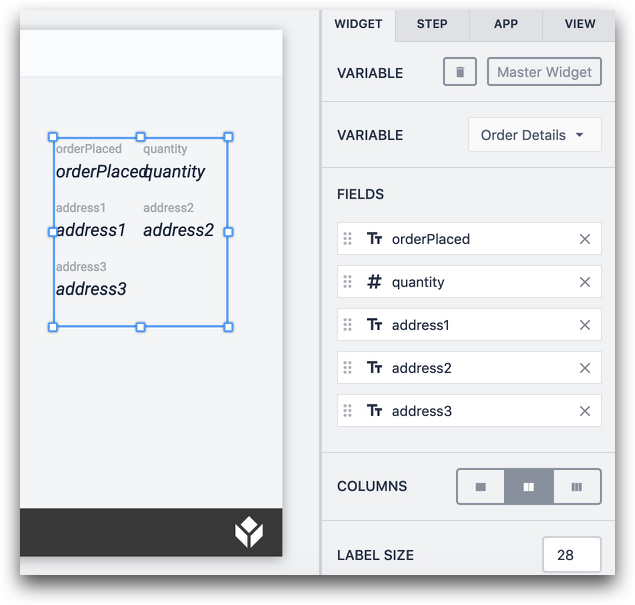
Displaying Objects
If your Object has multiple properties, you may want to show all of them at once in one step of your app. This is easier than creating new Variable text for each individual property.
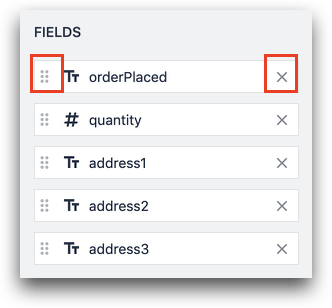
To reorder/remove individual properties from the object, click the x or the grid symbol on the property in the Side Pane.
To change the number of columns, use the Columns option in the side pane.

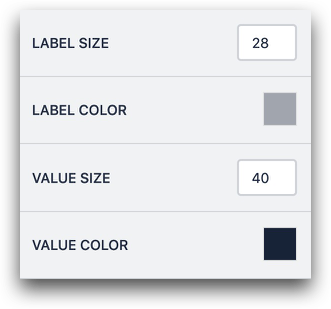
To change the display of the labels and values, adjust the color and font size in the side pane.
To see how this data will be shown the operator, run the app in the Player, and you will be able to see the whole object. Values will be included if you first run the Connector Function that gathers the values.
Manipulating Objects
Using an Array of objects in your app may limit your options for extracting the data points that you’re trying to target. You can manipulate an Array of objects that’s outputted from a connector function to make it easier to access the data you wish to use in your logic etc. This can be done by specifying the key(s) within an object that you wish to extract. This will help streamline your data output, allowing you to better leverage the data you’re interested in.
An example Connector Function can be seen below:
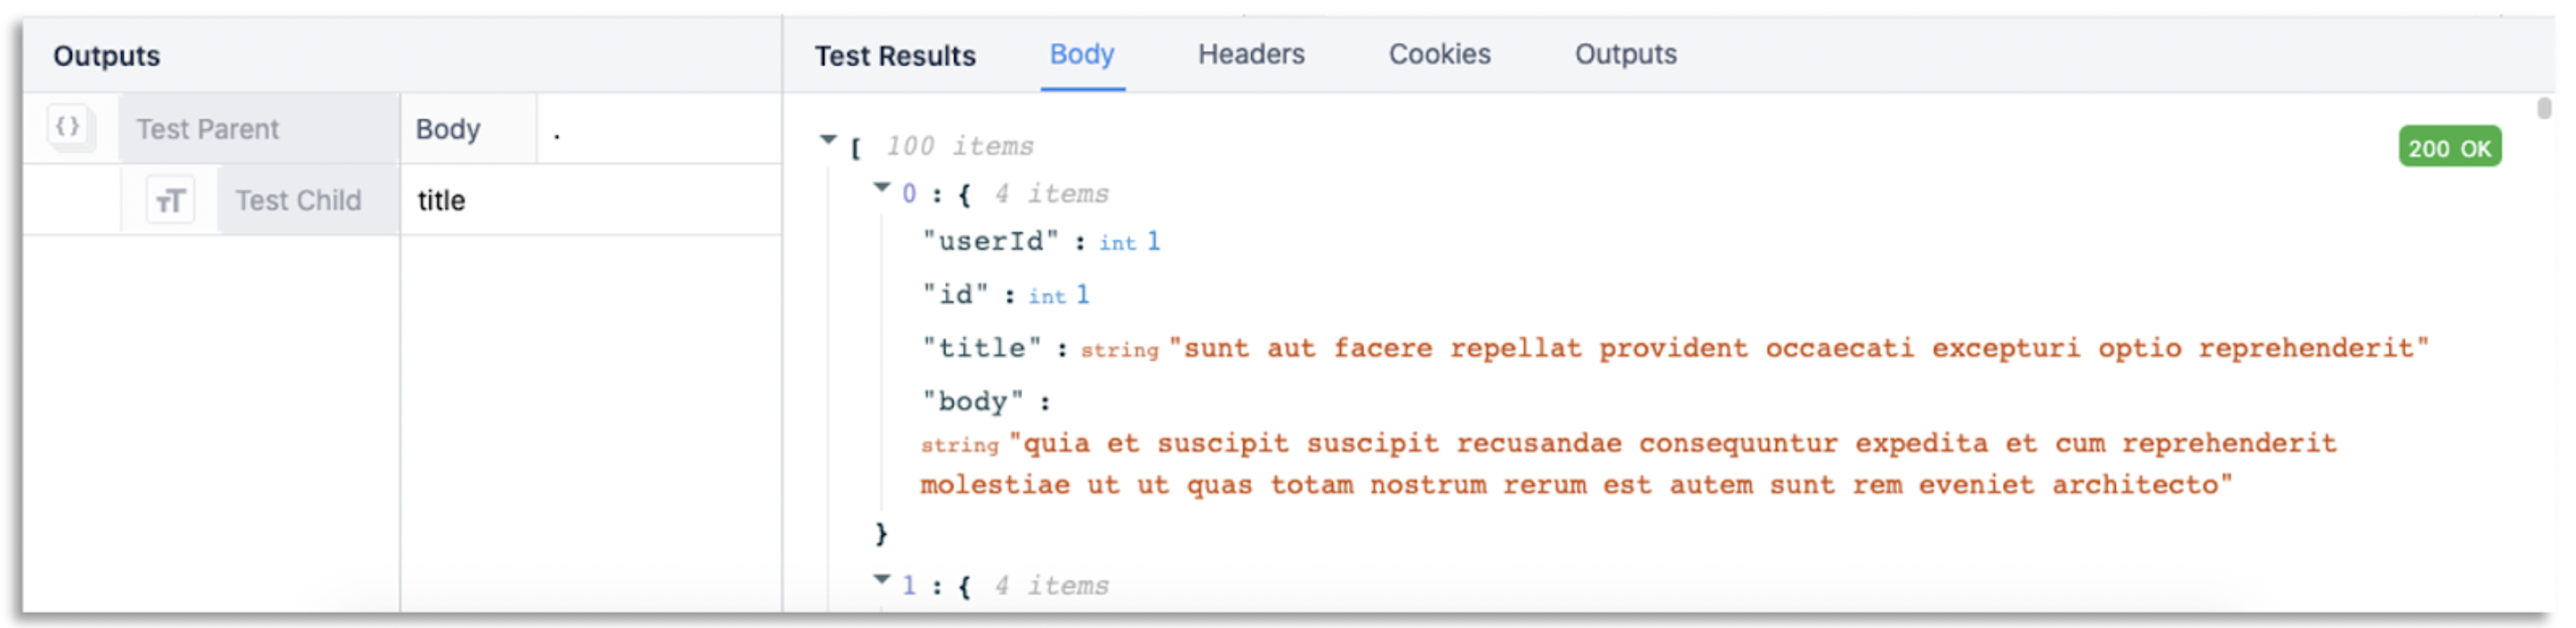

The output above is an array of objects. When connector functions return an array of objects, there are actions in the expression editor that help manipulate them. These map functions allow you to map corresponding values based on a given key. The outputted values can be mapped to an array of the selected type. You might use MAP_TO_TEXT_LIST() to get a text array of all the Titles.
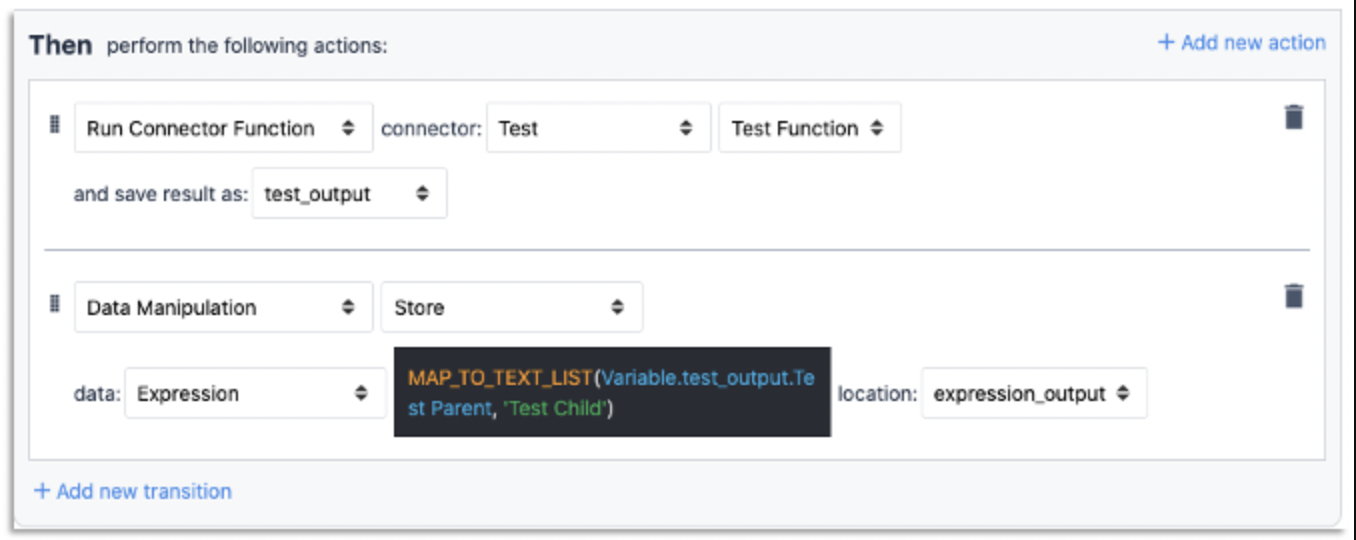
- "Run Connector Function" connector: "Test" "Test Function" and save result as: “test_output”
- “Data Manipulation” “Store” data: “Expression” “MAP_TO_TEXT_LIST(Variable.test_out.Test Parent, ‘Test Child’)
The first parameter passed into the map function is the array of objects. The second parameter, ‘Test Child’, is the extractor name outlined in the connector function output. The extractor name is used as the key to extract values. This will output all titles in an array of strings.
Reviewing All Object Variable In An App
In order to manipulate a data structure in an app, it must be already stored as a variable. You can see your existing variables by entering the side pane in the App Editor, and selecting the Sigma symbol next to “Variables” in the App tab.

Objects will be shown with the universal object symbol, “{}”.

Displaying Multiple Rows of SQL or Arrays from HTTP Connectors
If you want to turn multiple rows of SQL output or arrays from HTTP connectors into interactive lists in an app, check out this separate guide
Further Reading
- How To Use Arrays in Apps
- How To Call A Connector Function Using Triggers
- A Guide to the Expression Editor In The App Editor
Did you find what you were looking for?
You can also head to community.tulip.co to post your question or see if others have faced a similar question!