Using Node-RED with the Tulip API
If you are using Node-RED on your own device and would like to send data to the Tulip API, Tulip provides Node-RED nodes for API endpoints.
These nodes are preinstalled on Tulip devices that support Node-RED, but if you are running your own instance of Node-RED, you can still install the nodes by installing the package @tulip/node-red-tulip-api from the Node-RED library.
In this article, you will learn how to…
- add Tulip API nodes to your Node-RED installation
- use the Tulip Machine Attribute API to send data to a Tulip Machine
- use the Tulip Tables API node to read, write, and configure Tulip Tables
Prerequisites:
- You have Node-RED installed and running locally
Running Node-RED on Tulip's Edge MC? See this getting started guide
Installation
1. Add @tulip/node-red-tulip-api to your Node-RED palette
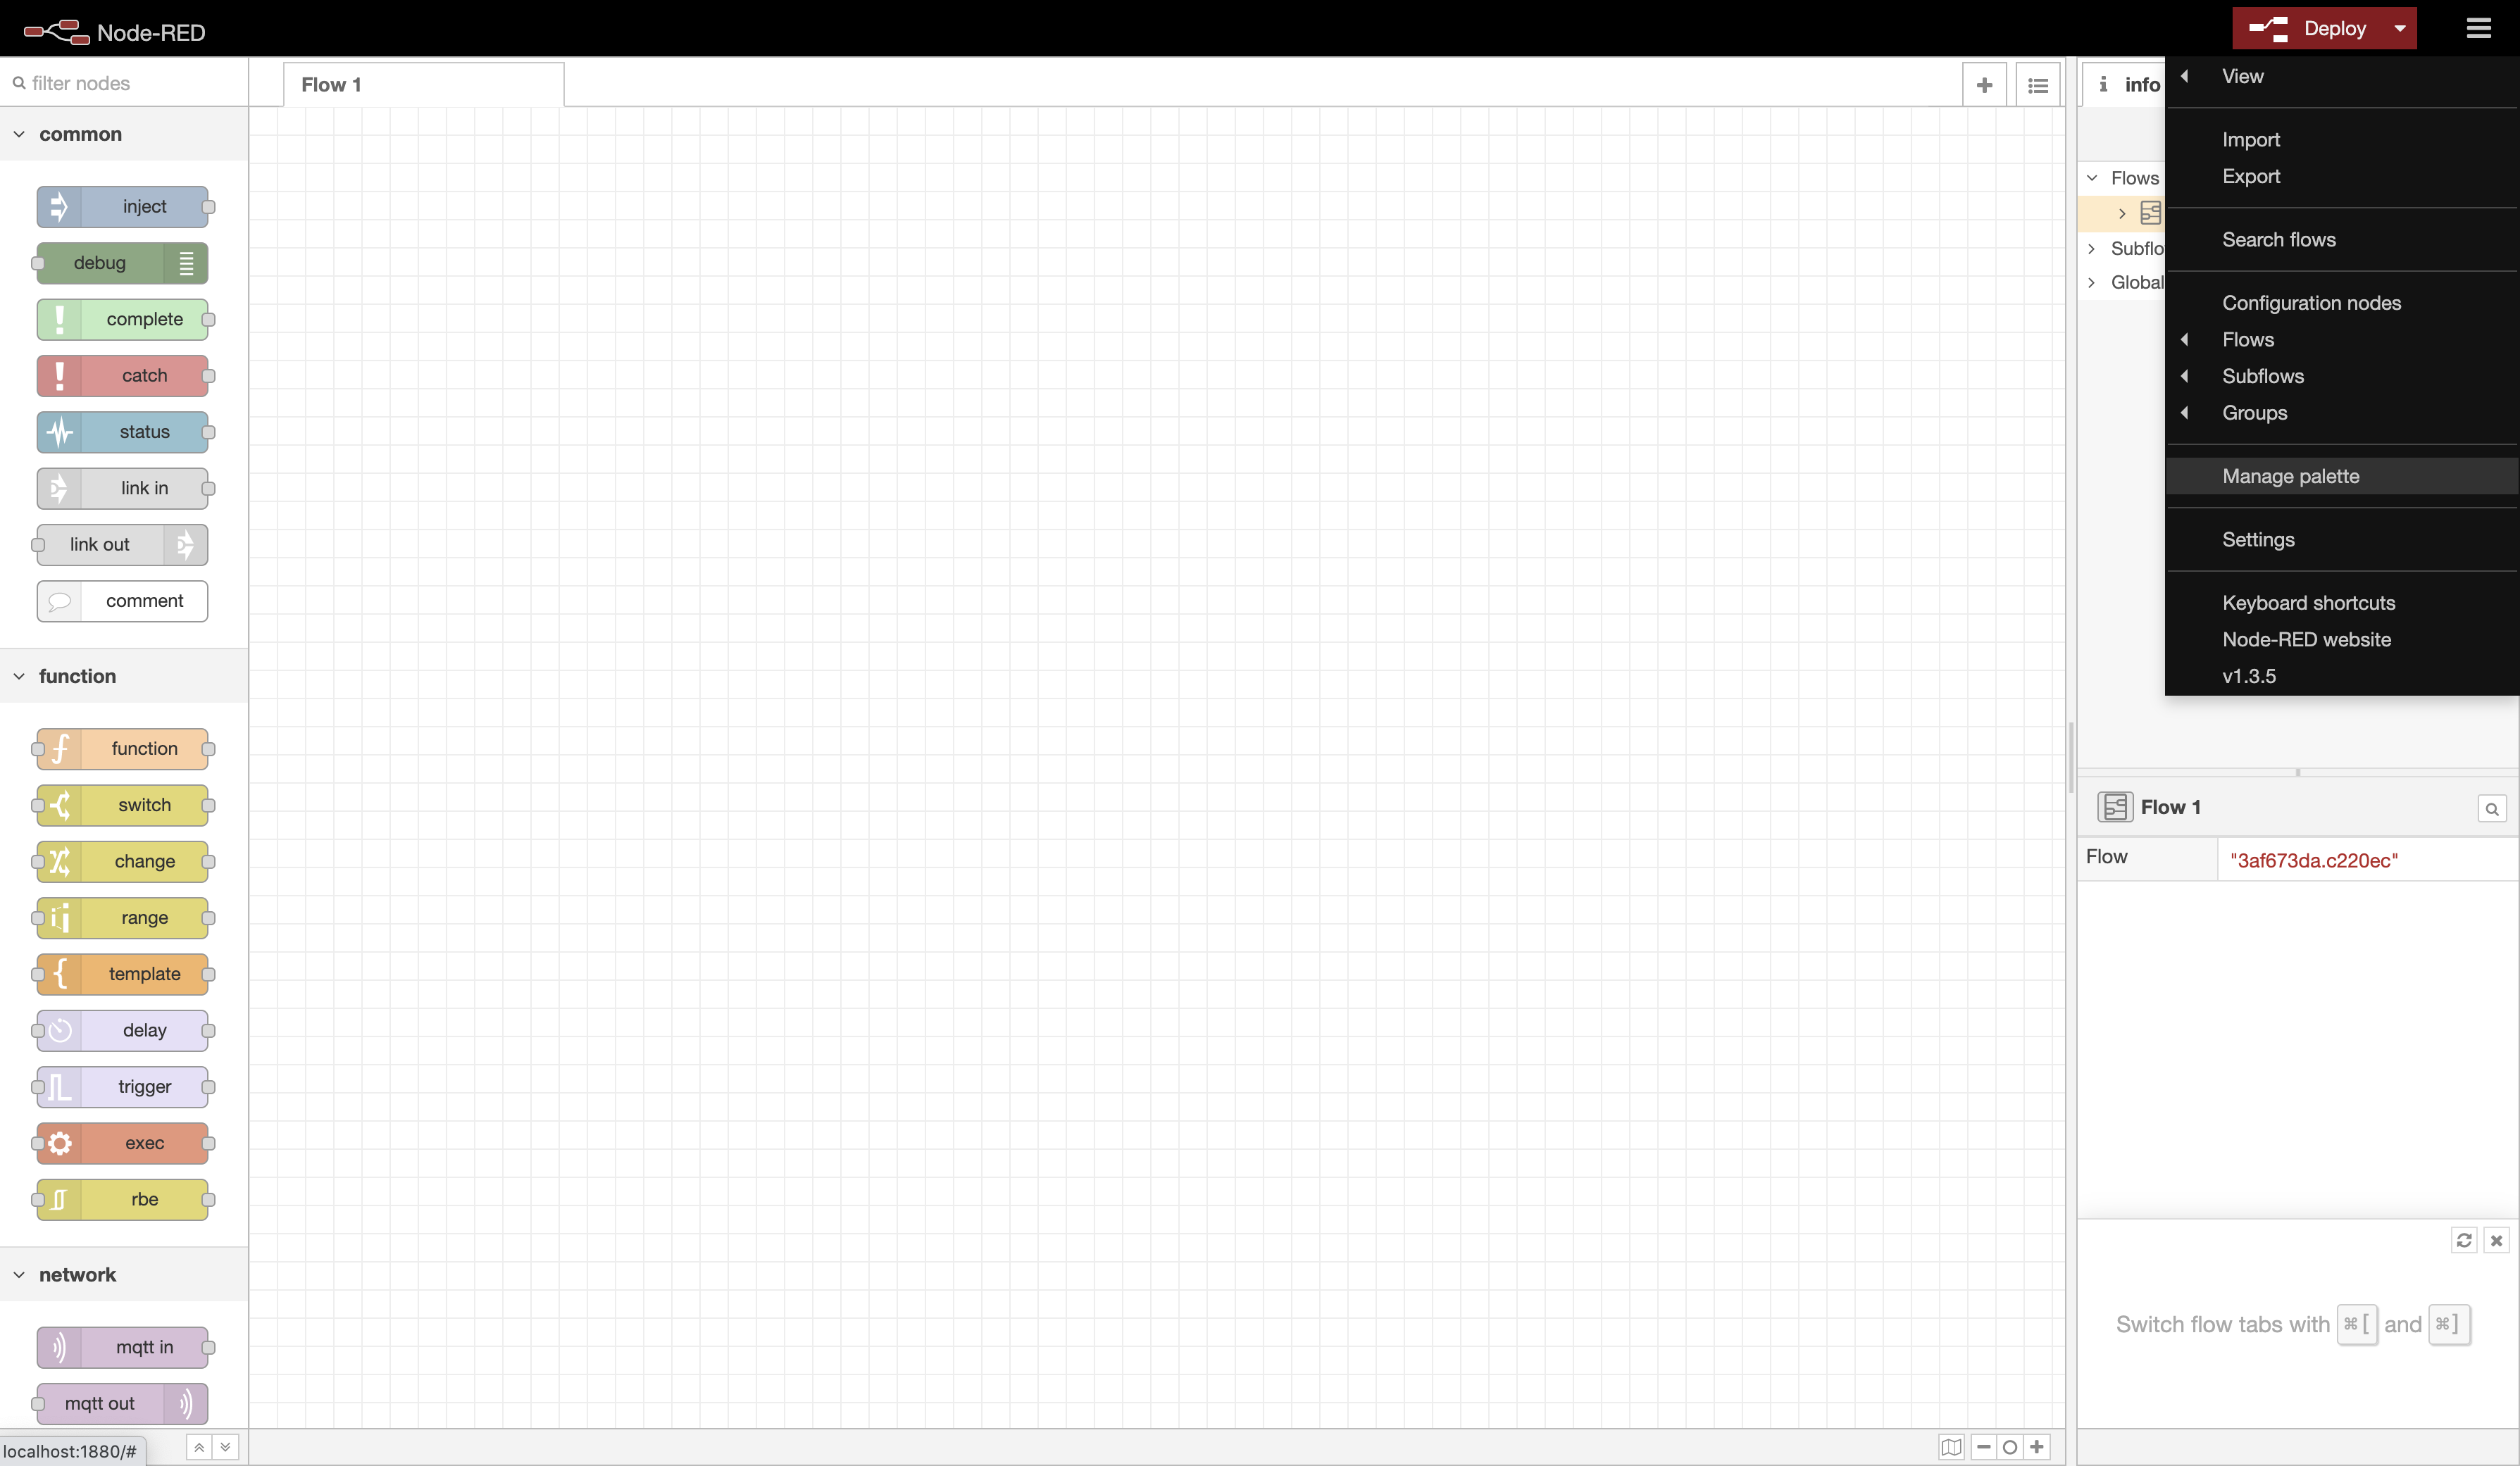
Open your Node-RED editor and navigate to Menu → Manage palette
Click on the Install tab and then search for @tulip/node-red-tulip-api
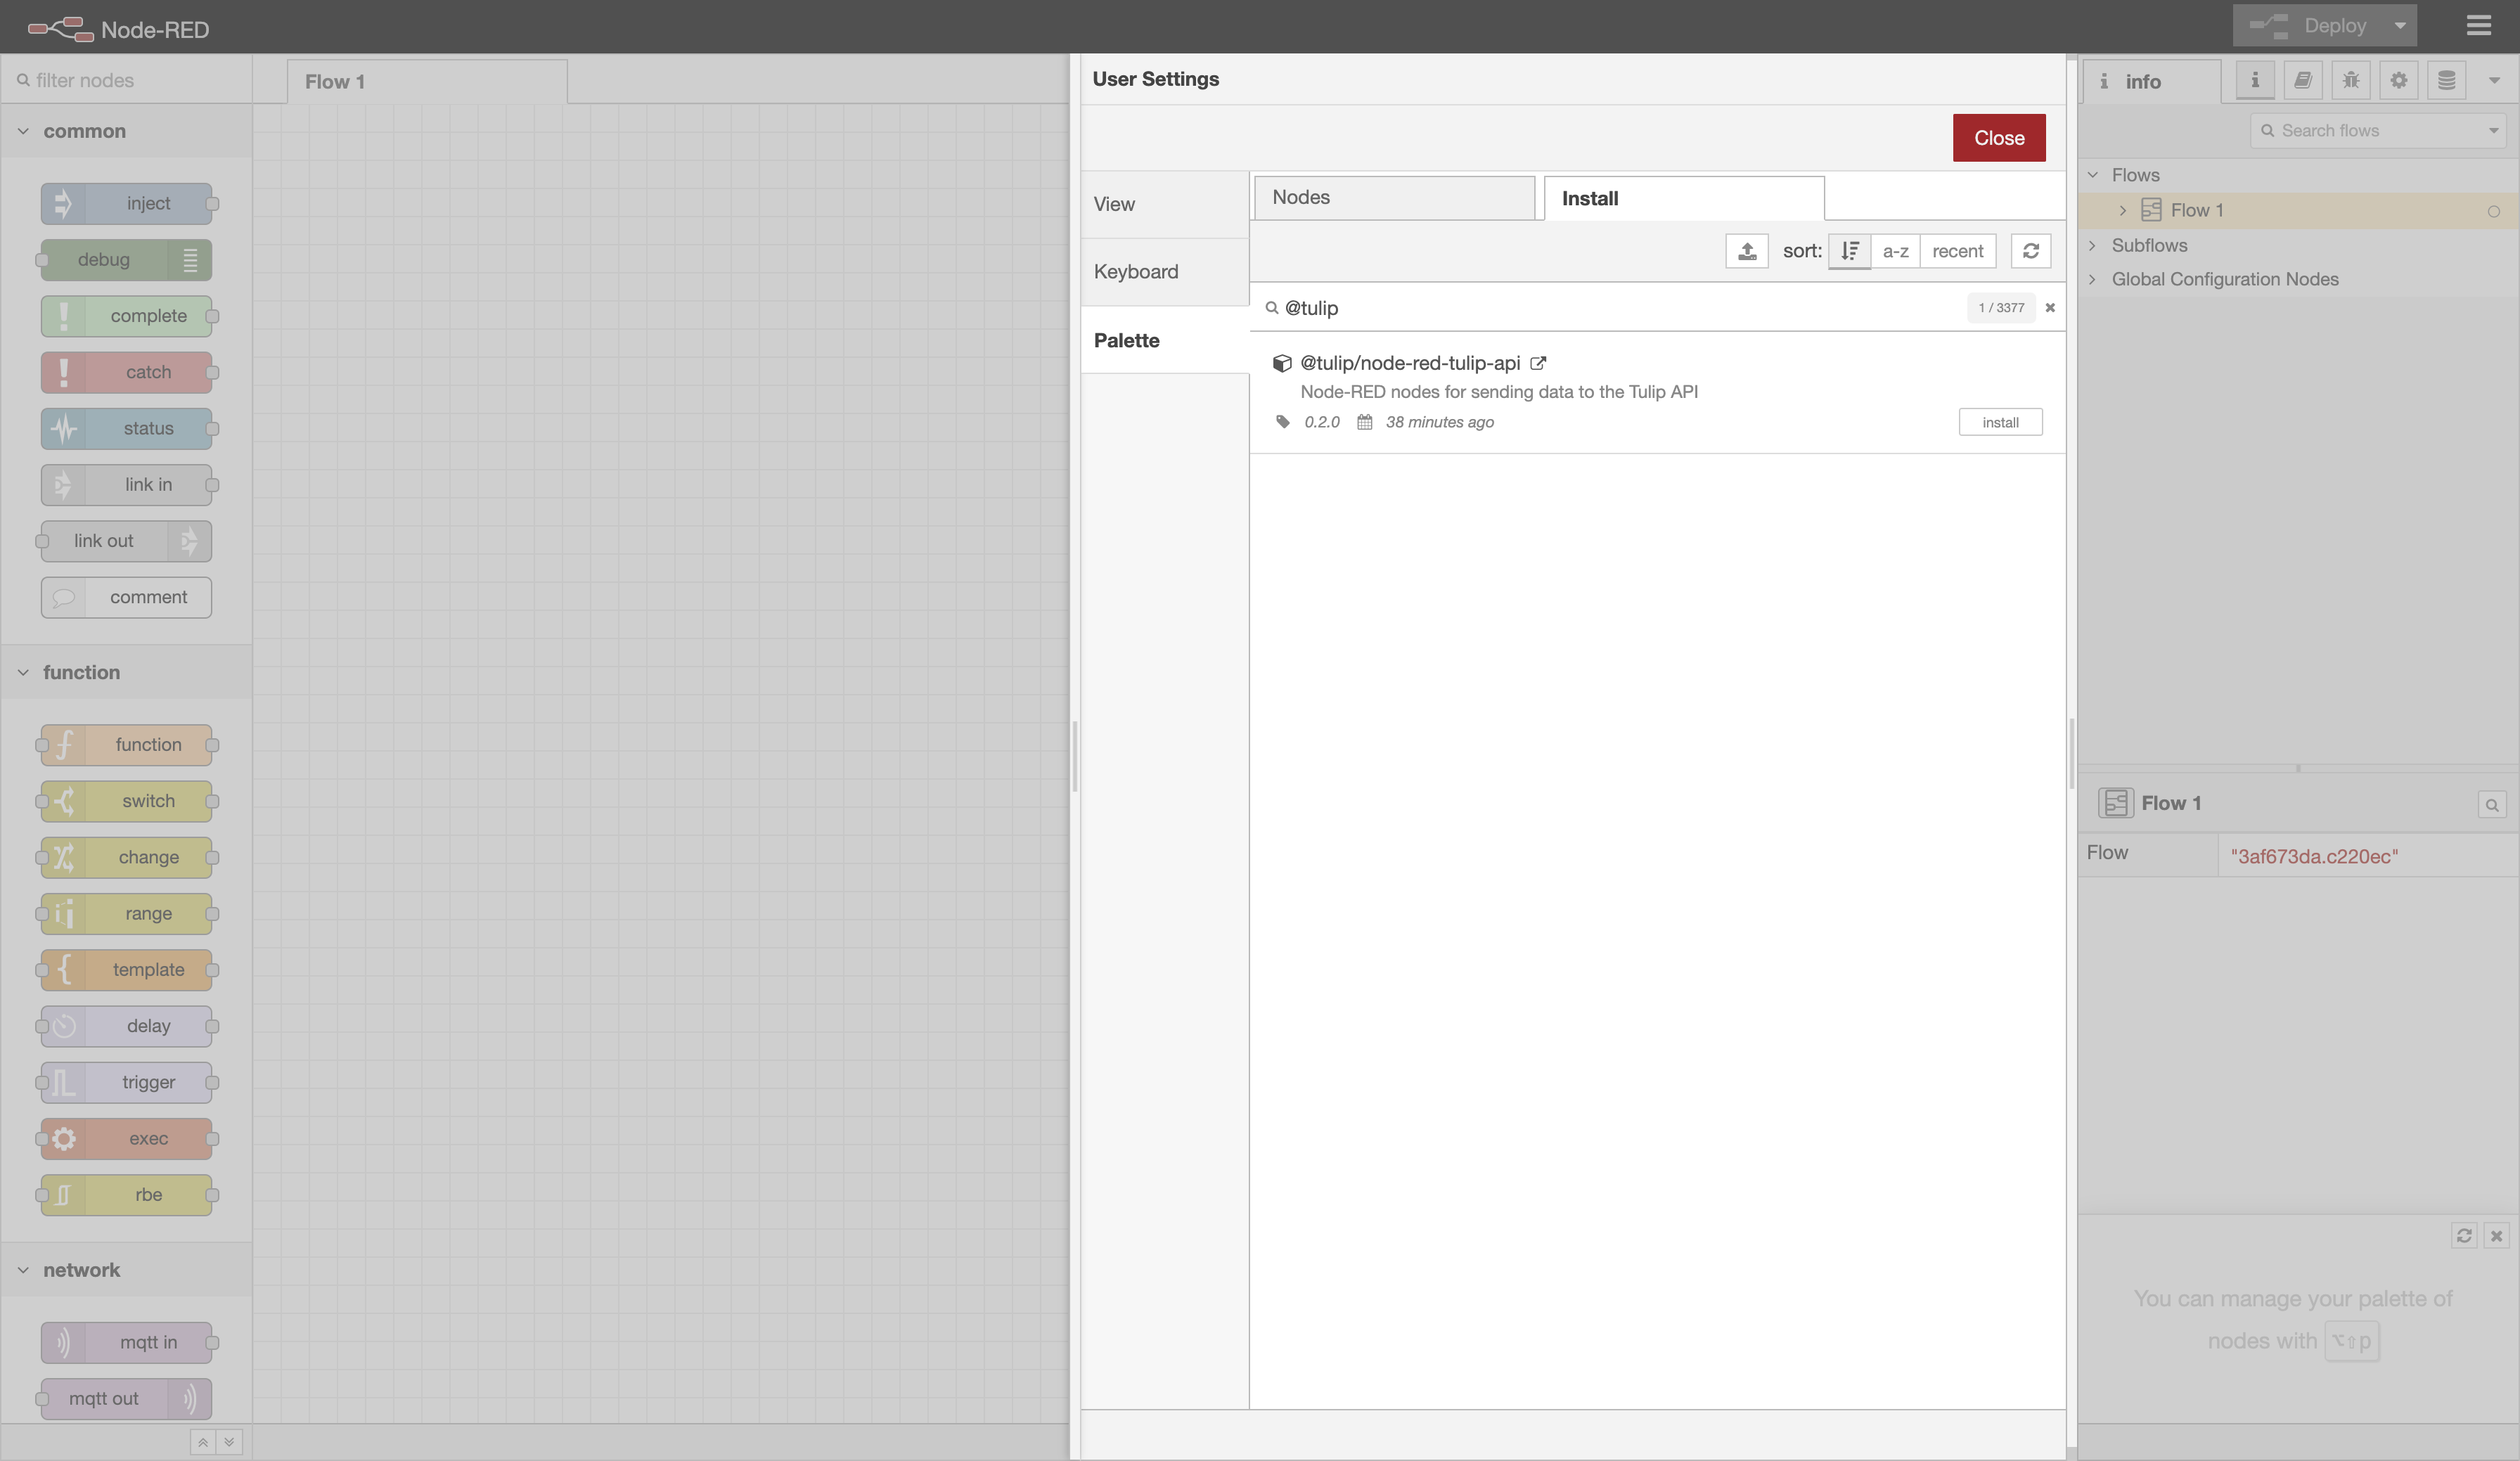
Note: You can also install the package via the command line. Navigate to your Node-RED user directory (i.e. cd ~/.node-red/) and run npm install @tulip/node-red-tulip-api
2. Check that installation was successful
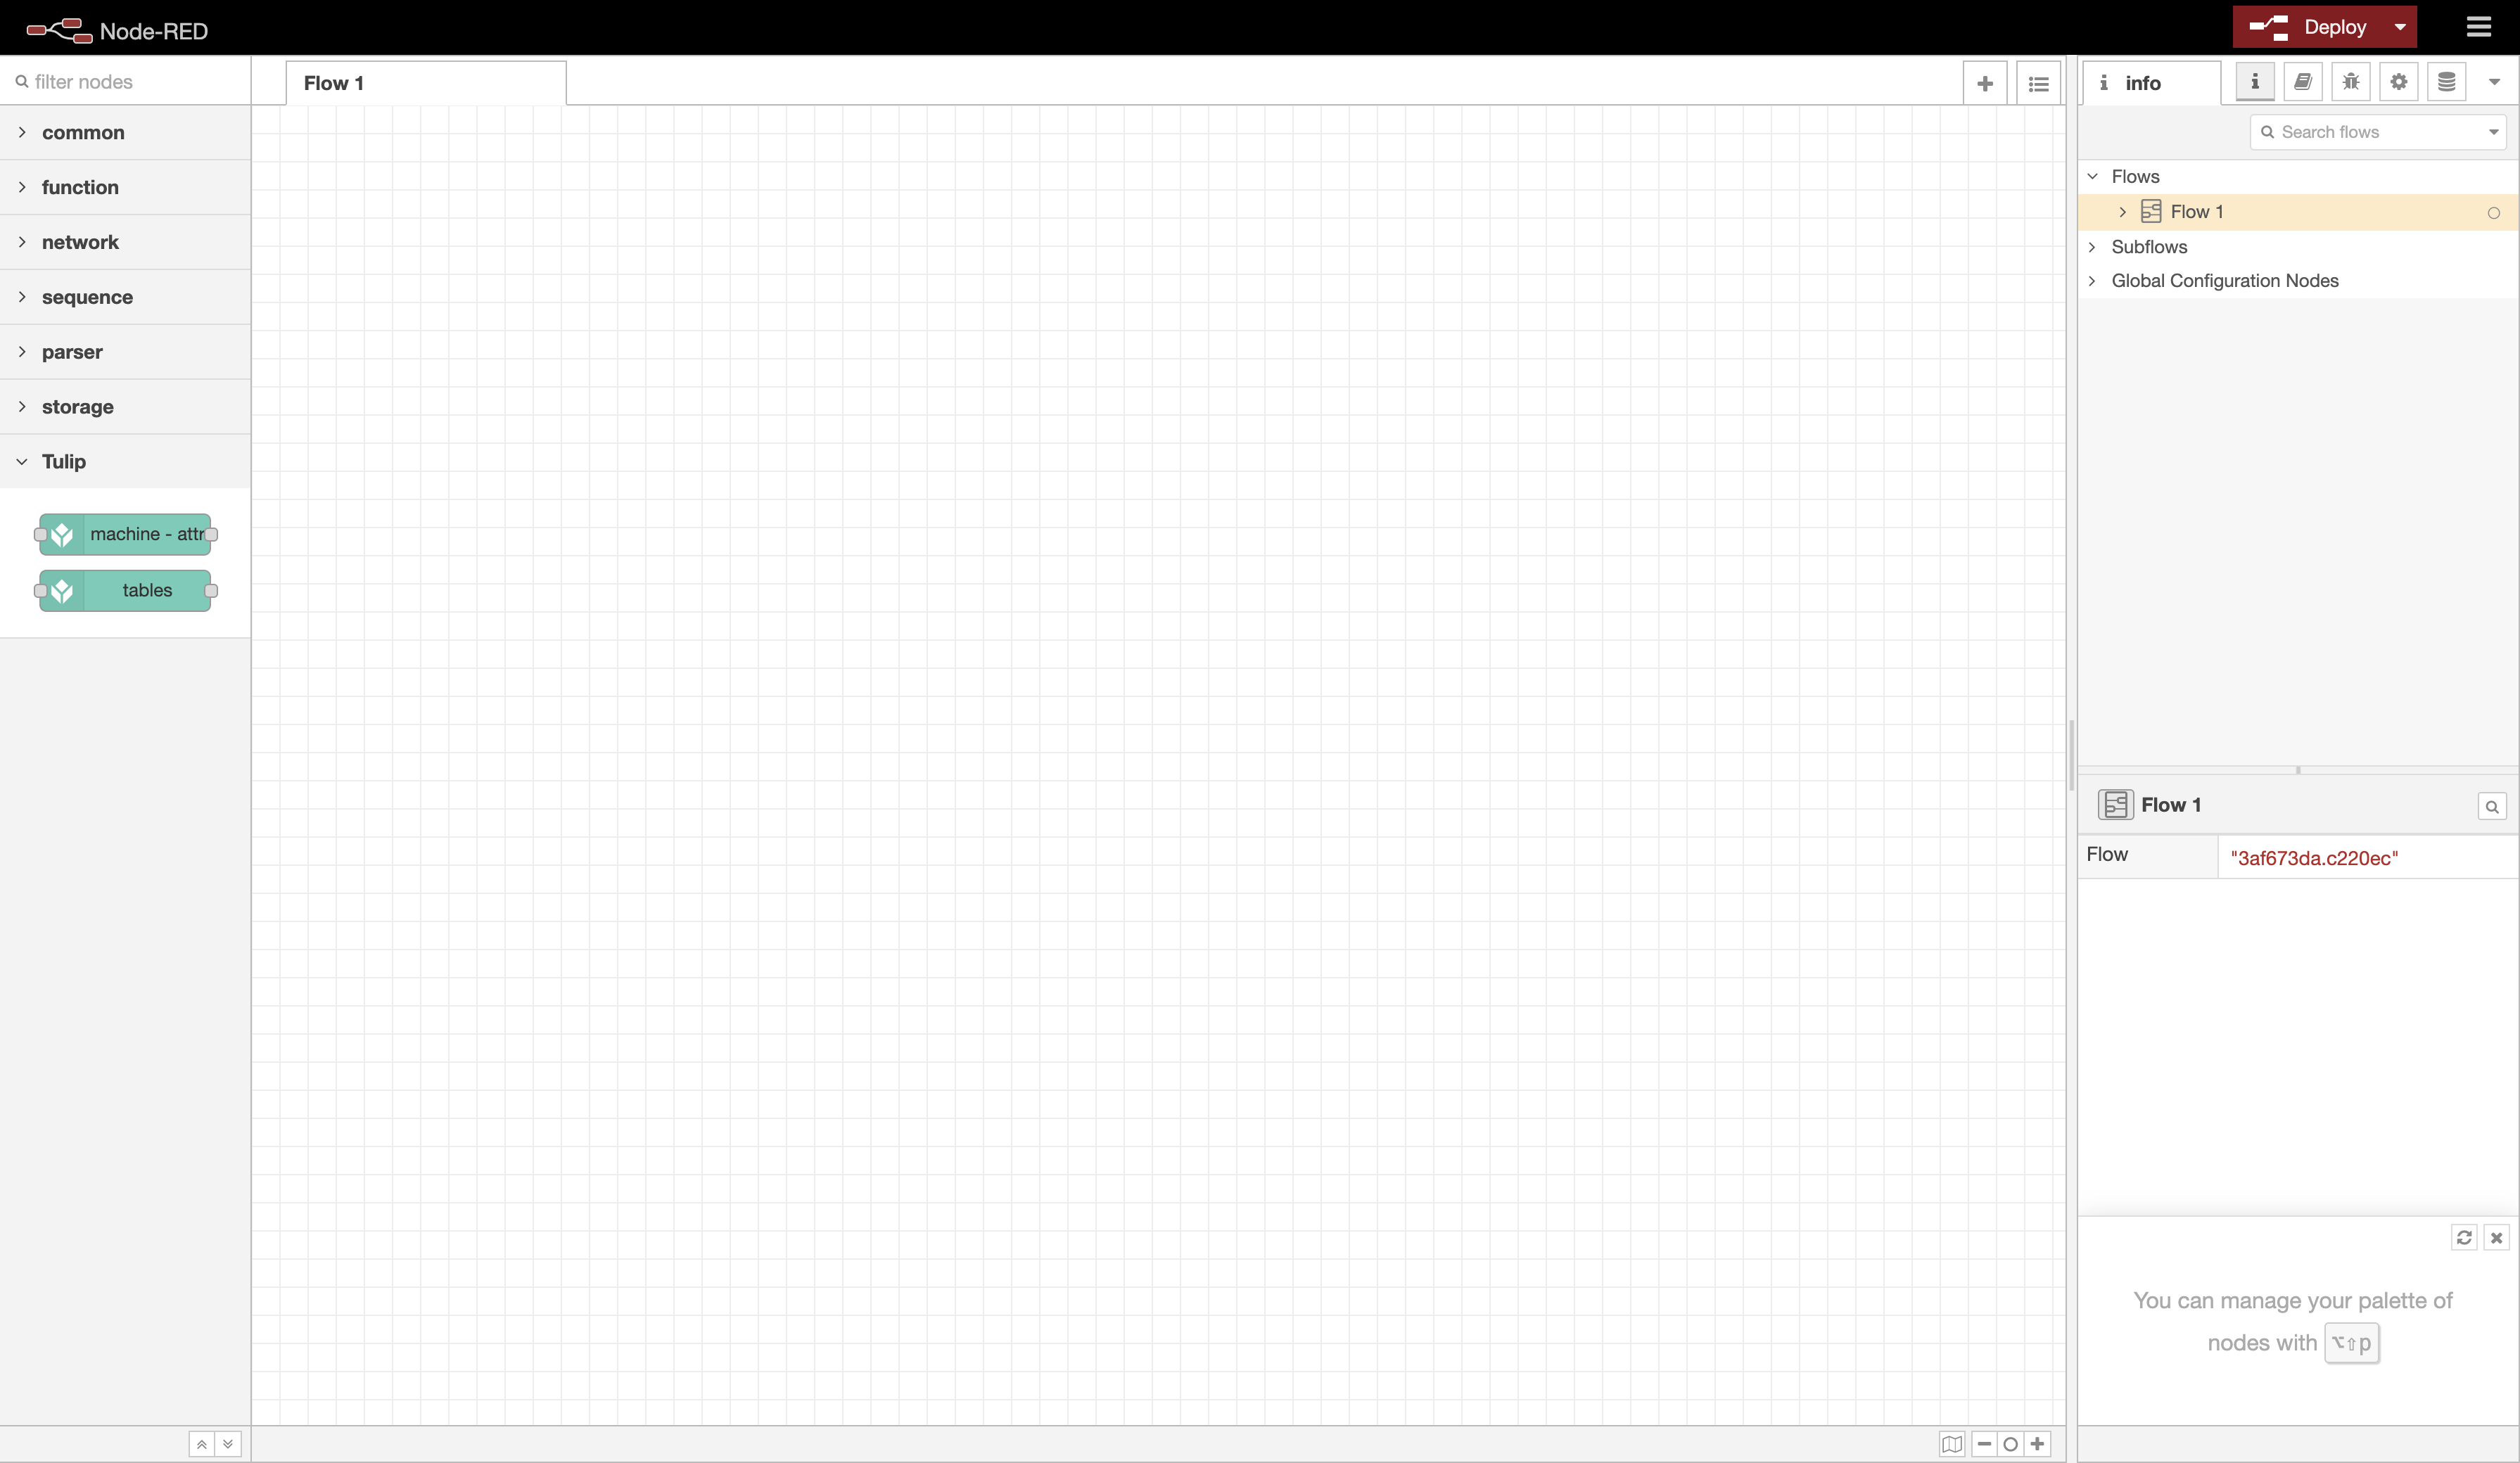
If the installation is successful, the tulip-machine-attribute and tulip-tables nodes will be visible in the palette (left sidebar) under the category Tulip.
Using the Tulip Machine Attribute Node
Prerequisites: You have read How to use the Machine Attributes API have an API Token configured with attributes:write permissions, and have a specific machine attribute you wish to send data to.
1. Drag and drop a Tulip Machine Attribute node into your flow
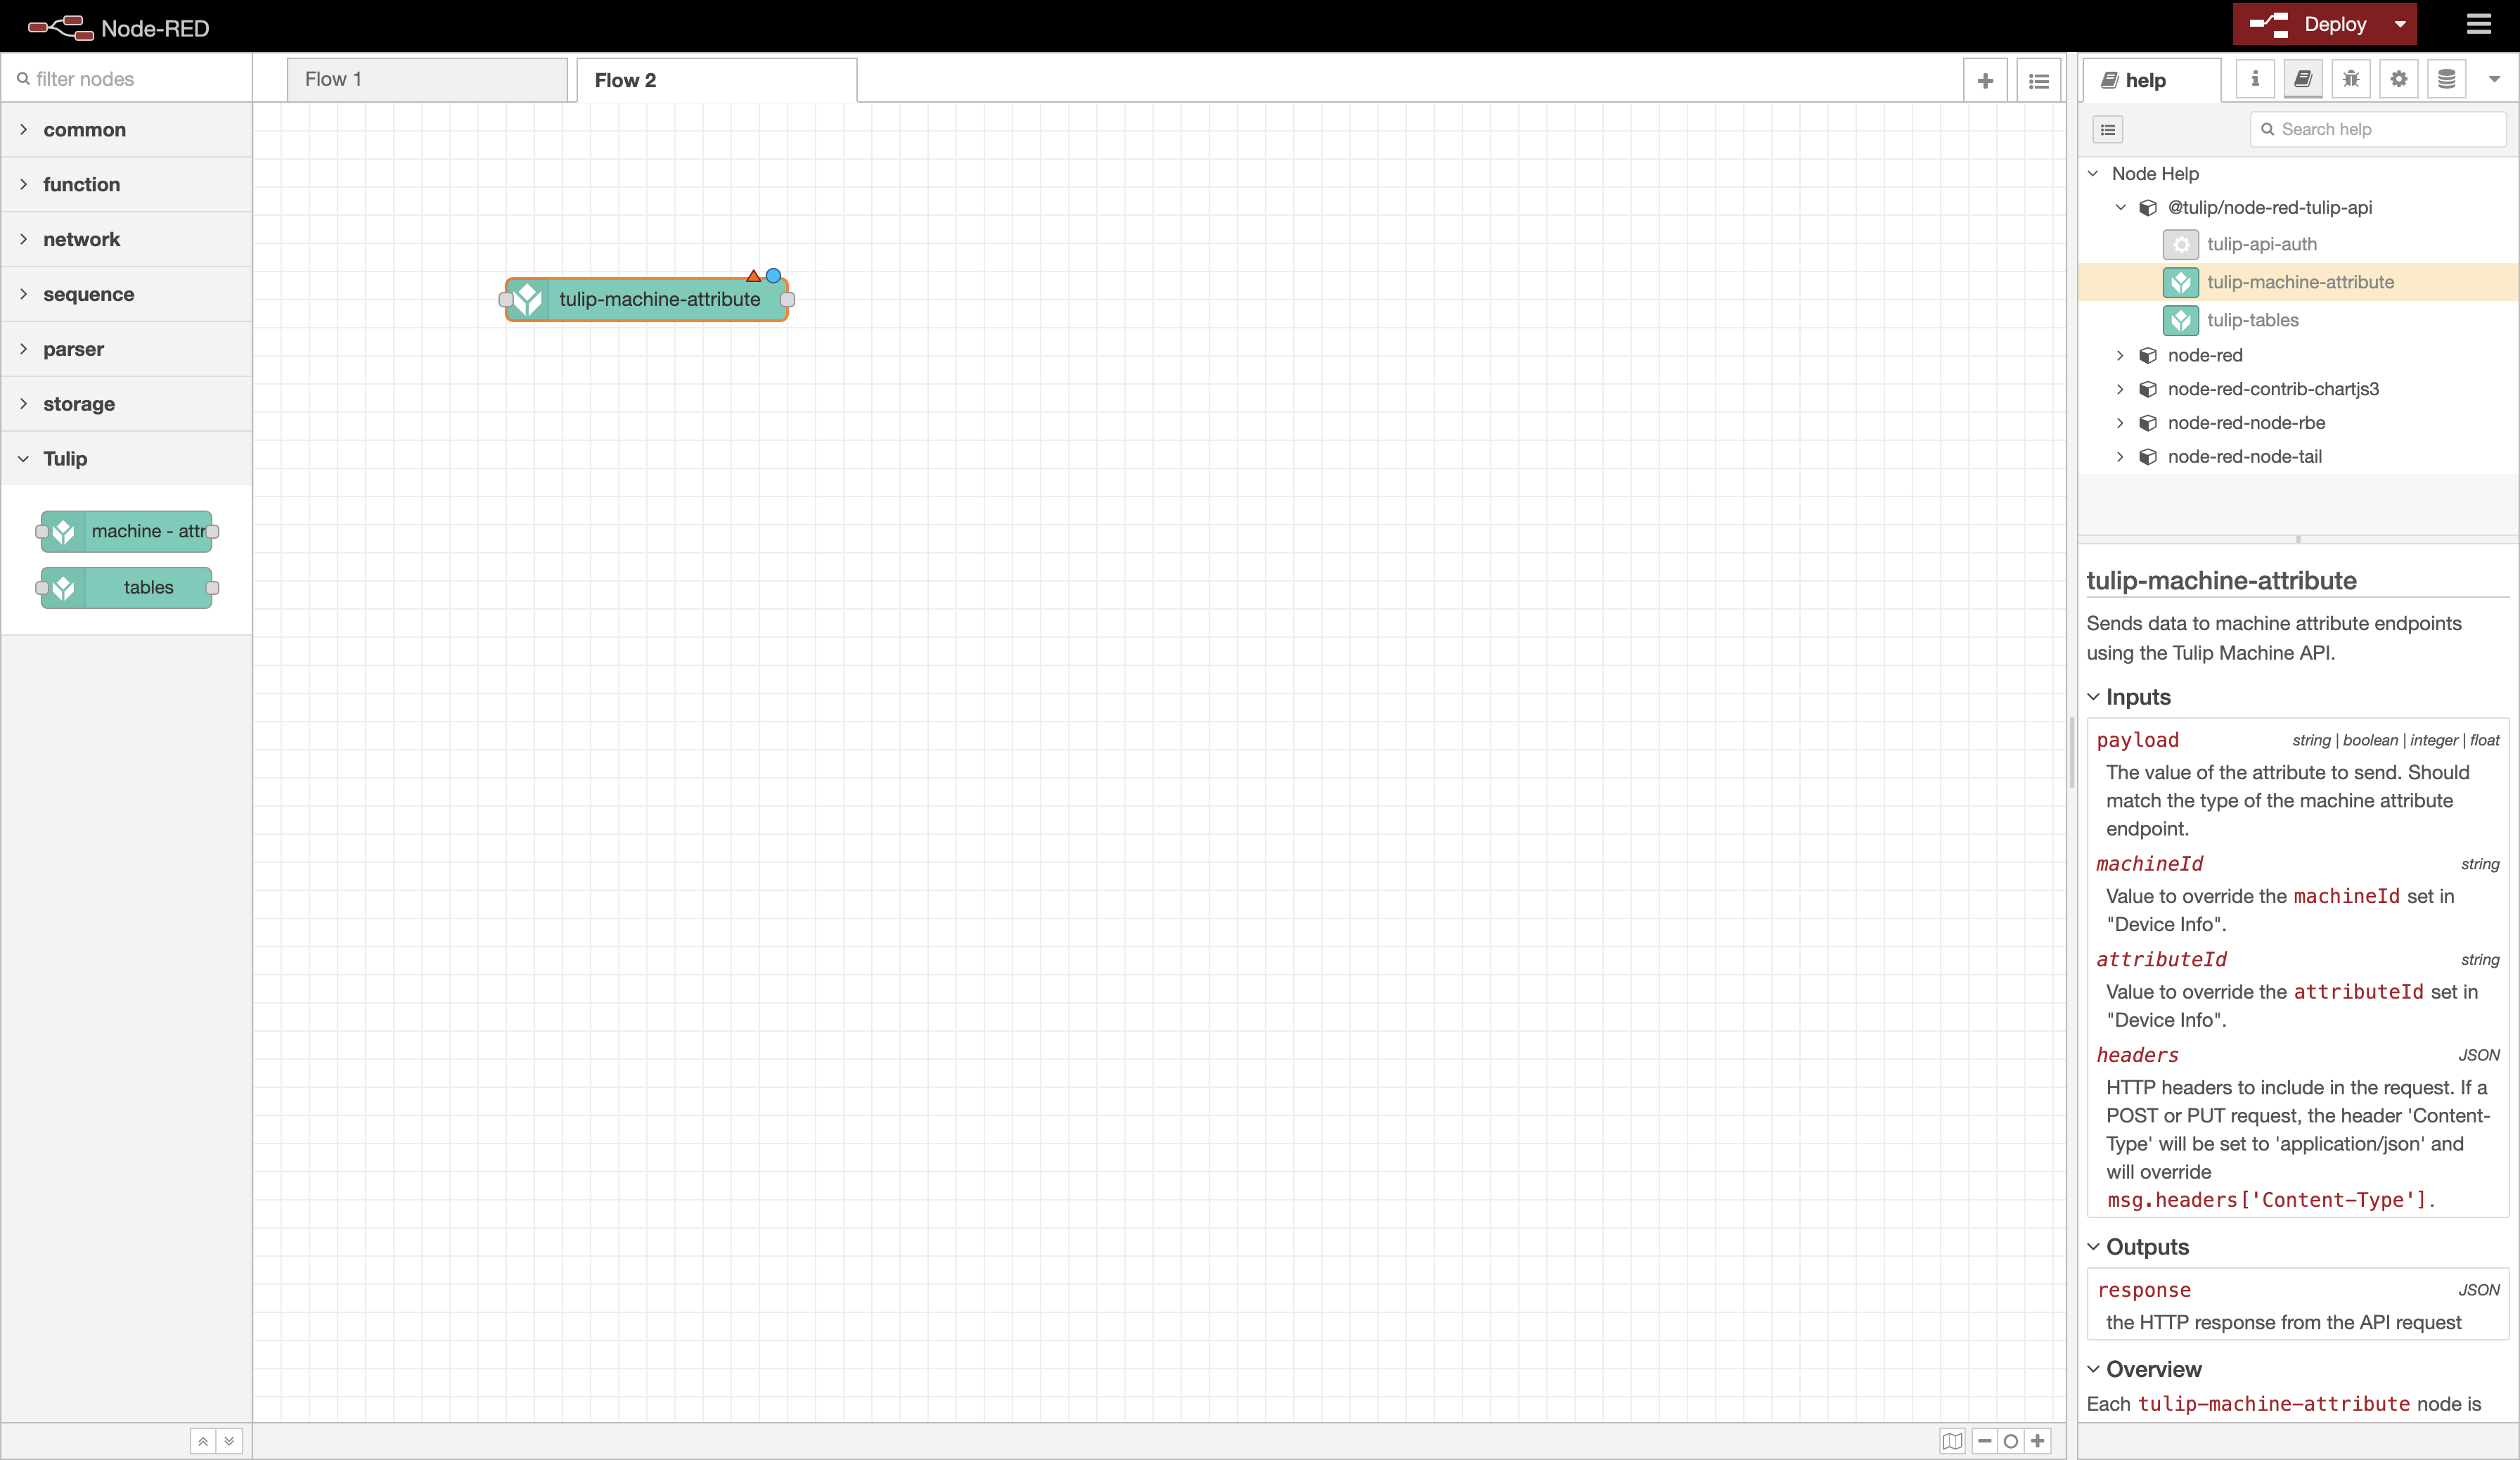
Note: In the right sidebar, select the help tab to view documentation about how to use the node.
2. Configure the node to match the target machine attribute.
We will use the following machine attribute as an example. Note that the Machine Data Source is the Tulip API.

Integer machine attribute for Tulip Machine “Example Tulip API Machine”.
Double click on the node to open its editor, and then configure the node to match this machine attribute. For example, you might configure your node as follows:
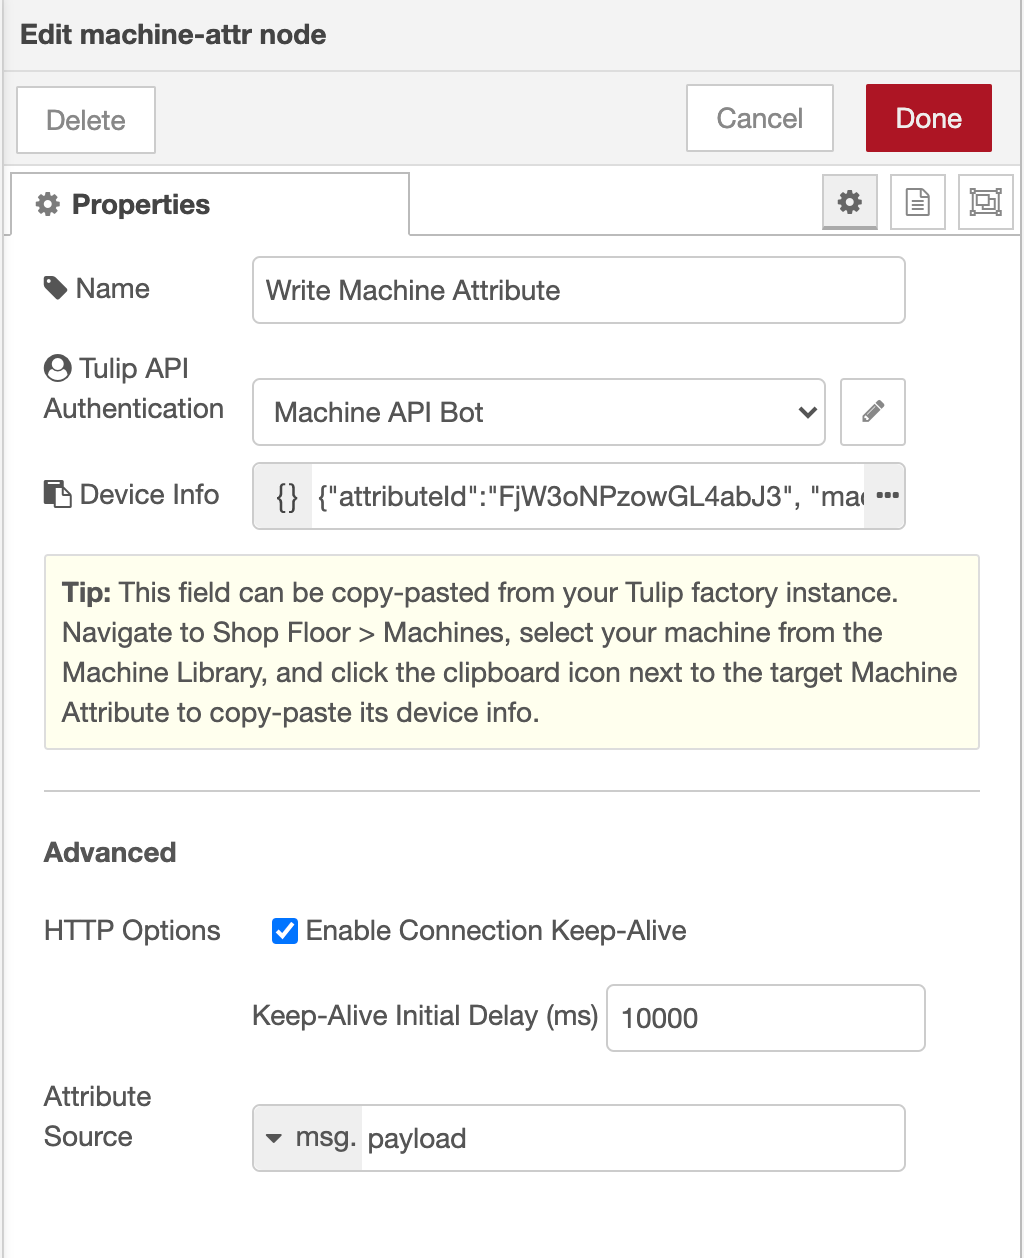
Tulip Machine Attribute node configuration.
With the Tulip API Authentication node configured as follows (fill in your authentication credentials):
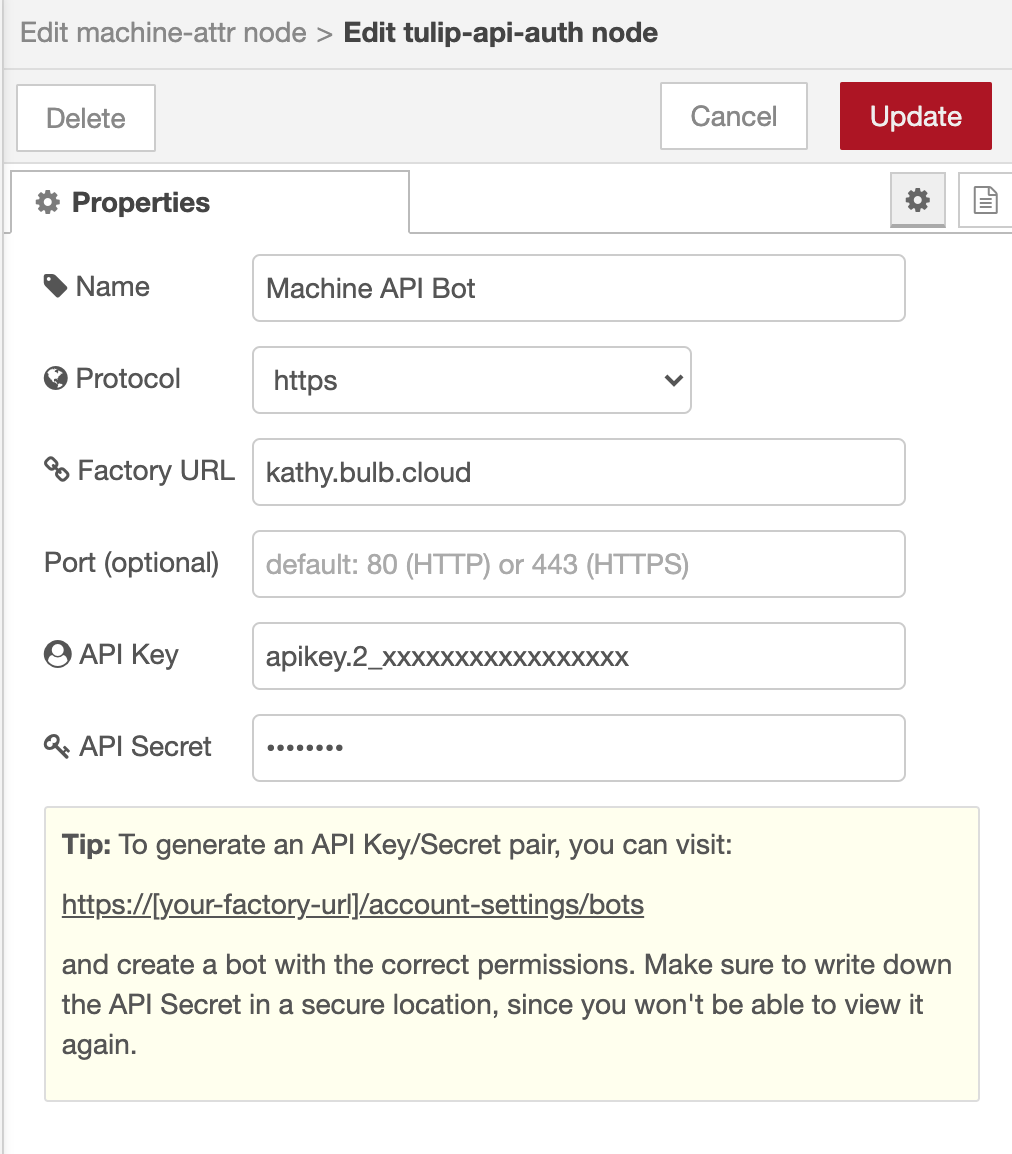
Tulip API Authentication configuration for API Token.
3. Test sending data.
Create the rest of the flow to send data to the Machine Attribute endpoint.
A simple test flow might be to send the value 0 to an Integer endpoint. Wire the input of the machine attribute node to an Inject node configured with msg.payload=0 (shown below). Wire the output to a debug node that prints the full msg.
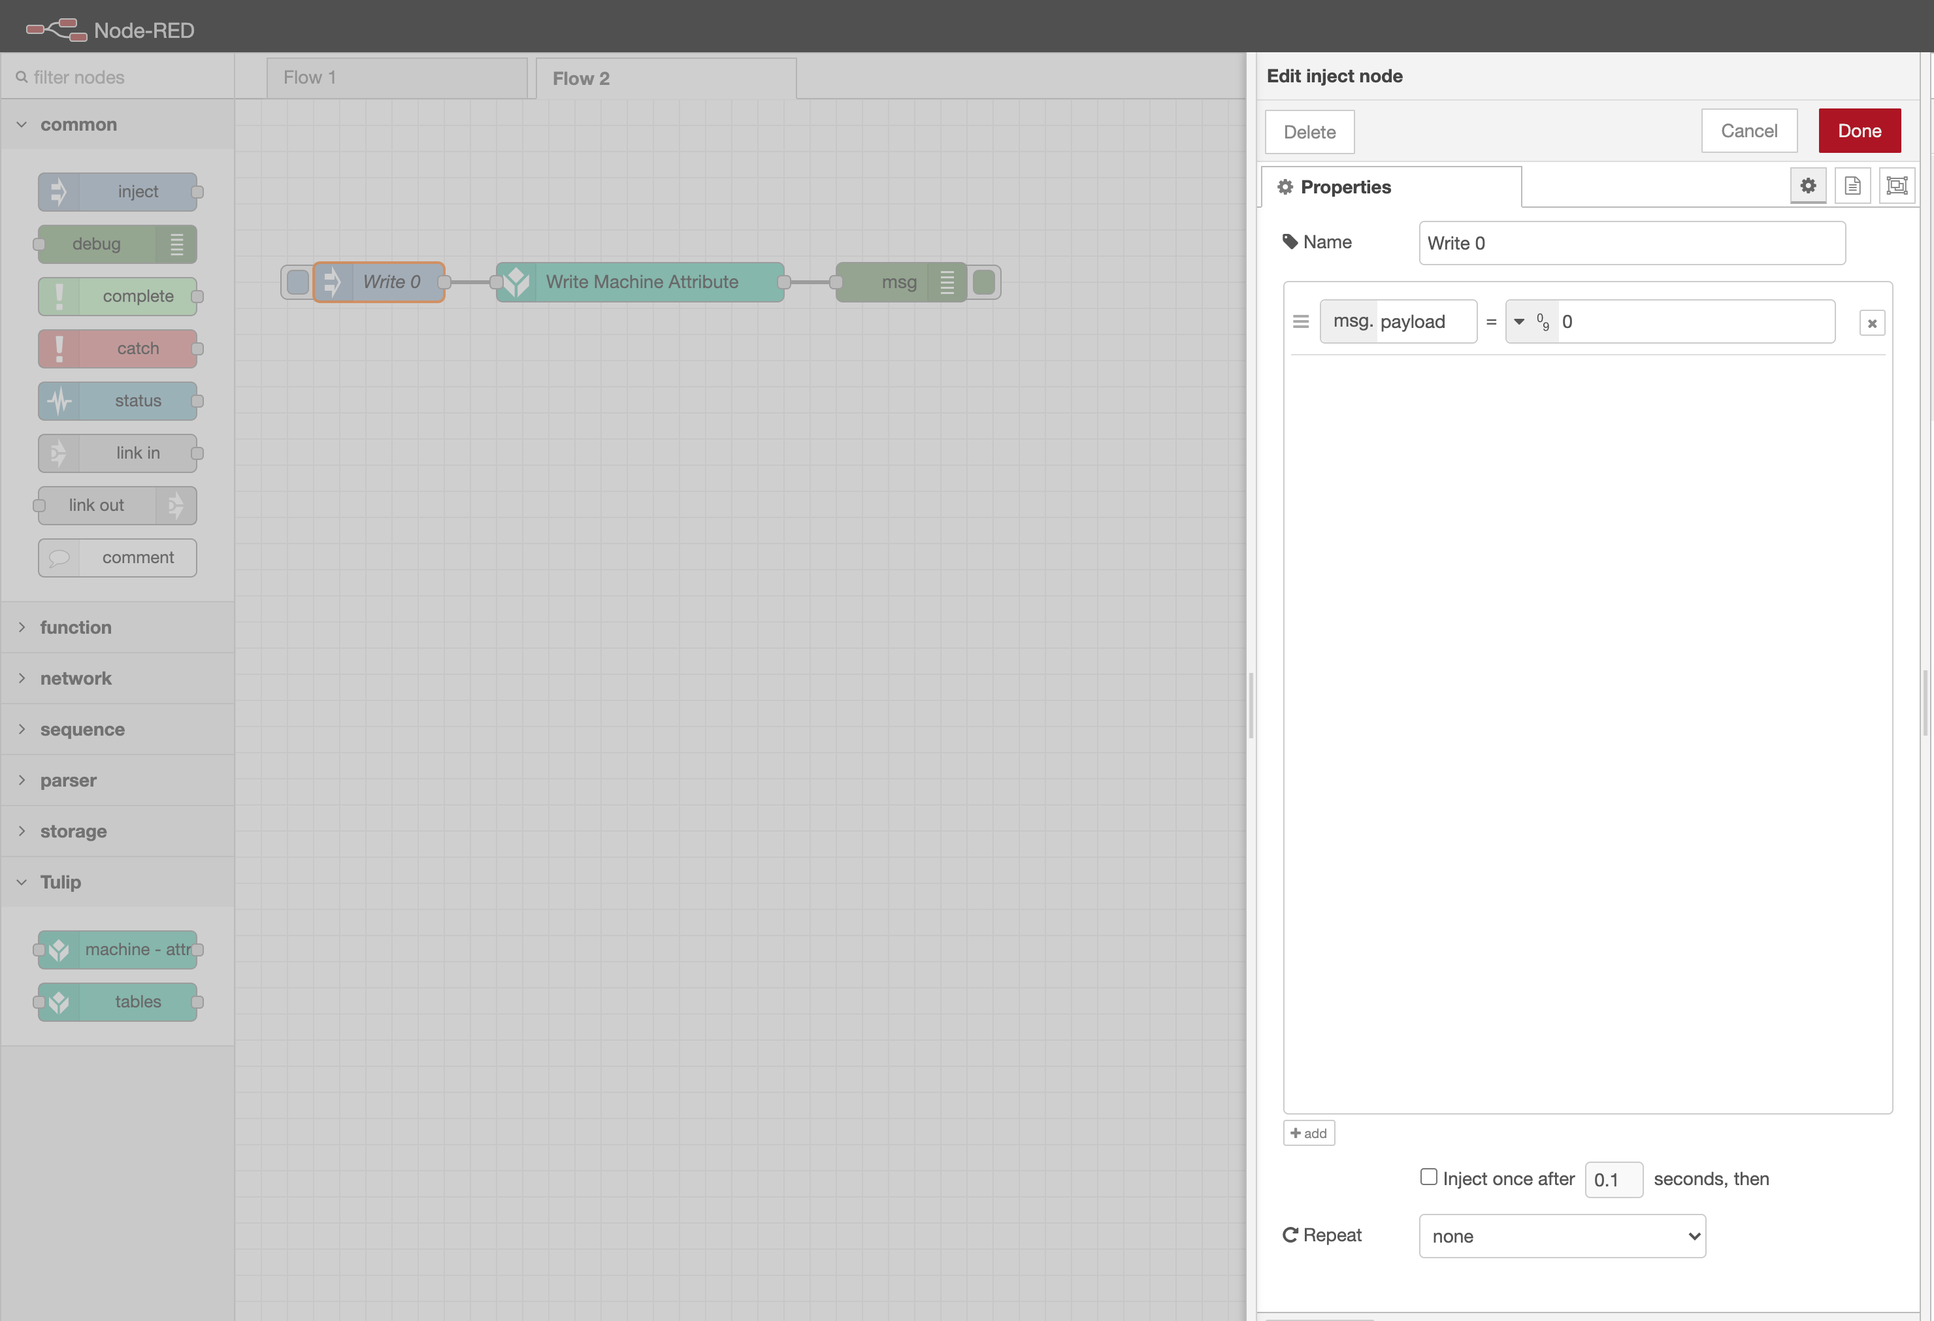
Click Deploy to deploy the flow. When you click the Inject node, you should see a debug message with a status code of 204.
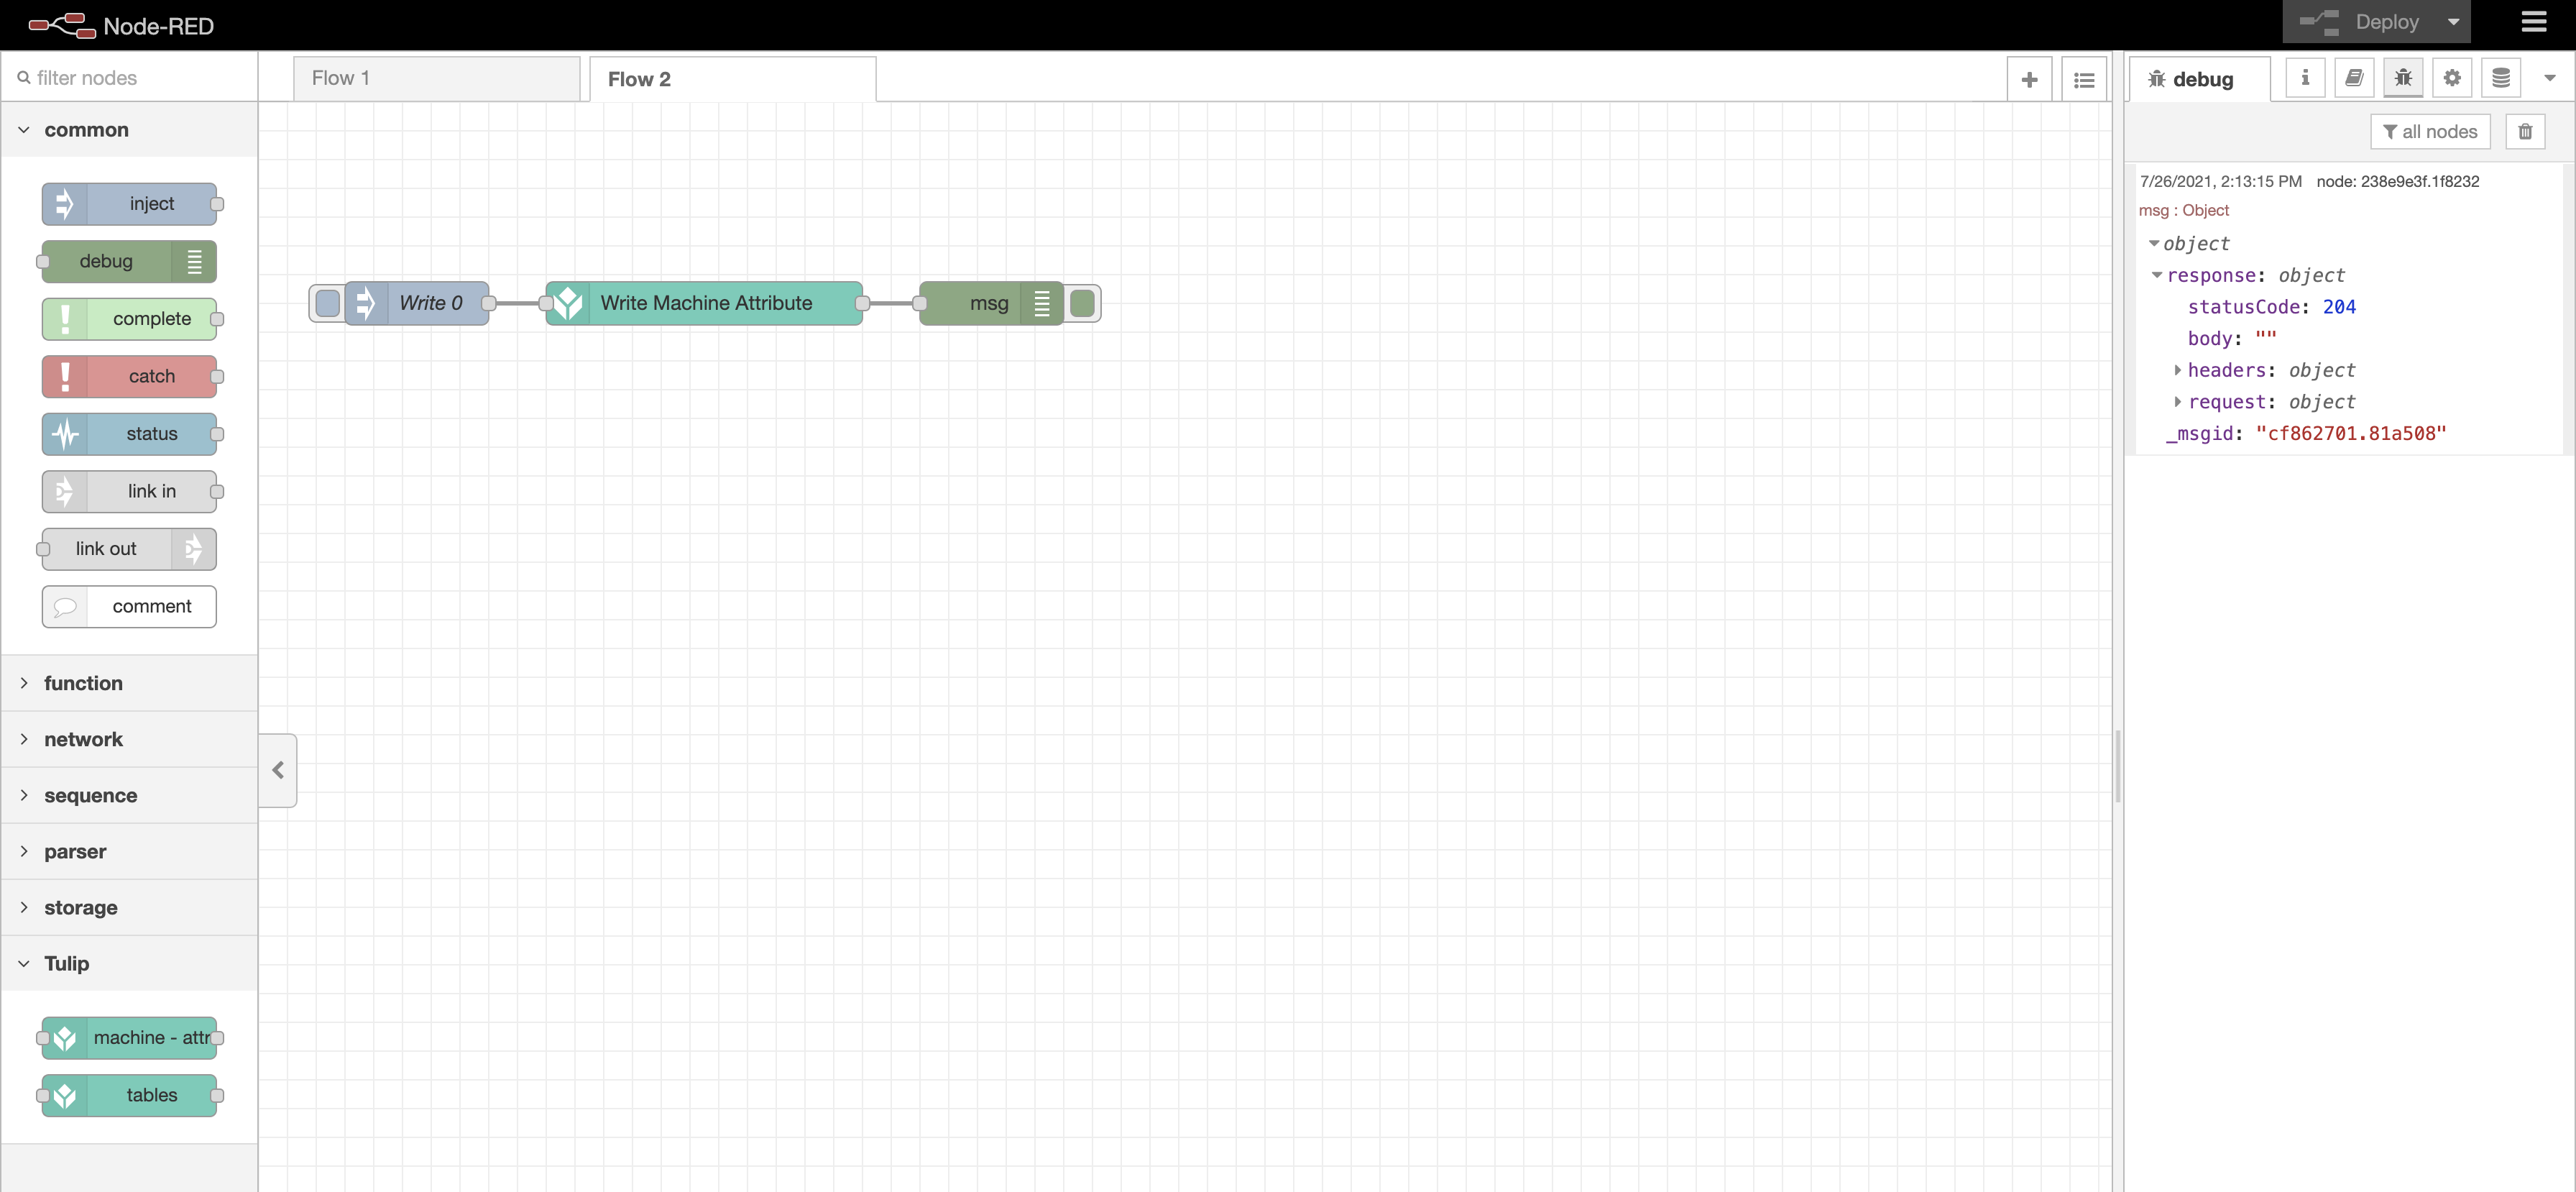
Test flow that sends integer value 0 to an integer machine attribute.
The data should also show up on your Tulip instance under the machine attribute.

Using the Tulip Tables API Node
Prerequisites: You have read How to Use the Table API have an API Token configured with tables:read and tables:write permissions, and have a specific table you wish to send data to.
1. Drag and drop a Tulip Tables node into your flow.
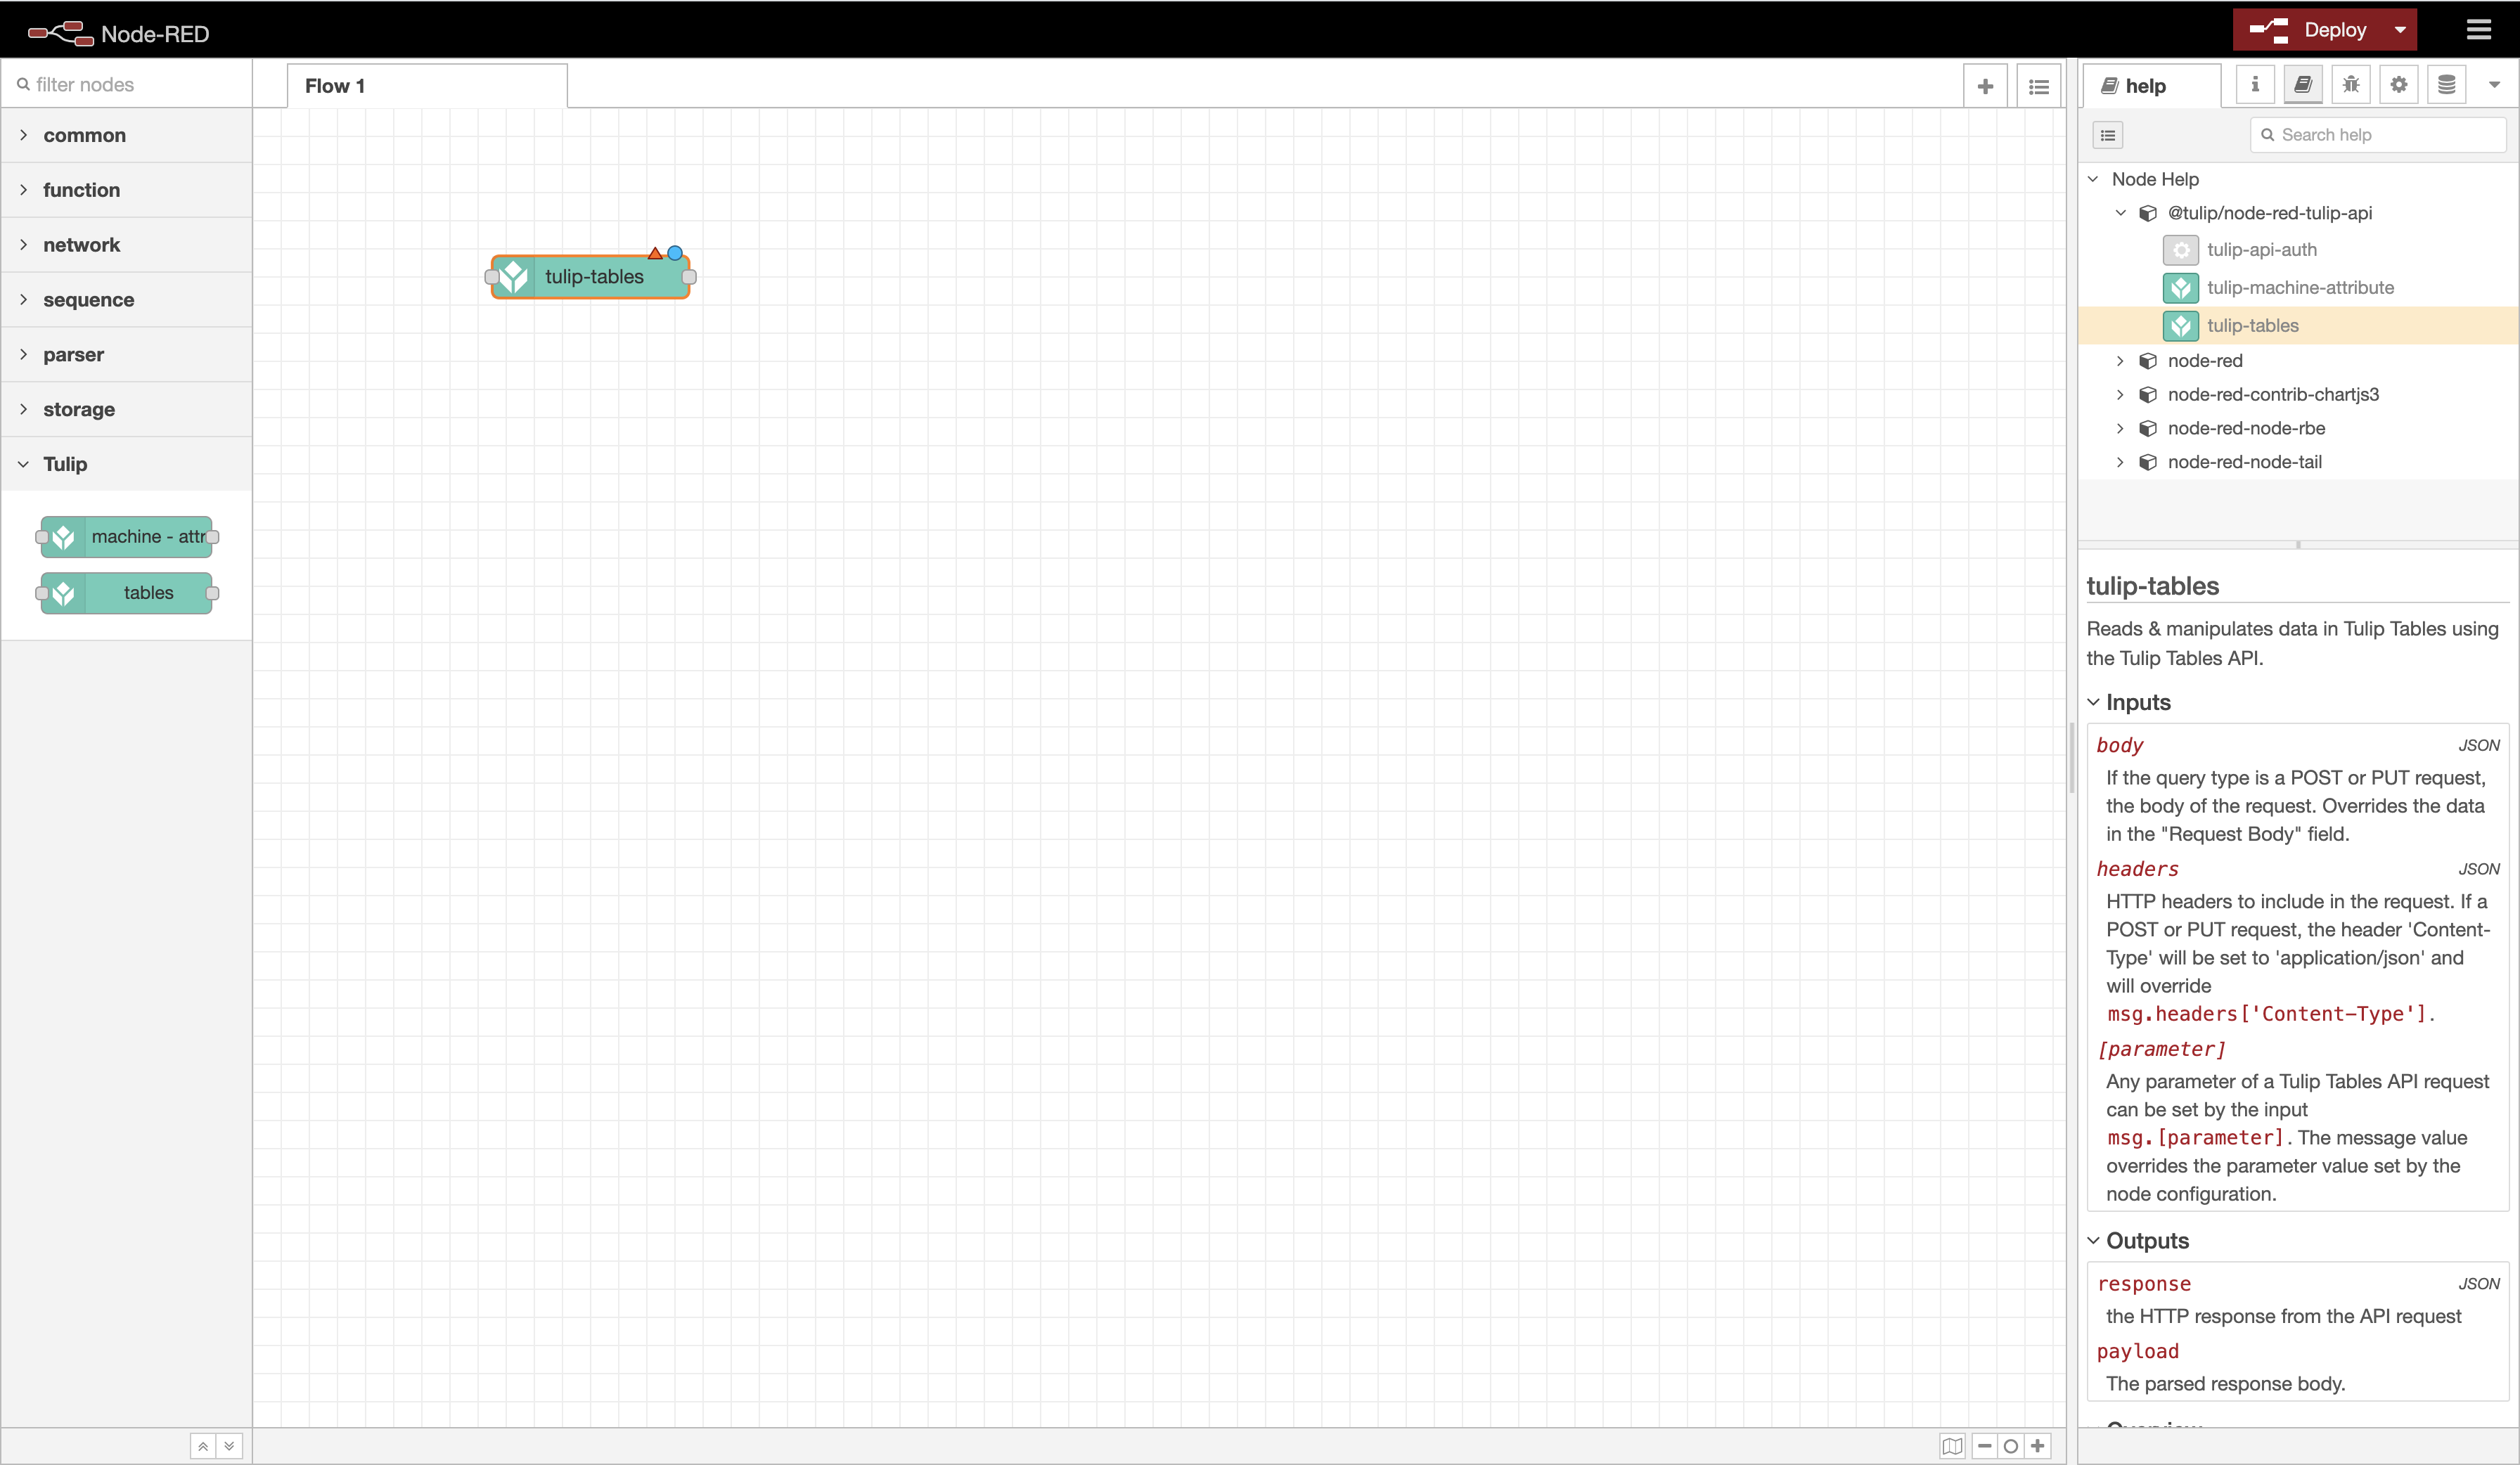
Note: In the right sidebar, select the help tab to view documentation about how to use the node.
2. Configure the node for a specific Tulip Tables API Query.
First double-click on the node to open its editor. Set the Tulip API Authentication configuration node to match the details of an API Token with tables:read and/or tables:write permissions (depending on whether the table query is a read or write operation):
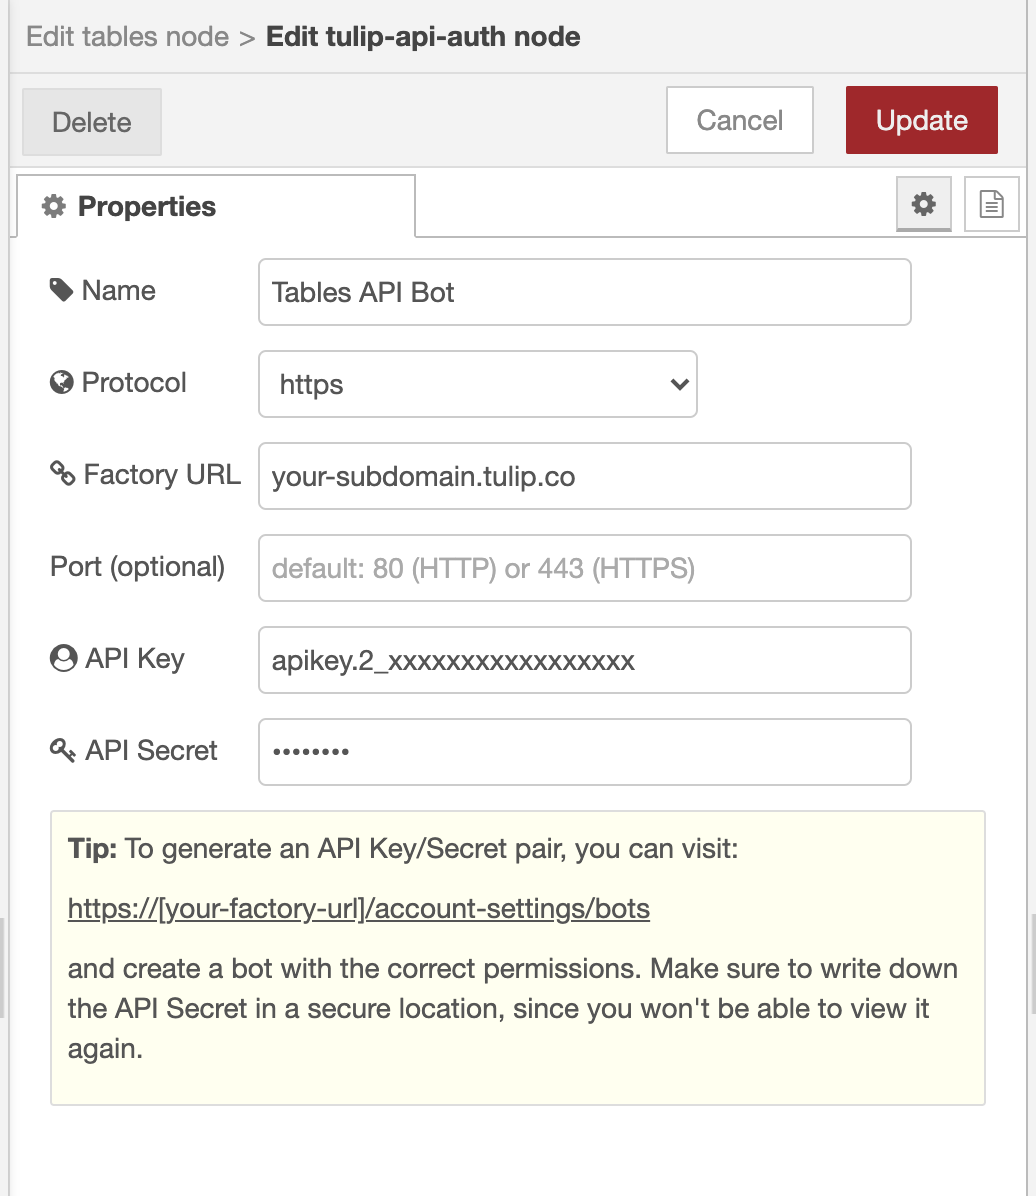
Tables API Token configuration
Set the Query Type to the query that you’d like to execute. The rest of the Query Options will then appear according to the type.
In this example, we will choose List records to list table records in the table with id 9YHHckKcFTXHQpXEu with the Status field “REVIEW”.
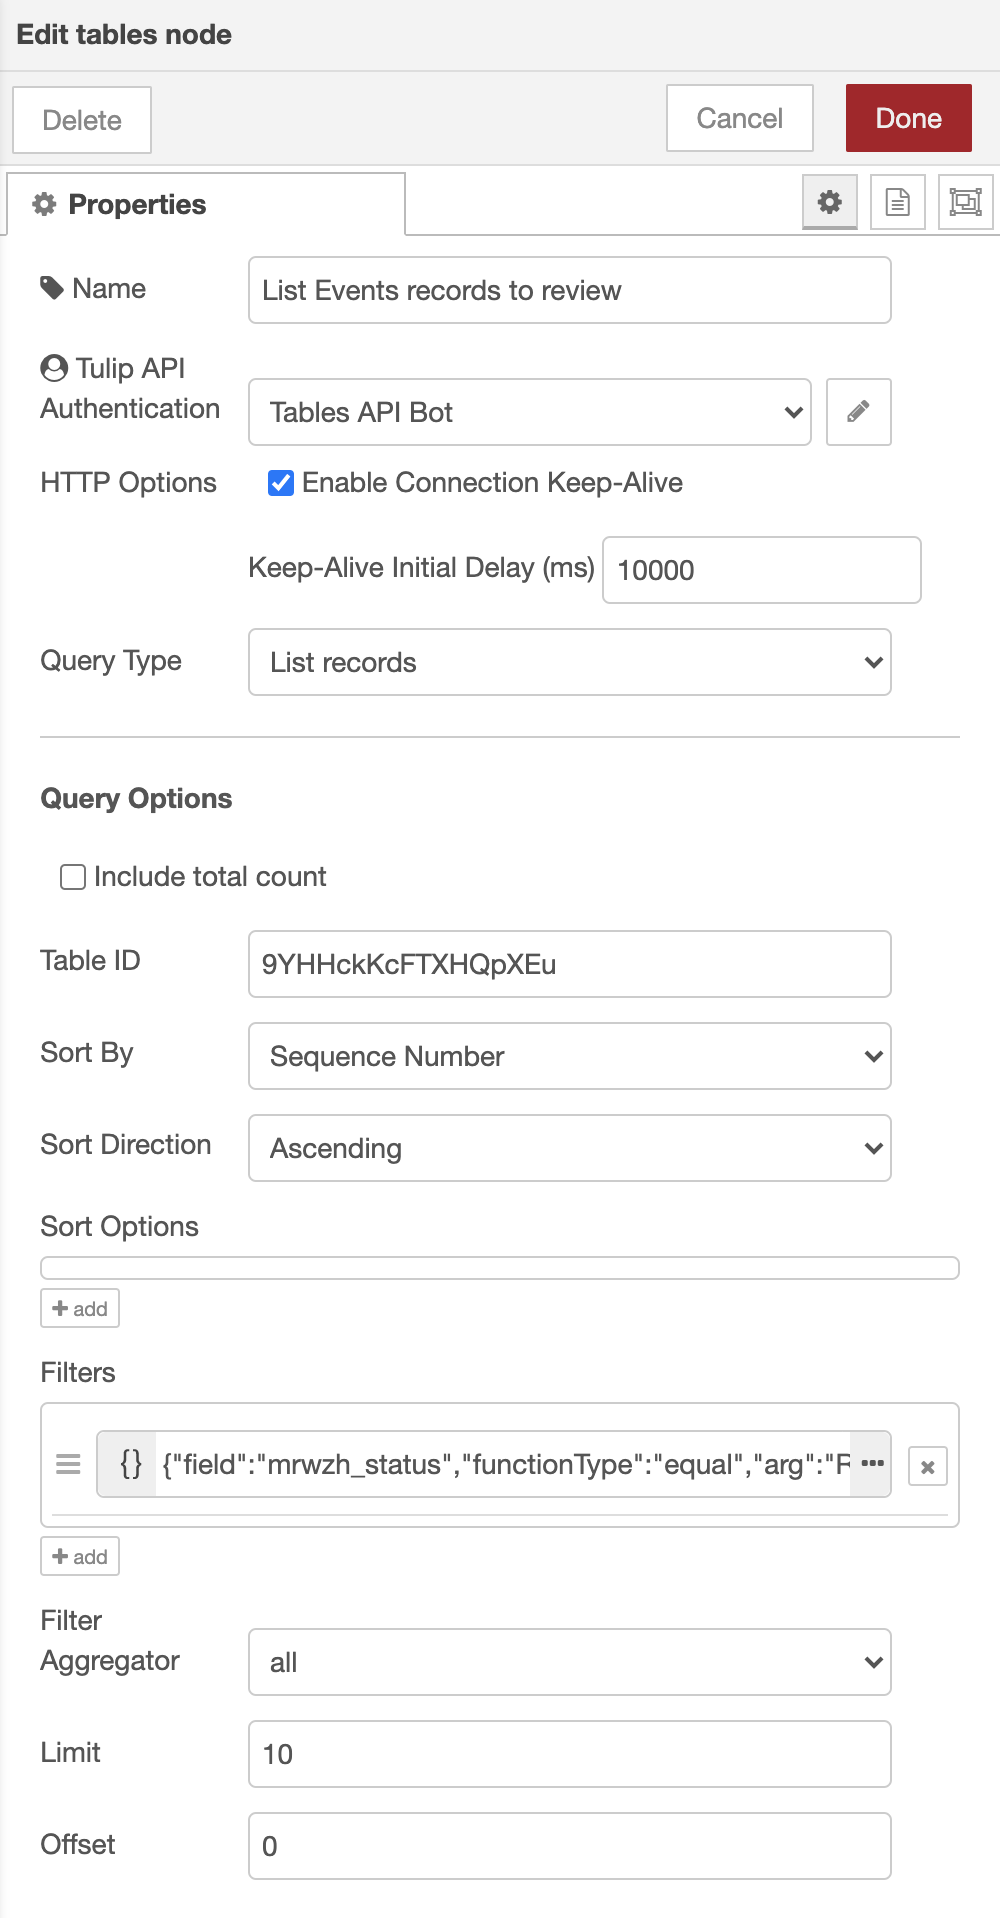
Table API node configuration
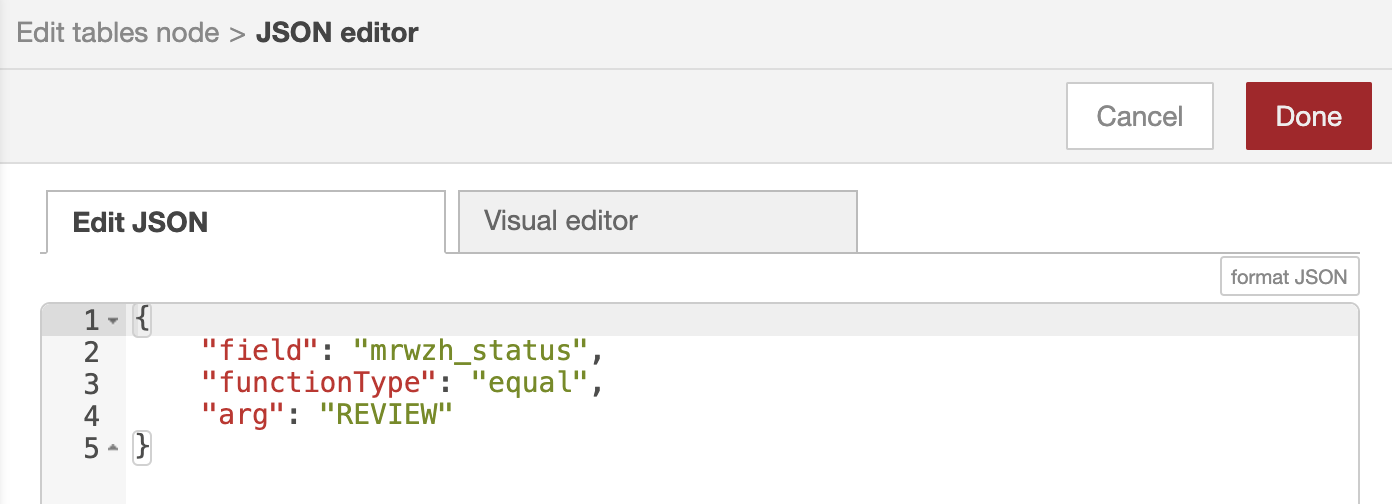
Expanded JSON from Tables API node “Filters” field.
3. Test sending data.
Create the rest of the flow to send data to the Tables API endpoint.
An example test flow could wire an empty Inject node to the input of the Tables API node to trigger sending the API request. You can also add a debug node that prints the msg.payload to see the parsed response.
See below the results when the configured Tables API request is sent to the following table at your-subdomain.tulip.co/tables/9YHHckKcFTXHQpXEu. Note that the response returns the two table entries with the Status field set to REVIEW.

Table to query with several records. Includes a Status field that we can filter by.
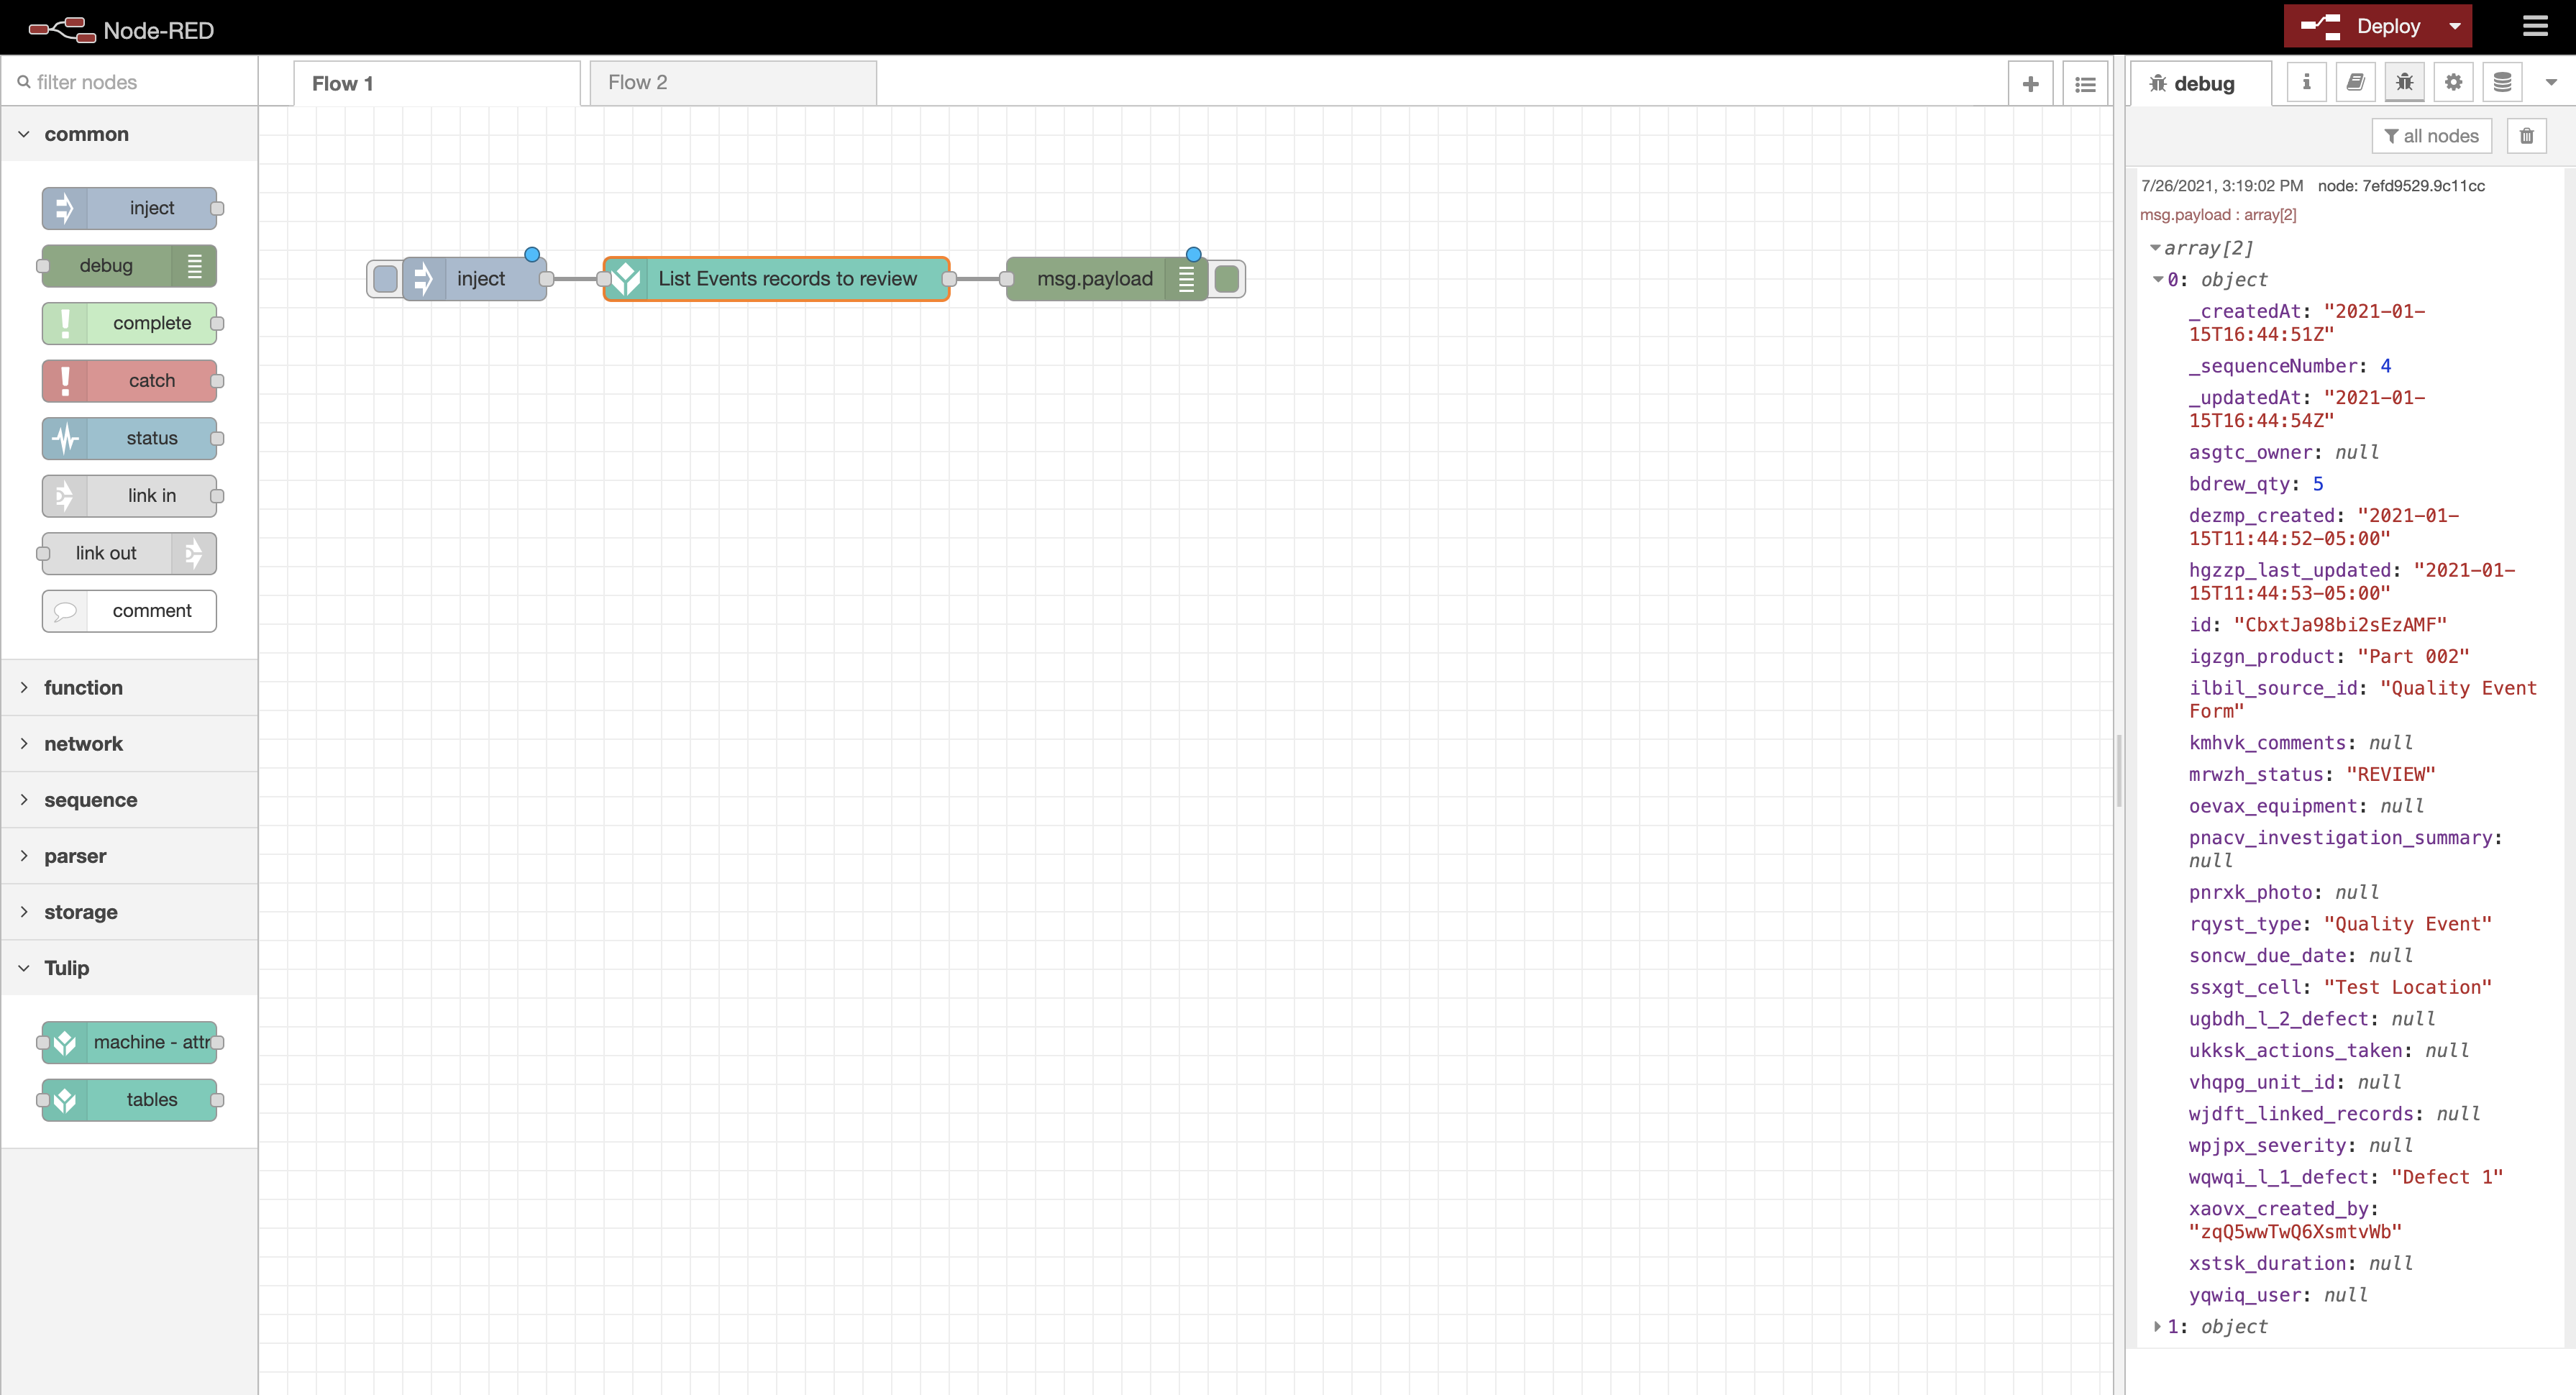
Flow to send “List Records” Tables API request to Tulip Table, and the response payload.
Further Reading
@tulip/node-red-tulip-apipackage README- How to Use the Table API
- How to use the Machine Attributes API
