

Establish relationships between table records with linked records
In this guide, you will learn
- What Linked Table Records are
- Caution on Performance of Linked Records
- How to link Table Records
Overview
Tulip Tables are used to manage a wide variety of data including Work Orders, Skills matrix, Bill of Materials and many more. There will likely be a definable relationship between two tables (ex: assembly and sub-assembly data, shift schedule and operator information data).
Linked Records, you can define, manage and visualize these relationships between different tables.
Use cases
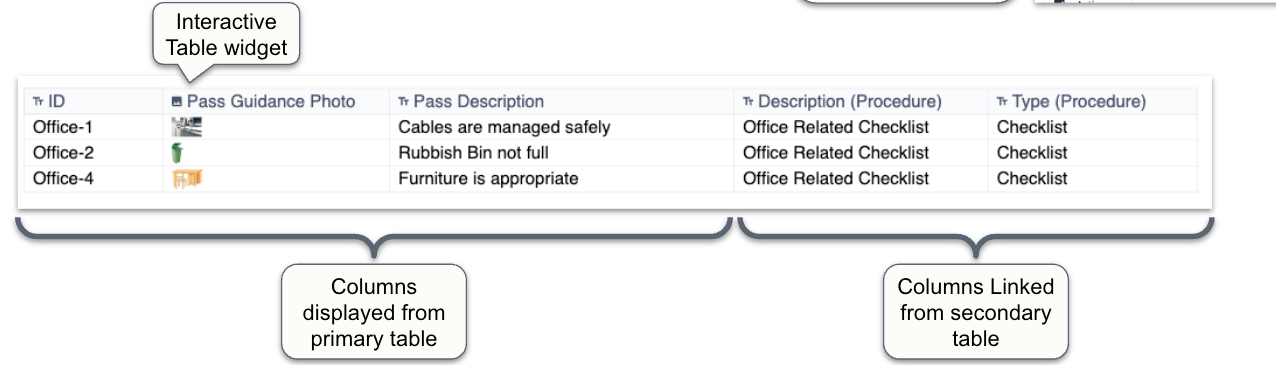
1. Display reference data (from a secondary table) in an interactive table
- Allows master data information to be displayed while not needing to duplicate columns
- Should be used for key information only
2. Create genealogy records / data
- Filtering views for genealogy data is easier with linked record
- Recommendation to still store parent ID as a column for queries/aggregations (see limitations)
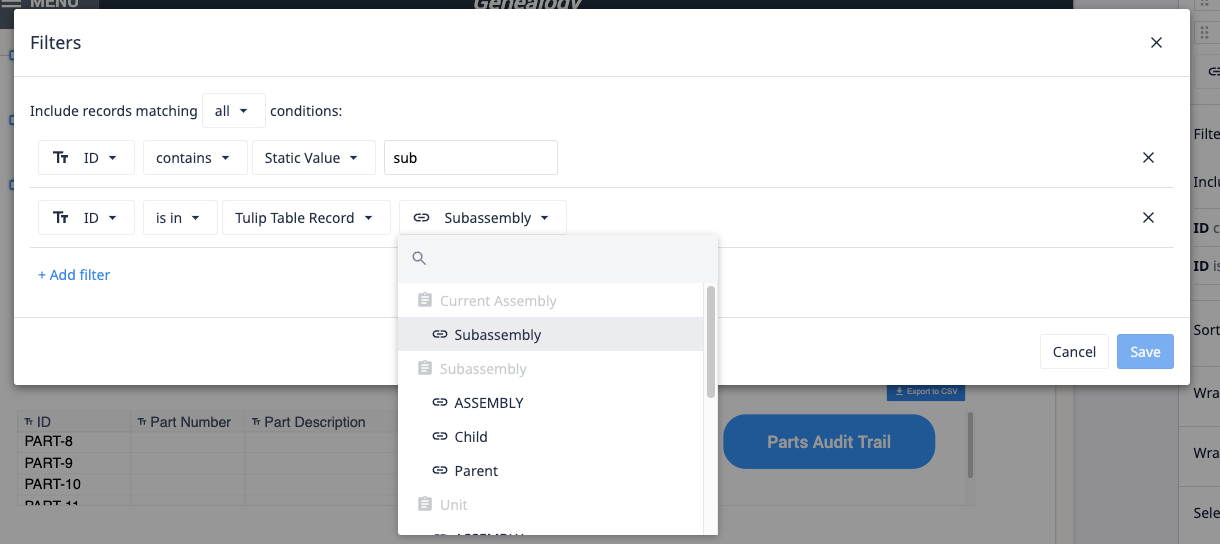
3. Easy ability for interactive table filtering using “is in” filter
Caution on performance of Linked Records
While linked records provide the ability to relate tables to one another, Tulip has seen significant performance issues when this feature is used at large scale (i.e. several linked record columns in a Table, several hundred thousand records in a table).
Limitations
It's important to note that linked records have certain limitations with the following Tulip features:
Performance
- Many linked record columns in a table may result in performance issues
- Can be more complex to manage due to inability to do import and required format for API
App Triggers
- Cannot load record directly for 1:1 relationships
- All linked record fields are string arrays even if a 1:1 relationship
- No error message if record is already linked
Import/Export
- Cannot import linked records via CSV import
- CSV export leads to each linked record field becoming a string array
Table queries and aggregations
- No aggregation possible on linked fields
- No filtering possible on linked field
Analytics
- Analytics can only refer to one table at a time. You cannot use linked records to analyze data from multiple tables at once.
UX limitations
After a linked record relationship has been created, only way to see the relationship type (one to one, one to many, etc.) is from within the “record card view” (UI within Tables page when clicking on a Table Record or editing a Table column name).
Alternative approaches to linked records
Here are recommended architecture designs for cases where you do not want to use linked records.
One to One relationships or One to Many relationships
You can “link” tables by storing the ID as a record in the table.
Example
In a Defects Table, rather than linking defects to a Work Orders table, create a ‘work order ID’ column in the Defects table and store one or more values in each row as a comma delineated list
Many to Many Relationships
You can store a string array to a table field containing the link of the information
Example
Rather than linking a set of Part Numbers that need a set of feature checks for quality, store an array of ids for checks required in each part record
Steps
-
Create an array in app logic for needed links
-
Convert the array to string and store it in a table field
-
Convert the string back to an array if you need to use the data in filters, app logic for any subsequent logic, or linking.
Link table records
To link two table records together, you must add a new column, to establish and define the relationship. It's important to note that you can not link existing columns in a Tulip Table.
Table Records are linked through the record's ID.
When you add a linked record column to a table, you will be prompted to define the relationship between the two tables. Upon creation, a new column in the linked table will also be automatically created, leaving you with one column in each of your linked tables. These columns will be populated with the ID of each table record.
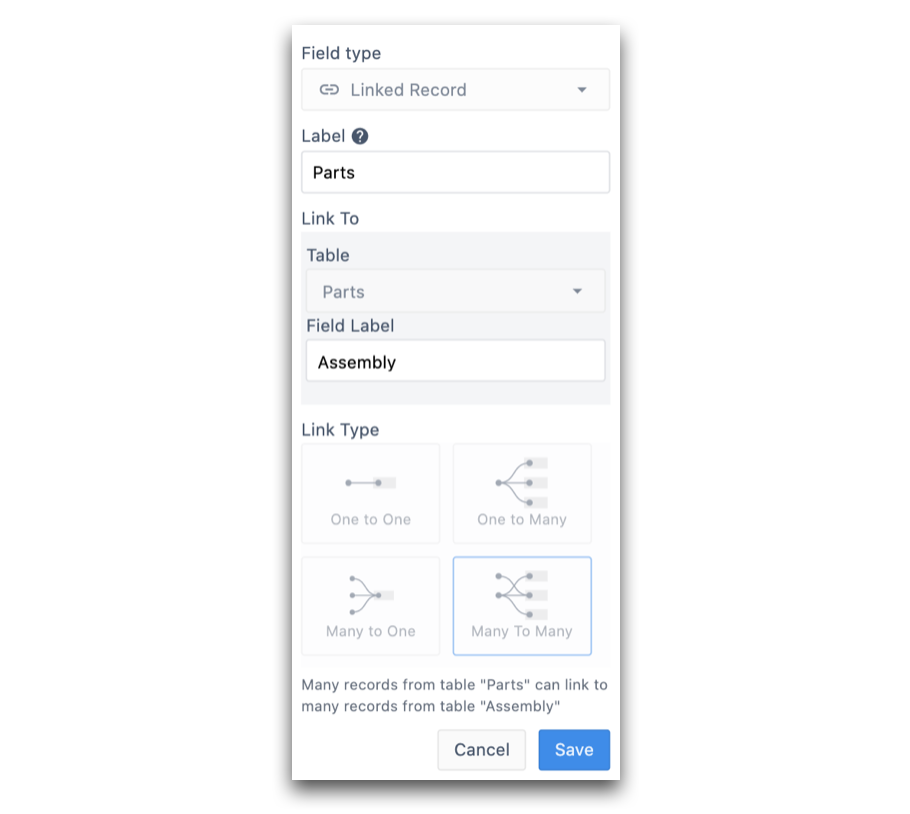
To add link a table record, add a new column in one of the tables you wish to link, and select Field Type: Linked Record.
A modal will pop-up with the following options:
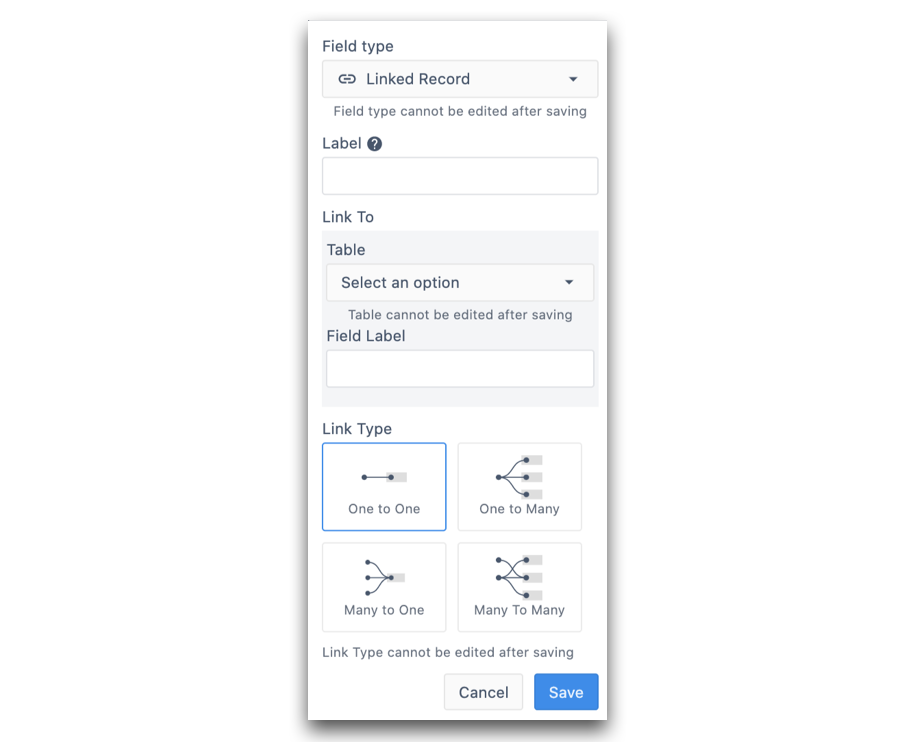
- Label: Define the column label within the Table you are currently working in
- Link to > Table: Select table you'd like to link your record to
- Link to > Field Label: Define the label of the column that will be populated in your linked table
- Link Type: Define the type of relationship between the table records. If you're unsure of what relationship type is best suited for your data, check out this article.
Once you save the column, the link type can not be edited.
Example
In the following example, there are two Tables:
- Assembly table
- Parts table.
Each assembly is made of multiple parts.

In the Assembly Table, we'll add a new column to establish the relationship between the two tables. Here the relationship type is Many To Many. This is because multiple parts can be used in multiple different assemblies, and vice versa.
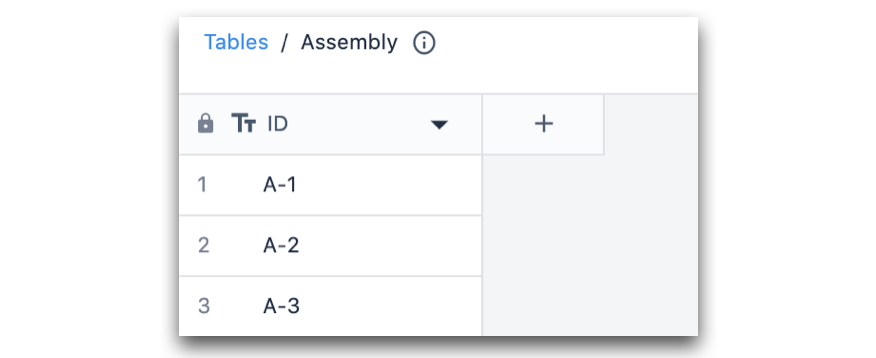
After saving the column, the following columns are generated in each table:
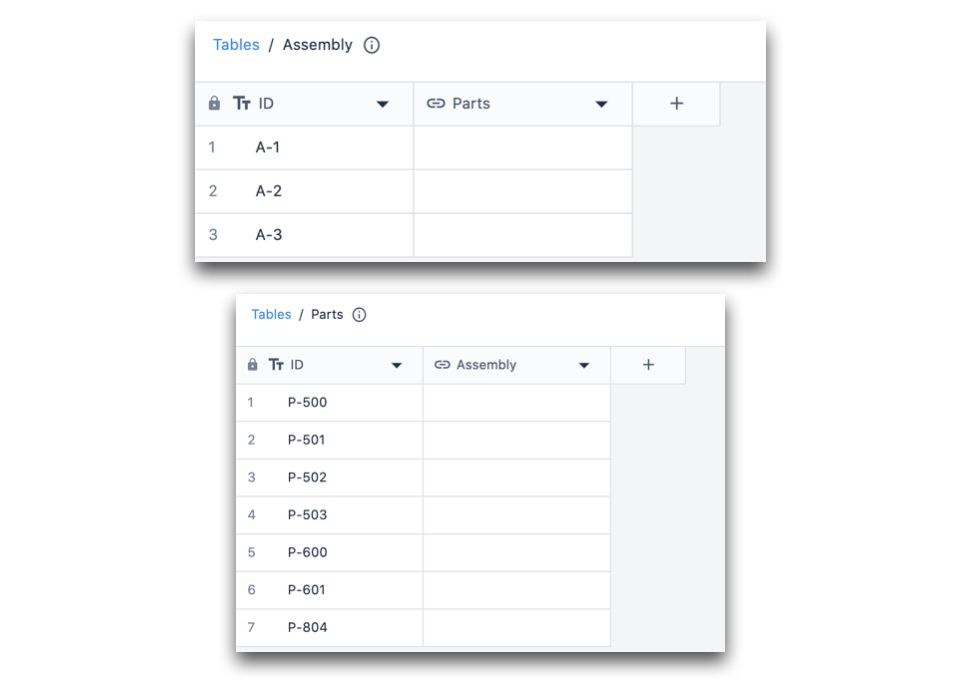
At this point, only the structure of the relationship has been defined between the tables. Now, it's time to point each table record to its specific linked record.
To do this, click on a table record. The following modal will pop-up:
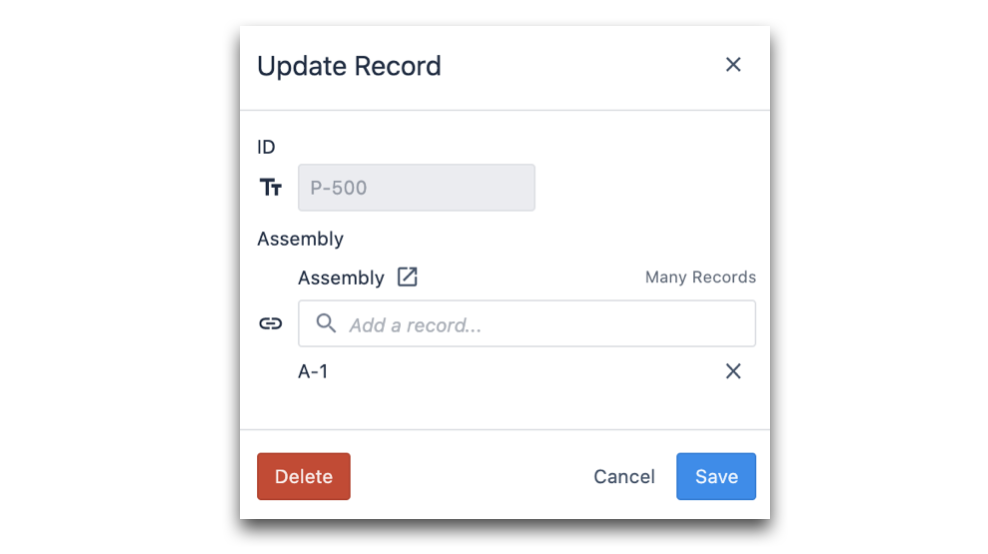
Within the search bar, you will be able to select the ID(s) of the table record(s) you wish to link. As mentioned above, the relationship between linked table records are defined by the ID(s) of the table record(s).
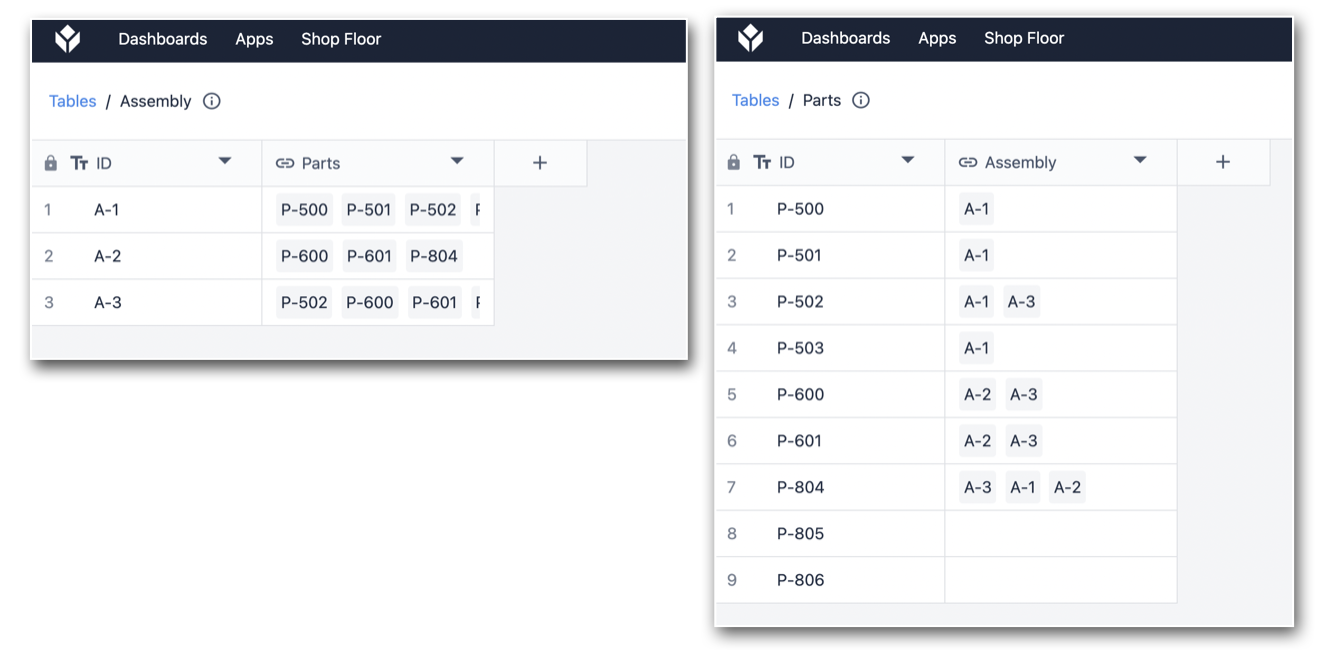
Below you can see what the tables look like after linking each Table Record:
Further reading
Did you find what you were looking for?
You can also head to community.tulip.co to post your question or see if others have faced a similar question!

.gif)