Ignition + Tulip Integration Guide
*This guide walks you through how to integrate the Ignition Platform with Tulip Manufacturing Software. You will learn how to exchange data between the two platforms and how to provide a single pane of glass on the application by embedding one application into the other.
*
The guide provides detailed information on how to integrate these two platforms for a seamless experience for operators.
Run Tulip in Ignition Perspective
Both Ignition Perspective and Tulip are native HTML web applications. Tulip apps can run directly in Ignition Perspective using inline frames (iframe).
Add Ignition’s Hostname/IP to Tulips Domain Allow List
Tulip does not allow embedding in an iframe without explicit permission by adding the hostname/IP to the allow list.
-
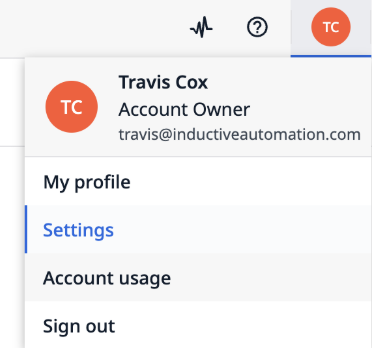
Login to your Tulip account and go to your account Settings.
-
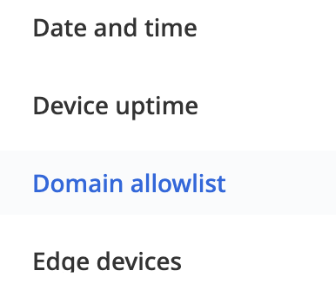
Select “Domain allowlist”.
-
Add the URL for your Ignition server. The URL may be a DNS hostname or an IP address. Make sure to put the port number if it is different from 443.
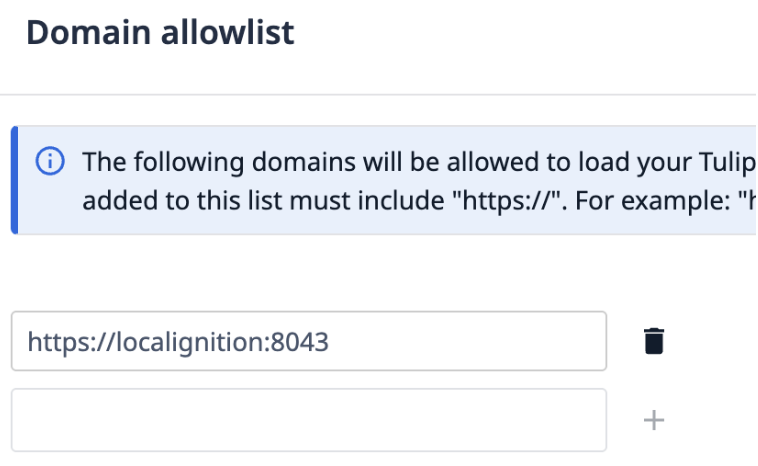
Note: Tulip requires the URL to include HTTPS. You will need to set up SSL/TLS on your Ignition server. For instructions click here.
Add the Inline Frame to your Perspective Project
-
Open the Ignition Designer and select your Perspective Project.
-
Open the Perspective View you want to embed Tulip inside of.
-
Drag the Inline Frame component into your view.

-
Select the Infline Frame component and view the Properties pane on the right of the screen.
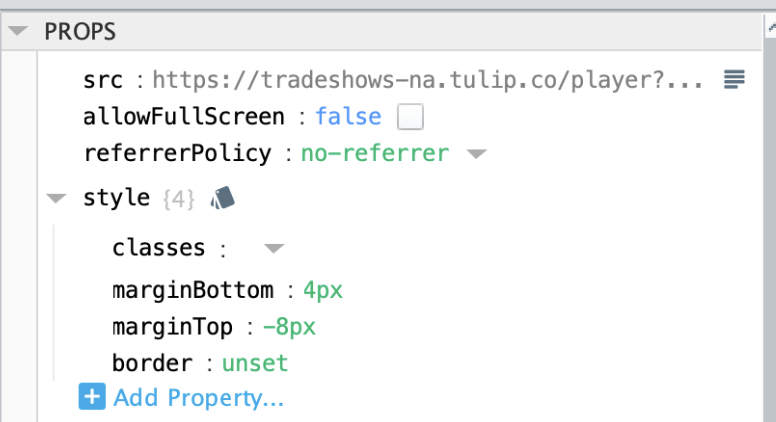
-
Set the “src” to the URL of the Tulip Player. The URL looks like the following:
https://<your-instance>.tulip.co/player?appId=<your-app-id>
The app ID can be found by opening the desired app in your Tulip instance then viewing the URL displayed in your browser. The URL will follow the format
https://<your-instance>.tulip.co/w/<your-app-id>/process/....
If you do not want to launch a specific app, you can set the URL to be
https://<your-instance>.tulip.co/player
Register an Interface
The Tulip player requires you to sign in and register the device to use the app.
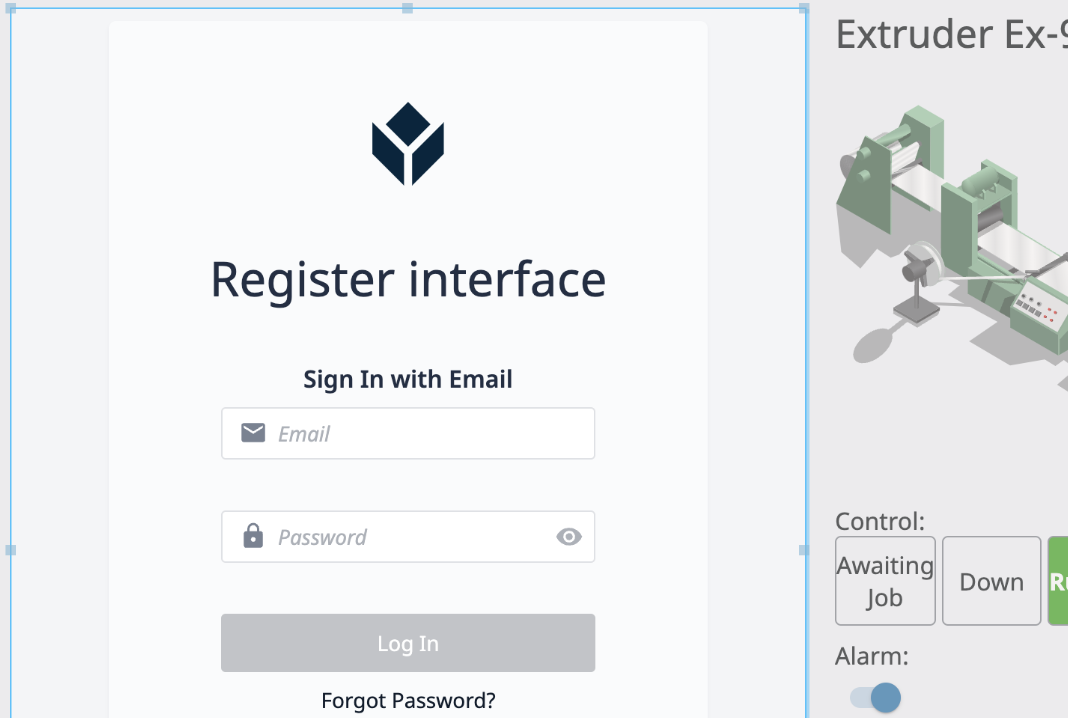
-
Login with your Tulip credentials.
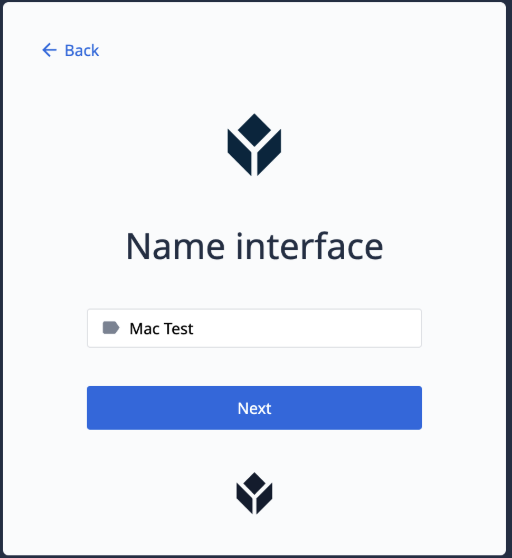
-
Name the interface.
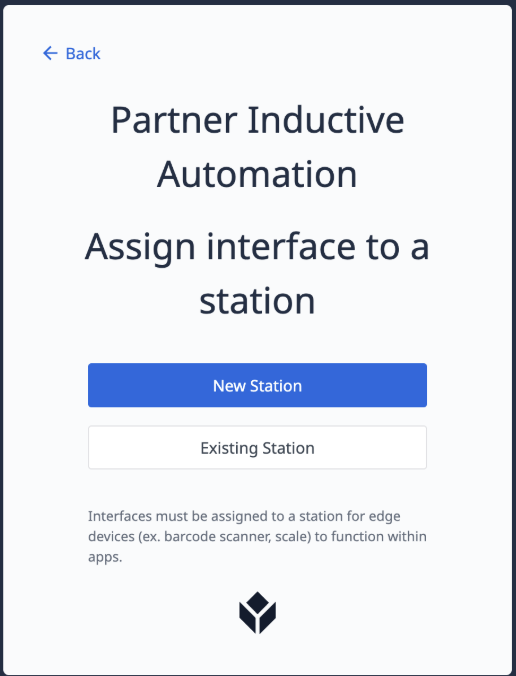
-
Assign the interface to a new station or existing station.
-
Sign in with your Badge Id.
-
You need to assign your apps to the newly created station.
*You will need to repeat this for every Perspective client you want to use the Tulip player.
*
Bonus: Use the same Identity Provider for Ignition and Tulip
Both Ignition and Tulip require users to login to access the applications. An Identity Provider (IdP) offers a way for users to log in to both systems using the same credentials. This provides a secure login and supports SSO (single sign on) and two-factor authentication (2FA).
Tulip currently only supports identity providers that support SAML. Ignition supports both SAML and OpenID Connect. If your identity provider is SAML you can configure both systems to use the same IdP and fully leverage SSO.
-
Follow the instructions here to configure SAML for Tulip.
-
Follow the instructions here to configure SAML for Ignition.
Exchange Data Between Ignition and Tulip
Ignition and Tulip can exchange data automatically through OPC-UA, MQTT, and REST. Exchanging data is critical so each application has the context and data they need to do their job.
OPC-UA
Ignition acts as both an OPC-UA server and client. As an OPC-UA server, Ignition can expose data from all of the devices connected and all of the configured tags to Tulip. This method requires Tulip running on-premise near Ignition for security reasons.
Ignition’s OPC-UA server is installed and running by default. You can find more information about the OPC-UA server here. The default URL looks like the following:
opc.tcp://<hostname or ip>:62541
Method 1: Using an Edge Device Connector Host
Setup your Tulip Edge Device and connect it to the same network as the HMI.
Navigate to https://<your-instance>.tulip.co/machine_data_sources. This page can also be found by navigating to Shop Floor > Machines then selecting Data Sources from the left side panel.
Select the 'Create machine data source' button. Fill in the following:
Name: <desired name of data source>
Runs on: <your Edge Device>
Type: OPC UA
Agent URL: <hostname or ip>:62541
Fill in the Security options to match those from the OPC-UA Server in Ignition.
Select 'Test' to verify the connection then 'Save' it.
Refer to How to Add and Configure Machines to connect the Ignition data source to a machine in Tulip.
Method 2: Using an On-Prem Connector Host (OPCH)
Setup an OPCH on the HMI. Refer to Overview of On-Premise Connector Hosts for instructions on setting up an On-Prem Connector Host (OPCH).
Navigate to https://<your-instance>.tulip.co/machine_data_sources. This page can also be found by navigating to Shop Floor > Machines then selecting Data Sources from the left side panel.
Select the 'Create machine data source' button. Fill in the following:
Name: <desired name of data source>
Runs on: <your OPCH>
Type: OPC UA
Agent URL: <hostname or ip>:62541
Fill in the Security options to match those from the OPC-UA Server in Ignition.
Select 'Test' to verify the connection then 'Save' it.
Refer to How to Add and Configure Machines to connect the Ignition data source to a machine in Tulip.
Expose Configured Tags in Ignition
By default, Ignition’s OPC-UA server only exposes data from configured devices. If you would like to expose configured tags over OPC-UA follow these instructions.
-
Login to the Ignition Gateway configuration section.
-
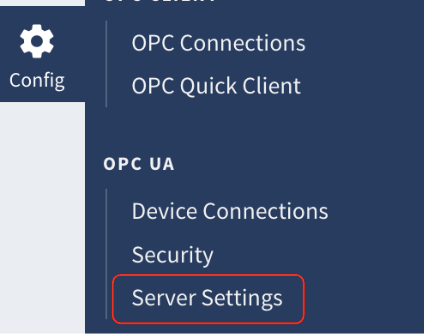
Click on OPC UA > Server Settings.
-
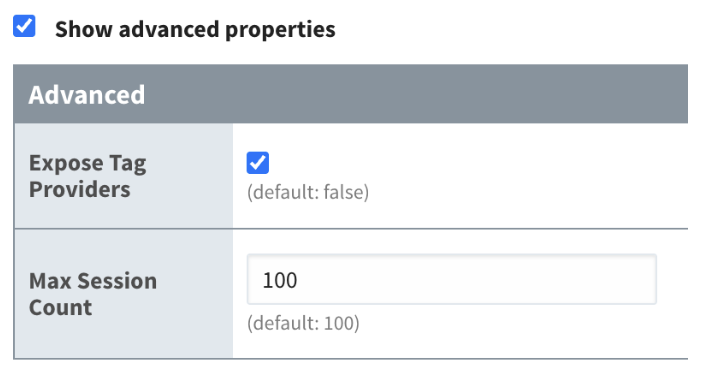
Click “Show advanced properties”
-
Check the box for “Expose Tag Providers” and press save changes.
-
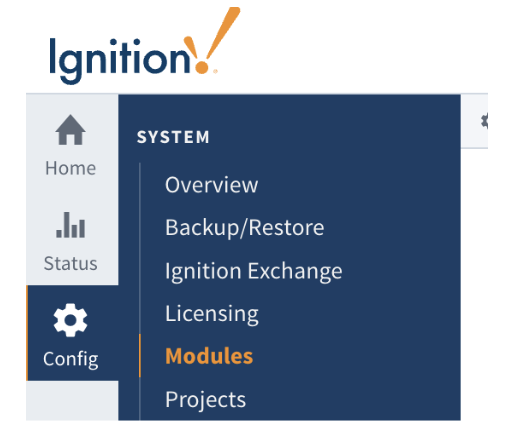
You will need to restart the OPC-UA module. Select Modules from the menu and press the “restart” button next to the OPC-UA module.

That is it! Now you can see all of your tags in Tulip.
MQTT
MQTT is a publish/subscribe protocol that allows edge-of-network devices to publish to a broker. Clients connect to this broker, which then mediates communication between the two devices. Each application can subscribe, or register, to particular topics. When another client publishes a message on a subscribed topic, the broker forwards the message to any client that has subscribed.
MQTT makes it easy to exchange data between Ignition and Tulip and is the preferred integration method.
Set Up a MQTT Broker
First, you need to set up a MQTT broker that both Ignition and Tulip can communicate with. There are many options:
-
MQTT Distributor Module for Ignition - The module provides a built-in MQTT broker in Ignition. You can deploy MQTT Distributor on-premise or in the cloud. Comes standard with Ignition Cloud Edition Purchased and installed separately for Ignition standard on-premise. https://cirrus-link.com/mqtt-software-for-iiot-scada
https://inductiveautomation.com/ignition/cloud-edition -
Cirrus Link Chariot MQTT Broker - Chariot is a powerful MQTT broker that can be deployed in AWS or Azure. https://cirrus-link.com/mqtt-broker-iiot-mqtt-servers/
-
HiveMQ - A scalable MQTT broker either as an on-premise broker or a cloud SaaS broker. https://www.hivemq.com/
-
Mosquitto - An open source MQTT broker that can be deployed anywhere. https://mosquitto.org/
Once the MQTT server is deployed you will need to know the hostname or IP, port, and credentials to connect for both Ignition and Tulip.
Connect Ignition to the MQTT Broker
Ignition provides two modules for working with MQTT: MQTT Transmission and MQTT Engine.
MQTT Transmission provides the ability to publish tag data from Ignition to the MQTT broker. You need MQTT Transmission for providing tag data to Tulip. MQTT Engine provides the ability to subscribe to data from the MQTT broker and create tags in Ignition. You need MQTT Engine for subscribing to data coming from Tulip.
-
First the appropriate module(s) need to be installed in Ignition. Download the modules from the Downloads page.
-
Install the modules in Ignition’s Gateway Configuration page under System > Modules.
-
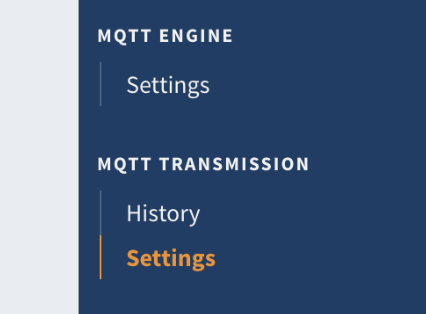
Once installed you configure the connection to the MQTT server in the same way. For MQTT Transmission click on MQTT Transmission > Settings and for MQTT Engine click on MQTT Engine > Settings.
-
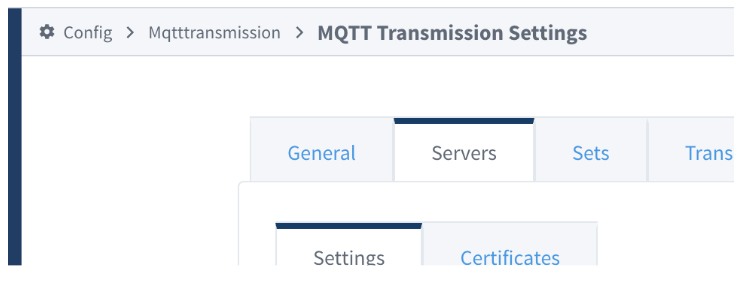
Click on the Servers tab.
-
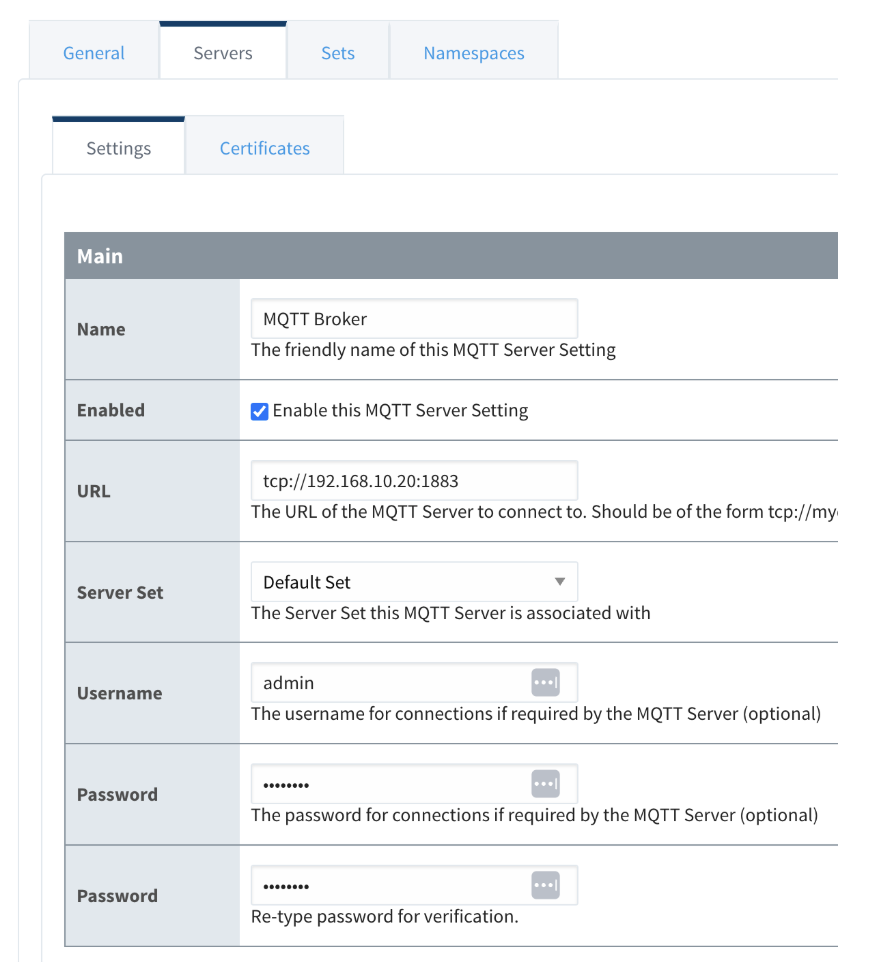
Click “Create new MQTT server”.
-
Provide the same connection information and credentials. For a non-TLS connection, the URL looks like:
tcp://MQTTSERVERHOSTNAME:1883
For a TLS connection, the URL looks like:
ssl://MQTTSERVERHOSTNAME:8883
-
Make sure to select a Server Set. Use “Default Set” by default.
-
Click “Create New MQTT Server” and check the connection. For MQTT Engine it should say “Connected”. For MQTT Transmission we won’t know the status until we specify a transmitter. See section below.
Configure Ignition to Receive MQTT JSON Data
Tulip only supports JSON over MQTT. Ignition’s MQTT Engine modules support both JSON and Sparkplug. For JSON, we need to configure a custom namespace for JSON data.
-
Login to Ignition’s Gateway configuration page.
-
Select MQTT Engine > Settings.
-
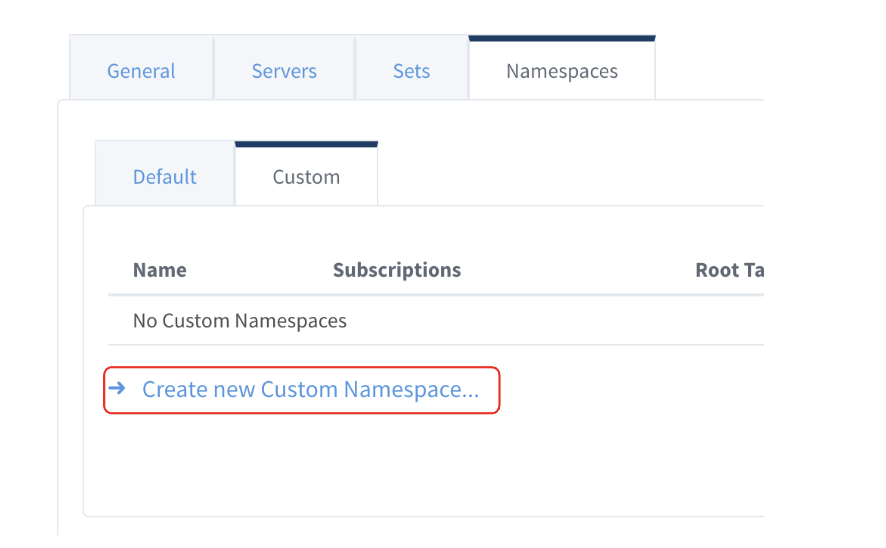
Select the Namespaces tab.
-
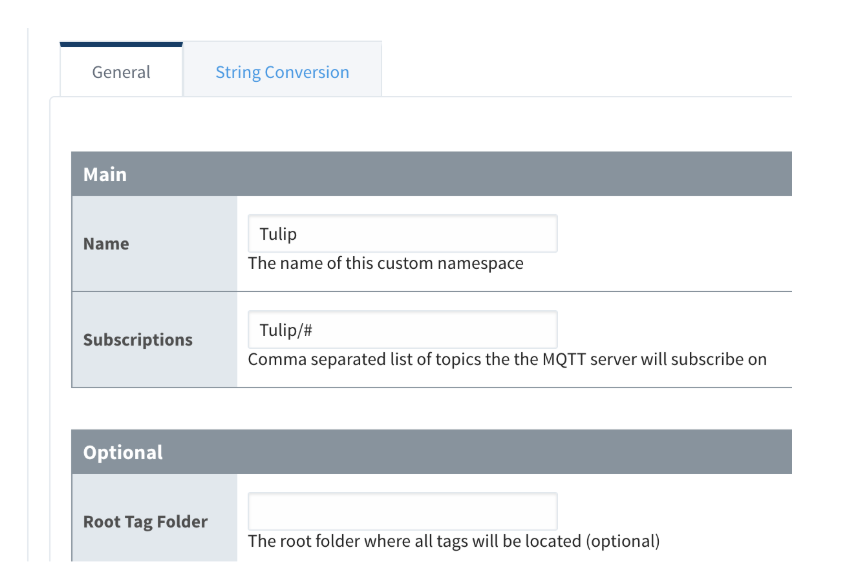
Select the Custom tab and click on “Create new Custom Namespace…”.
-
Provide a name.
-
Provide a comma separated list of topics that Ignition will subscribe to. For example, if you want to subscribe to any topic that starts with Tulip use
Tulip/#.
-
Press “Save Changes”.
-
As information is published tags will automatically show up in the MQTT Engine tag provider. Open your designer and select MQTT Engine tag provider in the Tag Browser.
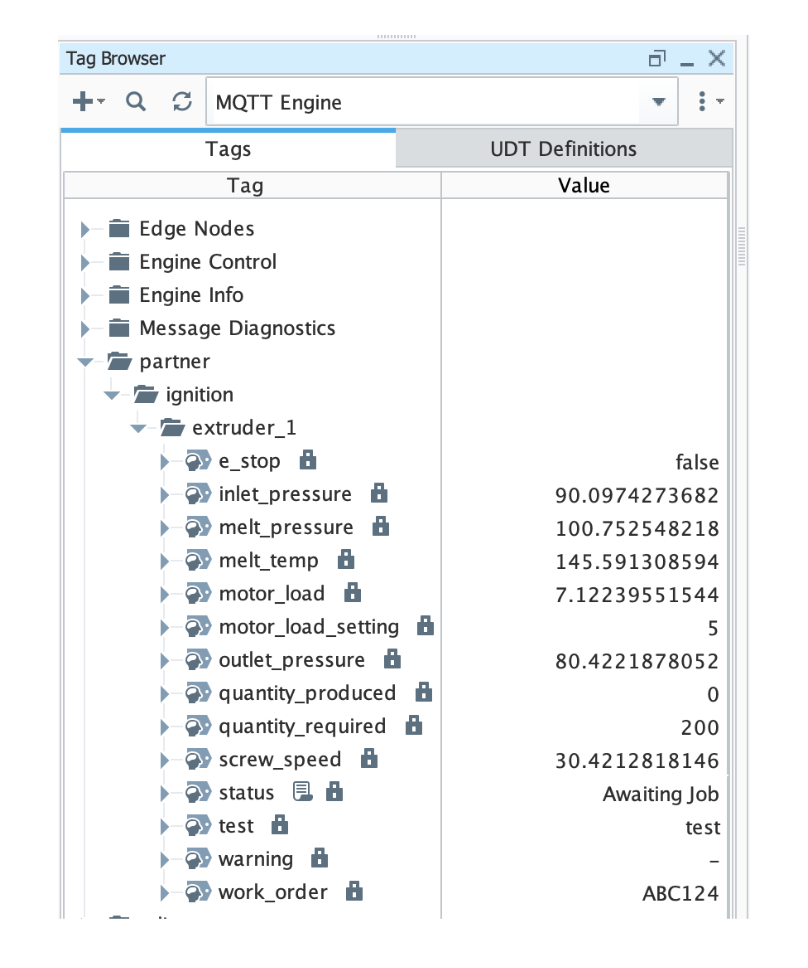
- Now you can use those tags anywhere in Ignition.
Configure Ignition to Send MQTT JSON Data
Ignition’s MQTT Transmission module can publish tag data or any data to a MQTT broker over Sparkplug or JSON. Since Tulip only supports JSON, there are two ways Ignition can publish JSON data: UNS transmitter or scripting function.
UNS Transmitter
The UNS Transmitter is an agent that monitors tags and publishes them as MQTT Messages with a JSON payload to an MQTT Server. This is a new feature of the MQTT Transmission module.
The UNS Transmitter will:
- publishes a single data message for each tag when QualifiedValue of the tag changes
- publishes a single properties message is published for each tag on every client connection
- publishes the leaf tags of Ignition UDTs and the structure of the UDT (i.e. UDT name itself and folders in the UDT) become topic tokens.
https://docs.chariot.io/display/CLD80/MT%3A+Configuration#MT:Configuration-unstransmitter
-
Login to the Ignition Gateway configuration page.
-
Click on MQTT Transmitter > Settings.
-
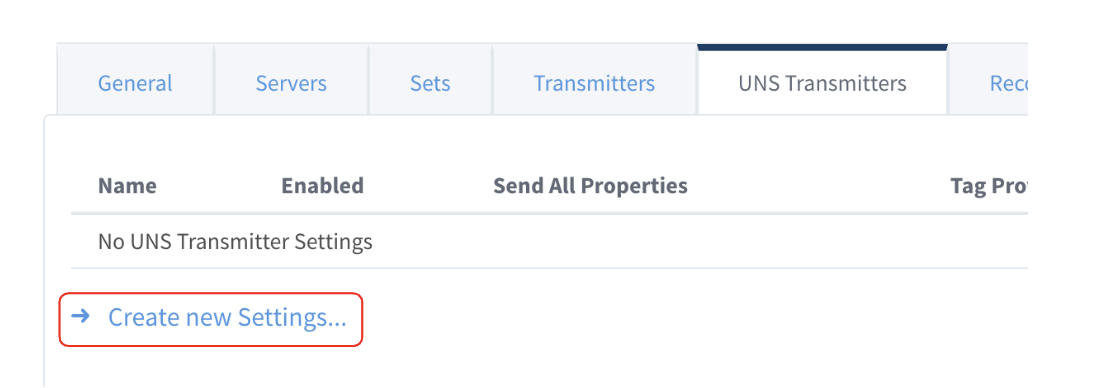
Select the UNS Transmitters tab.
-
Click “Create new Settings…”
-
Give the transmitter a name.
-
Specify the tag provider we want to publish from. If you have tags in multiple tag providers you will need to set up multiple UNS transmitters. If your tags are in the default provider type in “default”.
-
Specify the tag path of the root folder where you want to publish tags from. Leave empty to listen and publish on every tag in the provider. If you specify a path, you can select a specific folder or tag you want to publish on.
-
Select your server set, typically “Default”.
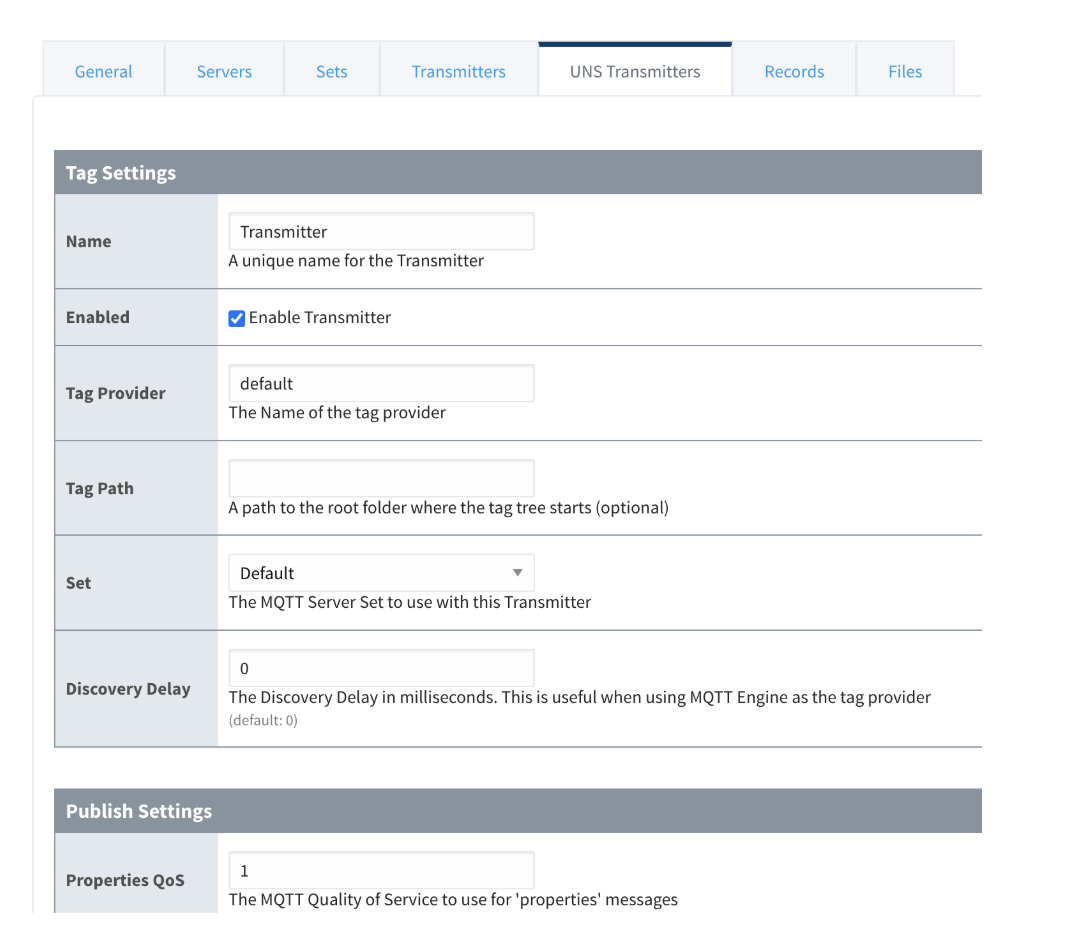
- Click “Create New Settings” to create the new transmitter.
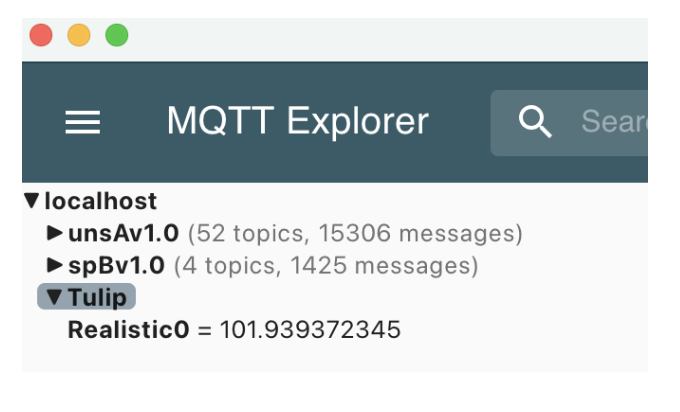
- You can verify that Ignition is sending data for the transmitter by going back to the Servers tab and checking on the Connected column. If you see “1 of 1” or “2 of 2”, the transmitter is working. You can have more than one transmitter for Sparkplug and UNS. If you see “1 of 2” only one of the transmitters is not working. You can use a 3rd party MQTT client to check the status. For example, here is a screenshot from MQTT Explorer:

Notice the topic namespace starts with unsAv1.0. Below that is under your control. However, the root node can be changed or removed through configuration. Contact Cirrus Link support for more details.
Scripting Function
The other way data can be published to a MQTT broker using MQTT Transmission is through the provided scripting function. This is very handy since you can publish anything on any topic. The function is:
system.cirruslink.transmission.publish(mqttServerName, topic, payload, qos, retained)
You can call this function anywhere in Ignition such as on screens, timer scripts, tag change scripts, etc. It is recommended to add a tag change script to the individual tags you want to publish to a broker. For example, let’s show how you can add a tag change script to an individual tag.
-
First, we need to tell MQTT Transmission to allow publishing through a script. Login to the Ignition Gateway configuration page.
-
Click on MQTT Engine > Settings.
-
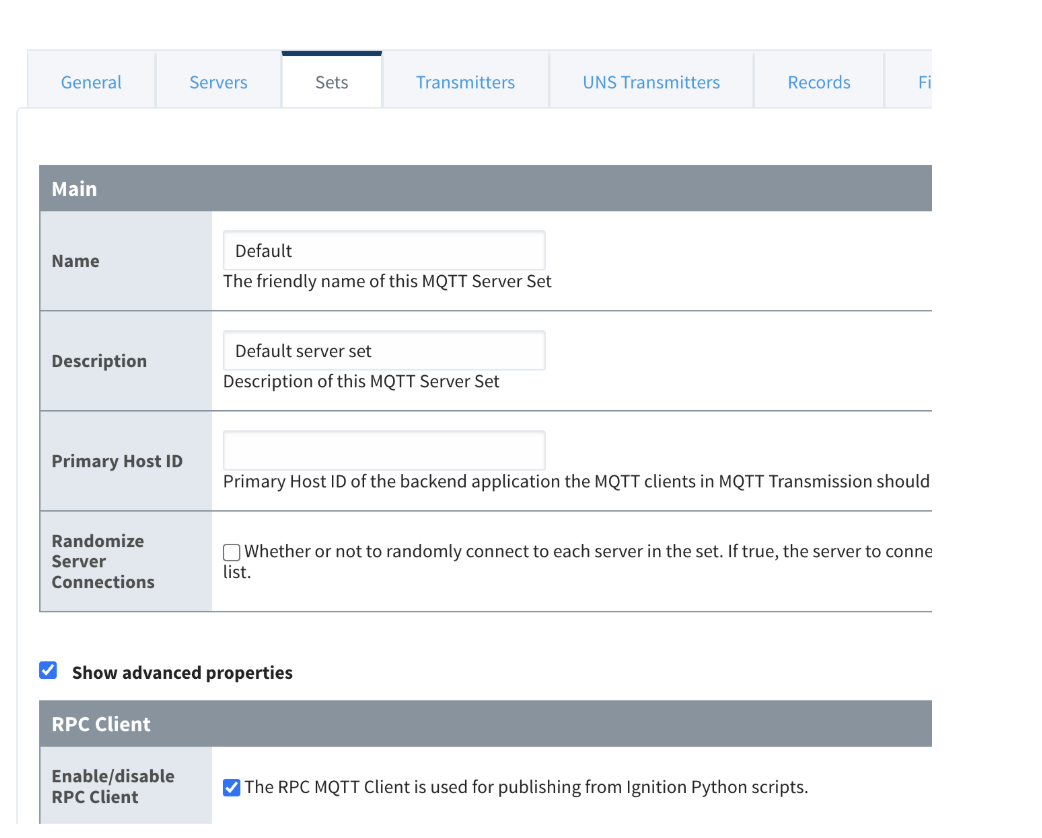
Select the “Sets” tab.
-
Edit your server set, most likely “Default”.
-
Show the advanced properties and check the box for “Enable/disable RPC Client”.
-
Save the changes. If you are using a different server set or multiple server sets make sure to enable this for each one you want to publish using scripting.
-
Open the Ignition Designer.
-
Find the tag you want to publish in the Tag Browser.
-
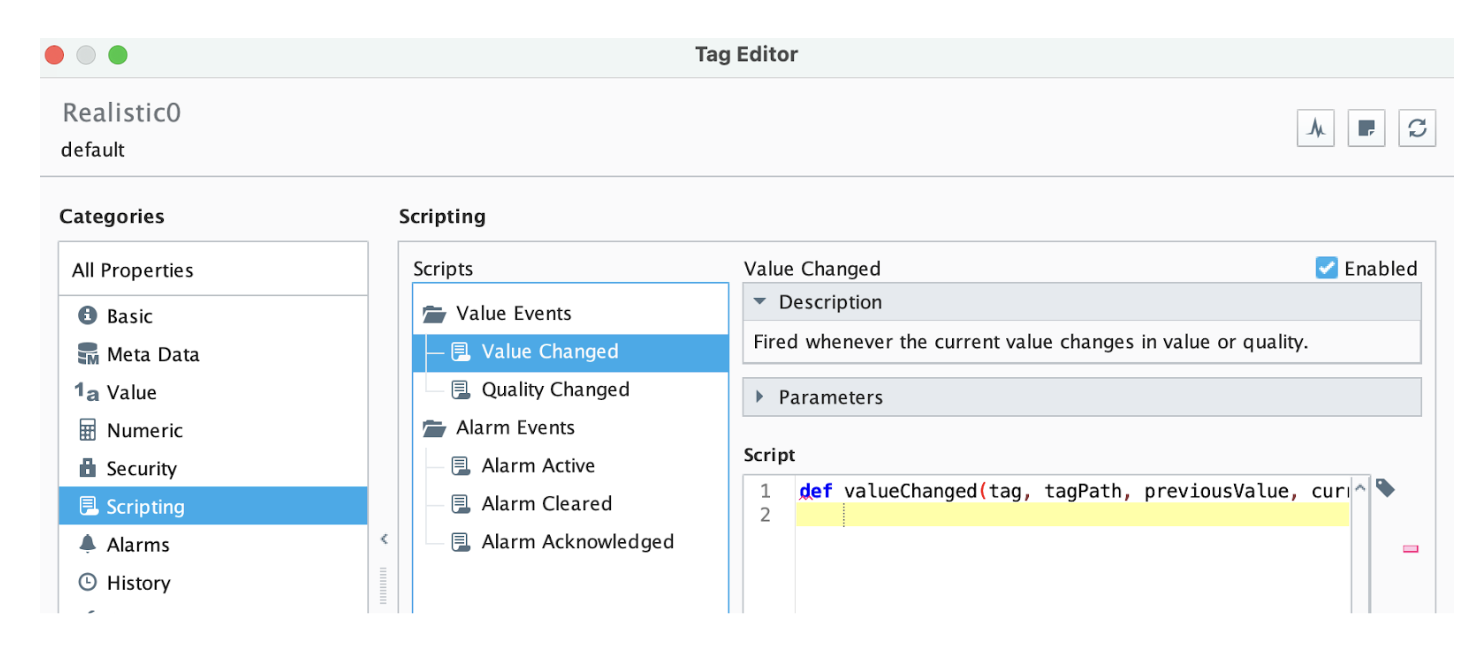
Right click and edit the tag.
-
Select Scripting and select Value Change.
-
Put the following line of code:
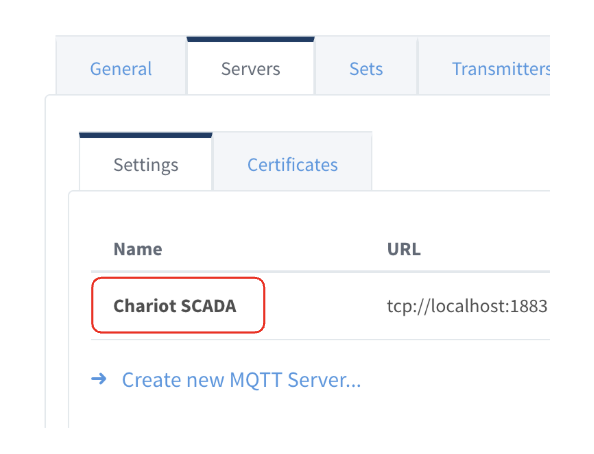
system.cirruslink.transmission.publish(“Chariot SCADA”, “Tulip/Realistic0”, str(currentValue.value), 0, True)
Make sure you set the name of your MQTT broker configured in MQTT Transmission.
Set the topic to whatever you want. The payload can be anything but typically just the current value.
- Save the changes. Check the MQTT Explorer for the new value.
REST
A REST API, also known as a RESTful API, is a simple, uniform interface that is used to make data, content, algorithms, media, and other digital resources available through web URLs. REST APIs are the most common APIs used across the web today. Tulip comes with built-in REST APIs to manage users, stations, machines, tables, and more. Ignition can easily interface with these REST APIs to exchange data.
For more information on Tulip’s REST APIs click here.
Let’s show two examples: how to report a new value for a machine attribute and how to query a Tulip table.
Report a Machine Attribute
See the specific API documentation here. We can call this API in Ignition using scripting.
You need to set up an API Token in your Tulip Account. Follow these instructions. Make sure you have the following scopes defined:
attributes:write
2. Note down the API Key and Secret as we will use that in the script in Ignition.
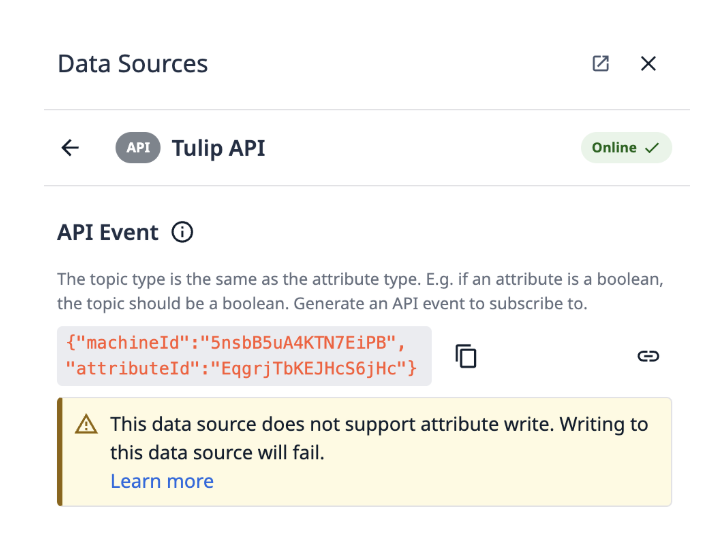
3. Next, we need to map the machine attribute to the Tulip API to retrieve the machine id and attribute id. Go to Shop Floor > Machines.
4. Select your machine.
5. Select the “Configuration” tab.
6. Click on the unmapped attribute and map it to the Tulip API.
7. Note down the machineId and attributeId.
- Now open up the Ignition Designer and select your project.
- In Scripting add a new Project Library called “Tulip”.
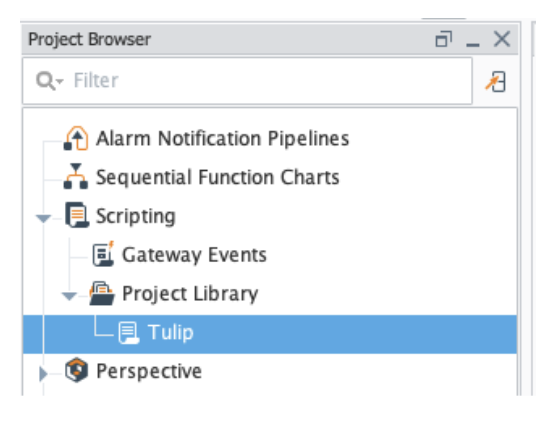
- Edit the resource and add the following:
API_KEY = "YOURAPIKEY"
SECRET = "YOURSECRET"

def reportMachineAttribute(machineId, attributeId, value):
   data = {
       "attributes": [
           {
               "machineId":machineId,
               "attributeId":attributeId,
               "value":value
           }
       ]
   }
   url = "%s%s" % (TULIP_URL, "/attributes/report")
   system.net.httpPost(url=url, postData=system.util.jsonEncode(data), contentType="application/json", username=API_KEY, password=SECRET)
Replace your instance name, API key, and secret in the variables.
- Save the project. Now you can call this function anywhere in Ignition.
Tulip.reportMachineAttribute("5nsbB5uA4KTN7EiPB", "EqgrjTbKEJHcS6jHc", 15)
Replace the machine id and attribute id with yours and specify the value.
-
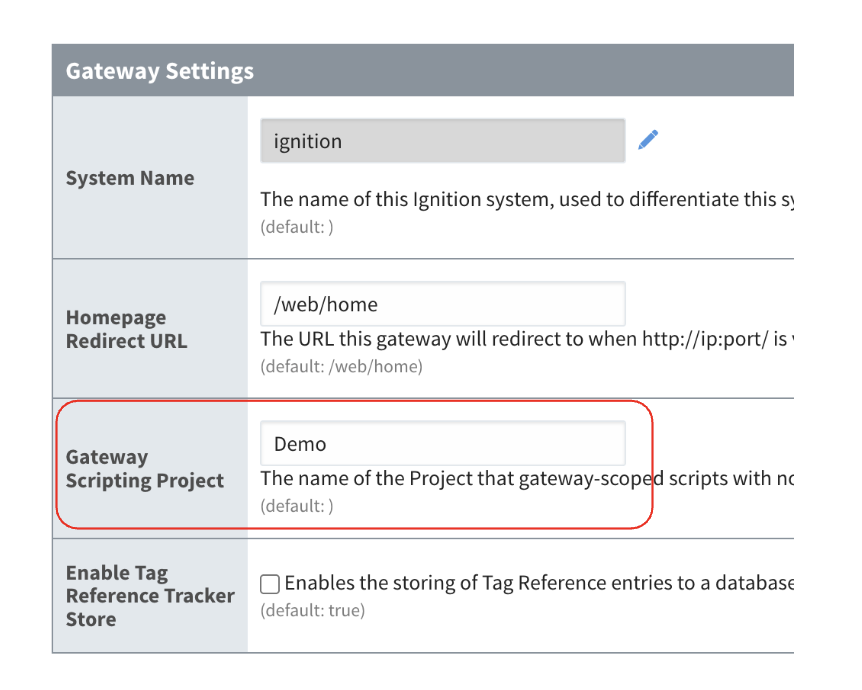
If you would like to use the scripting function on a tag change script you will first need to tell Ignition which project to associate for scripting on tags. Login to the Ignition Gateway configuration page and select System > Gateway Settings from the menu.
-
Set the property “Gateway Scripting Project” to the name of the project containing the Tulip scripting function and save changes.
-
Next, find the tag you want to publish in the Tag Browser.
-
Right click and edit the tag.
-
Select Scripting and select Value Change.
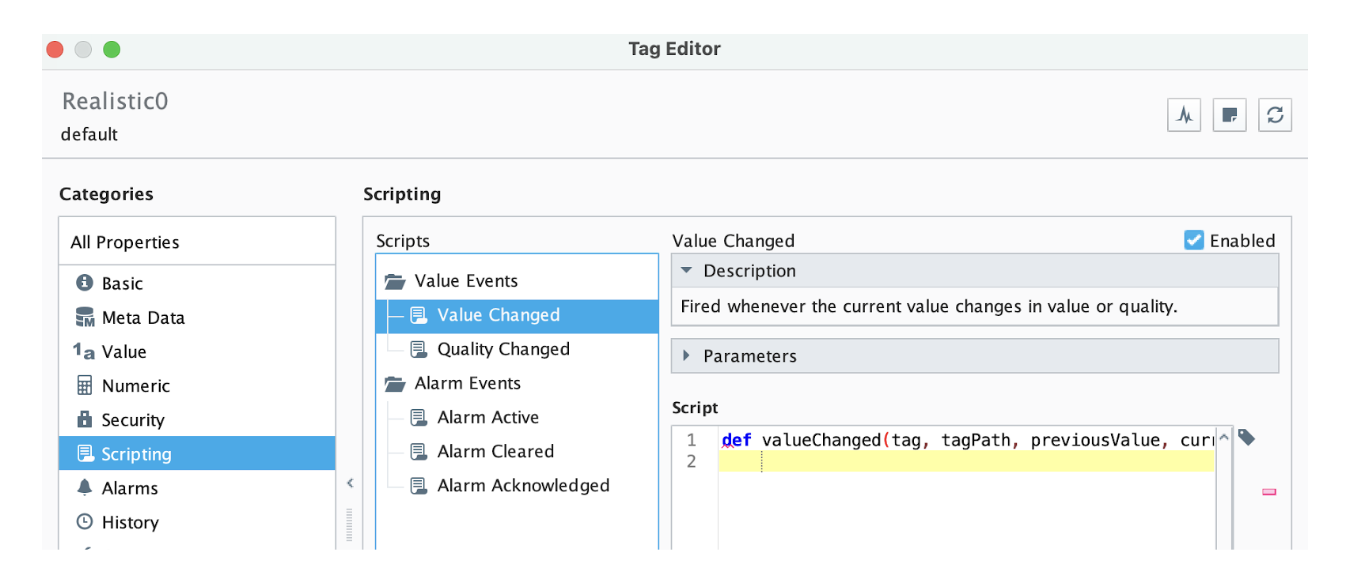
-
Put the following line of code:
Tulip.reportMachineAttribute("5nsbB5uA4KTN7EiPB", "EqgrjTbKEJHcS6jHc", currentValue.value)
Make sure you replace the machine id and attribute id with yours.
-
Save the changes. Check your Tulip account to see the new values coming in as the tag changes.

-
That’s it! You can call that function anywhere, especially from a Perspective screen if someone is entering in the value manually.
Query a Tulip Table on a Perspective View
- Follow the instructions in the previous example to get the Tulip API key and secret.
- Open the Ignition Designer and select your project.
- Open a Perspective view where you want to view the information.
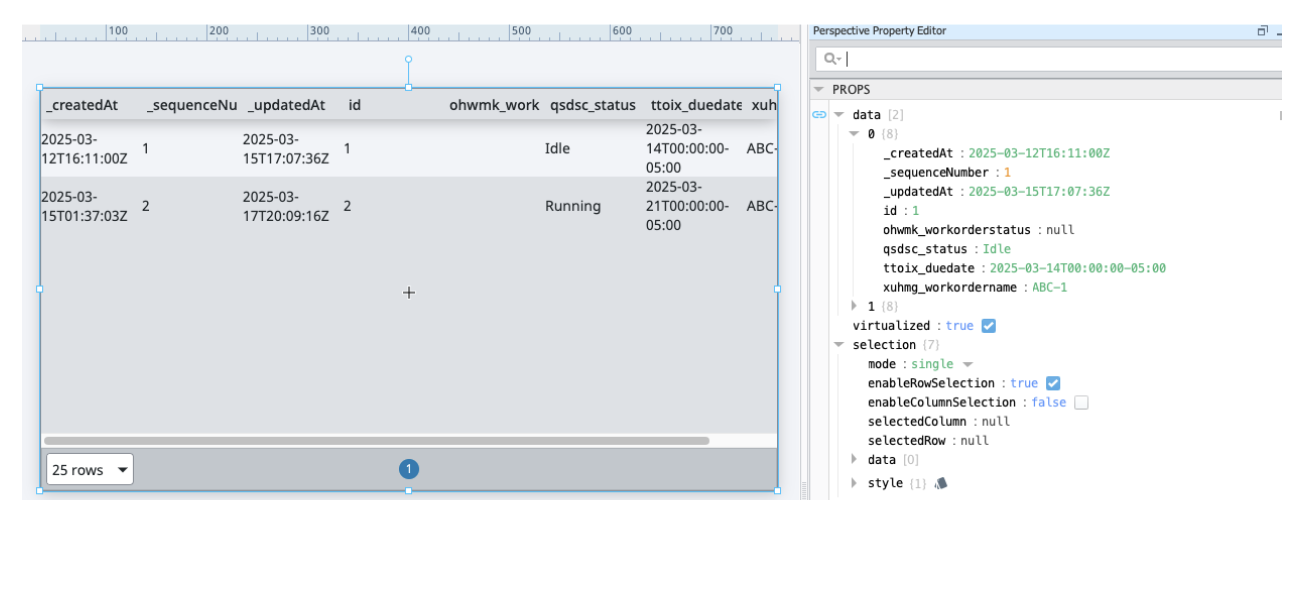
- Drag a Table component onto the View.
- Bind the data property of the table to a HTTP binding.
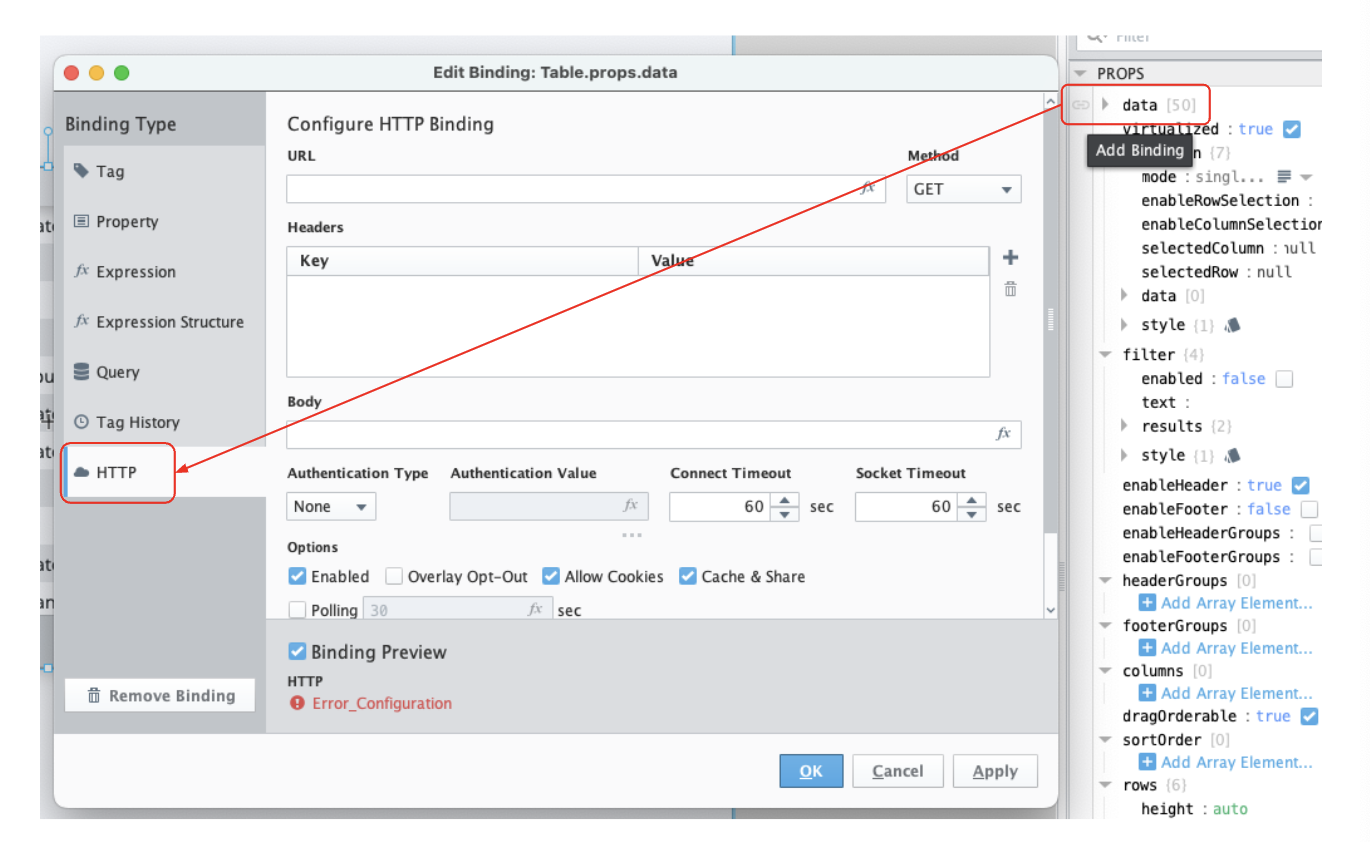
- Set the URL to the following:
”https://<your-instance>.tulip.co/api/v3/tables/<table-id/records”
Keep the quotes since the URL is an expression. Replace your instance and table identifier.
- Set the Authentication Type to Basic and put the Authentication Value as an expression. You should see a successful message and preview of the results at the bottom.
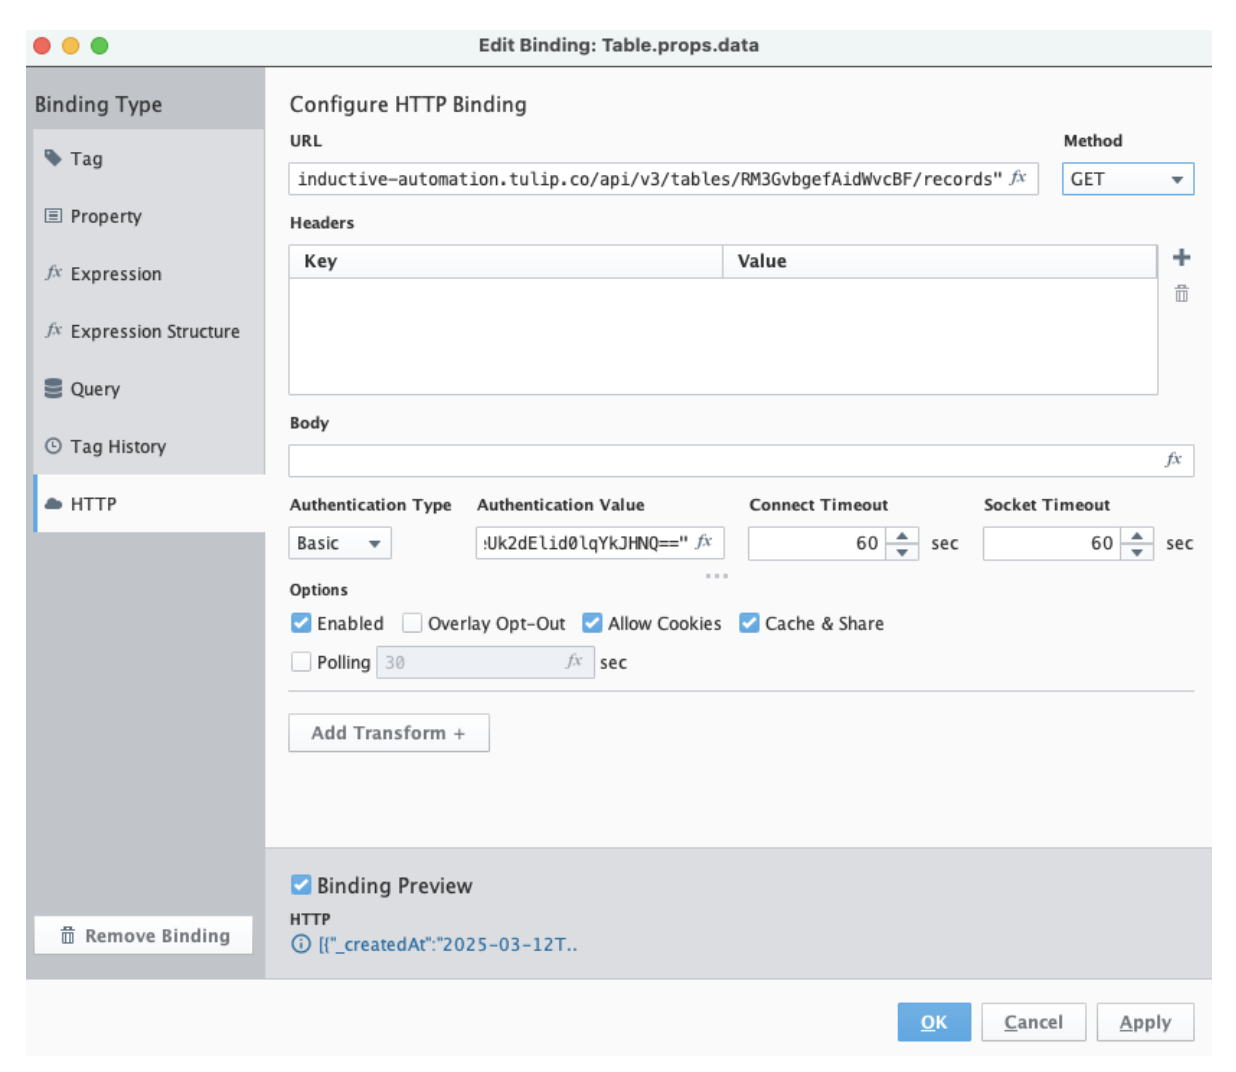
- Press OK and configure the table in Perspective. You can also create a scripting function like the previous example to use throughout Ignition.