


Learn how to use form steps in an app.
As of r234, Form steps have been disabled for all new Tulip Instances.
In this article, you will learn…
- How to lay out a Form Step
- The different ways that you can capture data in a form step
- How to add logic based on specific responses in the form
This topic is featured in the "Basic App Design and Logic" course in Tulip University.
In Tulip, there are two types of Steps that you can add to an App:
- Step - an individual step in a set of paper instructions. Normal Steps also allow extensable formatting.
- Form Step - allows an operator to input a series of details about the work they are doing.
Form steps are commonly used to replace fields in a work order, checkboxes in a defect report or any other case where operators need to add data.
They replace forms like this:

To look like this:
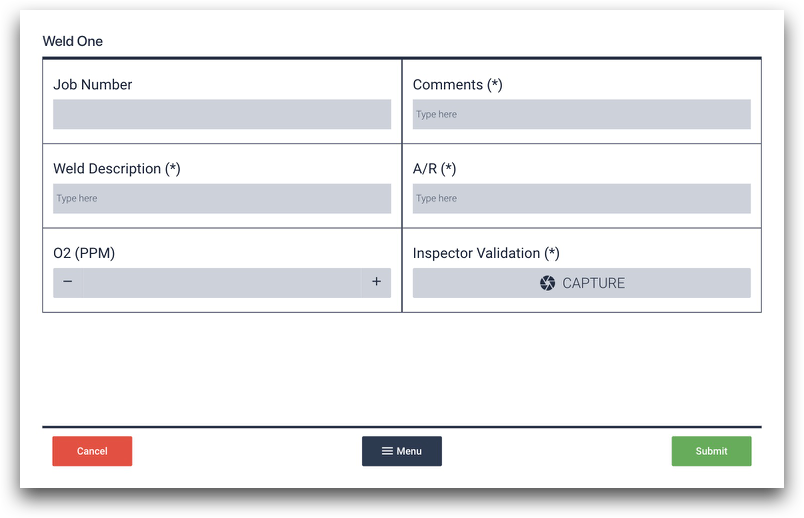
Here’s how to use a form step in an app. If you are interested in seeing form steps in the context of a normal manufacturing process, check out these step by step guides:
Form fields

Here are the different options within the form:
Boolean
Default Value: Choose whether the value should be default "Yes" or "No"
Dropdown
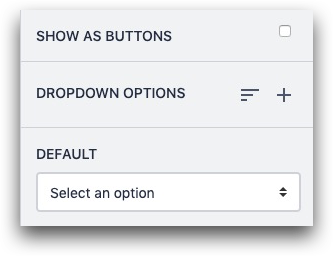
Default: Choose an option that should be selected by default.
Show As Buttons: List options on the screen rather than forcing the operator to open the dropdown
Dropdown Options: Add a new option to the dropdown list, or add a group within the list.
You can add a new option via the "Enter" key. You can also paste a list of options, as long as they are separated into individual lines in a text editor (ie Word or a notes app).
Multiselect

Multiselect Options: Add a new option to the list, or add a group within the list.
Default(s): Choose an option that should be selected by default
Columns: If the list of options is long, allow it to be broken into multiple columns
The Multiselect Form Widget stores all choices as text values in a variable.
Text
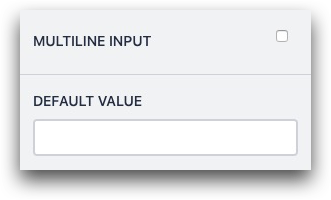
Multiline Input: Turn a single line into a multiline input to encourage longer responses
Default Value: Add a default value for the widget
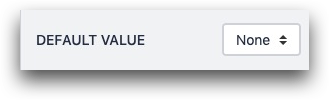
Number
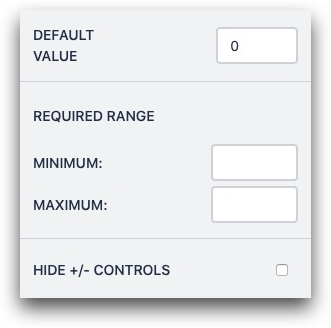
Default Value: Add a default number for the widget
Required Range: Do not allow the form to be submitted unless it falls within a certain range
Hide +/- Controls: Hide the + and - buttons from the widget
Image
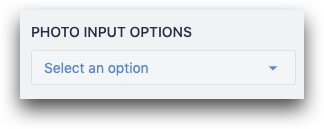
Photo Input Options: Choose whether operators can add a photo via camera, Image upload from the local computer, or both.
Modify form fields
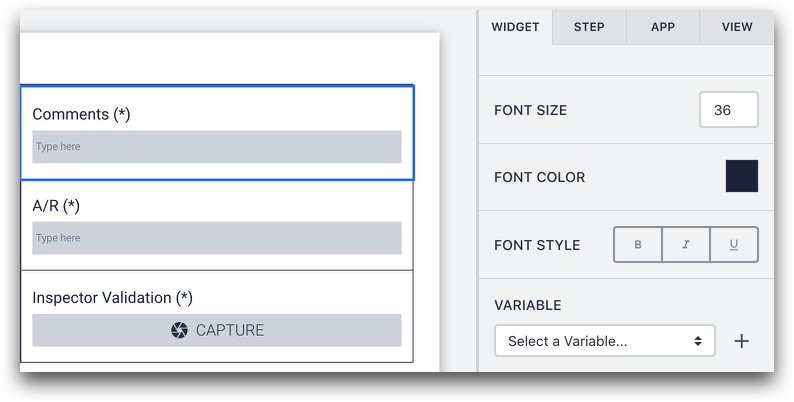
You can modify the following options in every type of form Widget:
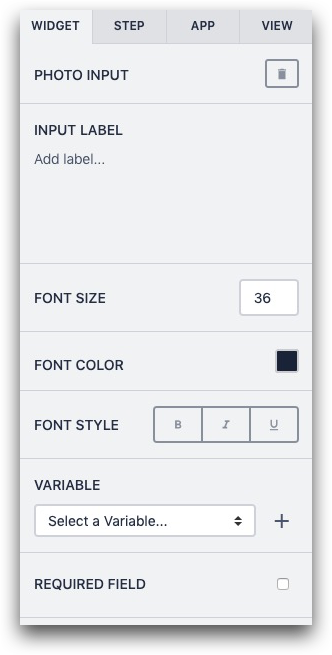
Input Label: The label within the form
Font Size: Size of label font
Font Color: Color of label font
Font Style: Style of label font
Variable: Variable that stores the value that is entered by an operator
Required: Whether the operator must enter any value before the form can be submitted
For more detail on each form widget, check out this guide to form widgets
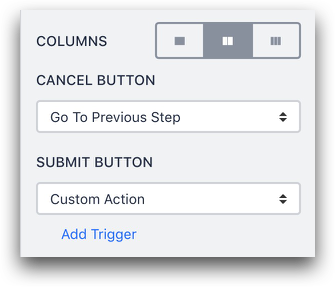
Change the form layout
Click the anywhere on the Step itself to see a list of options for changing the layout in the Context Pane on the right of the screen.
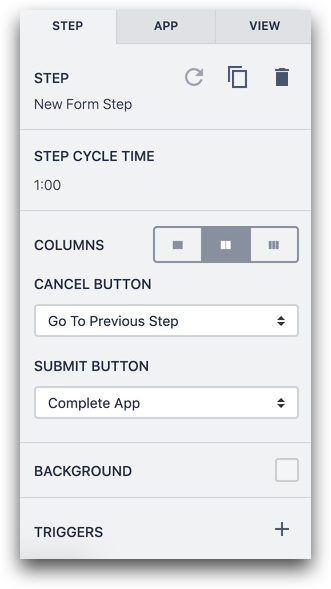
You can change the functionality of the Cancel and Submit buttons using the dropdowns menus in the context pane. You will see how to build more complex logic with these options in the next section.
Add multiple columns and then drag each field to the new column in order to fit a greater number of fields on the form.
All Form Steps include three buttons at the bottom:

- Cancel, which has multiple options for Triggers
- Menu
- Submit, which has multiple options for Triggers
Use Variables within forms
Let’s say that you want to build some dynamic logic based on the specific response in a form.
For example, if a person is doing a quality inspection, and they select an option that says “Rework” as opposed to “Scrap”, you want to direct them to place the part in the appropriate bin for rework.
This is where you will need a variable to track the value of a field in the Form Step.
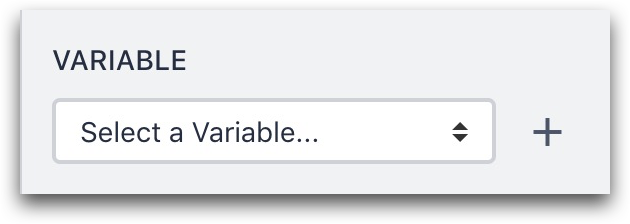
Select the field, then go to the Variable section in the Side Pane.
Click + to create a new variable that will track the value of the field.
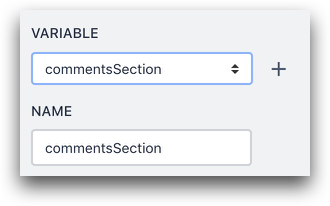
Then, you can change the name of the variable via the Name field.
Complete a form
As of r374, users can no longer copy, cut, or paste form triggers (i.e., form cancel or submit triggers) on form steps.
There are a couple things that can happen when a user is ready to complete a form. The operator must press the Submit button in the bottom right corner or the Cancel button in the bottom left corner.
In order to choose what happens after an operator presses one of those buttons, you can select from the options in the middle of the Side Pane when you click on the background of the form step.
Here are some options for the Submit button:
-
Go To Next Step - By default, the user will advance to the next step.
-
Go To Step… - Choose a specific step in the app.
-
Complete App - The user has completed the app.
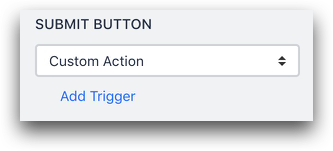
- Custom Action - This is where you can add a custom Trigger based on a variable that was updated in the form (or any other variable)
Read more about custom actions.
There are only 2 ways to clear the values in the form step:
- Complete the app
- Cancel the app
Signature Form
As of r234, Form steps have been disabled for all new Tulip Instances. Use the electronic signature widget instead.
The Signature Form Step requires operators to add a signature after they fill out a form. This will prevent them from advancing to the next step until they add a signature.
The Signature Form allows an operator to sign off on completed work or a defect report. The signature will be automatically concealed via star characters (*) in the Tulip Player.
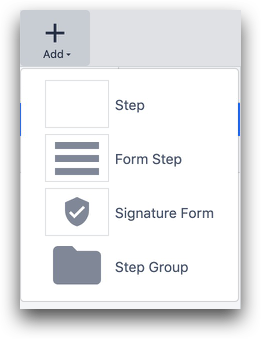
To add a form with a signature, click Add button in the top left of the App Editor and choose Signature Form.
Then, you will have two options for permitted signatures with the Form Submitters option in the Side Pane.
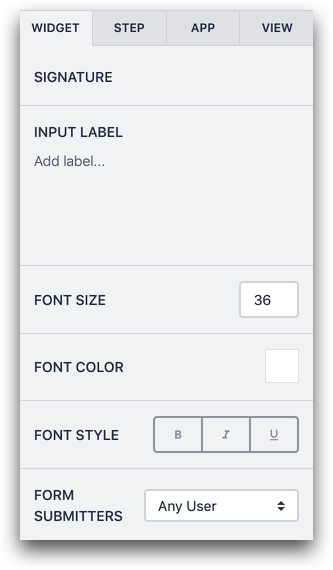
Any User: Any operator can add a signature.
Any operator besides app executor: Any operator can sign off except the one that is currently logged in.
Specify a list of allowed users: Choose from a list of all users and operators in your Tulip account. Multiple users allowed.
Current User: Only the currently logged-in operator can add their signature.
If you choose this option, the e-signature will be automatically filled in when the operator reaches the signature form step. The operator will not be able to change this signature.
Note: Autofilling credentials when the widget is set to "Current User" is only available when:
- Your organization is not using Validation Mode
- Your organization requires operators to authenticate with LDAP or SAML credentials.
There are three ways that an operator can sign:
- Badge ID
- LDAP Username/Password: If your organization uses LDAP to authenticate users in Tulip, then an operator must input their username and password from your LDAP directory.
- SAML Username/Password: If your organization uses SAML to authenticate users in Tulip, then an operator must input their username and password from your SAML directory in a popup window.
You can add multiple Signature Forms within any app.
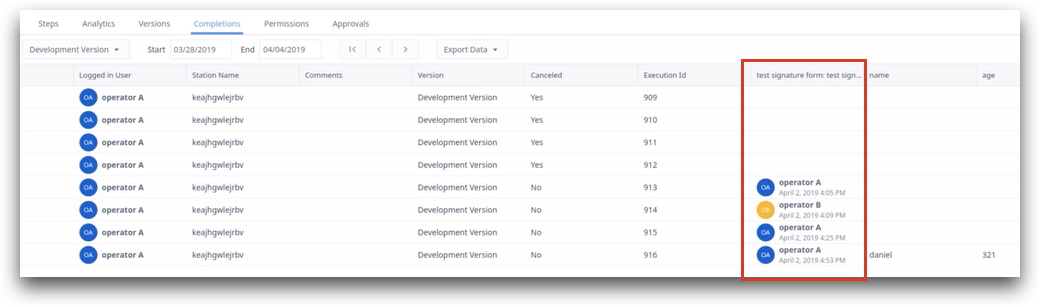
Signature History
In order to see the signature(s) added to each app completion, go to the Completions tab. There will be a column for each signature field, with details about the operator and the time they filled out the Signature Form. This timestamp will be different than the timestamp for the app completion.
Use form fields in Analytics
You can analyze the data from forms regardless with or without variables.
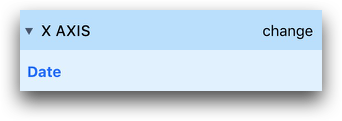
Navigate to an Analysis, then choose the X Axis category on the left sidebar.

Click the existing data point.
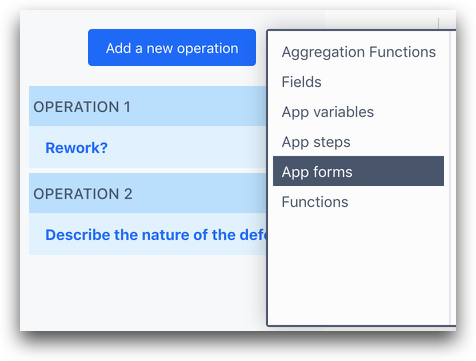
Then choose the App forms category.
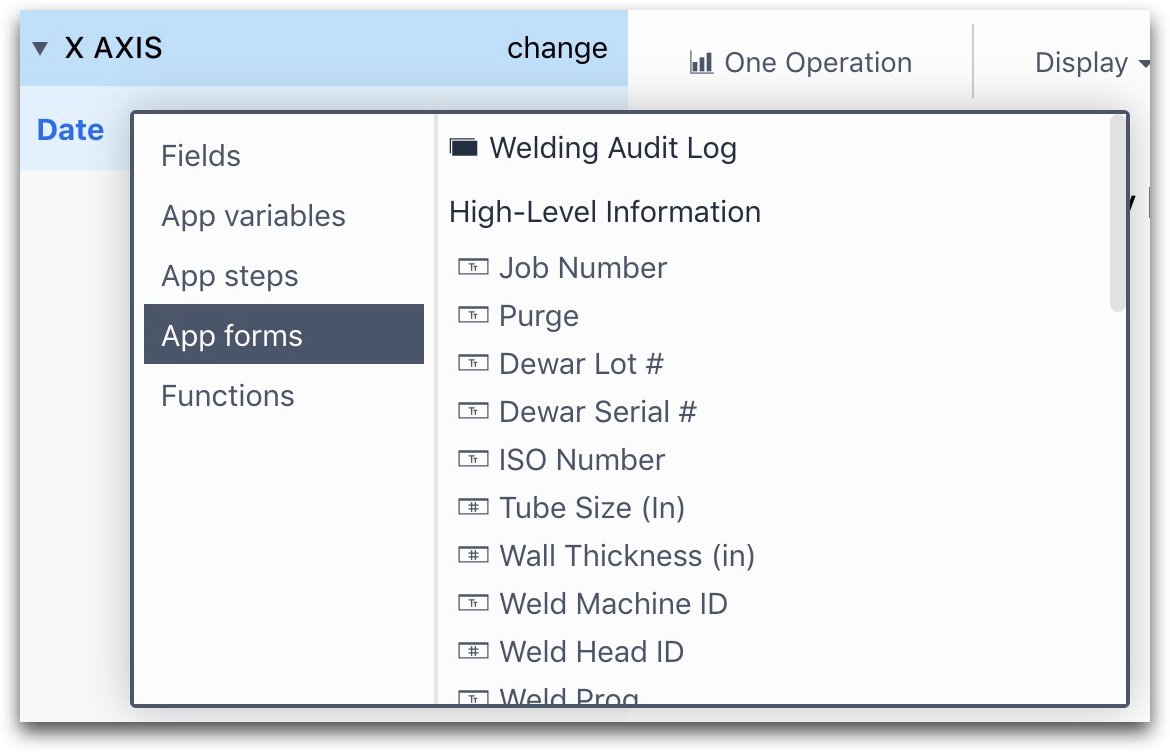
You will be able to choose any form field from the entire app.
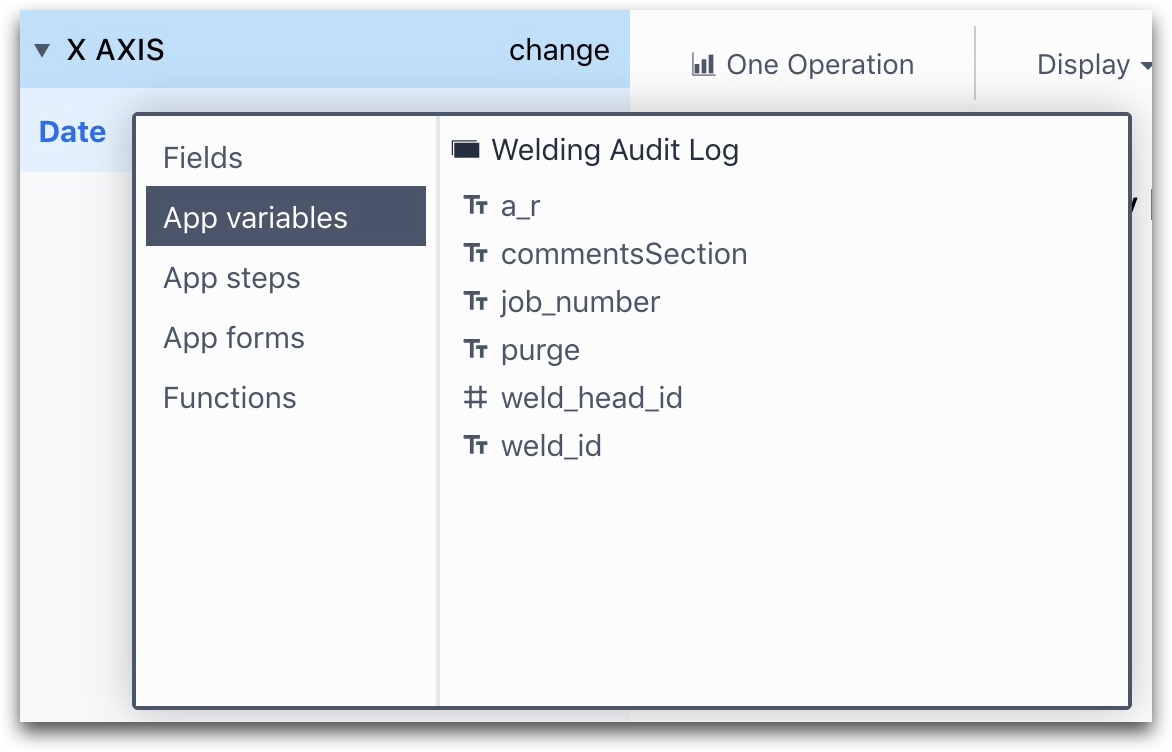
If you choose to track the result of a form field in a Variable, you can also use the variable in the “App variables” category.
A Table Analysis can show you multiple Form fields at once. To select multiple Form fields, click the Operations tab in the left menu.
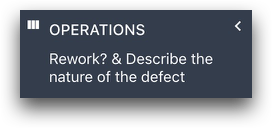
Click the Add a new operation button, and then choose a specific Form field to add.
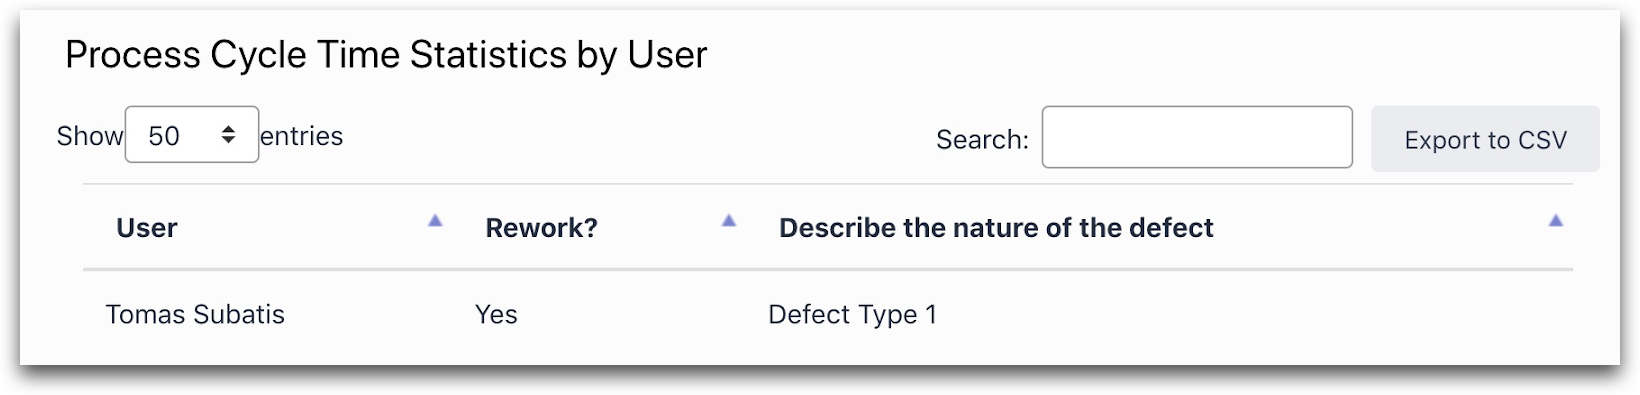
Here’s what the Table will look like.
Did you find what you were looking for?
You can also head to community.tulip.co to post your question or see if others have solved a similar topic!
.gif)