WhatsApp Messaging in Tulip with UltraMsg
Want to send and receive WhatsApp messages directly from your Tulip apps? Here’s how to get started using UltraMsg as the bridge.
How Does It Work?
Tulip connects with WhatsApp using UltraMsg. UltraMsg acts as the messenger in between, making communication automatic and simple.
Simple Overview
Tulip connects to WhatsApp through UltraMsg, which acts as a secure go-between. When you want Tulip to send a WhatsApp message, it sends the request to UltraMsg. UltraMsg then delivers it directly to WhatsApp. In the same way, any replies or incoming messages from WhatsApp go first to UltraMsg, which can then share them back with Tulip. This setup allows Tulip to communicate seamlessly with WhatsApp through UltraMsg, without requiring any direct connection to WhatsApp itself.

Step-by-Step Setup
- Log in or create an UltraMsg account
- Go to UltraMsg and sign in with your account, or create a new one if you don’t have one yet.
- Go to your instance, or create one
- In your UltraMsg dashboard, click on your existing instance, or create a new instance if needed.
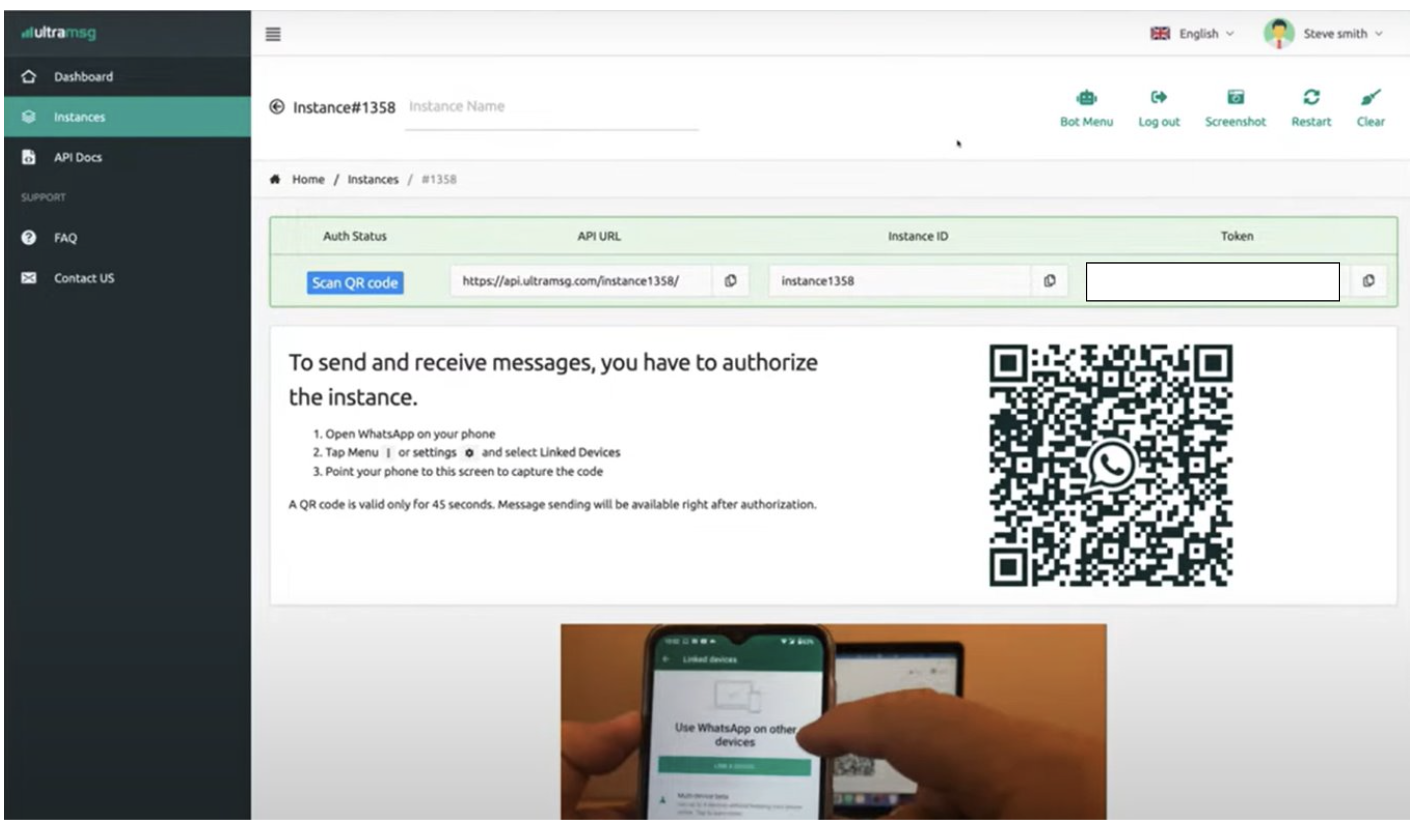
- Link your WhatsApp number
- Open your UltraMsg instance.
- Use your phone to scan the QR code shown, linking WhatsApp to UltraMsg.
- Make sure you see “Auth Status: authenticated” on your instance—it means you’re connected!
- Find your connection details
- After setup, you will see your API URL, Instance ID, and Token in UltraMsg.
- Make a note of these—you’ll need them for Tulip.
- Use the details in Tulip
- In Tulip, add a Connector using the API URL, Instance ID, and Token from UltraMsg.
- You’re now ready to connect your Tulip apps with WhatsApp!
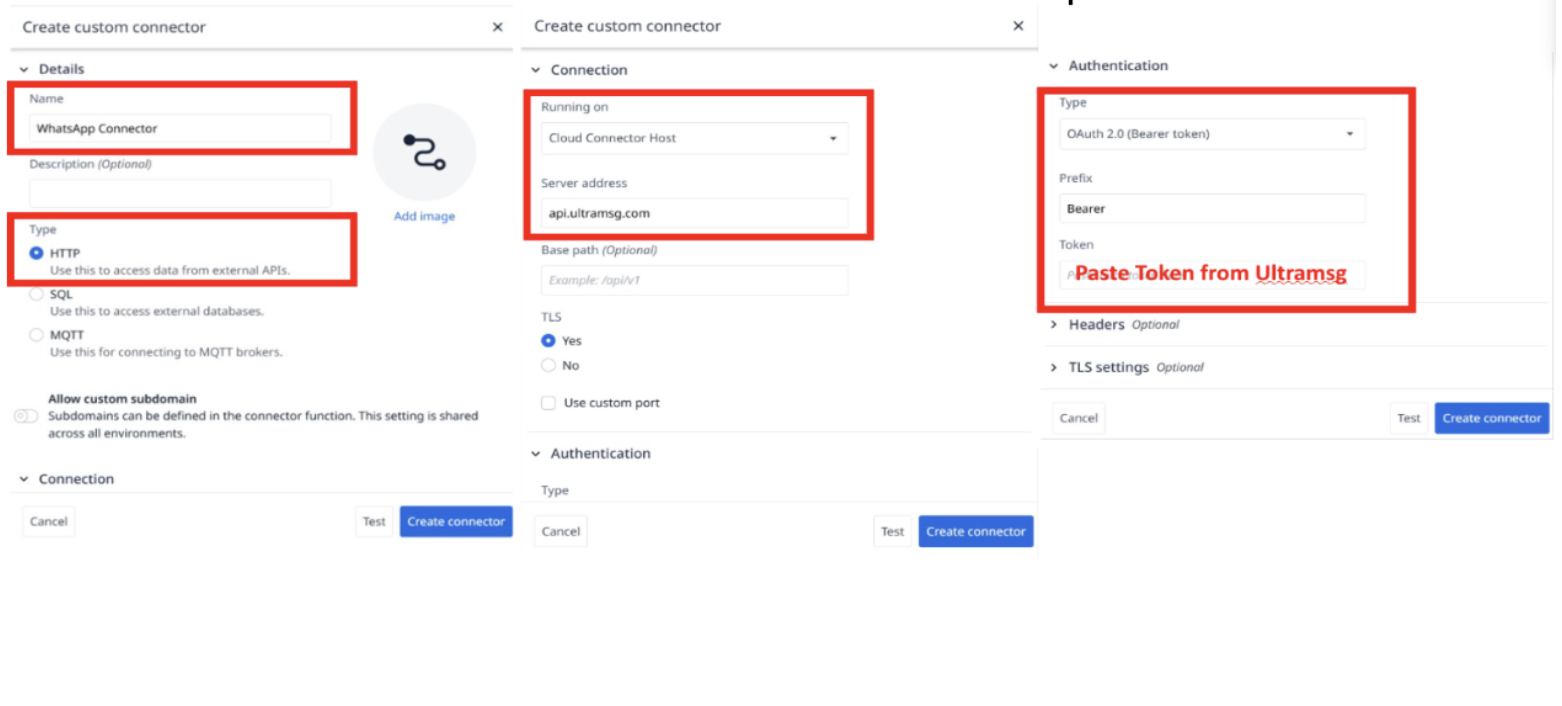
Creating the Custom Connector in Tulip
Next, you’ll set up a custom connector in Tulip to let your app communicate with WhatsApp via UltraMsg.
Simply follow these steps, as shown in the image:
- Name your connector
- Enter a name like “WhatsApp Connector” so you can easily identify it later.
- Choose the connector type
- Select HTTP because we’re connecting to an external API.
- Set up the connection details
- Make sure it is running on “Cloud Connector Host.”
- Enter the server address: api.ultramsg.com
- Configure authentication
- Set the authentication type to OAuth 2.0 (Bearer token)
- In the “Token” field, paste the token you received from your UltraMsg instance.
- Leave the prefix as “Bearer”.
- Finish setup
- Click Create connector to save everything.
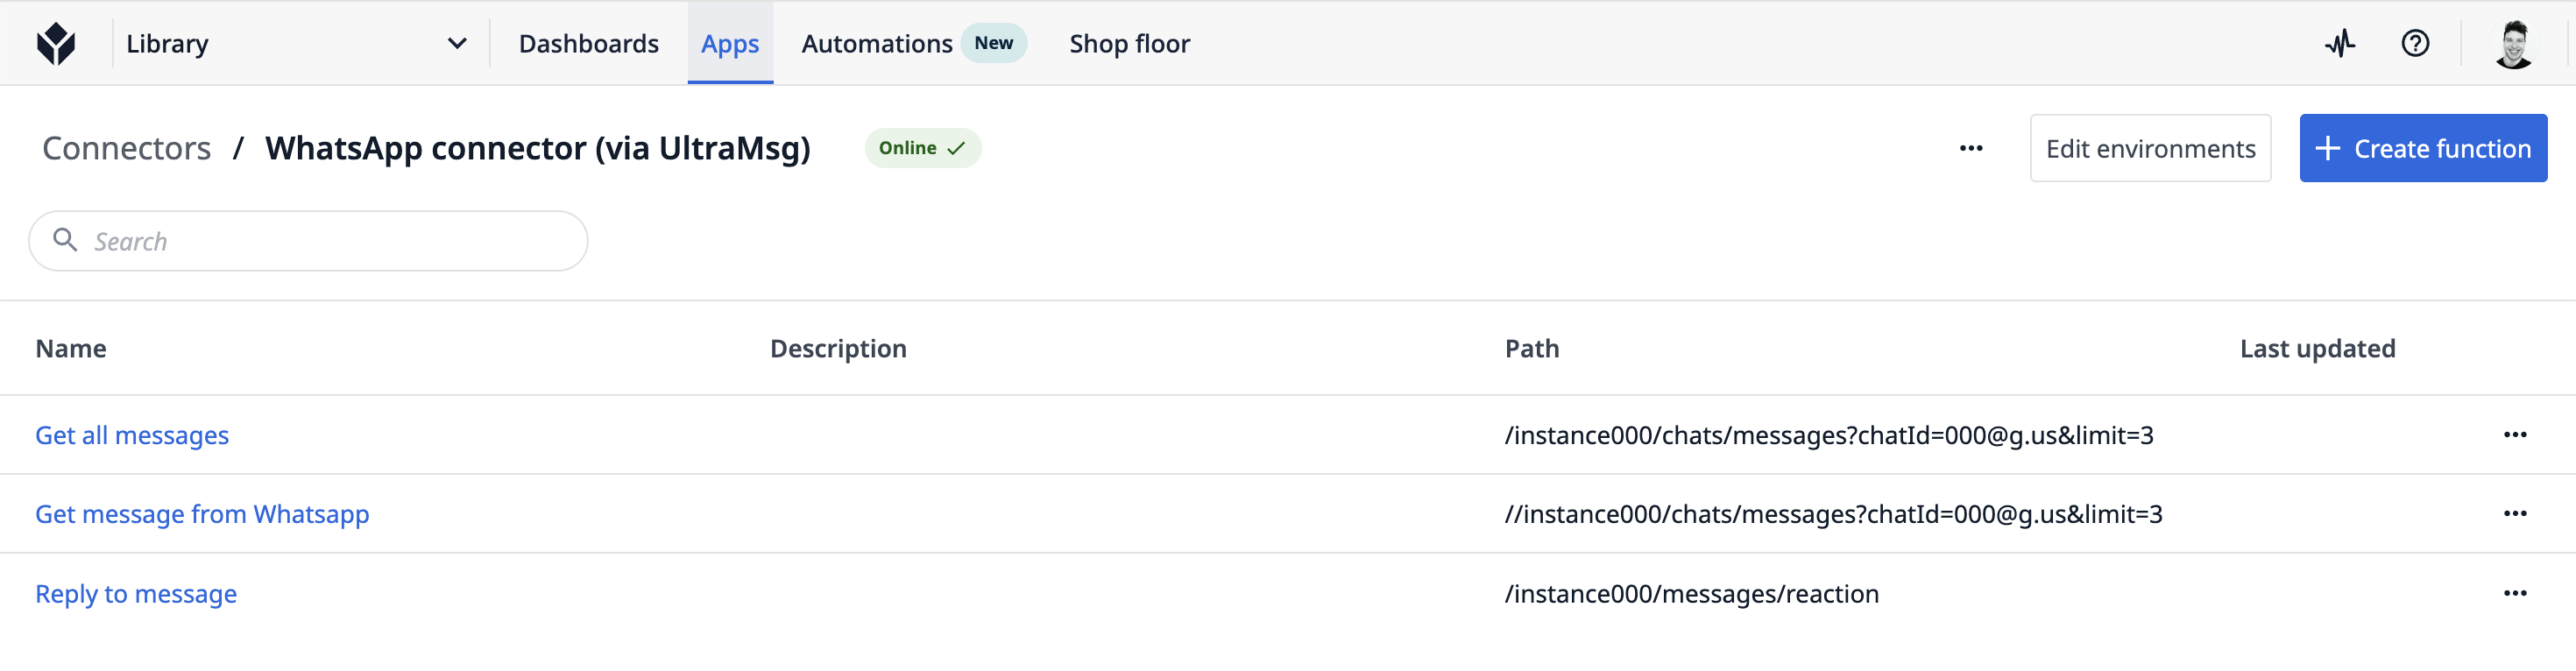
Setting Up Connector Functions
After creating your connector, you’ll add connector functions. Each function tells Tulip exactly what you want to do with WhatsApp—such as sending or receiving messages.
Below, you can see examples of WhatsApp connector functions that have been set up in Tulip:
Examples
This connector includes functions to:
- Get all messages: Retrieve all messages from a WhatsApp chat.
- Reply to message: Send a reply directly within the chat thread.
- Get message from WhatsApp: Get a specific message from a WhatsApp chat.
Pro Tips
- Test your setup thoroughly with different message types.
- Remember to update the InstanceIDs, ChatIDs and Tokens according to your UltraMsg setup.
- Leverage Tulip's automation features to get even more value from your WhatsApp integration.
- Stay updated with UltraMsg and Tulip feature releases for new integration possibilities.
Further Reading
To dive deeper into WhatsApp integrations and make the most of Tulip and UltraMsg, check out these resources:
UltraMsg API Documentation
Tulip Knowledge Base
Tulip Community Forum
Explore these links for advanced tips, troubleshooting, and new ideas to expand your workflows even further.