Overview
Here’s how to store data in an array in Tulip and move values from one data type to another.
In this article you will learn…
- How to create and use Arrays
- How to change arrays in the Trigger Editor
- Using split string to turn the output of a Connector Function into an array
Arrays and objects are two popular data structures that are used in many programming languages. Tulip utilizes these data structures in two parts of the platform:
- Variables, to store multiple data points related to the same variable
- Connectors, to pass the output of a Connector function to a variable
Arrays can be created:
- In the Trigger Editor (manually)
- In the Expression Editor (manually)
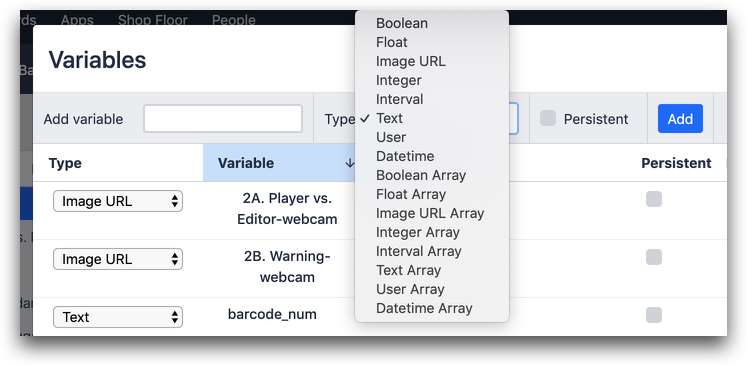
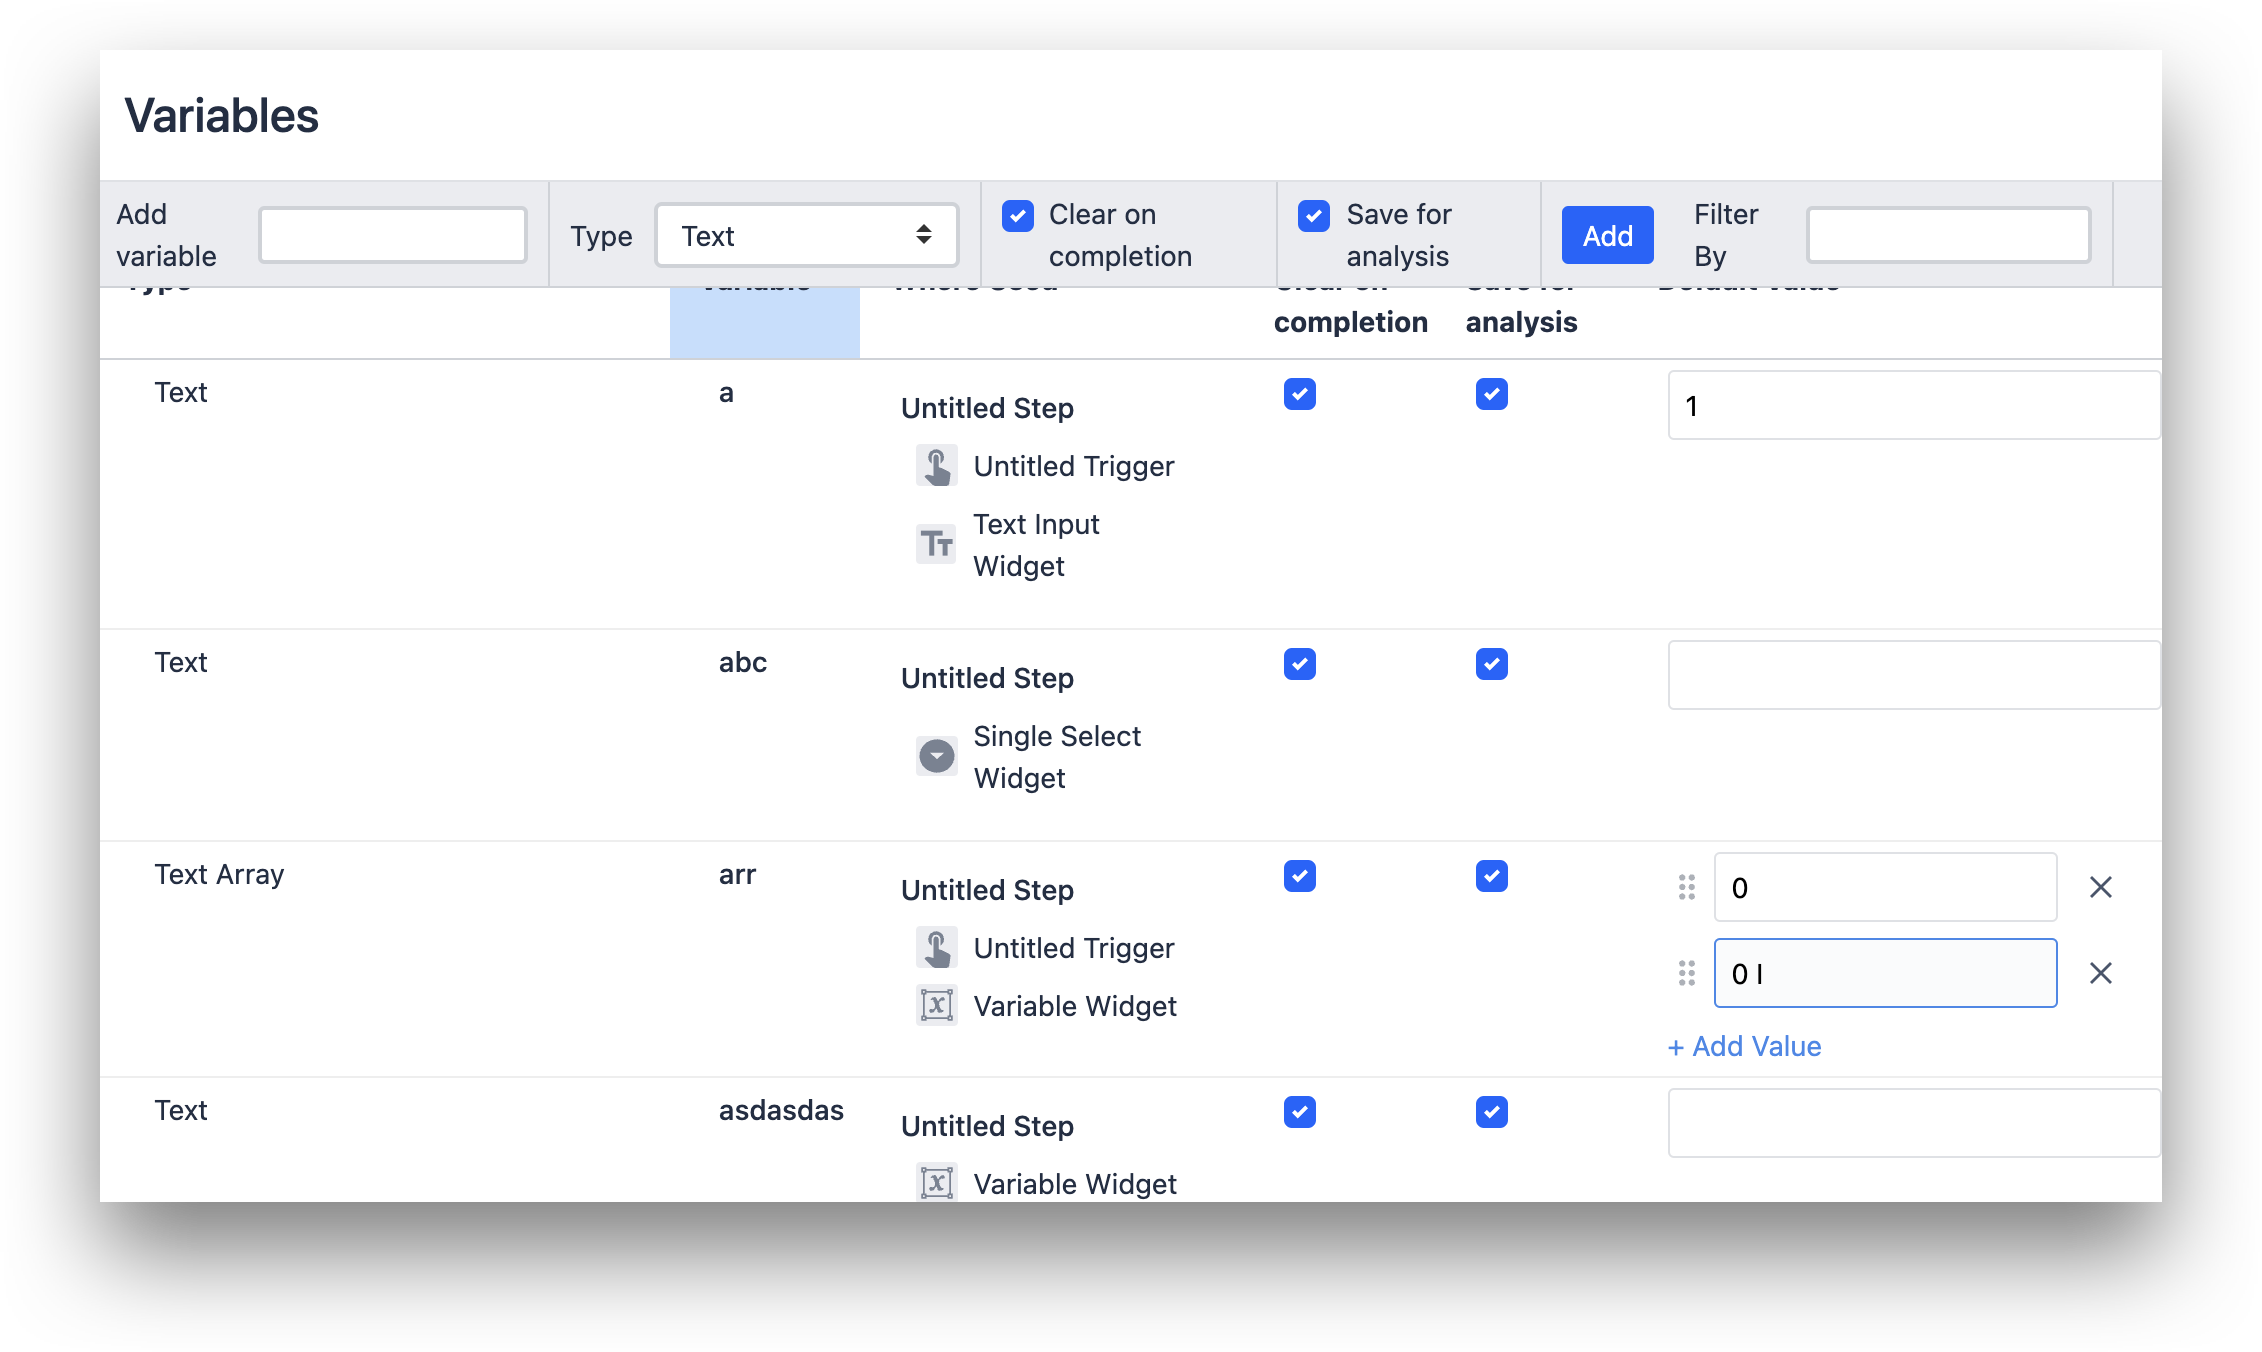
- In the Variable Summary View (shown below) (manually)
- By storing the output of a Multiselect input.
- By storing the output of a SQL connector function that returned multiple rows or HTTP connector with an array in the JSON that is returned(automatically)
Creating Arrays
In The Trigger Editor
You can create an Array by using the "Push onto Array" action.

- "Arrays" "Push Onto Array" data: "Static Value" "text" "text" array: (create array here)
In The Expression Editor
You can create a new Array via the "Data Manipulation" "Store" action. Like this:

- "Data Manipulation" "Store" data: "Expression" "[1,2,3]" location: "test_array"
Each array can only have one type of value, ie strings or integers.
In The Variable Summary View
Navigate to the Variable Summary View in the "App" tab of the side pane, then create a new variable at the top of the modal:
Manipulating Arrays
You can create and manipulate arrays through the Trigger Editor. In a “Then” statement, click “Add new Action” and then choose the “Arrays” option.
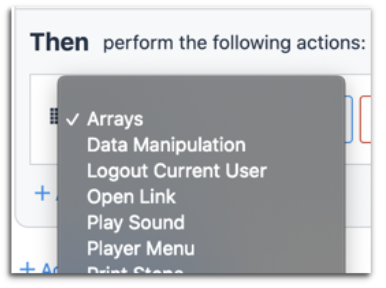
In the next dropdown, you will see a variety of array methods. These align with the array methods in JavaScript, so check out this guide to array methods if you need further explanation.
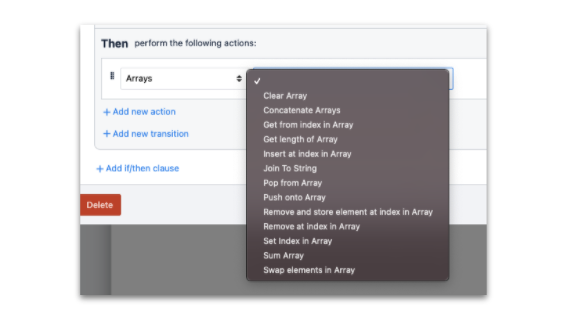
The available array methods include:
- Clear Array
- Concatenate Arrays
- Get from index in Array
- Get length of Array
- Insert at index in Array
- Join To String
- Pop from Array
- Push onto Array
- Remove and store element at index in Array
- Remove at index in Array
- Set index in Array
- Sum Array
- Swap elements in Array
Depending on your selection in this dropdown, the rest of the fields will give options on what array you would like to manipulate, which index you would like to change, and the new value you are setting.

- "Arrays" "Set Index in Array" data: "Static Value" "number" "90" array: "test_a" index: "Static Value" "integer" "0"
In the example above, you are changing the value at index 0 in an array called “test_a” to a value of 90.

- "Arrays" "Get from index in Array" array: "Variable" "test_a" index: "Static Value" "integer" "0" store in variable: "test_vari"
And in the example above, you are accessing the value at the 0 index of an array called “test_a” and storing it in a variable called “test_vari”.
Searching Through Arrays
Let's say you want to use a multiselect widget to allow an operator to input multiple types of defects about a single product. Then, depending on which defects they input, you would like to send them to a specific set of rework steps.
A multiselect form automatically saves values in an array. So, you will need to search this array for a specific value, and then send the operator to a specific step.
You can use the "Join To String" Trigger action to accomplish this. This will combine all elements in an array into a single string, and store it in a separate variable. Then, in a separate Trigger, you can use an "If" statement to see if this string contains a specific value.
The array elements can be separated by any string that you choose. Most Tulip users prefer a comma (,).
Here's an example of joining all elements in an array into a string:
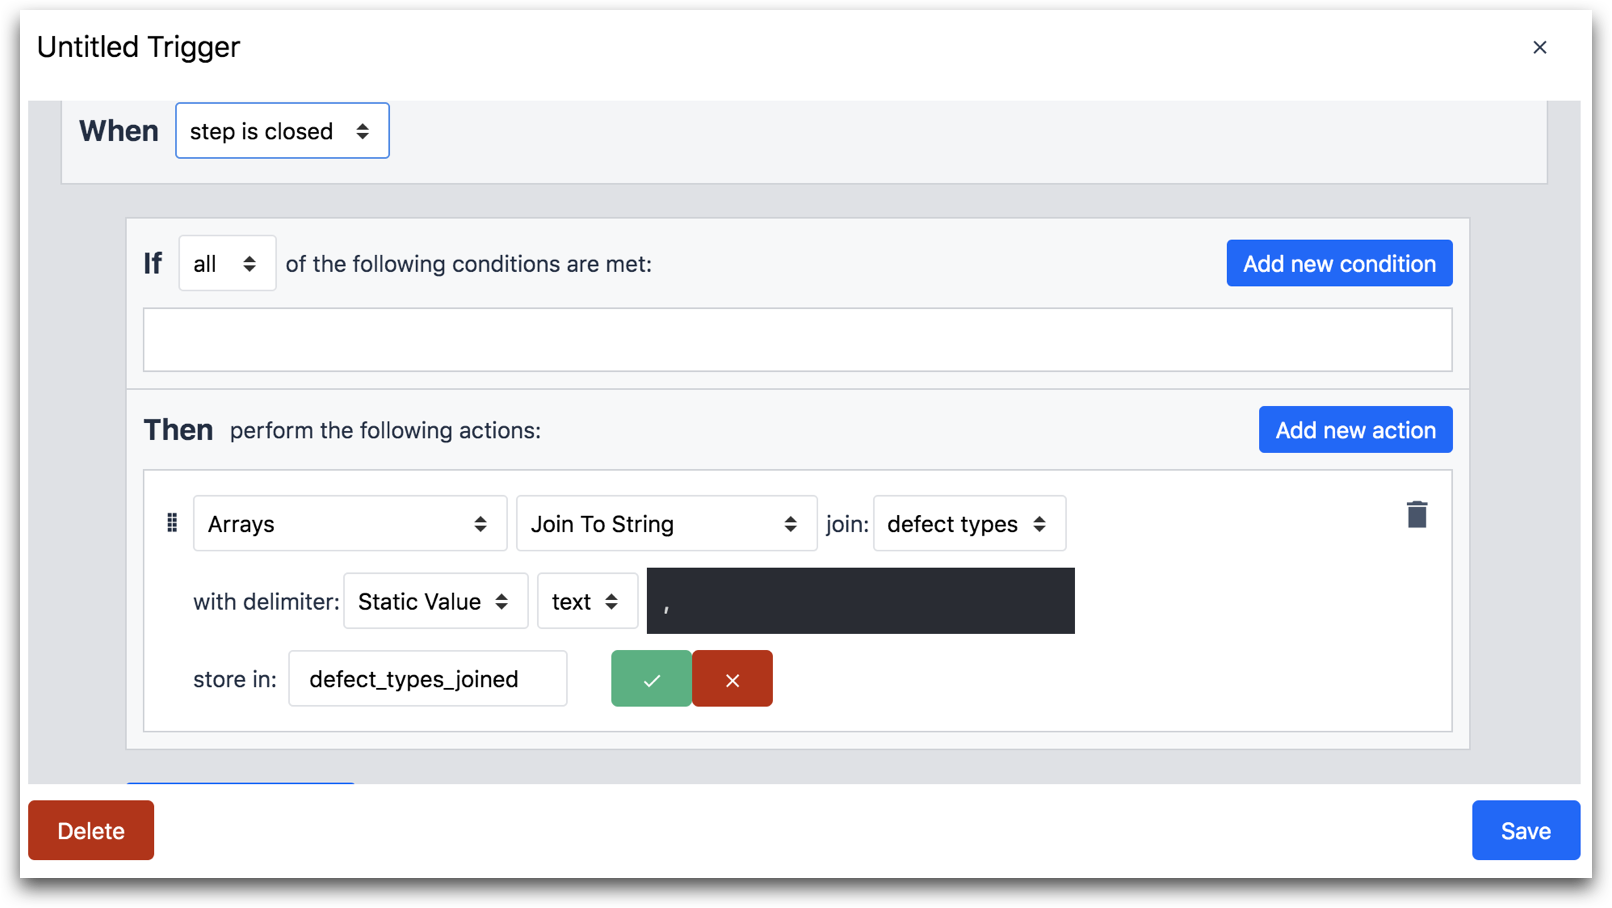
- "Arrays" "Join To String" join: "defect types"
- with delimiter: "Static Value" "text" ","
- store in: "defect_types_joined"
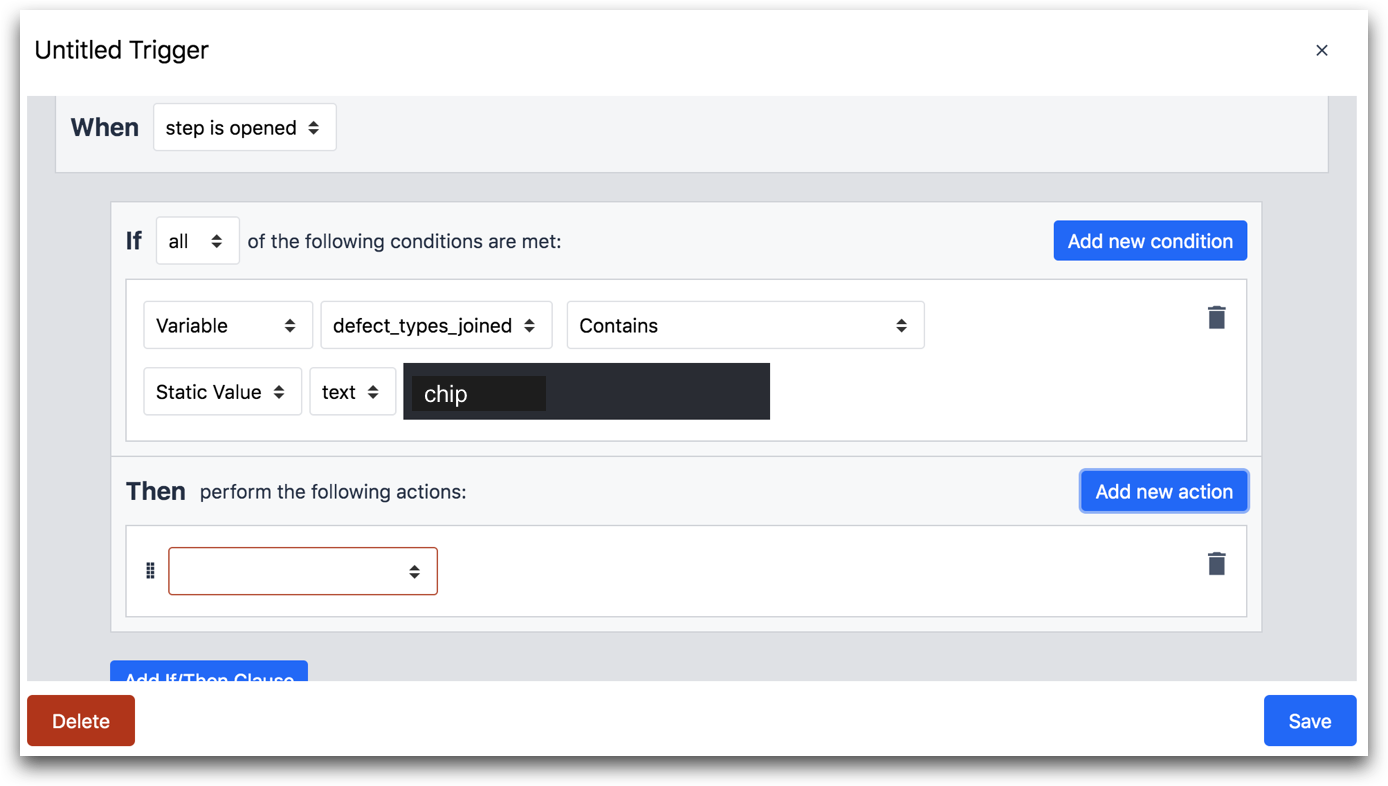
Here is the second trigger that you would use to search this new string for a specific value:
IF
- "Variable" "defect_types_joined" "Contains" "Static Value" "text" "chip"
Using Split String To Create Arrays
Based on everything covered so far, it would be very difficult to get the output of some types of connector functions into an array. To solve this problem, you can use split string.
If you want to prepare your connector function output to be stored in an array, you need to add a common character between each piece of data. Common examples include:
- Semicolon (;)
- Comma (,)
- New line character (“\n”)
Let’s say that you have a series of data points that you want to store in an array. In your SQL query or HTTP GET request, you will first want to combine them into one string, if they are not already stored in an object.
Here is an example:
7989;43f3;3e3;f34;f;34;3
The common delimiter is a semicolon.
In the Trigger Editor, you will want to use the “Split String” option to convert this string into an array.
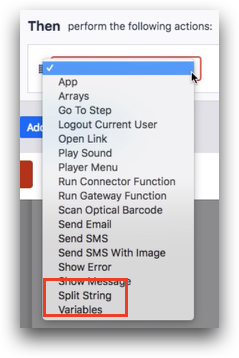
First select the variable you would like to split. In this case, it is called “q”.

Then, add the delimiter.

Finally, choose the variable where you would like to store the array.

- "Split String" split: "Variable" "q" by: "Static Value" "text" ";" store in: "w"
Displaying Array Variables
If you want to make sure this is working, add some variable text to a step. Then, choose the variable that stores the array.
Finally, open up the Tulip Player, and see if all the items in the array appear as a bulleted list. You may need to expand the text box in order to account for the number of items in the array.
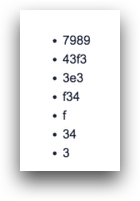
When you return an array of a single data type from HTTP connectors (text, boolean, integer etc.), the output will be a bulleted list, as shown in the section above.
Displaying Arrays from SQL and HTTP Connector Functions
When you return an array of objects from an HTTP connector function or multiple rows from a SQL connector function, a bulleted list will not be an ideal display.
Instead, check out this separate guide to see how to turn your connector function output into an interactive or static list.
Reviewing All Array Variables In An App
In order to manipulate a data structure, it must be already stored as a variable. You can see your existing variables by entering the side pane in the App Editor, and selecting the Sigma symbol next to “Variables” in the App tab.
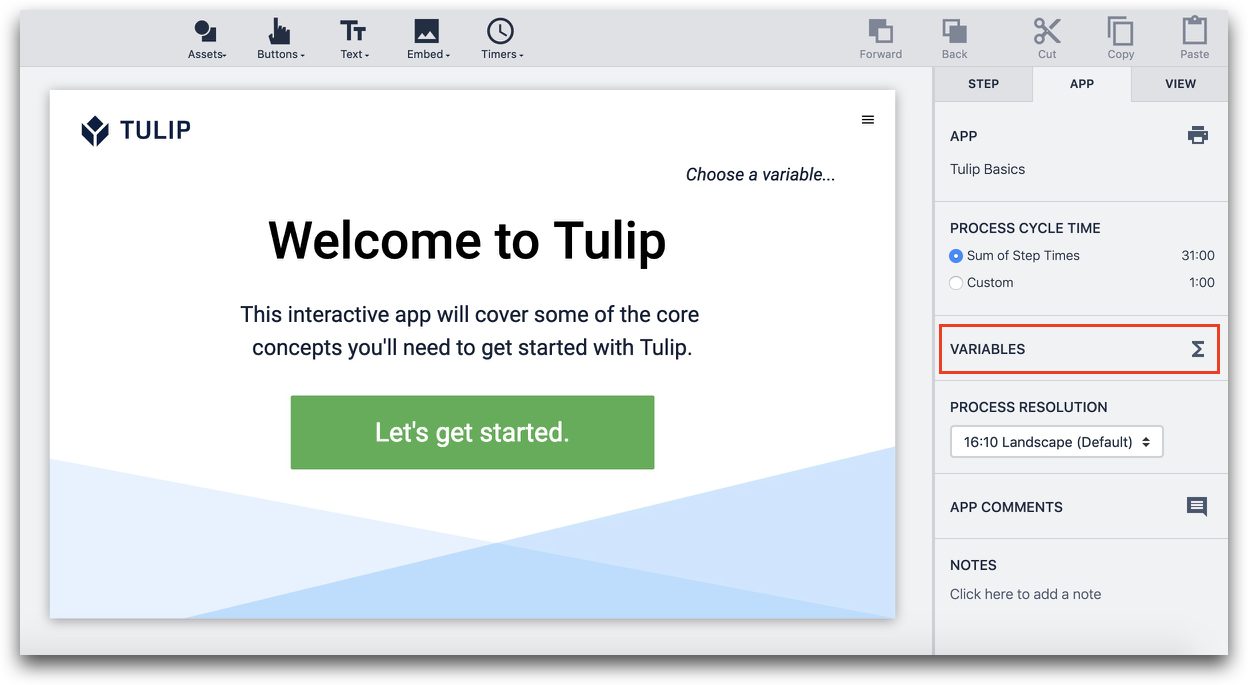
Arrays will be shown as “Array” in the “Type” Column, depending on what kind of values they contain. You may also create default values for indices of the array.
Further Reading
- How To Use Outputs from Connector Functions in Apps
- How To Call A Connector Function Using Triggers
- A Guide to the Expression Editor in the App Editor
Did you find what you were looking for?
You can also head to community.tulip.co to post your question or see if others have faced a similar question!

