How To Integrate Tulip with Slack
Learn how to use HTTP Connectors to send Slack messages from your Tulip apps.
This article will show you how to use Tulip's HTTP connectors to send messages to a channel in your company's Slack workspace.
If you aren't already familiar with Tulip HTTP connectors, take a look at this article first: An Overview of HTTP Connectors
Slack Setup
To allow your Tulip apps to post Slack messages, you will need to first create an app in your Slack workspace that will "listen" for requests coming from Tulip via a webhook.
Below is a short summary of the steps, but you can check out the following Slack article for the full details: Sending messages using Incoming Webhooks
The steps below assume that you are logged into your Slack workspace in your browser. If not, you will be prompted to login:

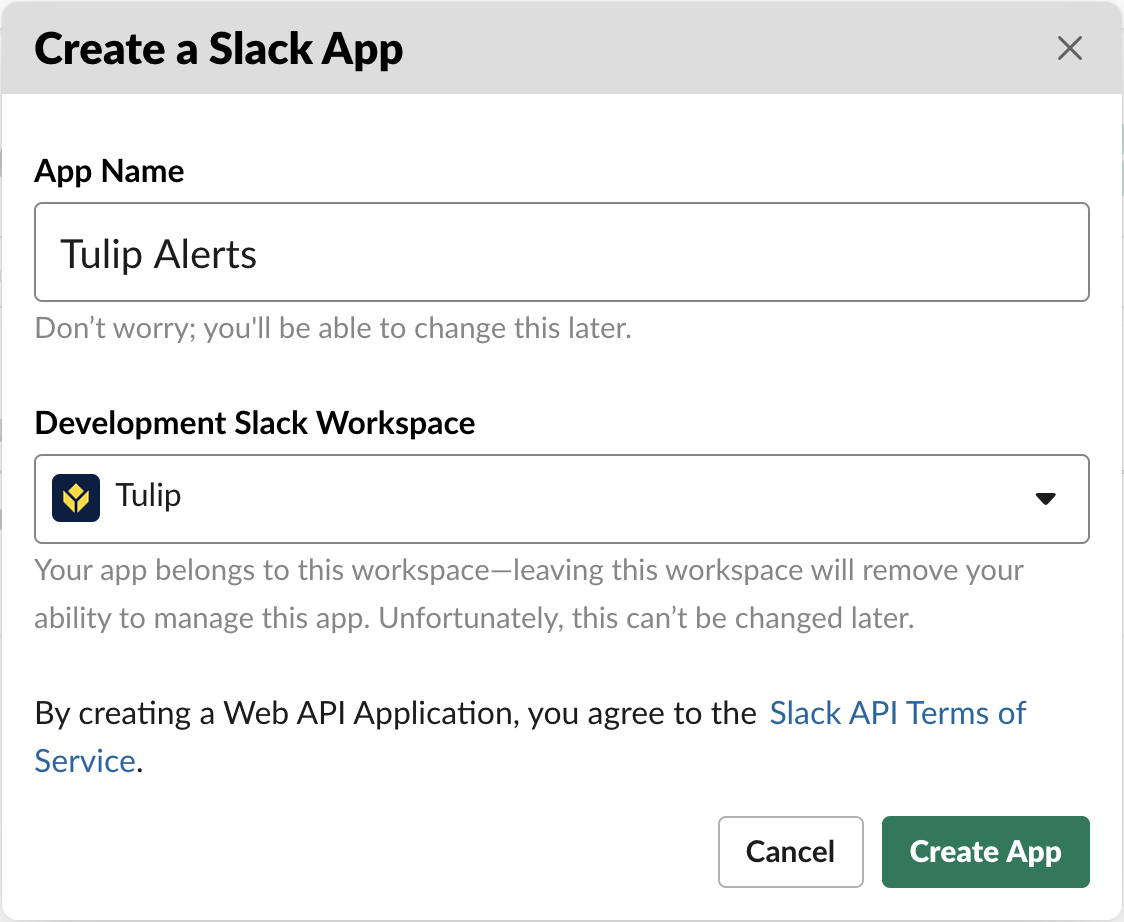
First, create a new Slack App:
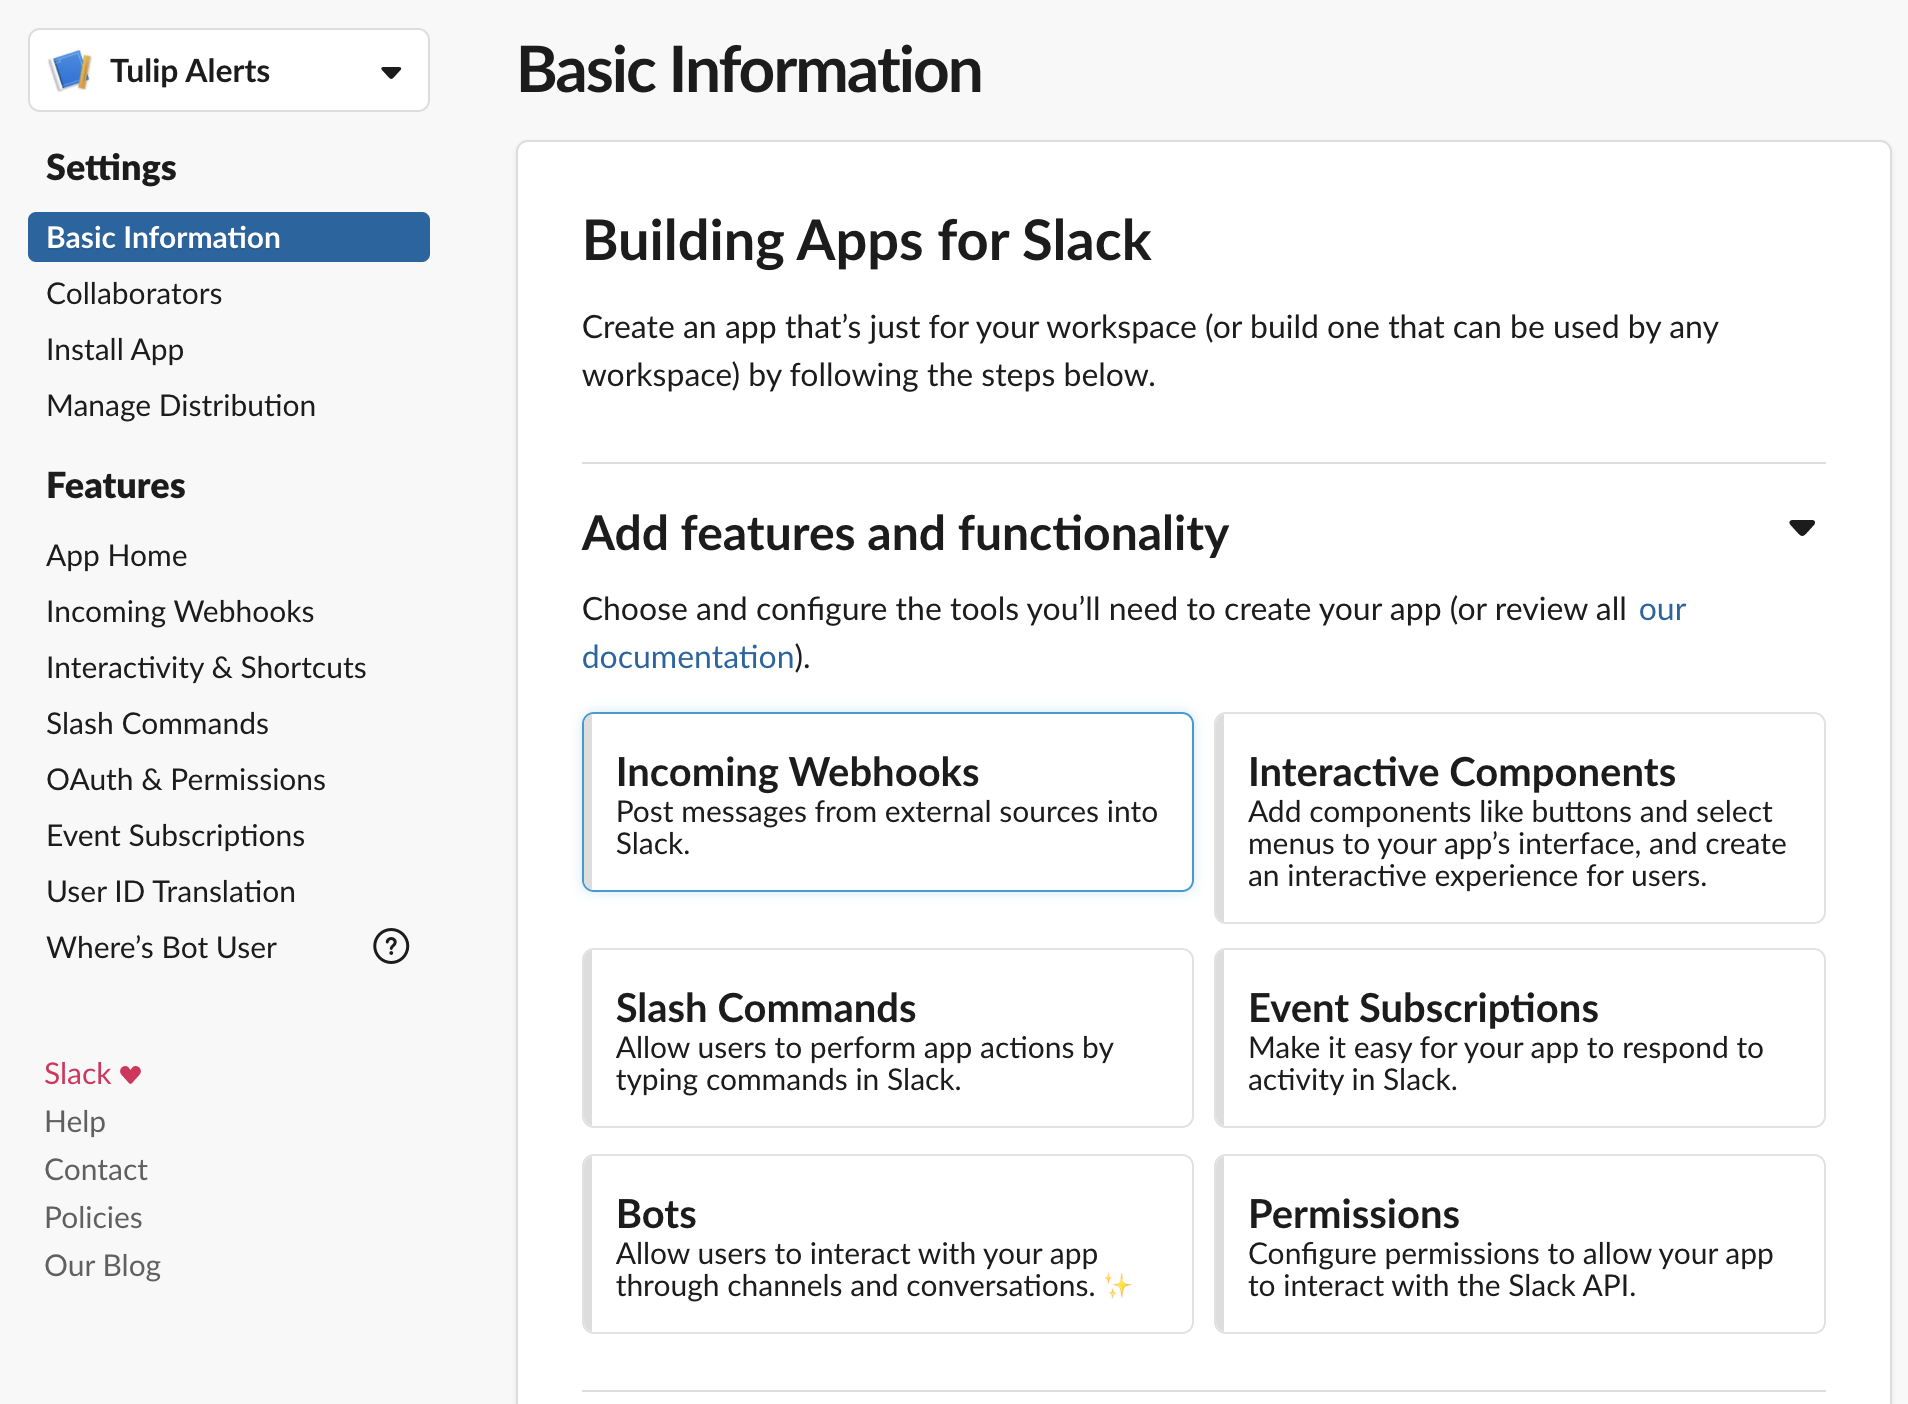
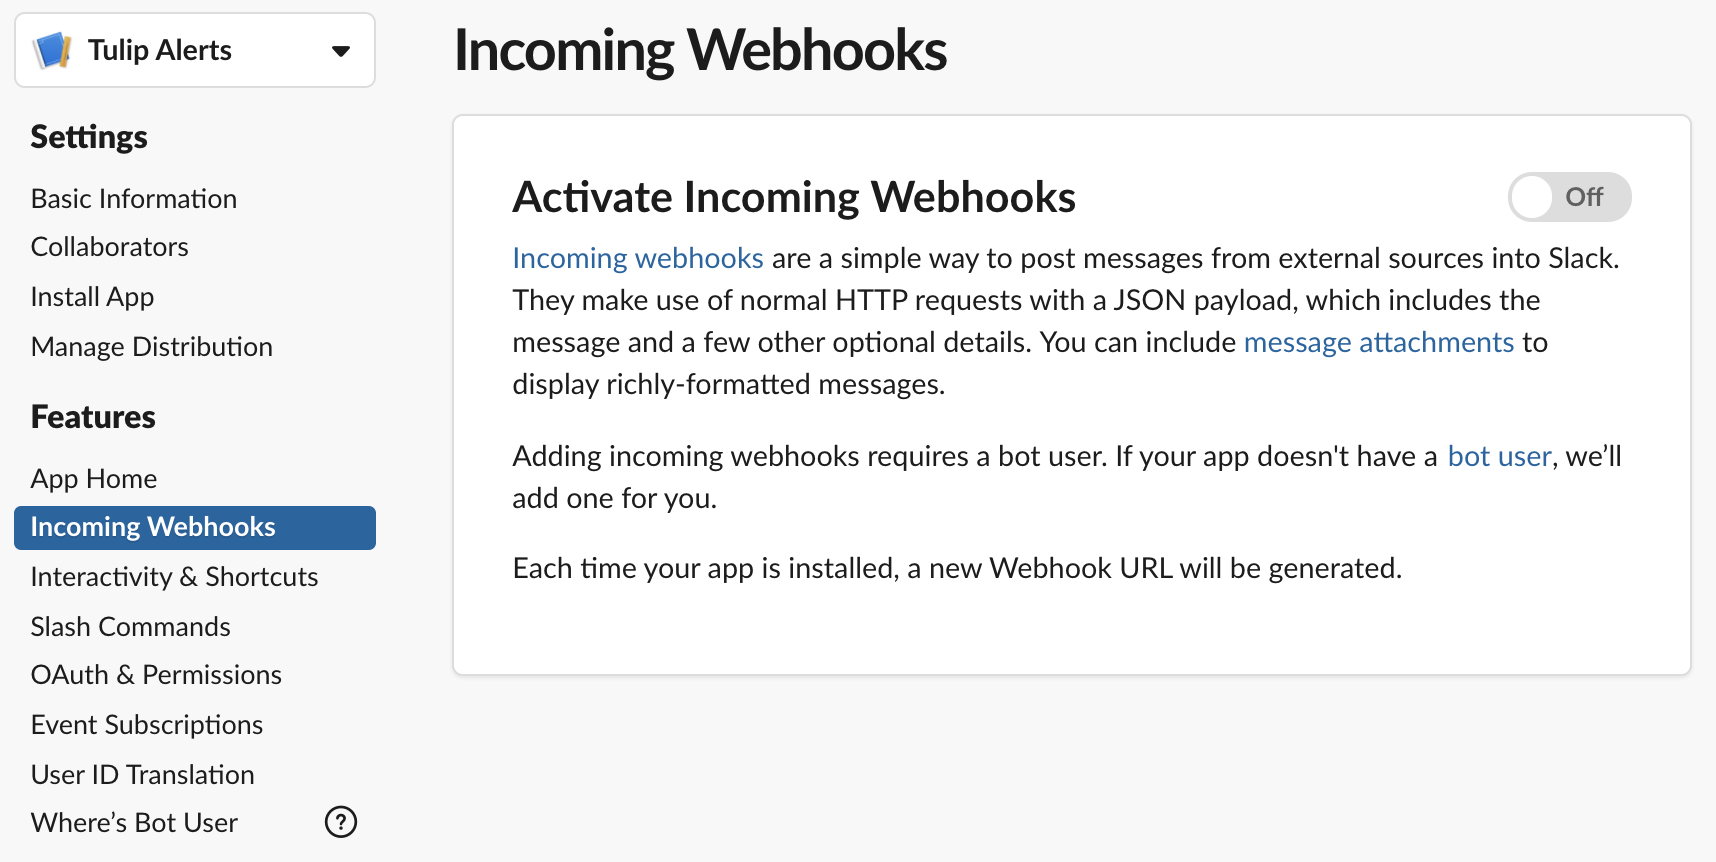
In your new app, select "Incoming Webhooks":
Activate incoming webhooks for the app, click "Add New Webhook to Workspace", and select the channel where you want your messages from Tulip to be posted:
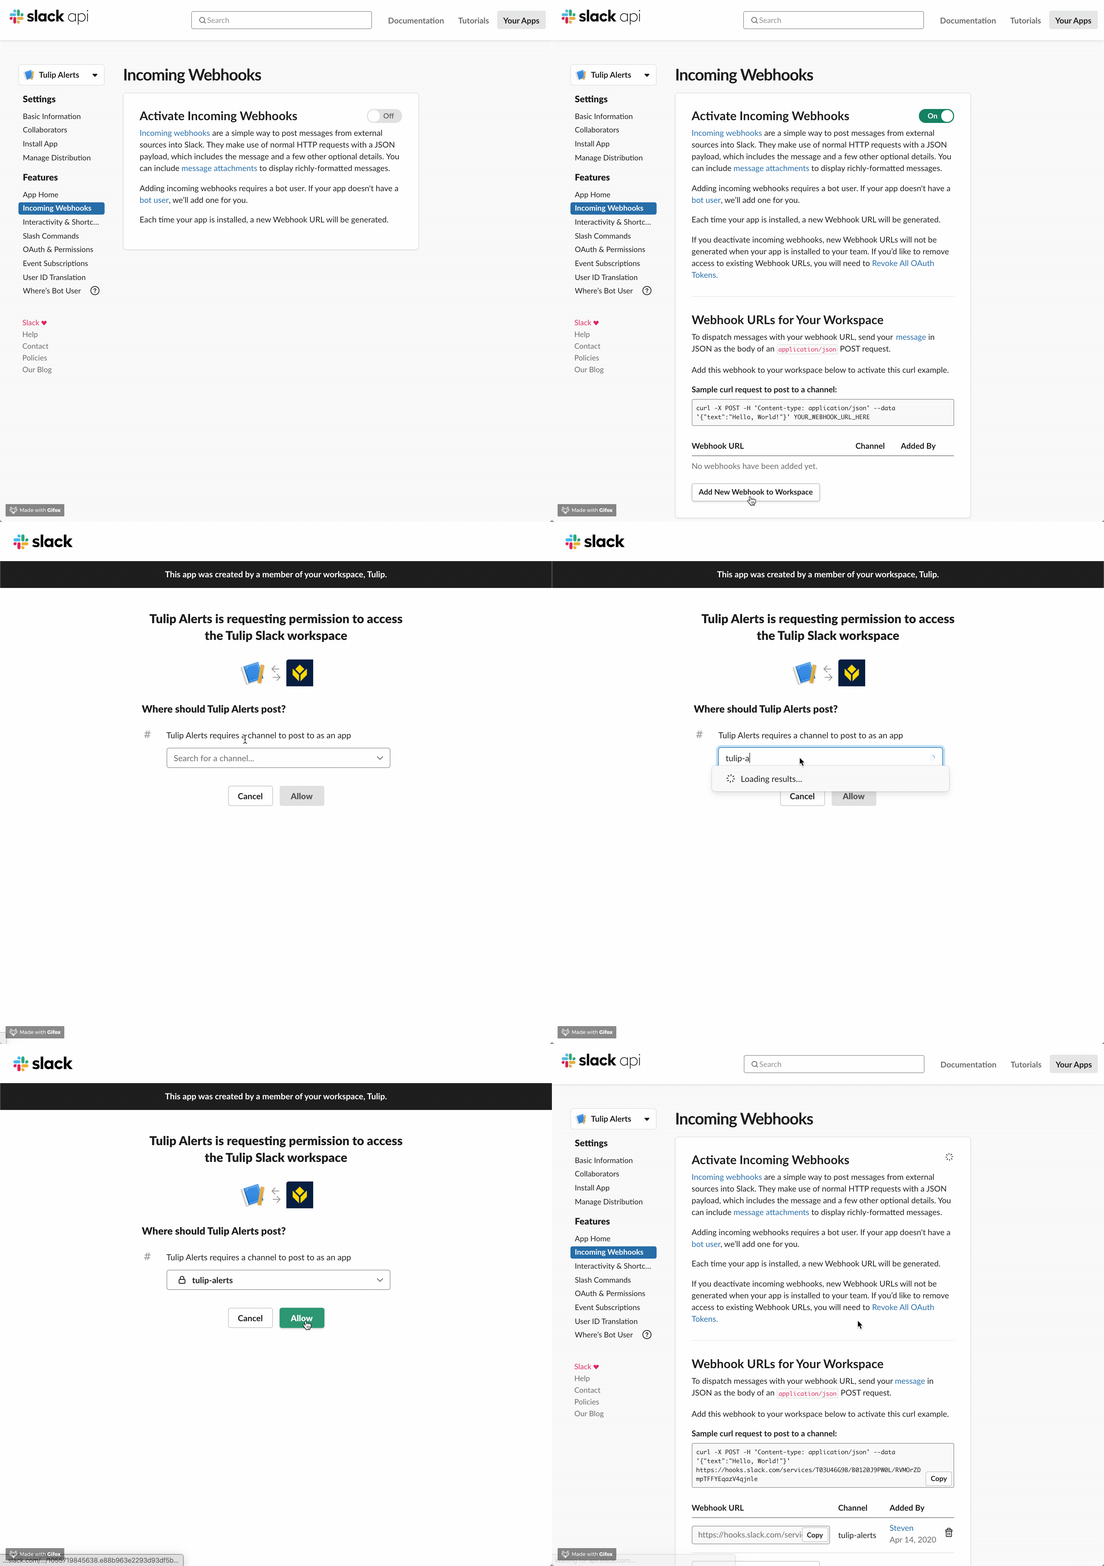
Step-by-step photos:
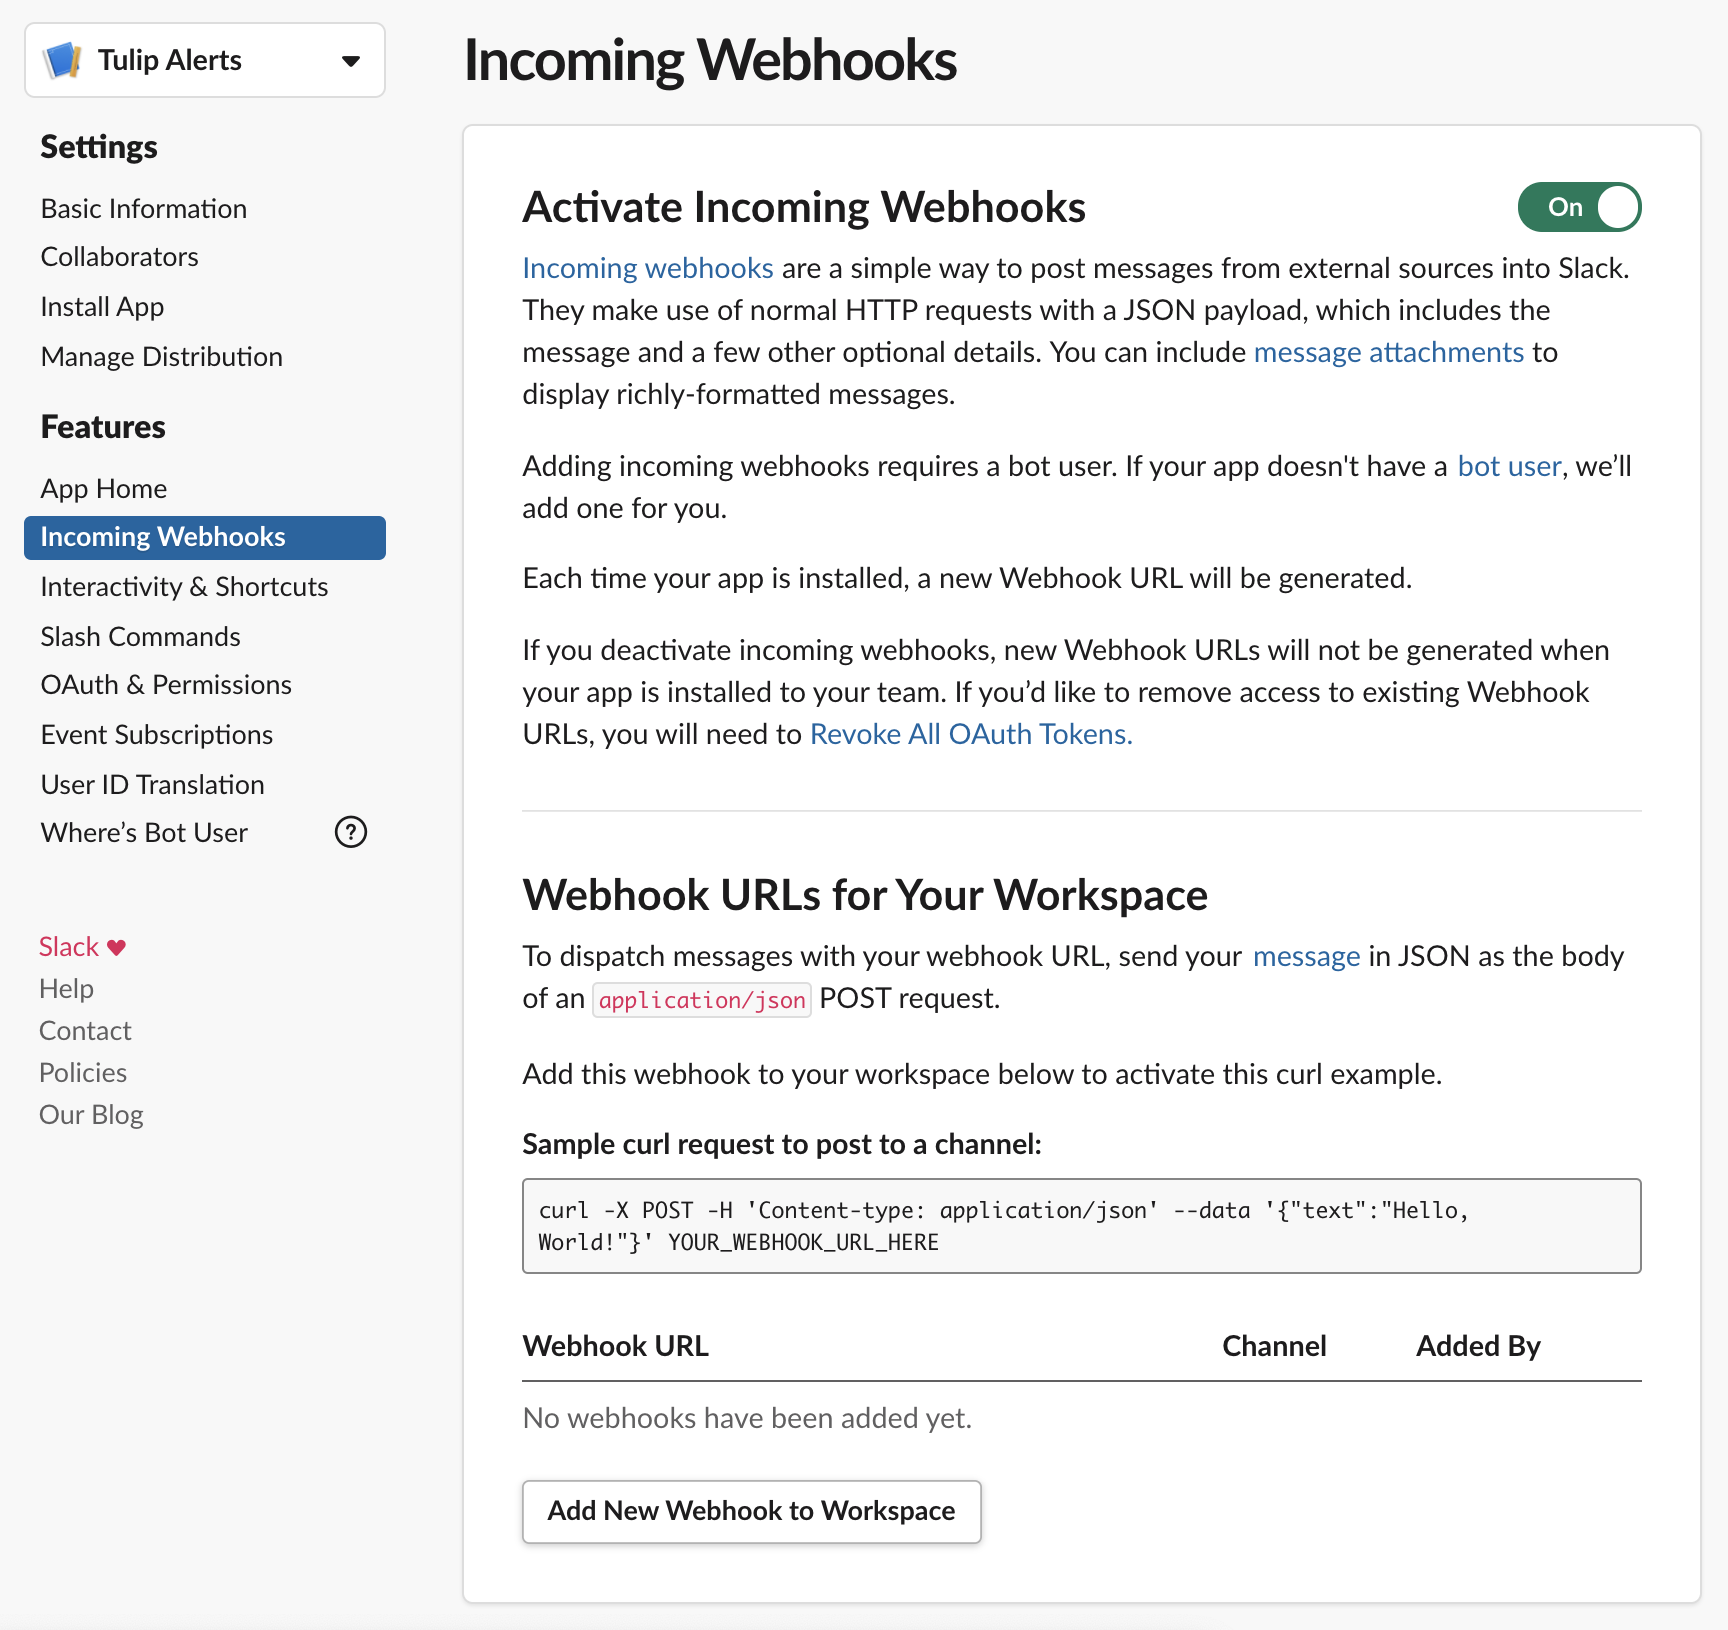
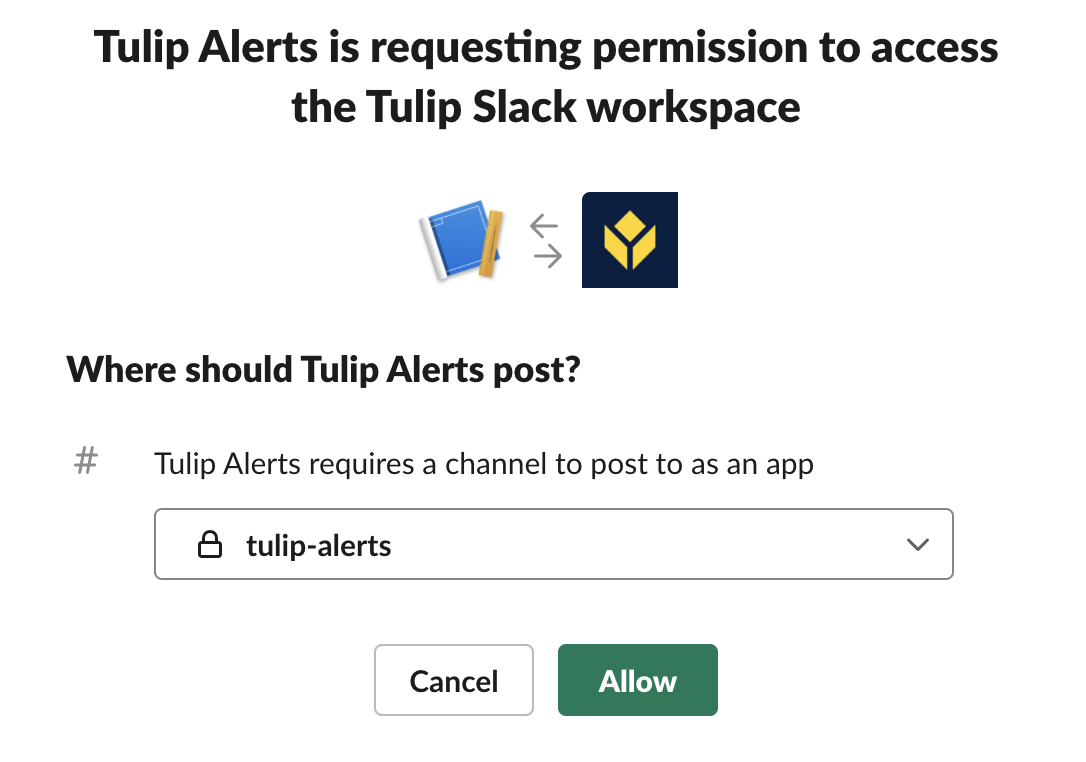
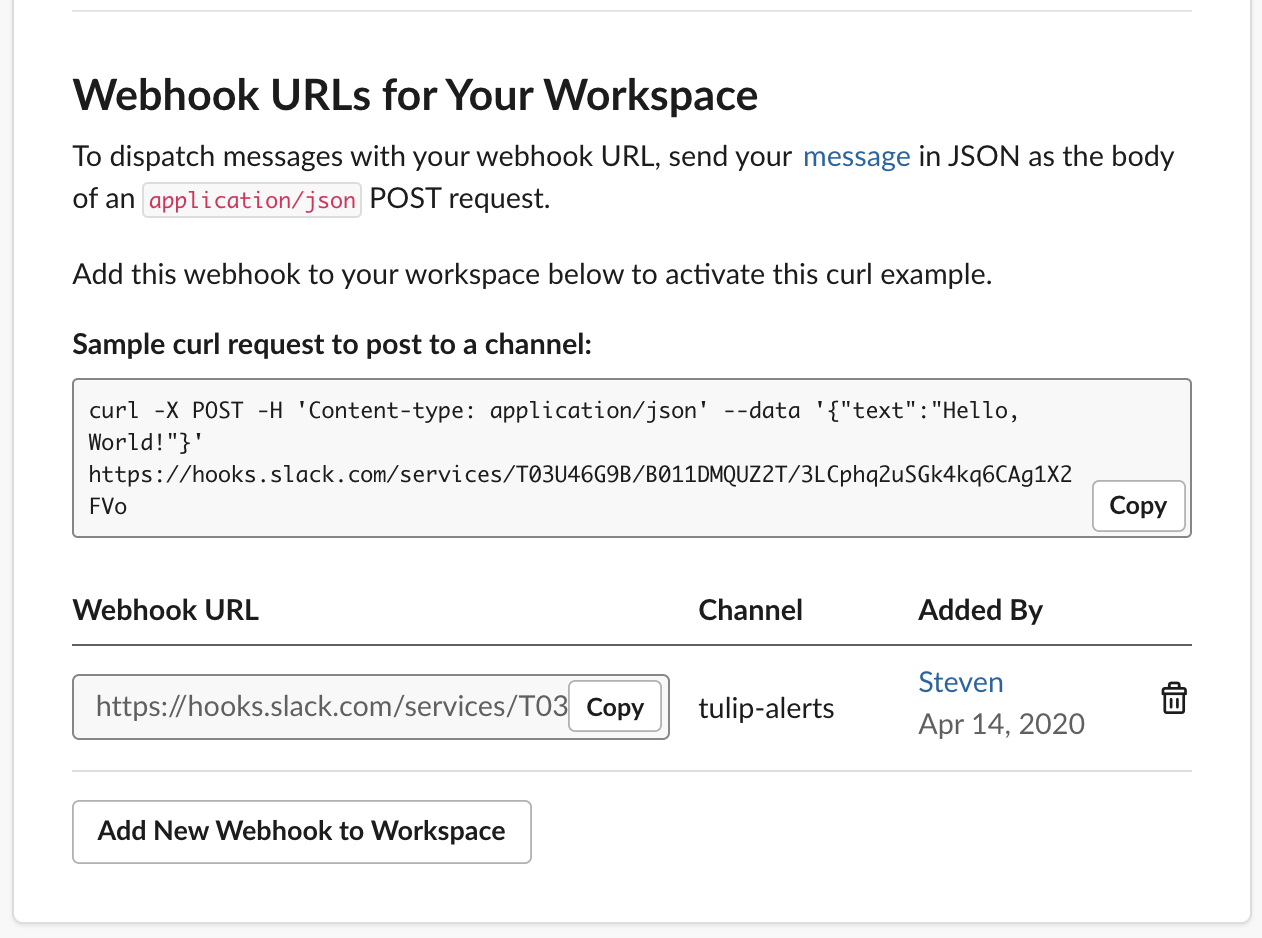
Your Slack app now has a unique webhook URL that you can use to post messages to the designated channel. Please keep in mind that while it would be nearly impossible for someone to guess this URL, the webhook is unauthenticated, meaning anyone with the URL could post to it.
If you are familiar with your computer's command-line interface (such as cmd.exe on Windows or Terminal on Mac) you can use the sample curl request provided in your Slack app to test the webhook:

You can also use a free browser-based curl utility such as https://reqbin.com/curl
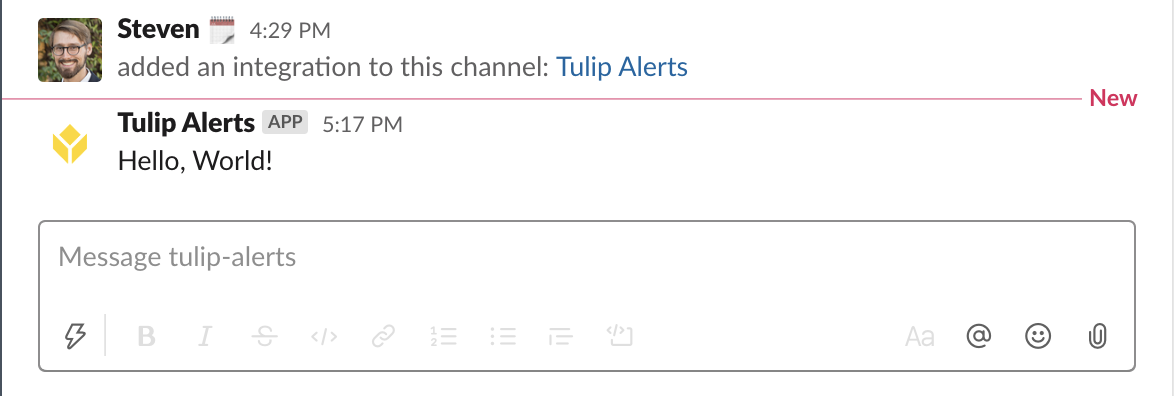
Either way, you should see the "Hello, World!" message appear in the Slack channel you selected earlier:
Tulip Connector Setup
Now that you have your Slack webhook, we can post to it with a Tulip HTTP Connector.
Open your Tulip site in your browser and select "Connectors" from the Apps menu at the top of the page:

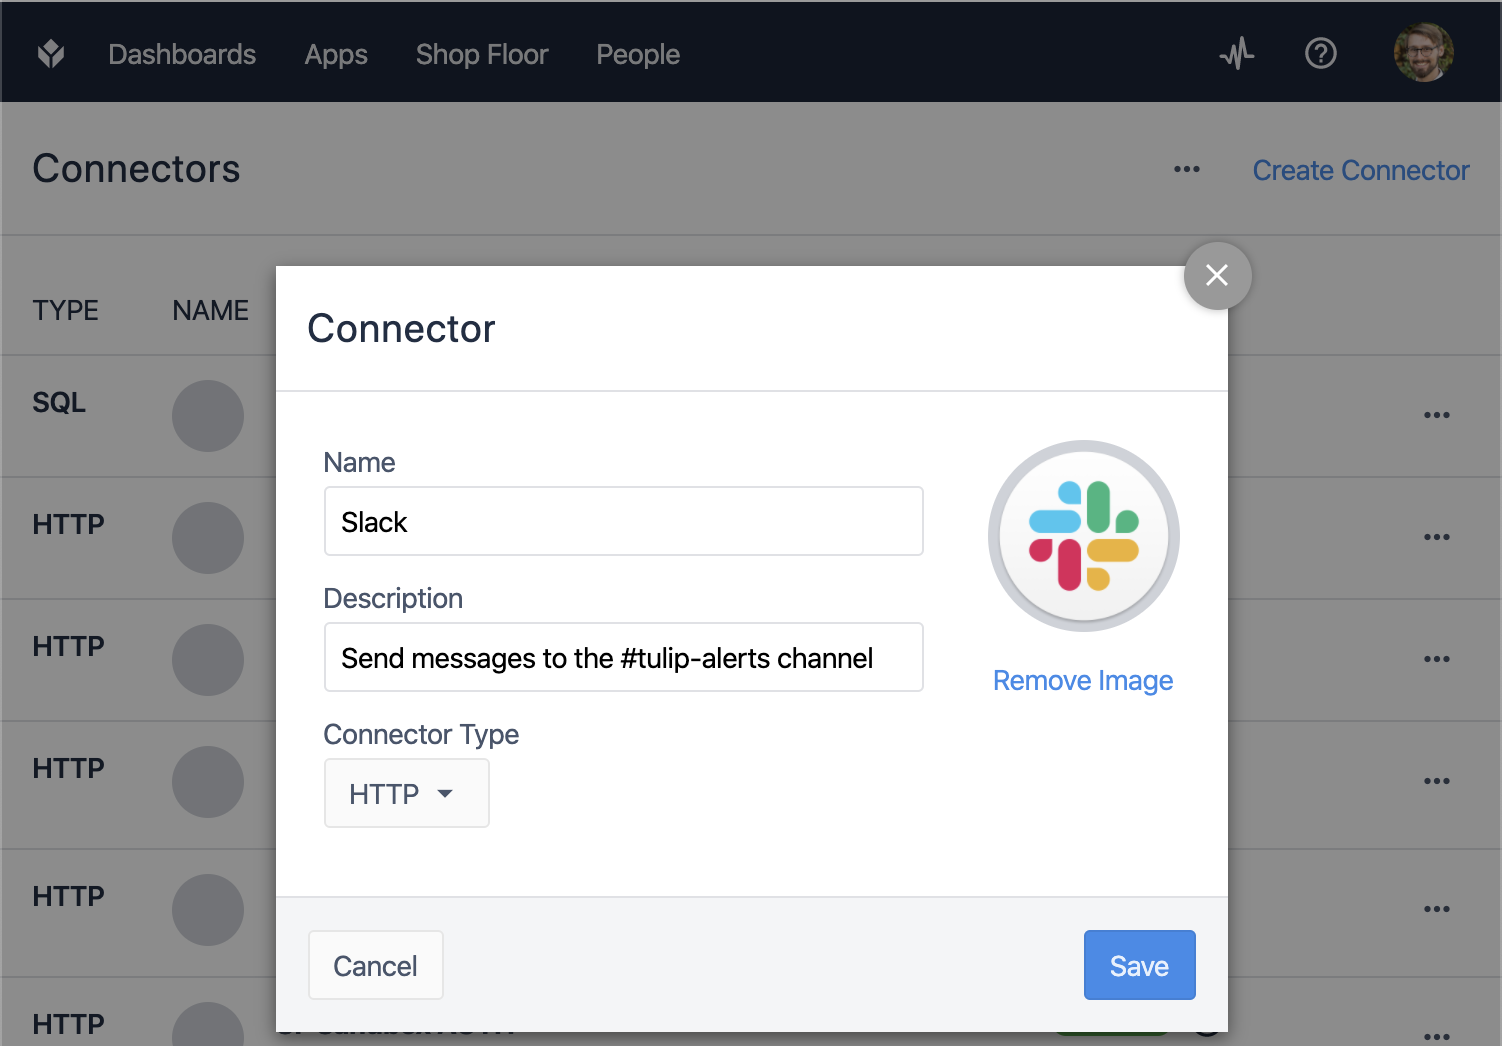
On the Connectors page, click "Create Connector" in the top right and fill in the details for your new Slack connector:
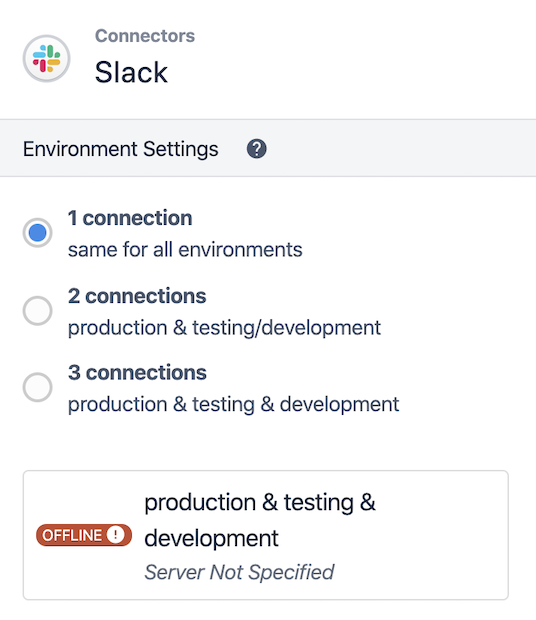
In your new connector, select your connection, which will initially show as "OFFLINE":
Edit the connection details, setting the host to hooks.slack.com and TLS to "Yes":
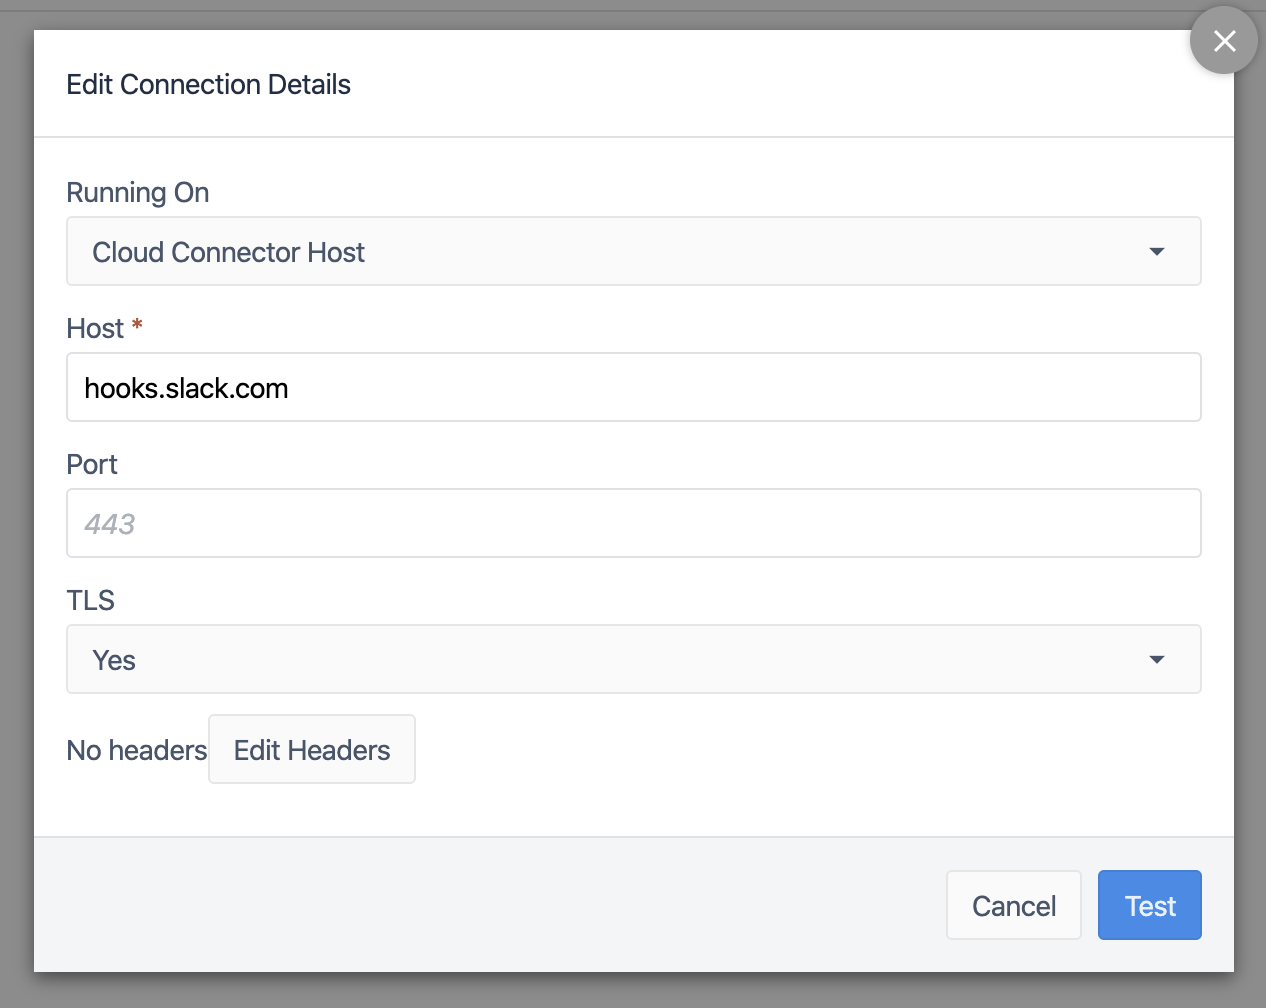
Hit "Test" to check the connection, then "Save" when the test passes:

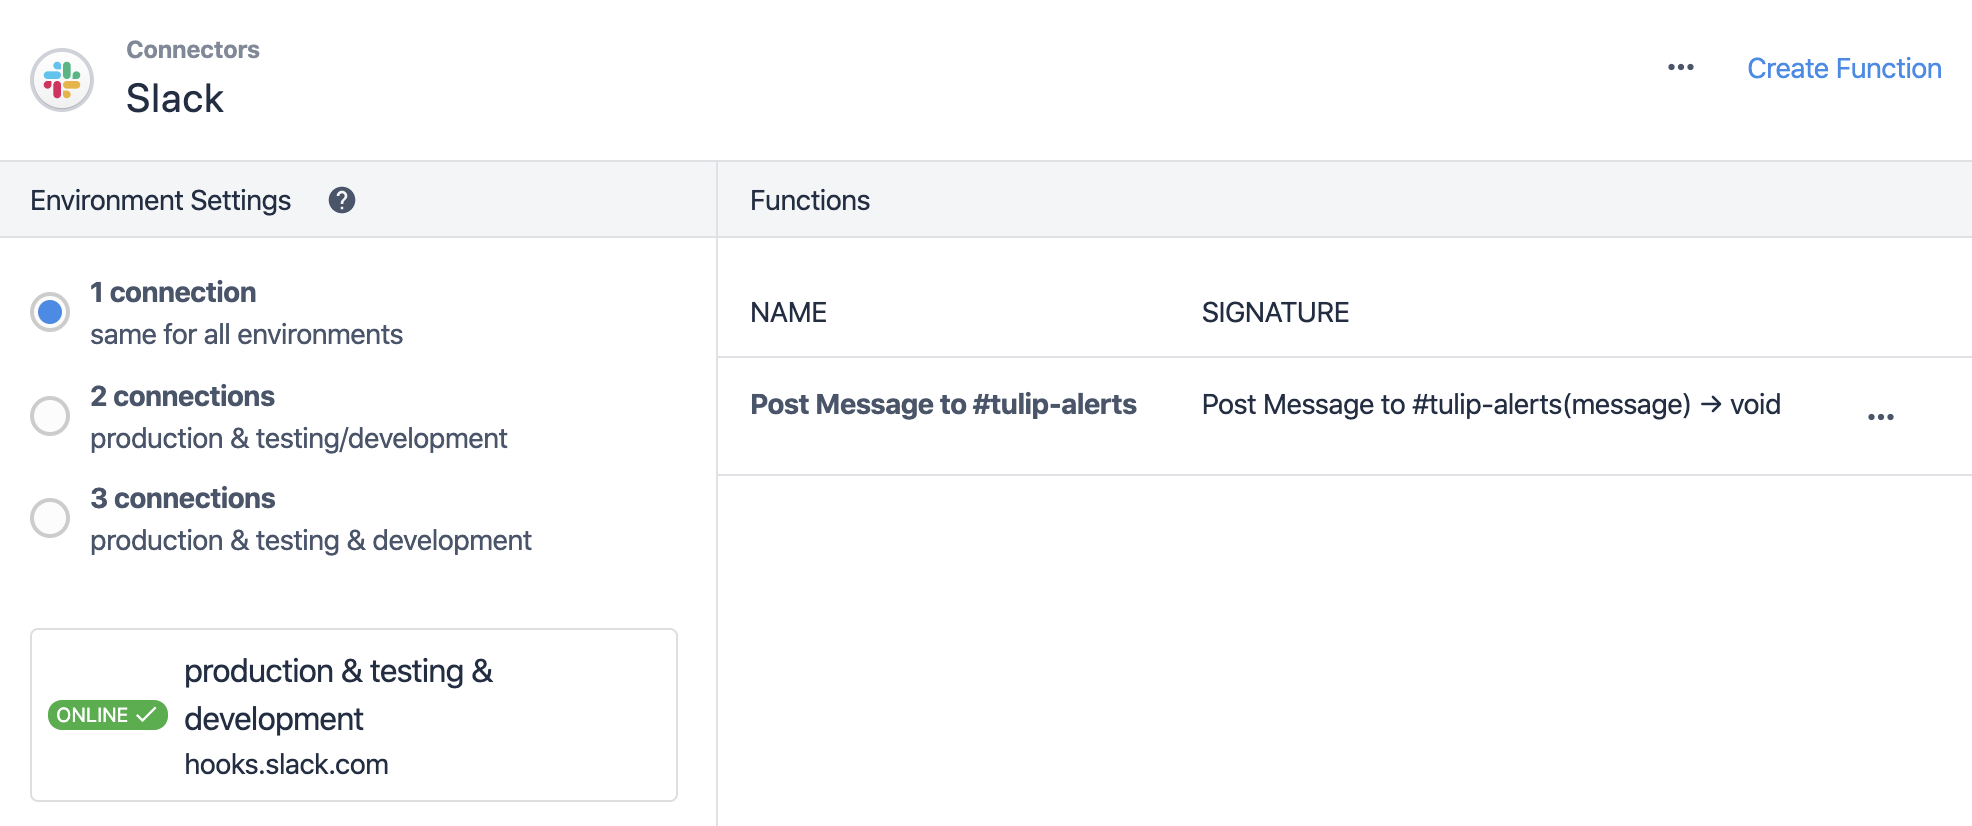
Your connection should now show as "ONLINE":

Next, click "Create Function" in the top right to setup the function that you will call in your Tulip app to send a message.
Give your function a helpful name, and select "POST" for the request type. In the URL bar, paste in the end of the Slack webhook, starting with "services/..."

Under the Inputs panel, add a text input titled "message". You can include a test value as well:

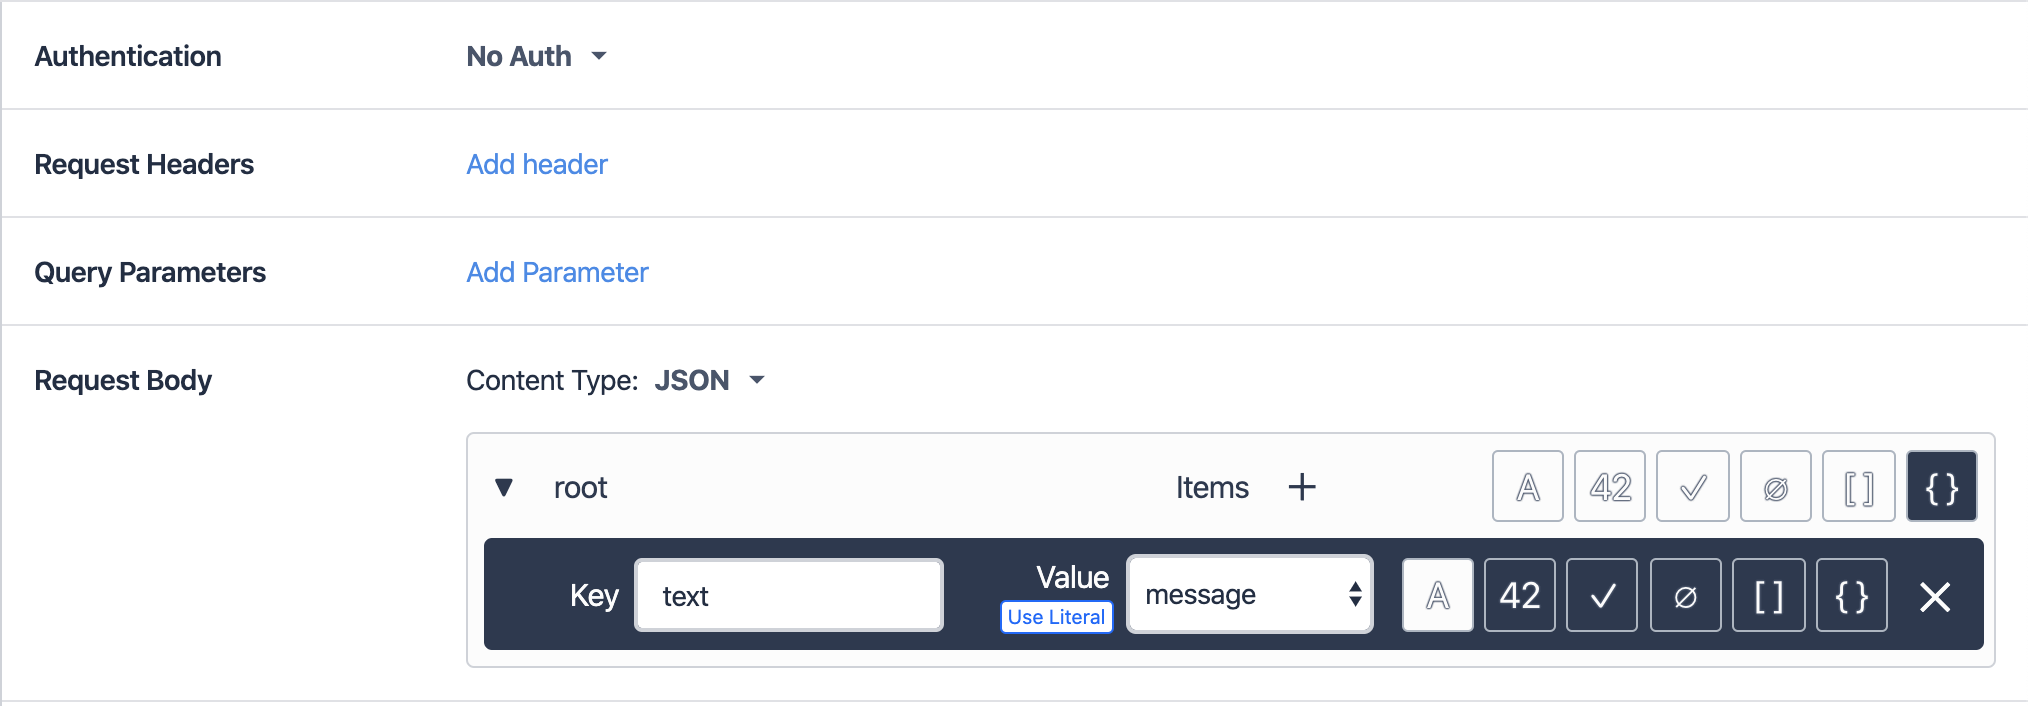
In the request configuration panel, set the Request Body Content Type to JSON, then use the + button to add an Item under root. For this item, set the Key to "text" and the Value to the "message" input you defined in the last step.
Now you can verify that your function works by hitting the "Test" button in the upper right. You should see a simple "200 OK" response in the Test Results panel, and your test input should appear as the message in your Slack channel:


Once you have successfully tested your function, click "Save Changes" in the upper
Send a Message from an App
Now we are ready to use our function in a Tulip app. Open an existing app or create a new one for testing:

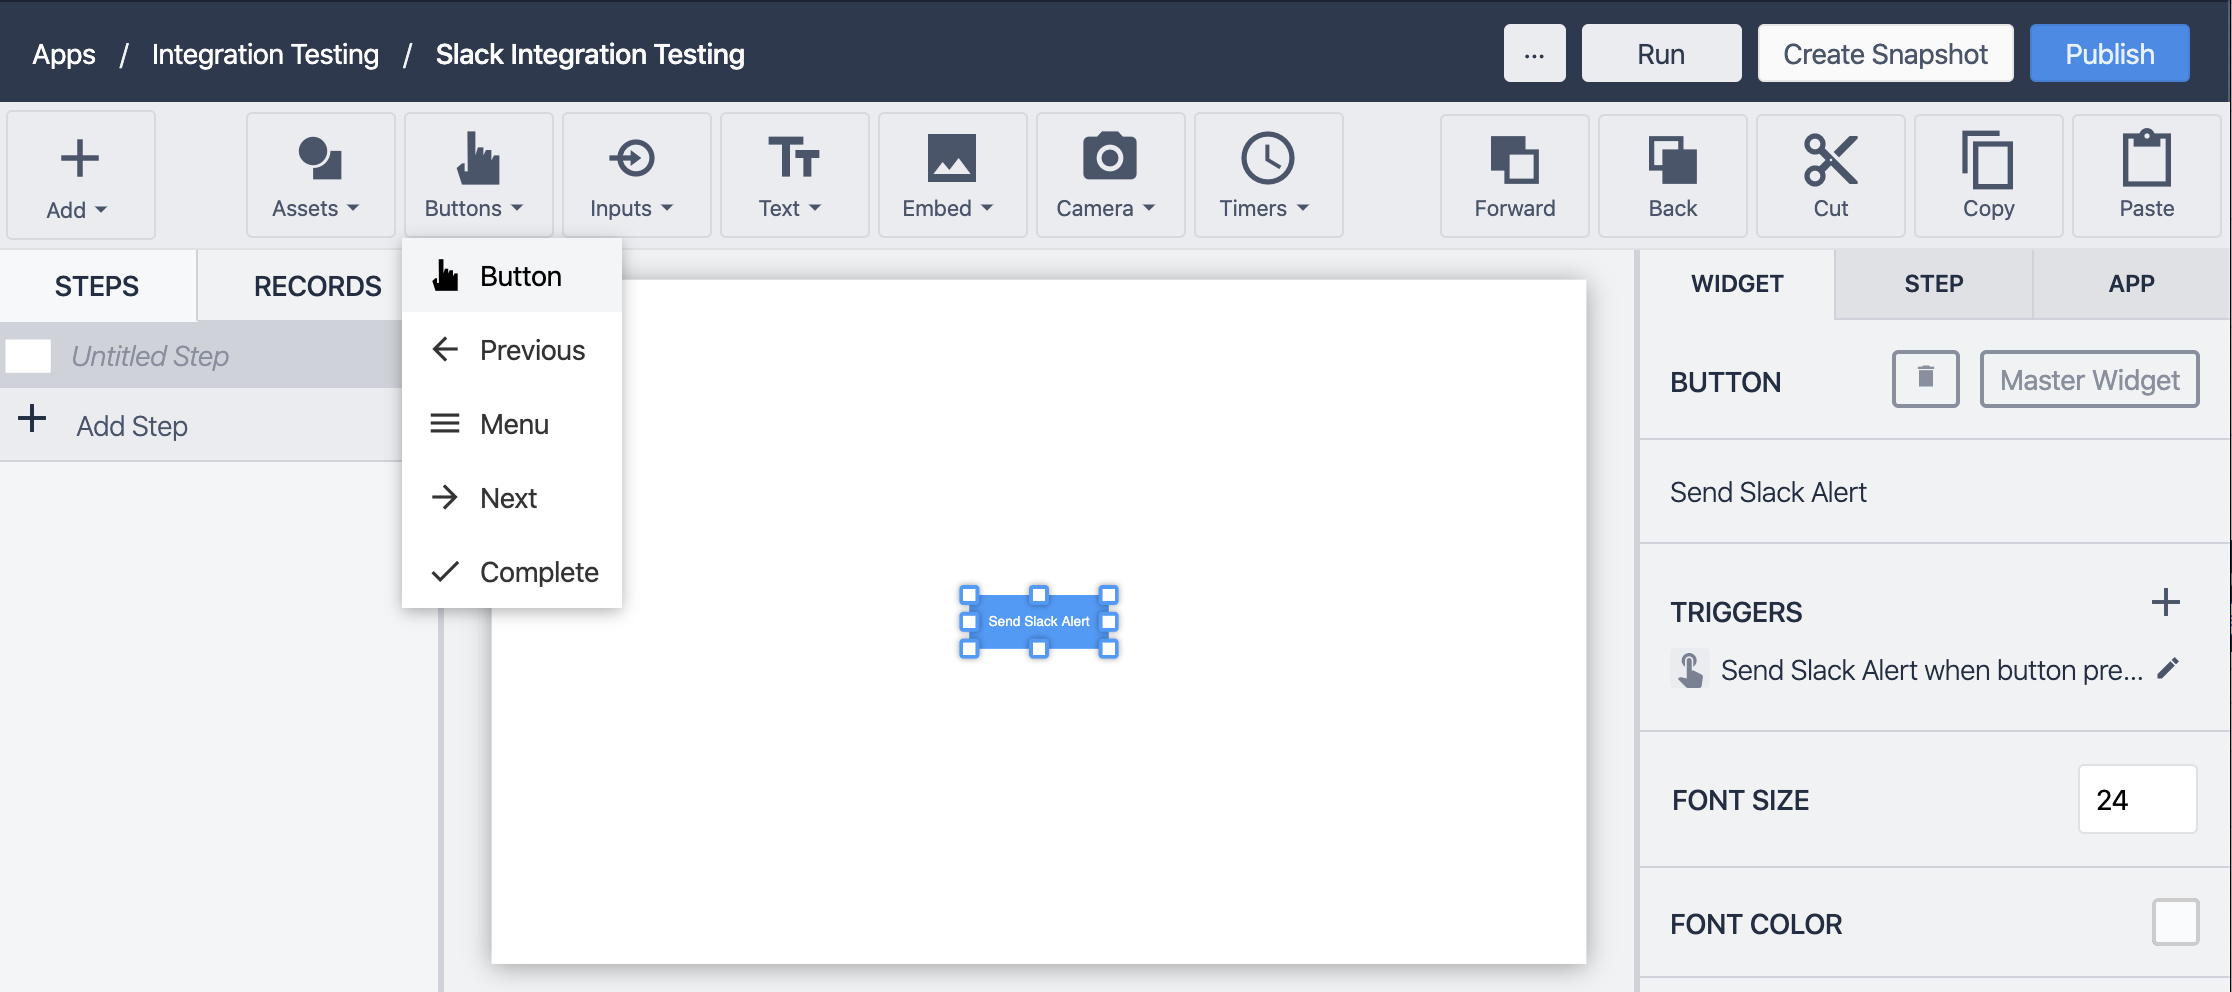
In your chosen Step, add a button, and then add a trigger to that button that runs the connector function:
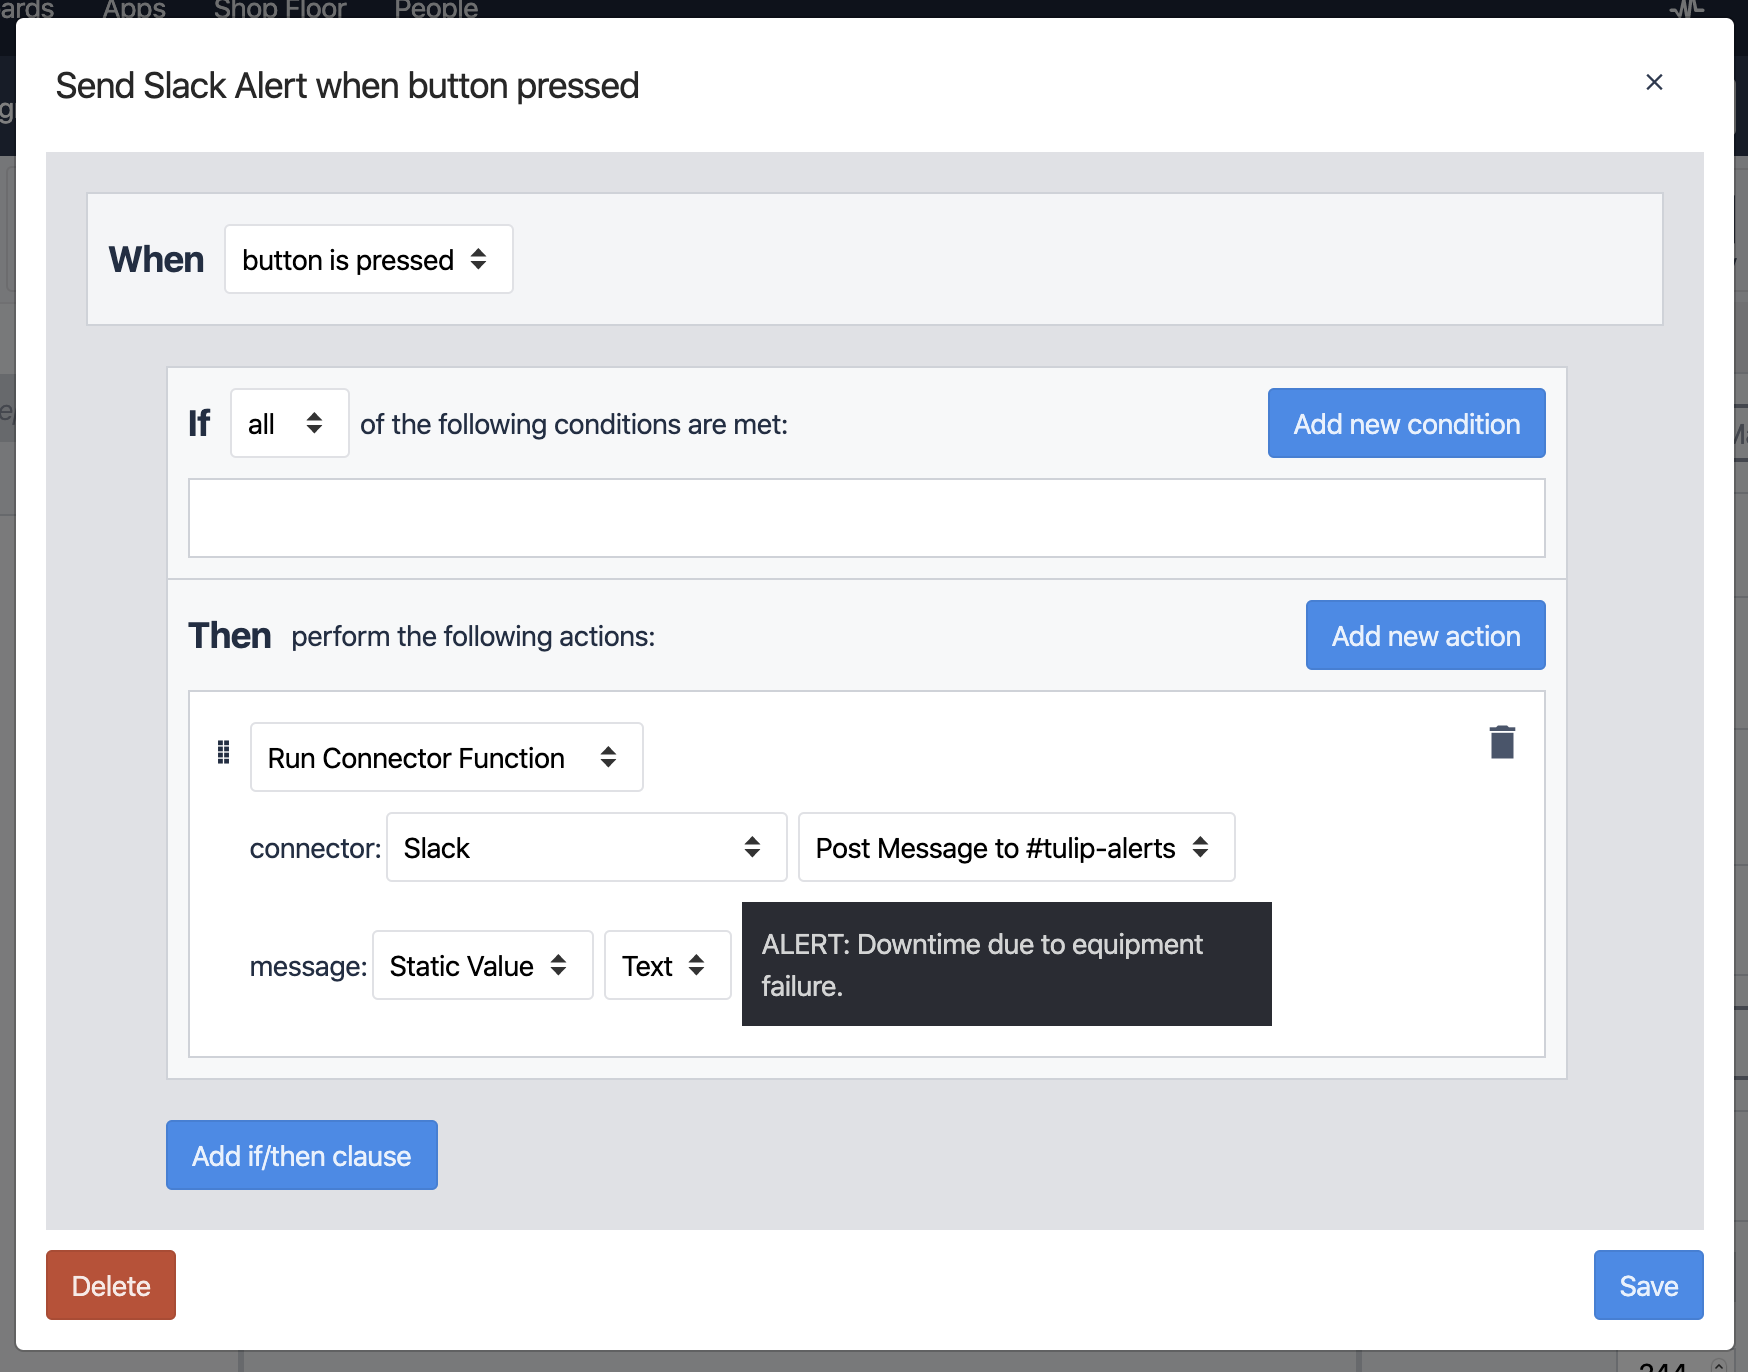
In the above example we set the "message" input to a simple static text value, but you could insert fields into that text to provide additional information (or use a variable):
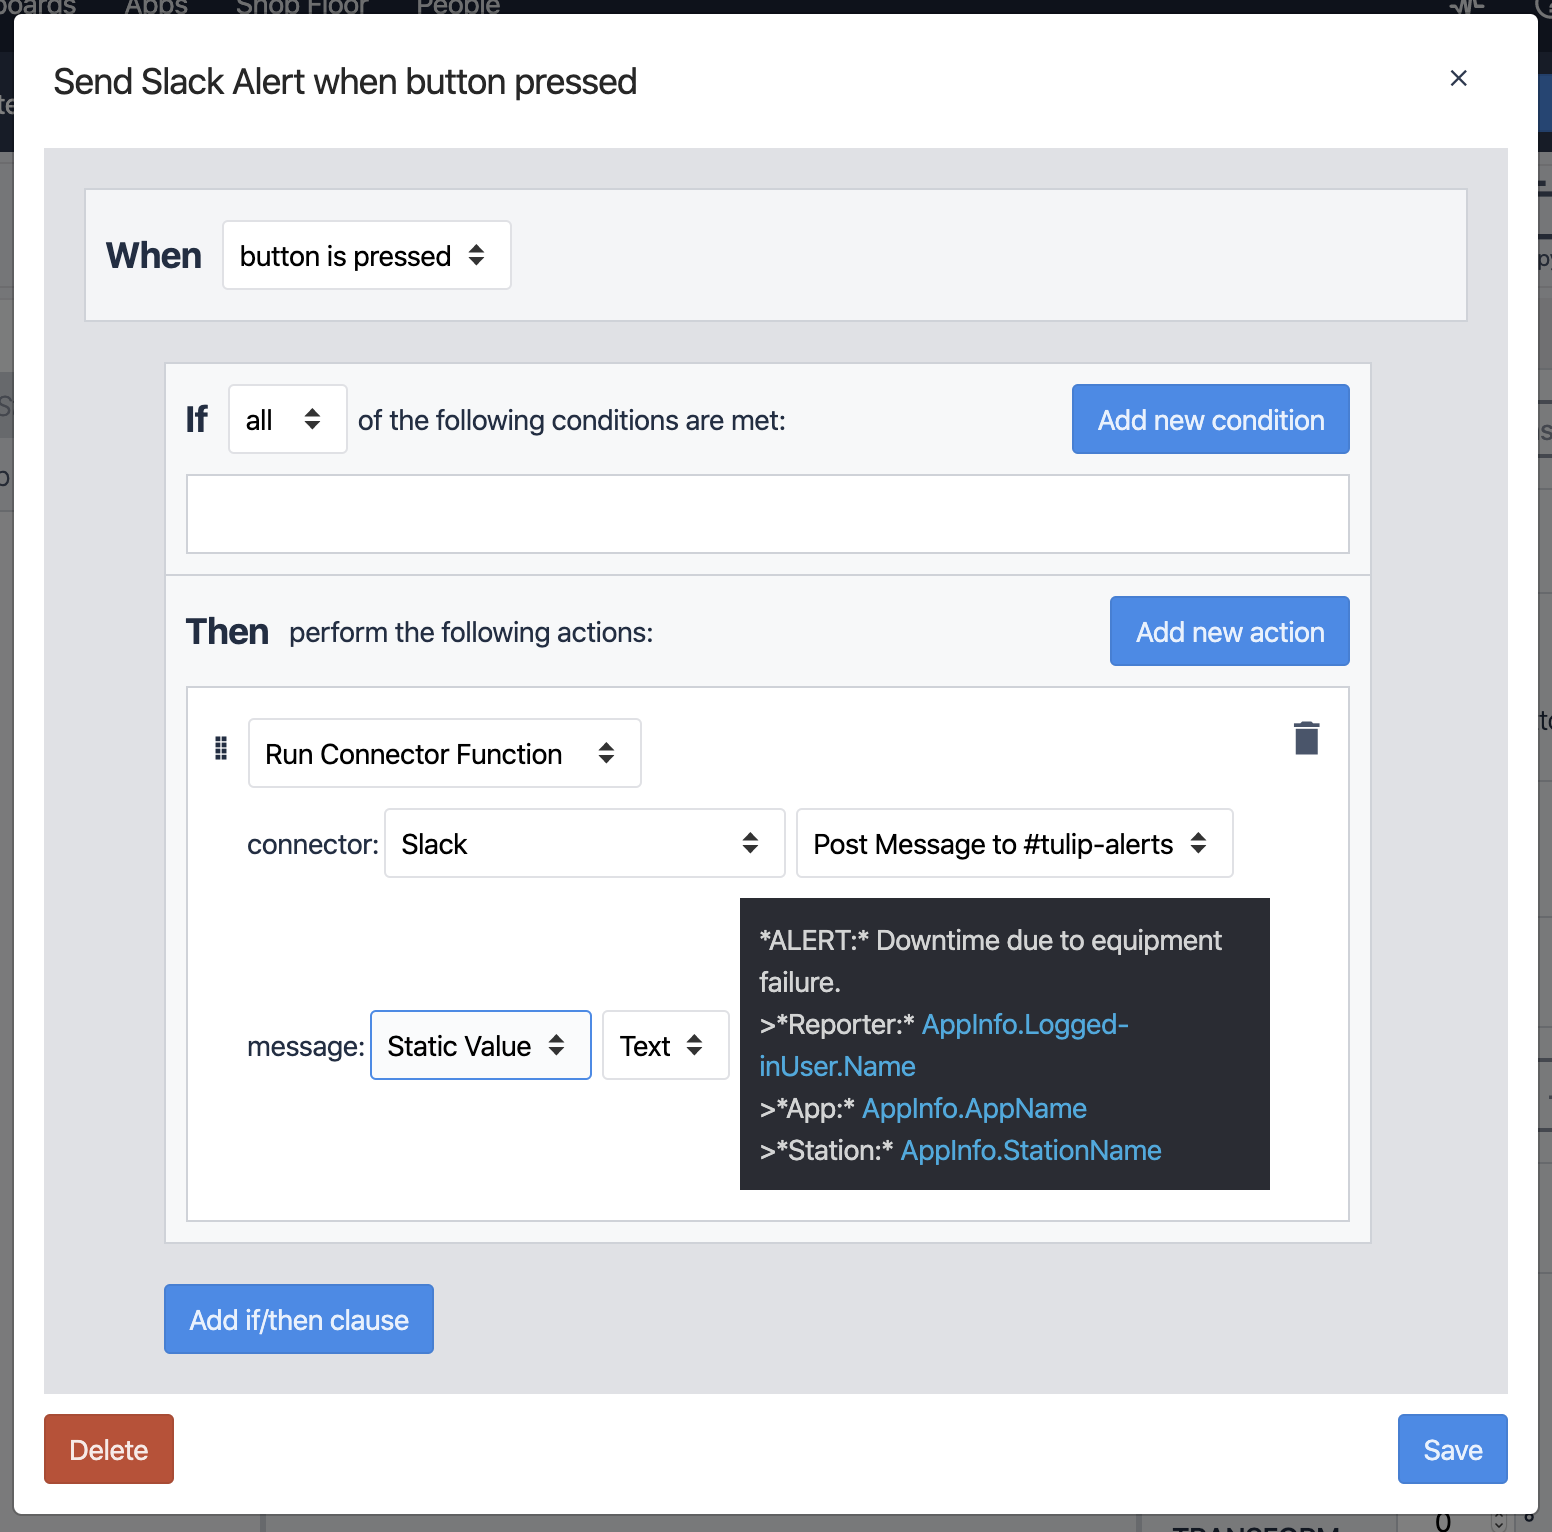
In this example we are using some special characters like * and > to format the final message. For more information on formatting Slack messages, see Formatting text for app surfaces.
Save your trigger, then run your app and click the button to test the functionality. If all goes well, you will see a message appear in the Slack channel with the information you chose in the trigger:
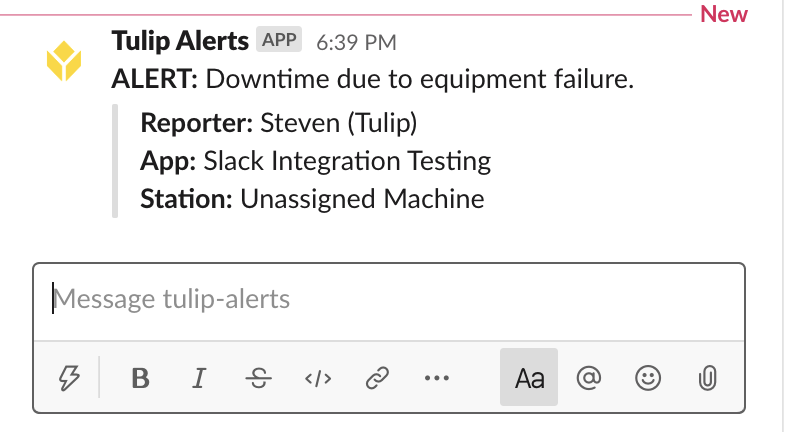
Success! You can now send alerts, updates, and other types of messages directly from your Tulip apps to Slack, leveraging the strengths of both platforms.
Note: a Slack app webhook is channel-specific, but if you want to post to multiple channels, you can add additional webhooks to your slack app and then create new functions within your connector to post to each.
You could even store the webhook URLs in a variable and use that as an input to the connector function to determine which channel the message posts to!
