

Purpose
Here are the different ways that you can configure Edge Devices to work with your company's network settings.
This article explains how to configure your Edge Device to function properly on your network.
This can be done at setup of your Tulip Edge Device or after it has been connected to your Tulip account.
Getting Started
To adjust network settings in your Edge Device, you should first connect your computer to your Edge Device through the Edge Devices' wireless network.
Once you have connected to the Edge Device, navigate to http://10.0.3.1 in your browser and either begin your initial setup process or log in to the Edge Device.
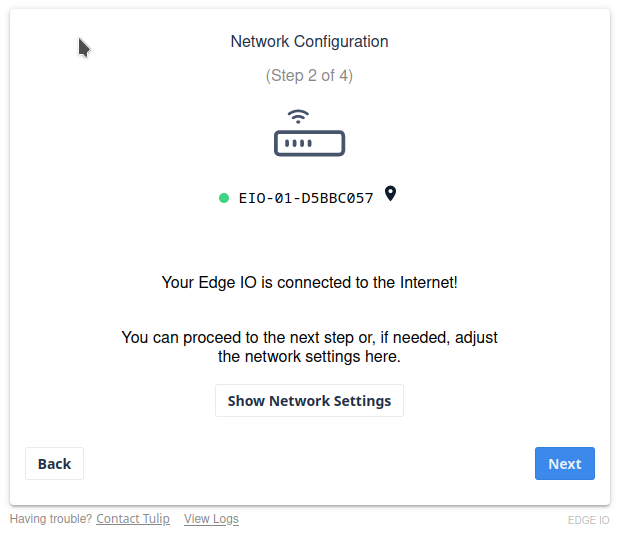
If you are setting up your Edge Device the first time, proceed normally until you have reached the second step and click Show Network Settings.
If you have already finished setup, you will be redirected to the dashboard page after logging in, where you can update these settings.
The screen might differ based on device type.
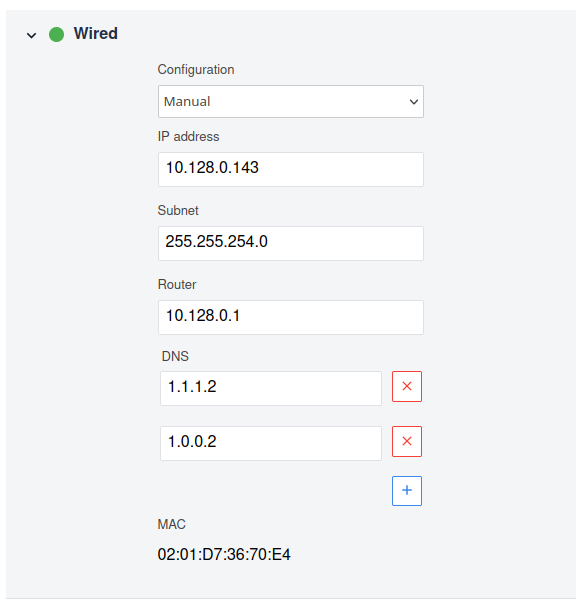
Setting Up the Wired Connection
Your Edge Device can be configured to operate either using DHCP or manual. If you are using DHCP, your Edge Device will automatically be assigned the following:
- IP
- Subnet
- Router
You will be able to set and/or add DNS locations.

If you choose to setup your Edge Device to operate with manual network settings, please ask you IT department for help. This will enable you to configure the following
- IP address
- Subnet
- Router
- DNS
Setting up your Edge Device to Use a Proxy Server
If your network requires all traffic to be routed through a proxy server for security reasons, this can be set on the same page as the wired connection above. To configure your proxy follow the steps below.
- Click on Proxy to expand the proxy section.
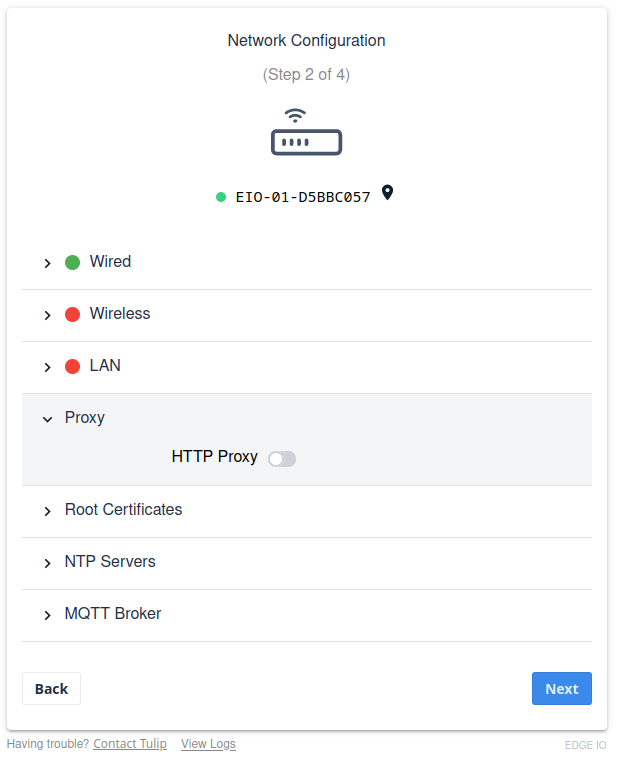
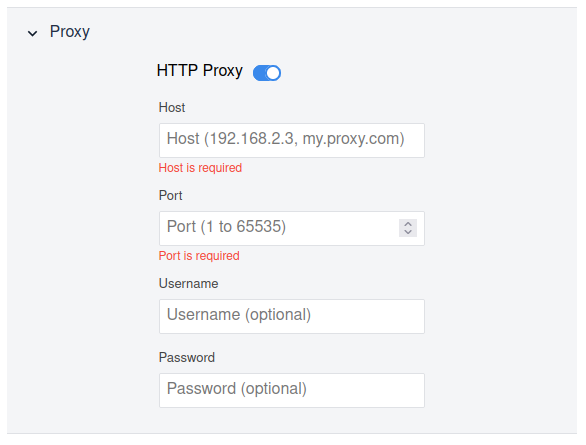
- Click on HTTP Proxy and it will turn blue to indicate it is enabled.

- You will now see the Proxy Configuration Utility for the Device Portal, which looks like the following:
-
Enter the host name of your proxy along with the port, username and password.
-
Click Next. The Edge Device will now check your network connection and alert you if it is having trouble.
Adding Custom CA Certificates on Your Edge Device
If you are using a proxy that requires a custom CA certificate, you can add that certificate or "cert" to the Edge Device in the same place as the proxy.
We only support base 64 encoded format.
To add a custom cert:
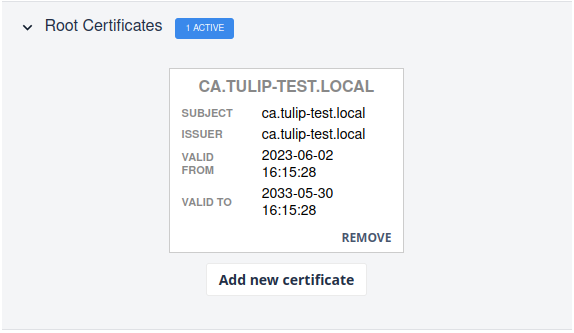
- Click on Root Certificates to expand it.

-
Click Add New Certificate.
-
A file explorer opens and you can upload the custom cert saved on your computer to the Edge Device.
-
When you have uploaded your cert, click Next/Save to save the cert and test your network connection. If the Edge Device cannot connect to the internet, you will get an alert. You can check the network health by navigating to the Diagnostics page and selecting Network Health from the dropdown.
-
The network setup page displays all added certs. You can add up to 10 certs.
Did you find what you were looking for?
You can also head to community.tulip.co to post your question or see if others have faced a similar question!