
Learn how to use Edge MC's Connector Host to communicate with Node-RED devices
In the following article we will...
- Set-up your Edge MC's Connector Host
- Build a Connector Function to communicate with your device
- Build an app to communicate with your device
Prerequisites
- Please make sure you've enabled Node-RED on your Edge MC. For instructions on how to do so, see this article.
Summary
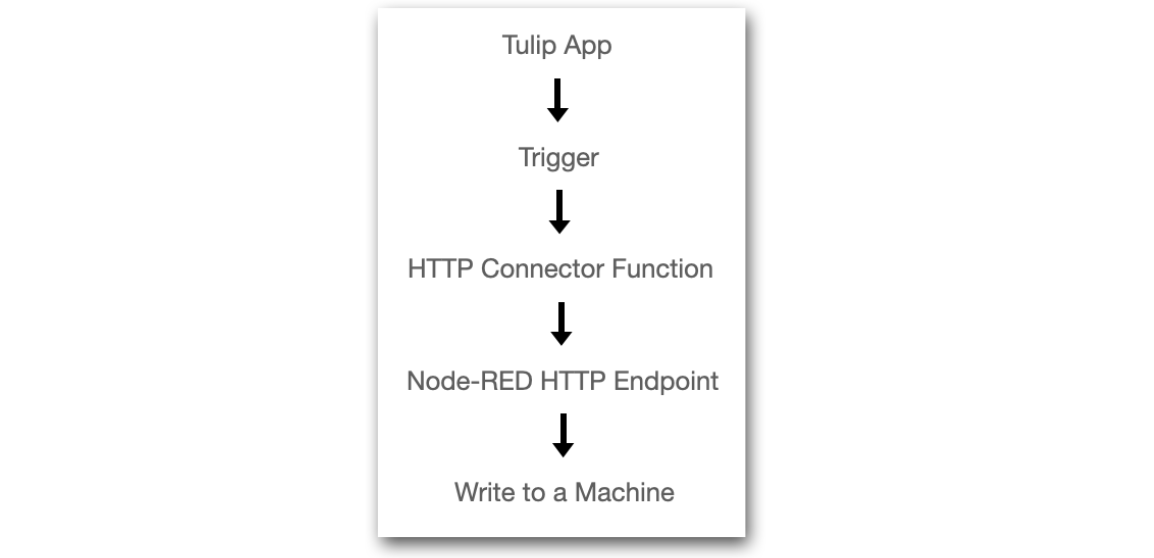
By leveraging your Edge MC's Connector Host, you can use an App to trigger Connector Functions that communicate with Node-RED running on a Tulip Device. This will ultimately give you the ability to write to machines from a Tulip app.
Setting up your Edge MC Connector
Note: If you're not familiar with Connectors and Connector Function in Tulip, check out this article.
To get started, first navigate to your Connectors page, and click Create Connector. A modal will appear, prompting you to fill in the following information:
- Name: Choose a name for your Connector
- Description: Choose a name for your Connector
- Connector Type: Select HTTP
Next, you will need to specify the Connector's details. Click on the production & testing & development button to open the Edit Connector Details modal, and enter the following information:
- Running On: Select your EMC Connector Host Note: In the event that you don't see this, navigate to your Edge MC portal and make sure Connector Host has been enabled.
- Host: Enter localhost
- Port: Enter 1880 (this is the port Node-RED is running on)
- TLS: Enter No
There is no need to add headers or certs. Now you're reading to click Test, and verify your connection is passes. Finally, click Save.
Creating a Connector Function
Now that you've successfully set-up your Connector, you're ready to start building connector functions to communicate with your Tulip devices. In this example Node-RED will act as a HTTP server.
To set-up your connector function you will need to configure the function in Tulip, as well as in your Node-RED editor. In this example, we will be building a simple function that takes the input of firstName and lastName, and returns a response of "Hello firstName lastName!", as well as a timestamp.
Building the Connector Function in Tulip
Navigate to the Connector for your Edge MC, and select Create Function in the top right corner.
Select GET as the Request Type, and enter the endpoint: /helloWorld. While this may feel arbitrary, in a later step we will configure this endpoint in the Node-RED editor:

Configure the inputs of the function to include First Name and Last Name:

In the Request Body, select Content Type: JSON, and set the following keys for the inputs. These will be referenced later in the Node-RED editor:
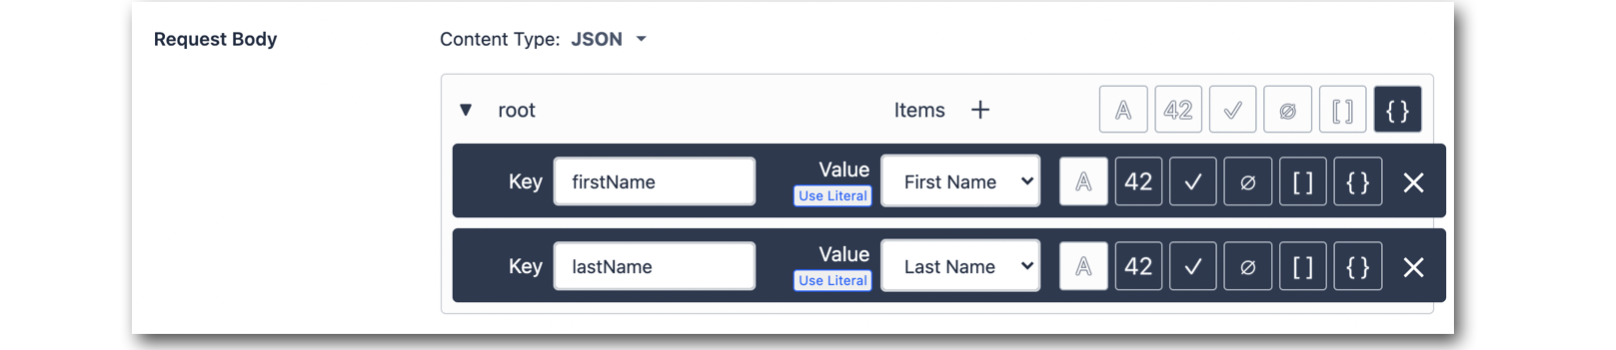
Now add the following outputs to the Connector Function, Message and Time. Add the associated Body to the outputs, so they can referenced in the Node-RED editor:

Next, verify that your Response Type is set to be JSON.
You've now finished configuring the Connector Function on the Tulip side. Click Save, to save the connector function.
Building the flow in Node-RED
It's now time to open the Node-RED editor from your Edge MC portal, and set-up a new flow.
First, drag and drop a http in node from the network section, into your editor. Set the node to have the following configuration:
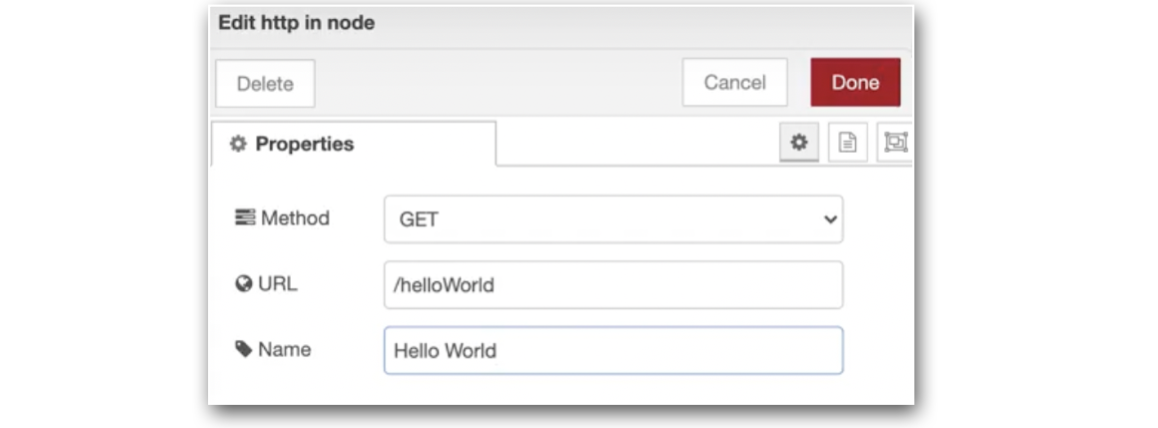
It's important that the Request Method and Request URL match the connector function you configured in Tulip.
Next, drag and drop a change node with the following configuration:
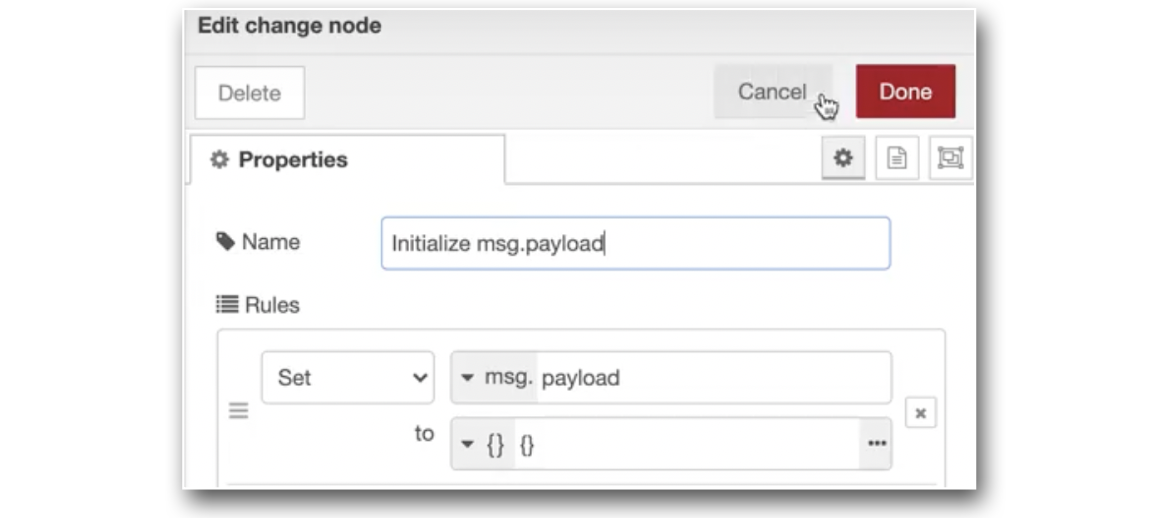
Set msg.payload to be JSON, and leave it as an empty object: {}
Now insert a template node. This is where you can take properties of the incoming message (connector function inputs), and build a string with them (e.g. "Hello World").
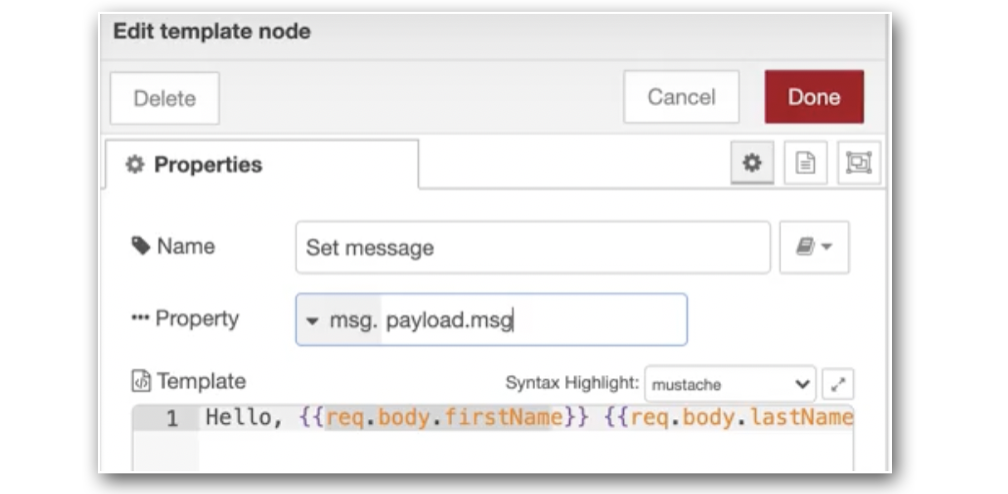
Hello,

##{{req.body.firstName}}

##{{req.body.lastName}}!
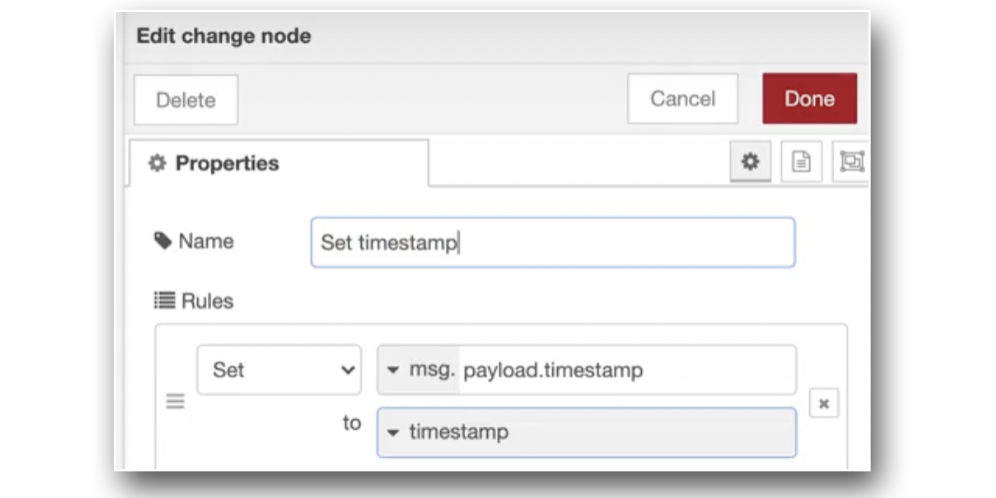
Now it's time to add another change node, to capture a timestamp, and send it back as part of the response. Configure the node like the following:
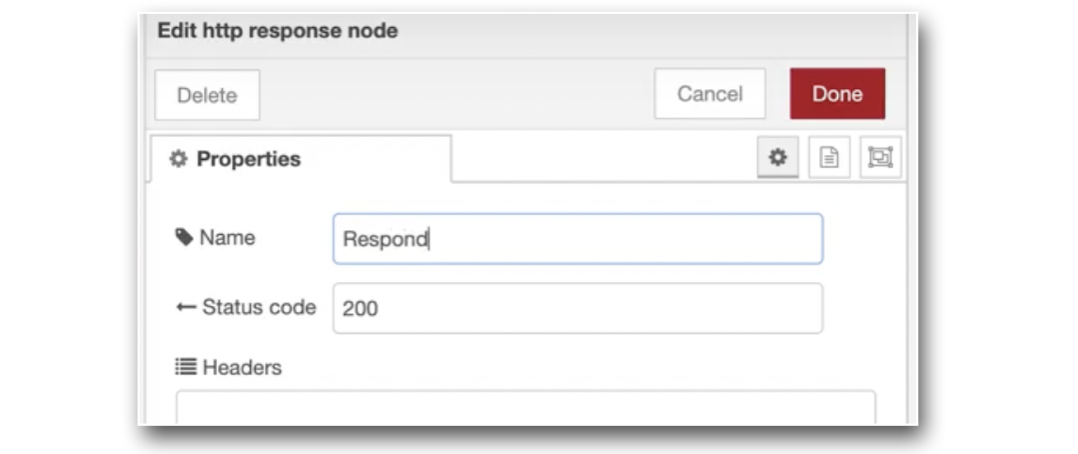
At this point our flow has accepted the inputs being sent from Tulip, and it's now time to configure a response. To do this, drag and drop a http response node. Configure the response to have a Status Code of 200, OK:
The overall flow is now finished, and should look something similar to the following:

Please note the green nodes in the above flow are debug nodes, utilized to show your payload in the Node-RED editor.
The final step will be to Deploy your flow from the Node-RED editor. You will now be able to Test you connector function from the Tulip test environment,
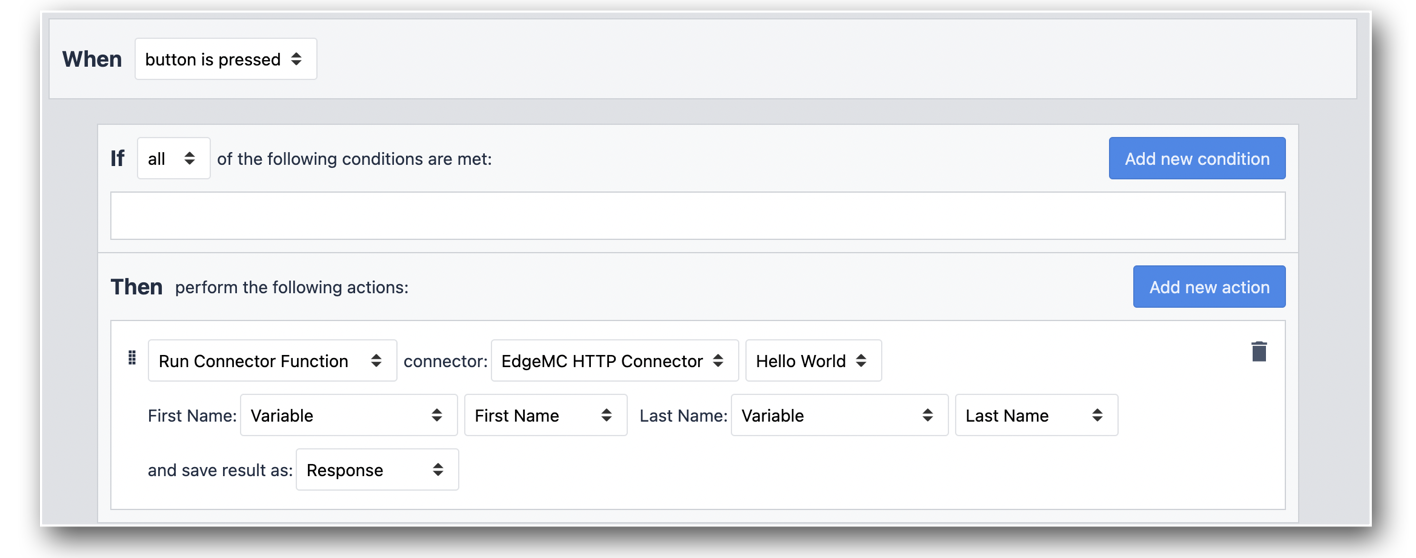
Running the Connector Function through an App
Now that you've set up your connector, and a connector function that effectively communicates to your device using Node-RED as an http server, you're ready to integrate this functionality into your apps.
In this example, there are two input boxes to accept the firstName and lastName variables that will be sent in our request:
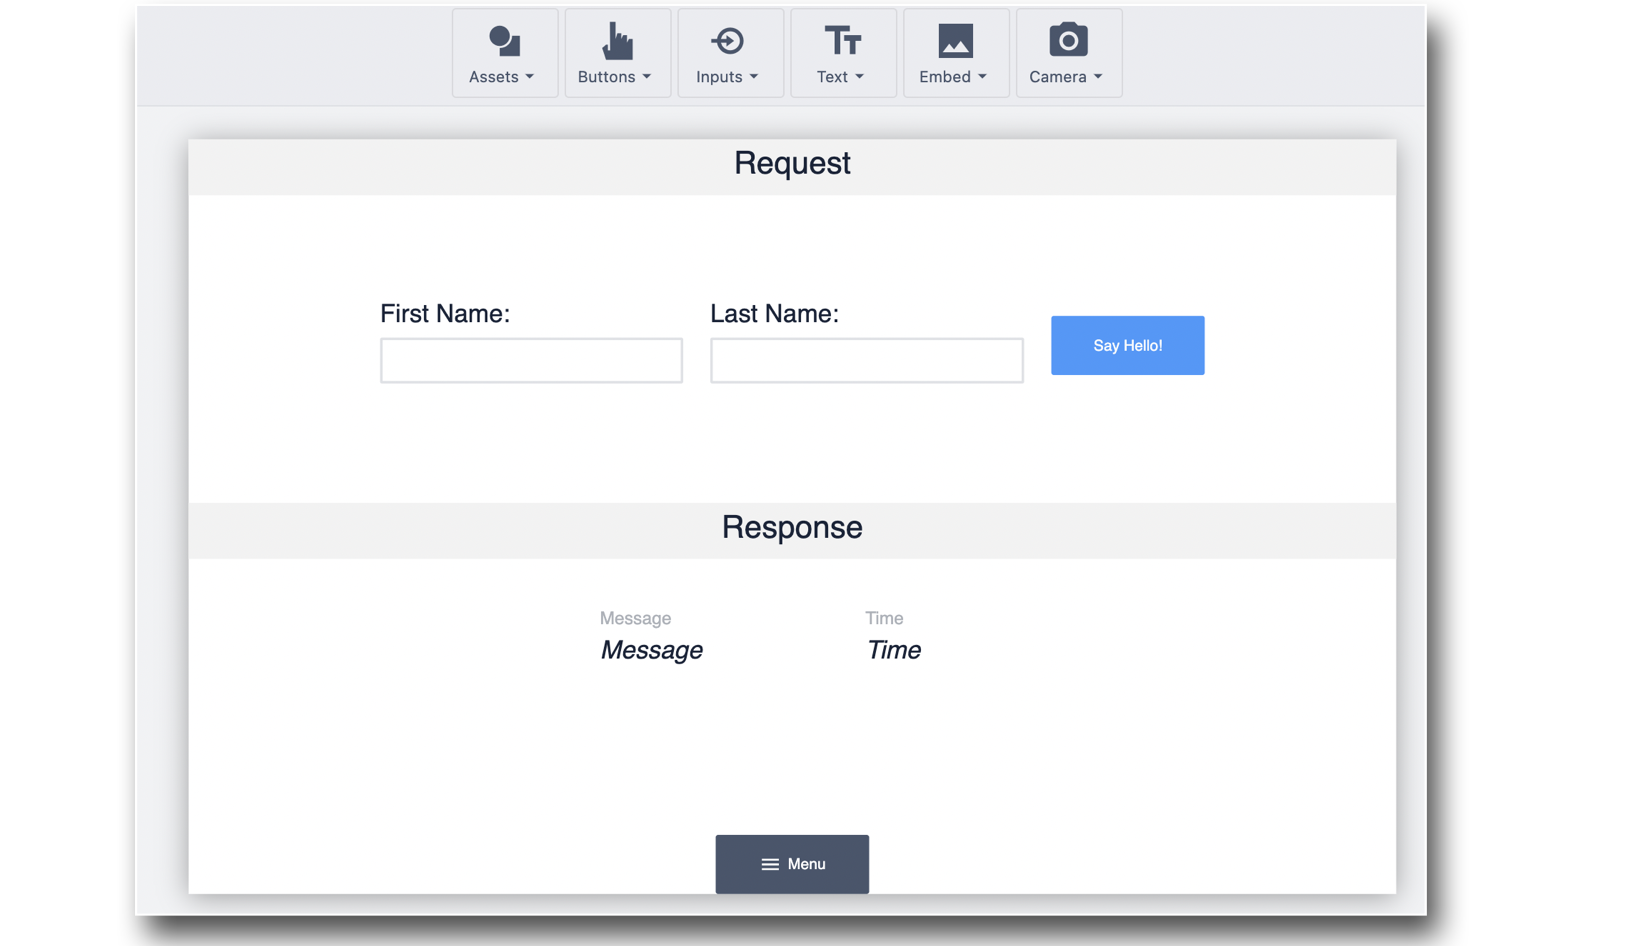
In the button "Say Hello!", enter the following trigger to call the connector function:
Once you've entered your inputs, and clicked "Say Hello!" you will have effectively sent an http request to your Tulip device, and received a JSON response.
To test your app, click on the Test button in your App Editor to enter Development Mode!