Using Vision's Snapshot feature with an External OCR Service
Capture and send images to an external computer vision service API
While you can accomplish this with Vision - another alternative is to use CoPilot. Read more about CoPilot and OCR here.
Overview
Vision's Snapshot feature can be used in conjunction with Tulip Connectors and an external OCR service. This article will guide you on how to quickly build a robust OCR (Optical Character Recognition) pipeline that detects text from the snapshot taken with a Vision Camera. Leveraging this functionality, you will be able to scan documents, read text from printed labels, or even text that's embossed or etched on items.
The following article will walk through how to use this feature with Google Vision OCR. The Google Vision OCR feature is capable of reading text in very harsh image conditions.
The steps this article will take you through:
- Setting up Tulip Vision and the Google Cloud Vision API
- How to create a Tulip Connector to the GCV API
- Building an app to take a snapshot, and communicate with the OCR connector function
Prerequisites
Setup Snapshot along with a Camera Configuration
Please make sure you've successfully setup a Vision camera configuration, and are familiar with Vision's Snapshot feature. For more information, see: Using the Vision Snapshot Feature
Enable Google Cloud Vision API and a Google Cloud Platform Project
Create a GCP project, and enable the Vision API by following the instructions as stated in this article: https://cloud.google.com/vision/docs/ocr.
Create an API Key on Google Cloud Platform to be used for Authentication
Follow the instructions stated in the article: https://cloud.google.com/docs/authentication/api-keys to create an API key for your GCP project. You can restrict the usage of this API Key and set appropriate permissions. Please consult your network manager to help you configure this.
Creating a Tulip Connector Function for Google OCR
The connector and connector function you build will be configured to match the type of request expected by the Vision API as stated in the following image:
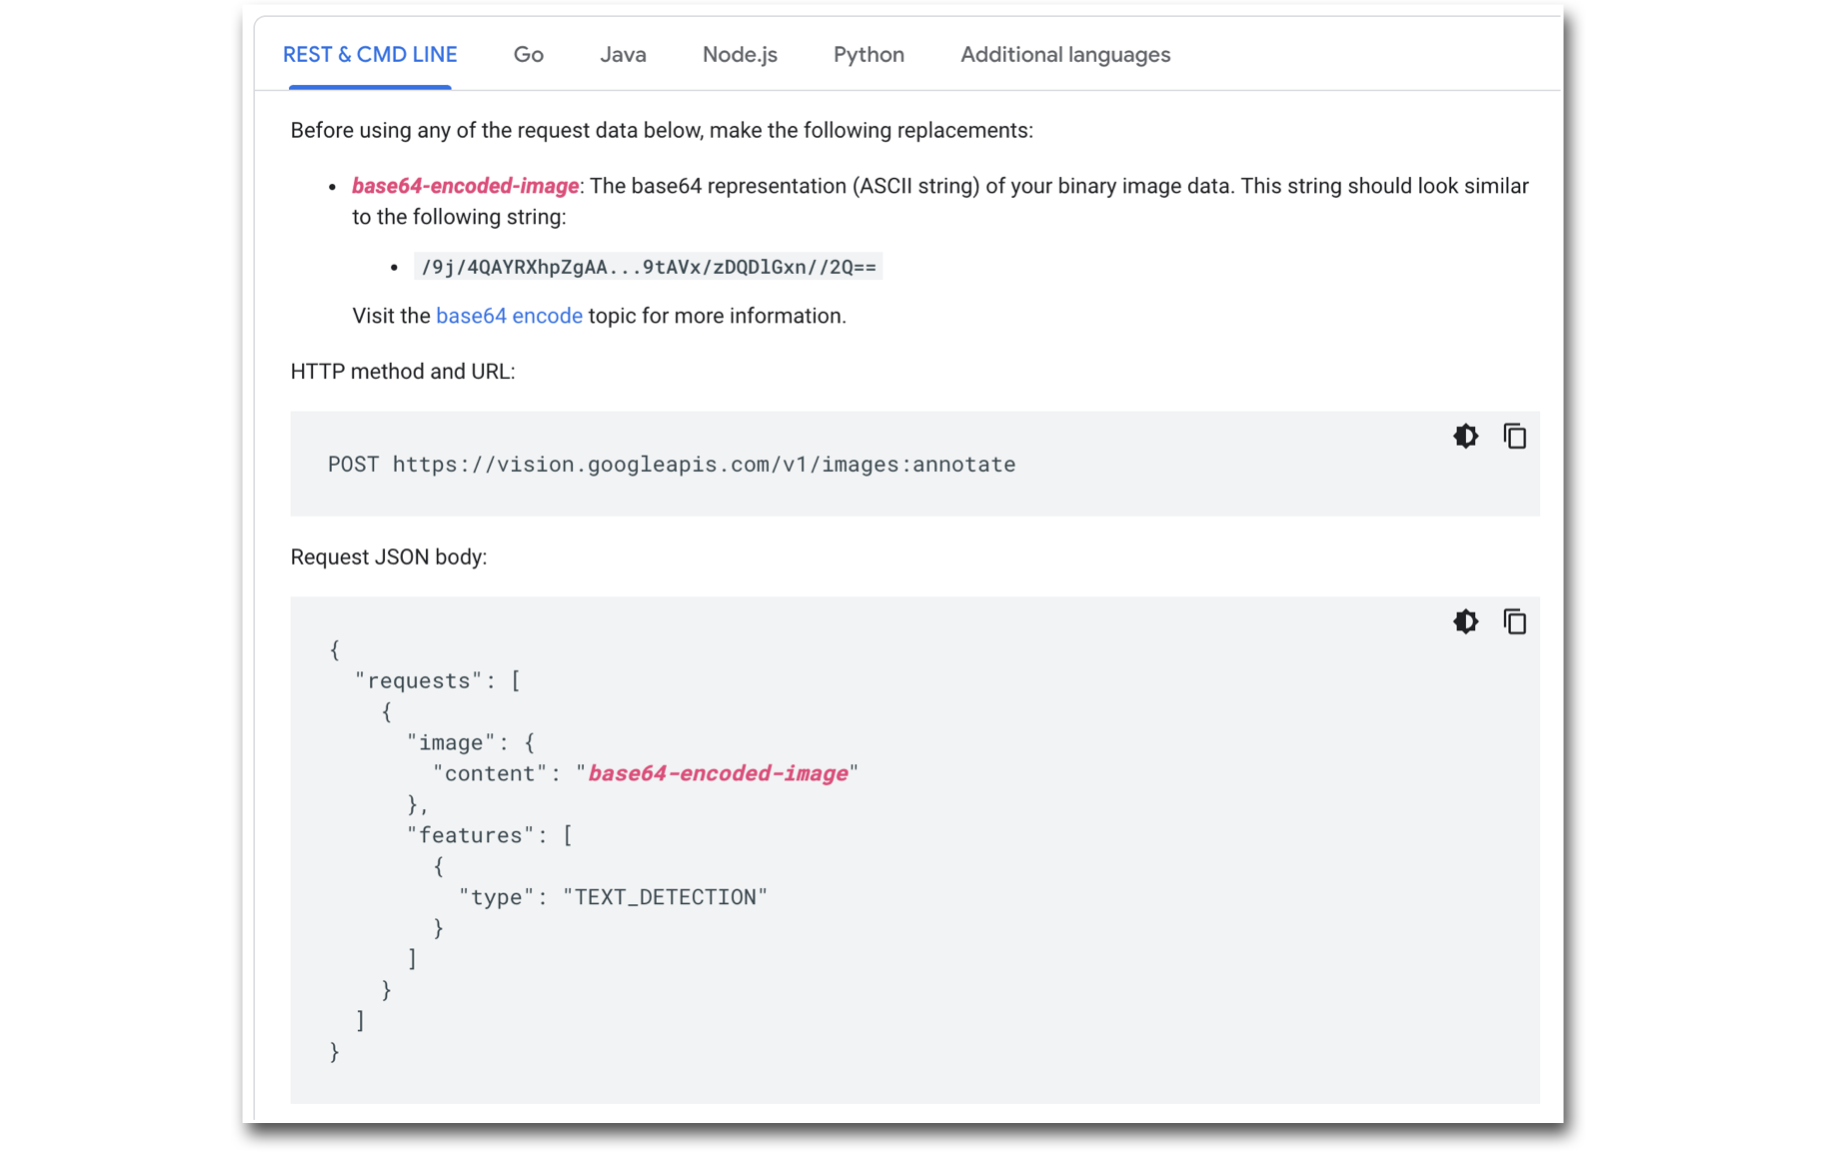
Configuring your Connector Function:
- Create an HTTP Connector.
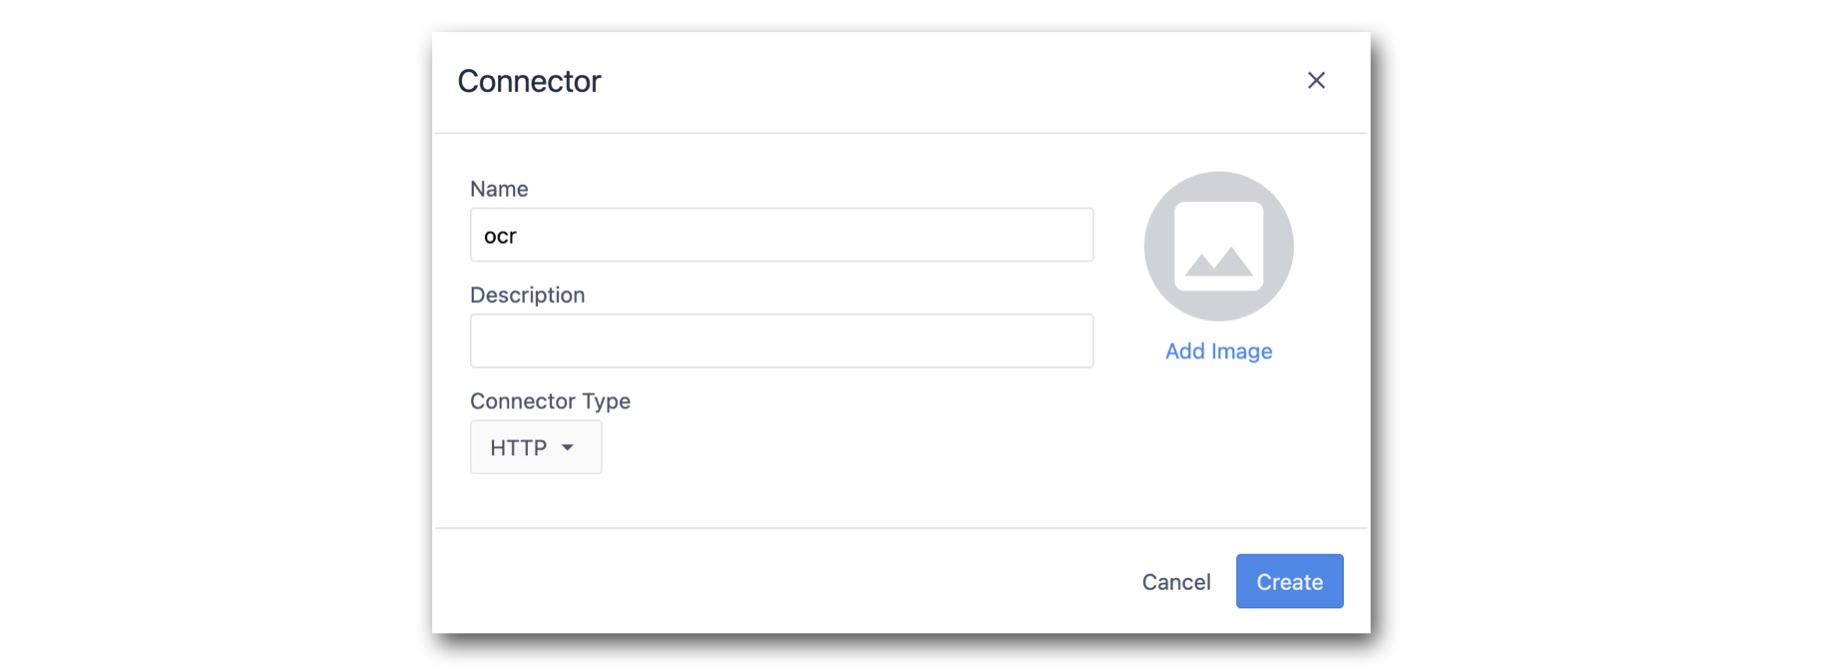
- Configure the Connector to point to the Google Vision API endpoint.
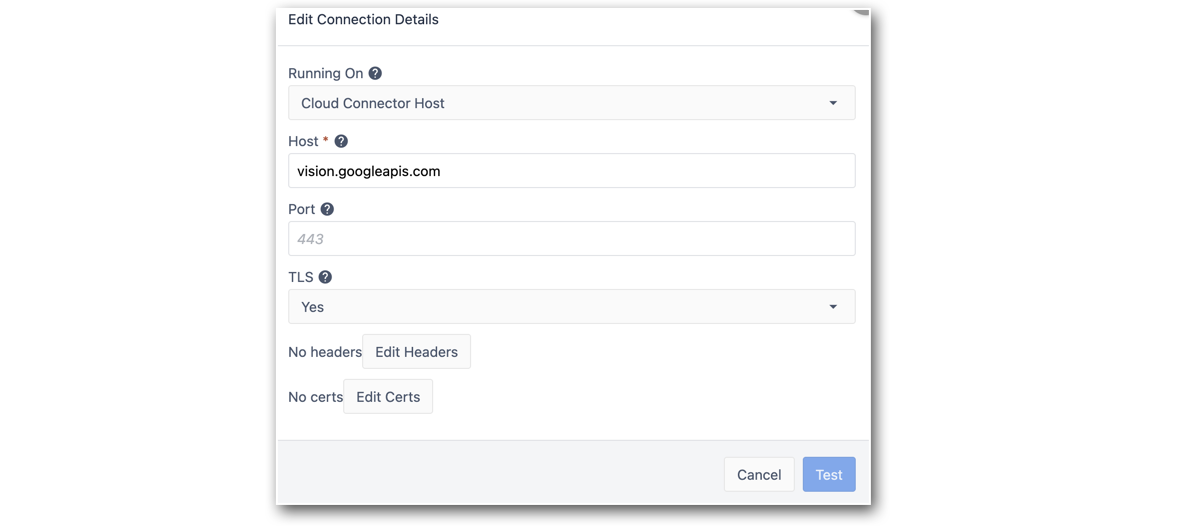
Host: vision.googleapis.com
TLS: Yes
3. Edit the connect's Headers to include the Content-Type.
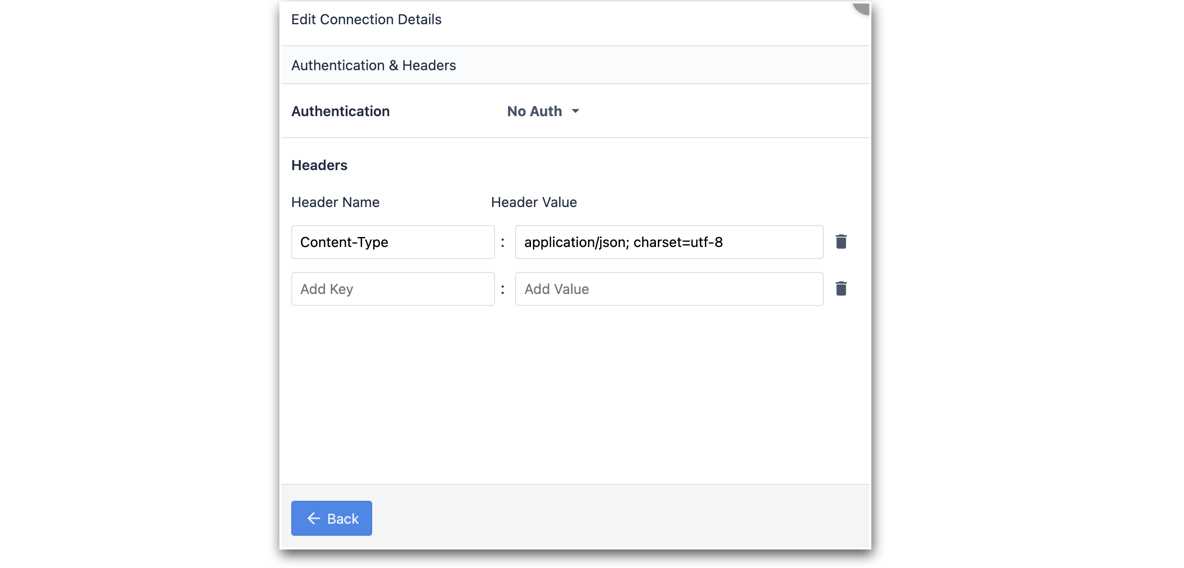
- Test the Connector and Save the configuration.
- Next, create a POST request connector function, and add the following path to the endpoint: v1/images:annotate

- Add an image as an input to the connector function. Make sure the input type is Text.

- Ensure the request type is JSON, and that your Request Body matches your Google Vision API request type:
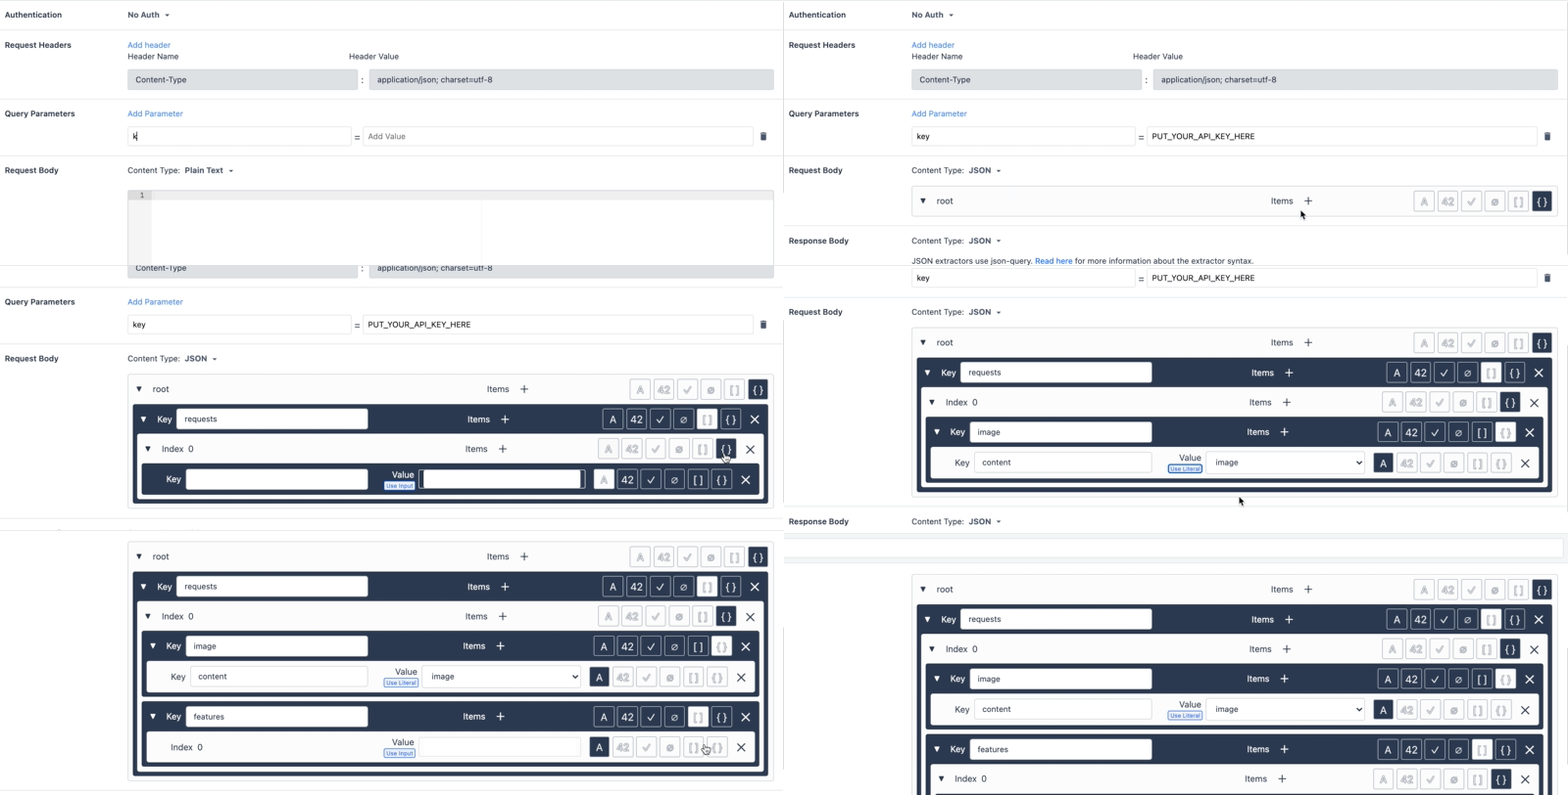
Note: Replace PUT_YOUR_API_KEY_HERE with your own API Key created in the steps above.
8. Next, test this connector function by converting an image of text into a base64string (to do so, you can use this website). Use this string as the test value for your image input variable.
You should receive a response back similar to:

- Set the output variable to point to the .responses.0.textAnnotations.0.description
- Save the connector function.
Creating a Tulip App that uses Snapshots and the Google OCR Connector
- Go to the App Editor and use the app created while setting up the Snapshot Trigger: Using the Snapshot Feature
- Next, create a button with a Trigger to call Connector Function. Use the image Variable that is stored by the Snapshot output as input to the connector function.
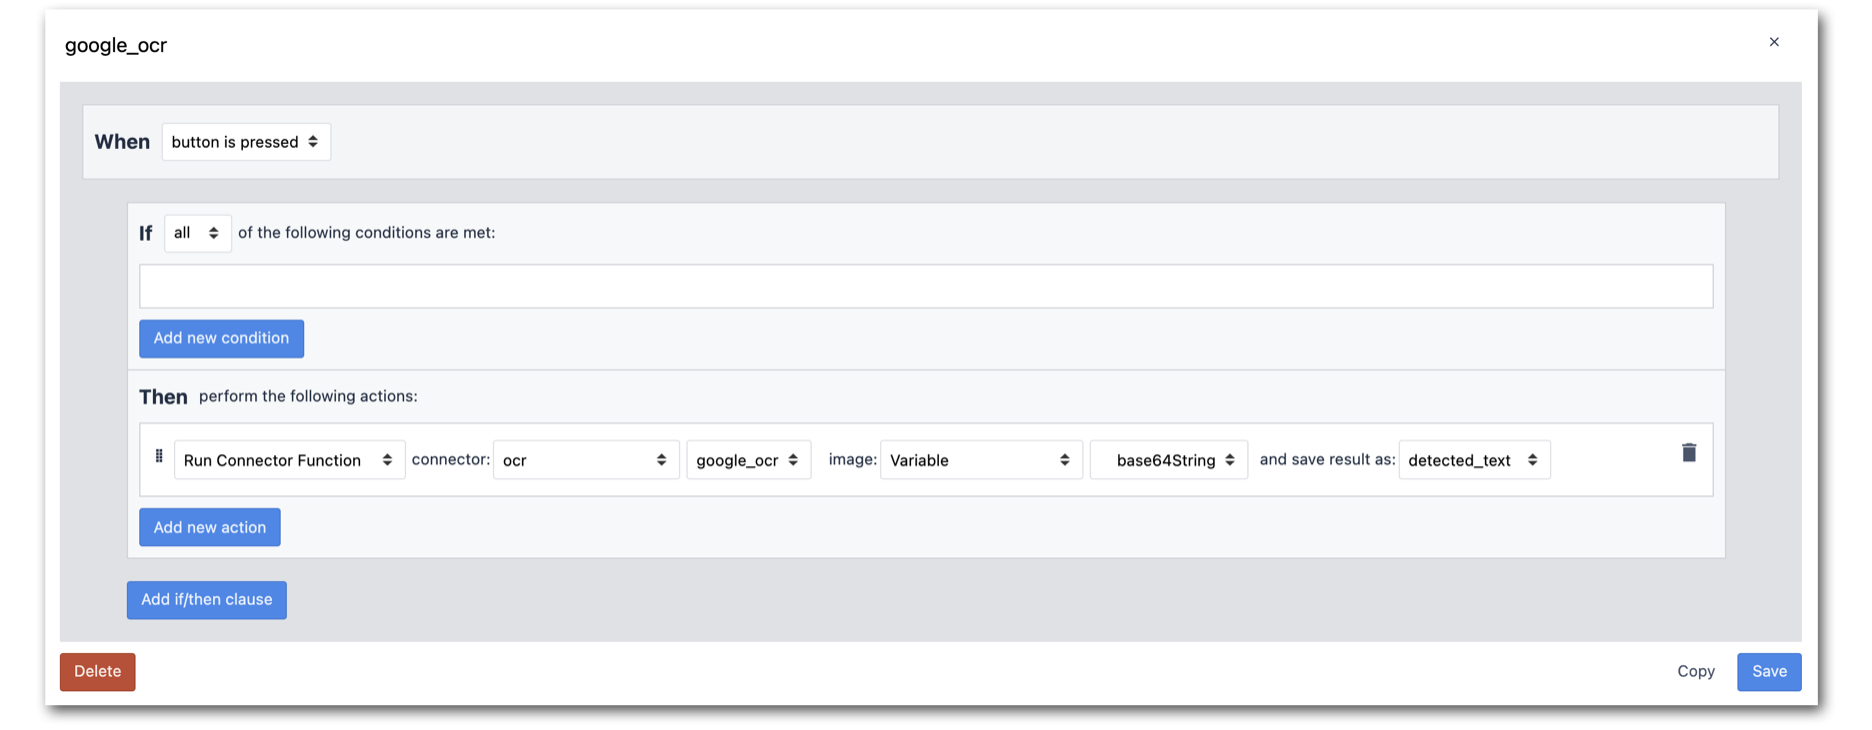
- Add a Variable, detected_text, to your app Step so you can view the results returned from the connector function:
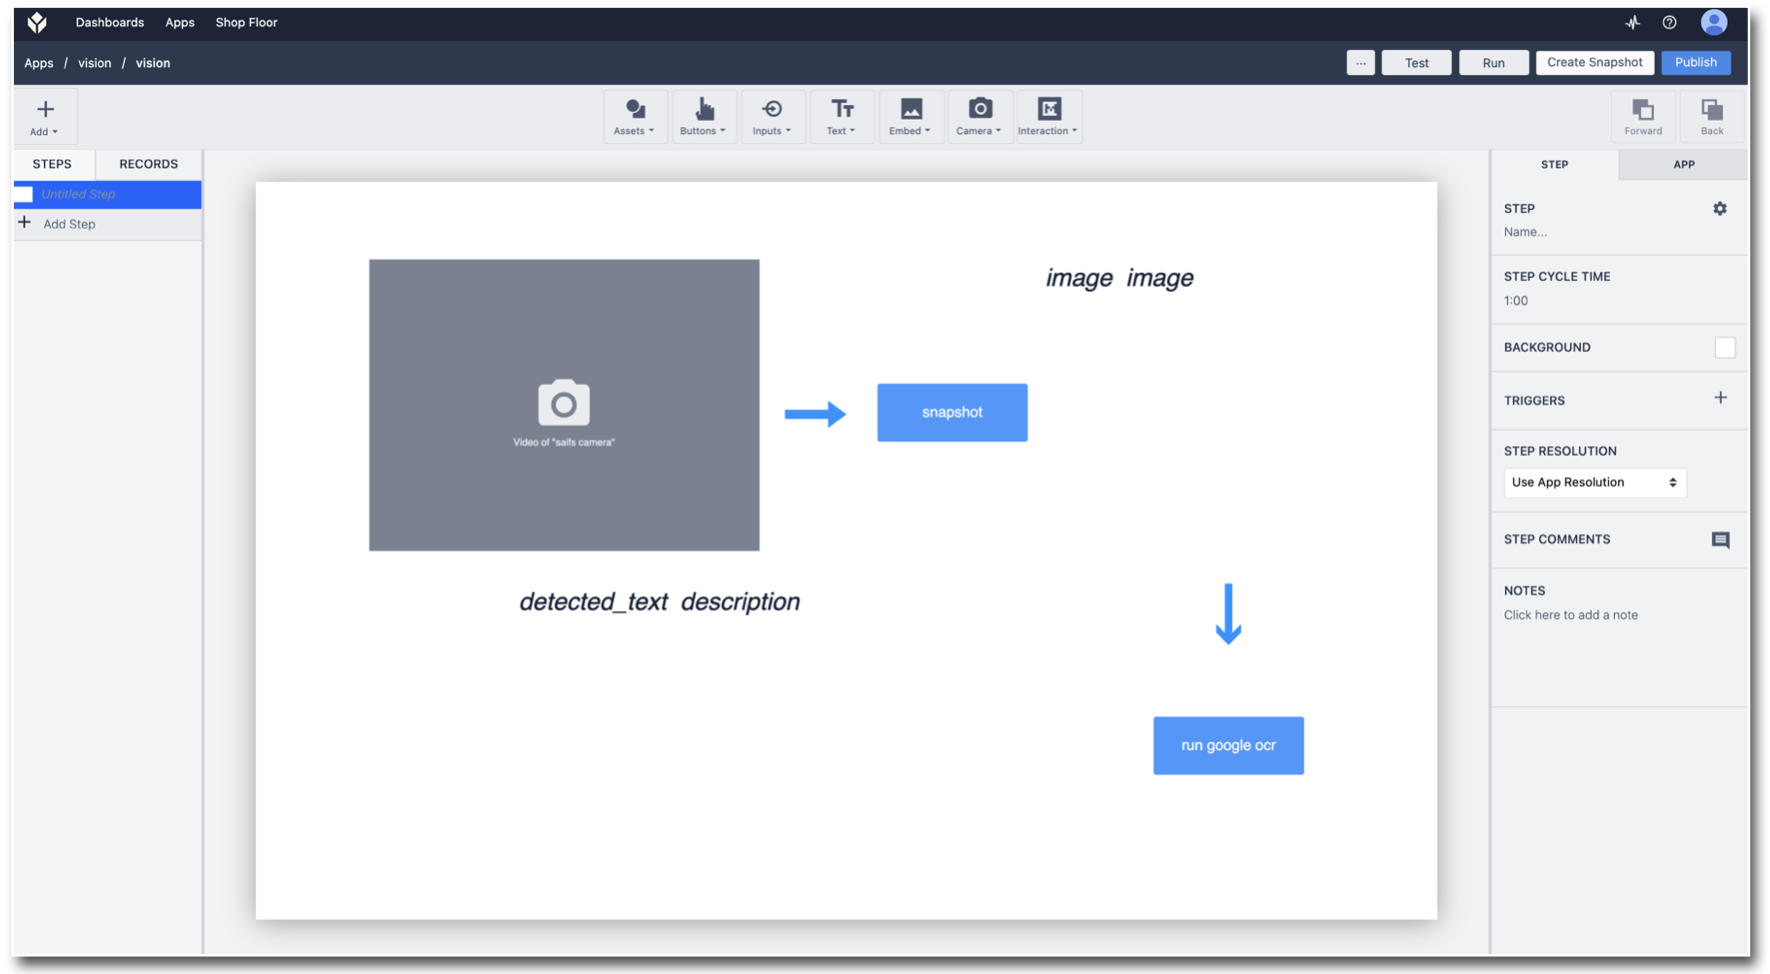
- Test the app and observe the OCR results:
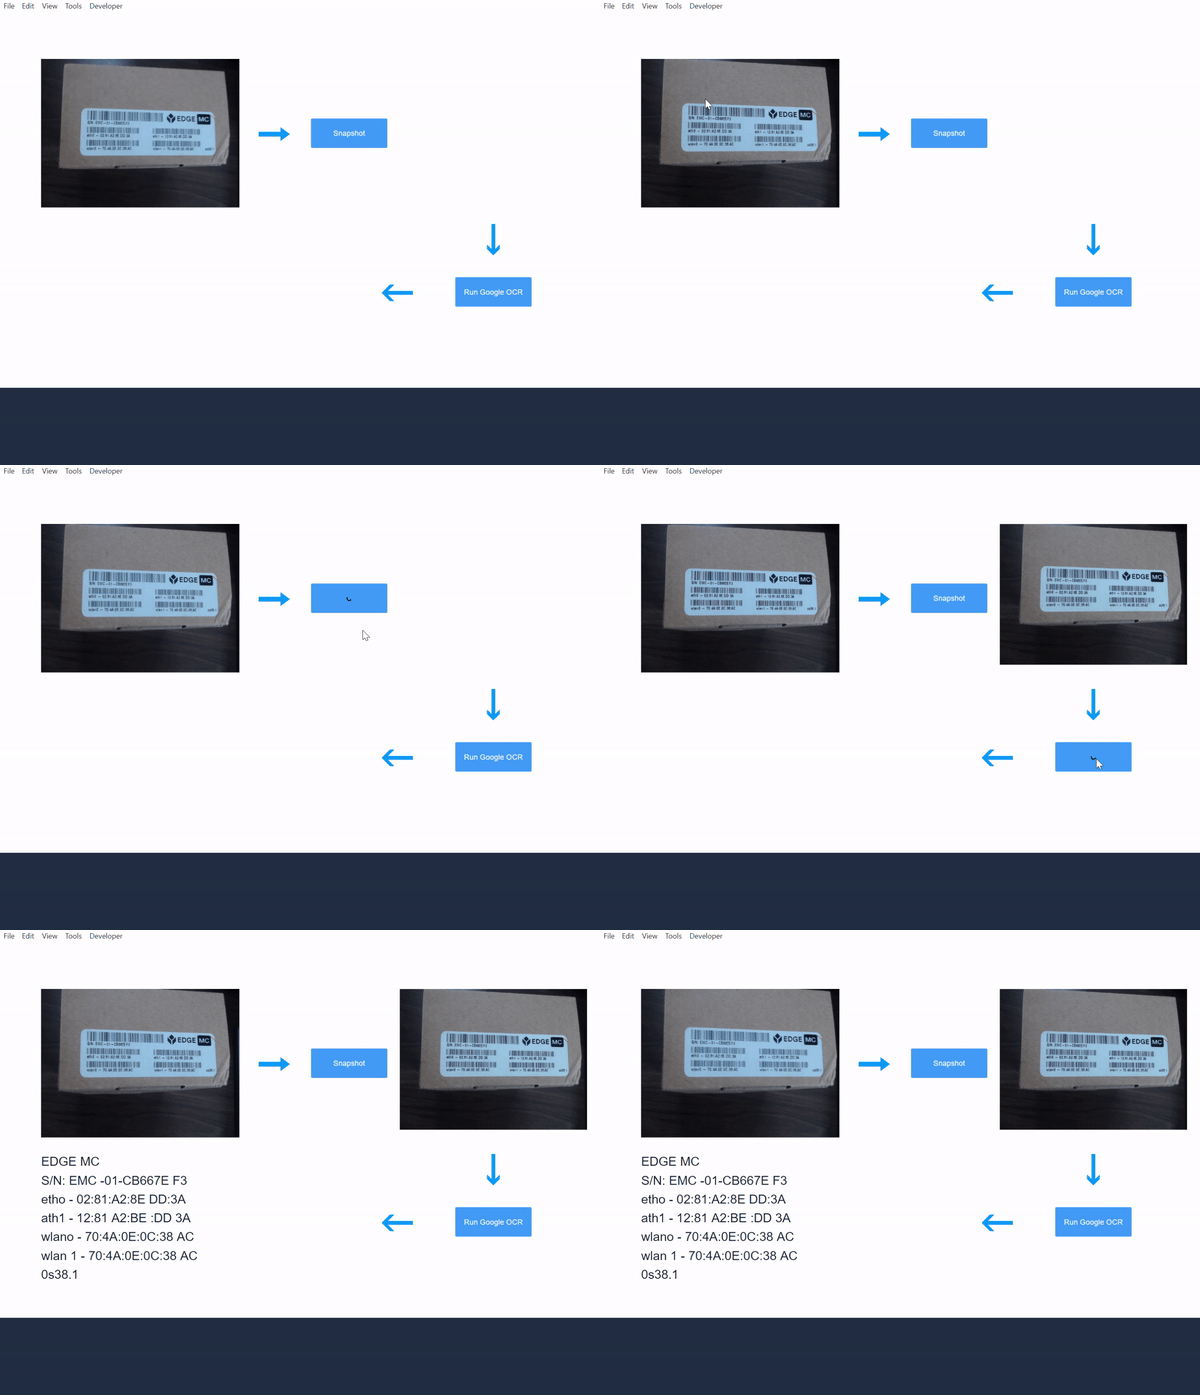
You have now created a Tulip Vision app that connects to Google Vision API OCR service. Try it now on your shop floor!
Further reading:
- Getting Started with Vision
- Using the Change Detector (Requires: Intel RealSense D415)
- Using the Jig Detector
- Using the Color Detector
- Using the Vision Camera Widget in Apps

