Using the Record History Widget to View Changes to Table Records
- 28 Nov 2023
- 5 Minutes to read
- Contributors


- Print
Using the Record History Widget to View Changes to Table Records
- Updated on 28 Nov 2023
- 5 Minutes to read
- Contributors
- Print
Article Summary
Share feedback
Thanks for sharing your feedback!
Review record changes in the context of your processes
Capturing GxP data and ensuring data integrity is a vital component of app building, and it's important to have visibility into the changes that take place throughout your app.
Tulip's approach to data integrity follows GMP guidelines and the concepts summarized by the acronym, ALCOA:
- Attributable
- Legible
- Contemporaneous
- Original
- Accurate
ALCOA+ builds off the existing acronym to incorporate four additional concepts:
- Complete
- Consistent
- Enduring
- Available
Digital Record History Overview
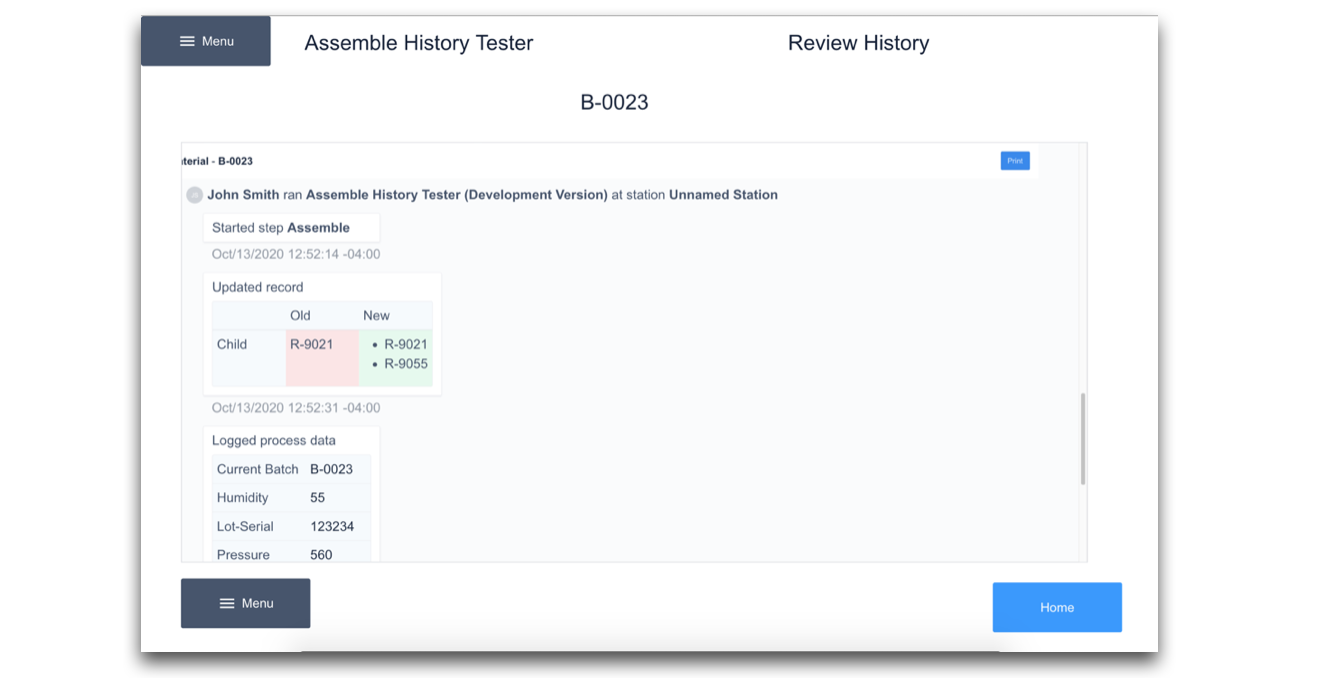
The history Widget offers visibility and traceability into the creation, update and deletion of Table Records. It is an interactive, scrollable widget, that you can embed within your app, and link to a specific table record.
This offers the ability to verify, or approve, the change of the table record itself, the state of other variables within the app at the time of completion, and if applicable, the e-signature of the user within the app.
You might find this widget especially powerful for batch work, subassemblies, and material management. From a quality perspective, this widget can be leveraged in the approval process of your batch work.
Information included in the Record History
The Record History will first show a header that includes the following information:
- Logged-in User
- App name
- Station name
- Step name
- Timestamp
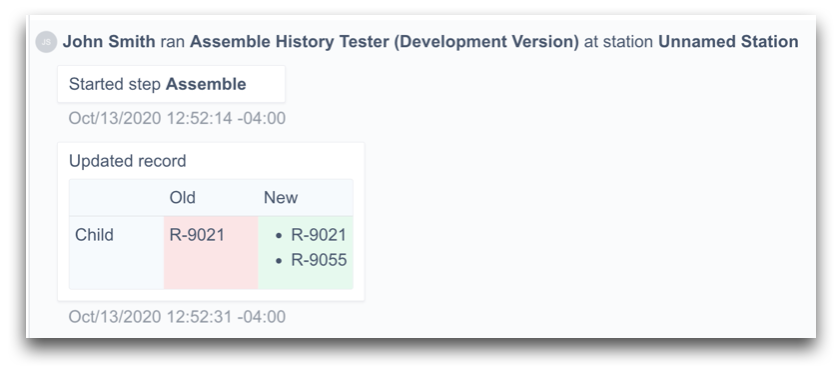
The widget will then include information about the change of the record itself, including:
- Type of edit (Create, Update, Delete etc.)
- Original value
- New Value
- Timestamp
Additional information
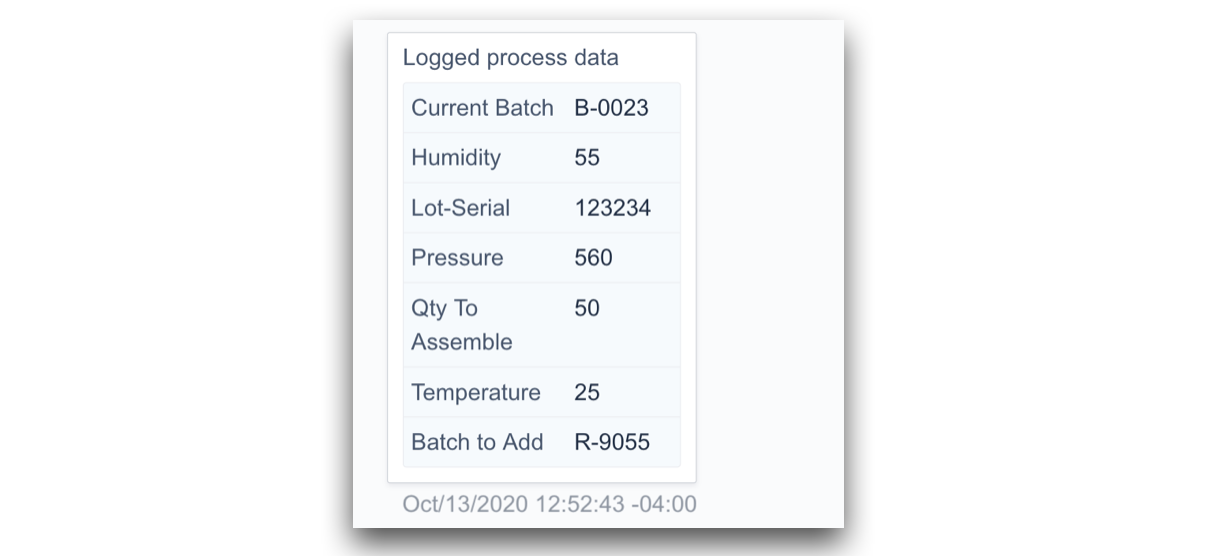
- Logged process data: The values of Variables within your app when the app was completed. Note: These variables must have 'Saved for Analysis' enabled on them.
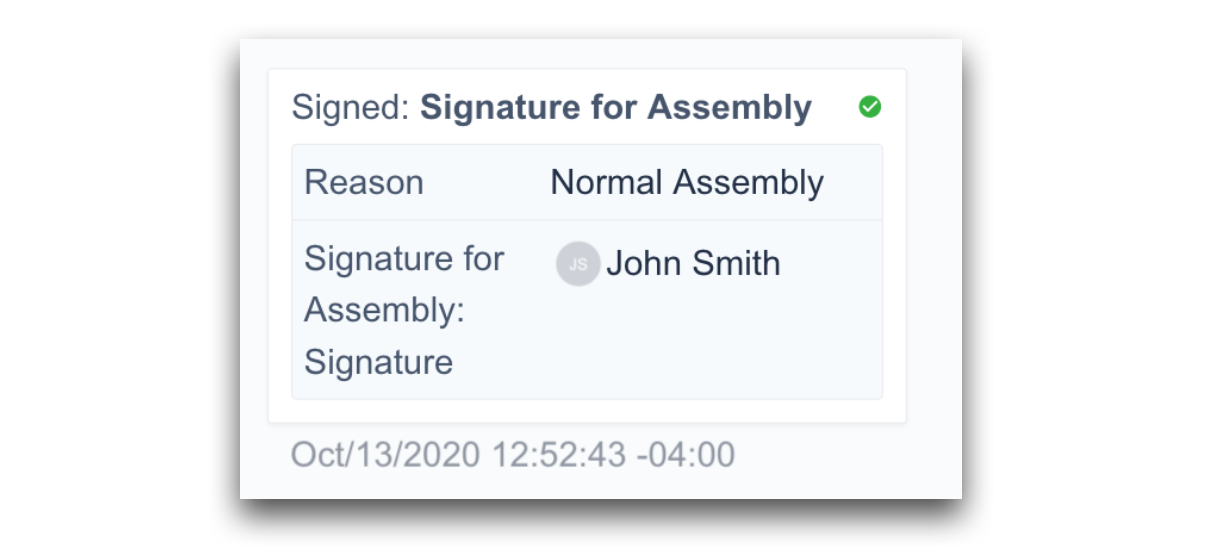
- Electronic Signature: This will include the verification of signature, the reason for signature and the User associated
Embedding the History Widget
First, open the step you'd like to embed your Widget within. Then click Embed, and select Record History.
History Widget Configuration
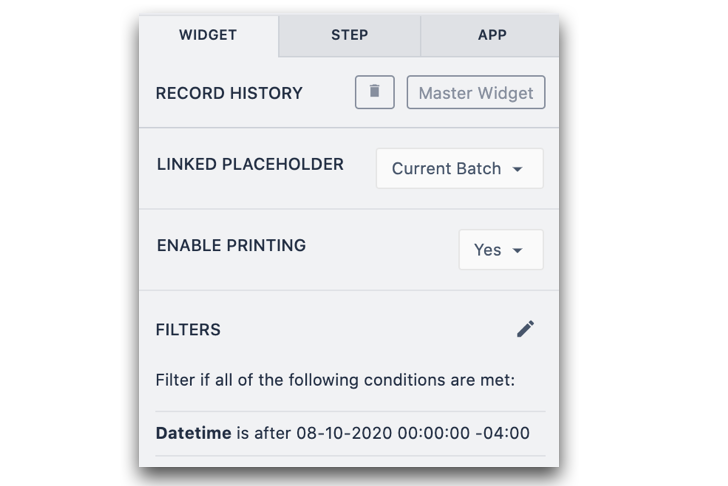
- Linked Placeholder: Link the Table Record you'd like to show the history for
- Enable Printing: When enabled, a print button will display in the header of the Widget
- Sorting Default: Option to sort dates from newest to oldest or oldest to newest.
- Hide Sorting Options: A toggle to enable sorting while running the app. If on, the sorting options will be visible to the user.
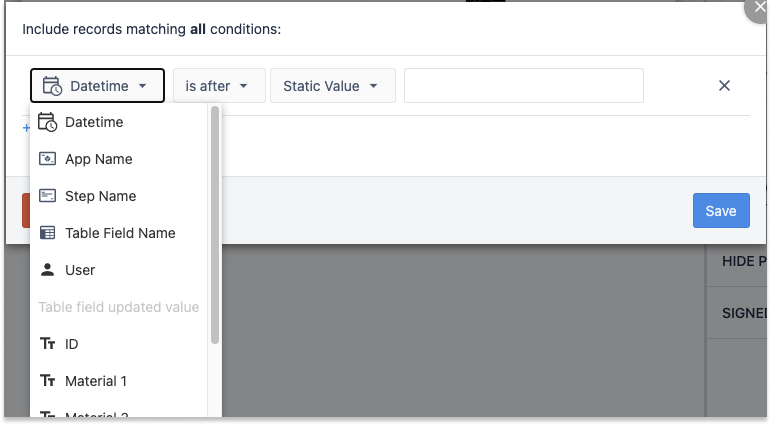
- Filters: Filter the record history, similar to filtering of Embedded Tables The following filters are available:
| Filter | Description |
| Datetime | The date and time an event occurred |
| App Name | The name of the app where data was modified. |
| Step Name | The step within an app where data was modified. |
| Table Field Name | The name of the field from Tulip Tables that was modified. |
| User | The person who made the changes. |
| All Fields from Linked Placeholder | The values of all fields in the history can be used in filters. For example, Density > X. This could be useful in finding changes that are outside a certain standard. |
- Hide "Old" Values in Record Updates: This will hide the previous value for all fields and only the current value will be shown. Useful for making the history more compact when necessary.
- Hide Process Data: Hide all blocks within the Record History that pertain to Process Data. Useful when all critical data is being captured in a Tulip Table.
- Signed Completions Only: When on, only blocks of data within the history that contain signatures will be shown. Helpful to quickly narrow down the history to milestone events.
Further Reading
Did you find what you were looking for?
You can also head to community.tulip.co to post your question or see if others have faced a similar question!
Was this article helpful?