
Manage location of materials on the floor from one location to another. Visualize where the materials are using this pre-built app.
Purpose
Managing Work In Progress (WIP) is an ongoing challenge and part of the joys in manufacturing. In finance terms, WIP is the cost of the materials on the floor in addition to the cost of the labor and overhead costs. The faster the material flows through the production line and turns into the a finished good in the finance books, the better. Optimizing this process is no small feat, and the Material management is a first step at being able to understand WIP on the shopfloor.
The main benefits:
- Digital log of all material moves on the factory
- Real time view into status of material
- Customize workflows
General Process Overview
Using the "Material Management" application, one can select a batch to get started. The app then retrieves stored information about the status of the selected batch and prompts user to select the next location. Once next selection is made the user is shown a list of all open batches and the current status of each. The user can choose from any batch to edit it's location. A log is kept of all moves and the location of each batch is updated in the *Materials table.
Installation
This applications makes use of Tulip Tables *Materials, *Jobs, & *Stations. The *Materials & *Jobs require configuration before using the application.
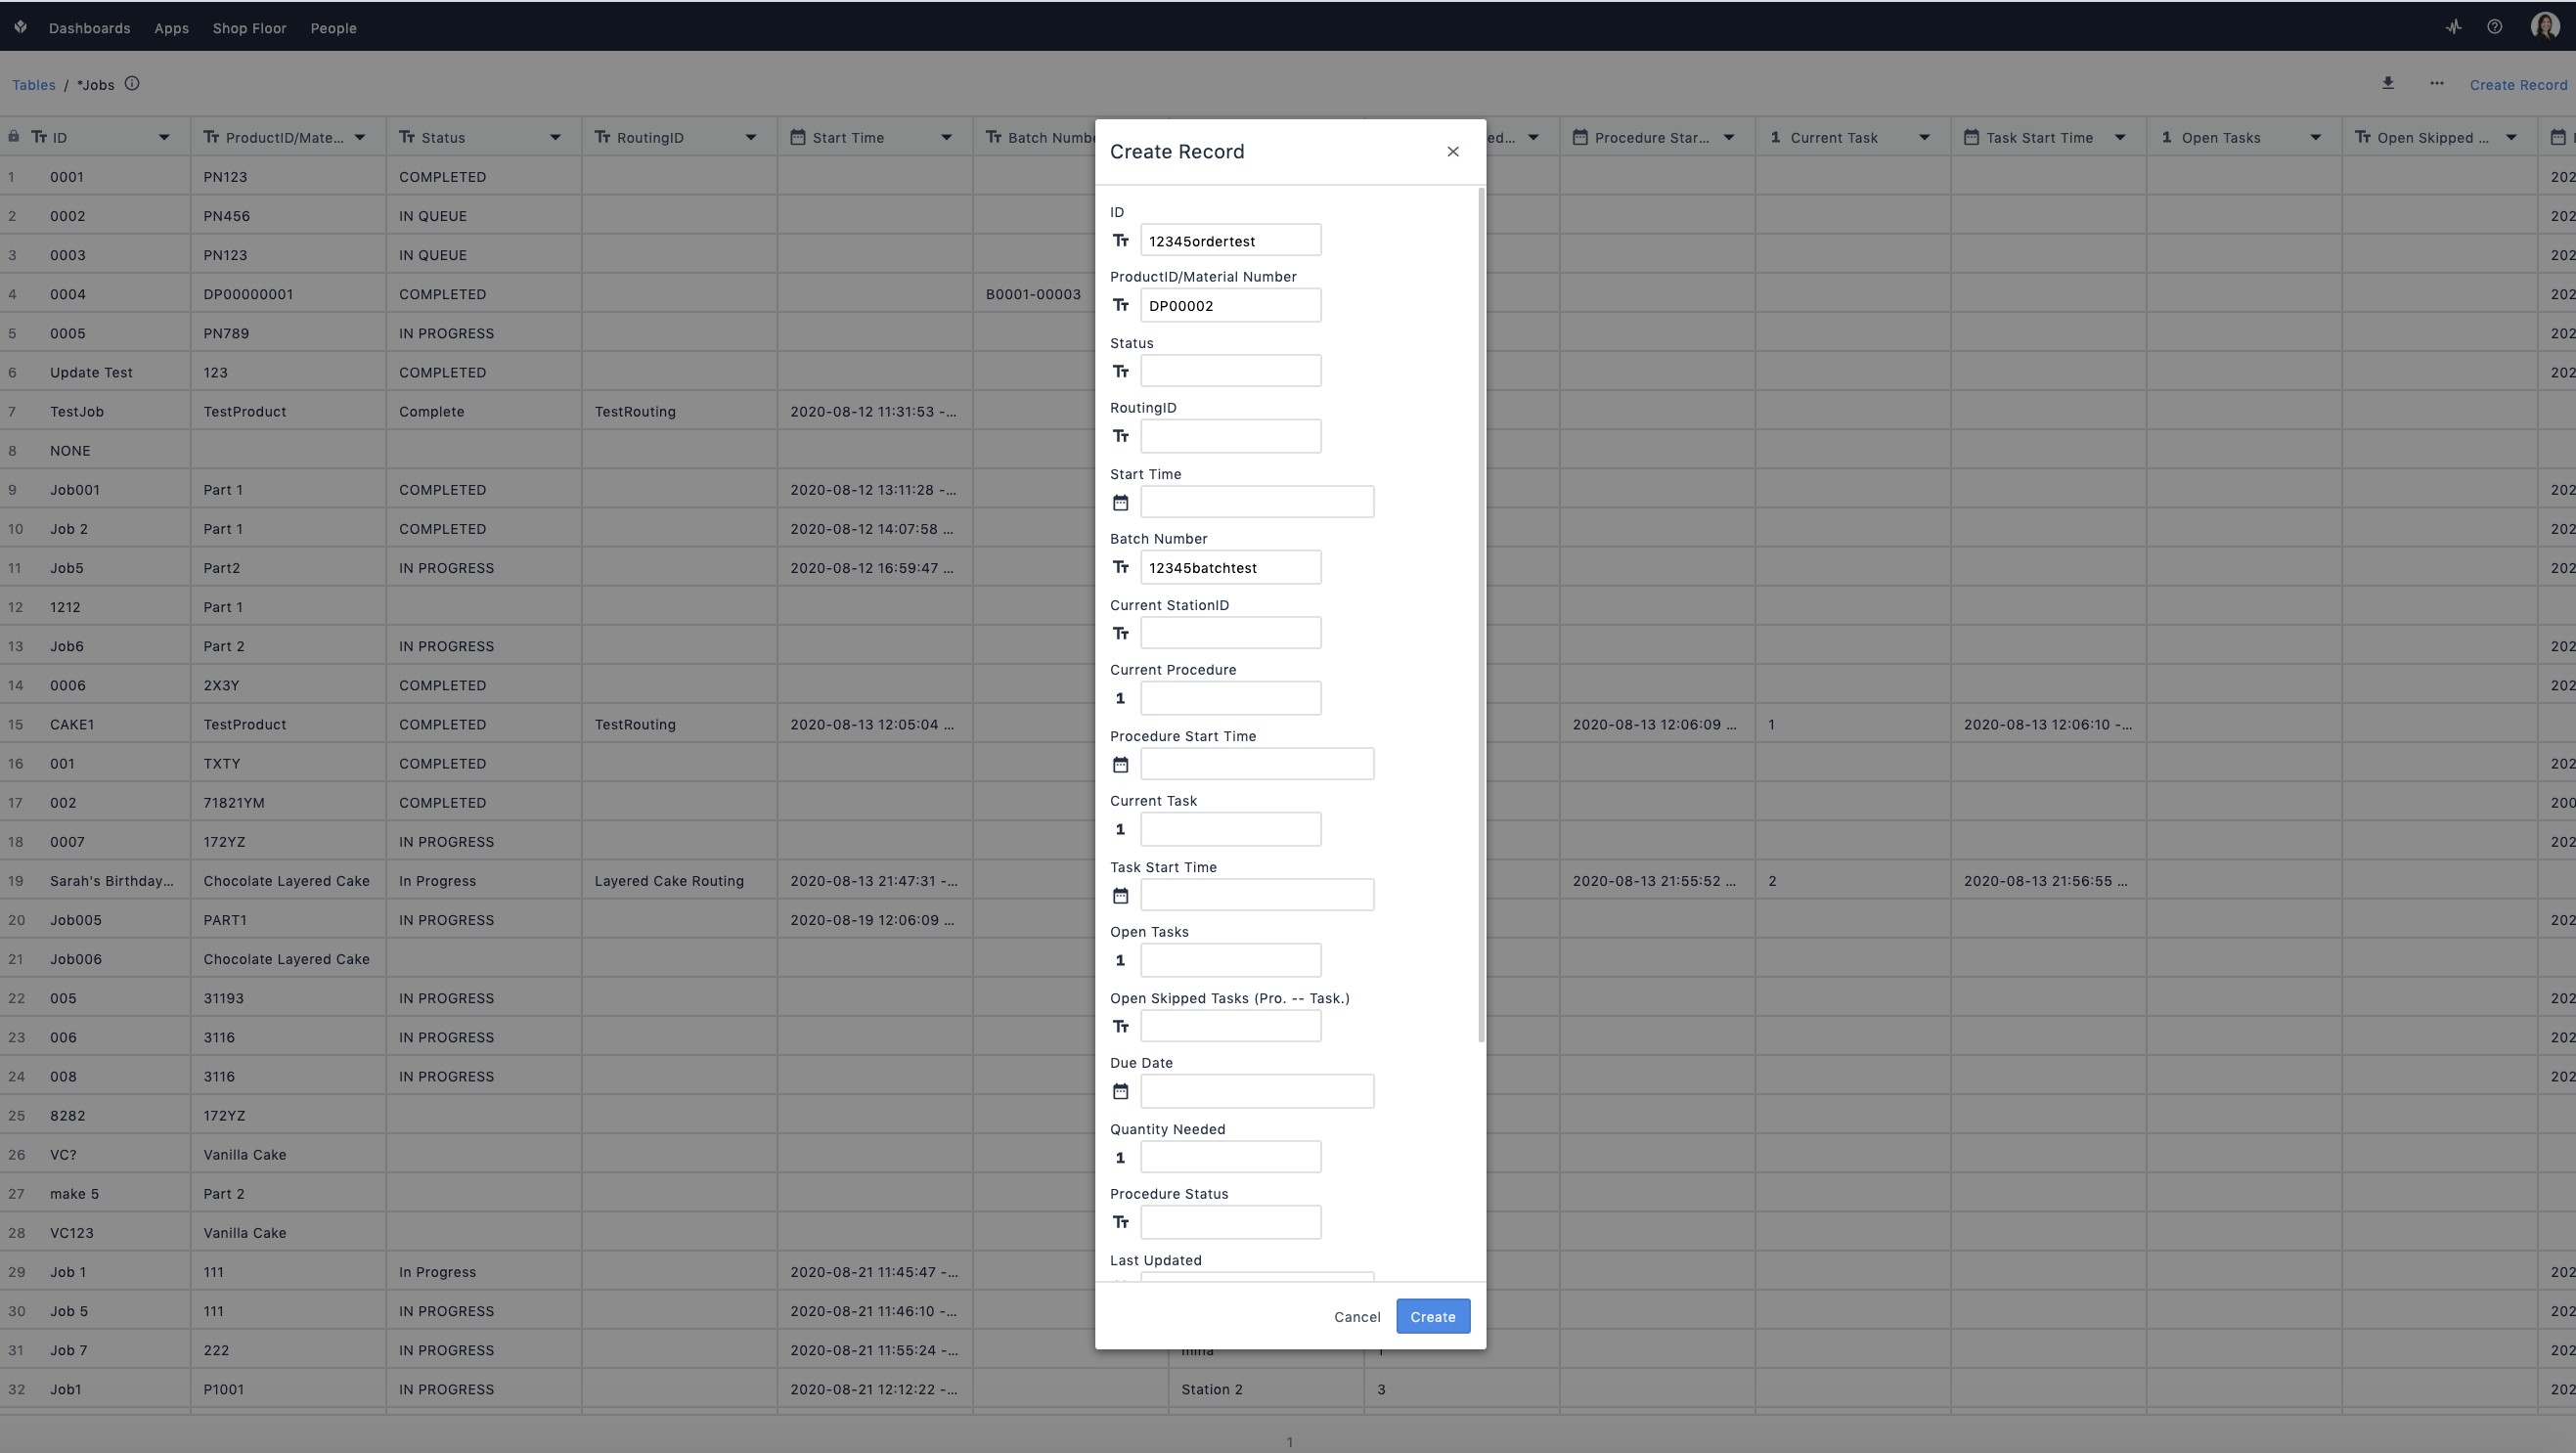
Go to *Jobs tables and click 'Create Record' in top right.
Add a new row with an ID (must be unique) and Batch Number, Quantity Needed,Unit of Measure, and the rest of the fields are optional:
Copy the Batch Number and head over to the *Materials table. Add a new record and past the Batch number into the ID field. Add the Order ID as well, and any other metadata fields (i.e Description, etc). The application will use this table to look up the *Jobs table based on the Order ID field.
Return to the application and confirm that the added batch appears on the dropdown list.
Modifications
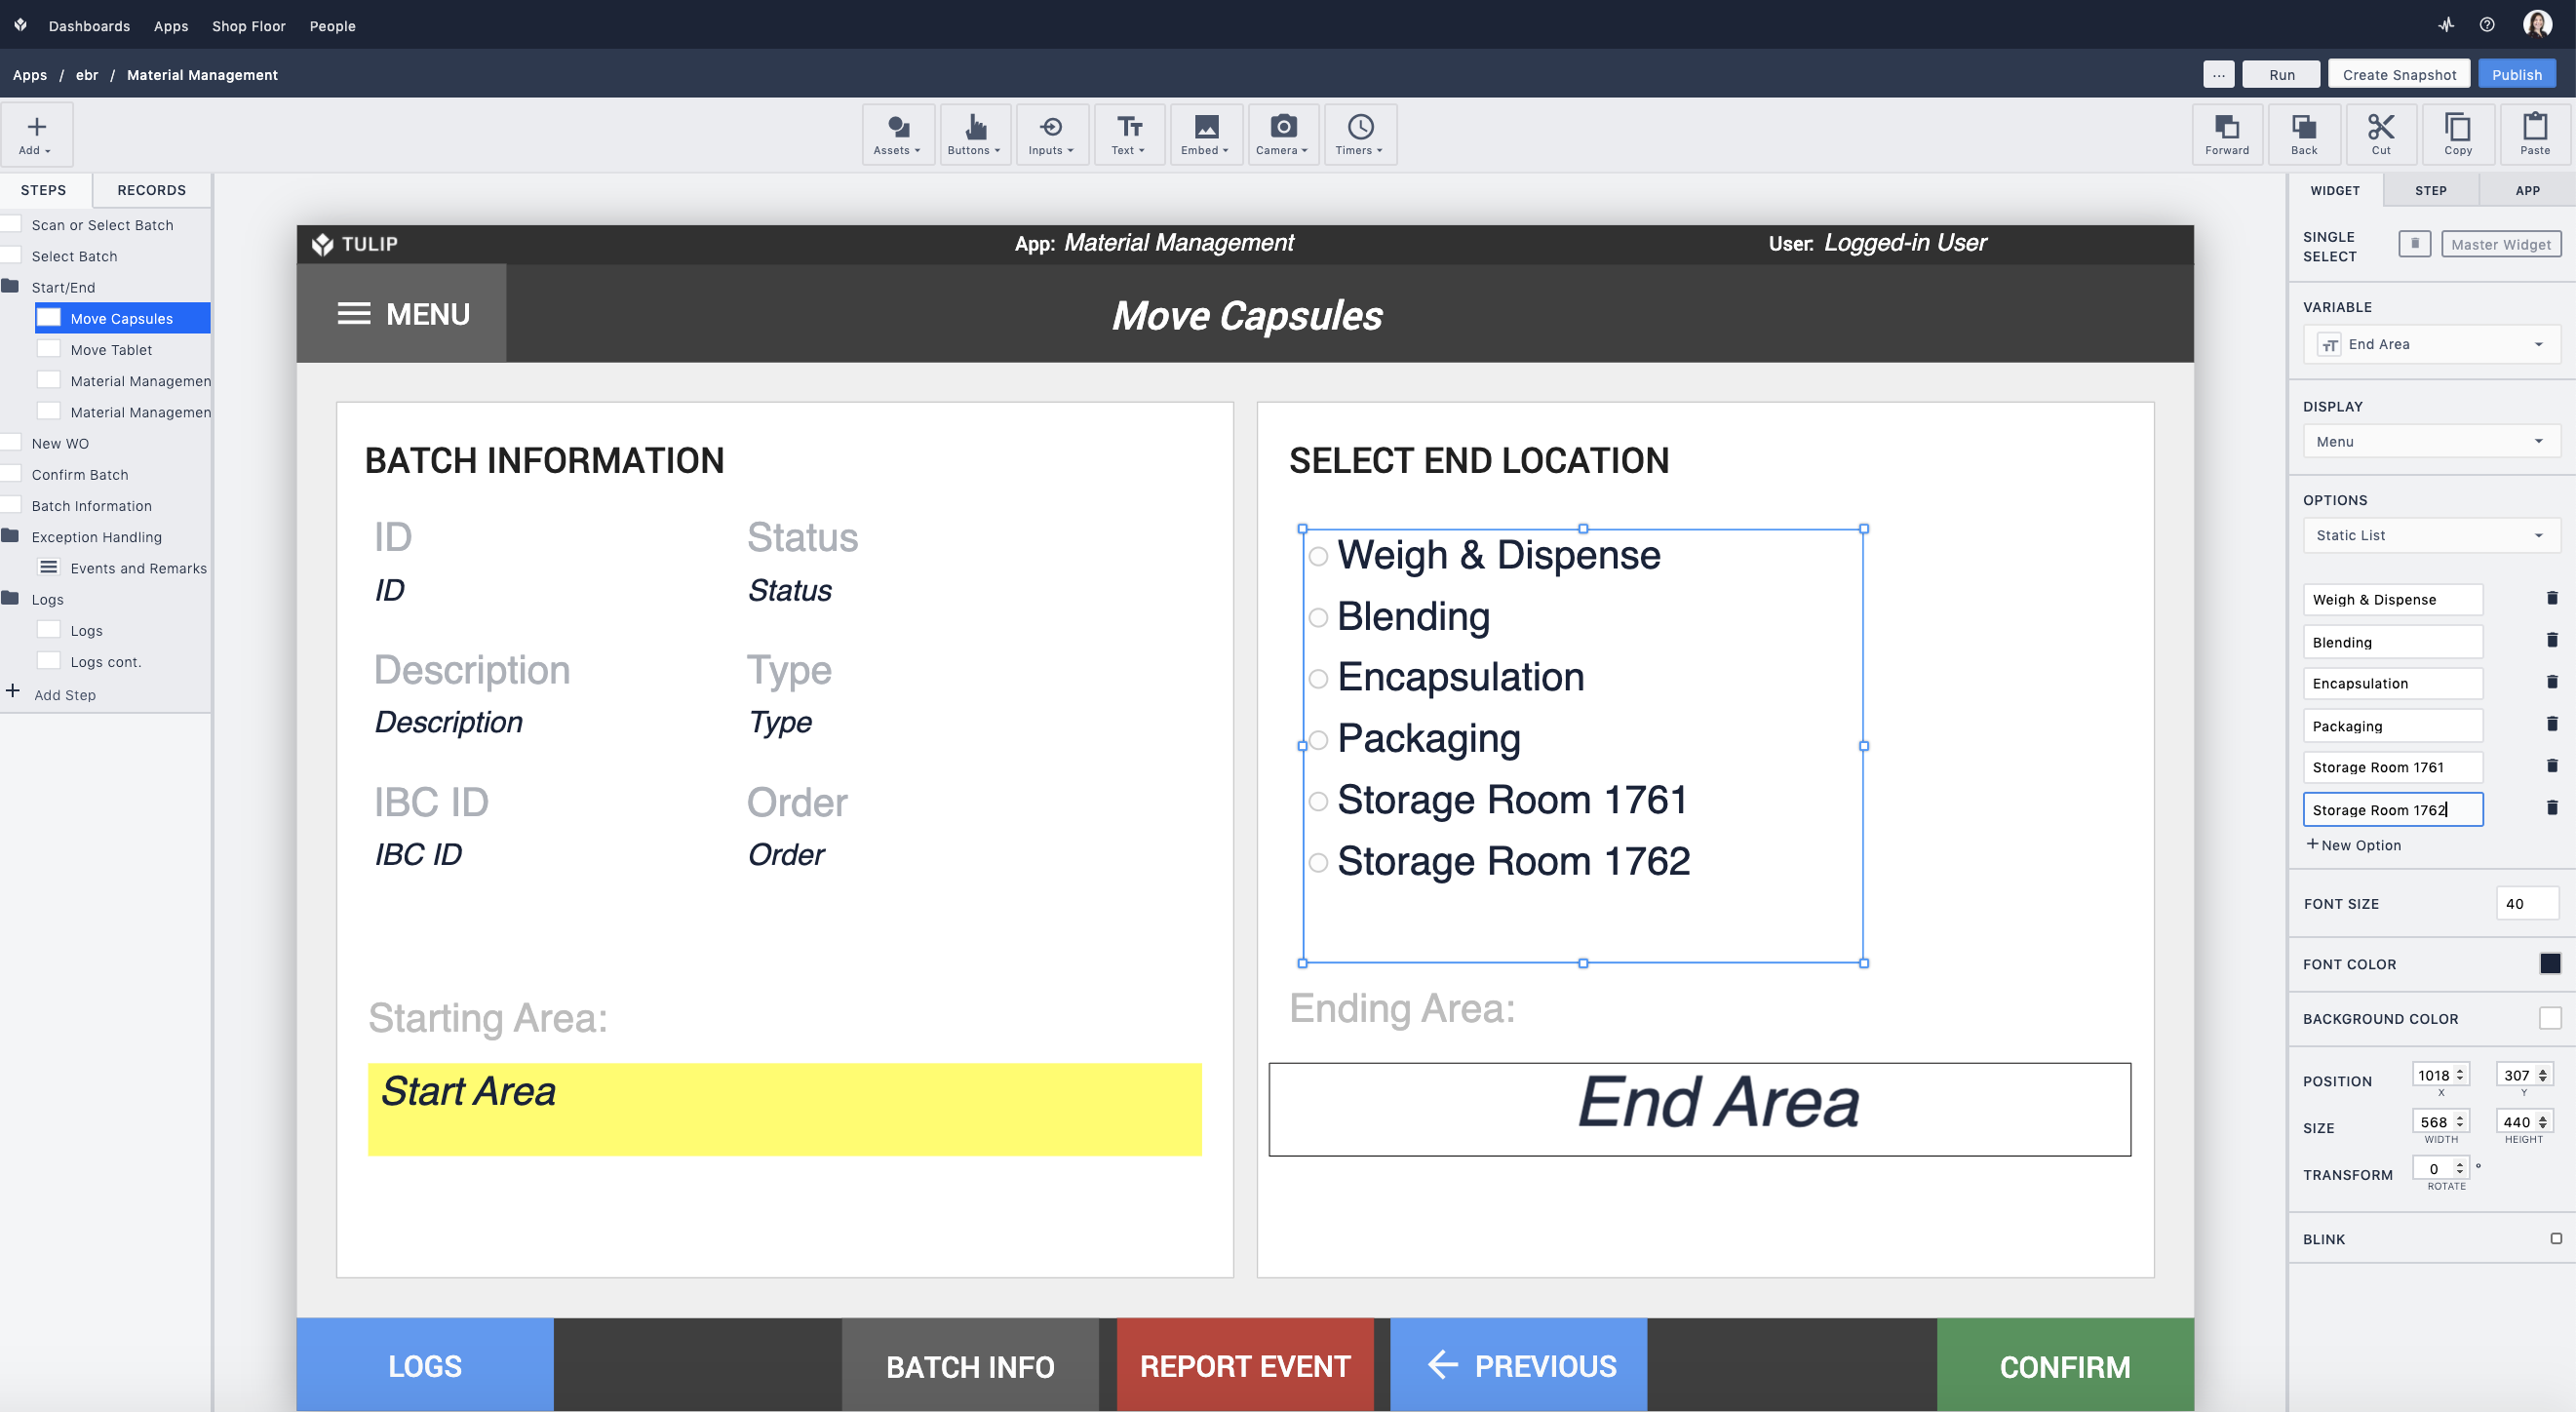
To Edit locations:
Go to one of the steps beginning with 'Move' and select the Single Select widget. Edit options on the right hand side menu
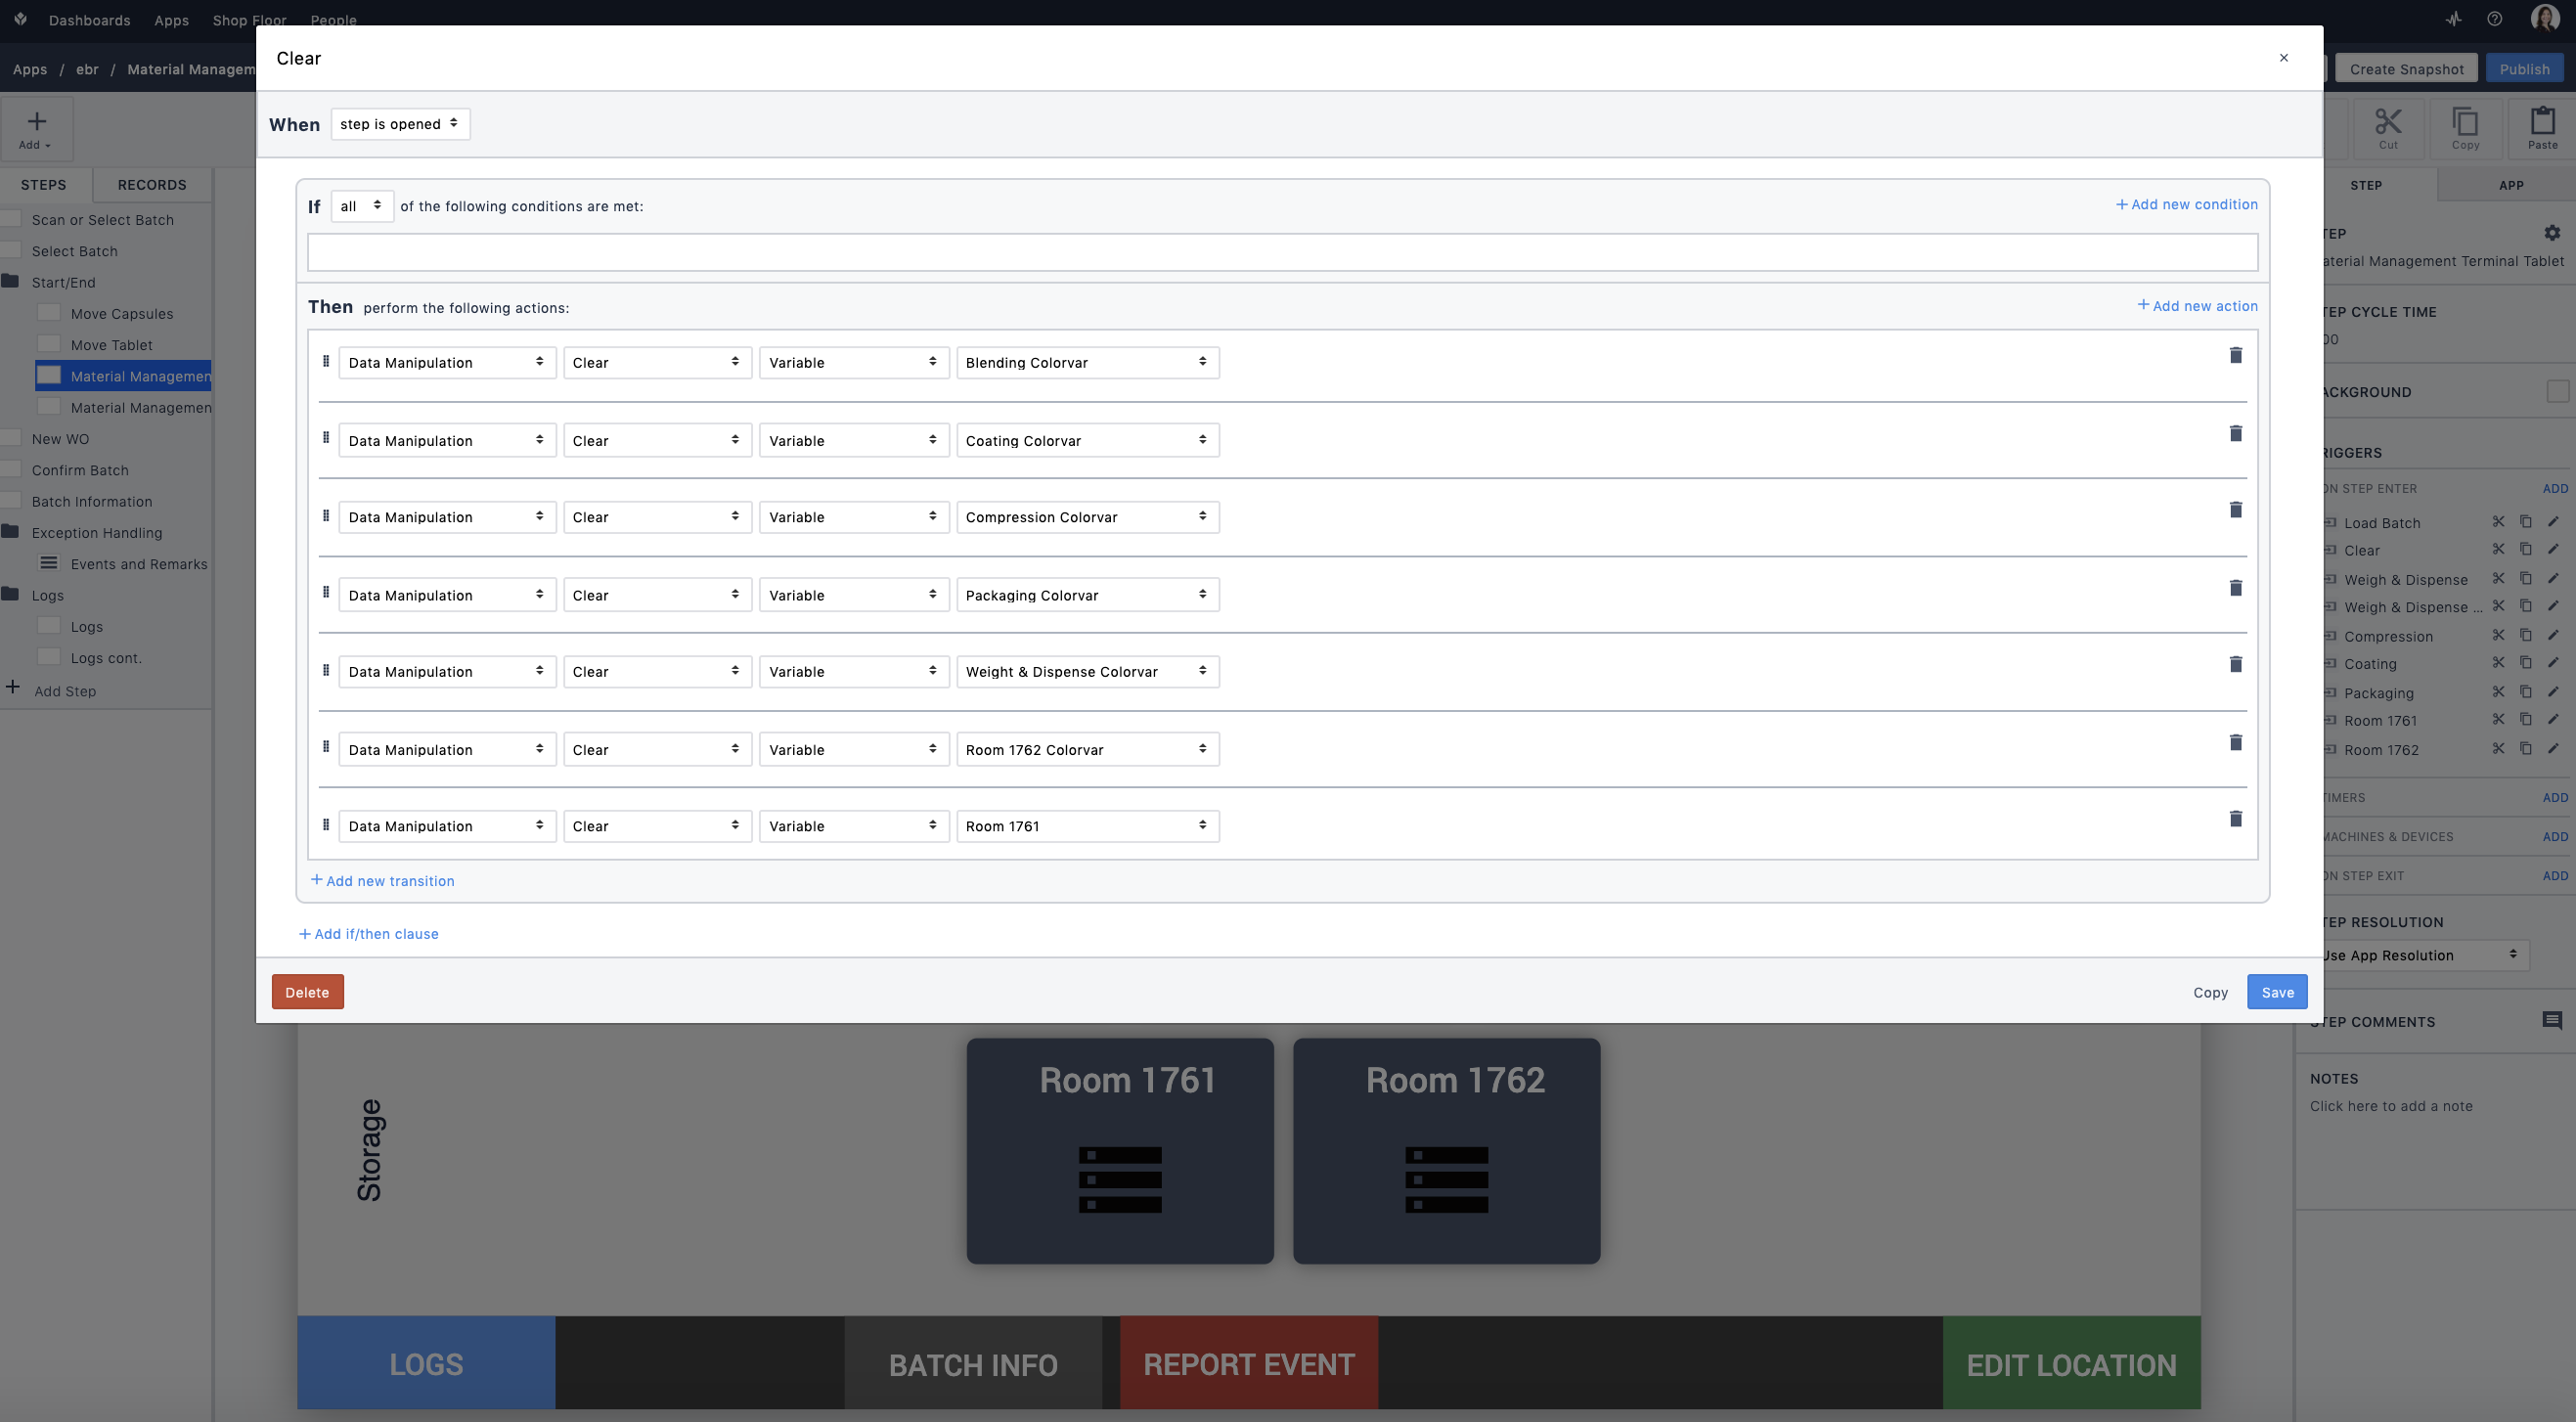
Don't forget to edit the views and logic on the 'Material Management' steps to reflect the new locations. First, add a clear action to the 'Clear' trigger on step open
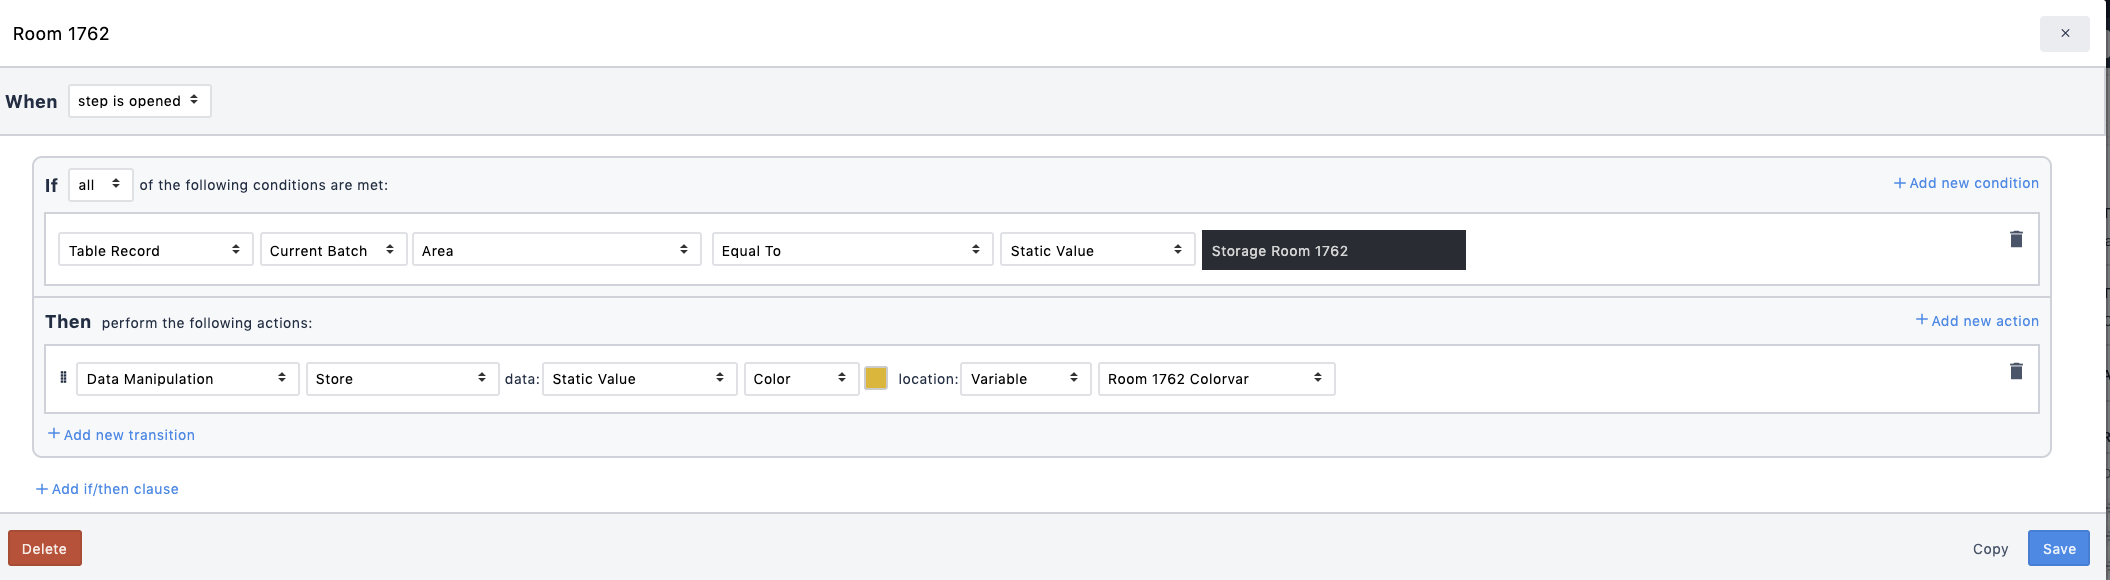
Then make a copy of one of the existing location specific triggers and modify for the new location
Then select the Interactive table on the step and do the same modification of trigger logic for the widget
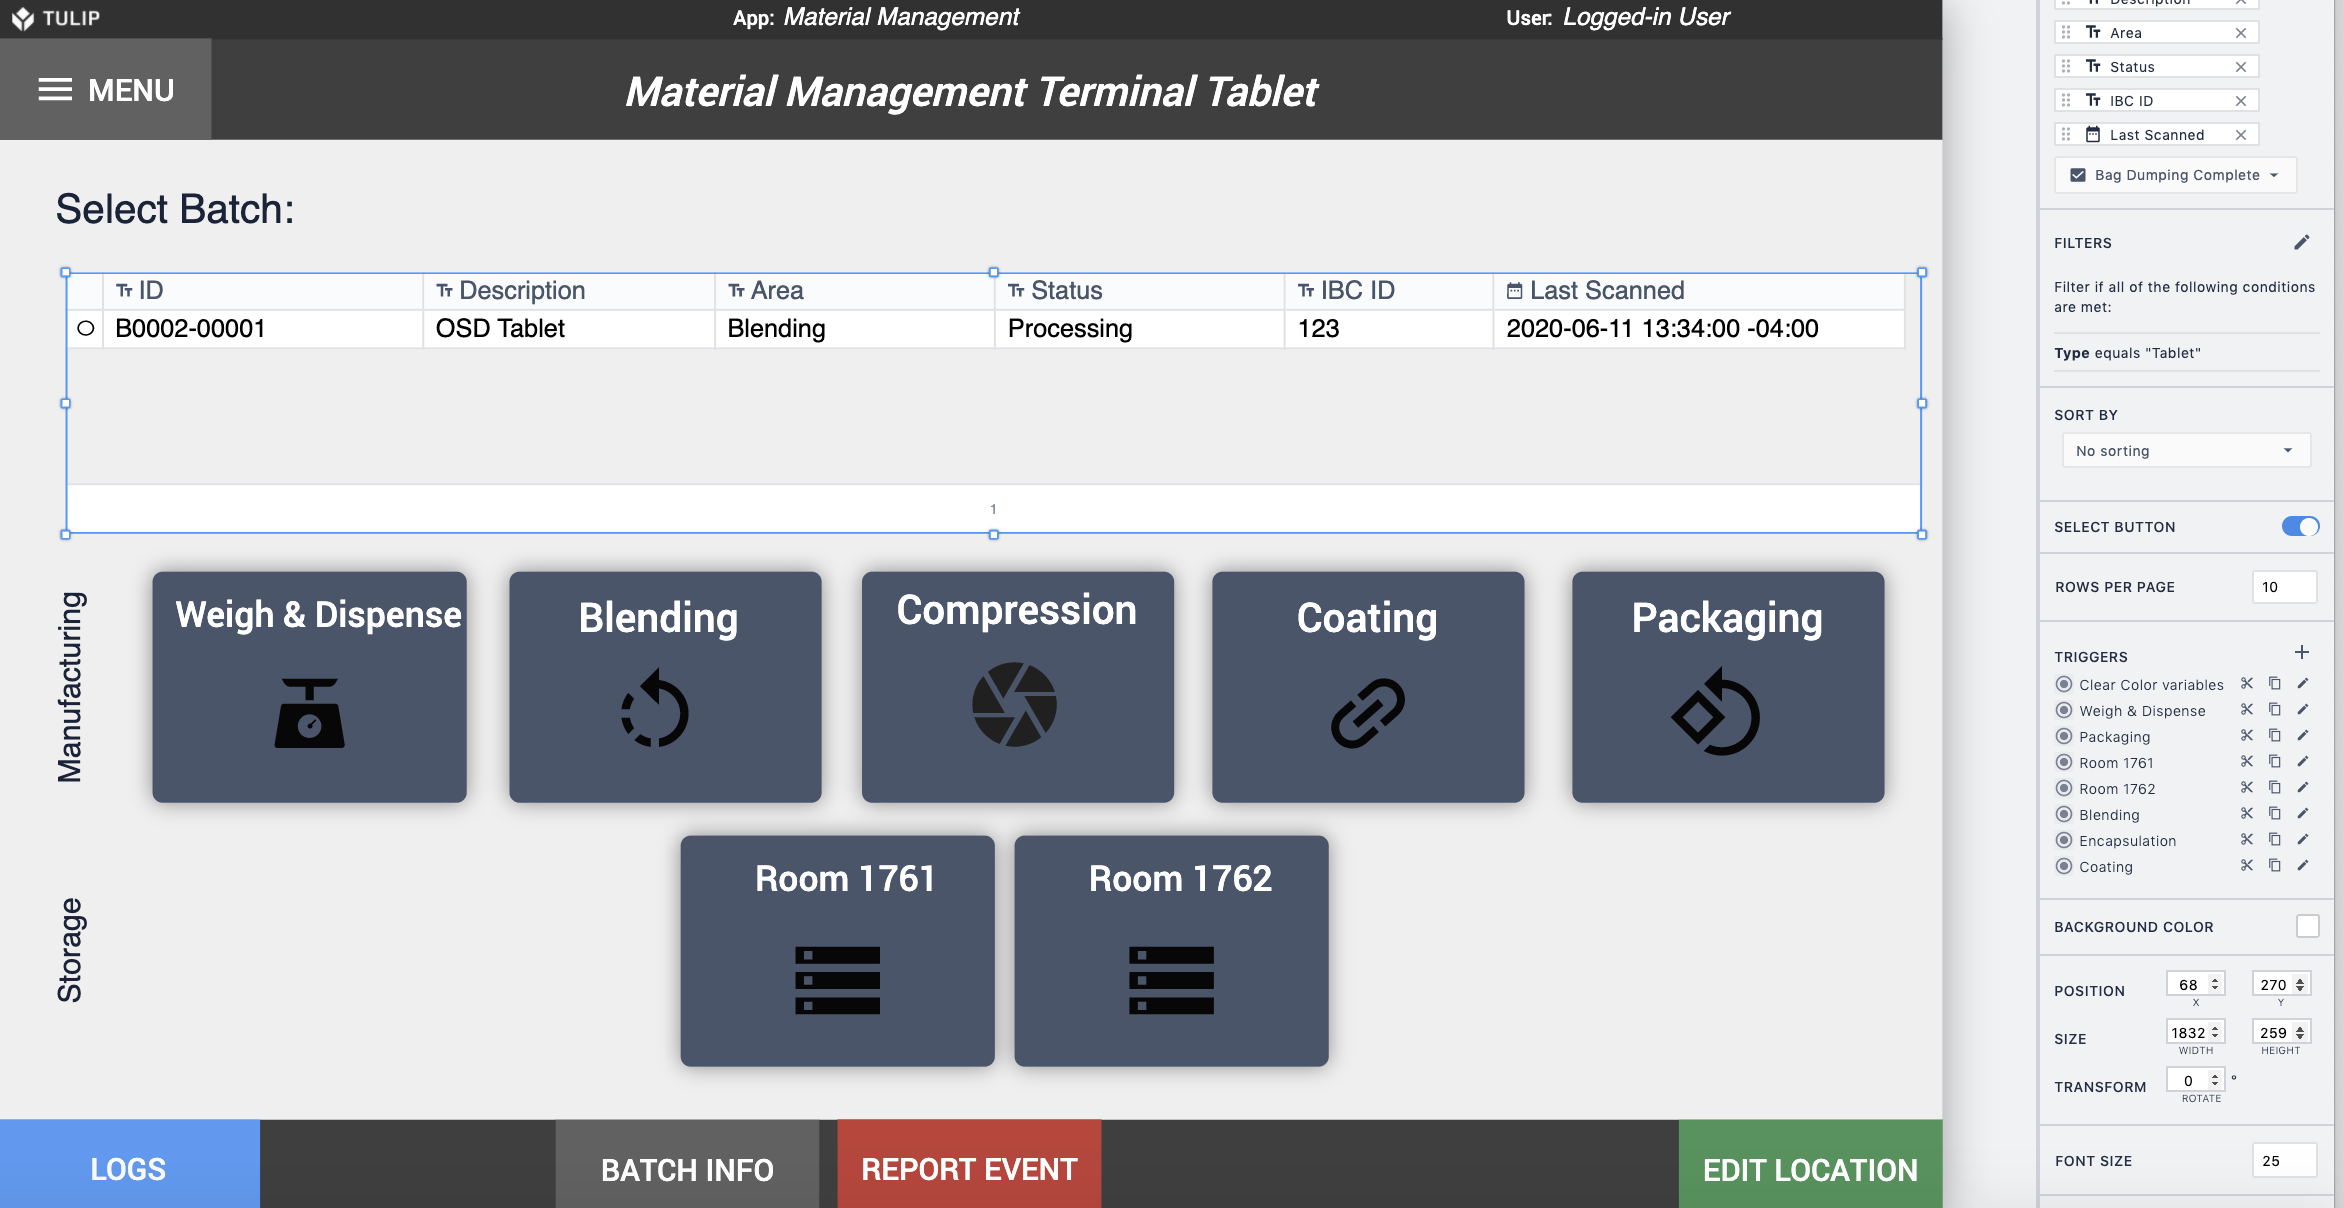
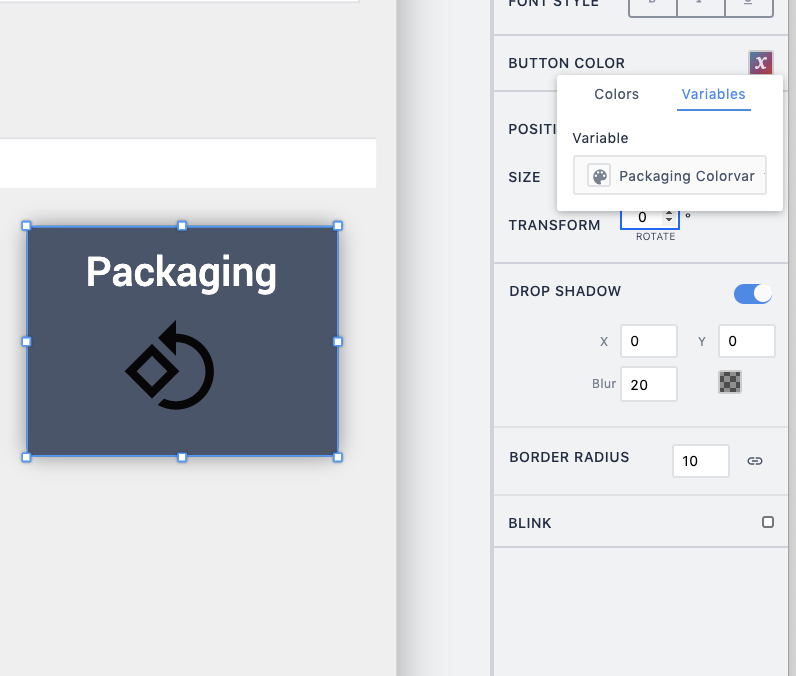
Lastly, copy one of the existing location indicators on the screen, rename it with the new location, and assign the color variable as it's background color.
To Edit Routing Logic
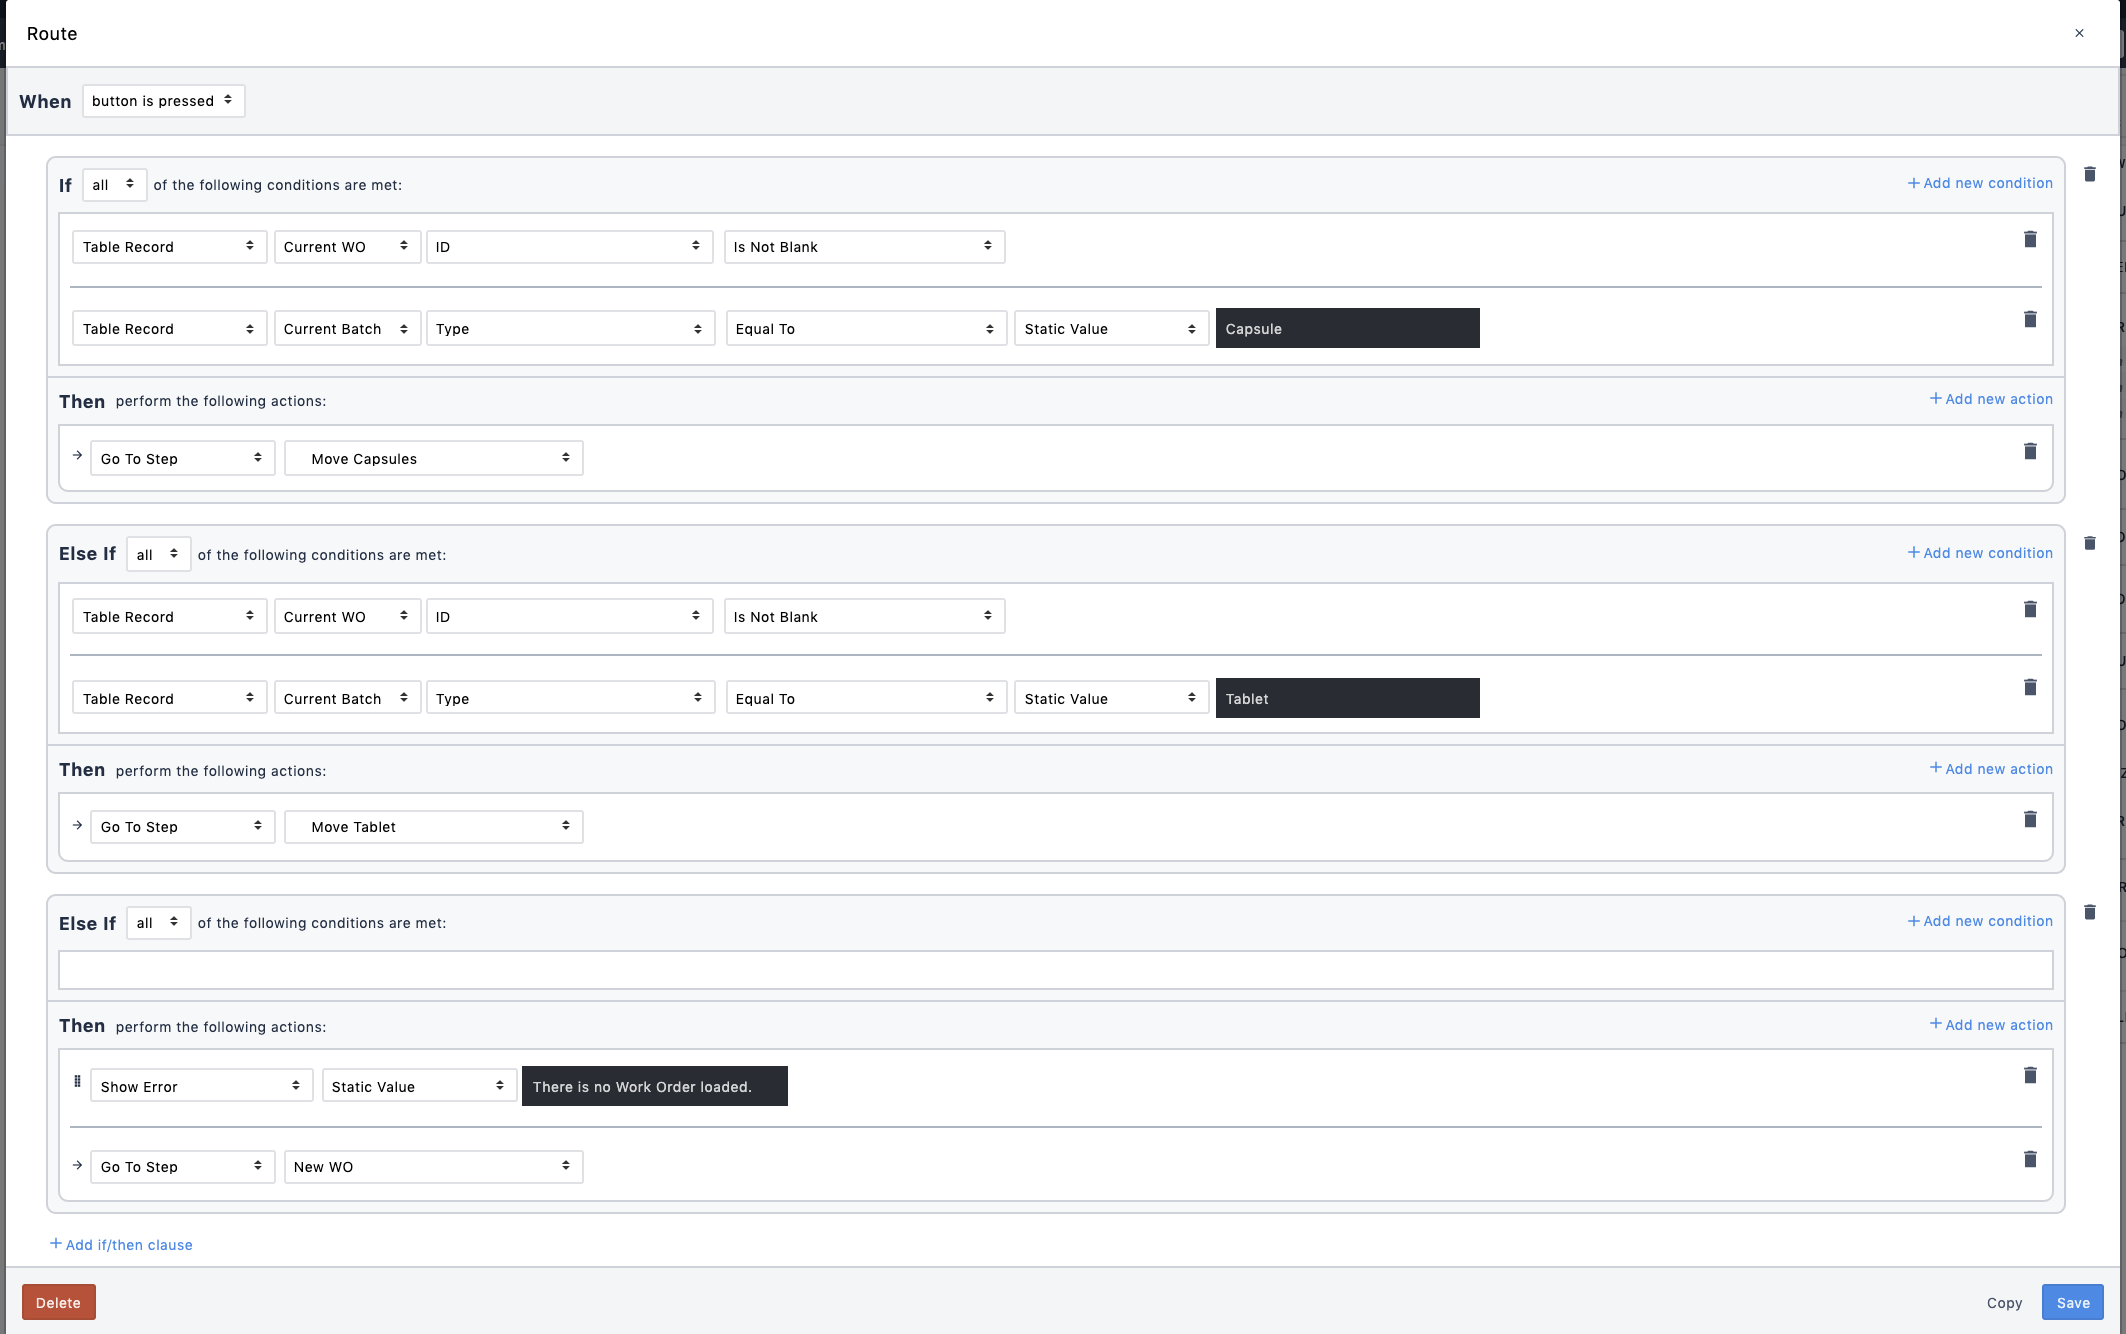
Go to step 'Select Batch' and click the 'SELECT' button on the bottom right. Open the trigger 'Route' and modify the routing. For example, if you did not want to distinguish between a tablet or a capsule then simply delete one of the 'if/then' statements and update the 'Go to Step' trigger.
If you have any questions or concerns please contact us via live chat