How to Use the Stations API
- 17 Apr 2024
- 2 Minuty do przeczytania
- Współtwórcy

- Wydrukować
How to Use the Stations API
- Zaktualizowano 17 Apr 2024
- 2 Minuty do przeczytania
- Współtwórcy
- Wydrukować
The content is currently unavailable in Polish. You are viewing the default English version.
Article Summary
Share feedback
Thanks for sharing your feedback!
Purpose
Set up and use the Tulip API to interact with Tulip from other systems.
Note: Advanced Article.
Assumes previous experience with APIs.
Note:
Advanced Article: Assumes previous experience with APIs. Click here to view our Station API documentation.
Tulip interacts with many other system's APIs via Connectors. Using connectors, a Tulip app can initiate an HTTP or SQL query.
In other cases, you may want to allow an external system to query data that only exists within Tulip. It is possible to communicate with Tulip from external systems using the Tulip API. This article will walk through the set up and testing for the Tulip API.
The Tulip API is useful for integrating these external systems with Tulip in many ways. The API currently only works with Tulip Tables This might include updating a table record with new information, creating a table, or getting the count of records in a table.
Stations API Functionality
Stations API can help you manage and onboard new stations quickly. The general functionality is to create, list, and modify stations, station groups, and interfaces(formerly known as display devices). Read more here.
For example, you can write a script that allows you to automatically send a link to set up a new interface every time you onboard a new user.
Quick Walkthrough
Accessing the Stations API
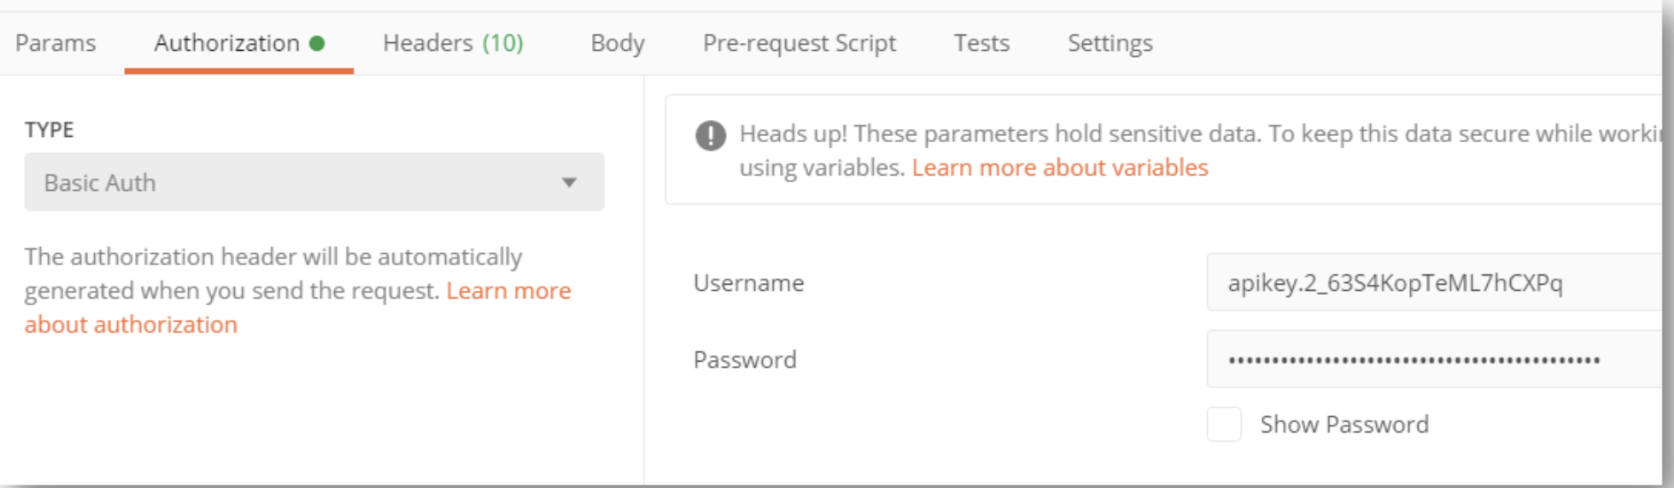
See this article to see how to set up an API Token.
Note:
If you have a Tulip API already set up, you may use that API Key and Secret
- Navigate to your Settings > API Tokens
- Click Create API Token in the upper right-hand corner of your screen
- Name your API Token, and select
stations: readandstations: writefor its scope:

Note:
Make sure to save the API Token information for the API Key, Secret, and Authorization Header.
Congratulations - you’ve officially set up your Stations API!
## Using the Stations API
The following will go through how to create a station. In this case, the example will use Postman to perform the creation.
First, add your API endpoint to the Post request.
Under Headers, add the Auth Header.

In the Body, format the request to take in the JSON object. The generic format for this request is as follows.
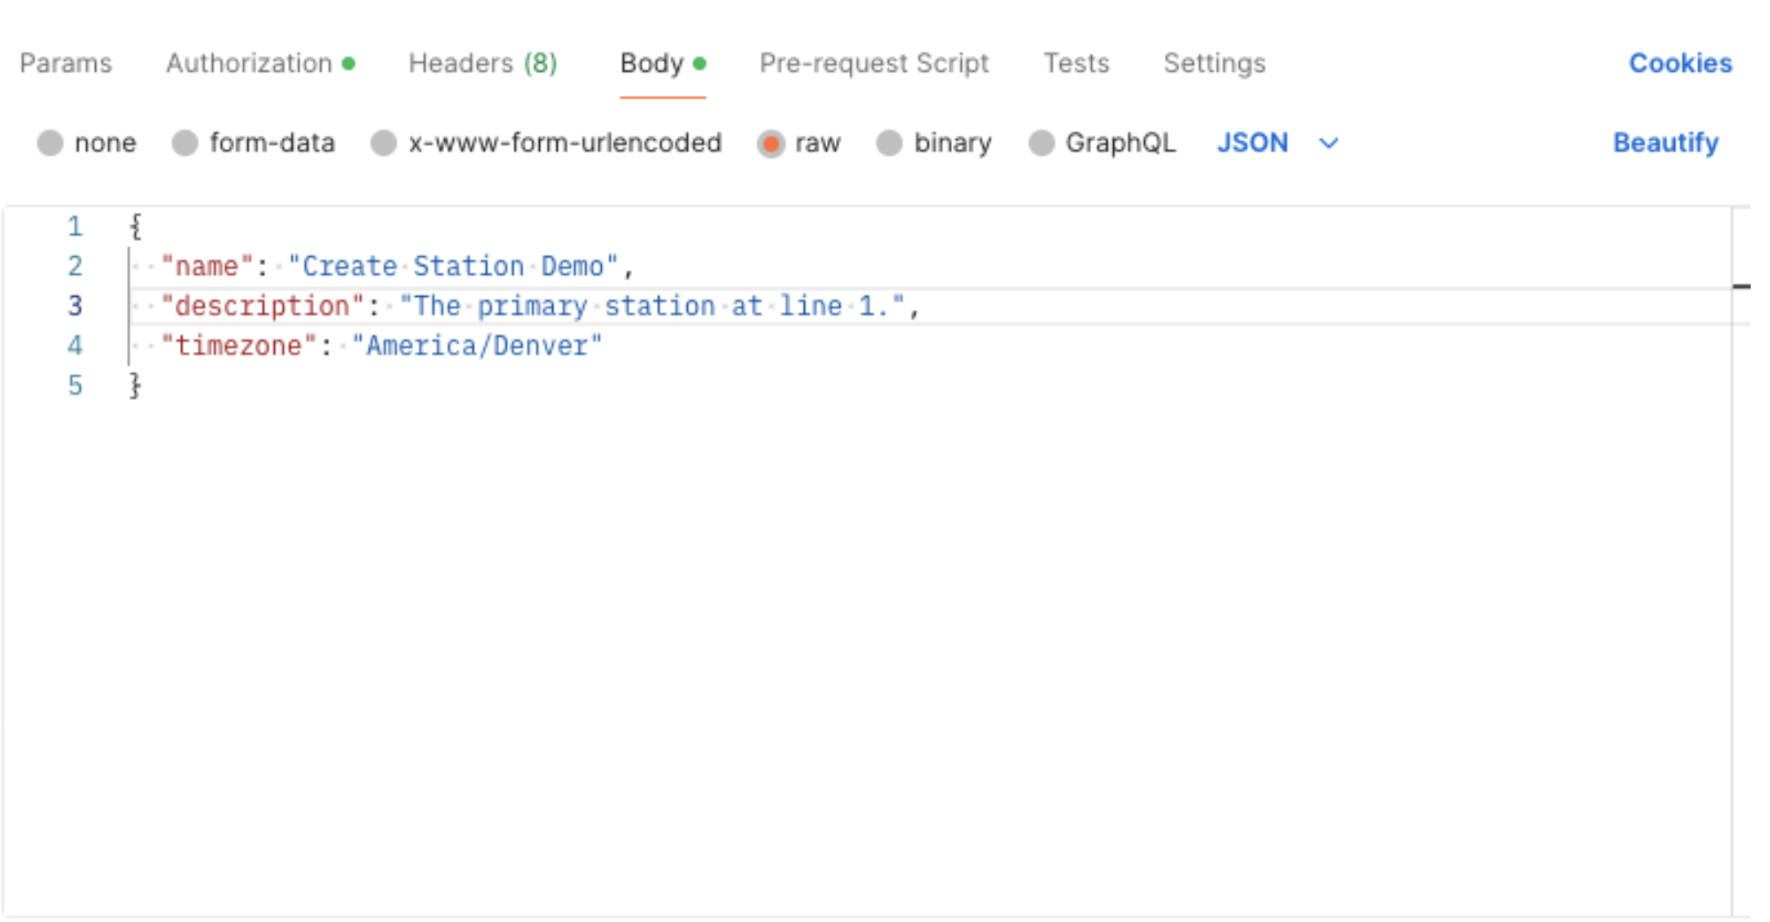
When you form the request, make sure to include the workspace as well like this <your-instance-name>.tulip.co/api/stations/v1/w/1/stations(in this case, we’re hitting the stations endpoint. If you don’t have a workspace then you should set it as 1. If you have a few workspaces, you can figure out which workspace you are in by going to
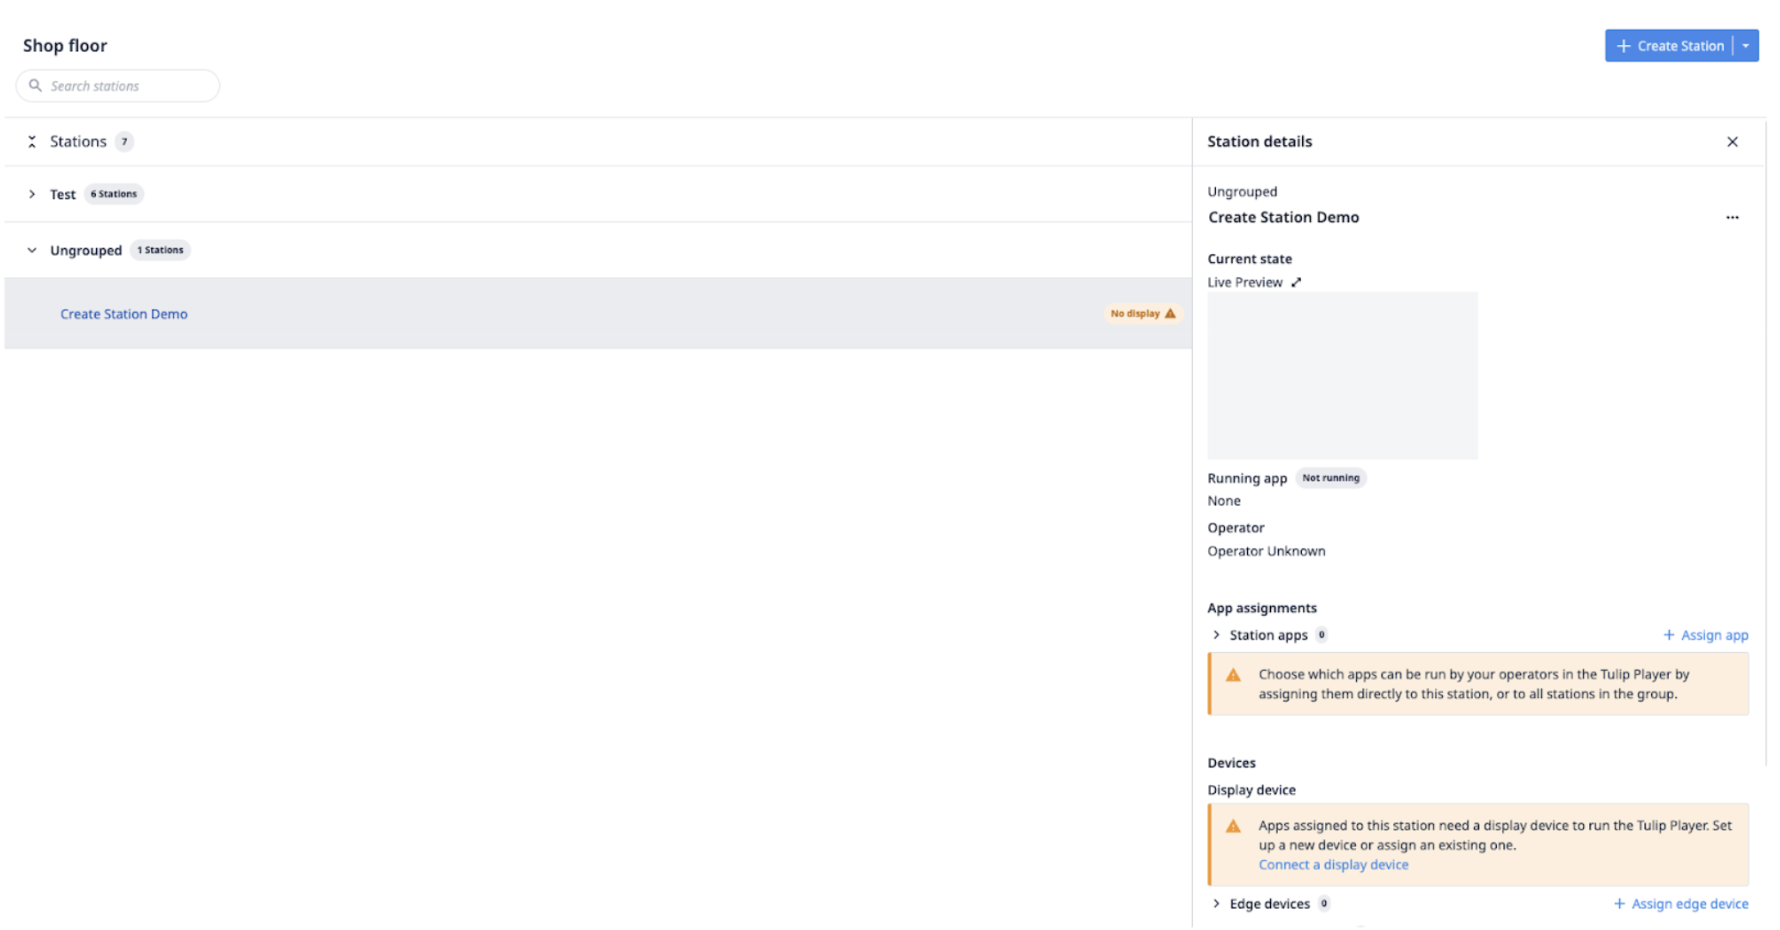
Hit send to run the request, and you will receive a 200 response to indicate success. To verify, you can check your stations page under Shop Floor, and confirm the station was successfully created.
Hit send to run the request, and you will receive a 201 response to indicate success. To verify, you can check your list of Users in Settings, and confirm the user was successfully created.
Czy ten artykuł był pomocny?