
You can use user provisioning and deprovisioning alongside SAML to provision and deprovision users instantly.
Users on Professional plans and above.
Overview
After setting up SAML SSO in Tulip, you may also want to provision and de-provision users in real time, following the SCIM API.
With SCIM, your identity provider (IdP) automatically creates users in Tulip, updates their names, and deactivates them when they leave, so you manage access in one place. Setting up SCIM has two parts: getting your SCIM details from Tulip, and configuring a custom SCIM application in your IdP.
Note: Tulip does not provide a pre-built SCIM application or configuration for identity providers
Step 1: Get your SCIM details from Tulip
To connect your IdP to Tulip, you'll enter two values from Tulip into a custom SCIM application in your IdP (see Step 2):
- Tenant URL: the SCIM endpoint your IdP sends requests to.
- API Key/Secret: the Bearer token your IdP uses to authenticate with Tulip. Store it securely.
To find them in Tulip:
- Go to Account Settings and click the SAML page.
- Select the SCIM tab.
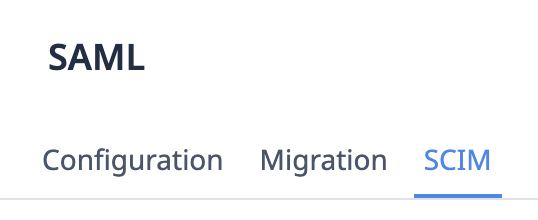
- Copy the Tenant URL. Then generate an API key (or regenerate it if one already exists) and copy the API Key/Secret. You must be a System Administrator or Account Owner to do this. Keep both values handy for Step 2.
Step 2: Create a custom SCIM application in your IdP
Tulip doesn't provide a pre-built SCIM application or configuration for identity providers, so you'll create a custom (non-gallery) application in your IdP.
Enter the Tenant URL and API Key/Secret you copied in Step 1 to this application. Depending on your IdP, these fields may be labeled differently (for example, "Secret Token").
When you configure the application, make sure your IdP is set up as follows:
- Map the IdP attribute for the SCIM
userNameto the same value your IdP sends as the SAML NameID. This helps provisioned users sign in on their first SAML login. - Confirm your userName and email mappings before you assign users. These values are fixed once a user is provisioned.
- Turn off group provisioning. Tulip provisions users only, and groups aren't synced through SCIM.
Microsoft Entra ID
For those using Microsoft Entra as their IdP, the Tulip app in the Entra gallery supports SAML SSO only and has no Provisioning tab. This is expected and doesn't mean anything is misconfigured.
To use SCIM with Microsoft Entra ID:
- In the Microsoft Entra admin center, go to Entra ID > Enterprise apps > New application > Create your own application.
- Name it, select "Integrate any other application you don't find in the gallery (Non-gallery)", and create it. Use this application for provisioning only.
- In the new application, select Provisioning > Connect your application.
- Set the authentication method to Bearer authentication.
- Enter your Tenant URL (https://
/scim/v2) and the API Key from Step 1 as the Secret Token, then select Test Connection.
- Open Attribute mapping. Map the SCIM
userNameattribute to the same value as your SAML NameID, and disable the groups mapping. - On the Users and groups tab, assign individual users. Don't assign groups, because Tulip doesn't support syncing them and provisioning will fail.
- Use Provision on-demand to test a user, then select Start provisioning.
Because Entra and other IdPs may require additional customization for your environment, work with your IdP administrator or Tulip Support if you need help planning your rollout.
Supported features
Tulip supports the following real-time updates via the SCIM API:
- User creation
- Updates to a user's name
- User deletion / de-provisioning
User creation
Within your IdP, you control which users have access to the Tulip application.
When Tulip becomes registered as a Service Provider, your IdP will use the SCIM API to provision all users who need access to Tulip. Those users will be created automatically in Tulip with no access to any part of the platform.
After you set up SAML in Tulip, when a user logs in with SAML for the first time, they will be assigned a workspace and role based on your SAML configuration.
Then, when a new user is added to your IdP who should have access to Tulip, they will be immediately provisioned in Tulip with no access to any other part of the platform.
Updates to user name
When a user's name is updated in your IdP, or if you modify the order of family name and given name in Tulip's SCIM settings, user names will update in real time in the Tulip platform.
User deletion / deactivation
The SCIM API uses the term "delete" related to de-provisioning users, but users in Tulip can only be deactivated, not deleted. Tulip expects the "delete user" endpoint to only be used when deprovisioning users.
When the "delete user" endpoint is used for a given user, they will be immediately deactivated in Tulip.
Things to keep in mind as you configure SCIM with Tulip
To help your rollout go smoothly, keep the following in mind:
- Reactivate users in Tulip. When a user is removed or disabled in your IdP, SCIM deactivates them in Tulip. SCIM can't reverse this, so if you add or re-enable the same user in your IdP later, they stay deactivated in Tulip. To restore access, reactivate the user in Tulip, then run a sync in your IdP (for example, Provision on demand in Microsoft Entra ID) so both systems agree.
- Only some users are visible to SCIM. SCIM only works with users who have an email address and a SAML NameID. Users who don't meet both requirements don't appear in SCIM, so your IdP can't see them and changes made in your IdP won't apply to them. If a user isn't syncing as expected, confirm they have an email address and a SAML NameID first.
Did you find what you were looking for?
You can also head to community.tulip.co to post your question or see if others have solved a similar topic!