Inventory Management
- 22 Apr 2024
- 6 Minutes to read
- Contributors


- Print
Inventory Management
- Updated on 22 Apr 2024
- 6 Minutes to read
- Contributors
- Print
Article Summary
Share feedback
Thanks for sharing your feedback!
To download the app, visit: Library
This article is a guide for app configuration that includes a functional breakdown of steps and ideas for connecting to other apps.
The Inventory Management app is a part of Tulip’s composable MES Inventory app suite. You can use it individually or in combination with other applications.
Usage and Value Creation
This app has two primary focuses. The first is managing and viewing inventory items, storing data in a Tulip table. The second function involves managing Kanban cards, which provide a lean and efficient solution for material management. In this context, the application integrates Kanban loops, which establish replenishment relationships between suppliers and consumers using customizable bins/cards.
Tulip Tables in the app
All the applications in the Composable MES app suite use common tables.
The main Tulip tables used in this application are the Material Requests and Kanban Cards to support the Kanban system. Additionally, application uses the Material Definitions and Inventory Items tables to store all the relevant data for inventory management.
(Operational Artifact) Material Requests
- ID: Unique identifier for request
- Item: Identifies the part number of the requested material
- Requesting Location: Location where the request was made
- Supplier: Location where the requested material is stored
- Kanban ID: Identifies the Kanban container for the request
- Quantity: Amount of material requested
- Status: Current status of the material request
- Status Color: Current status visionalised by colours
- Requestor: Requesting operator personnel
- Assignee: Assigned operator for movement and replenishment
- Requested: Date/time of request was made
- Started: Date/time of start processing request
- Completed: Date/time of completed request
- Bin: Bin Requesting Location where material replenishment should be delivered.
- Compiled by: User who provided the material requested to fulfil the replenishment request.
- Ready for pick time: Ideal cycle time for picking up the filled container
- Delivered by: User who delivered the material to the Requesting Location.
(Operational Artifact) Kanban Cards
- ID: The unique identification of a kancan card
- Part Number:Item/Part/Material to be replenished.
- Status:Status of the kanban card
- Consuming location: Location that will consume the material replenishment request.
- Supplier: Location that will fulfill the kanban replenishment request.
- QTY: Quantity of Material of the kanban
- Part Description: Description of the Item/Part/Material to be replenished.
- Status Color: Color status of the kanban card
- Image: Image of the material to be replenished
- Active: Is the kanban card active?
- Lead Time: The time expected from empty to replenish, can be used to set a due date
(Reference) Material Definitions
- ID: The unique identification of a items
- Name: The name of the material definition
- Type: Field used to categorize materials. For example: Raw vs Intermediate vs Final or Make vs Buy
- Description: Material Description
- Image: Image of the material
- Status: As a material evolves, it can progress through various statuses (for example: NEW, READY, BLOCKED, OBSOLETE)
- Unit of Measure: Unit of Measure
- Version/Revision: The number or letter representing the individual revision of the part
- Vendor ID: Reference to the Supplier of the material
- Target Cycle Time: The amount of time it should take to complete 1 unit, this can be used to set target production rates and establish target cycle times.
(Physical Artifact) Inventory Items
- ID: Unique identifier for items
- Material Definition ID: Material Definition of the inventory item
- Material Definition Type: Type of Material of the inventory item
- Status: The status or current state of the inventory item
- Location ID: Current physical location of the inventory item. It could be a station ID, a location ID, or any arbitrary indication of a location.
- Location Area: Further subdivision of locations by area, allows for grouping or filtering by area or zone
- QTY: The quantity of the inventory record.
- Unit Of Measure: The Unit of Measure related to the quantity.
Configuration and customization
In-app help
As with all applications in the Composable MES app suite, the Inventory Management app includes in-app help as well. These are short descriptions of the Required setup steps and App builder tips to support further customization. After downloading the app make sure to read these instructions and then delete them before running the application.

Required setups
In the Create Inventory Item step, you should adjust the ID creation logic within the create inventory trigger (located on the save button) to align with your own process of ID generation.
In the Print Label step, you need to configure the Print Label trigger on the Print Label button.
Customization options
In both the View Kanban Cards and Create Kanban Card steps, you should update the selection options for these widgets. This can be done either by providing a static list of locations or by using a Table Aggregation to pull the locations dynamically.
In the Main Screen step and the Edit Status step, you can configure the data source for the Status with table aggregation or static values.
In the Material Request History step, you should update the selection options of the Status single select. You can do this by either using a static list of your statuses, or employing a Table Aggregation to dynamically pull the statuses.
App Structure
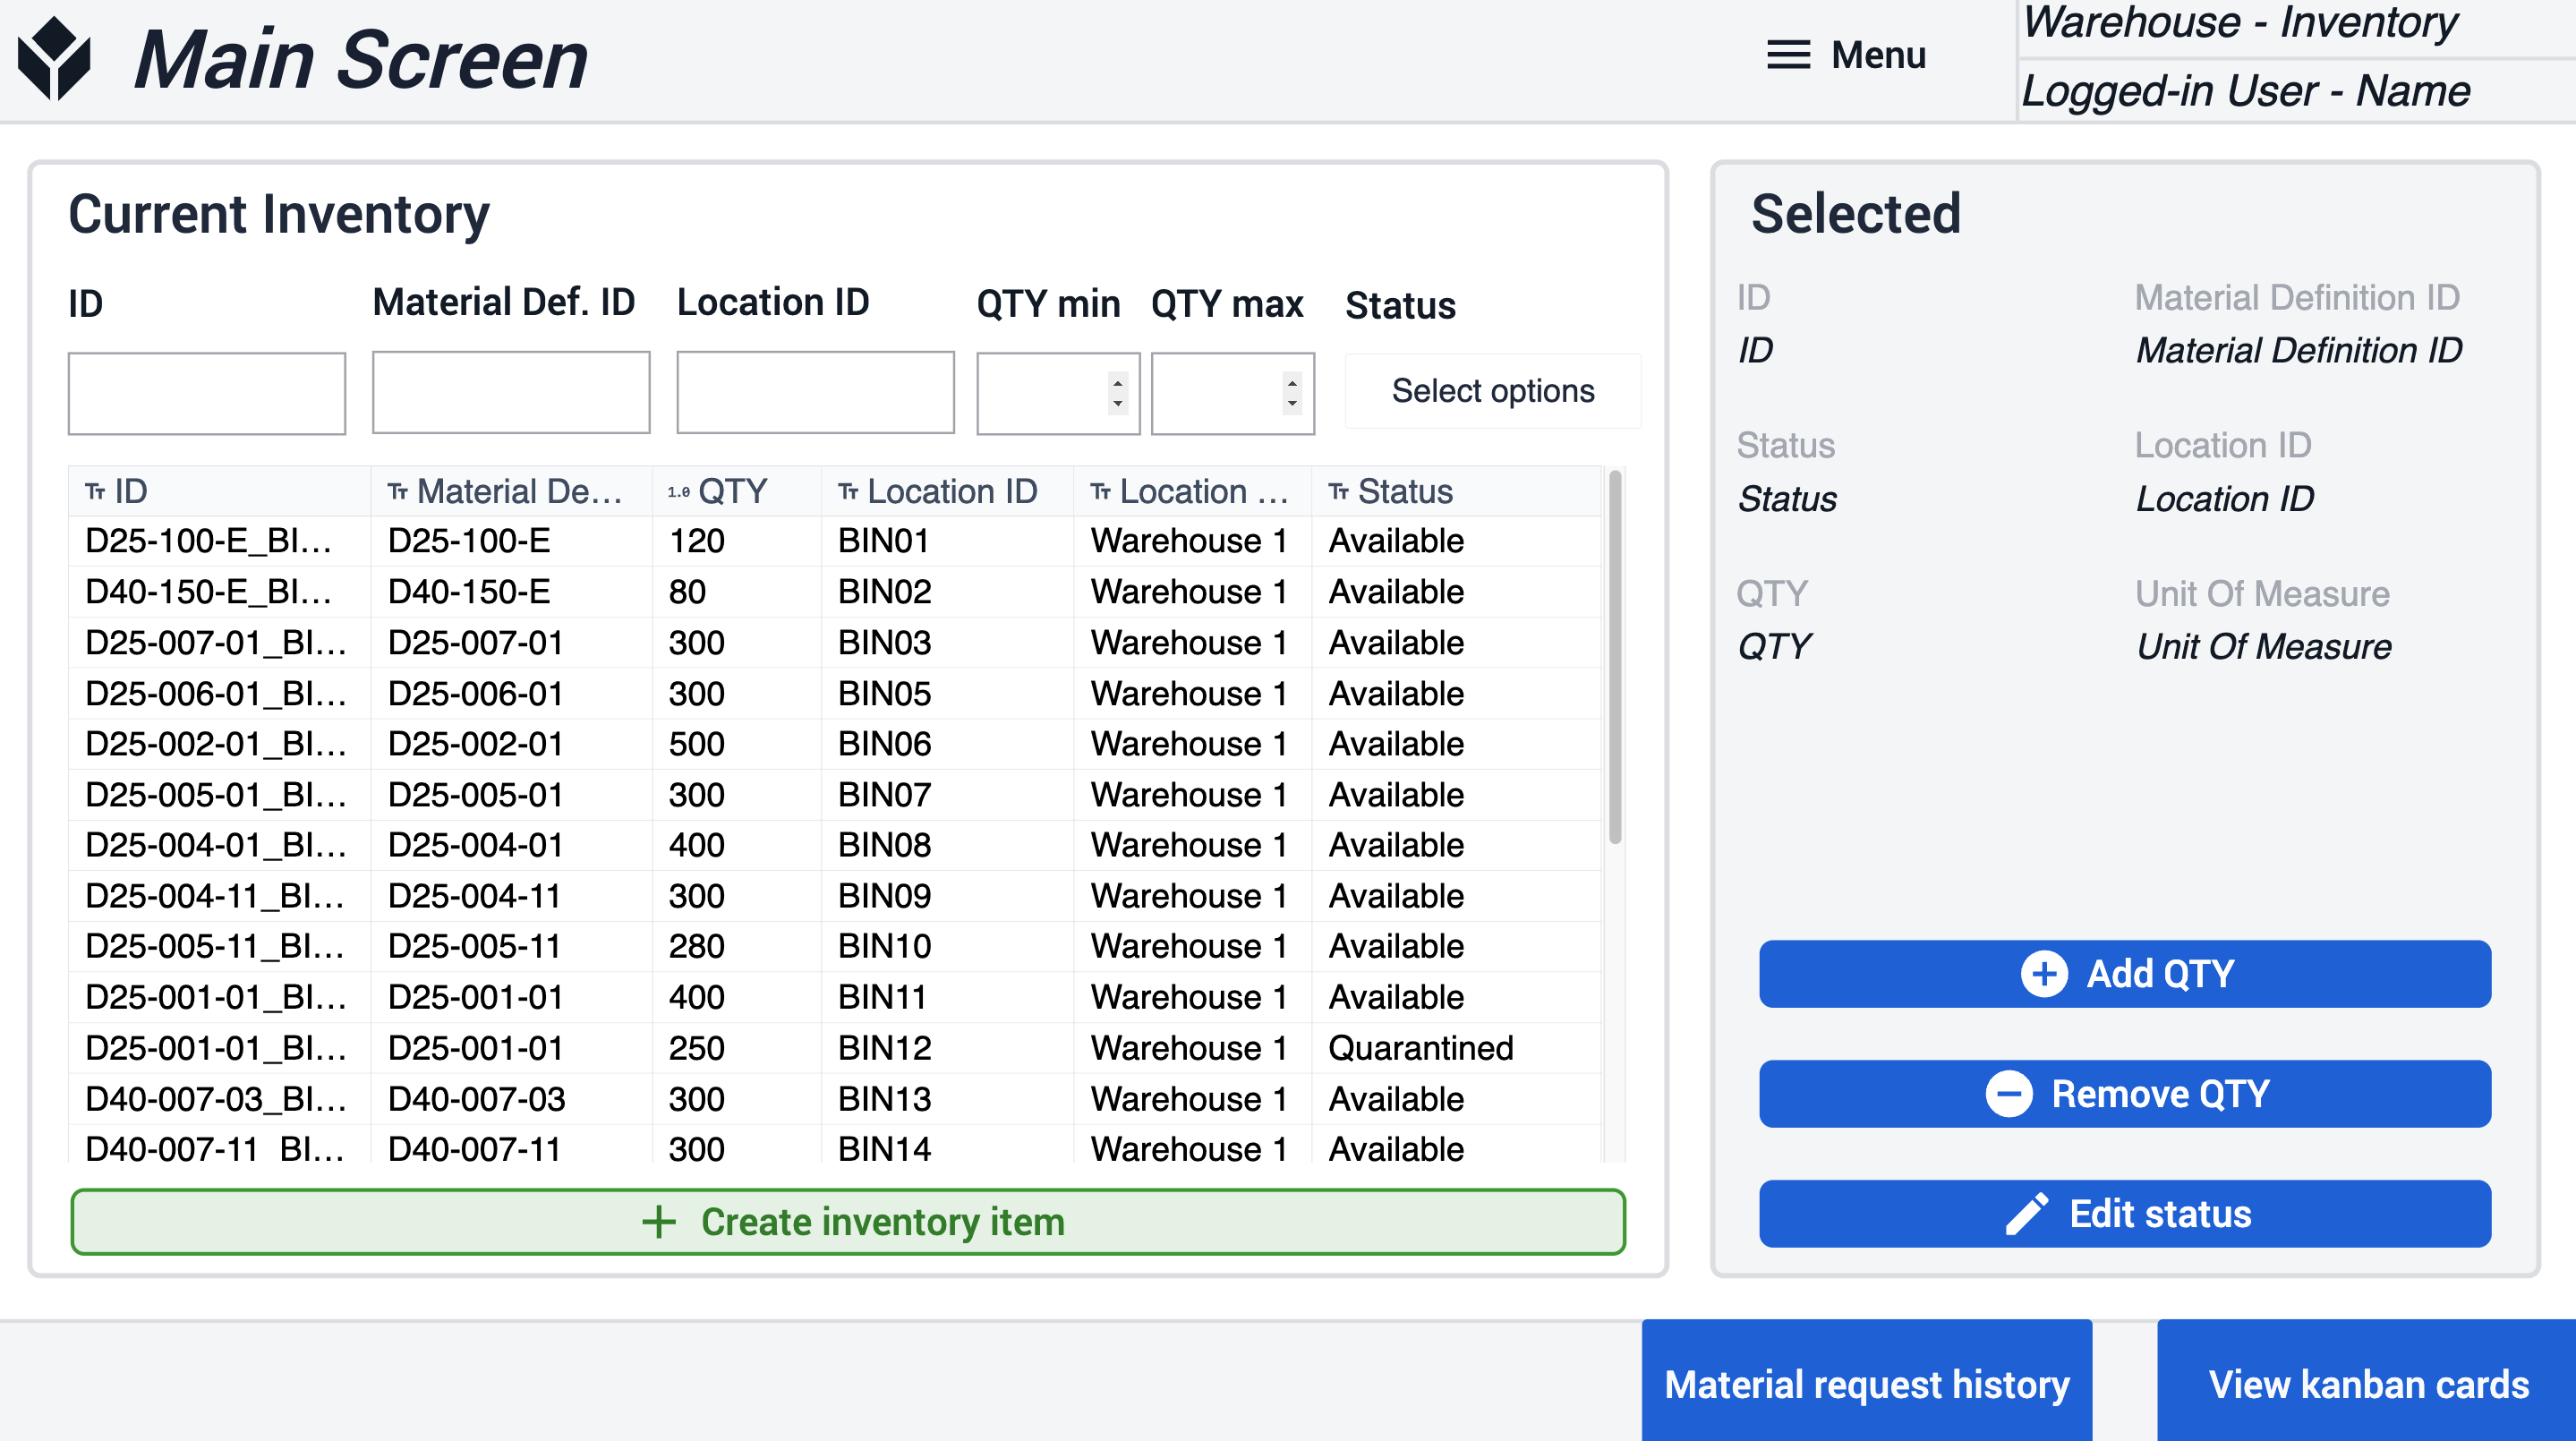
The Main step in the inventory management application serves as the navigation page for the app. There are multiple actions you can choose from:
- Filter inventory items based on ID, Item Name, Location, and Status
- Create a new inventory item
- Add items to an existing inventory record
- Remove items from an existing inventory record
- Edit the status of items in an inventory record
- View Kanban cards
- View material request history
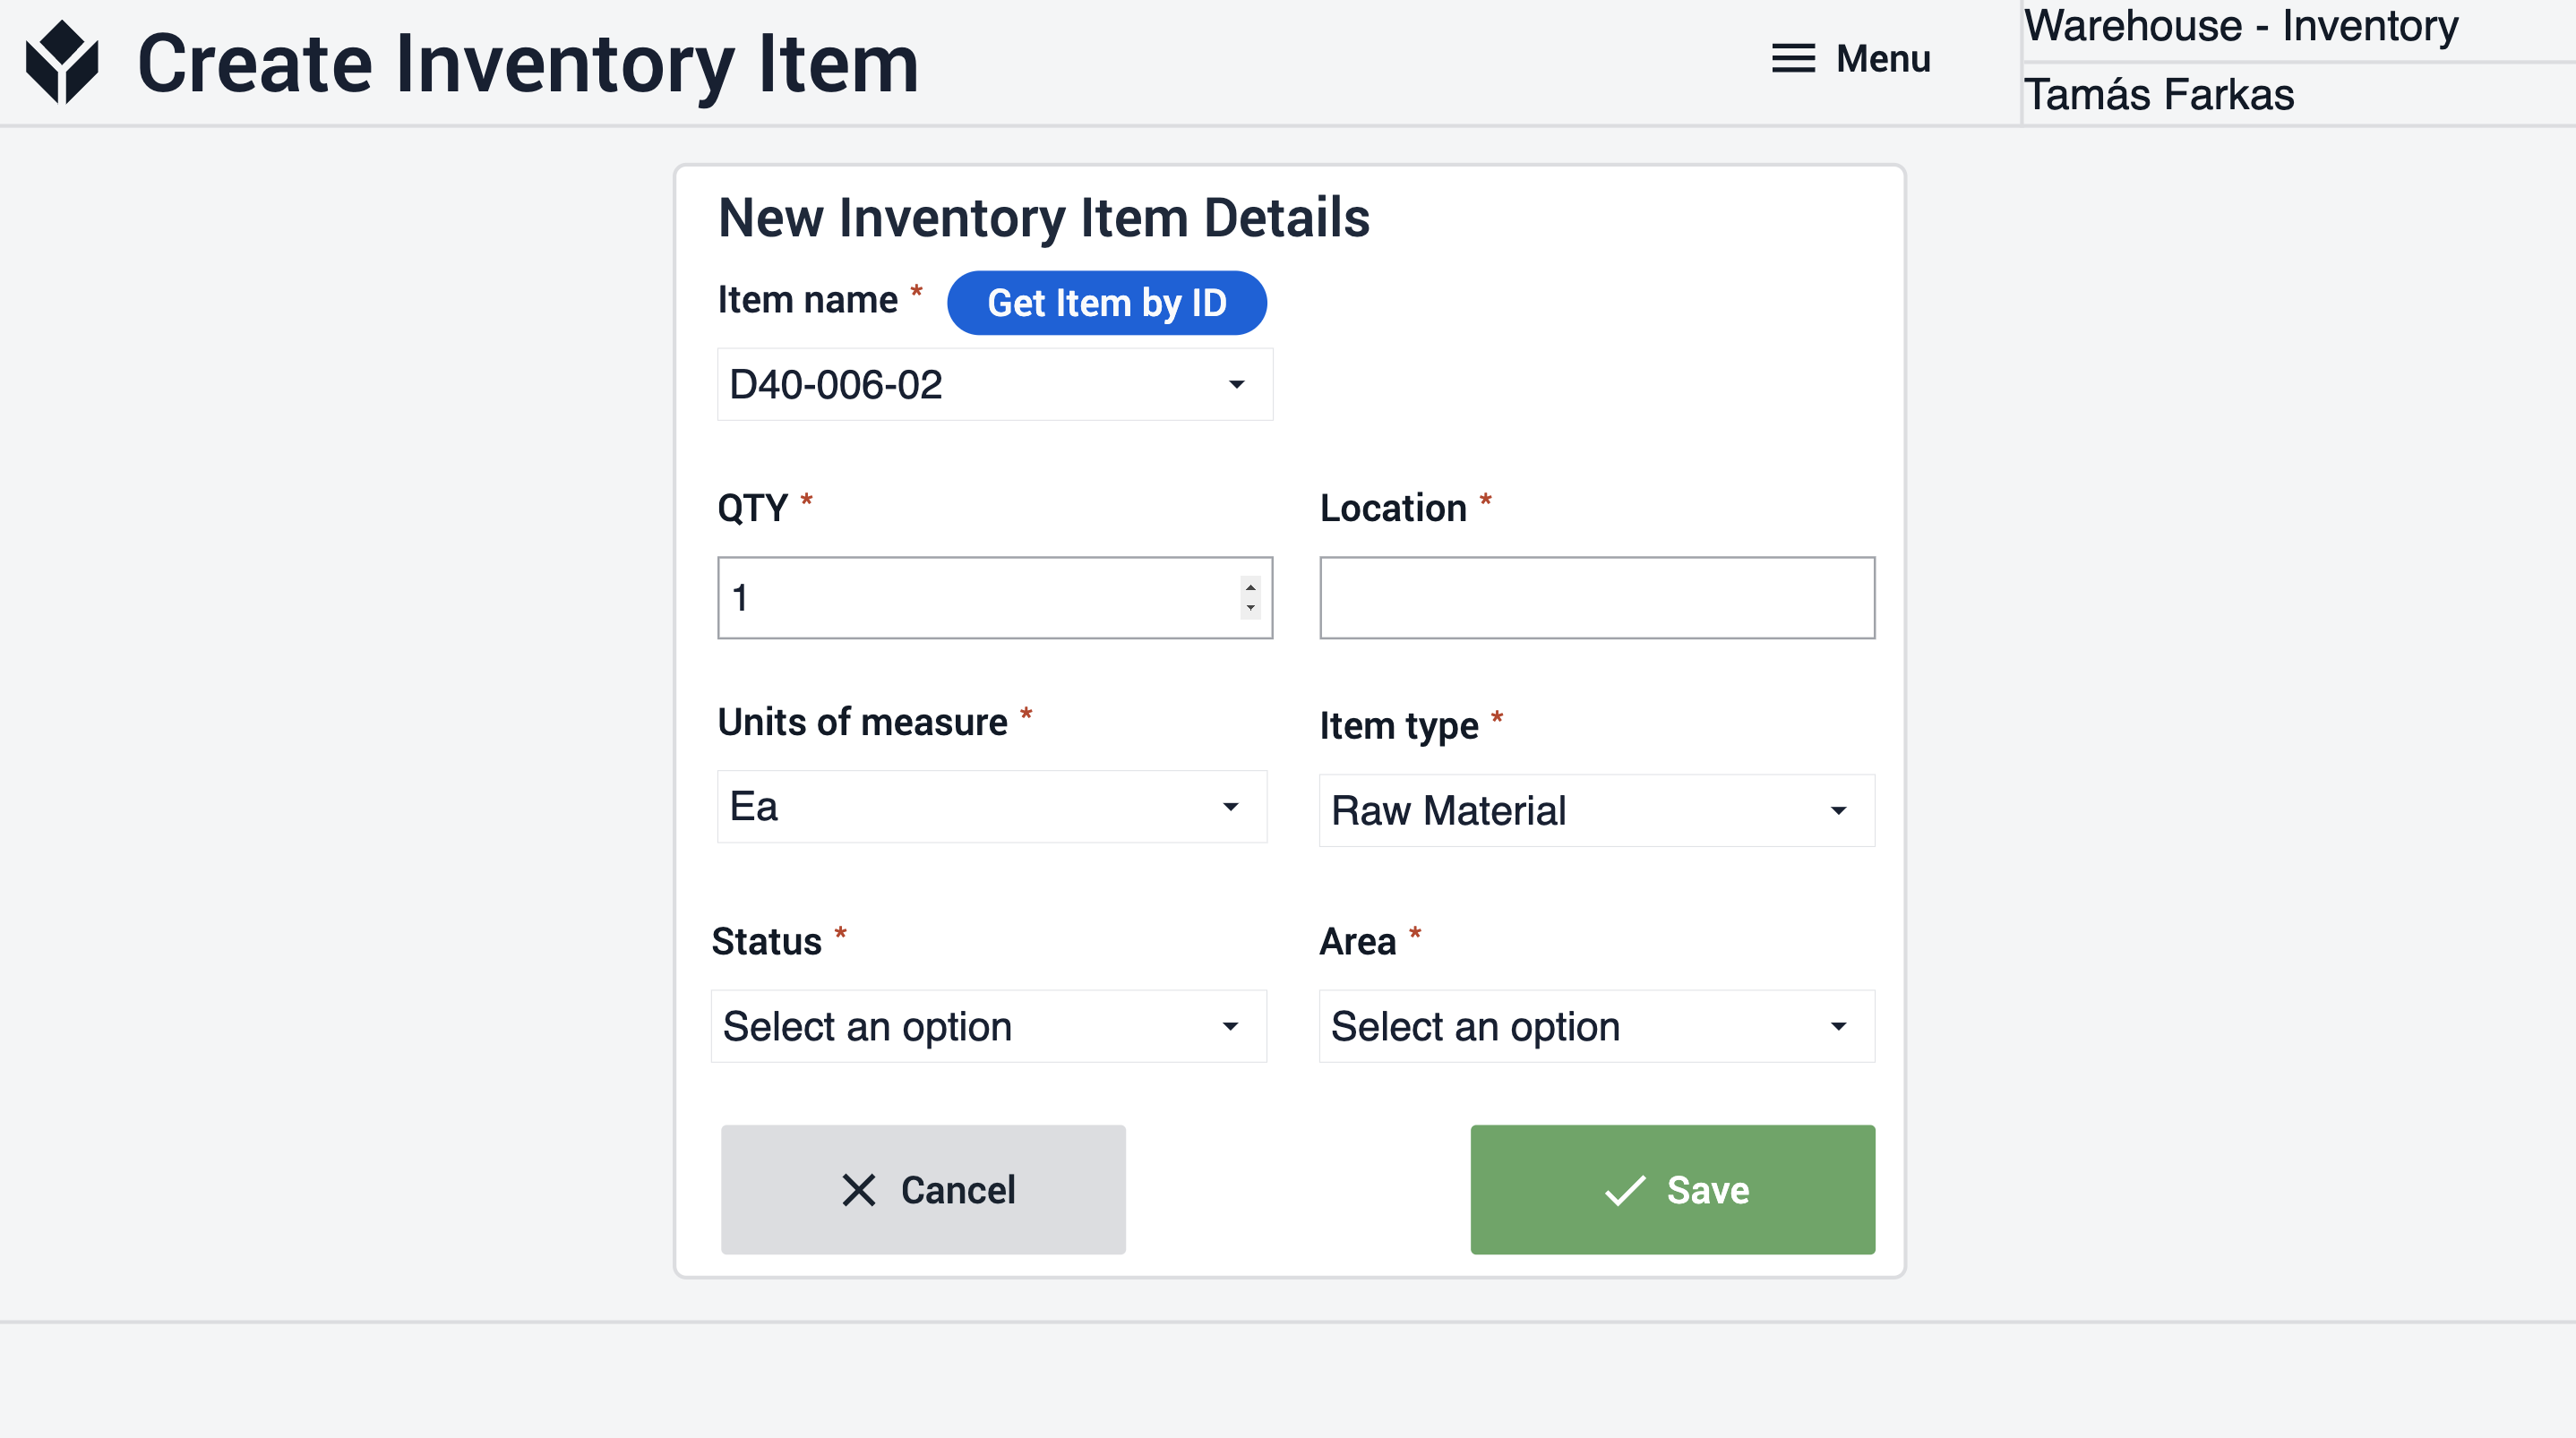
When the user clicks the Create inventory item button on the Main screen, they are navigated to the Create Inventory Item step. Here, they need to fill out all the fields and click on the Create button to create a new inventory item.
By clicking the Add QTY button on the Main step, the user is directed to the Add QTY step. Here, the user is required to input the number of additional items and then update the table record by clicking the Update QTY button.

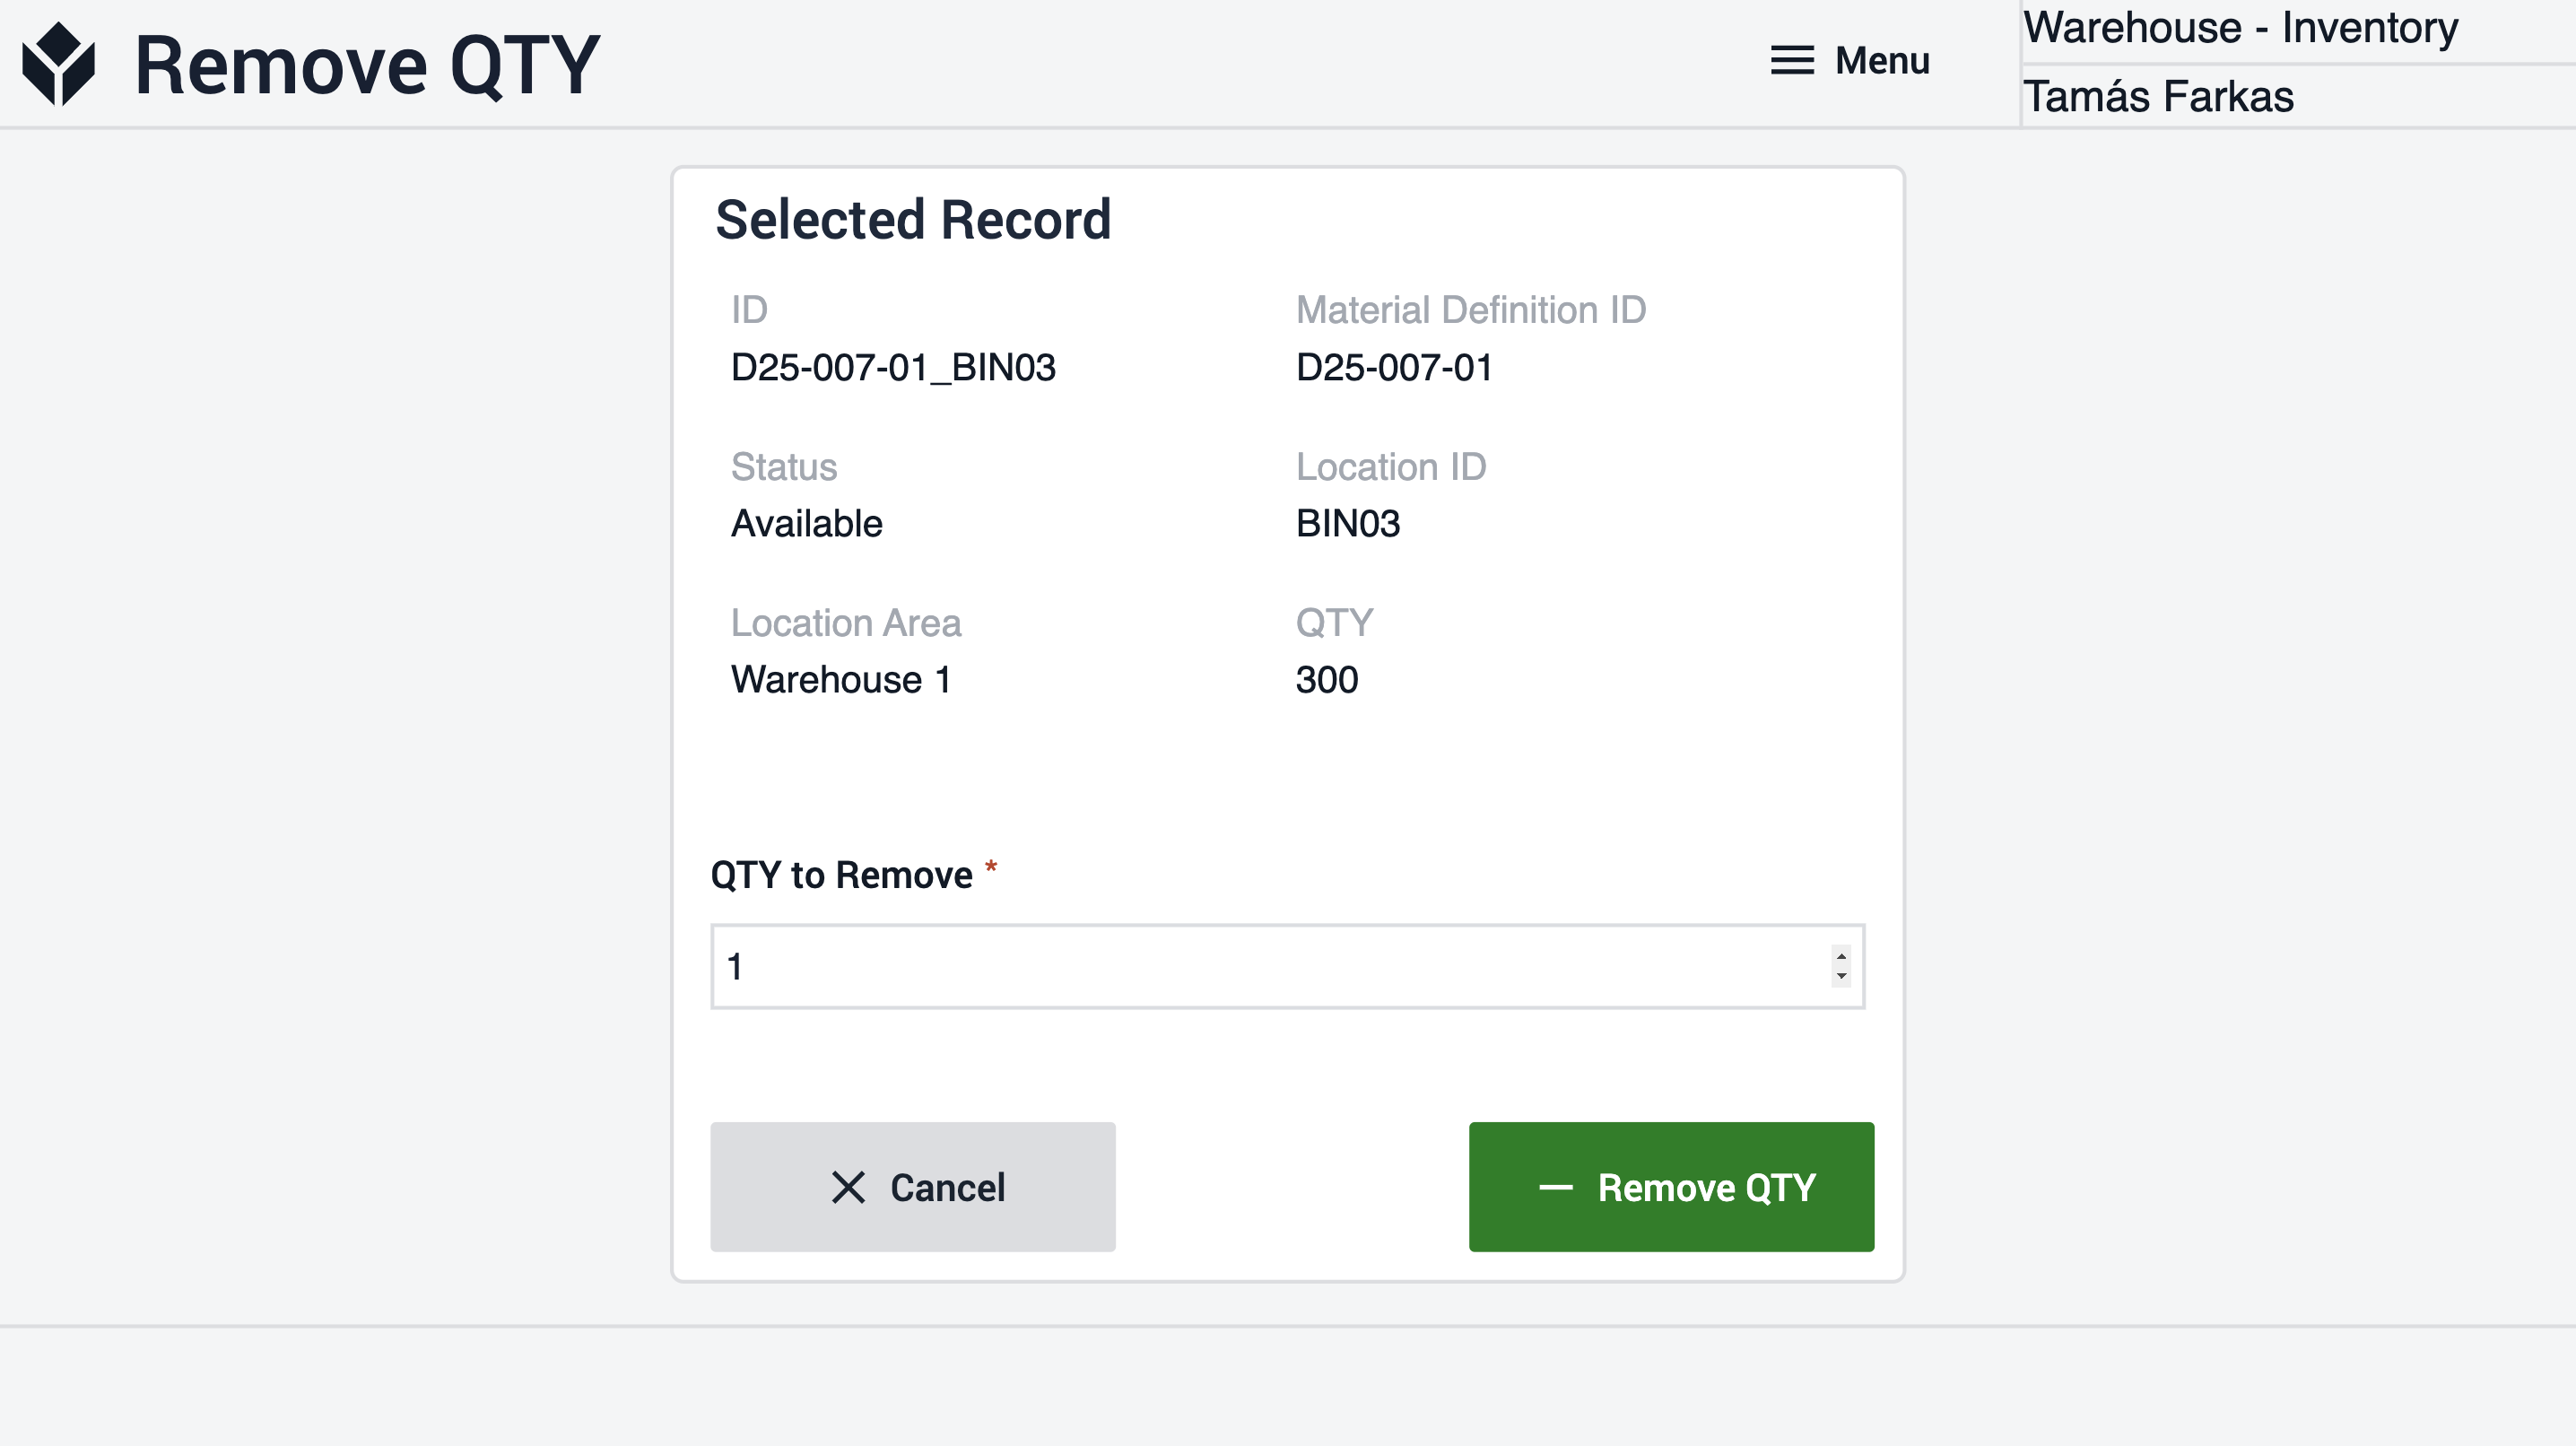
By clicking the Remove QTY button on the Main step, the app navigates the user to the Remove QTY step. The user needs to type in the number of items to remove and update the table record by clicking on the Remove QTY button.
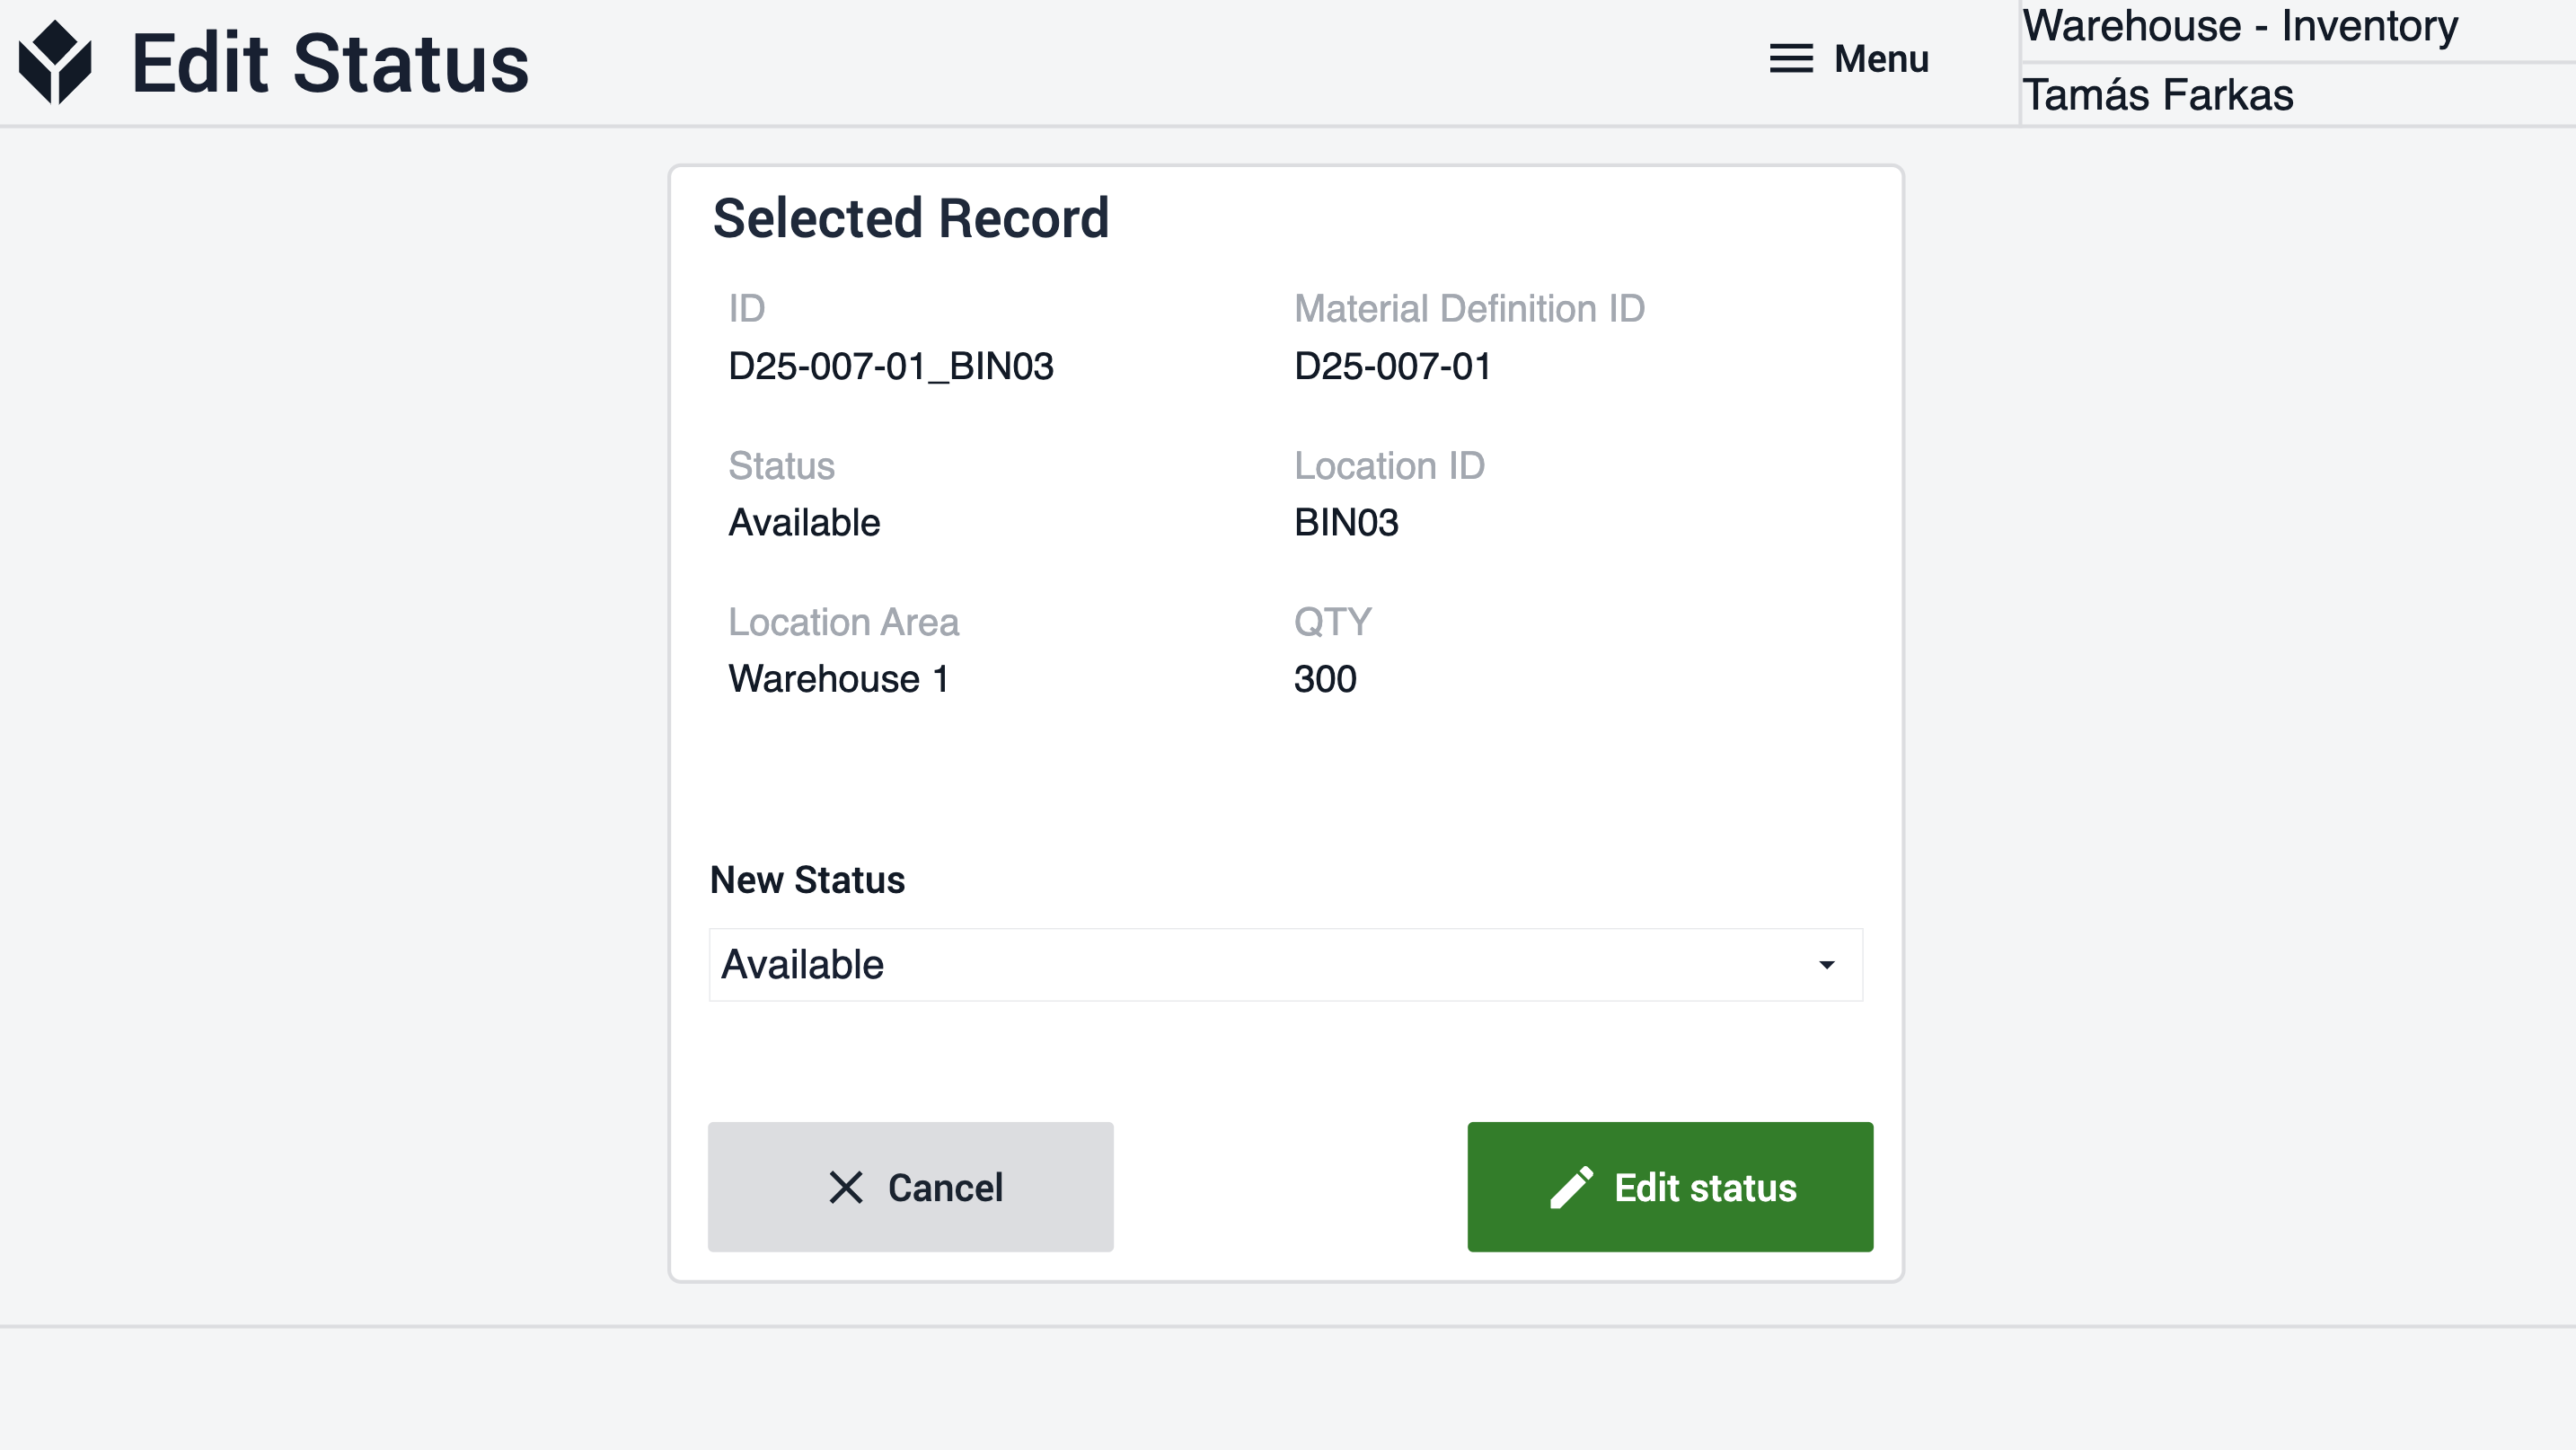
By clicking the Edit status button on the Main step, the app navigates the user to the Edit Status step. The user is required to determine the new status. The changes are then saved by clicking on the Edit Status button.
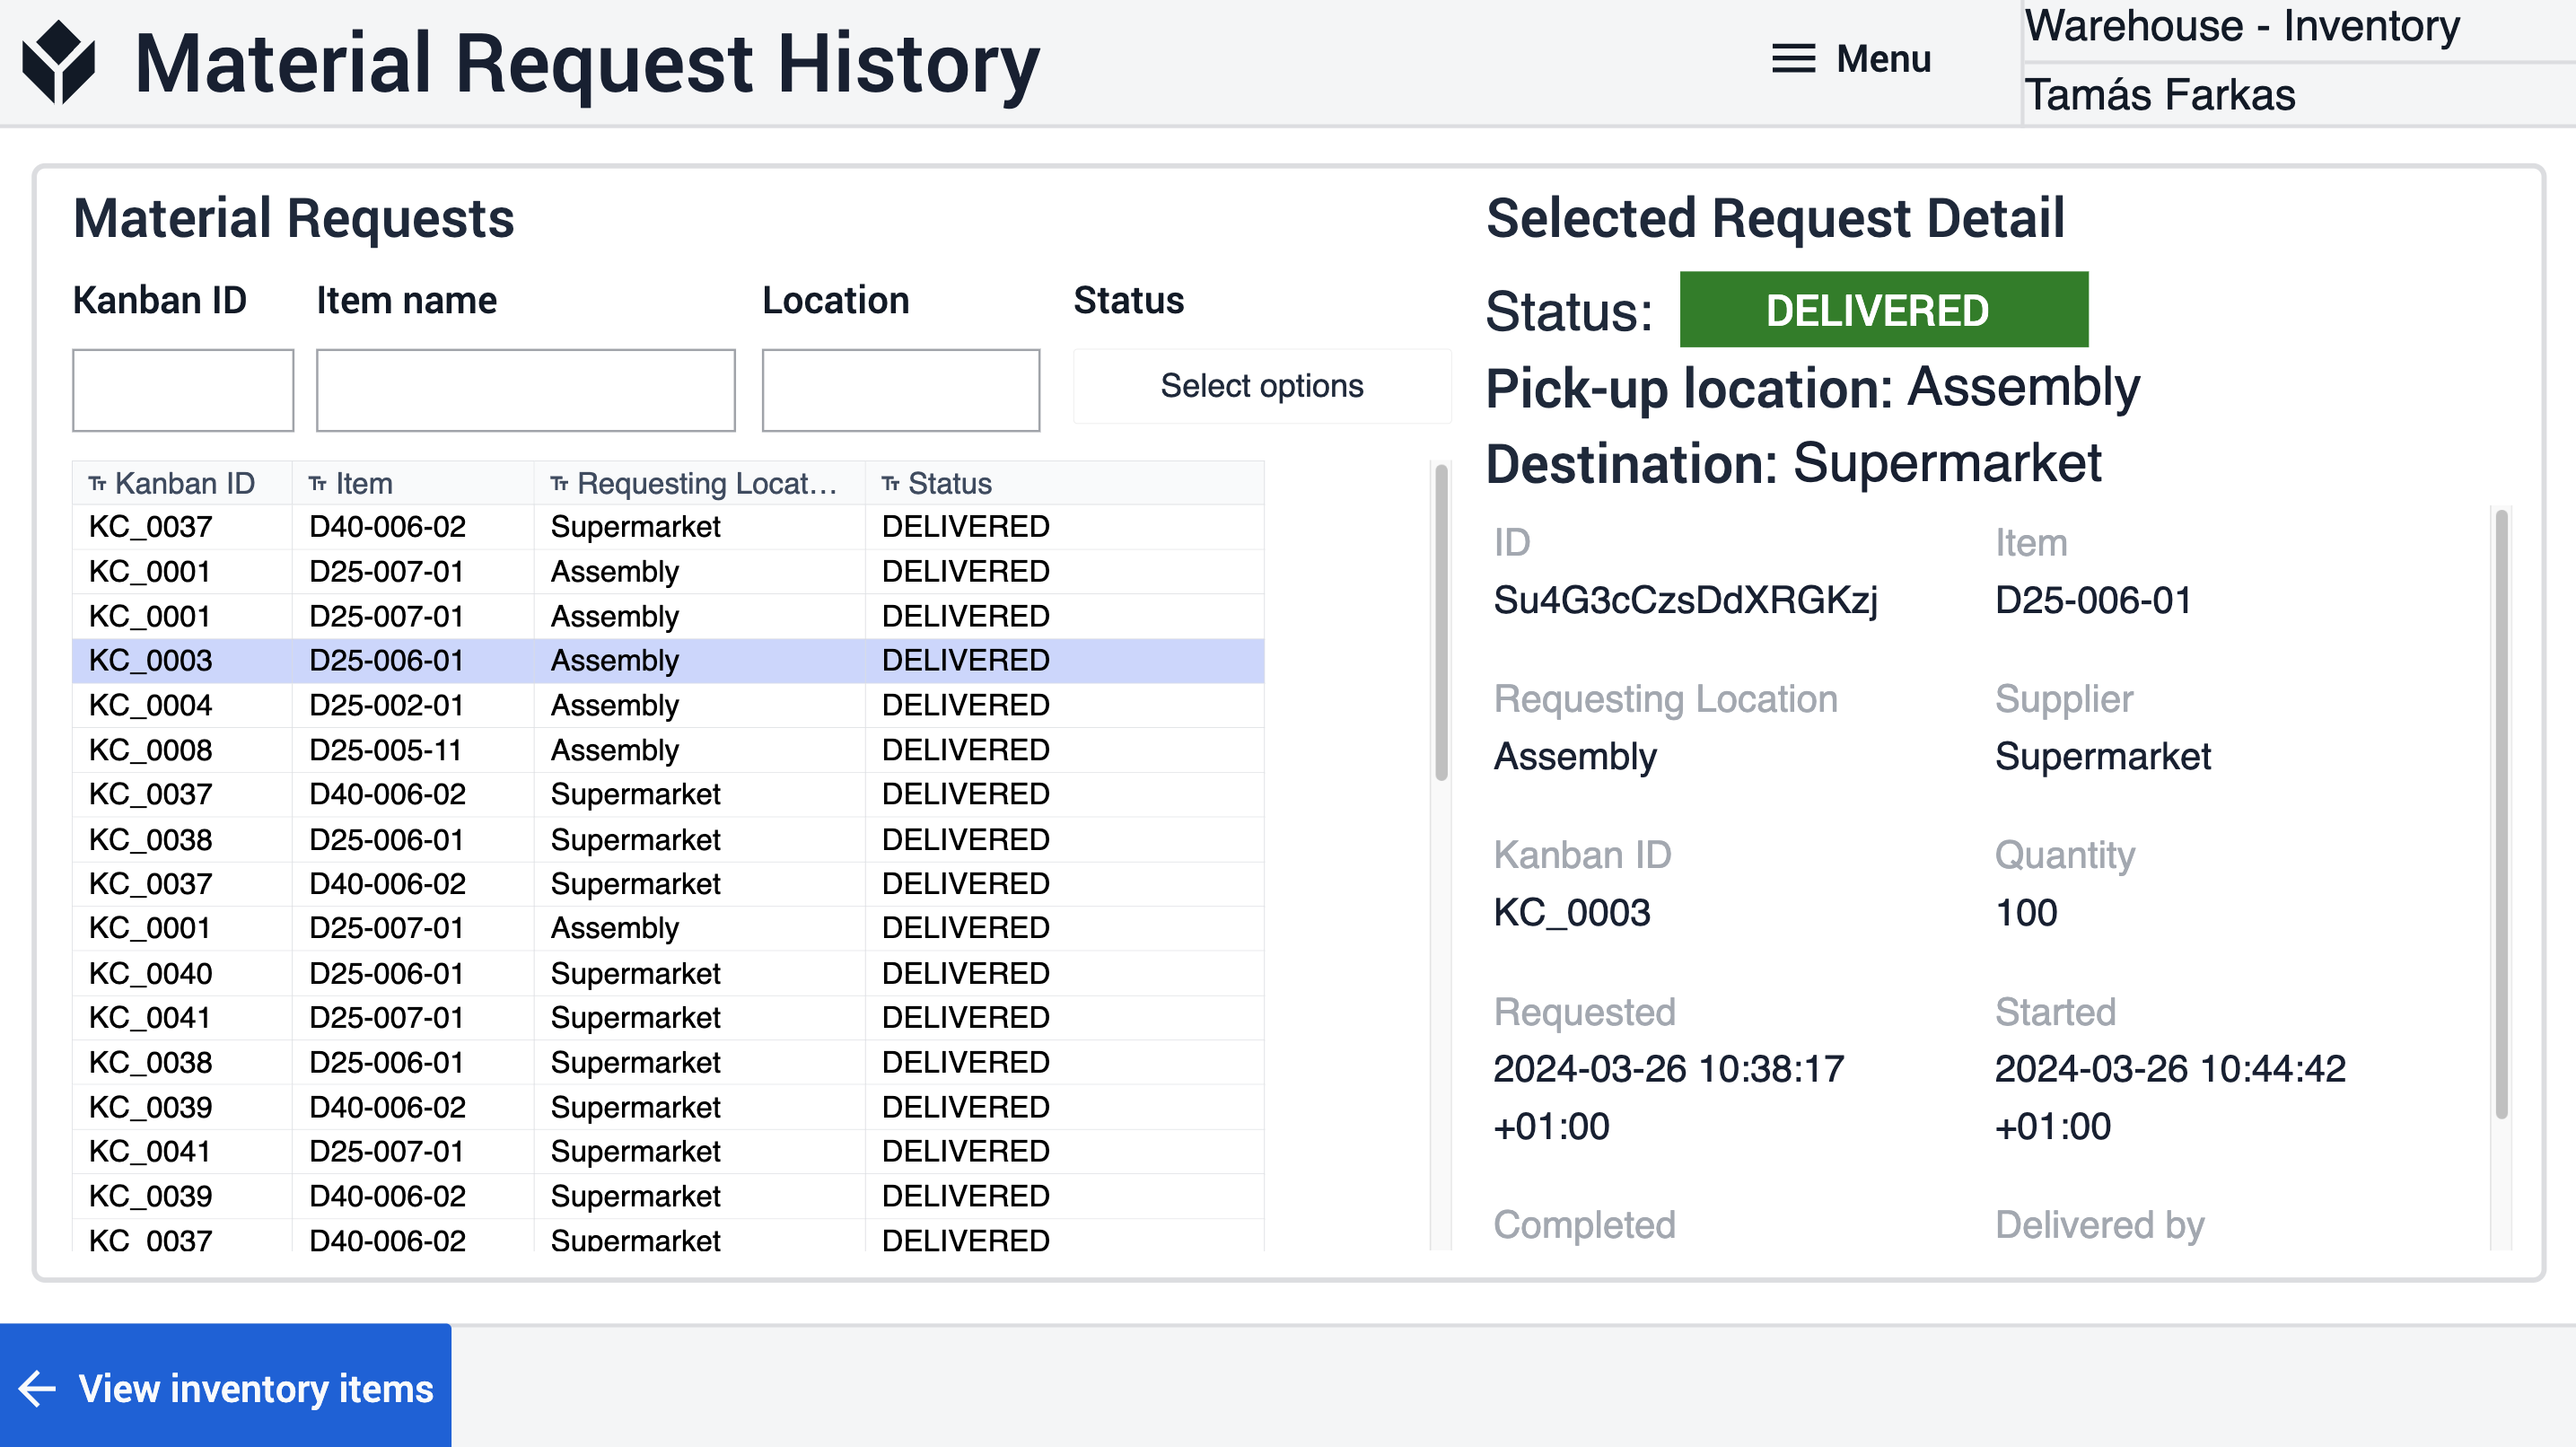
When users click the Material Request History button, they are navigated to the history step. Here, the table can be filtered by Kanban card ID, item name, location, and statuses. Users can view detailed information by selecting a record from the table.
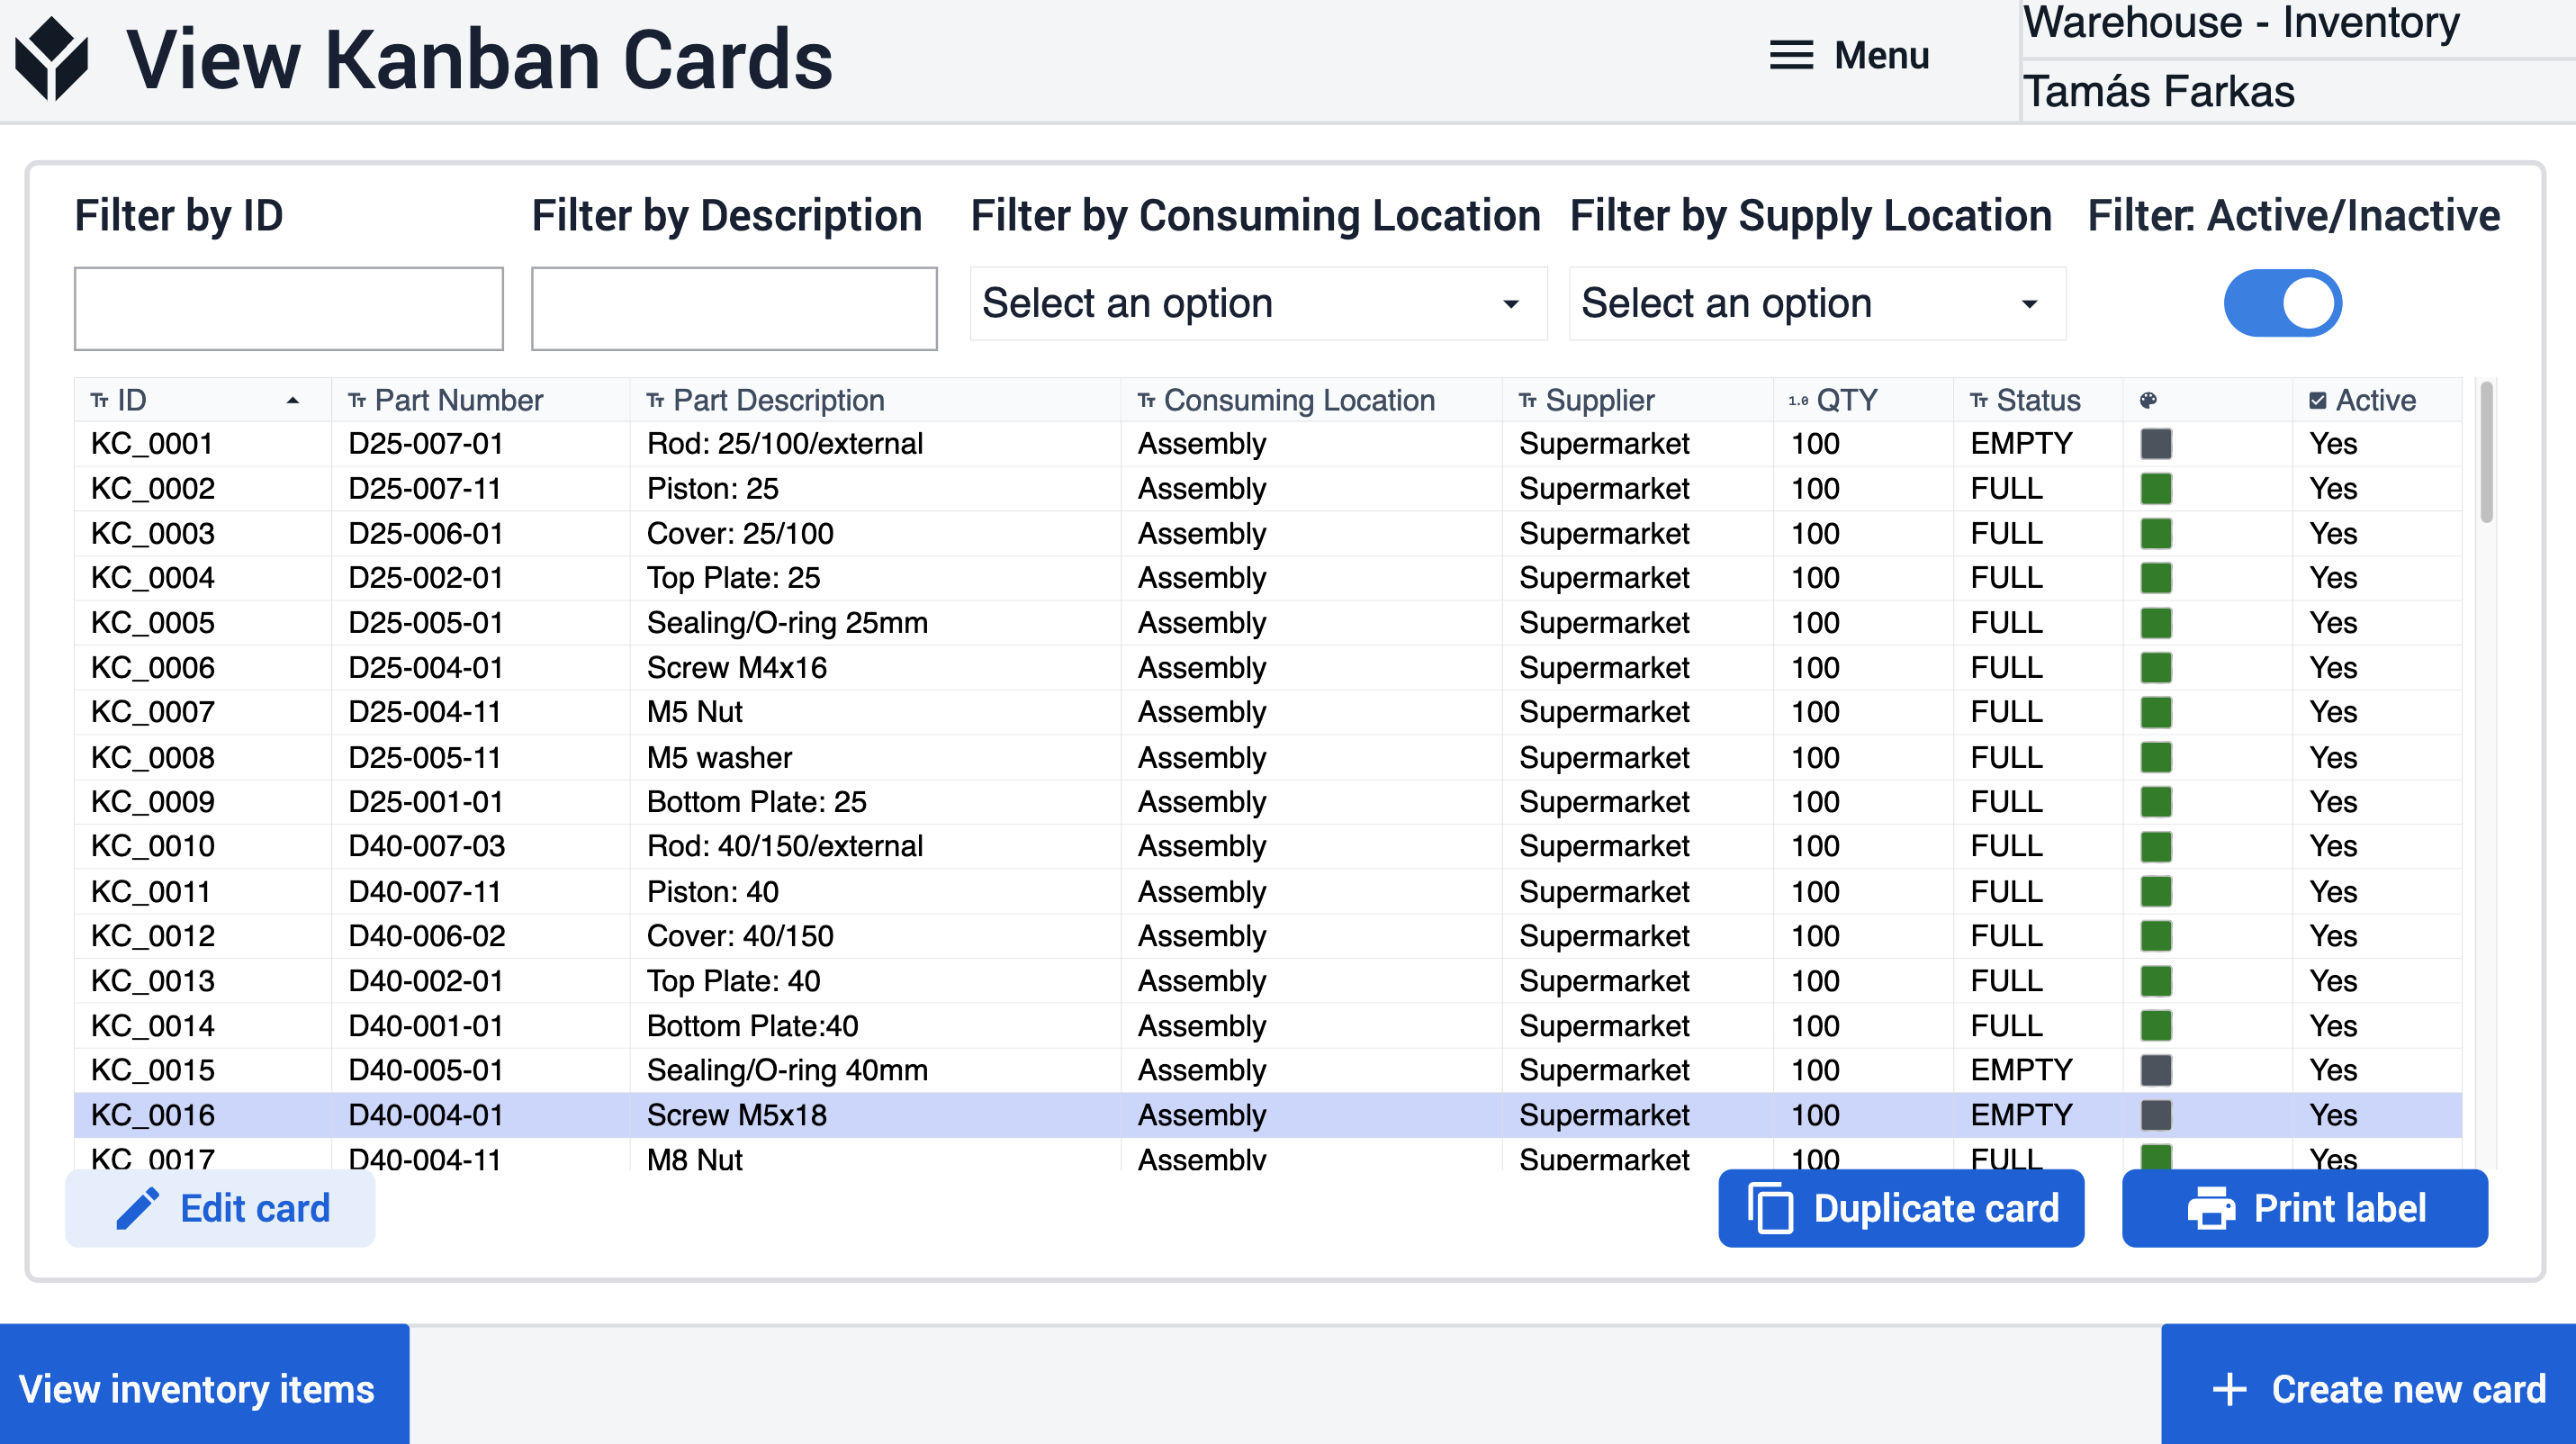
In the View Kanban Cards step, users can view all the cards that have been created.
Users can duplicate a selected card by clicking on the Duplicate Card button. Using this function, they can create a new card that shares the same attributes as the selected one, but with the card ID incremented by one.
By clicking on the Print Label button, the user is navigated to the label print step, where they have the option to print scannable labels for bin containers.
To activate or deactivate a selected card, the user should click on the Edit Card button. Deactivated cards don't appear in other apps where the active filter is appropriately set.
To create a new card, users should click on the Create New Card button, which navigates them to that step.
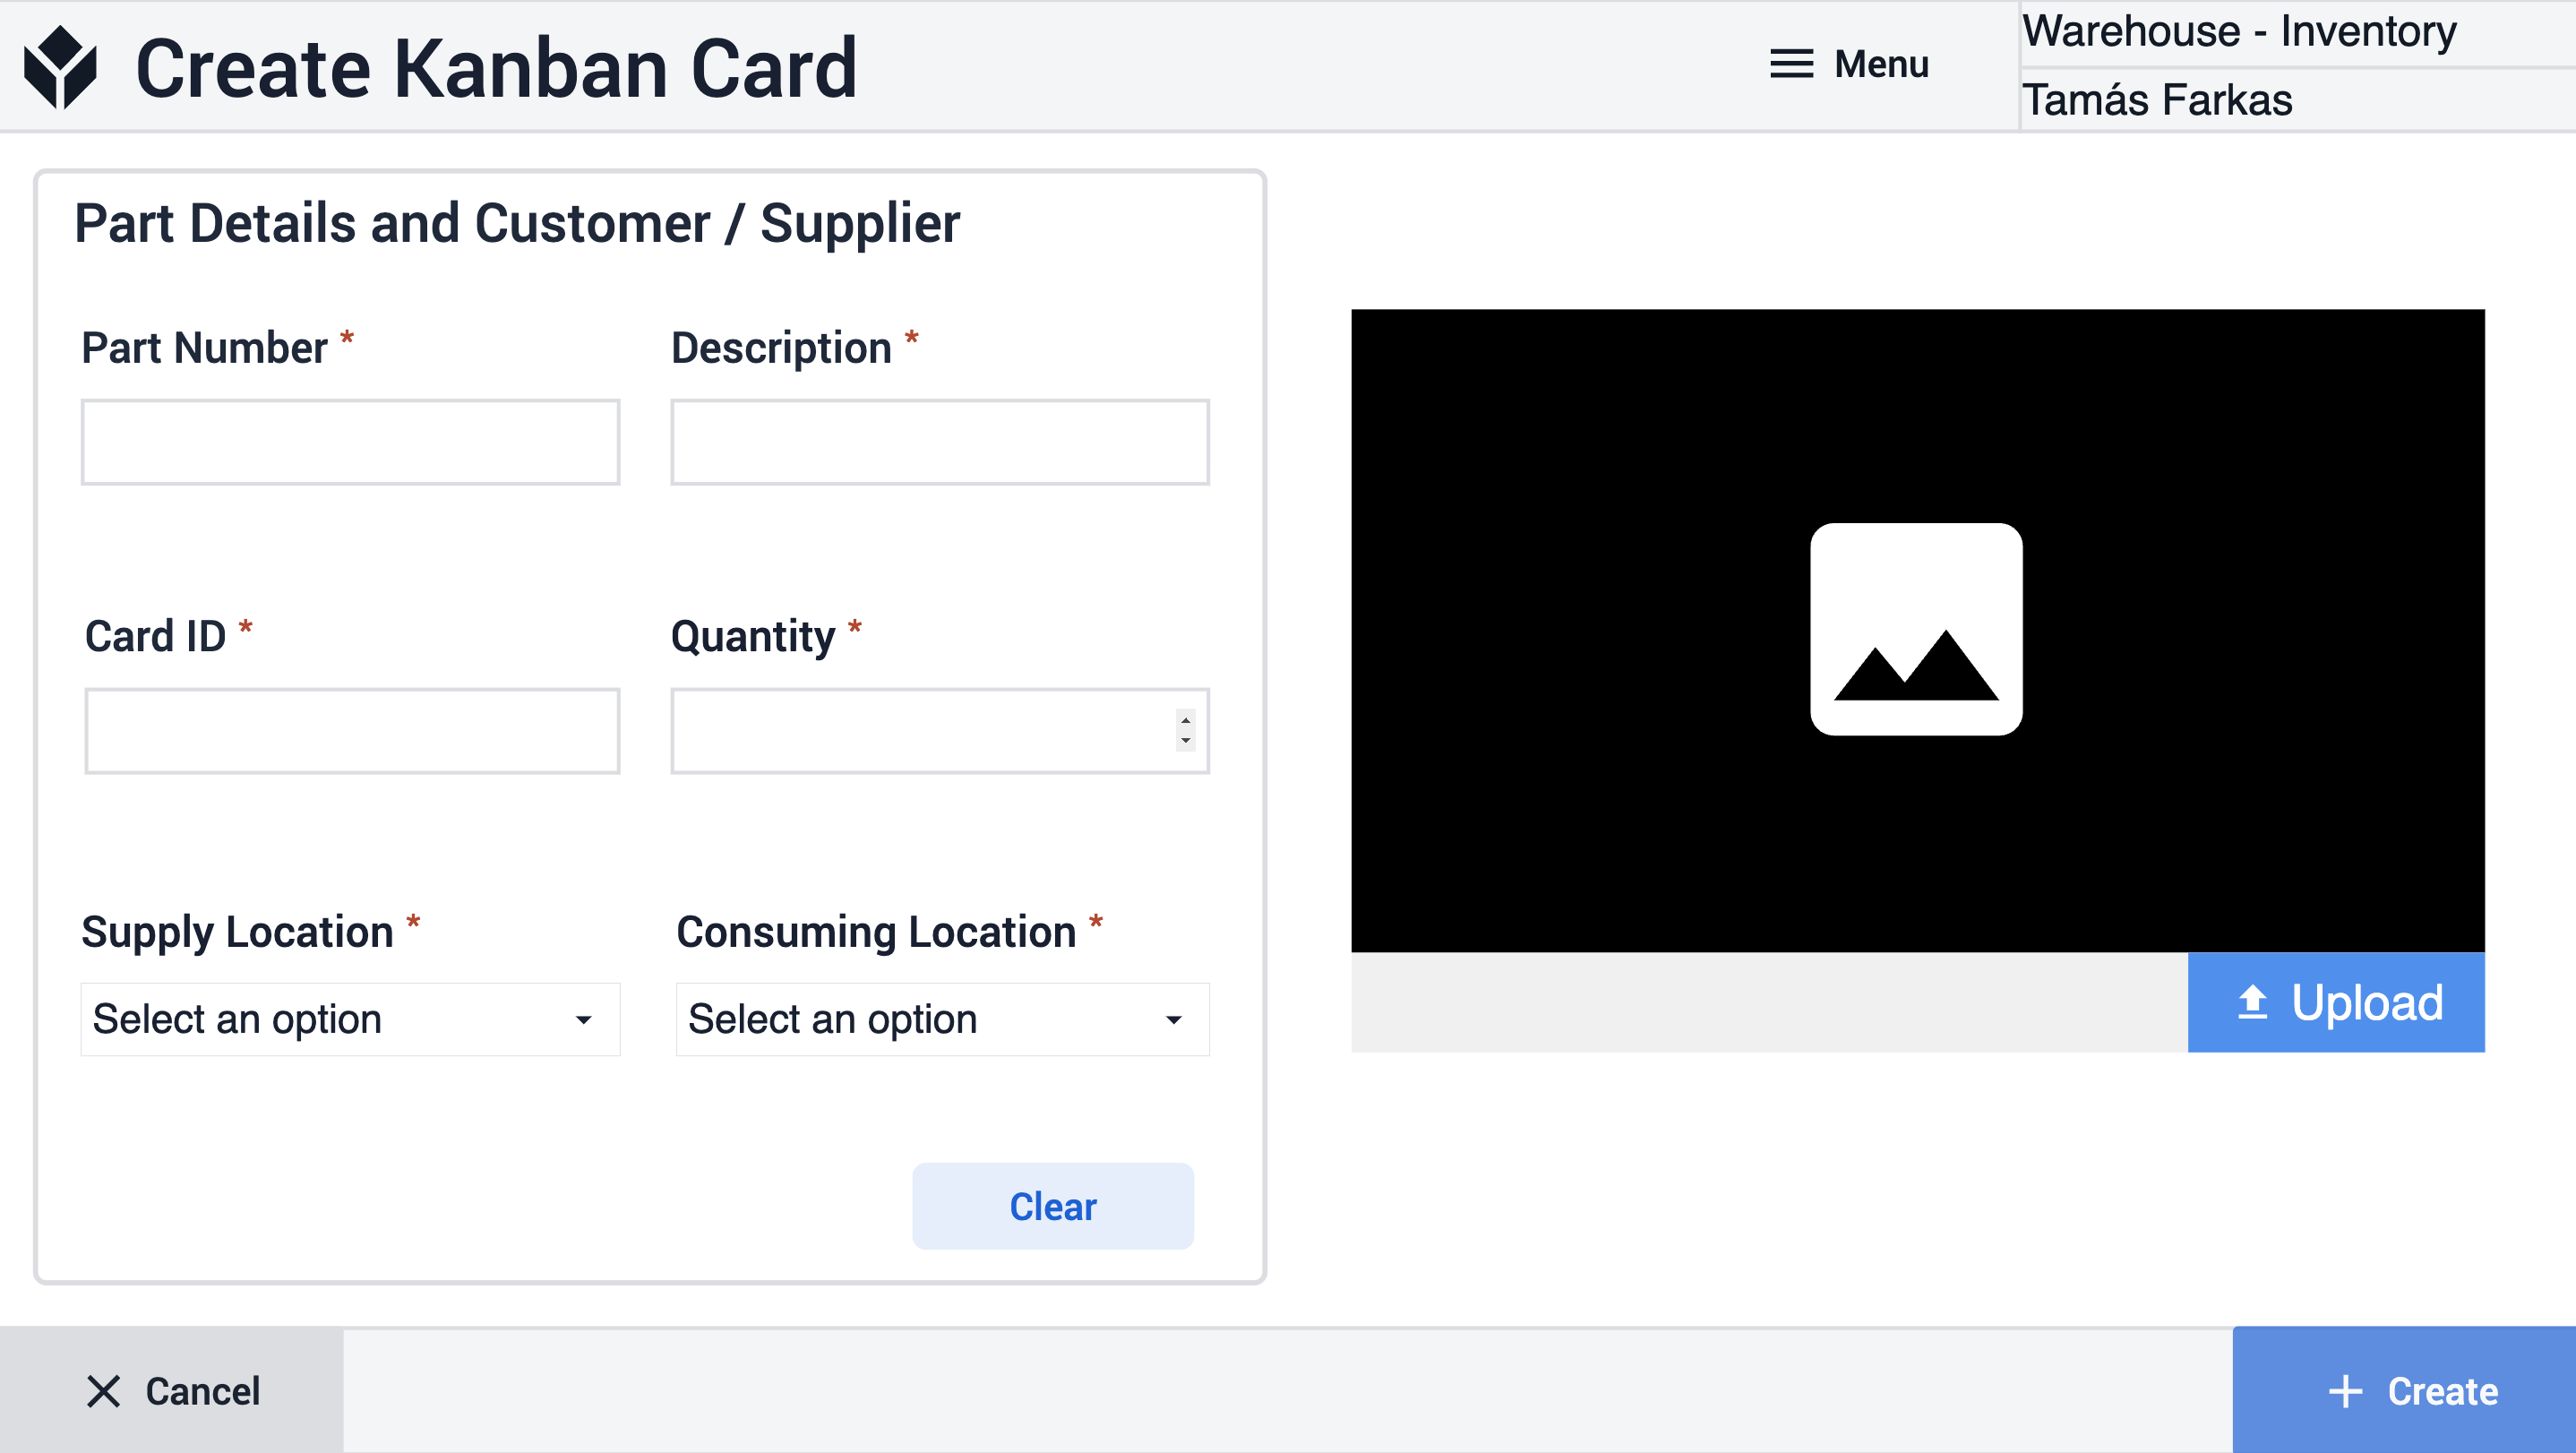
In the Create Kanban Cards step, users must fill in all the required fields to create a new card.
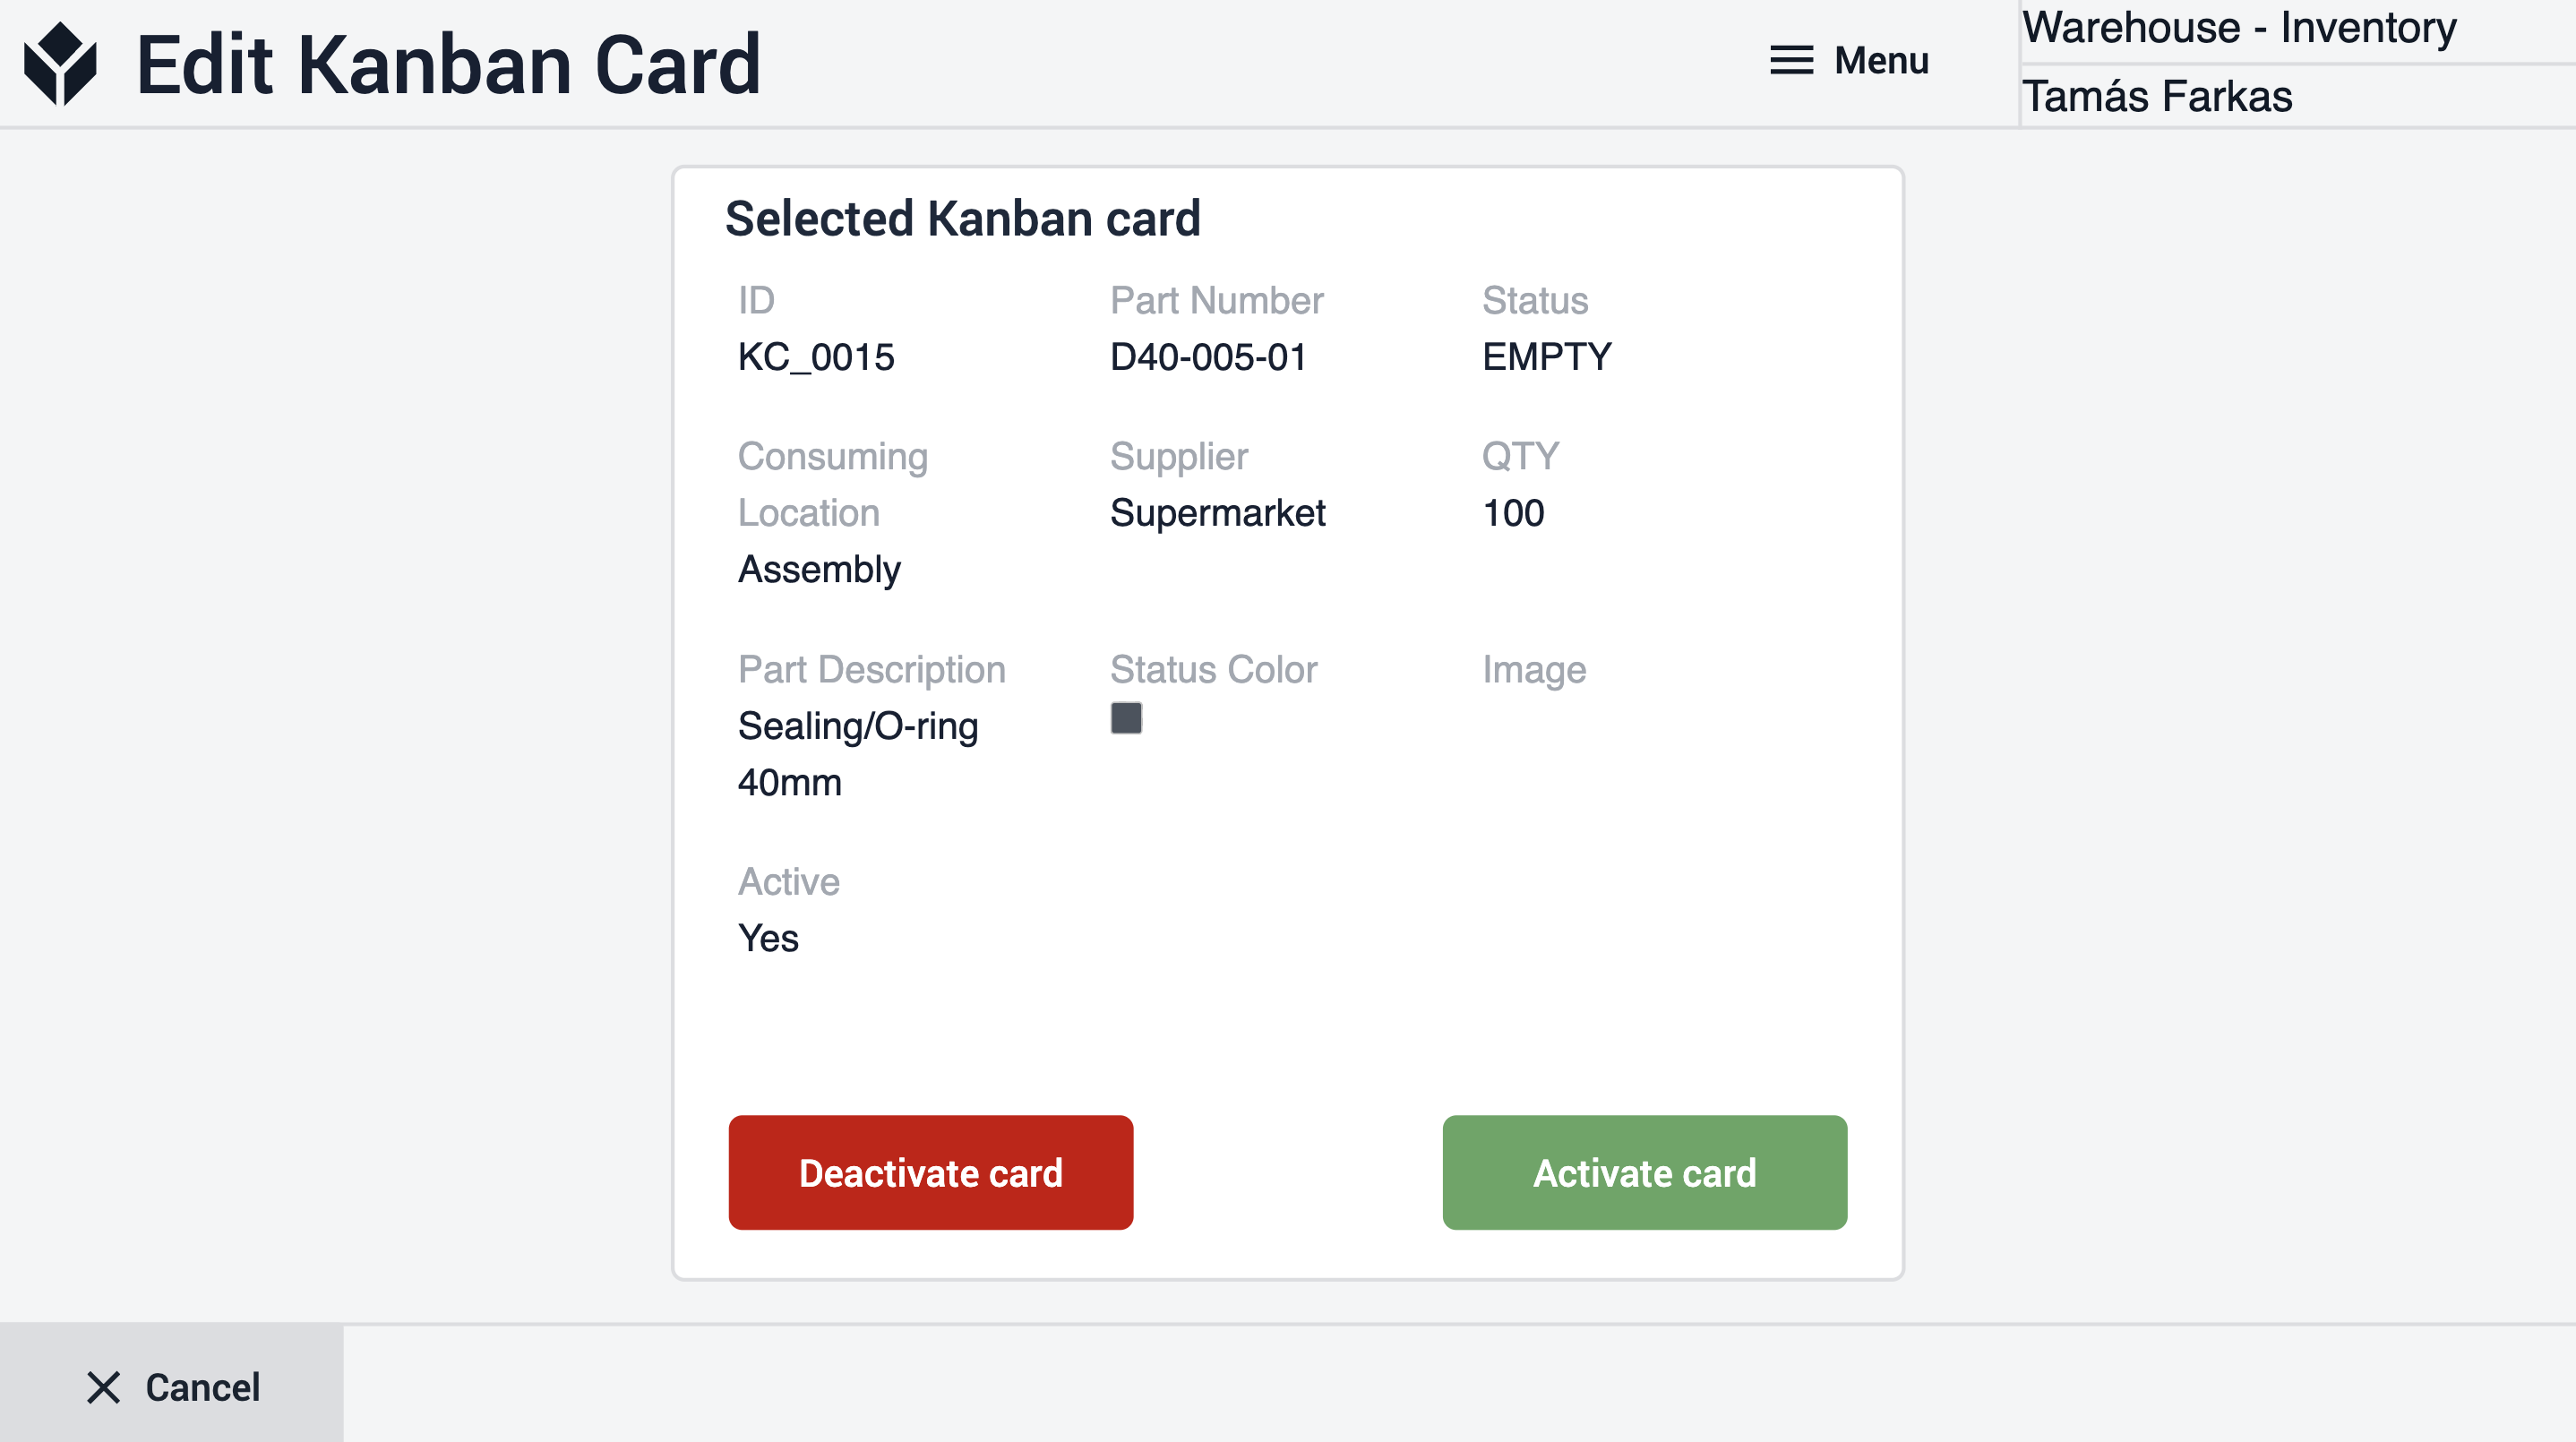
In the Edit Kanban Card step, users have two options: Activate or deactivate the card. Only one button is active based on the card's current status.
Extended App Connections
Examples for connecting apps to work with each other.
Replenishment
If the Replenishment application requires new Kanban cards, those can be created using the Inventory Management application.
Material Request
If the Material Request application requires new Kanban cards, those can be created using the Inventory Management application..
Material Warehouse
In case of mistakes during new item registration to the warehouse, corrections can be made using the Inventory Management app.
Further Reading
Was this article helpful?