How To Build Your First MQTT Data Source
- 26 Jan 2024
- 3 Minutes to read
- Contributors


- Print
How To Build Your First MQTT Data Source
- Updated on 26 Jan 2024
- 3 Minutes to read
- Contributors
- Print
Article Summary
Share feedback
Thanks for sharing your feedback!
Warning
MQTT support is not enabled on all Tulip Instances. Contact support@tulip.co if you are interested in getting this feature enabled.
How To Build Your First MQTT Data Source
Use this guide to learn how to bring MQTT Topics into Tulip
In this guide, you will learn:
- How to set up a MQTT Data source in Tulip
If you have a functioning MQTT broker that you would like to connect to Tulip, then you are ready to set up an MQTT data source and create your first machine monitoring app.
Setting Up A MQTT Data Source
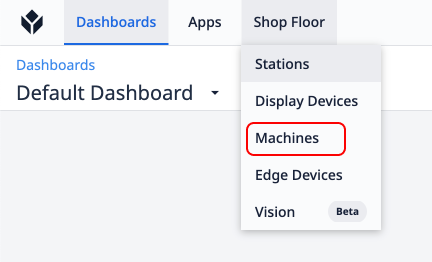
- Click into the Machines option under the Shop Floor tab on the Menu Bar.
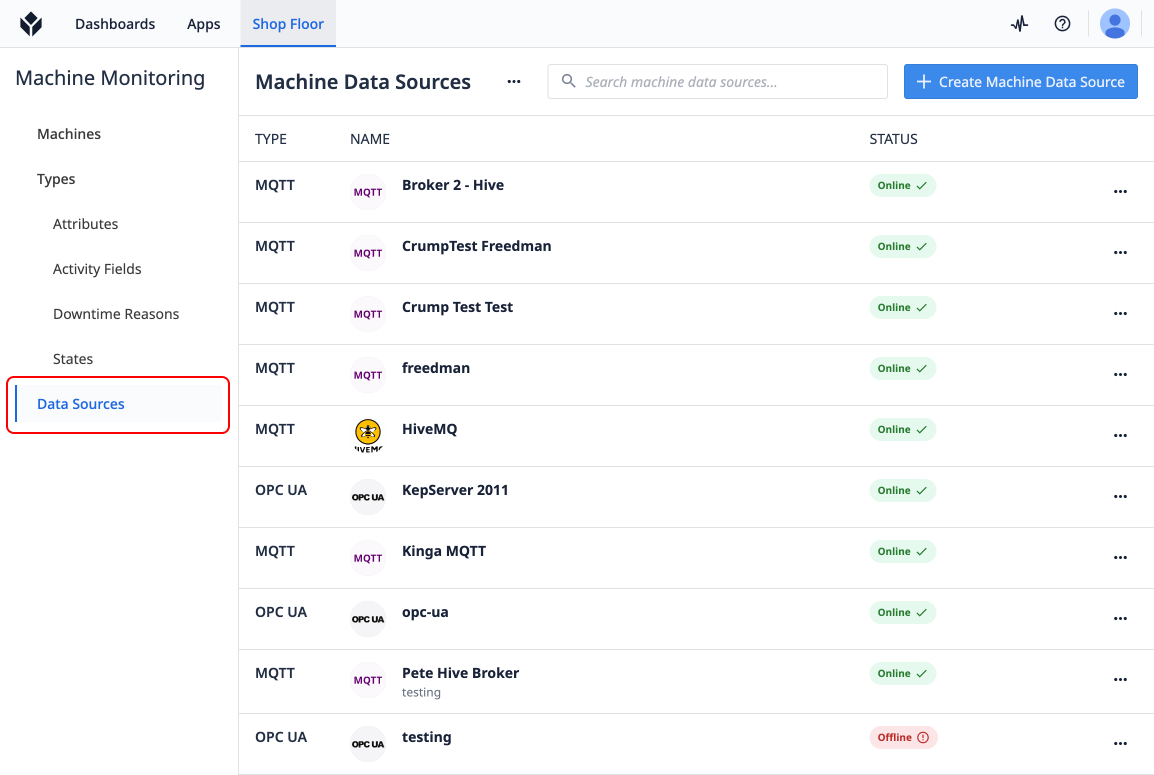
- Then, click Machine Data Sources from the left side drawer.
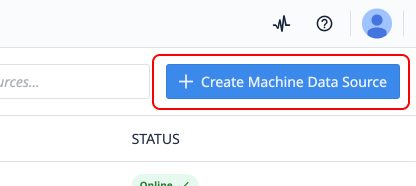
- Then, click Create Machine Data Source from the Machine Data Sources page.
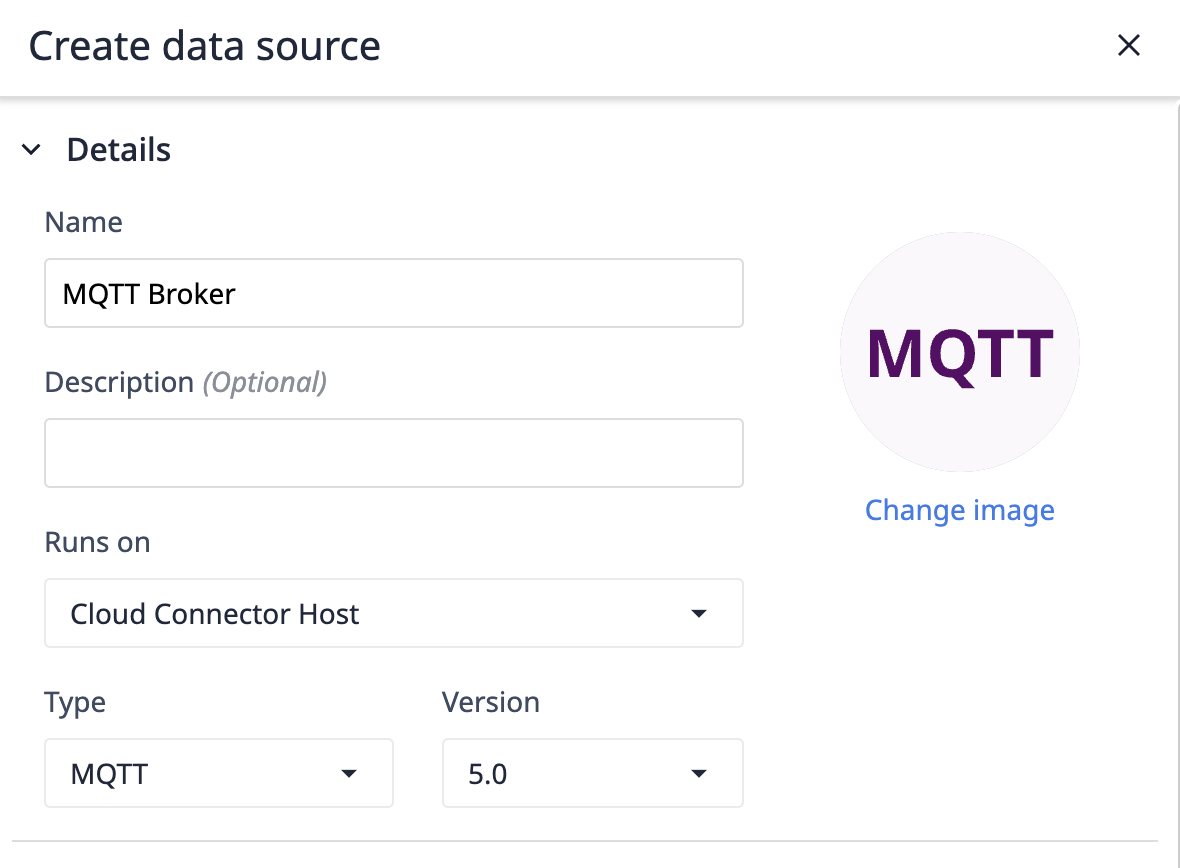
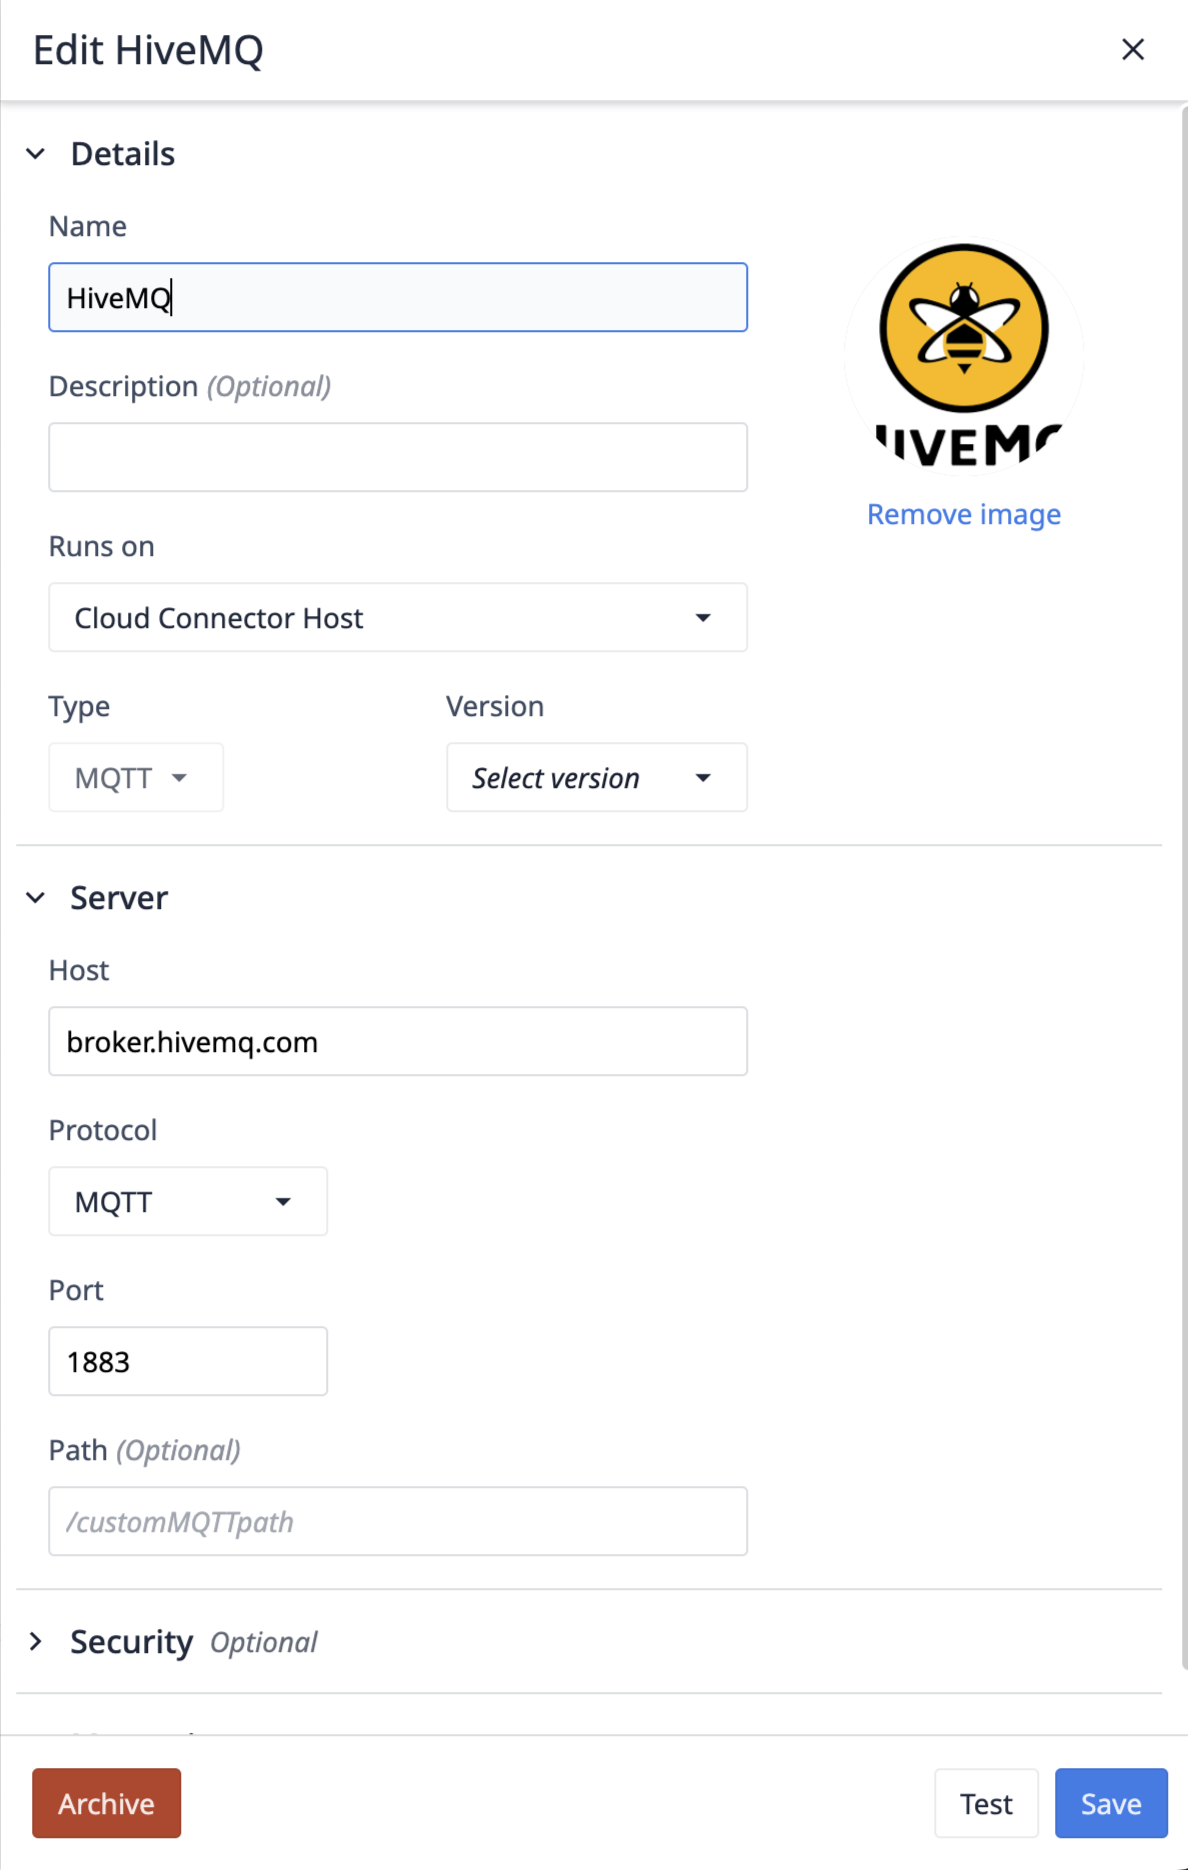
- Name your data source, select a Connector Host, select MQTT, and your desired MQTT version.
Note
If left blank, MQTT v5.0 will be used.
- Add the connection details to connect to your broker.
Configuring the MQTT Connection
Runs On
Runs on represents the Connector Host that will be responsible for handling the connection to your broker. If your broker is not accessible to the wider internet, an On-Prem Connector Host will be required to access your MQTT broker. Please review the folllowing version requirements prior to testing the Connector Host.
On Prem Connector Host Version
Only On Prem Connector Hosts of version 261 (LTS11) or higher support MQTT data sources.
Only Edge Devices on OS56 or higher Support MQTT data sources.
MQTT vs. MQTTs
MQTTs is simply MQTT, with an added layer of security. When MQTTs is selected, SSL/TLS wll be used for communication from the client to the broker. Additionally, MQTTs supports Private Keys, Certificates, and or Trusted CA tokens. With just MQTT selected, only authentication through username and password, or username by client ID are available.
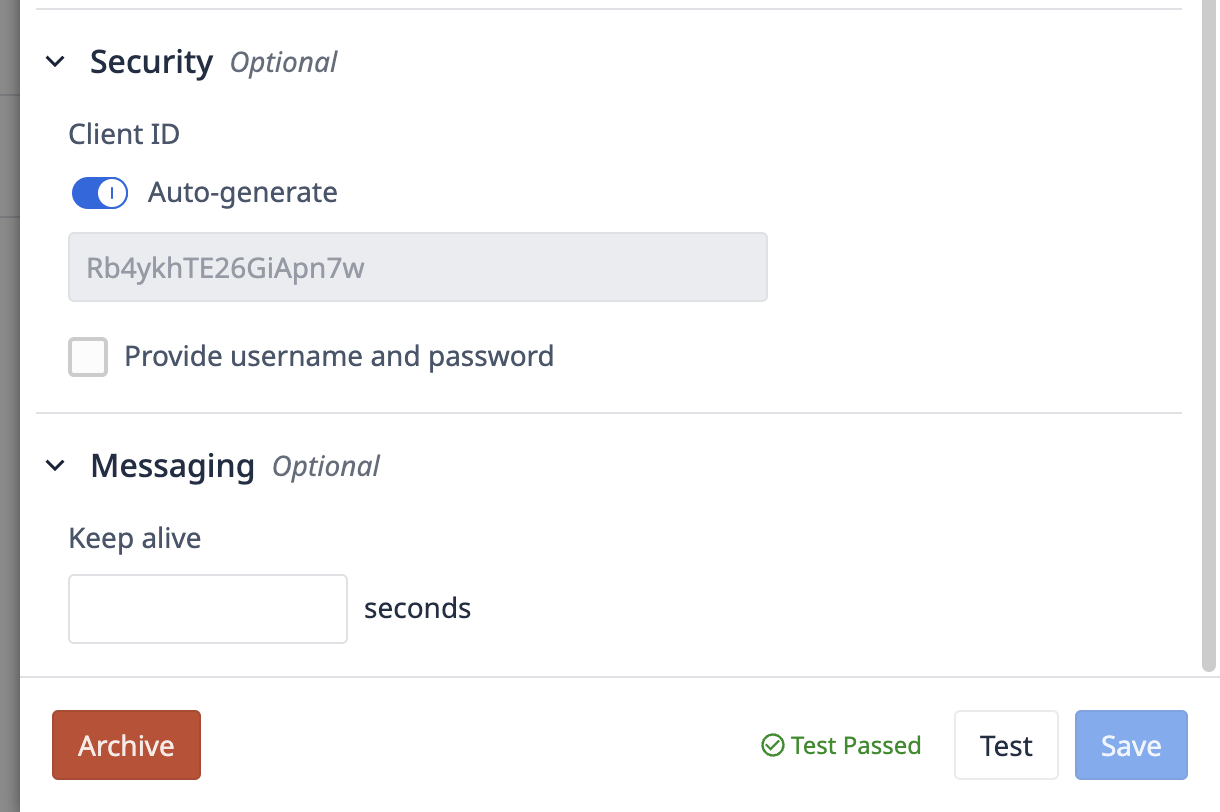
Client ID
Client ID is how the Tulip client will identify itself to your MQTT broker. At the simplest level, this is often used for authentication and access control. This can be set to a static value, or set to a random value with the "Auto-generate" flag flipped.
Keep Alive
The keep alive is the maximum time, in seconds, that the client would like to keep communication open with the broker. If no messages have been passed from broker to client in that duration, the client will send a message to the broker indicating it is still alive.
Testing your Connection
Hit Test to see if you can successfully connect to the broker.
If the test is successful, then you are ready to set up a machine. Click Save, and then go to the Machine Types page to set up your first category of machines.
Did you find what you were looking for?
You can also head to community.tulip.co to post your question or see if others have faced a similar question!
Was this article helpful?